Ikea table 3d printer enclosure
How to build a simple, cheap enclosure for your 3D printer
Maybe you have already seen some of those fancy enclosures people build for their printers. How do they work? And do they work? Today, we will shed some light on this matter! Plus, we are going to dive into patent wars and explain why not all printers come with an enclosure. To top things off, we will even give you a full guide with information on how to build an enclosure for your own printer. But first, let’s start with the fundamental question: what is it good for?
- Stable printing environment – Drafts can negatively impact your print. An enclosure will keep the temperature stable and high. Big differences in ambient and printing temperatures can lead to warping and shrinking of the printed object, especially when printing with ABS. Layer adhesion may also improve with higher ambient temps.
- Reduce and contain smell – Some filaments (looking at you, ABS!) can release unpleasant fumes during printing.
An enclosure will contain these fumes, and you can quickly vent them outside through an open window when the print finishes.
- Noise reduction – As if you needed the MK3 to be any quieter 🙂 But another level of sound isolation can’t hurt, especially if you place the enclosure next to your work desk or in a living room.
- Dust collection – The bearings and smooth rods will appreciate the reduced amount of dust that settles on your printer.
- It’s fun to build 🙂
However, if you’re not printing with ABS or other high-temperature filaments that suffer from warping, you won’t see much of a difference. You might actually want to keep the enclosure open with, for example, PLA to ensure there’s enough cool air around the printer for the part cooling fan.
Enclosure for the MMU2S
If you own the MMU2S, we created a modified version of the enclosure – check it out here.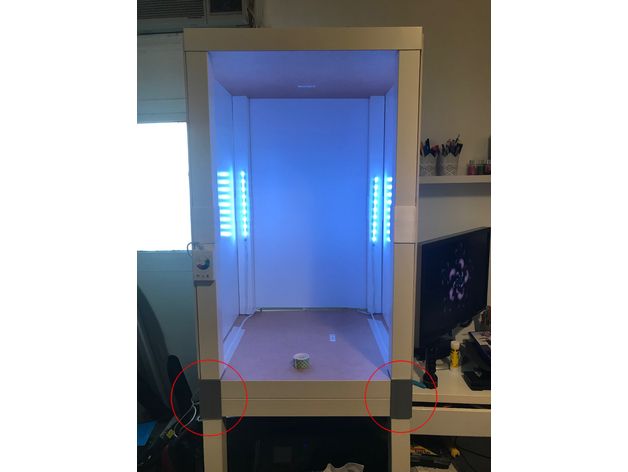
Why aren’t all the printers on the market enclosed by default?
There are two factors here – price and patents. There is no doubt that the rise of consumer 3D printers was delayed by patents. Companies like Stratasys, Zcorp or 3D Systems have patented nearly every 3D printing technology you can think of. It’s pretty crazy when you look at the sketches from 1980s-1990s and realize just how much some of the current 3D printers are similar to them.
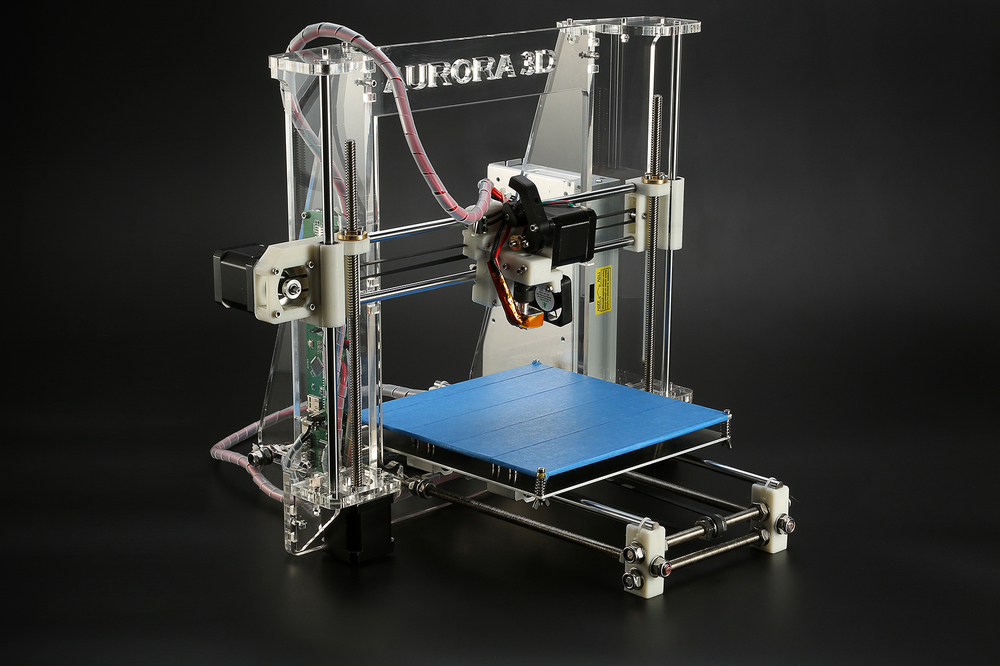
It was only after these key patents expired in 2009 (20 years after application) that the RepRap movement started. And cheap, easy-to-build 3D printers quickly started to be developed. Even though most of these basic patents have already expired, some of them (most importantly the ones owned by Stratasys) are either still active, or have just recently expired. For example, Stratasys’s (still active) patent describes an apparatus “That builds up three-dimensional objects in a heated build chamber” (…) “The motion control components of the apparatus are external to and thermally isolated from the build chamber.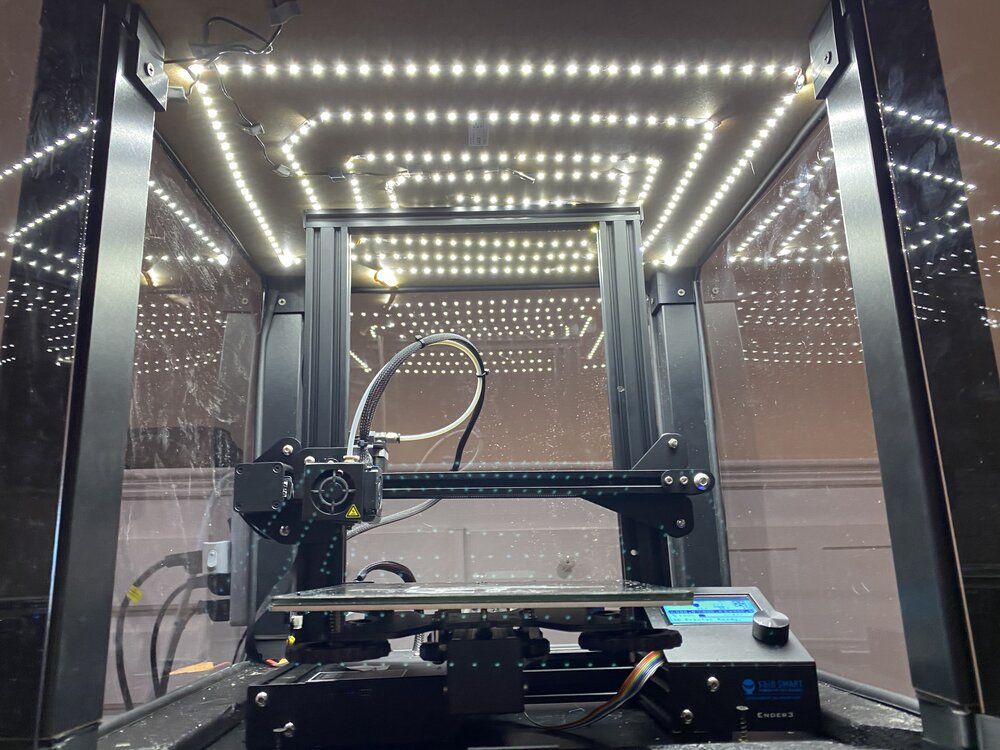 ” That means if you put the stepper motors outside of an enclosure, you can’t sell the product, as it would violate the patent.
Another obstacle is the price. We have considered and even developed a Prusa enclosure quite a while ago. It was made mostly of Plexiglass. Our target was $90 price tag and considering the packing, shipping and material cost, we just couldn’t make it work. It makes much more sense to build the enclosure yourself from locally sourced materials.
How hot should the enclosure be and can the PSU stay inside?
Let’s get something straight, we are not targeting really high temperatures inside the enclosure.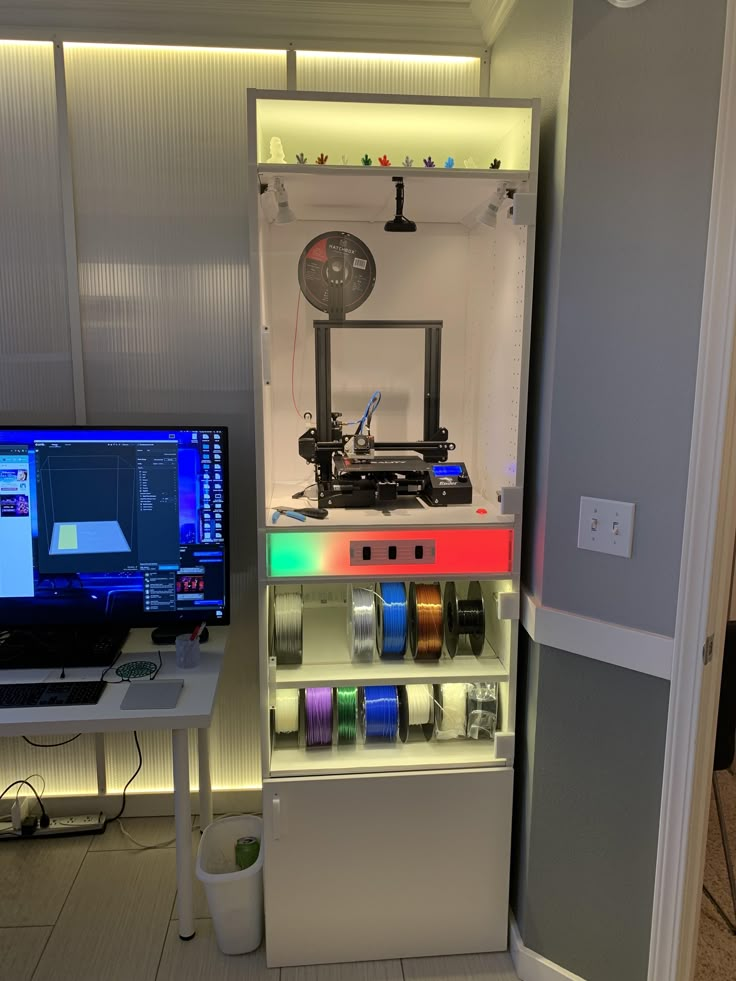 You don’t need an extra heater. The printer itself produces a lot of heat and all you have to do is to not let it escape. The goal is to achieve stable temperatures without any sudden changes from wind or draught. Even just 35°C inside the enclosure will make a massive difference, increase layer adhesion and may prevent ABS from warping.
The PSU is not made to work in extremely hot environments. By keeping the PSU in temperatures above 40-50°C can significantly shorten its lifespan. Ideally, you’d place the PSU outside the enclosure. You can even place the LCD outside to be able to control the printer without letting the hot air out.
2 simple enclosures
Photo studio tent – no work required at all
An enclosure can often be created from an object originally made for a completely different purpose. This photo (80×80) tent can be bought on eBay or Aliexpress for about $15-20. And all you have to do is place the printer inside the tent.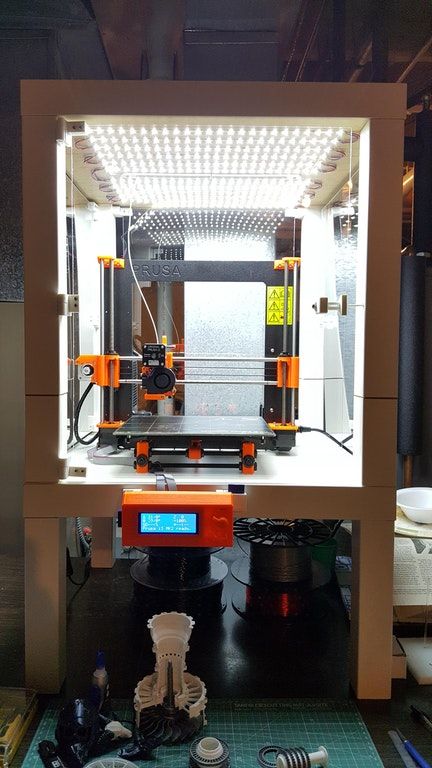 It’s made of textile material, which means it’s porous. A textile enclosure won’t let you reach crazy high temperatures, so you can even keep the PSU inside. We reached temperatures around 38°C after 10 minutes of printing inside a room with the ambient temp. of 26°C – that’s a significant improvement. And as a bonus, you have a photo tent for your prints 🙂
Ikea Lack – when you care about looks as well
Using Ikea Lack as an enclosure is the most popular choice among the 3D printing community. If you search online, you’ll find dozens of Ikea Lack enclosure designs. The table can be bought for under $10 and has almost the perfect size for Prusa printers. You can stack the tables on top of each other to create bays for multiple printers, or use one as filament and tools storage. Even though some of the existing enclosure designs are pretty good, we wanted to give it our own spin.
Advantages of our enclosure
- PSU placed outside in a clip-on holder, but easily placed back if you need to move the printer
- LED lighting connected to the printer’s PSU
- Hinges built into corner extensions
- Double-door opening
- Individual tables can be lifted at any time
What you’ll need
Printable parts
Ikea Lack enclosure main parts
Frame brace replacing the PSU for the MK3 (silver PSU)
Frame brace replacing the PSU for the MK3 (black PSU)
Frame brace replacing the PSU for the MK2/S (remix by Martin Schnur)
60 degree heatbed cable cover for the MK3
45 degree heatbed cable cover for the MK2/S
Construction
- 2x or 3x Ikea LACK table
- 4x Neodymium magnets 20mm x 6mm x 2mm
- 3x Plexi 440 x 440 mm, 3mm thick (if you’re in the US, try Queen City Polymers)
- 2x Plexi 220 x 440 mm, 3mm thick
Electronics
- Fire/smoke detector
- Indoor/Outdoor Thermometer
- LED stripe 24V, 30 cm
- 24V for MK3, 12V for MK2/S
- If you want to use a 12V LED strip with the MK3, use a separate power supply.

- Twin cable, 100 cm
- 2x WAGO 221 or similar compact lever connector
Screws
- 12x 6×20 mm (12 x 3/4″)
- 4x 6×50 mm (12 x 2″)
Printed parts
- Upper table (enclosure box)
- Lower table (support table)
- Spool holders
Tools
- Philips screwdriver
- Allen keys
- Super Glue
- Drill + 3 mm wood drill + 10 mm wood drill
- Measuring tape
- Marker
Enclosure (upper table) assembly
Upper corner standoffs installation
Attaching the legs
LED stripe
For about $12, you can buy an LED strip with a power supply, like this one. However, if you’re feeling a bit adventurous and have some experience with wiring up electronics, you can power the LEDs directly from the printers power supply. Remember, that the MK3 runs on 24V, whereas MK2/S runs on 12V, so make sure you buy the correct LEDs.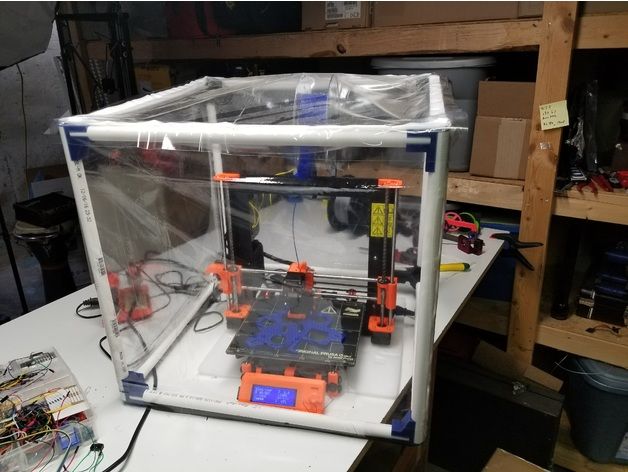
Spool holders
Smoke detector installation
Place the smoke detector in the rear part of the table so it will not obstruct filament insertion or won’t get in the way when you’re taking the printer out from the box.
Bottom corner standoffs installation
Before you start screwing the bottom standoffs, make sure you place the Plexiglass in first. As soon as you tighten the standoffs, the Plexiglass will be fixed in place, and you won’t be able to remove it. This means you can easily lift this section of the enclosure without worrying that the glass would fall out. Note, that one of the four standoffs has a hole for cable pass-through. Make sure you place this standoff on the left side so that the cables can be routed directly to the EINSY board.
Support table (lower table) assembly
PSU holder
Electronics do not thrive in higher temperatures inside the enclosure.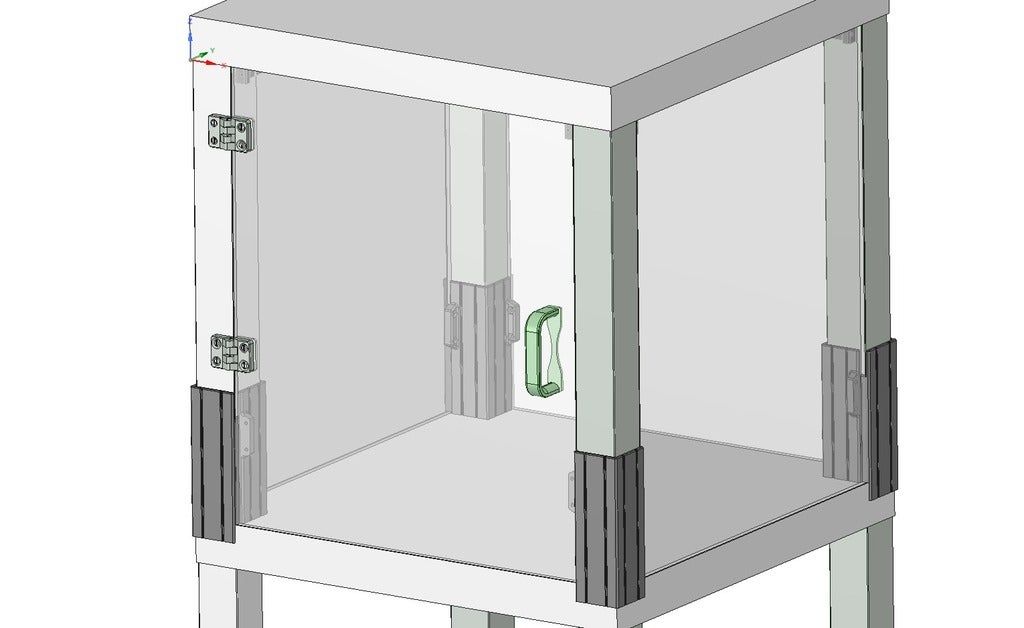 To preserve PSU in good condition, it’s better to place it out of the box. It is even safer!
- Unplug the printer from the power socket. Remove zip ties on the frame to release PSU cables. (Tighten the rest of the cables with new zip ties.)
- Disconnect the cables from the EINSY board. Do not forget to unplug the Power panic sensor as well.
- Unscrew the PSU form the frame.
- Hold the PSU next to the rear left leg (the one with the cable pass-through). Tighten the PSU holder printed part with two screws and then install PSU catcher printed part.
- PSU is now fixed, but it is possible to slide it out when you need it.
- You can replace the PSU on the frame with this printed part to ensure the rigidity of the frame.
Frame brace and right-angle cable cover
After removing the power supply from the frame, it’s possible to replace it with a printed part and ensure frame stiffness. The heatbed cables may hit the plexiglass in the back of the enclosure.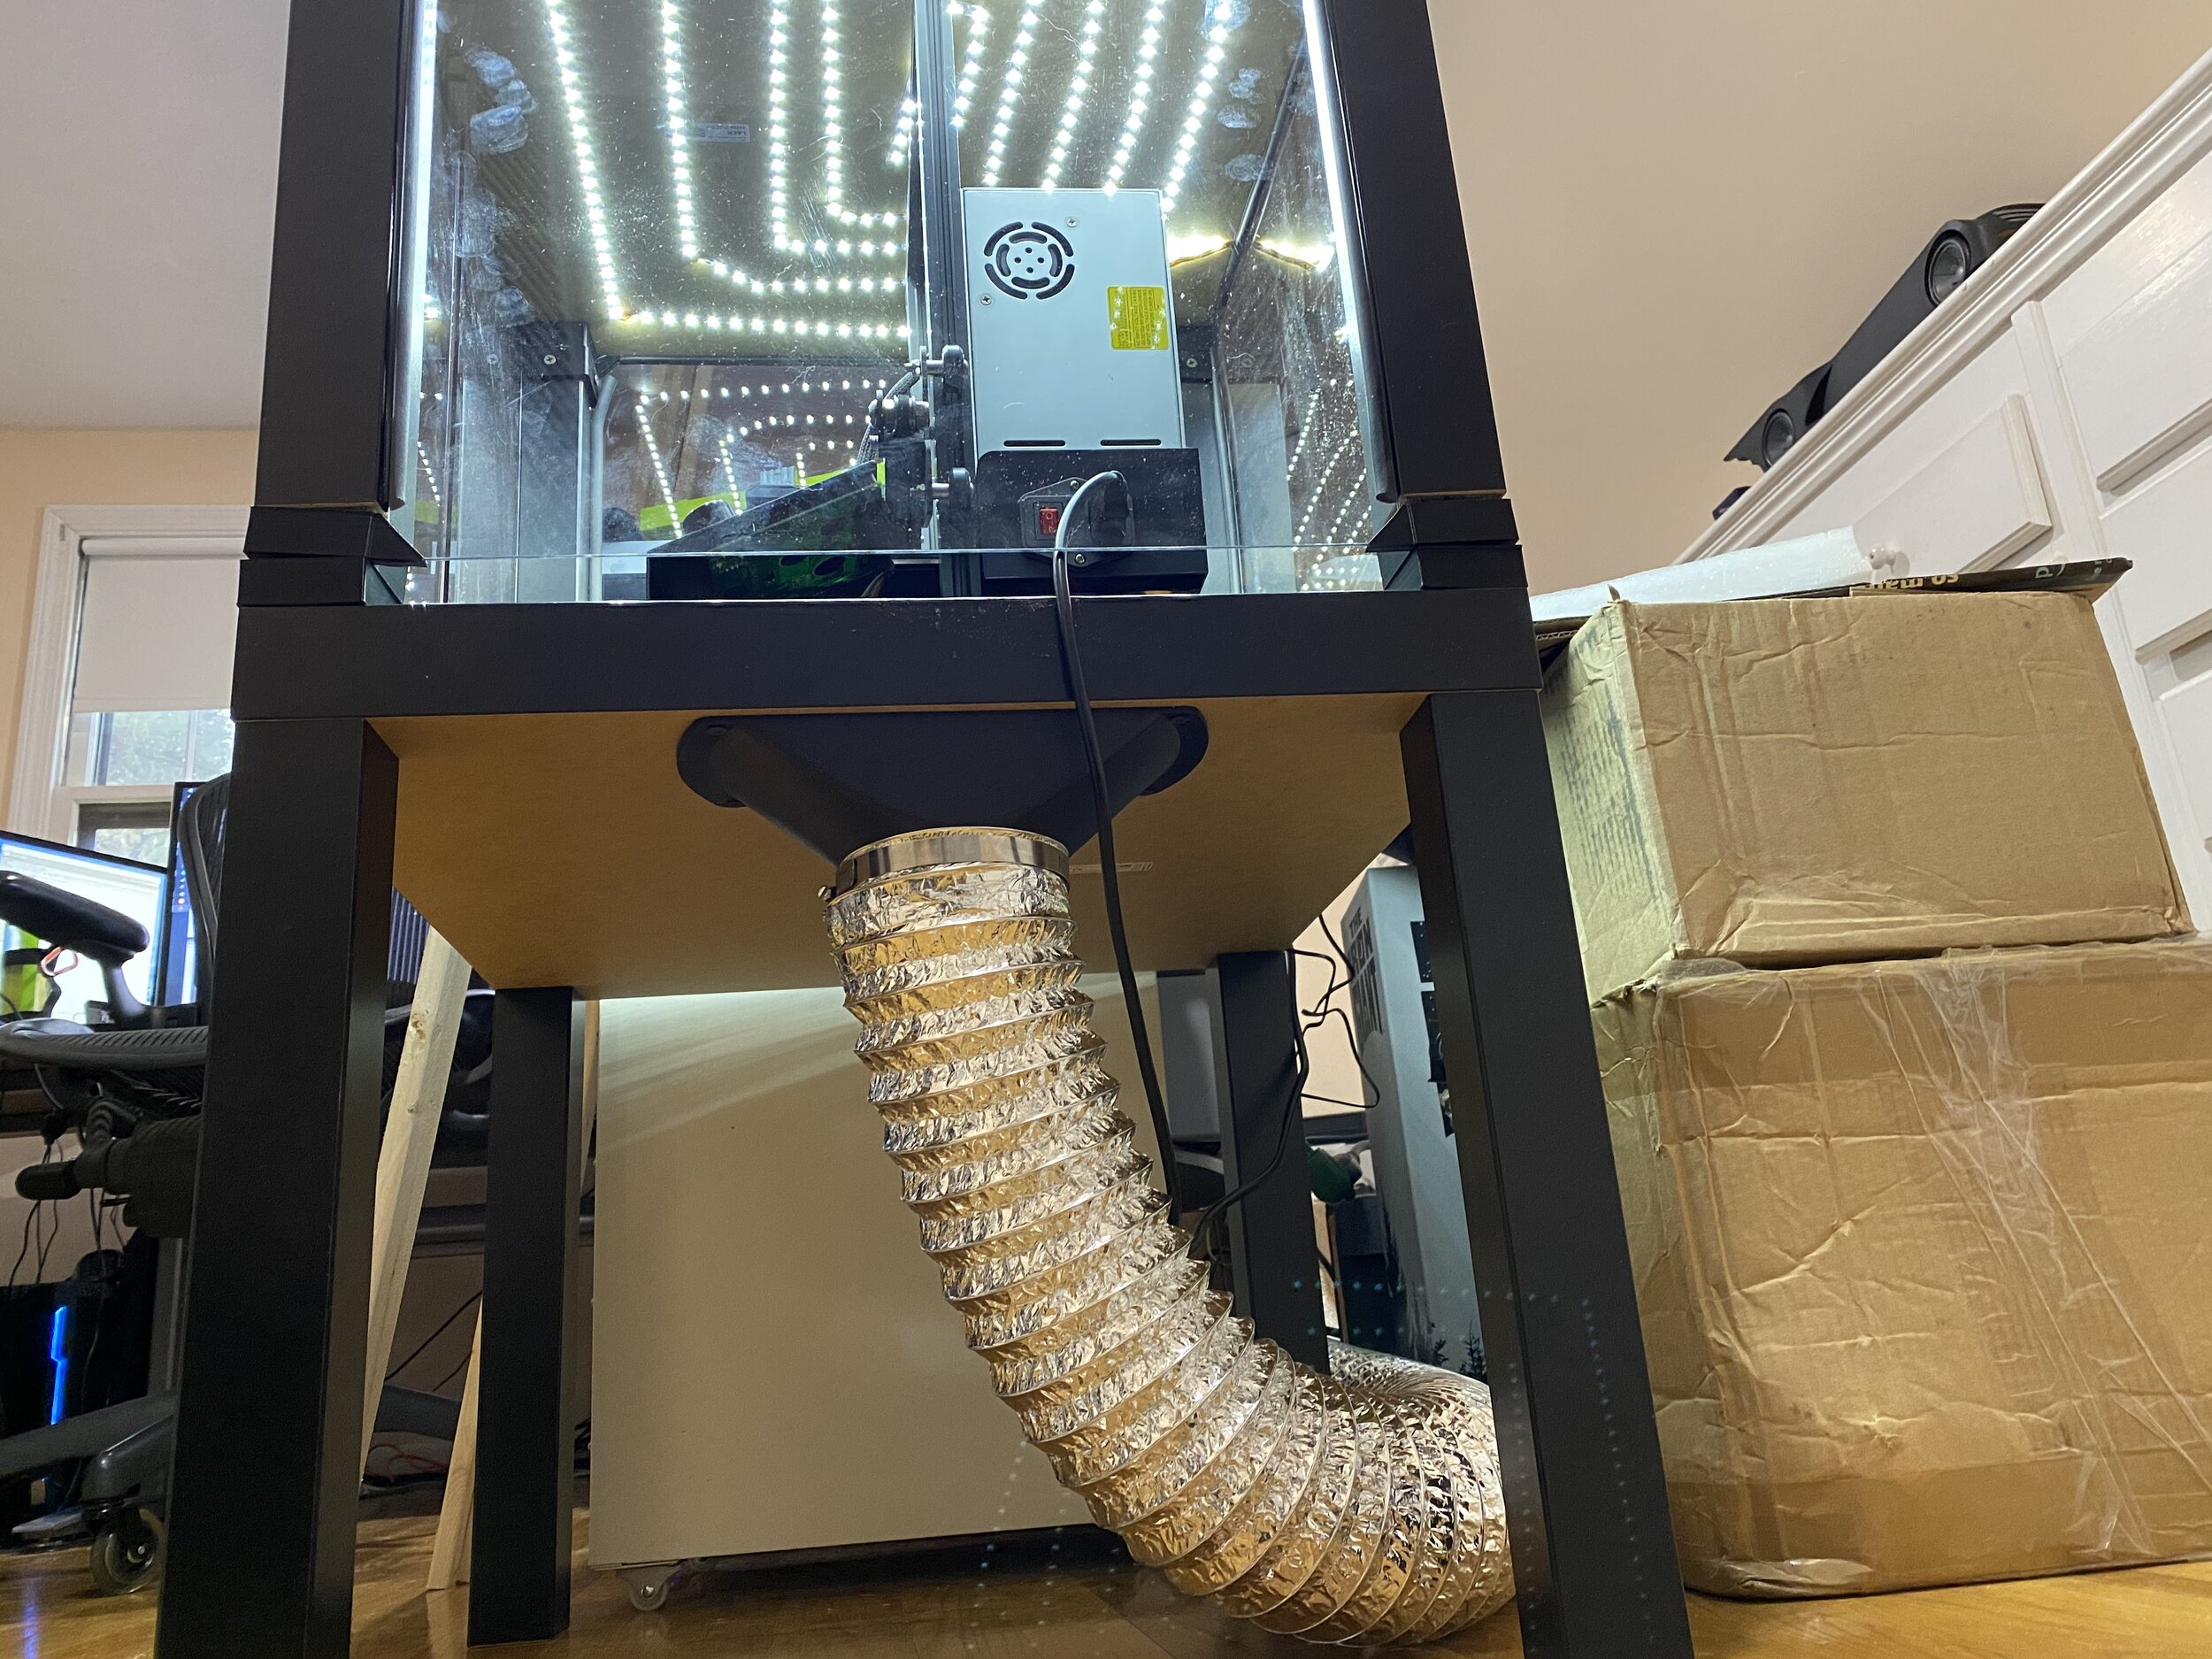 To prevent this from happening, print an alternative 60 degree heatbed cable cover. (EDIT: Users reported several problems with the right angle one shown in the video and on the pictures below, so we switched the suggestion to the 60 degree one).
Plugs fixing and magnetic handles
Fix the four bottom plugs. One of them has a hole for cable pass-through. Place it in the rear left corner of the enclosure. Glue two magnets to the door stopper and screw it to the front of the table. Leave enough space for the plexiglass and the handles (1 cm).
Finished enclosure
Now just stack the two tables on top of each other and the enclosure is complete. Optionally, you can add another Ikea Lack table to the bottom to raise the printer to a more comfortable height.
Building an IKEA Lack Enclosure for the Ender 3 Pro — Joe's Projects
Various electronics, programming, welding, mods and other non-automotive projects.
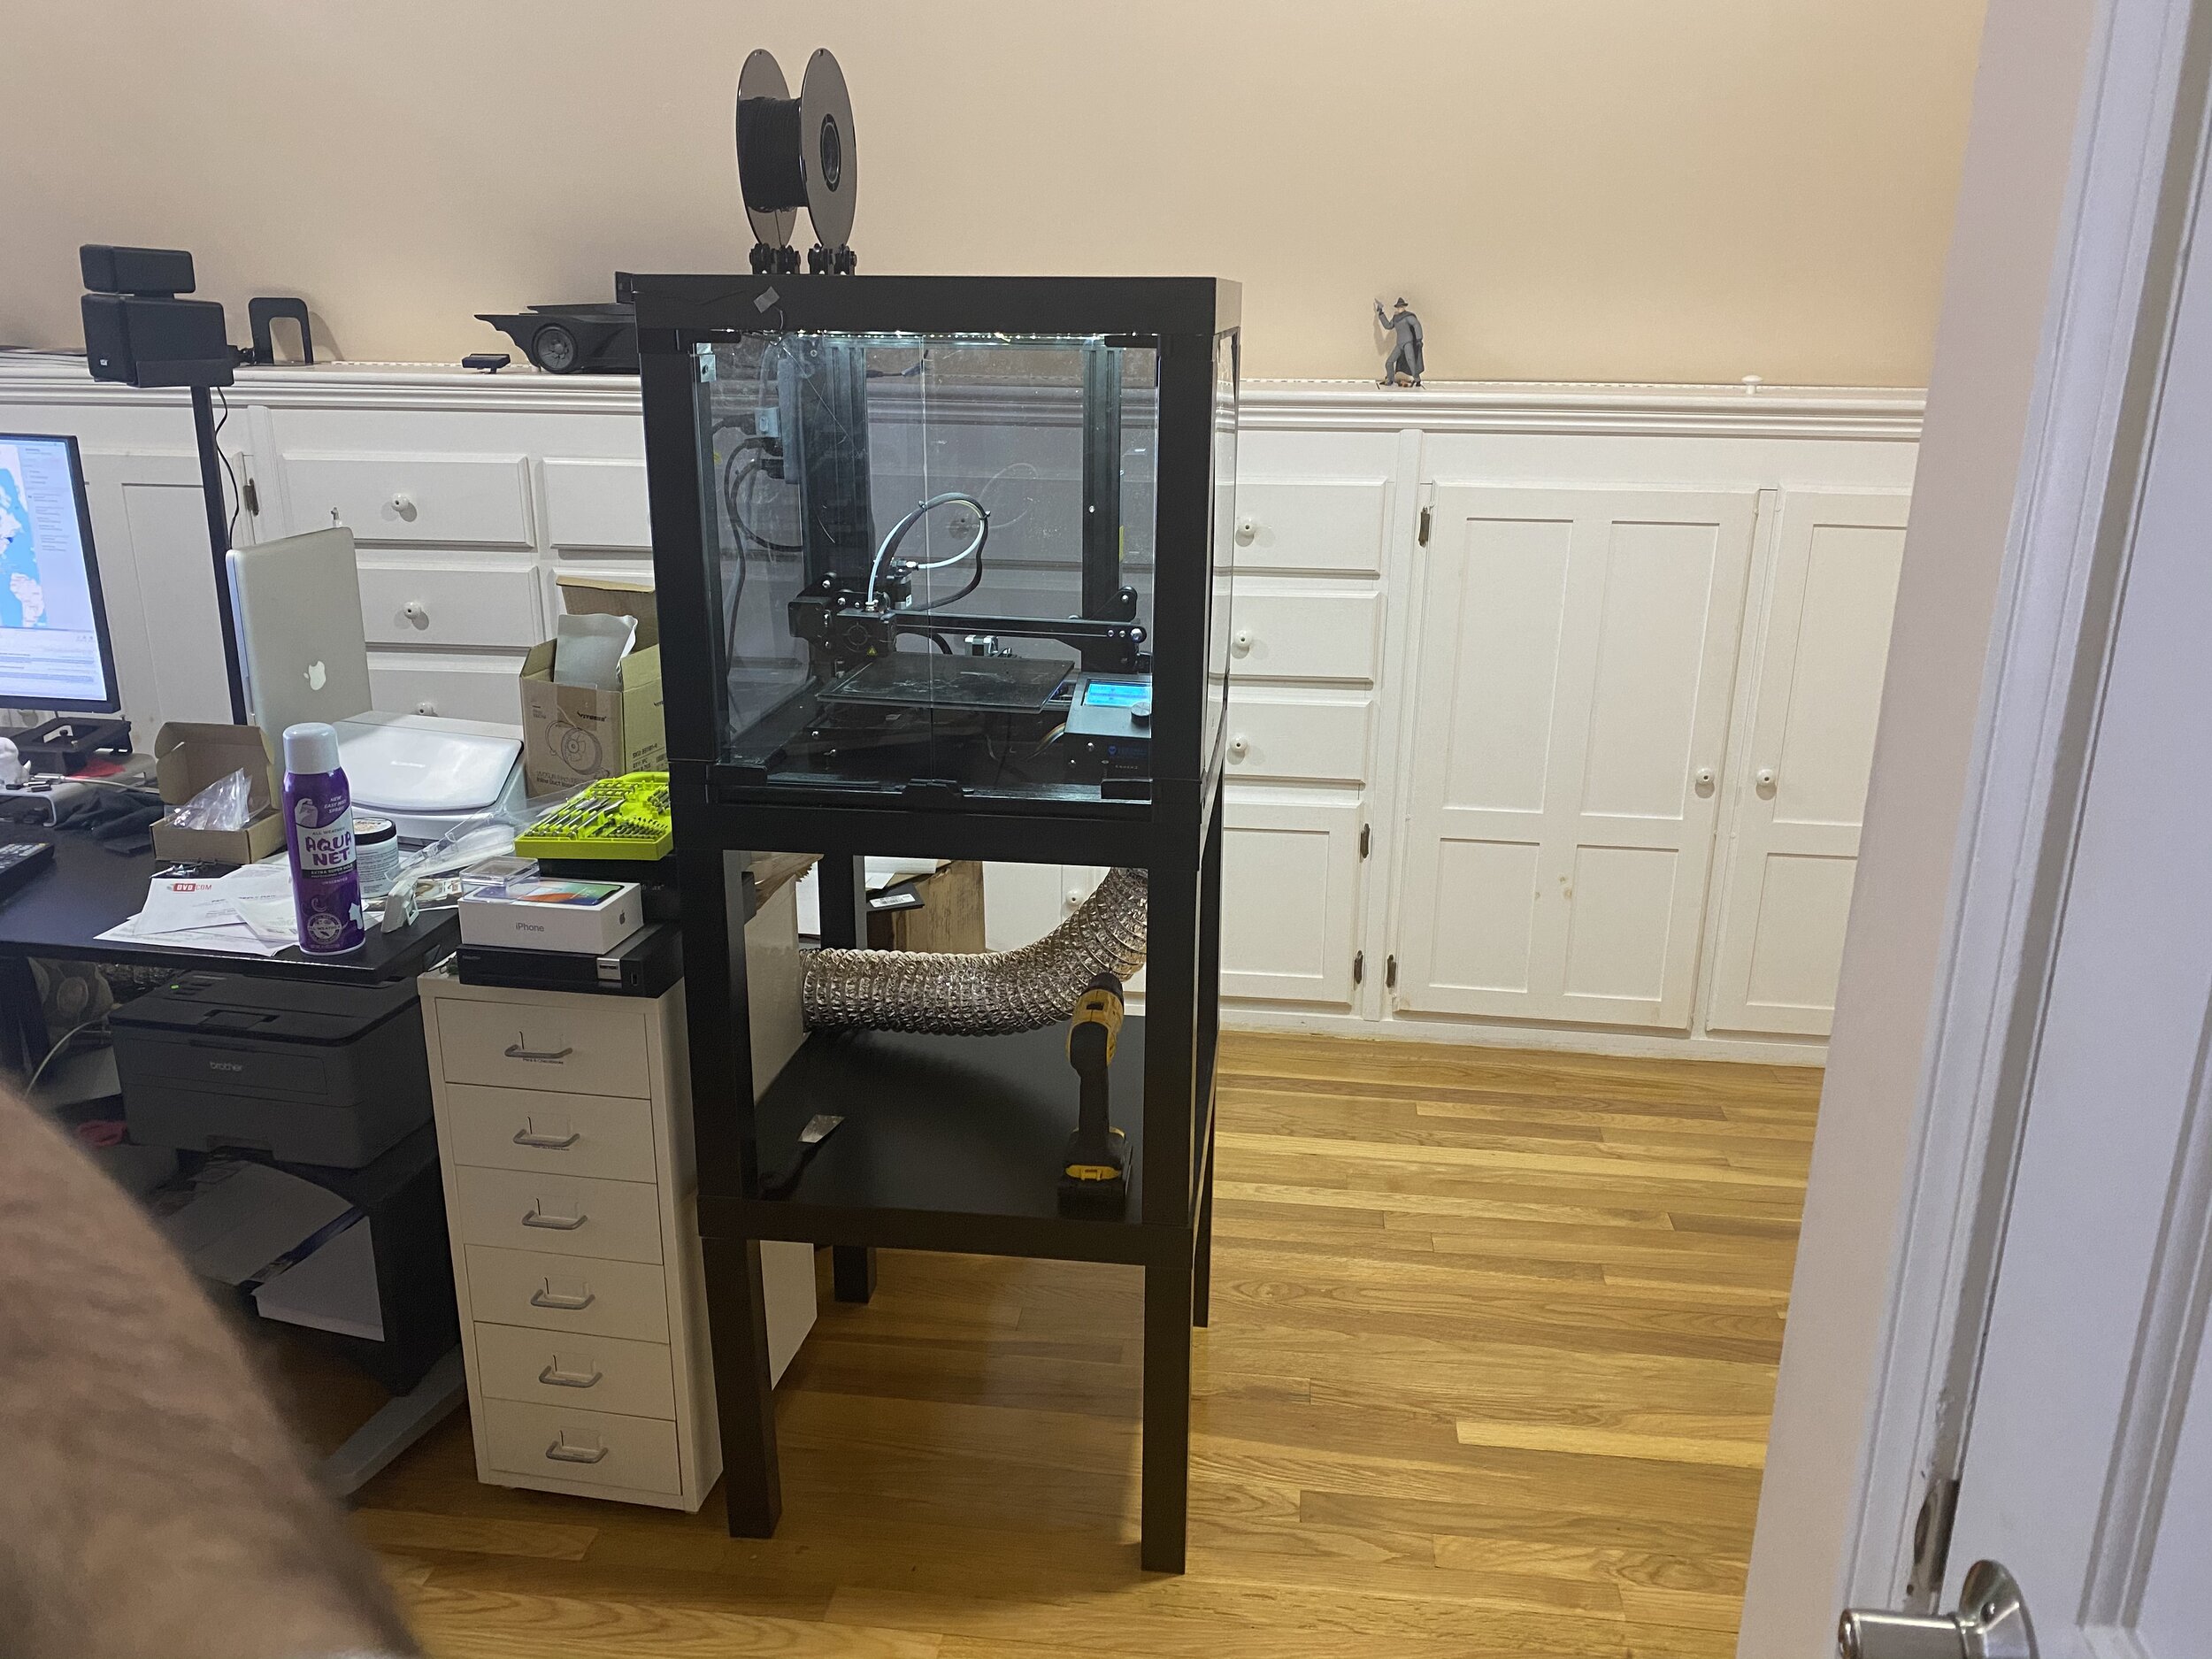
I recently got an Ender 3 Pro 3D printer. It works great, and I’ve been doing a lot of little projects and prototypes with it. Since I plan on working in an automotive environment, I’m using ABS to ensure that parts don’t melt in the engine compartment or from the hot sun in the cabin.
To print with ABS, you really need an enclosure. This traps the heat in, reducing the chance of warping. For a while I used a photo tent, which was cheap and worked pretty well. However, it was hard to look at the print while it was printing, and the fumes would get annoying, and the VOCs released by ABS aren’t good to breathe — the photo tent had no provision for venting. Something more robust was needed.
I modeled my design on a Prusa enclosure. It has a series of 3D printed parts that take around 40 hours to print. These parts mount at the corners to hold the plexiglass panels in place, and include pieces for double hinged doors, a spool holder, a shaft to run the filament from the spool through the top of the table, and a few other odds and ends (power supply mount, cable clips) that I didn’t use.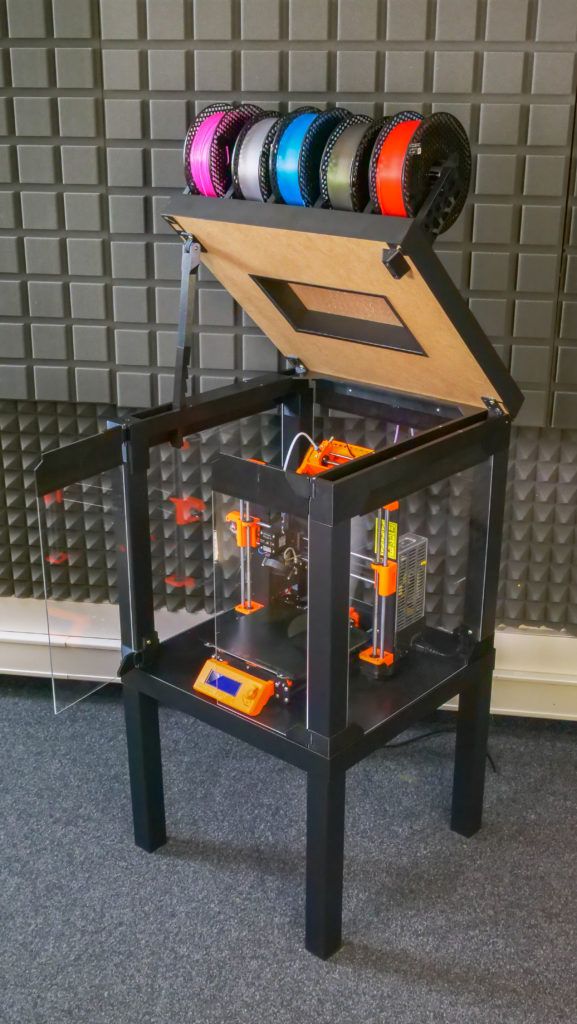
Besides the 3D printed parts, this requires a few more pieces:
Two (2) IKEA Lack side tables. These are $10 each. The plexiglass is mounted between the legs of one table, which is then placed on top of the other table. I later used a third to raise the printer up higher and provide storage underneath.
Plexiglass sheets. I was able to buy a complete set of tinted 440x440 and 440x220 pieces specifically for this for about $65 on Amazon. You can probably get them cheaper if you cut them yourself, but this was very convenient.
Screws. I just used some sheetrock screws I had lying around.
For the most part, the design worked quite well. I ran into a few issues, though.
Plexiglas Size: The plexiglass sheets were slightly too tall (or the legs too short), which made it impossible to properly seat the corners. It wasn’t a big deal, but it affected my ability to seal the enclosure and keep the VOCs in.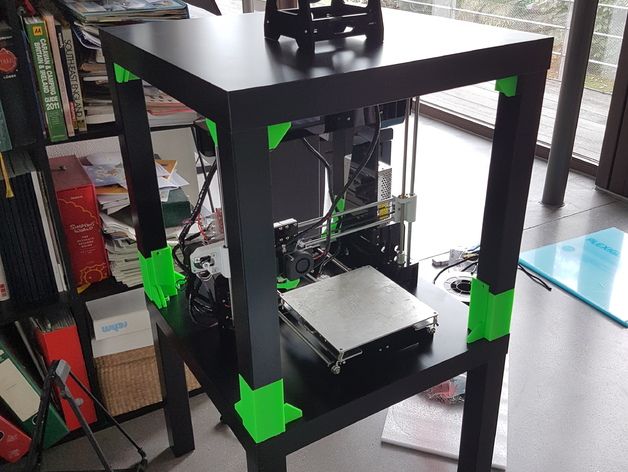 I worked around this by printing a series of 1mm and 2mm shims that I could insert to between the bottom feet and the legs to get the height right. Spacers STL
Printer Height: A bigger problem is that the Ender 3 Pro is slightly taller than the Prusa. I fixed this by printing new feet with 20mm risers. This introduced a 20mm gap between the glass and the bottom table top, which I filled with 1”x3” wood strips painted black. Tall Feet STL
Printer Depth: The printer barely fits in the enclosure front-to-back, with the bed coming very close to hitting the front and back as it moves. Once I had the final position figured out, I put two screws down in front of the printer to act as stops so that I could align it again easily in the future.
Spool Holder Width: The printed spool holder was designed for wider spools. I loaded the STL file into modo and reduced the width of the base to properly hold the smaller $20 spools I had been getting from Amazon.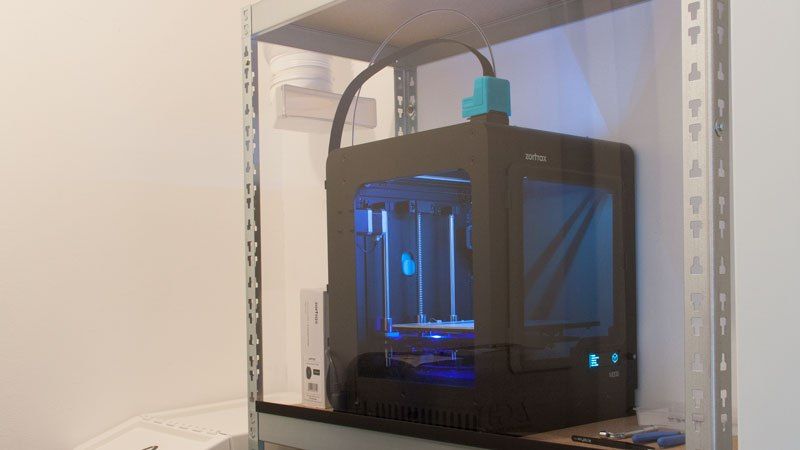 Modified STL
I also wanted to know how hot the enclosure actually gets. I bought a refrigerator thermometer with a temperature probe from Amazon. Most of the small thermometers I found were meant for grow rooms and cycled between temperature and humidity, which is not what I wanted. The one I found was under $10, and the probe let me mount the display outside the enclosure.
I originally considered adding a heater, but Googling and my own testing showed that this was not necessary. The enclosure gets up to around 108 F purely through waste heat from the bed and nozzle.
The modified spool holder on top of the printer.
A digital thermometer shows the current enclosure temperature. It gets up to around 108 F when printing — no extra heater is needed.
I wanted to get rid of the VOCs, which first meant keeping them in the box.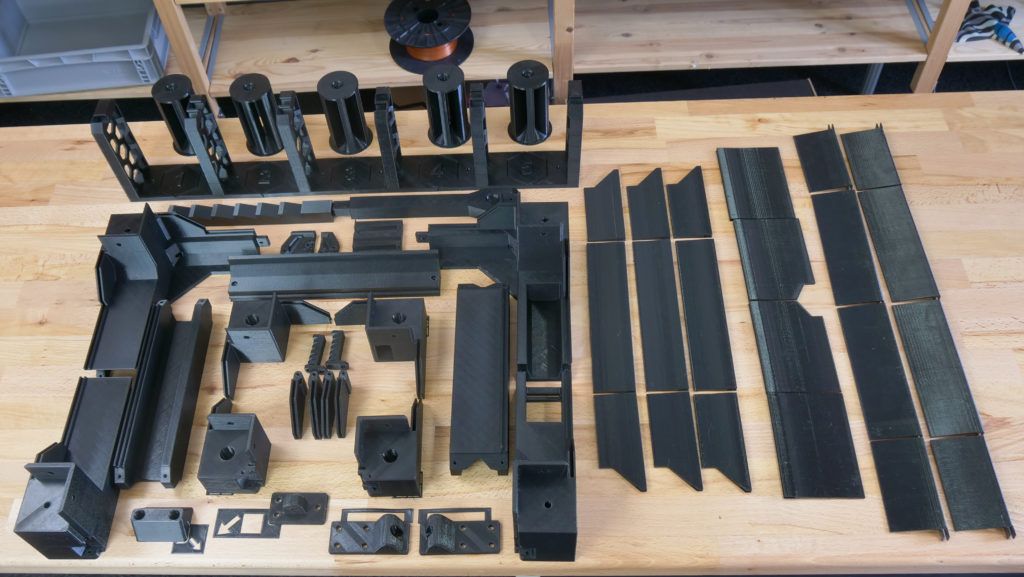 This was pretty simple: I bought some adhesive-backed rubber automotive seal from the hardware store. I ran it along the legs and top of the table just behind where the glass would slide into the mounts, then inserted the glass. The glass presses against the strips, making for a reasonably tight seal.
The doors aren’t sealed. I’ve run the printer this way for over a month and don’t even notice the VOCs anymore, as the majority are sucked out through the vent. The extra sealing isn’t necessary, and in fact it’s arguably useful to leave it unsealed to act as an intake to keep air moving towards the vent.
Adhesive-backed weather stripping used to seal the sides of the enclosure.
Wooden strips used to fill in the gaps between the bottom of the glass and the bottom table top after adding the risers to the legs.
Next I had to get the VOCs out of the box, and out of my room.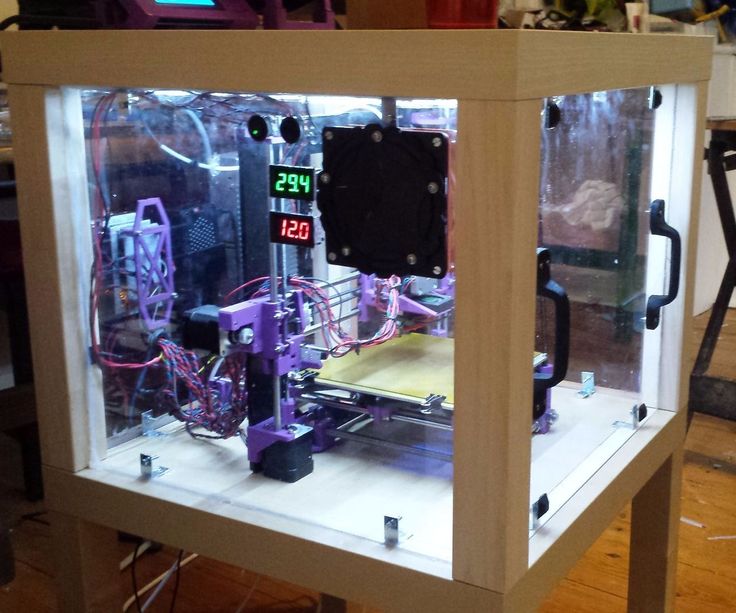 For this I bought a 4” 100 CFM exhaust fan for about $20 from Amazon. 100 CFM isn’t terribly strong, but that works out — it’s strong enough to pull the fumes out without removing all the heat from the enclosure.
I bought a $10 4” duct mount from Amazon, and cut a hole in the bottom of the enclosure, then screwed the mount over that. I positioned it near the power supply so that I could try to keep air flowing over it, but later moved the power supply out of the case entirely — the stock cabling was just long enough to do that.
I ran 4” dryer duct between the enclosure and the fan, and then from the fan to the window. On the window side I bought a shelf from the hardware store, then cut a hole in it and mounted a louvered cover on the outside, and attached the ducting to the inside. I couldn’t actually fit the shelf into the window opening in one piece, so I cut it in half, put the two pieces in, and screwed them into a third piece of wood.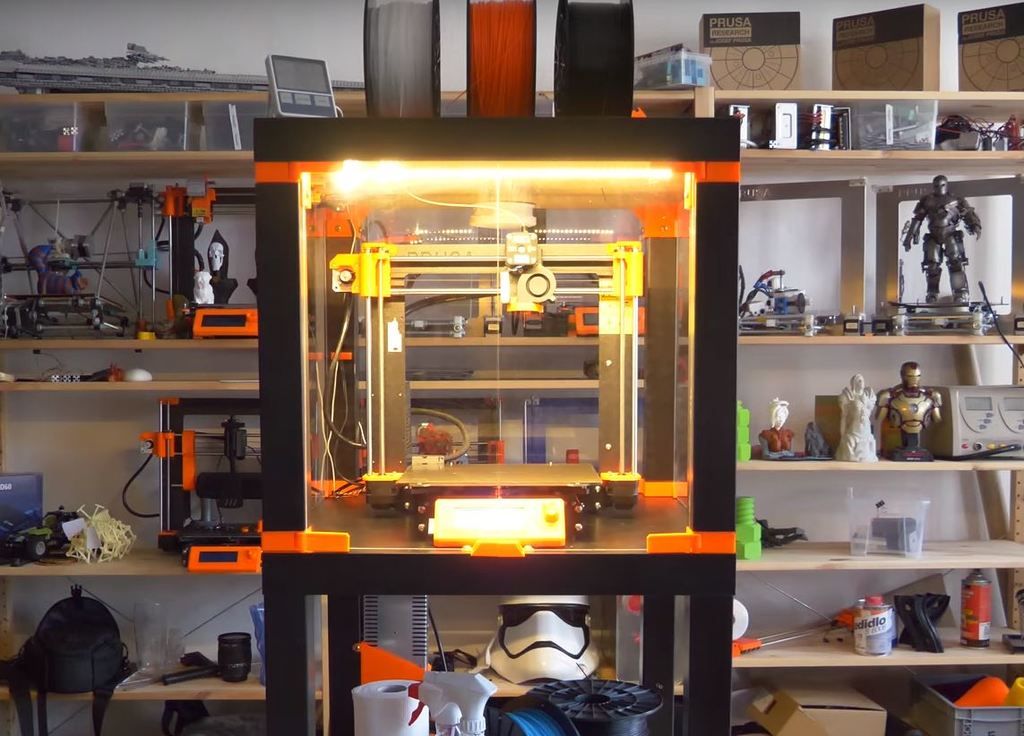 Before installing it, I used some more adhesive-backed weather stripping to keep drafts out.
I did try to use a hinged backdraft blocker. I got one that had gravity-assisted closing and one that used weak springs. It turns out 100 CFM across 4” is not strong enough to open either of those. The louvered piece outside should be enough to keep most air and weather out, so I just left them out. I did consider a stronger fan, but the price jumps quickly, and I was trying to keep this cheap.
The duct routing in my office.
The duct running from the bottom of the enclosure.
The exhaust fan in the middle of the ducting.
The duct going out the window.
I bought a simple LED strip from Amazon, and spiraled it around the top of the enclosure.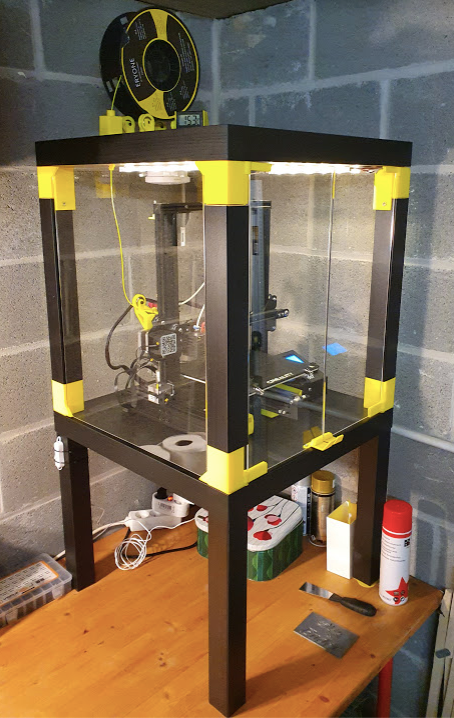 I snuck the power wire out the top of the enclosure and taped the power supply to the back of the enclosures. The strip is dimmable, and I mounted the dimmer on the back of the enclosure, although I just leave it at full brightness.
LED lighting spiraling around the top of the enclosure to light up the print.
The dimmer crudely attached to the back of the enclosure.
The printer, fan and lights are all plugged into a power strip attached to the side of the enclosure. I can turn on the strip to turn on all three at once. I also put a switched outlet adaptor on the fan so that I could either run it all the time or only run it at the end of the print.
The power supply was moved out of the enclosure to keep it out of the high-temperature printer environment. The stock wiring just barely reached. It’s simply secured with a zip tie, which seems to be fine.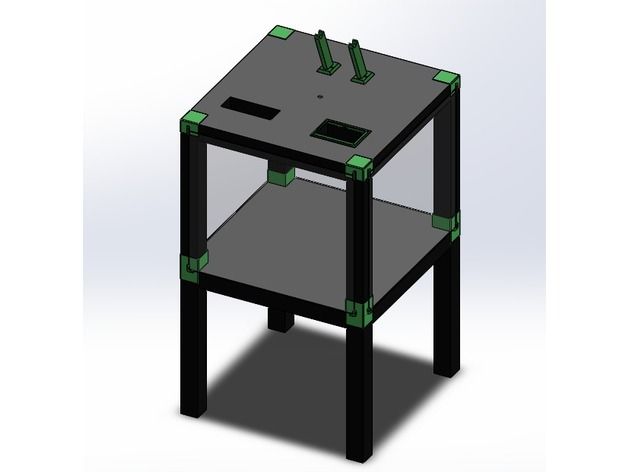 Moving it outside should increase the power supply’s life, but likely wasn’t strictly necessary. The steppers are still in the enclosure, but there’s not much I can do about that.
Printer, fan and light power all plugged into a single power strip. Toggling the switch toggles all three at once. The fan has a separate switch on it so that it can be separately turned off if desired.
The power supply (silver, below the white power strip) mounted outside of the enclosure with a zip tie. The LED dimmer can also be seen above the power strip.
I’ve done many prints since building this enclosure, and the VOCs are basically nonexistent in my office. The majority of my prints now come out with no warping at all. I sometimes have to apply more Aqua Net Extra Super Hold hairspray to keep the prints stuck to the bed, and sometimes I’ll have a feed error that results in strings of plastic everywhere, but these are rare, and the ABS prints themselves are good and solid.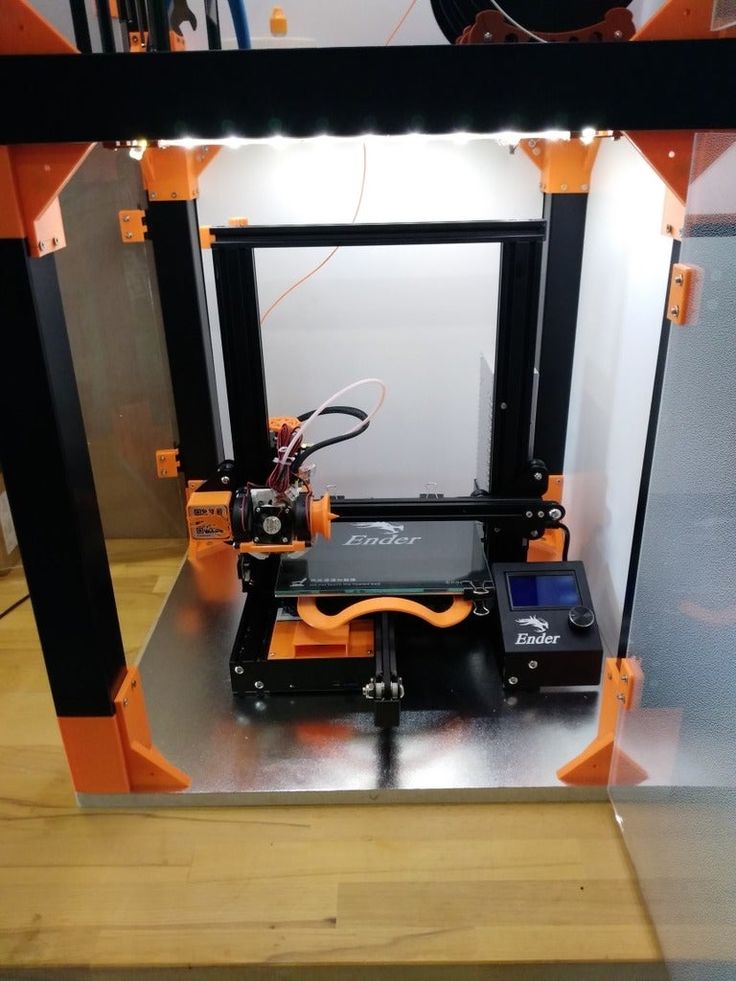 Overall, I’m pretty happy.
STL File Printer Boxes for Ikea Lack Table・3D Model Download and Print・Cults
Printer Boxes for Ikea Lack Table
INTRODUCTION
This drawer set was originally designed for Ikea Lack table, although they can fit under any table with a gap of at least 450mm.
VERSIONS
I uploaded a total of six versions based on all the suggestions I received from the community, five with steel plate slots and a sixth without them:
Printer box preview
-
V1. Prusa Mini: The first version is designed for Prusa Mini / Mini+ and all parts are designed for its printing plate.
-
V2. Prusa Mini +Plates: The second version is also designed for the Prusa Mini / Mini+, but it can accept several additional plates, up to a total of six.
-
V3. Prusa MK3 & MK2.5: The third option is for the Prusa MK2.5 / MK2.
 5S / MK3 / MK3S / MK3S+, and again, all the details are designed to fit the dimensions of the printing plate.
 -
V4. Prusa MK3 & MK2.5: The fourth option is also for the Prusa MK2.5 / MK2.5S / MK3 / MK3S / MK3S+, but this option allows you to install several additional plates, up to a total of six.
-
V5. Prusa Mini & MK3 & MK2.5: The fifth option is for all Prusa printers and can install up to six PCBs in total, from both mini and MK. It has been designed so that both sheets can fit in each slot, so it is very polyvalent.
-
V6. No Sheet Slots: The sixth option is designed to fit any printer and comes without sheet slots.
COMPLETE LIST
To make it easier to determine which parts to print based on the model you're looking for, I've created a parts list included with the instructions, where you can even check off the parts you've already printed.
BENEFITS
Drawers are designed so that they don't fall out when you take them out, so you can use them safely without fear of your belongings falling.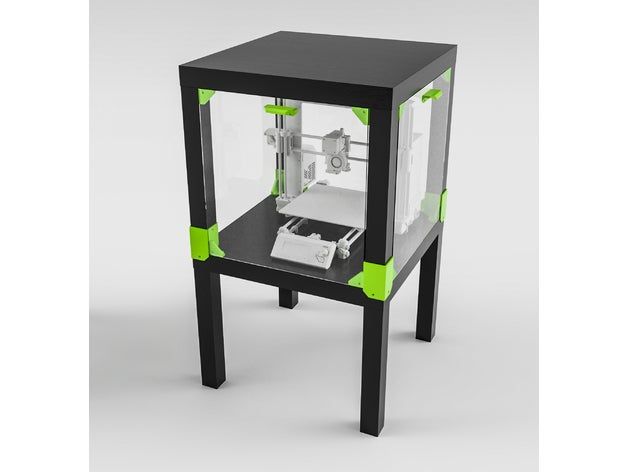
The exception is the bin drawer, which has been designed to be easy to slide out so you can sweep your waste into it and also to make it easier to empty.
In addition, the dual plate supports on the V5 are designed so that both print sheets (Mini's and MK's) fit in all slots since there are two slots for each plate.
CUSTOMIZE
Because I wanted the drawers to be fully customizable, I made the front panel plates removable so you can easily take them out and change them. If you would like me to design your own labels feel free to contact me.
What's more, I also recently uploaded some hex inserts so you can make your drawers even more unique thanks to the Omega MiniProject idea You can preview the V1 manual here:
V1 - Prusa Mini EN - Printer Drawers Assembly Instructions
You can also watch the assembly video below:
Printer Drawers For Ikea Lack Table Assembly Renderization
In addition, the full assembly video can be seen below: via Cults3d or message me on Instagram where you can find this and other cool projects and where you can follow me to keep up to date:
SolidWorksMaker Instagram profile
Or at Prusa Printers looking for SolidWorksMaker:
SolidWorksMaker profile at Prusa Printers
Stay tuned and if you like this print I would really appreciate it if you post your work so everyone can see what a great setup you have you turned out with these boxes.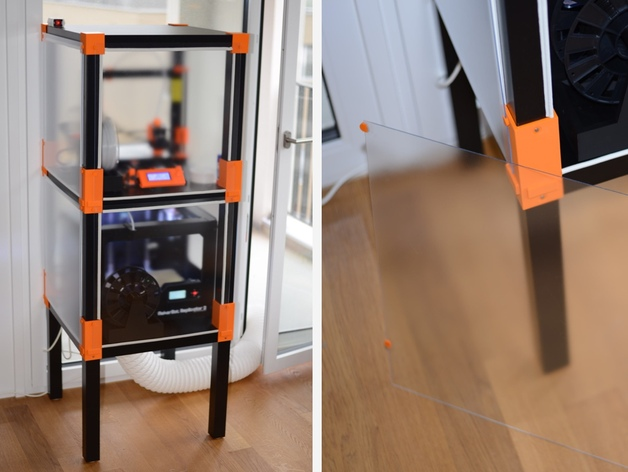
Print Orientation: As manual
Supports: As manual
Layer Height: 0.20 mm
Infill: 15%
Perimeters: 3
How a 3D printer can save you money How a 3D printer can save you money
The justification for investing in a new, modern 3D printer is that it actually saves money.
New research confirms that buying a 3D printer to make plastic iPhone cases (or paper towel holders) at home saves money in the long run. This does not mean that 3D printers will soon crowd out stores or lead to the closure of factories in China or Vietnam. But it's fair to assume that this technology creates a world where you could end up printing a lot of products at home or at your local workshop.
“Printing money” (or rather, saving money)
For example, purchasing an open source RepRap 3D printer can not only pay off, but actually lead to money savings if you print on it (by at least) 20 household items per year (for example: shower curtain rings and safety razors).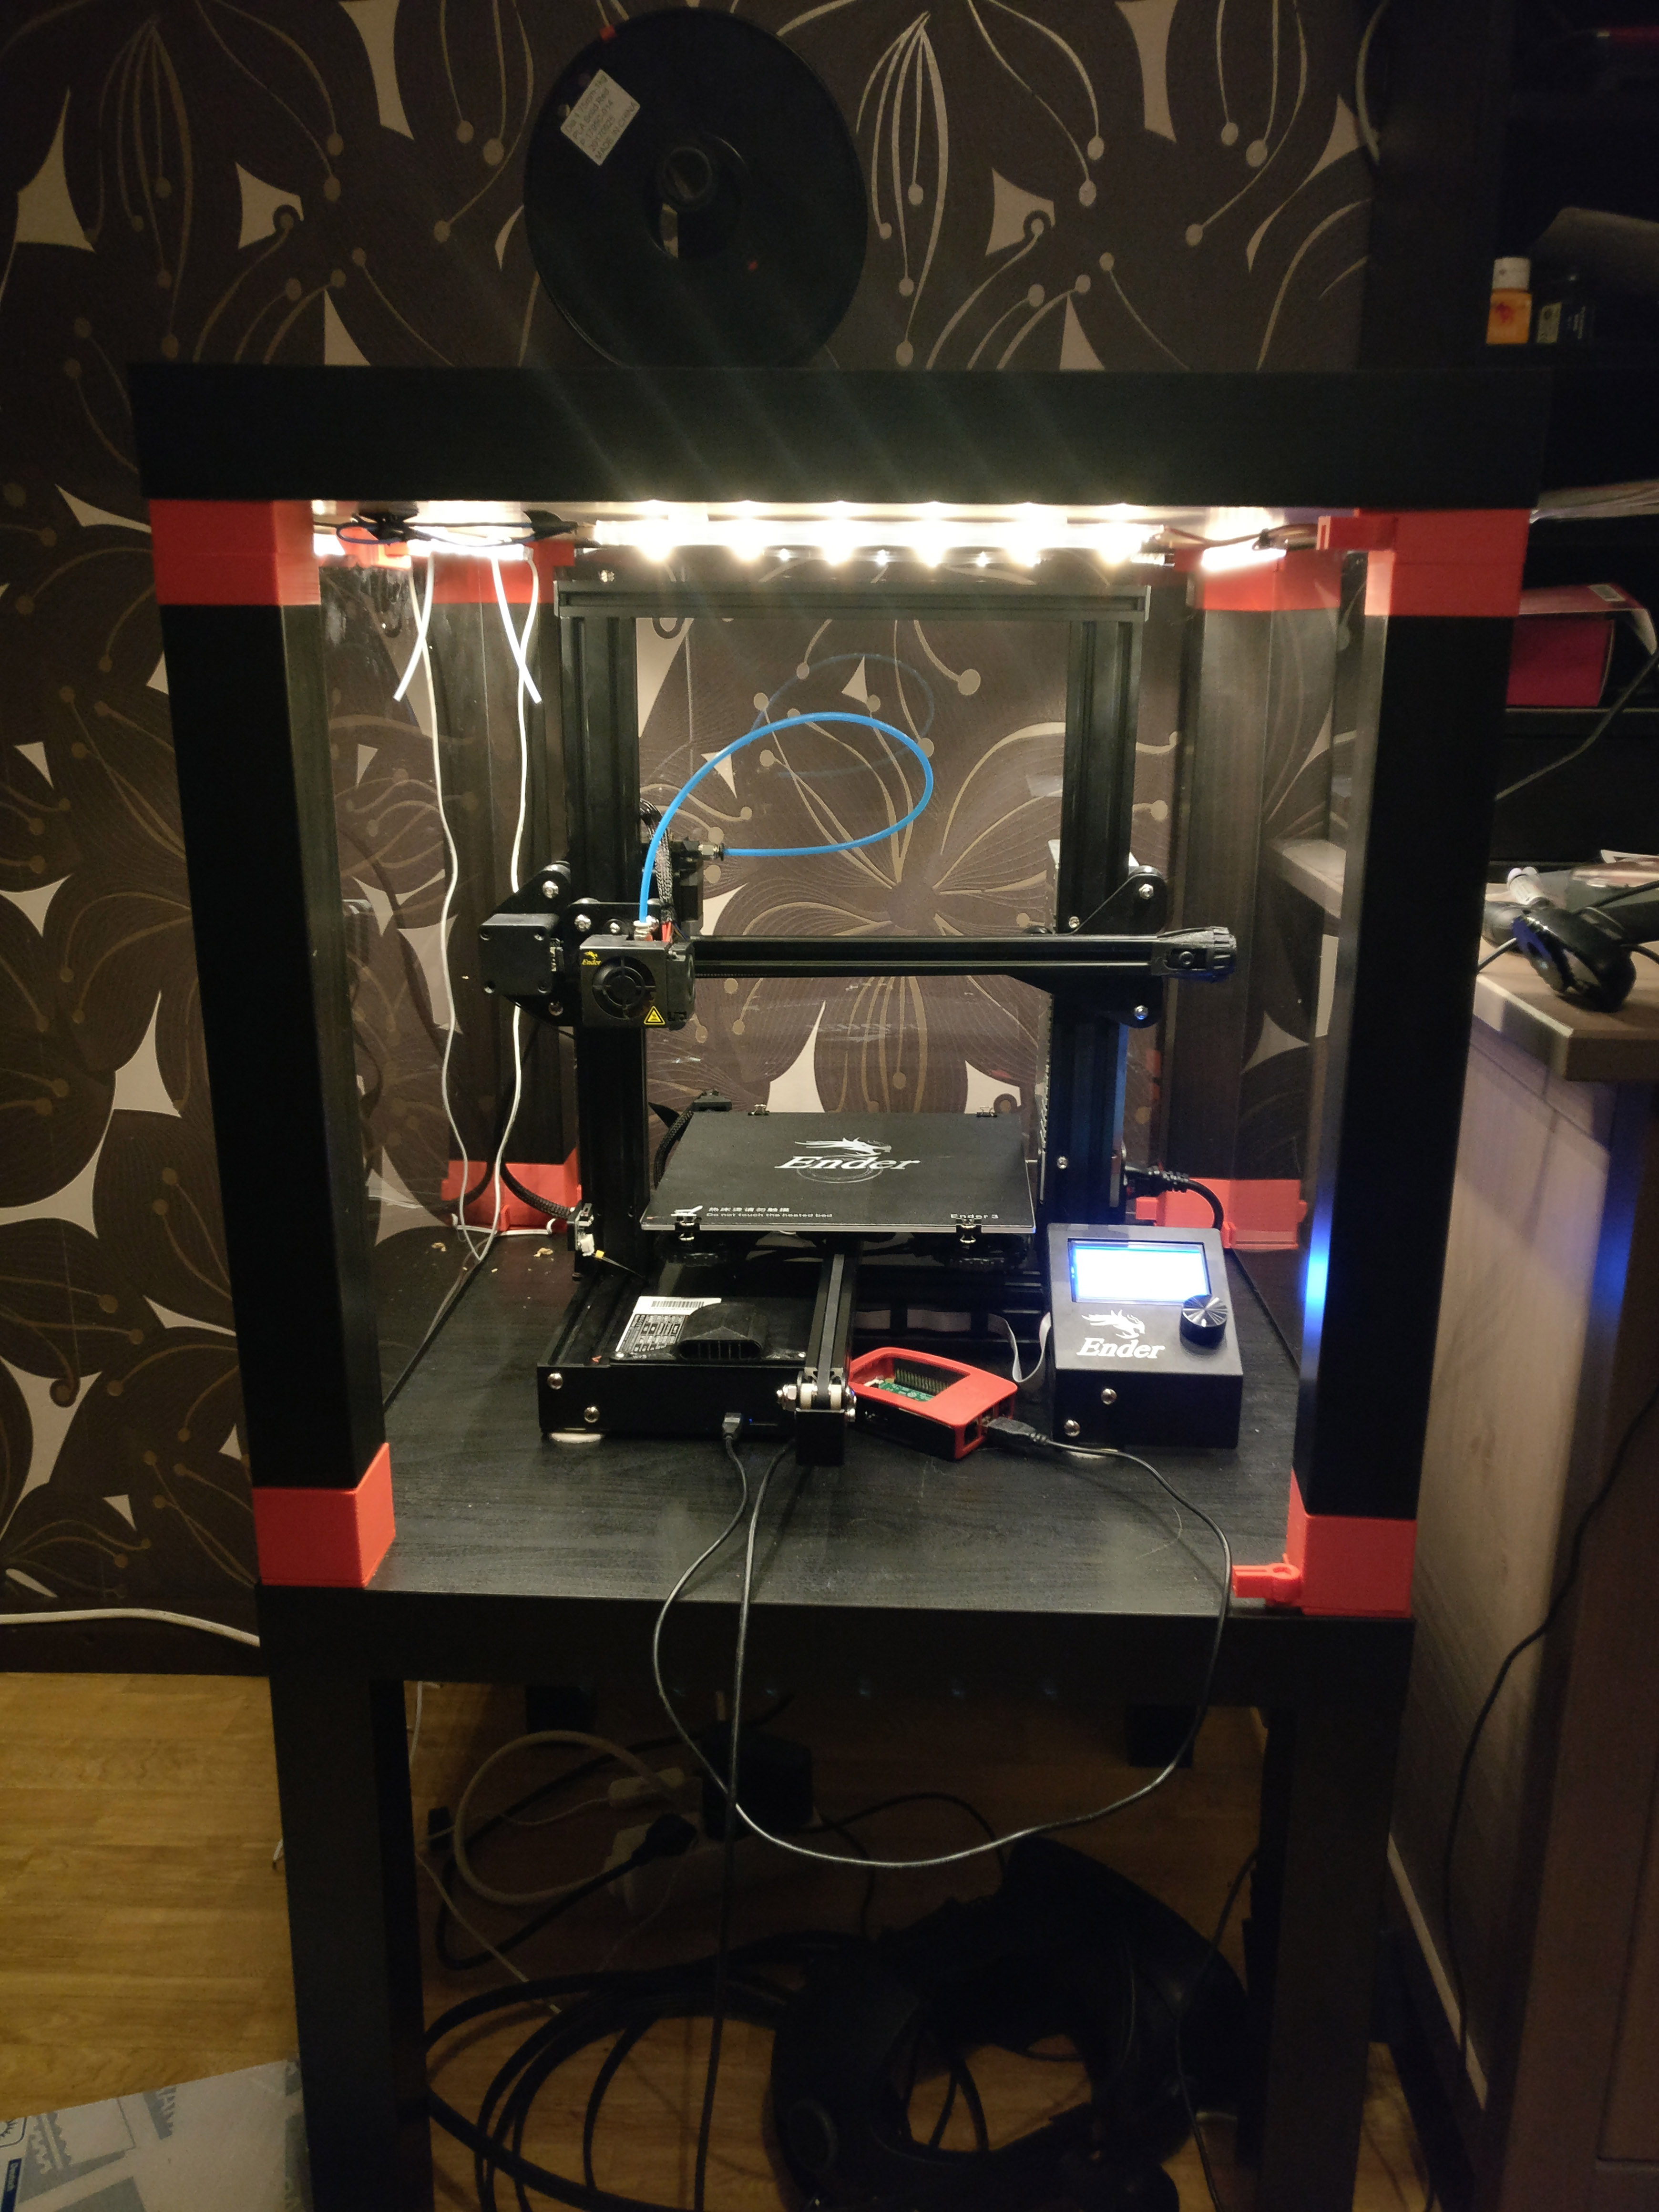 A recent study (known to the general public as the “life-cycle economic analysis of distributed manufacturing using open source 3D printers”) challenges not only the skepticism of the world’s major manufacturers, but also the wariness of 3D printing experts who believe that this technology is still in its infancy.
Today we already have the ability to print with plastic, and this opens up a huge potential for making thousands of products that are already in our homes and that we use every day. The range of printed material is expanding rapidly, and it is likely that consumers are likely to print many products themselves instead of buying them.
Owners of RepRap 3D printers can save between $300 and $2,000 per year, depending on which 20 household items they print. RepRap 3D printer owners can also continuously improve their open source 3D printer and even print new parts (as technology advances) rather than having to purchase a new 3D printer every few years.
3D printed cups
Other costs associated with the 3D printing process
Despite its merits, assembling an open source 3D printer is a labor-intensive DIY process. RepRap spare parts cost $500-600 and in order to assemble them, you need to spend about 24 hours of working time. And a beginner may need to first learn the assembly process at an appropriate workshop or use an online assembly guide. However, beginners can pay double the price of a collected RepRap. (It's still a good deal compared to so-called polished models like the $2,000 Makerbot Replicator 2.)
Also, don't expect, for example, that the iPhone's plastic case (made from 3D printing) will have the same quality or gloss as a store-bought version. Today, 3D printers still render objects with very small steps or ridges on the sides (no smooth finish). Of course, the object can be smoothed with a nail polish remover and painted, but this is additional labor.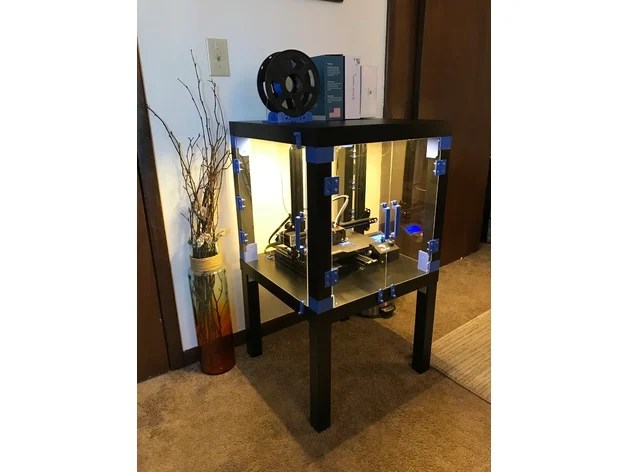
Is the quality of products resulting from the 3D printing process on par with the quality of products that are made in a traditional production and then sold? Unfortunately not: it doesn't even come close to factory quality.
Disadvantages of 3D printing
Today, 3D printers are able to print products with unusual shapes and unique customer requirements: they are well suited for printing a limited number of expensive parts for jet fighters or a customized implant to restore a destroyed part of the skull (both of which are already happened). However, this technology is not yet capable of making items from a variety of materials, and is too slow and too expensive to produce a large number of items.
Very inexpensive and relatively uncomplicated mass-produced items (such as plastic trash cans) will be made in large industrial centers for a long time. Such products, which are produced in the hundreds of thousands or millions, are not good candidates for 3D printing due to the speed and cost of the process.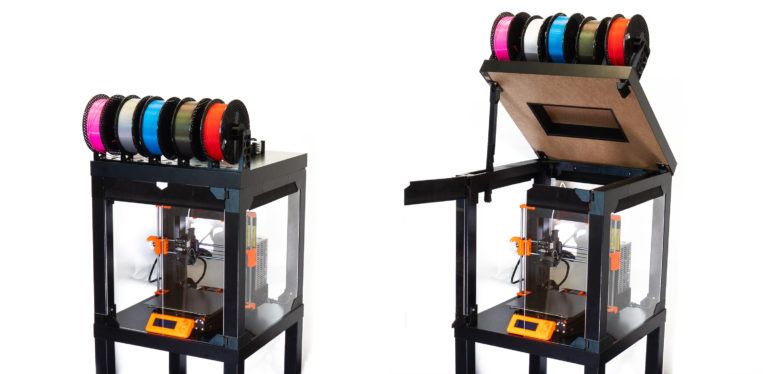
No one has done a definitive study comparing the cost of 3D printing plastic products locally to the cost of making plastic products in a Chinese factory and shipping them around the world. But some experts believe that industrial production is still able to easily compete with 3D printing. One reason for this is that industrial grade 3D printing requires more energy per unit than traditional industry.
How 3D printing could be used in mass production
3D printing technology could improve over the next 10 to 15 years to the point where it can compete with industrial production. This can be compared to how personal computers took over large electronic computers in less than 10 years.
3D printers still have a long way to go in order to take their place among the must-have household gadgets.
You will be able to make toys (like McDonalds Happy Meal), but hardly anyone will like having to buy a device for $300 or $400 (the price range of cheap modern 3D printers) in order to make such toys themselves. For this to happen, print quality needs to go up and the price of the device goes down.
However, 3D printing is still able to compete with factory-made products. 3D printing allows the customer to customize the final product design and have it produced on site immediately. For example, toy stores may someday be able to offer a custom doll with unique characteristics based on a 3D scan of a customer's face or body. (One company (3D Systems) is already offering custom 3D printed Star Trek figurines.)
Even a savvy engineer can construct many simple 3D printable pieces that will snap together as easily as Lego bricks to create larger or more complex objects such as chairs and cabinets. It could be called a 3D printed version of IKEA furniture that needs to be assembled by yourself.
Order and print anywhere
The ability to print anything, almost anywhere, gives 3D printing a huge advantage over factories. The military in the US has recognized this advantage by placing 3D printers on ships and in remote battlefields in order to recreate equipment prototypes and possibly someday make vehicle replacement parts.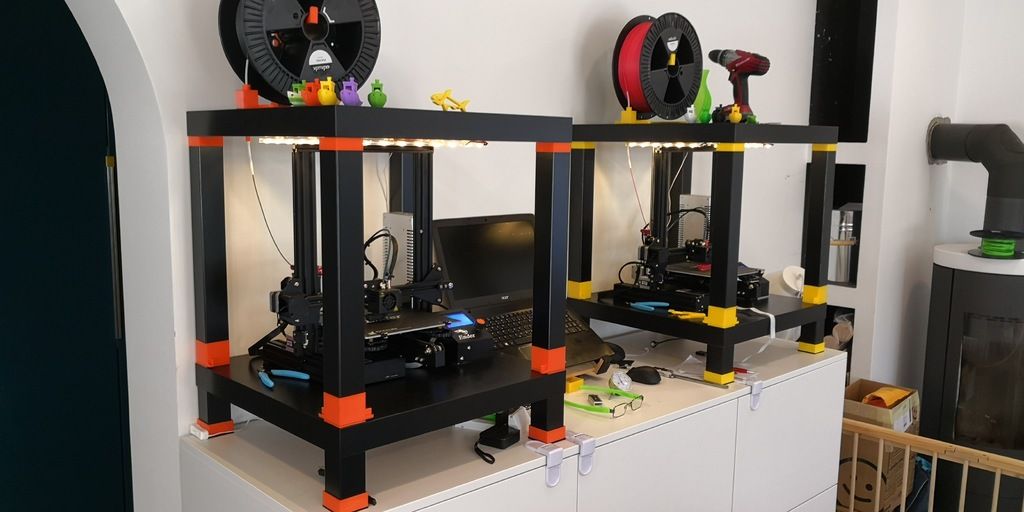
Global shipping company DHL is already thinking about how 3D printing will impact the way and where you shop for products in the future. According to a 2012 DHL report, the full opportunity for a "customizable lifestyle" scenario is given to 2050. It will be a world in which 3D printing devices in homes or local shops will replace the mass production industry in most cases. In such a world, only raw materials and digital developments will cross national borders.
A small glimpse of this future can already be seen at Kraftwurx. It is a Houston-based company that operates in the digital marketplace with orders for simple 3D printed products (such as metal jewelry and plastic figurines) around the world. The Kraftwurx network consists of more than a hundred 3D printing companies scattered around the planet: this allows buyers and sellers to save on international shipping and paying duties on imported goods.
Breakthroughs in 3D printing technology
This future may become even closer as 3D printing technology begins to overcome its current limitations.


