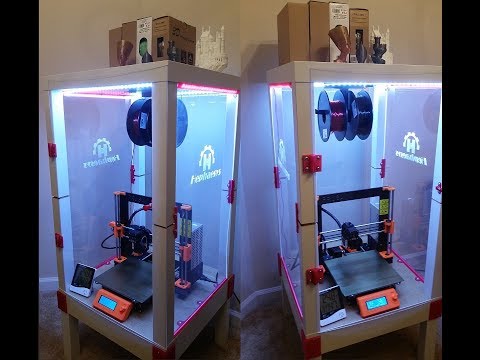
Ikea 3d printer enclosure ender 3
Building an IKEA Lack Enclosure for the Ender 3 Pro — Joe's Projects
Various electronics, programming, welding, mods and other non-automotive projects.
I recently got an Ender 3 Pro 3D printer. It works great, and I’ve been doing a lot of little projects and prototypes with it. Since I plan on working in an automotive environment, I’m using ABS to ensure that parts don’t melt in the engine compartment or from the hot sun in the cabin.
To print with ABS, you really need an enclosure. This traps the heat in, reducing the chance of warping. For a while I used a photo tent, which was cheap and worked pretty well. However, it was hard to look at the print while it was printing, and the fumes would get annoying, and the VOCs released by ABS aren’t good to breathe — the photo tent had no provision for venting. Something more robust was needed.
I modeled my design on a Prusa enclosure. It has a series of 3D printed parts that take around 40 hours to print. These parts mount at the corners to hold the plexiglass panels in place, and include pieces for double hinged doors, a spool holder, a shaft to run the filament from the spool through the top of the table, and a few other odds and ends (power supply mount, cable clips) that I didn’t use.
Besides the 3D printed parts, this requires a few more pieces:
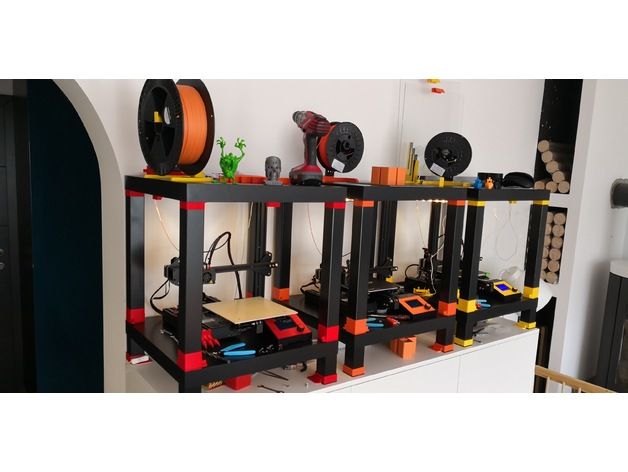
Two (2) IKEA Lack side tables. These are $10 each. The plexiglass is mounted between the legs of one table, which is then placed on top of the other table. I later used a third to raise the printer up higher and provide storage underneath.
Plexiglass sheets. I was able to buy a complete set of tinted 440x440 and 440x220 pieces specifically for this for about $65 on Amazon. You can probably get them cheaper if you cut them yourself, but this was very convenient.
Screws.
 I just used some sheetrock screws I had lying around.
For the most part, the design worked quite well. I ran into a few issues, though.
Plexiglas Size: The plexiglass sheets were slightly too tall (or the legs too short), which made it impossible to properly seat the corners. It wasn’t a big deal, but it affected my ability to seal the enclosure and keep the VOCs in. I worked around this by printing a series of 1mm and 2mm shims that I could insert to between the bottom feet and the legs to get the height right. Spacers STL
Printer Height: A bigger problem is that the Ender 3 Pro is slightly taller than the Prusa. I fixed this by printing new feet with 20mm risers. This introduced a 20mm gap between the glass and the bottom table top, which I filled with 1”x3” wood strips painted black. Tall Feet STL
Printer Depth: The printer barely fits in the enclosure front-to-back, with the bed coming very close to hitting the front and back as it moves. Once I had the final position figured out, I put two screws down in front of the printer to act as stops so that I could align it again easily in the future.
Spool Holder Width: The printed spool holder was designed for wider spools. I loaded the STL file into modo and reduced the width of the base to properly hold the smaller $20 spools I had been getting from Amazon. Modified STL
I also wanted to know how hot the enclosure actually gets. I bought a refrigerator thermometer with a temperature probe from Amazon. Most of the small thermometers I found were meant for grow rooms and cycled between temperature and humidity, which is not what I wanted. The one I found was under $10, and the probe let me mount the display outside the enclosure.
I originally considered adding a heater, but Googling and my own testing showed that this was not necessary. The enclosure gets up to around 108 F purely through waste heat from the bed and nozzle.
The modified spool holder on top of the printer.
A digital thermometer shows the current enclosure temperature. It gets up to around 108 F when printing — no extra heater is needed.
I wanted to get rid of the VOCs, which first meant keeping them in the box. This was pretty simple: I bought some adhesive-backed rubber automotive seal from the hardware store. I ran it along the legs and top of the table just behind where the glass would slide into the mounts, then inserted the glass. The glass presses against the strips, making for a reasonably tight seal.
The doors aren’t sealed. I’ve run the printer this way for over a month and don’t even notice the VOCs anymore, as the majority are sucked out through the vent. The extra sealing isn’t necessary, and in fact it’s arguably useful to leave it unsealed to act as an intake to keep air moving towards the vent.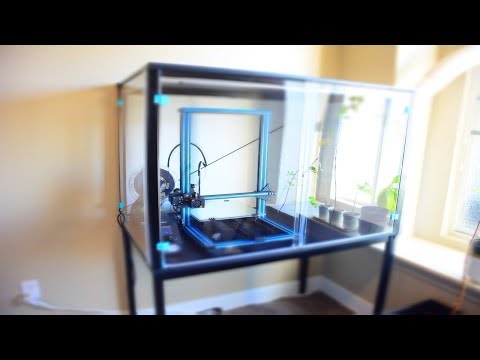
Adhesive-backed weather stripping used to seal the sides of the enclosure.
Wooden strips used to fill in the gaps between the bottom of the glass and the bottom table top after adding the risers to the legs.
Next I had to get the VOCs out of the box, and out of my room. For this I bought a 4” 100 CFM exhaust fan for about $20 from Amazon. 100 CFM isn’t terribly strong, but that works out — it’s strong enough to pull the fumes out without removing all the heat from the enclosure.
I bought a $10 4” duct mount from Amazon, and cut a hole in the bottom of the enclosure, then screwed the mount over that. I positioned it near the power supply so that I could try to keep air flowing over it, but later moved the power supply out of the case entirely — the stock cabling was just long enough to do that.
I ran 4” dryer duct between the enclosure and the fan, and then from the fan to the window. On the window side I bought a shelf from the hardware store, then cut a hole in it and mounted a louvered cover on the outside, and attached the ducting to the inside. I couldn’t actually fit the shelf into the window opening in one piece, so I cut it in half, put the two pieces in, and screwed them into a third piece of wood. Before installing it, I used some more adhesive-backed weather stripping to keep drafts out.
I did try to use a hinged backdraft blocker. I got one that had gravity-assisted closing and one that used weak springs. It turns out 100 CFM across 4” is not strong enough to open either of those. The louvered piece outside should be enough to keep most air and weather out, so I just left them out. I did consider a stronger fan, but the price jumps quickly, and I was trying to keep this cheap.
The duct routing in my office.
The duct running from the bottom of the enclosure.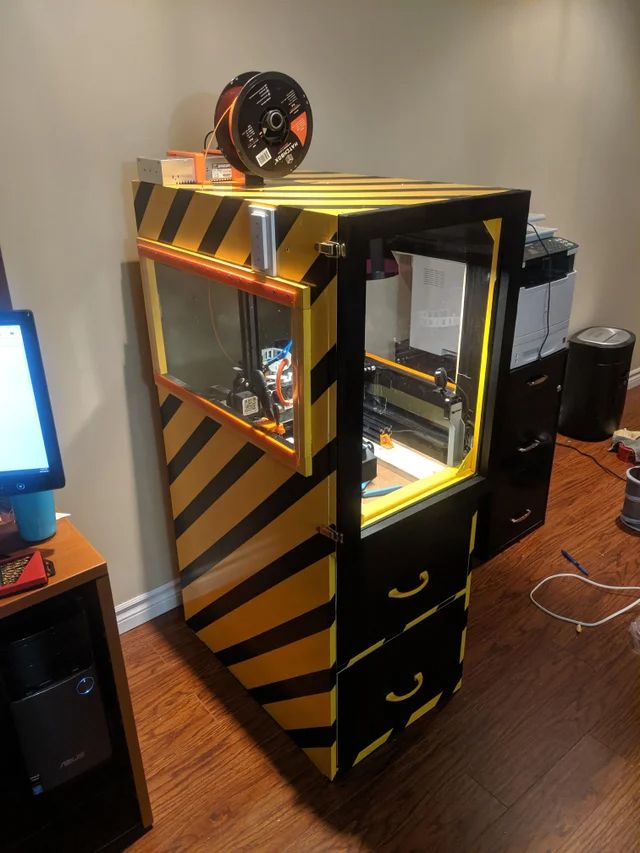
The exhaust fan in the middle of the ducting.
The duct going out the window.
I bought a simple LED strip from Amazon, and spiraled it around the top of the enclosure. I snuck the power wire out the top of the enclosure and taped the power supply to the back of the enclosures. The strip is dimmable, and I mounted the dimmer on the back of the enclosure, although I just leave it at full brightness.
LED lighting spiraling around the top of the enclosure to light up the print.
The dimmer crudely attached to the back of the enclosure.
The printer, fan and lights are all plugged into a power strip attached to the side of the enclosure. I can turn on the strip to turn on all three at once. I also put a switched outlet adaptor on the fan so that I could either run it all the time or only run it at the end of the print.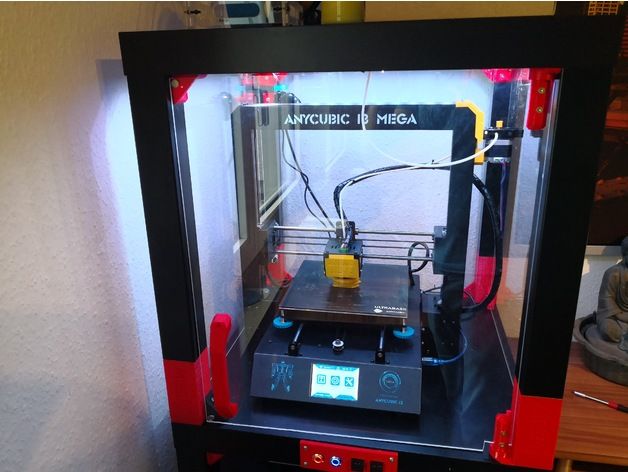
The power supply was moved out of the enclosure to keep it out of the high-temperature printer environment. The stock wiring just barely reached. It’s simply secured with a zip tie, which seems to be fine. Moving it outside should increase the power supply’s life, but likely wasn’t strictly necessary. The steppers are still in the enclosure, but there’s not much I can do about that.
Printer, fan and light power all plugged into a single power strip. Toggling the switch toggles all three at once. The fan has a separate switch on it so that it can be separately turned off if desired.
The power supply (silver, below the white power strip) mounted outside of the enclosure with a zip tie. The LED dimmer can also be seen above the power strip.
I’ve done many prints since building this enclosure, and the VOCs are basically nonexistent in my office. The majority of my prints now come out with no warping at all. I sometimes have to apply more Aqua Net Extra Super Hold hairspray to keep the prints stuck to the bed, and sometimes I’ll have a feed error that results in strings of plastic everywhere, but these are rare, and the ABS prints themselves are good and solid. Overall, I’m pretty happy.
IKEA LACK Enclosure for Ender 3 v2
Last updated at Sunday, February 27, 2022.
As I mentioned in a previous post, I have had a 3D printer, the Ender 3 v2. My printer hasn’t been off much in those months (shown by the rolls of filament that have been pushed through it…). And although I am very happy with it, my printer has 2 major drawbacks. First of all, it makes quite a lot of noise during printing. I have already partly solved this by installing a quieter fan, but it is still not nice to sit next to it for a whole working day when it’s busy with a long print (with headphones on it’s doable, but I don’t like to have a headset on all day).
The second problem is that it takes up quite a lot of space on my 2nd desk. We will tackle both problems in this post.
The IKEA LACK table is a widely used product within the 3D printing community for making printer enclosures. They are inexpensive and the right size for most printers. To fit the Ender 3 v2, you will need extra printed parts. For this build I followed this tutorial, with some changes for personal preference. If you want to make your own, I can only recommend making your own adjustments. At the time of writing, I’m not quite done with it myself. For example, I want to print some cable organizers to make the cables a bit neater.
Bill of Materials
In the Dutch version of this post I’ve included the links to the products, but since all are local shops, it’s not useful for the international version.
| 2x IKEA LACK table | €17,98 |
| 2x 1kg PLA | €50,- |
| Tube of PolyMax kit | €13,49 |
| 16 AWG Silicone cables | €9,99 |
| 3x 44cmx52,5cm 3mm Plexiglass | €34,13 |
| 2x 22cmx52,5cm 3mm Plexiglass | €11,37 |
| Verzendkosten Plexiglas | €8,95 |
| 4x 5mmx2mm Neodymium magnets | €5,95 |
| Plastic glue | €4,69 |
| Small piece of PTFE tube | €6,20 |
| Total | €162,75 |
In total not as cheap as I assumed in the beginning, but a lot cheaper than buying a dedicated enclosure.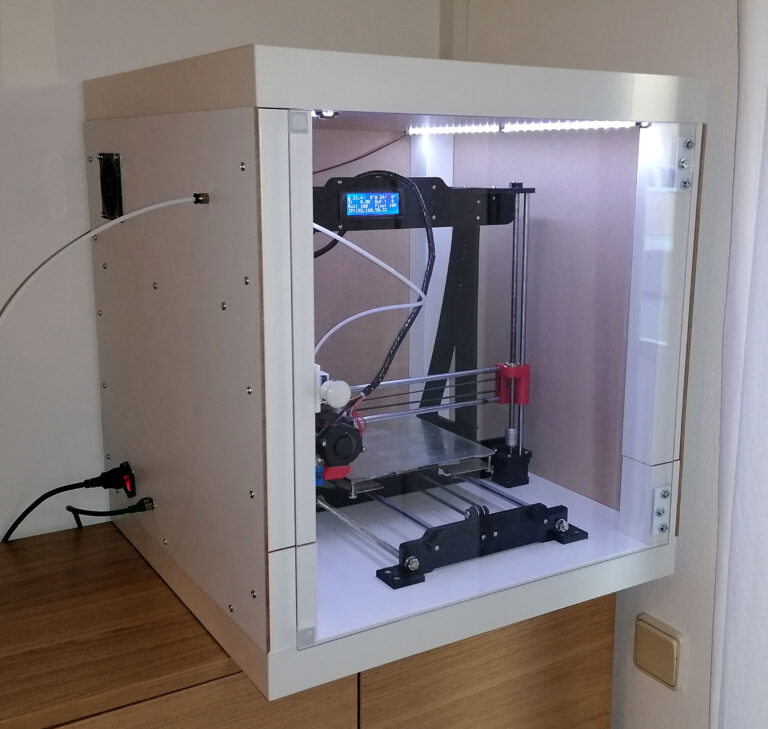
Prints
- bottom_corners.stl (all if you want the cable rail on the right, if not, remove the corner with the cable rail from this file)
- top_corners.stl
- hinges.stl
- bottom_feet.stl
- Door Handles for LACK Enclosure
- Side-mounted Spool Holder for LACK Enclosure
- *Parametric Phone Holder for LACK Enclosure
- *Back Left Leg with Cable Rail for LACK Enclosure (If you want the cable rail on the left)
- *Ender 3 v2 Left Display Mount for LACK Enclosure
* = Optional
Building tips
One of the things I did wrong myself is the hole for the filament, drilled in the center of the plate. Then it is only in an annoying bend, which makes it A) not easy to change filament, and B) it can possibly lead to problems. Make sure you have your printer in place first, then mark the point where the extruder hole aligns with the Plexiglas.
Although the display does not need to be outside the enclosure, it is important for the life of the PSU.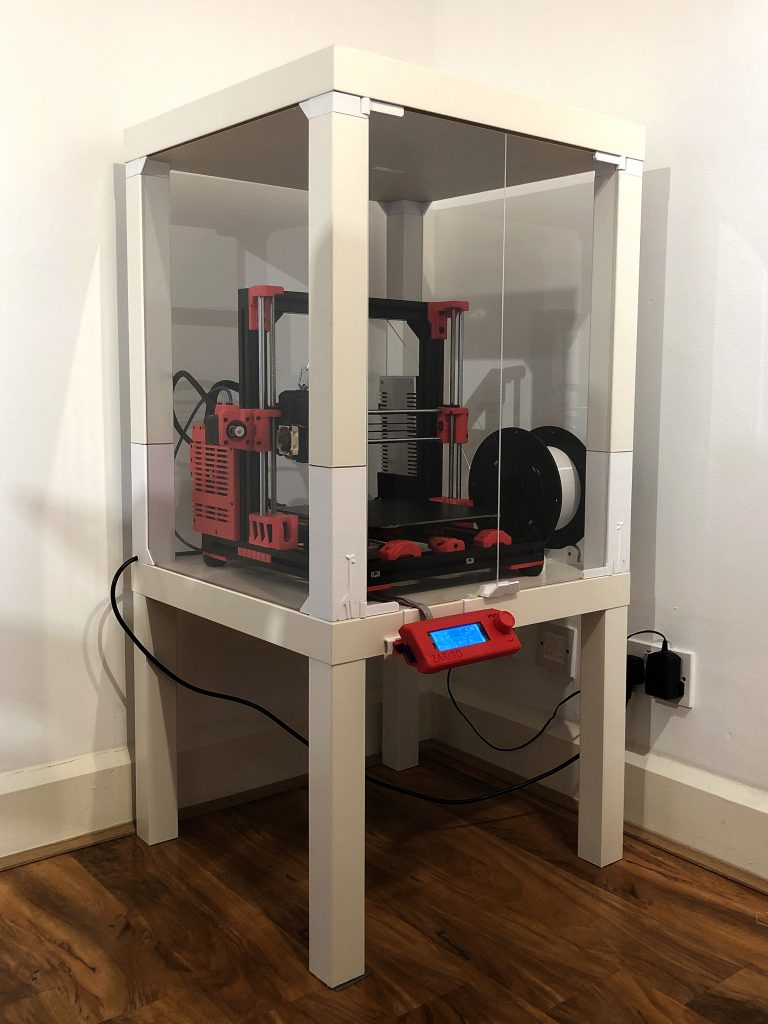 I attached it to the front under the cabinet, so that the power button is in a nice place, but you can choose where you want it.
Finally, I put the printer on a paving stone, which is again on an old yoga mat. For a better explanation of this, I refer to CNCKitchen, who made a great video about it.
End Note
The printer is in place, which means I finally have room on my desk for other clutter (honey, I need to get a 2nd printer!). I had actually thought that a few sheets of Plexiglass wouldn’t stop much sound, but I was really positively surprised. I’ve walked into the office a few times now and was shocked that a print was on, because all I heard was a soft buzz. The housing also keeps the heat in well. Haven’t measured it yet, but it feels nice and cozy inside when the print is just finished. For something like PLA this does not matter much, but for ABS this is something that is required.
Free 3D File of Ikea Platsa Ender 3 V2 Case ・3D Printed Model for Download・Cults
Ikea Platsa Tool Holder for Ender 3 (Remix)
Free
Keychain Famel
Free
Best 3D Printer Files in Home Category
nine0003 Bad Robot 3dPrintable 3dFactory Brasil 7.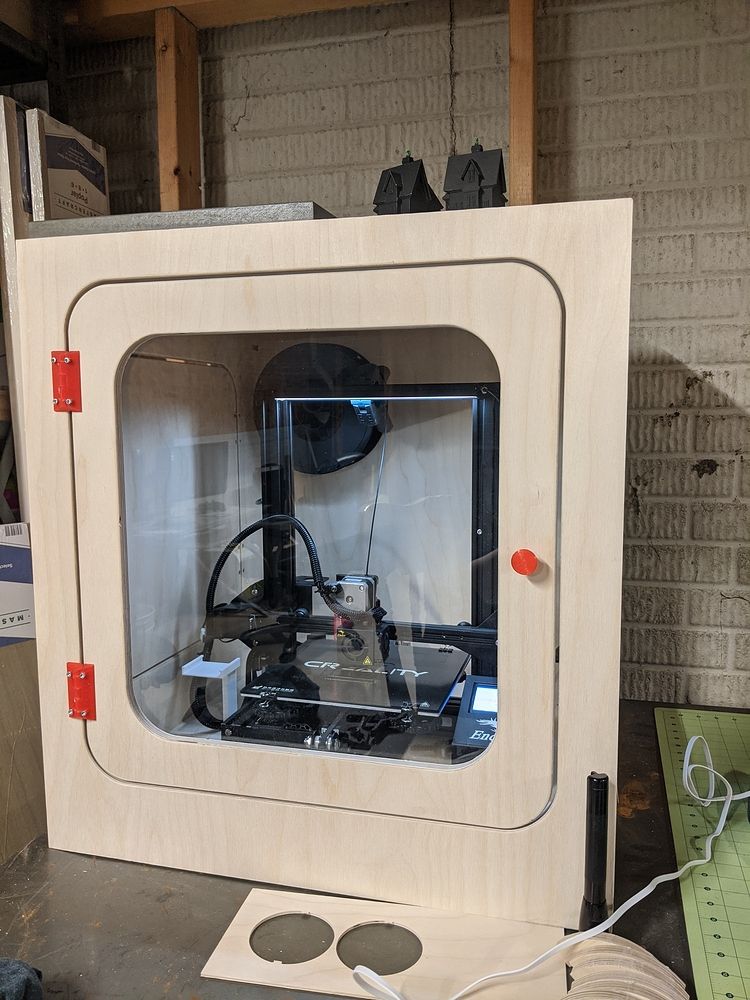 81 €
81 €
Harry Potter clock death relics for 3D printing and laser cutting
2,50 €
Super Mario Bros Pipe Planter / Pen Holder
0.61 €
Sir Pigglesby (a most noble piggy bank)
Free
D&D Wine Glass Marker
1.17 €
GOTHIC 6x LITHOPHANE LAMP SHADE 1
2,80 €
Pumpkin Knife Accessory
Free
Modern ring lamp
1 €
Bestsellers in the Home category
Hanging cat - print-in-placement
1.47 €
Clothes hanger "Wolf"
2. 08 €
08 €
Secret tray for bowls of ramen noodles
2.66 €
HAIRY FLEXIBLE GNOME FOR ON-SITE PRINTING
2.36 €
Wall shelf "Oyster mushroom"
2,40 €
nine0003 Quick Print Gift/Storage Boxes - Ultimate Collection (Vase Mode) €5.68 -25% 4.26 €
Bear wine holder
2.36 €
GYRO BEER STAND 2
2.14 €
nine0003 Kawaii dim sums in a cute basket1.54 €
Crystal corner decor - printing on site
1.54 €
Pencil with dinosaur gluttony
1,55 €
Wall shelf "Tinder Fungus"
2. 40 €
40 €
Ornamented tea holder
€2.83 -25% 2.12 €
Super cute paw pen cup
1.32 €
Candlestick - Arbre de vie
1,20 €
Another quick-change toilet roll holder
1 €
nine0002Do you want to support Cults?
Do you like Cults and want to help us continue our journey on our own ? Please note that we are a small team of 3 people, so supporting us in maintaining activities and creating future developments is very easy. Here are 4 solutions available to everyone:
-
AD: Disable your AdBlock banner blocker and click on our banner ads.
 nine0006
 -
AFFILIATION: Shop online with our affiliate links here Amazon.
-
DONATIONS: If you want, you can donate via PayPal here.
-
* INVITE YOUR FRIENDS: * Invite your friends, discover the platform and the great 3D files shared by the community!
Free 3D file IKEA 3D printer body・3D printing design to download・Cults
Filament bearing
Free
Prusa-i3 3DP-11 X-Axis Belt Tensioner
Free
Tea bag holder for command tape
Free
Pyro Plunger
Free
nine0003 Improved belt holder HICTOP Prusa i3 Y-AxisFree
Prusa i3 aluminum frame filament guide
Free
The best files for 3D printers in the Tools category
1.
 75mm Universal Spool Clip
 Free
Calibration de votre imprimante
Free
Zim Box Test
Free
Pentax K-01 SMC DA-40mm lens cover
Free
Mazda RX3/808 Wagon Rear Window Pole Holders
Free
Cable clip
Free
nine0003 Face shield COVIDFree
Ultimate-er Stringing Test
Free
Bestsellers in the Tools category
INDICATOR FOR BETTER BED LEVELING FOR ENDER 3 V2
2,37 €
Business card embossing system
3 €
nine0003 Armadillo - flexible wire conduit 1.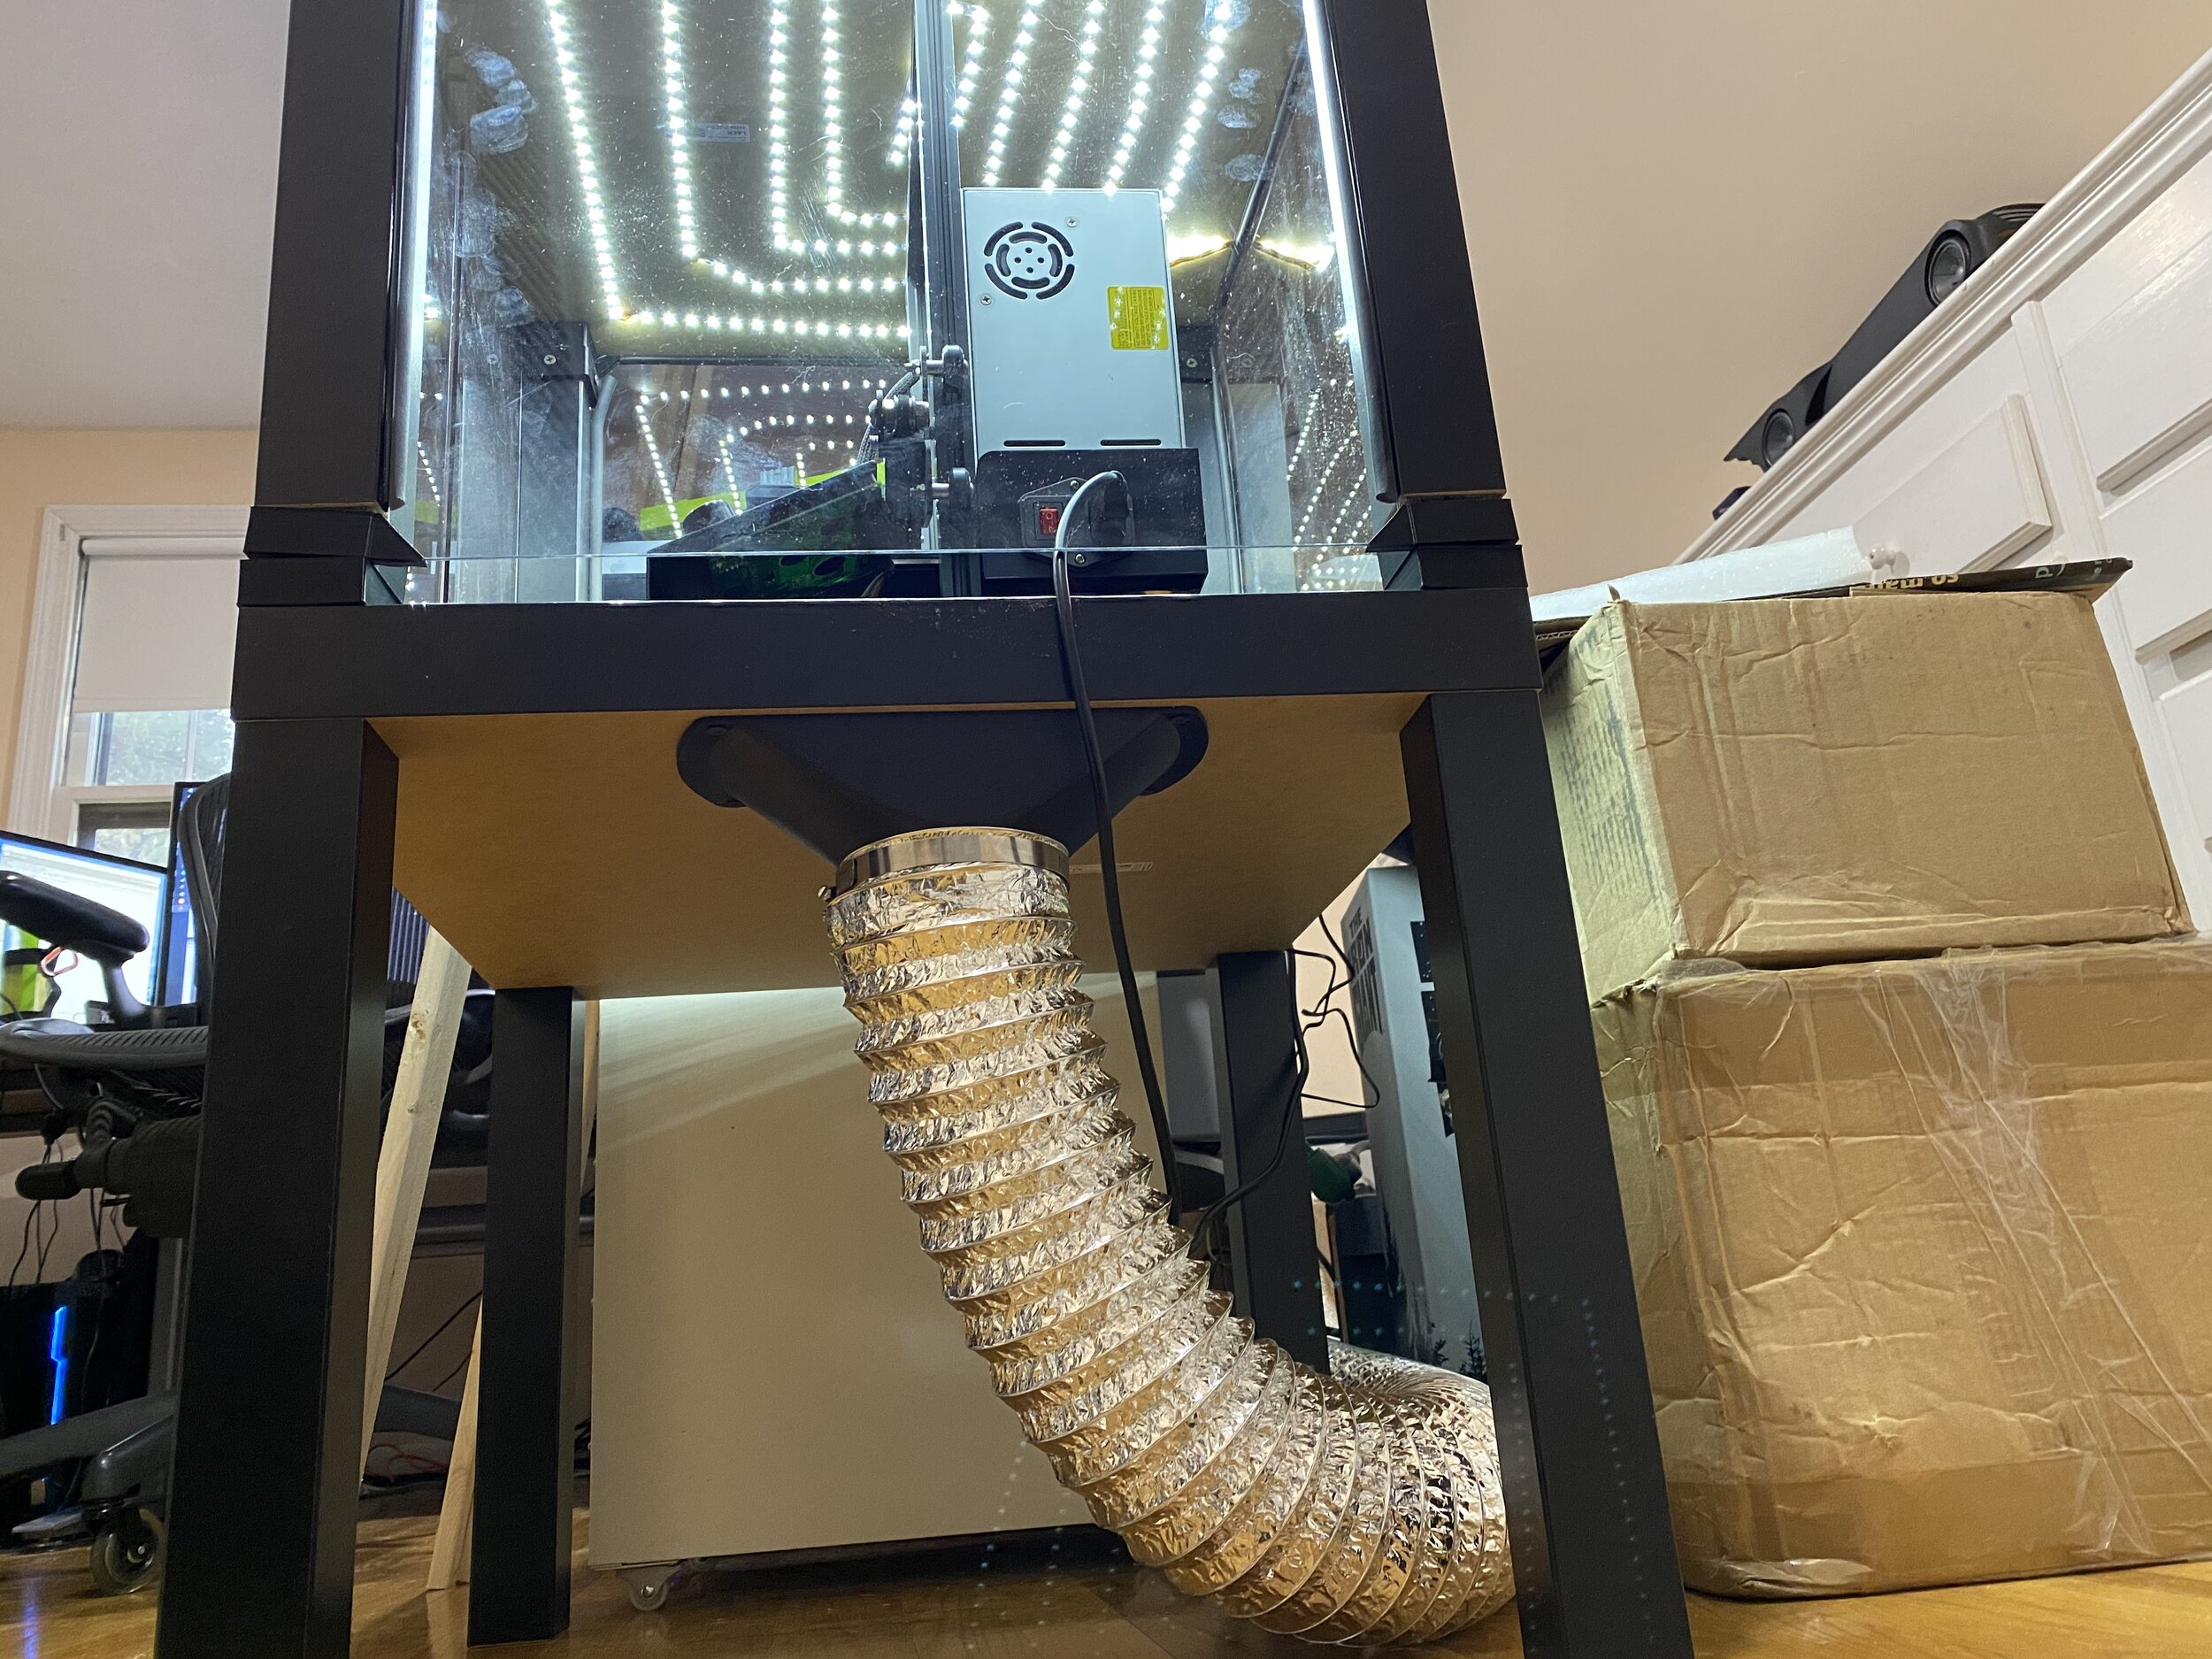 68 €
68 €
Fire hydrant container
1.89 €
Ratchet holders - magnetic - holders for tool box organization
2,68 €
Ender 3, 3 V2, 3 pro, 3 max, dual 40mm axial fan hot end duct / fang. CR-10, Micro Swiss direct drive and bowden compatible. Printing does not require support
1.57 €
PRECISE DIAL INDICATOR 3D PRINT DIY
1.91 €
Ender 3 S1 pro fan duct 5015 4020
1,30 €
UNIVERSAL BED LEVELING INDICATOR FOR PRACTICALLY ALL PRINTERS
2,37 €
Ender 3 Briss fang Gen2, red lizard, spider, nf crazy, dragonfly, etc. nine0004
1.75 €
ENDER 3 S1/S1 PRO REEL HOLDER AND DEPORTED REEL
2,13 €
Case for Chill Buddy lighter
0,93 €
ENDER 3 S1, S1 PRO, SPRITE, V3 AIR DUCT FAN 5015, ACCELEROMETER, LED strip
€2. -20% 2.15€ 69
69
ARTEMIS -> Shop for Alligator 2 || 6.5" arrows || Repeating crossbow
6.25 €
Paint stand with scissors
5.21 €
Bit holder Spartan 4 mm Hex
1,80 €
Do you want to support Cults?
Do you like Cults and want to help us continue our journey on our own ? Please note that we are a small team of 3 people, so supporting us in maintaining activities and creating future developments is very easy. Here are 4 solutions available to everyone:
-
AD: Disable your AdBlock banner blocker and click on our banner ads.
-
AFFILIATION: Shop online with our affiliate links here Amazon.
Learn more