How to use 3d printing pen
3D Printing Pen – Architecture, How it Works, How to Use, Applications
3D Printing Pen or Doodlers seems to be the buzzword around 3D printing enthusiasts and hobbyists. This post will discuss in detail about what is 3D Printing Pen or 3D Doodler, it’s architecture, how it works, how to use, applications and advantages.
Deep Web: How to Enter, Dangers, Wh...
Please enable JavaScript
Deep Web: How to Enter, Dangers, What Can Be Found, and Everything You Need to Know
What is 3D Printing Pen3D Printing Pen is a hand held device in the shape of a marker. It is similar to hot glue gun with the ability to print a fine line of PLA (Polylactic acid) or ABS (Acrylonitrile Butadiene Styrene). PLA and ABS are thermoplastics which are considered the best for prototyping applications.
Fig. 1 – Introduction to 3D Printing Pen
It prints in 3 dimensions without using any software or computers. A normal Pen uses ink whereas a 3D pen melts environment-friendly plastic using heat that oozes out of the pointy-end of the pen. Whatever you imagine, you can draw. It goes from your brain, to your hand, right there.
Be it a child or a professional artist, everyone is eager to have a 3D pen. The fact that it brings fun at the workplace, inspires creativity and helps in learning, is making 3D pens a craze all over the world.
One can draw a raised graphic with the help of 3D Pen. Capability to draw in air makes it different, allowing you to instantly form 3D structures right in front of you, which you can pick up and hold in your hand. Fig. 2 shows 3D object (Eiffel Tower) created by 3D Printing Pen.
Fig. 2 – Prototype of Eiffel Tower created by 3D Printing Pen
Architecture of 3D Printing PenThe architecture consists of components namely:
- Hot End
- DC Geared Motor
- Motherboard
- Arduino Controller Board
- Transistor (NPN)
- LED Display
Hot End is referred to the pointed end or nozzle and the heater. The heater maintains the operating temperature within 130- 2000 C. At this temperature the filament melts and makes it’s way out through the nozzle creating a thin line of plastic. It adheres to the surface it’s laid on.
Gear assembly is attached to the DC Motor to increase the Torque output and decrease the speed.
MotherboardIt is nothing but a printed circuit board which provides communication between electronic components of the system and other peripherals. Hot End and DC motor are assembled onto the Motherboard.
Arduino Controller BoardThe control of the entire system is handled by Arduino Microcontroller. The Arduino board is programmed to run the device efficiently.
Transistor (NPN)It is typically used to amplify or switch signals and electrical power. NPN Transistor is bipolar in nature and can be made to operate as ‘ON/OFF’ switch by biasing the Base terminal of the Transistor. The push Button on the pen is connected to NPN Transistor. When the User switches on the device, the transistor helps the motor to run and vice versa.
Mode of Operation along with Temperature settings and control is displayed.
Fig. 3 – Architecture of 3D Printing Pen
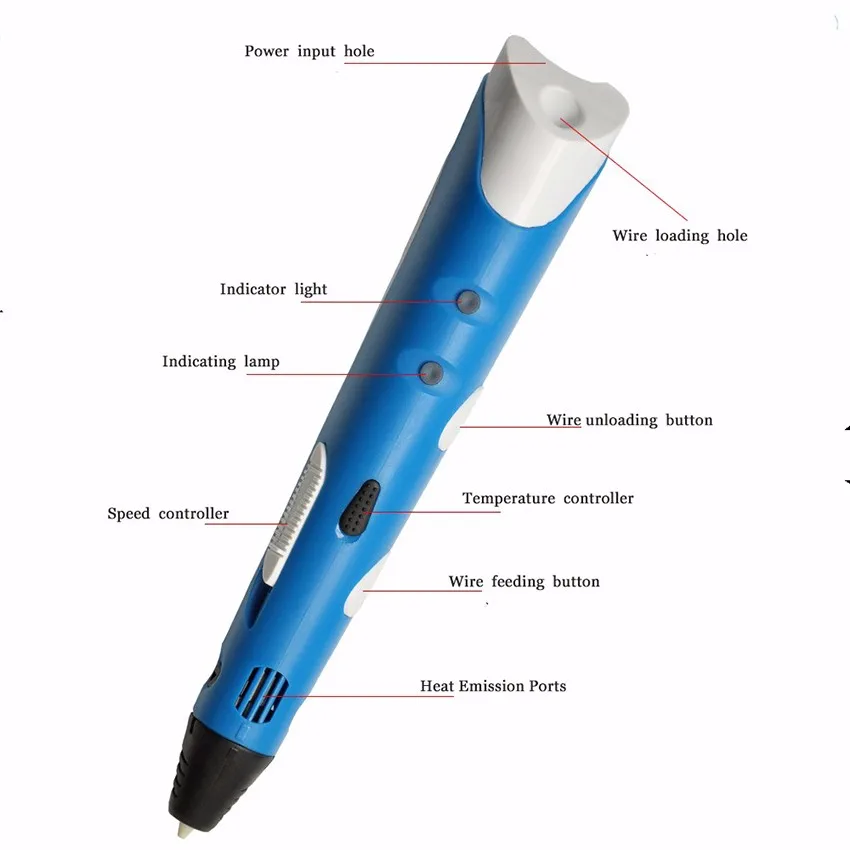
How does 3D Printing Pen WorkThe physical components of the device include:
- Power Jack
- Plastic Insert Port
- Indicator Light
- Reverse and Forward Button
- Speed Change Button
- Nozzle
Power Jack
It helps in connecting the power supply to the device and powers it on.
Plastic Insert Port
This port is used to insert plastic filament in the 3D Pen.
Indicator Light
To indicate filament is warming up or warmed up.
Speed Change Button
Select the fast setting and press the extrude button until the melted filament starts to come out of the tip of the pen.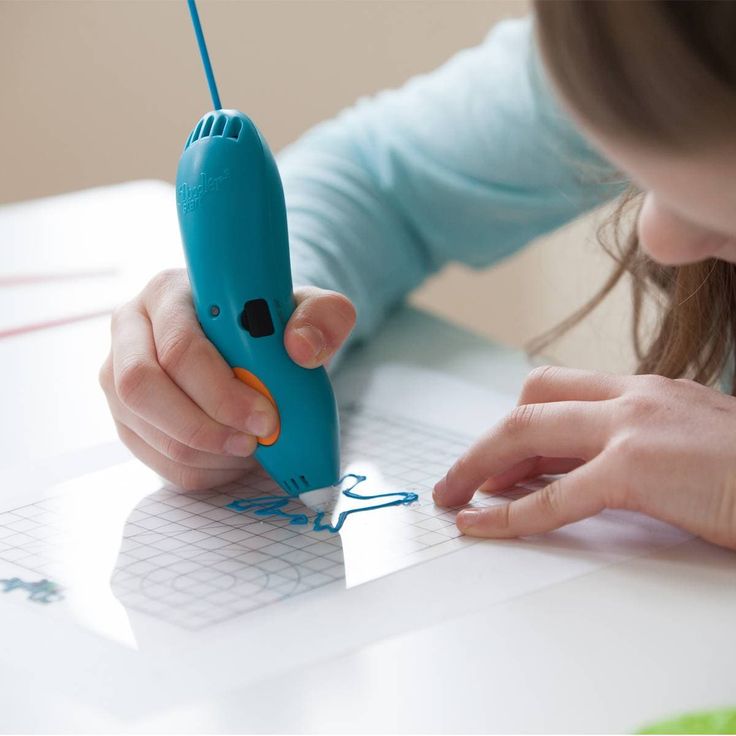 Then you can adjust the speed setting based on what and how you are printing.
Reverse and Forward Button
Pushing these buttons make the filament to move back and forth.
Nozzle
Nozzle is at the end of pen for extruding melted plastic.
In a 3D pen, the plastic is heated and pushed out of the tip of the nozzle. Once the melted plastic leaves the tip it is very malleable and can be painted onto any surface or molded into any shape.
After leaving the tip, the plastic begins to quickly cool down and after a few seconds, the plastic hardens and is molded into whatever shape you have created.
- Turn the device on.
- Heat it up and then load plastic filament.
- Select the speed.
- Double click for continuous flow.
- Unloading/Reversing the plastic filament
Fig. 4 – Components of 3D Printing Pen
Applications of 3D Printing PenThe applications include:
- Basic 3D shapes and 3D models.
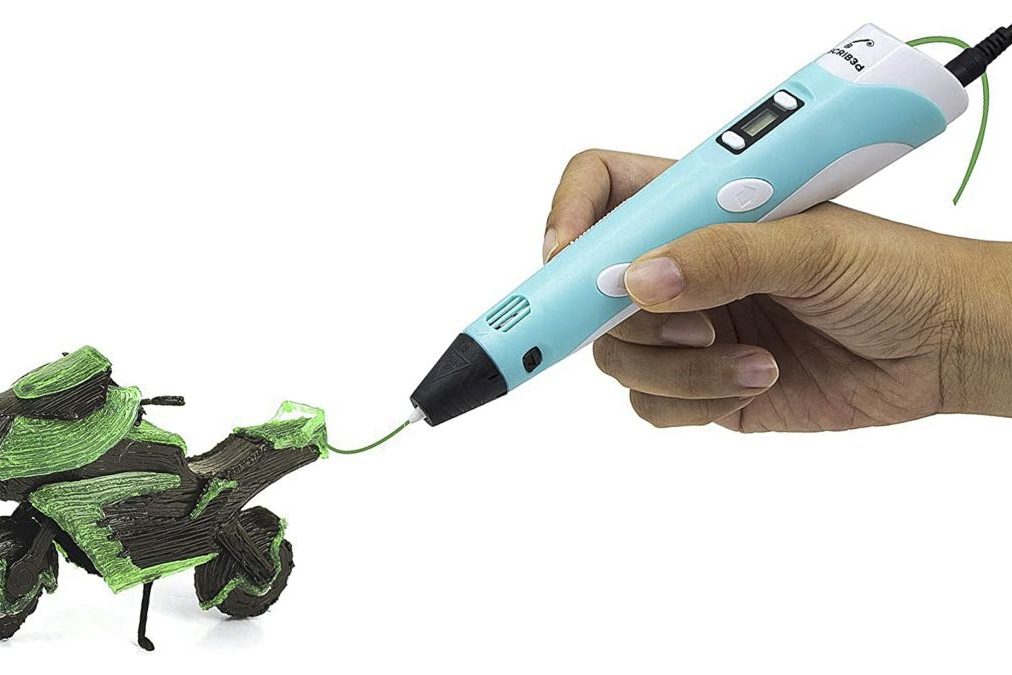
- Jewellery, pendants and hanging ornaments.
- Decorative art and fridge magnets.
- Personalization of everyday objects.
- It is used to create complex organs of human bodies by doctors and then use them whenever required.
- It is used for creating first renderings of the project in the field of architecture.
- It is used to repair objects and weld together different pieces.
Fig. 5 – Plastic Welding by 3D Pen
Advantages of 3D Printing PenIt offers a wide range of advantages compared to traditional methods. These advantages include those related to design, time and cost, amongst others. The advantages of 3D Pen include:
- Unlimited shapes and no limitation of size: There is no limitation of sizes for making objects out of it.
- Creative Design and Customization: It allows us to design more complex designs than traditional manufacturing processes.
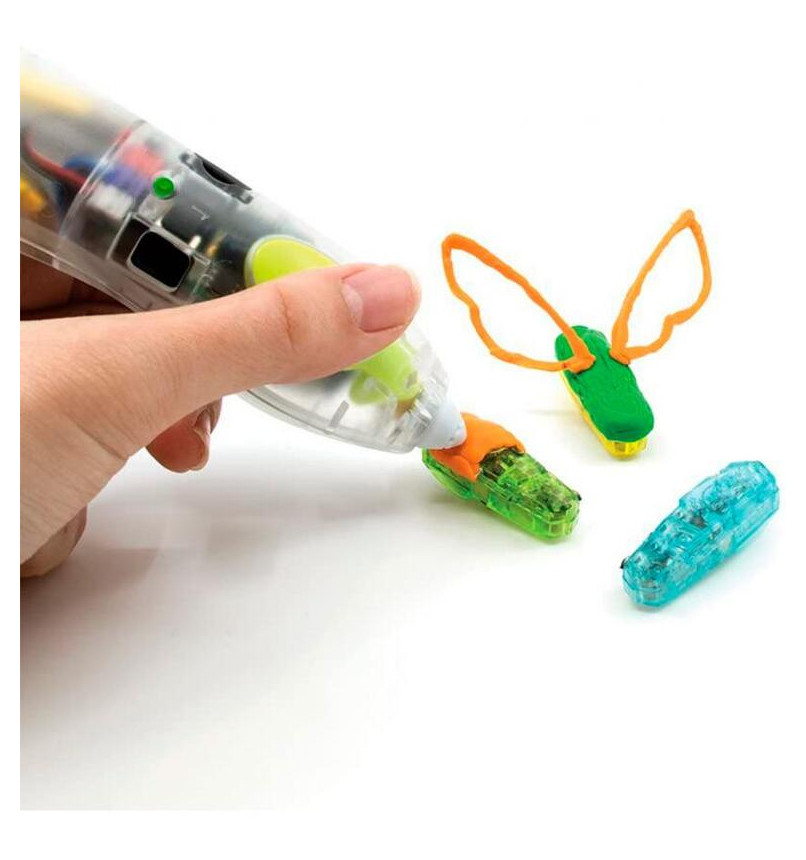
- Profit in industries: The loss companies are facing due to the manufacturing of trial products to see whether the final product will be a success or not will be terminated – thanks to the 3D pens.
- Waste Reduction: Results obtained from 3D pens are eco-friendly.
The disadvantages include:
- Expensive– 3D printing pen and materials cost make the technology expensive.
- Limited Materials– Materials that can be used as filament are limited.
- 3D prototyping from the device is a slow process.
3D printing pen provides countless benefits. It is false to believe that 3D pens are mostly for kids and do not have any useful applications. Countless useful things can be accomplish using this small tool.
Also Read: Electronic Paper Display (e-Paper) – How it works, Types, Applications BIOS (Basic Input Output System) – What is BIOS, Functions, Limitations Smart Street Light System: Architecture, Working Principle, Applications
3D Pen Tool - 3D Printing at the SMS
3D pen tools at the SMS
The SMS has several 3D printing pen tools available for use in the studio.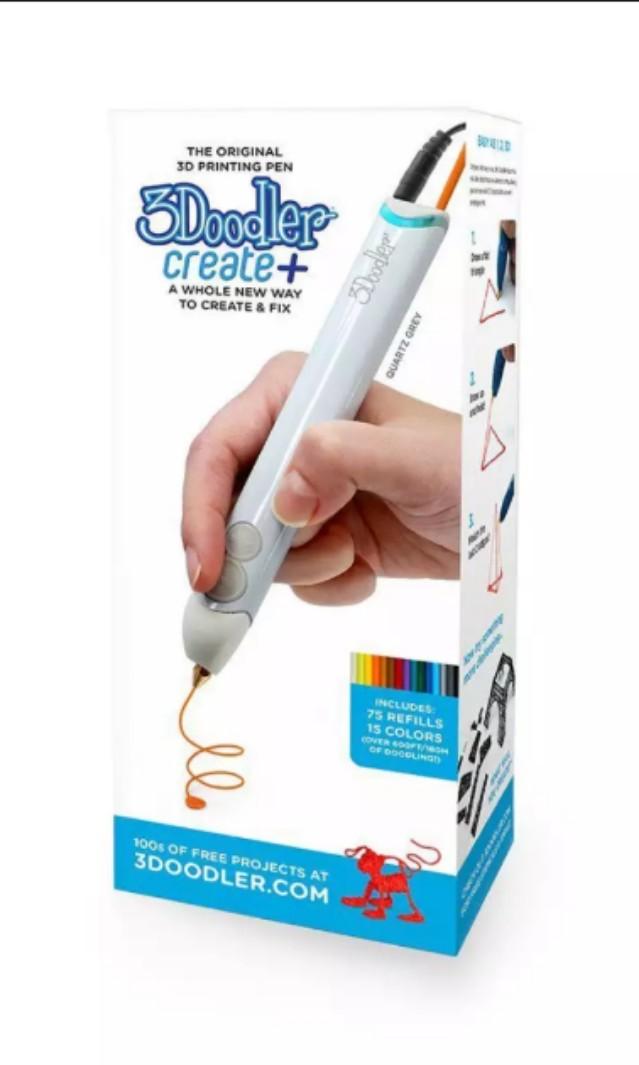 The concept of a 3D pen is similar to a glue gun in that material is loaded into it and, once melted, it is extruded and manually applied. 3D pen tools have been promoted as a great way to draw freehand, as well as trace designs in 3D. Our favorite example of tracing so far is the Eiffel Tower project. Using a template design from the 3Doodler website, our student traced the tower outline with the pen, then assembled and fused the model together using the pen and filament.
The pens are a compliment to our 3D printing service and can be used to repair or embellish upon 3D printed models. Our pens use the same filament as our Makerbot Replicator 2x printer so we are able to color match and, depending on the model, produce seamless repairs.
Our 3D pens are freely available for use by Kent State students. See our "Policies" section below for more information.
FAQ's
What is a 3D pen?
A 3D pen is like a handheld 3D printer but there is no program necessary – just your imagination and a little practice.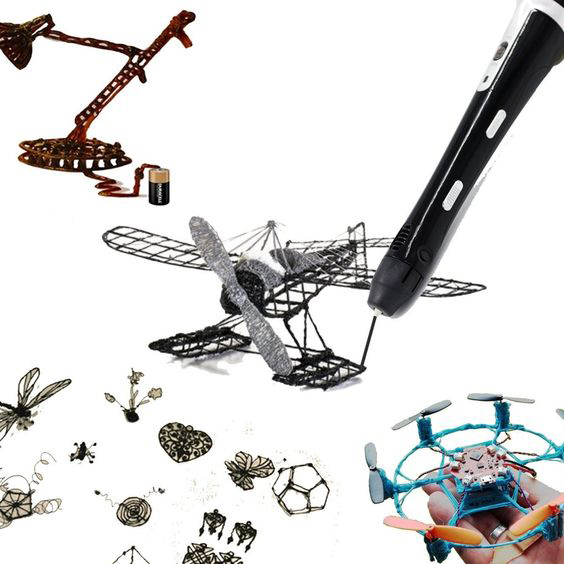
How does it work?
Just like the 3D printer it pulls in the plastic filament, heats it up and extrudes it out like a hot glue gun. The plastic cools rapidly which allows you to build forms. Depending on the device, it may either use ABS, PLA or both.
What can you do with it?
-
Draw straight up in the air
-
Build 3D forms out of plastic
-
Trace images on paper
-
Weld pieces of plastic together to enhance or repair things
-
Enhance a 3D printed model
Are 3D pens expensive?
Unlike a 3D printer that can cost in the thousands of dollars, a pen is only about $100.
Is the material expensive?
Some 3D pen tools such as the 3Doodler will only work with their proprietary material, which can be expensive. The pens in the SMS, along with many other pen tools, can use either ABS or PLA filament that works with our 3D printers. The ABS filament can range from about $40 for standard colors to $130 for specialized materials like glow-in-the-dark. Filament is sold in 750g-1kg spools (which goes a LONG way!)
Policies and procedures
Before your first project
You will be asked to first sign the SMS Liability Waiver (which can be done in advance of your arrival.) An SMS consultant will take you through a brief training session in order to learn the ins and outs of the 3D pen tools. Once we feel that you show a reasonable proficiency with the tool you will be permitted to use the pen on your own project. You only need to complete training once before having access to the pens. The 3D pens are available at all hours that the SMS is open, however training is at the discretion of the SMS staff - as availability allows. To plan ahead we encourage you to contact us at [email protected] to set up a training appointment!
Working on your own project
Stop in to use the pen during our regular SMS hours. While we do not currently require users to reserve a pen in advance it is advisable to call or email ahead of your arrival to make sure that a pen is available. Due to the quirks of the pen tools and potential for injury (hot nozzle tip) we prefer that a consultant work alongside you. The pens sometimes need tinkering in order for them to work properly. We hope to eventually have this process streamlined soon (and more quirks worked out on the pens!). Thanks for your patience as we make adjustments along the way!
Under development
As we are in the pilot phase of offering use of the 3D pen tools, our policies and procedures will be subject to change. Your use of the tools will help us further develop the service. Thanks in advance for your patience and understanding!
Please note that we reserve the right to decline use of the 3D pens for any reason.
Questions?
If you have any questions about our 3D pen tools or 3D printing in general, contact us at 330.672.0221 or [email protected]. You are also welcome to visit us in person at the Student Multimedia Studio, located on the first floor of the University Library.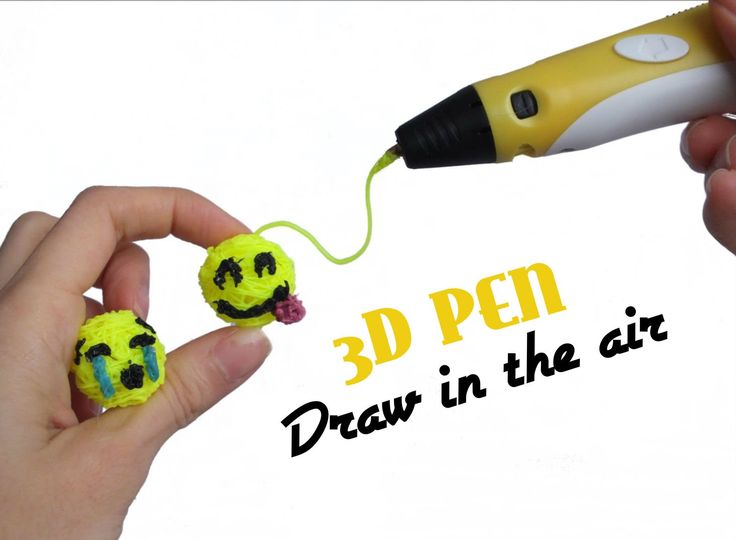
HOW TO DRAW WITH A 3D PEN
With the magic marker you can create 3D shapes in space. It can be designer parts, hairpins, puzzles, buttons - anything.
To understand how to draw correctly with a 3d pen, you need to understand its structure. Almost all extruders (devices for melting plastic), regardless of the brand, have identical equipment with the only difference: some models work on mains, others on batteries or batteries.
| Part | Features |
| Temperature control button | Allows you to select the mode according to the type of plastic |
| Feed speed switch | By adjusting the temperature and threading speed, you can create a figure of any complexity. The more expensive the device, the more speeds |
| Forward button | When pressed, the melted plastic rod comes out of the handle |
| Back button | Press if necessary to remove the plastic from the device.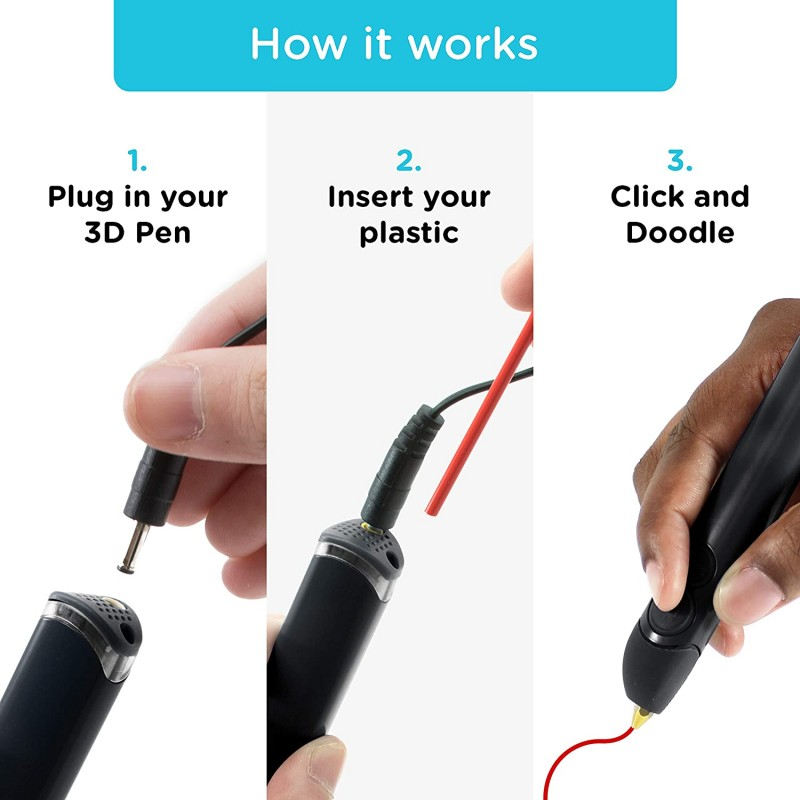 Usually the button is activated by a long press - to prevent accidental extraction Usually the button is activated by a long press - to prevent accidental extraction |
| Display | The mini-screen displays speed, temperature, sometimes the type of plastic. Each indicator can be changed at the current moment |
| Nozzles | The shape of the nozzle determines the thickness and shape of the lines. Popular nozzles made of ceramics and metal. When working at high temperatures, ceramic tips are preferred - the material is resistant to heat |
| Buttons for changing nozzles | On some models, the attachments are removable, several options are included in the set. To change the tip, you need to hold down two buttons at the same time |
| Filling port | Through it, a cartridge is inserted into the body - material for three-dimensional drawing |
The outside of the instrument is easy to understand. How does a 3D pen work from the inside? After turning on the device, the heating element - the extruder, sharpened into the body, reaches the set temperature. Then a polymer thread is inserted into the handle: the built-in mechanism automatically pulls the rod to the extruder through the tube. The material is straightened in the handle, and under pressure, moving along the tube, it exits in the form of a thread through the tip. Usually devices are equipped with a fan - to speed up the hardening of the plastic. nine0003
Good to know: TOP 5 best 3D printers
Drawing features and safety
The plastic remains pliable for several seconds after exiting the nozzle. It quickly hardens under the influence of air temperature. Therefore, the creation of three-dimensional objects requires skill. Users note that it is important to find "your" temperature and thread feed speed.
For safety reasons, many models switch off after 2 minutes if the handle is not used. To resume work, you must press any button on the case. nine0003
Please note: when heated, the tip becomes especially hot. And if the ceramic nozzle heats up slowly, then the metal nozzle can reach temperatures of 200 ° C and above. For this reason, the use of the 3D pen by children under the age of four is not recommended.
Users are wondering if plastic is safe when heated? Does it give off toxic fumes? Usually, consumables are made from organic waste, so high-quality threads do not emit a pungent odor when heated. nine0003
Read: How a 3D printer works: an overview of 5 materials and technologies
Preparing for work
To prepare for using a 3D pen, in addition to reading the instructions, we follow the algorithm:
-
Select plastic
Threads made of low-grade material may have a strong odor and be dangerous to the body. Users note that ABS filaments exude a pungent odor, PLA is less pronounced, and SBS filaments have no odor at all. For most models, polymer rods are suitable, which are used for 3D printing. The material is bought in coils, and then cut into pieces of the required length. nine0003 - Prepare the workplace
Whether you use the 3D pen in the air or on the surface, you need free space.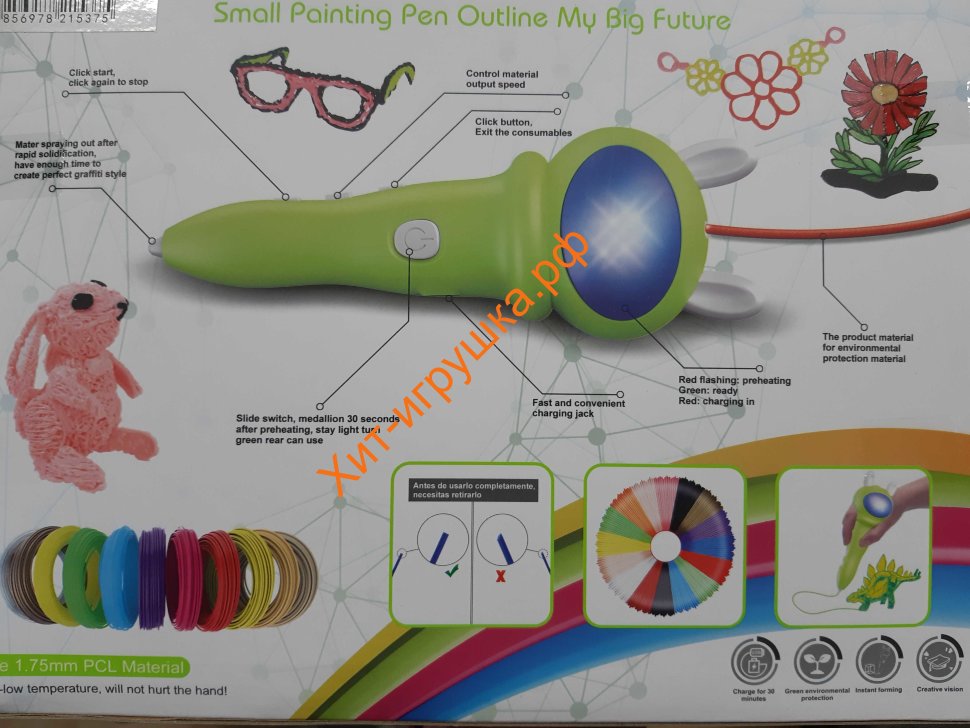 To create one-dimensional figures, a regular desktop is suitable. To create three-dimensional objects, you will also need free space above the table so that the user can freely move their hands, connecting plastic threads in the air.
 - Turn handle
Depending on the model and the selected mode, the extruder heats up within 1-3 minutes. nine0099 - Fill the device
How to insert plastic into a 3D pen? Before you introduce the thread to the threading hole in the case, make sure it is intact. Creases and breaks on it can cause damage to the extruder or motor. You need to refill the 3D pen in the on state.
The device is now ready for use. Press the filament feed button and get creative.
How to draw with a 3D pen
With a 3D pen, you can have fun and create real masterpieces: models of castles and cars, reproductions of famous monuments and statues, decorative elements and furniture. nine0003
To make a three-dimensional figure, you will have to practice. And it is advisable to start with flat images.
Interesting article: ROKIT ChocoSketch 3D printer: 3D printing for the sweet tooth
One-dimensional drawings
Decide what to draw on. Options:
- Coated paper. The polymer adheres well to it.
- Glass. It is necessary to degrease the surface first.
- Metal. It is advisable to take a sheet with a rough surface. nine0099
Draw with the 3D pen comfortably in a horizontal position. The plot of the drawing should be thought out in advance: you can draw the outlines with a pencil or a marker that writes on any surface. A good option is to trace the lines of the drawings in the coloring book. Follow the lines by adjusting the temperature and speed of the plastic feed. Over time, contour figures made of plastic will turn out to be even and neat.
In this way, you can make a mobile for a playpen, interior decorations, Christmas decorations, jewelry, patterns for sewing, stencils for creativity, photo frames and other useful things. nine0003
Three-dimensional objects
Working with one-dimensional objects allows you to fill your hand and switch to drawing with a 3D pen in the air. Start with the simplest: create a cube or pyramid. Draw a shape on paper and draw vertical lines from the vertices. These will be stiffeners that can be interconnected. Paint the faces connecting the edges.
To draw more complex figures, you can use the simplest figures as a basis: add elements to the main cube or pyramid. The “core” can be an empty package or a can, a sleeve from a used roll, etc. By covering the base with plastic fibers, you can make toys for children, flower pots, candle holders and much more. After mastering this technique, drawing in the air will be easy. nine0003
Note: Top 5 best board games for kids
Maintenance details: how to clean the 3D pen
When choosing the temperature of the pen, it is important to consider the type of plastic. PLA melts when heated up to 180-220°C, PRO - up to 200-220°C, ABS - up to 210-240°C. Incorrectly selected temperature regime threatens with the following consequences:
- The material gets too hot and melts above the extruder, inside the body, and gets stuck there.
- The rod is not hot enough and will harden in the housing. nine0099
Use twigs from different materials, and don't forget to change the mode while drawing.
Another mistake that raises the question of how to clean the 3D pen is to let the filament go completely into the case. The consumable must be replaced when the length of the "tail" is 1 cm. Pull out the remaining polymer, and insert a new polymer thread into the hole.
How to properly clean the nozzle of the 3D pen and not damage it:
- Set the temperature to the highest setting. nine0099
- Press the refill button.
- Help with hands, but do not use force.
If a filament with a straightened tail comes out of the body, cut it off and try how the handle works. If the problem is not solved at this stage, proceed as follows:
- Turn off the device.

- Disassemble the housing.
- Remove the resin tube from the handle.
- Remove the remnants of the hollow rod - use a special drill or a guitar string. nine0099
If the tube is clean, plastic has accumulated in the tip of the 3D pen. It is advisable to clean the nozzle when it is still warm. In this case, a string or drill for cleaning holes is also suitable.
The spatial modeling pen has a simple design, but requires some skill and care. Subject to the instructions and safety rules, the device will last a long time and become a tool for development, creativity or even business.
By the way: Polaroid Play 9 3D-pen appeared on sale in MOYO.ua0003
3D-pen for 3D-printer, bug fix / Sudo Null IT News
Almost everyone has heard about 3D-pens. Many have tried them, many have them. So, perhaps, this gadget will surprise no one. And, probably, if there is a 3D printer at home, then the pen against its background will look very funny. But... Do not rush, a 3D pen can become an indispensable assistant and a very handy tool for any maker. Now, using my example, I will show how easy it is to save a three-dimensional model that took 41 hours to print using a 3D pen. nine0003
Let's start by inspecting the gadget.
Everything is standard, the box contains instructions, power supply and the pen itself.
Power supply cable length 1.4 m, should be enough for most outlets near tables.
12 volt, 3 amp power supply.
At idle, it easily gives out the declared volts, I didn’t measure the current, sorry. Let's go straight to the test.
Pen like a pen. Of the interesting - this is the specified nozzle diameter - 0.7 mm. A big plus for me personally is that the pen is omnivorous. You can print both PLA and ABS. There is also a manual temperature control.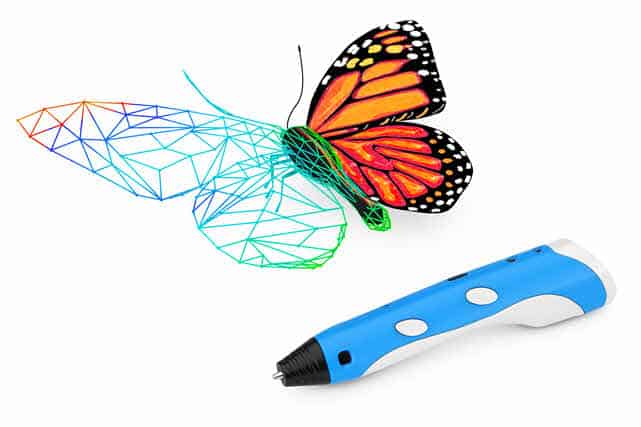
Mode selection is intuitive. You just need to press the buttons on the sides of the screen.
Next, press the feed button, you can release it once. Heating starts. Heats up quickly, faster than a 3D printer. nine0003
When the desired temperature is reached, the indicator to the left of the screen changes from red to green.
In addition to adjusting the temperature, there is an adjustment for plastic feed (speed) on the handle.
On the other side of the feed adjustment there are 2 buttons - “squeeze out” and “pull out”.
Filled for the first test with a piece of plastic left over from the last print.
On the first delivery, you can see that there was already some plastic in the nozzle. This is good, since the handle was really checked. Some printer manufacturers supply them with a printed figure on the table, the user immediately sees that the device is working and prints as it should. nine0003
I had a test plastic right away for a reason, I refilled transparent SBS, it is quite soft and often there are problems with it when printing on a printer. Here, everything immediately went briskly.
A small digression.
I was given a set of plastic along with the pen.
3D palette.
By the way, a very good addition to the 3D pen. In addition to conveniently located plastic in separate pockets, there is a compartment for storing a pen, as well as an envelope with sketches on tracing paper for easy creation of three-dimensional models. nine0003
We take a tracing paper and draw glasses along the contour.
Once the plastic has cooled, it can be easily removed from the tracing paper. We're filming.
Draw the second bow.
Next, melt the temples to the glasses.
PLA plastic is very pleasant to work with, easy to soften and stick to each other. But there is one drawback, it should not be overheated, it becomes too fluid, but more on that later. nine0003
Glasses are ready.
Now let's get down to business. I printed a Pinky monster figurine from DOOM 3. Printing did not work right away, the model is very complex with spikes and other details sticking out in all directions. I printed both in 2 extruders with supports from HIPS, and with supports generated in MeshMixer. But when moving to the beginning of the hands, something always fell off and I had to stop printing. Perhaps the plastic is to blame, it is almost a year old and it was stored without a package and a box, just like that. nine0003
In general, for the third time I combined printing methods and added supports from HIPS plastic to the model with supports from MeshMixer. In the middle of printing, I saw that my hands were torn off again, but I spat and finished printing to the end, deciding to simply glue the damaged parts.
The parts have been reprinted and now with a 3D pen I can easily glue them to the main model.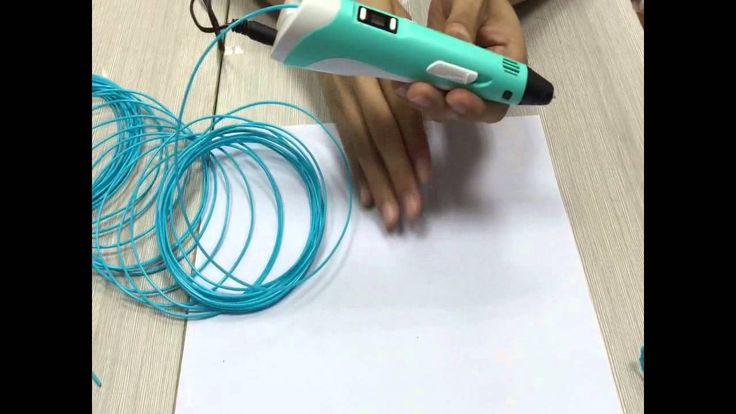
With such a seam, glued parts are obtained, but firmly. And the protruding excess plastic can be ground off or cut off with a knife after treatment with dichloromethane. nine0003
Saw off the muzzle.
And glue a new, high-quality one.
This is a darned creation of Frankenstein.
Here you can see the comparison of the quality of the old and new muzzle.
Let's move on to the hands. It’s more difficult here, in some places it turned out to be a big gap.
But, in principle, the handle easily copes with wide gaps.
It remains only to process the seams.
I didn't sand or sharpen them dry. I decided to treat the entire model with methylene chloride, it dissolves both PLA and ABS equally well.
The seams have become smoother, but most importantly, the top layer of plastic has become soft and can be easily cut with a knife, like plasticine.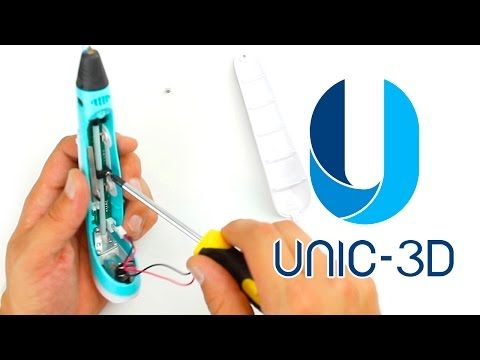 Align all the seams, cutting off the excess, and once again go through the brush with DCM.
And here is the result:
Finally, let's look inside the 3D pen. nine0003
Remove the black tip and unscrew one single screw.
Here you can see a ceramic nozzle with a heater and a thermistor, a short bowden tube and an extruder on a simple brushed motor. The feed is controlled by the rotation speed of the motor shaft. On the motor there is a small brass gear pushing through plastic, on the other hand, all this is pressed by a small bearing with a flat side. In general, everything is very simple, like Kalash. Yes, and remember, I wrote about the fact that you should not overheat PLA plastic. In the disassembled photo, it is noticeable that there is something red on the back of the heater, where the tube enters it. It's just PLA plastic, I painted it a little in the heating mode for ABS, and it became so liquid that it went in the opposite direction.