How to remove 3d prints
6 Easiest Ways How To Remove 3D Prints From Print Bed – PLA & More – 3D Printerly
You’ve finished your 3D print and come back to a lovely looking model, but there’s one problem, it’s stuck down a little too well. Many people have faced this problem, including myself.
Fortunately, there are some easy ways to help remove 3D prints from your print bed, whether made of PLA, ABS, PETG or Nylon.
The easiest way to remove 3D prints stuck on your 3D print bed is to heat up the bed temperature to 70°C then use a good quality scraper to get under the print and lift it off. You can use liquid solutions to weaken the bond between the print bed and the plastic to help remove 3D prints.
There are some details that I will describe in the rest of this article to help you remove 3D prints from your bed, as well as help you prevent it happening in the future. Keep on reading to get clued-up on some useful info.
Easiest Ways to Remove Finished 3D Prints Stuck to Bed
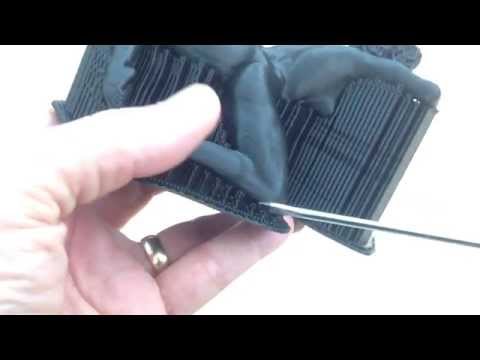
The method in the video below works for several people, which is a simple combination of 50% water & 50% alcohol sprayed on the troublesome 3D print.
If it doesn’t work, rest assured, there are many other methods and techniques that will solve your issue, as well as preventative measures so it doesn’t happen again.
When 3D prints stick down to the bed too much, you run the risk of actually ruining your build platform.
I remember watching one video of Joel Telling (3D Printing Nerd) breaking the glass bed of a $38,000 3D printer because the PETG literally bonded with the glass and couldn’t be separated.
There are several ways to remove stuck 3D prints, but we will list down some for you which we find the easiest and most convenient.
Apply Some Force
The most tried method of removing 3D prints from the build surface is to just use a little force, whether that is slightly pulling, twisting, bending, or just grabbing the 3D print.
In most situations, if you have a respectable setup, this should work fine, but if you are reading this article, it might not have worked so well!
Firstly, before trying to remove the print, let the print bed cool down for a considerable amount of time then try removing it manually by applying some force.
You can also use some kind of rubber mallet to dislodge the 3D print, just enough to weaken the adhesion. After it has weakened, you should be able to apply that same force and remove your print from the print bed.
Use a Scraping Tool
Next up would be using some tools, such as the spatula that usually comes with your 3D printer.
A little bit of pressure set underneath your 3D print, with additional force in multiple directions is usually enough to remove a 3D print from your print bed.
I’d use my spatula, with my hand on the 3D model itself, then wiggle it side-to-side, diagonally, then up and down, until the adhesion weakens and the part pops off.
Disclaimer: With any sharp print removal tool, watch where you put your hands! If you slip, you want to make sure your hand is not in the direction of force.
Now, not all scraping tools and spatulas are created equal, so that stock one that comes with the 3D printer isn’t always the best.
Getting yourself a proper print removal kit from Amazon is a great idea if you are having issues removing prints. I’d recommend the Reptor Premium 3D Print Removal Tool Kit.
It comes with long knife with a beveled front edge, allowing for gentle sliding underneath prints, as well as a smaller offset spatula with a black ergonomic rubber grip and safe rounded edges.
They are made of stiff, hardened stainless steel blades which are flexible, but not flimsy. It can remove larger prints with ease and is very highly rated on Amazon at 4.8/5.0 stars at time of writing.
Reviews show amazing customer service and top functionality to remove prints smoothly without scraping your bed surface, the perfect tool for 3D printer users.
Use Dental Floss
Usually, a small force is sufficient to dislodge it however if that’s not possible, use a piece of dental floss.
Simply hold the dental floss between your hands and place it at the back of your print, close to the bottom, then slowly pull it towards you. Many people have had success using this method.
Heat your Print Bed
You can also reheat your print bed to about 70°C, at times heat can also make the print pop off. Using temperature changes to manipulate the print is a great method since we know these print materials react to heat.
Higher heat can soften the material enough to decrease adhesion to the print bed.
Freeze the Print Bed Along With Your Stuck Print
By spraying compressed air onto your stuck prints, you can make them easily pop off due to temperature changes also.
Placing your print and bed in the freezer also causes the plastic to contract a bit resulting in the print bed loosening its grip on the print.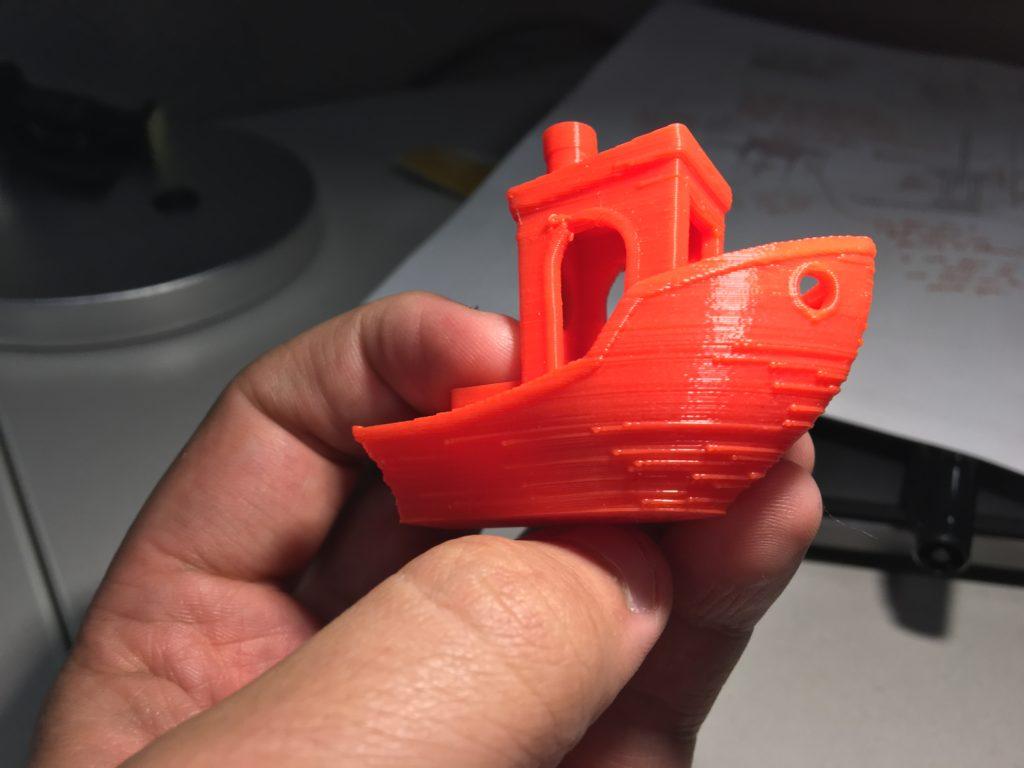
This isn’t a common method because once you do the proper preparation, prints should come off fairly easily in the future.
Dissolve the Adhesive Using Alcohol
Another way of removing stuck prints from the base is to dissolve adhesive with the help of isopropyl alcohol. Put the solution near the print’s base and allow it to sit for 15 minutes.
Using a putty knife you can then easily pop the stuck print off the edges.
You can also use hot water to melt the adhesive as an alternative, but make sure it’s not boiling so it doesn’t bring the print material to its glass transition temperature, which could deform the print.
How Do You Remove a Stuck PLA Print?
To allow the easy removal of a stuck PLA print, it’s best to heat the heat bed around 70°C which results in PLA getting soft. As the adhesive will be weakened, you can remove your prints off the glass bed.
Since PLA has a low level of heat resistance, heat is going to be one of the better methods to remove a stuck PLA print.
You may also use a high quality spatula or a putty knife to help twist the print from the sides and allow it to detach completely.
Dissolving adhesive using alcohol won’t work for PLA. PLA has a lower glass temperature, and hence it is best to heat it up and remove prints.
This method has been popular among users because of its effectiveness and speed.
Check out my article on How to 3D Print PLA Successfully.
How to Remove ABS Prints on a 3D Print Bed?
Many people have trouble removing ABS prints due to reasons such as a glass print bed expanding and shrinking which creates tension on the interface layer.
If your ABS print is really stuck down to the print bed, an ideal way to detach ABS prints is by refrigerating or freezing them.
Place your print bed along with the prints in the freezer for some time. The freezing air will cause plastic to contract and this result will loosen the grip on your stuck print.
The glass surface expands and shrinks according to the ABS under specific temperature.
Allowing the glass bed to cool will shrink it, and create tension on interface layer that can then be exploited using a thin scraper.
Moreover, putting the bed along with the print into the refrigerator increases the tension to a certain point at which the bonding eventually breaks.
This results in the print popping free in several areas and even sometimes completely- easing the removal.
When your ABS print finishes, another good idea is to turn on the fan to cool it down quickly. This has the effect of quick contraction, resulting in prints popping off.
A good preventative measure to stop ABS prints sticking to the print bed is to use an ABS & acetone slurry mix on the print bed beforehand, along with some cheap tape. If the print is a smaller one, you probably won’t need the tape.
Simple glue stick is still widely used today because it works so well also. It’s easily cleaned and helps most prints stick to the bed, as well as with removal afterwards.
Check out my article on How to 3D Print ABS Successfully.
How to Remove PETG Print From Print Bed?
PETG prints stick too much to the print bed at times or the build surface, preventing easy removal and even at times come off in bits when removed.
You should opt in to using glue stick or hairspray to help remove PETG prints from the print bed. Another tip is to avoid printing directly on build surfaces like BuildTak, PEI, or even glass.
You would much rather 3D prints come off along with the adhesive, rather than with pieces of the build surface.
Here is the video of the glass print bed which got ripped off along with a finished 3D print!
Check out my article on How to 3D Print PETG Successfully.
How to Prevent 3D Prints Sticking to Print Bed Too Much
Rather than have to deal with the problem of a print stuck down too much to your print bed, you should take a preventative approach to tackle this problem.
Using the right build platform is one of the most essential tools you can implement to make 3D prints easy to remove from the print bed.
Flexible, magnetic build plates can easily be removed from the 3D printer, then ‘flexed’ to pop off 3D prints.
Several users who have the flexible build surfaces love just how easy it makes remove 3D prints. A great flexible build surface you can get from Amazon is the Creality Ultra Flexible Magnetic Build Surface.
If you have a glass build plate rather than the flexible one, many people will use materials such as blue painter’s tape, Kapton tape, or apply glue stick to the print bed (also prevents warping).
Borosilicate glass is a build surface designed to not shatter easily, as opposed to tempered glass, which is similar to car windshield glass.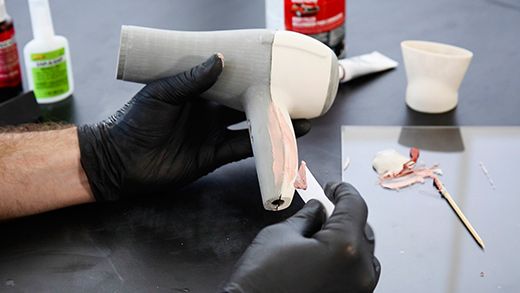
You can get a good borosilicate glass bed on Amazon for a good price. The Dcreate Borosilicate Glass Print Platform is highly rated and gets the job done for several 3D printer users.
How to Remove 3D Print From Ender 3 Bed
When looking at removing 3D prints from an Ender 3 bed, there isn’t really much difference compared to the information above. You want to follow the process of having a good bed, good adhesive substance, high quality scraping tool, and good quality filament.
When a 3D print has finished on your Ender 3, you should be able to either pop it off with the flex build plate, or scrape it off with a print removal tool like a spatula or even a thin blade.
Larger prints can be harder to remove from the print bed, so you can also incorporate the water and alcohol spray mixture to try and weaken the bond between your print and the print bed.
If your 3D print is stuck down a little too hard, either heat up the bed and try remove it again, or put the build plate along with the print in the freezer to make use of temperature change to weaken the adhesion.
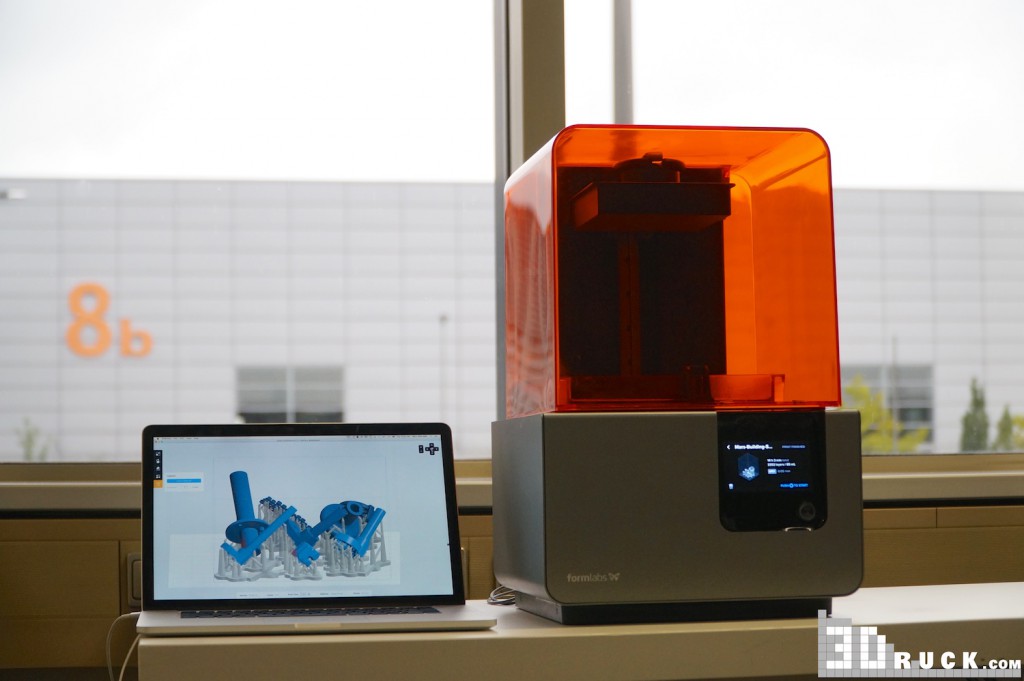
How to Remove a Resin 3D Print From Build Plate
You should use a thin, sharp razor or blade to insert underneath your resin 3D print, then insert a palette knife or spatula underneath this and wiggle it around. This method is one of the most common ways to remove a resin 3D print because it is so effective.
The video below shows this method working.
Other things you can try is when printing with rafts, to give it quite a high rim with a small angle, so a print removal tool can slide underneath and use a lever motion to remove the resin print.
Adding angles to the base of miniature prints makes removing them a lot easier.
Again, make sure your hand is not in the direction of the print removal tool so there aren’t any injuries to yourself.
A rotating motion under a resin 3D print on your build surface is usually enough to remove the print.
Some people have found luck after adjusting their base height, finding a sweet spot to where you get good adhesion, while not being a struggle to remove the print.
A good process that people follow is to clean the aluminum build surface with IPA (isopropyl alcohol) then use 220-grit sandpaper to sand the aluminum in small circles.
Wipe off the sticky gray film that comes off with a paper towel and continue this process until the gray film stop appearing. Clean the surface one more time with IPA, let it dry, then sand the surface until you only see dust coming off.
After this, do one final cleaning with IPA and your printing surface should give you amazing adhesion, while being able to remove the prints with ease after printing.
How Do You Clean a Magnetic Build Plate?
It’s best to clean your magnetic build plate with the help of 91% isopropyl alcohol. This will not only act as an effective disinfectant but also a good cleaner. Wipe the surface clean and dry preferably using a lint-free piece of cloth.
If you don’t prefer using alcohol, you can also clean the build plate using dishwashing soap/liquid and hot water.
For ease, you can make up this cleaning solution in some spray bottle. You can then spray it as per requirement and wipe the surface dry using a lint-free piece of cloth.
How Long Should I Let 3D Prints Cool Between Prints?
For some reason people think they should wait a certain amount of time to let their prints cool between prints, but realistically you don’t have to wait at all.
As soon as I notice my 3D print has finished, I work towards removing that print, doing a quick clean of the bed, and getting on with the next 3D print.
Prints are usually easier to remove when you catch the finishing moments of the print, but using the techniques in this article, you should easily be able to remove prints after they have cool down.
It may be a little harder when it cools down on a glass bed, depending on whether you used some substances on the print platform beforehand.
In other cases, prints can be removed easier when they have cooled down, so it really depends on your build platform, printing materials and adhesive substance. After you get into a routine, you can dial in your process to make life easier.
The contraction of the plastic after cooling down might be enough to pop off the print from the print bed without having you to move it.
Conclusion
The aforementioned hacks are quite promising when it comes to removing your stuck prints from the print bed. The tips are totally flexible and you can easily decide which one best matches your printing needs and requirements.
Tips on Removing your Finished 3D Print from the Bed
3D Insider is ad supported and earns money from clicks, commissions from sales, and other ways.
Can you imagine working on a project for several hours, painstakingly adjusting settings to get the best results, only for something to go horribly wrong when it’s almost finished? This is exactly the case when something snaps off your 3D print just when you’re removing it from the bed – a situation that is familiar to anyone who has ever dabbled into 3D printing. What can you do to prevent this from happening? Here are some of the best tips and techniques that we have tried.
Before you print
Even before the print starts, you can take a few measures to prevent your print from sticking to the bed. If you’re printing on a glass bed without any tape or adhesives, make sure to clean the surface of the bed thoroughly with some isopropyl alcohol. This removes any residual adhesives from your previous projects.
Some users also find that setting the nozzle height at a too low Z-setting for the first layer tends to make the base stick to the bed too well. As a rule of thumb, set the home position of the nozzle at a Z-setting that is about 70% to 80% of the height of the first layer. This is a pretty good middle ground that ensures that the base layer sticks to the model during printing but can still be removed when the print bed cools.
After printing
When your print has finished, and you’re satisfied with its quality, it’s worth the time to take it slow and deliberate to make sure that you get the finished print off the bed. There are two objectives to this part: remove the print without the print getting damaged, and without the bed itself getting damaged. Here are the step-by-step procedures we suggest you take:
1. Cool it down
Right after printing, the best thing you can do to make sure that the print comes off cleanly is to leave it be. Let it cool down to room temperature from several minutes up to an hour. Not only does this help the print solidify and become more durable, but it also results in a slight contraction in the filament material. This contraction should too small to have any effect on the print’s visual appearance but should help it lift off from the print bed.
In most cases, the cooling effect is enough for a print to pop right off the bed. This method typically works with PLA and with other filaments that don’t require the use of any adhesives.
2. Use a bit of force
If the print has already cooled down but does not pop right off, then you might need to apply some force to it. Depending on how big or how sturdy your print is, you’ll have to exercise some care on how much force you apply. Most prints can be pushed, pulled, or twisted to some degree. Even if this does not fully remove the print from the bed, it should result in even the slightest allowance on the base, which will help you do the next step.
3. Tap with a screwdriver
Many experienced 3D printing professionals swear by this method. Once your print bed has cooled down to room temperature, simply take a flat head screwdriver, place it near a corner of the base of the print, and give it one sharp tap on the handle. The print should come right off in most cases. If you print with some tape on your bed, this method is really useful in preserving the tape, so you won’t need to reapply it for your next print.
4. Scrape it off
If you’ve reached this point and still cannot remove your print from the bed, then it’s best to remove your print bed from the build platform. The next steps could damage the clamps that hold the print bed in place.
Use a thin, flat object and insert it on any clearance that you can find between the base of the print and the bed. For this purpose, most 3D printing professionals keep a flat-edged steel scraper on hand. You can also use a razor blade with a handle (which you can print yourself with this design). Use a combination of a sliding and lifting motions to gradually lift the bed off the print. Again, be sure not to apply too much force, as you can still easily damage the print.
Just a word of warning: this method has the potential of damaging your print bed. If you print on an untreated glass surface, doing this method repeatedly can result in the surface getting progressively more uneven. If you print on a BuildTak, you’ll probably need to replace that BuildTak surface for your next print.
5. Cool it down even more
Cooling is your friend when it comes to removing the print from the bed. If you can cool your print down even lower than room temperature, then it should contract more and self-lift off the print bed.
The easiest way to do this is to place your whole print, including the bed, inside a refrigerator. You can leave it there for an hour or so, and it should be much easier to remove after. If your print is way too big for your refrigerator, then you can also use a couple of ice packs and place it on the underside of the print bed right below the base of the print.
6. Rinse with warm water
This method mostly works if you used an adhesive on your print bed, such as glue stick, ABS slurry, or hairspray. Lukewarm water – anything below 50 °C – should work well enough to rinse off the adhesive without damaging the filament material.
7. Use alcohol
If warm water doesn’t do the trick in rinsing off the adhesive, then some isopropyl alcohol should be a foolproof alternative. This works particularly well if you used blue painters’ tape to get your print to stick onto the print bed. The downside of this method is that you’ll have to remove all the tape afterward and apply a new layer before your next print project. Nobody likes the process of applying tape to a print bed, so consider this method a last resort.
For this method, simply pour some alcohol on the edges of the print. You’ll have to use a liberal amount since you’ll need the tape to soak up the alcohol and dissolve the adhesive. The print should come right off with a little bit of prodding.
Final thoughts
It can be really frustrating to come so close to the finish line and still mess things up. In 3D printing, if you’re not careful during the print removal step, you can end up ruining your finished print or damaging your glass print bed. Either way, it’s one of the most frustrating things that can happen to you in your 3D printing career.
Fortunately, this is a problem that just about all 3D printing professionals have gone through, so there is a wealth of good advice online. By taking the necessary measures before the printing starts and by following a deliberate and thoughtful approach to print removal, it shouldn’t be much of an issue.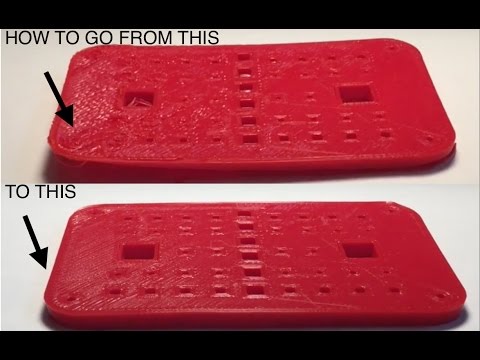 Do you have a method that works for you that isn’t listed here? Let us know in the comments below.
Warning; 3D printers should never be left unattended. They can pose a firesafety hazard.
How do I remove the 3D printing media?・Cults
3D printing support is required to successfully design your 3D printed part. Once the 3D printing is complete, these support structures must be removed from the printed model. Cults shows you how.
There are various methods for removing supports for 3D printing. To get a quality printed part without debris, learn here about methods for removing unwanted 3D printing supports.
Manual removal of 3D printing support structures
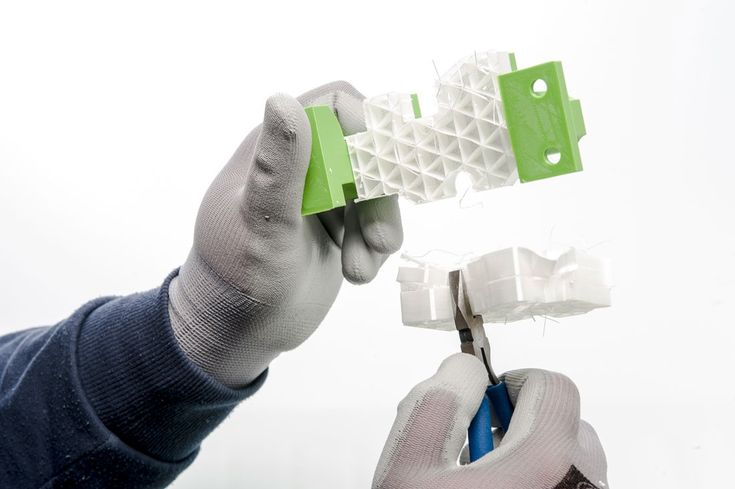
This is the easiest technique to remove support material that is damaging your 3D printed model. All you need to process the printed parts is your hands and small sharp tools. To do this, you need to go through several stages.
Plate Removal
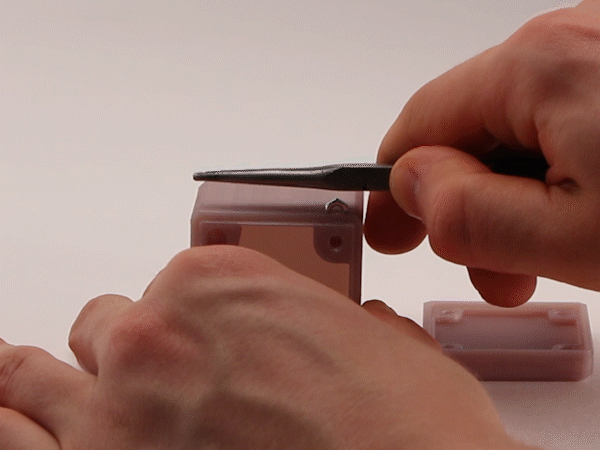
Using a cutter or thin blade, carefully remove the plate seal from your printed model .
Media Removal
Removing the print layer makes it easier to remove the support material from the 3D print. However, you should be careful not to damage the 3D printed part, because without the printed layer, it becomes more brittle. The best way to do this is to cut the support structures at various points of contact. The cutting pliers that come with your 3D printer are essential for this operation.
Elimination of deficiencies
Now you have your part, but with fragments of supporting structures and imperfections. To get better access to certain parts, use your cutter or other small sharp tool and remove any remnants of printed paper.
Sanding
After removing excess printed material from the printed part, you should already be able to see its shape, but it still looks rough. To bring the printed model to perfection, it must be polished. To do this, you can use ordinary files or sandpaper. If you chose the latter, use sandpaper 9 first0005 low grit (150). Then, if necessary, continue with a finer grit sandpaper.
Whichever tool you use, sand the printed part in small sections. After filing, part of your printed model becomes more brittle.
Finishing part
Dust may remain on the printed object after sanding. To remove it use a soft cloth or microfiber cloth . You can also clean the dust layer with mineral oil. The advantage of this technique is that it instantly adds shine to the print. However, be careful not to use too much mineral oil. A few drops are more than enough.
Always have a photo or image of your 3D printed model handy. This will prevent you from cutting the printed part. Use a small knife or a heated blade to make cutting easier, especially if the material is a bit hard. 9The 0005 Dremel and the hand sander can be useful if the backing material is resistant to the sharp object you are using.
It is important to be careful when doing this, as you may break some of the staples with your fingers.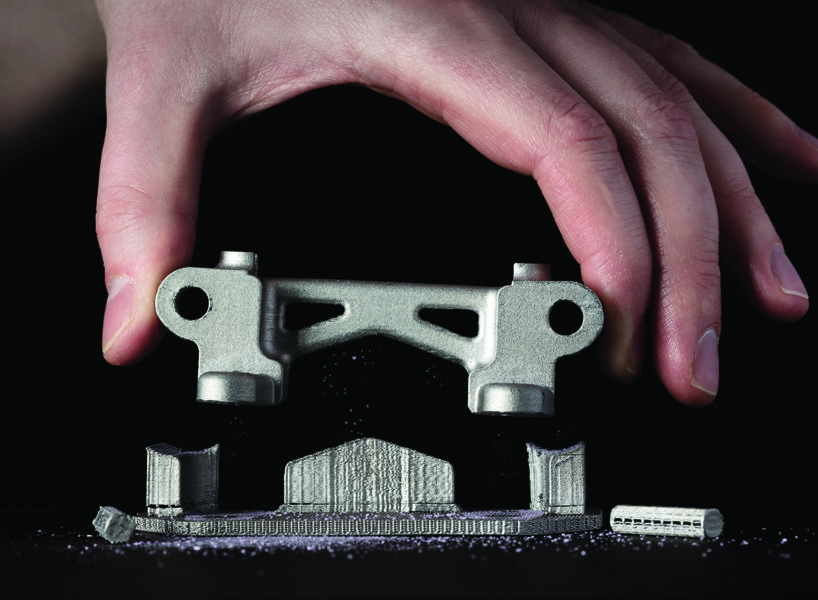
Other methods are also effective for removing the 3D print support from your printed object. However, they are more complex and require the use of special products and equipment.
Acetone vapor smoothing for finishing your 3D model
This post-processing method is for small parts made of ABS filament and FDM . It is mainly used to improve the 3D printed model. During the vapor smoothing process, your 3D printed part will be exposed to acetone vapor in an enclosed area. The fumes will melt the remaining supporting structure and layer lines. After removing the backing material, the acetone vapor polishes and smoothes the surface of the printed model's outer layer, giving it a glossy appearance.
In practice, you will need acetone, a glass or metal container and a lid. A piece of wood or a block of rigid cardboard wrapped in aluminum foil will also come in handy to support the printed product, as well as a hot plate from a printer (any other hot plate will do).
Proceed as follows:
- Pour a few millimeters of acetone into the container.
- Place the container on the hot plate of the printer and wait for the acetone to boil.
- Place the holder at the bottom of the container if the acetone does not reach the part where you will place the 3D printed object.
- Place the 3D printed part on the holder and close the container.
- Let the acetone vapor work. Smoothing time depends on the size of the part (for a small part with a surface area of 3 cm, for example, it may take 3 to 4 minutes).
- Remove the workpiece from the container as it is still soft at this stage.
3D printed part should be allowed to air dry for at least 2 hours .
Using the Support Removal Machine
There are machines on the market today that remove print media from a 3D part for you. Such a device is designed for faster cleaning. This not only ensures that there is no media in the printed part, but also gives it a uniform look.
Ultimaker Cura software
If you use the 3D printer, you must have heard of Cura. It is often seen as a solution for removing unnecessary supports from a 3D object. In reality, Ultimaker Cura is a software slicer. More precisely, it is for setting up your 3D printer. ¿Cómo se retira el soporte de impresion 3D?
The best way to remove 3D prints from the build platform. What is the easiest way to remove a 3d print from a bed? An easy method to remove sticky 3D printed objects from Build-Plate. Extract your 3D print from the Build Plate.
Skip to main content
- Base plate with tire lamelles
- Baseplate with VW tooling
- Baseplate with parts
- base plate with many parts
- 3rd generation molybdenum wire cutting
PreviousNext
Additive Manufacturing
RP : Rapid Prototyping
Power Bed Fusion
SLS : Selective Laser Sintering
SLM: Slective Laser Melting
DMLS : Direct Metal Laser Sintering
EBM : Electron Beam Melting (Laser Cusing)
Metal Binder Jetting
BEST BASE PLATE REMOVAL TOOL: NovicutM-AM3D
High-performance wire cutting machine for separating components made of materials that are easy to difficult to machine from their base plate using an additive manufacturing process.
Designed as an
affordable and reliable wire EDM solutionto economically remove metal 3D-printed parts from their build plate.
Based on our standard machine build since more than 20 year,
The
Novicut-M-AM3D can handle build plates ranging from100 x 100 mm to 500 x 1000 mm.
Bigger sizes on demand!
-
The Wire EDMs are equipped with a reusable Molybdenum wire feature, which quickly moves inexpensive wire from the source capstan, to the receiving capstan, and then back again so that the wire is continuously moving back and forth through the workpiece .
-
The rapid speed of the wire (10 - 50 times higher than normal brass wire cutting machines) creates its own flushing so high-pressure pumps are not required.
-
The Molybdenum wire is very resistant to wire breaks, offering an advantage over the brass wire that is typically used in a wire EDM.
-
The dielectric used is a mixture of water and oil to reduce oxidation on the part surfaces.
We offer a cutting process that is:
Stable and reliable
Fast cutting:
Medium speed for hard materials is around 150-220 mm²/min = 9000 - 13.200mm²/hour
High speed for hard materials is till 360 mm² /min = 21.600mm²/hour
Handle ALL hard conductive materials
Reliable : based on an 30 years existing technology
With a minimum loss of material (0.18mm)
Precise : +- 0.005 mm
Zero-force cutting: never damage a part
With low investment
At a ridiculously low cutting cost per hour
Easy to operate
Flexible : fit for most of the base plates of any brand
We reuse our wire continiously
Almost no wire breakage problem by powder inclusions
The EDM range is intended as an affordable option for removing metal 3D-printed parts from build plates.

| 400 x 400 mm baseplate sample | Manual bandsaw | Automatic bandsaw | Special AM bandsaw | wire cutting machine | novicut-M AM-3D |
| investment | 8-15. 000€ 000€ | 24 - 40.000€ | 80 - 120.000€ | 90 - 150.000€ | 35 - 50.000 € |
| operator needed for | all time | setup-collect | setup | setup-collect | setup-collect |
| Thickness of cut : material losses | 1-2mm | 1.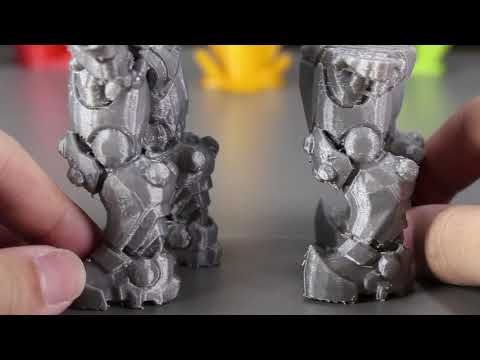 4 - 2.8mm 4 - 2.8mm | 0.9 -1.2mm | 0.3mm | 0.18mm |
| cutting time | short | short | short | very long | Average-short |
| cutting forces on part | big | Big | Big | None | None |
| Precision positioning | 0. 5mm 5mm | 0.5mm | 0.3mm | 0.01mm | 0.01mm |
| Angle deformation compensation | no | no | no | yes | yes |
| multiple loaded in machine possible (unmanned long run at night) | no | no | no | yes | yes |
| dustfree-healty | no | no | yes | yes | yes |
The EDMs are equipped with a reusable Molybdenum wire feature, which quickly moves inexpensive wire from the source capstan, to the receiving capstan, and then back again so that the wire is continuously moving back and forth through the workpiece.