3D printed sequential shifter
BEAVIS Motorsport
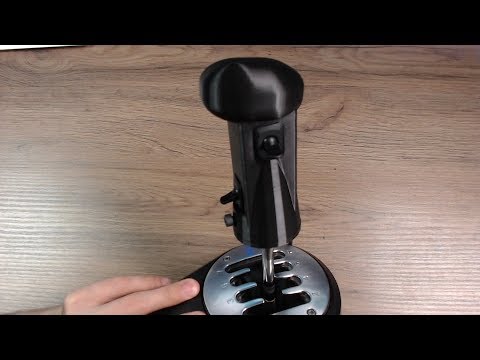
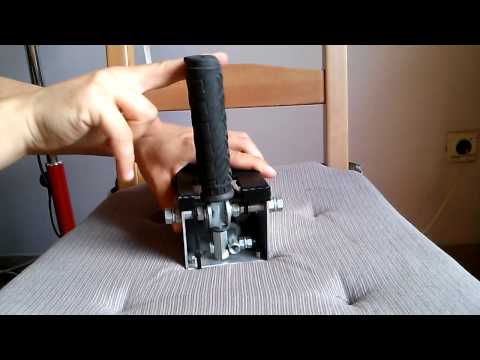
DIY 3D Printed Racing Sim Sequential Shifter
Thanks for your interest in my DIY 3D printable Racing Sim sequential shifter.
The idea was to design it to be strong & long lasting, but also cost effective and without any special components required.
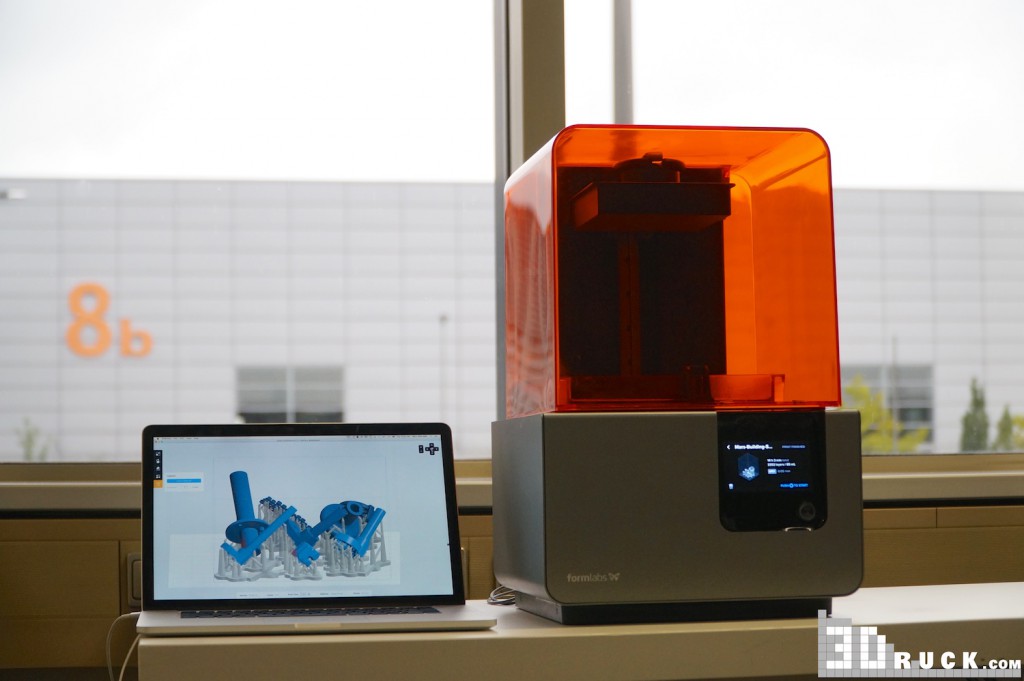
In total, print time will be about 1.5 days, and require around 500 grams of filament. I chose PLA and have had no issues with long term use.
I've been using mine for ~6mths of occasional use and it's been absolutely flawless. I have made some small changes/improvements to the model that is available here since using this first prototype.
DIY Sequential Shifter
DIY 3D Printed Racing Sim Sequential Shifter
Filament required: 500grams
Print time: 1.5days
Total cost: ~$25 (incl. non 3d printed components)
See also: Thingiverse
.
Components Required
3D Printed Components
- 1x Main Shifter Body
- 1x Shifter Shaft
- 1x Bottom Cover
- 4x Switch Spacers (I made these a separate component rather than merging into the main body mostly just for ease of printing.)
- 1x Shift Knob (Optional - I'd recommend you to use any real car shift knob with an M10 x 1.5 thread)
- 1x Pivot Pin & 1x Pivot Cap (Optional - see details on pivot tube below)
Additional (non-3d printed) Components
- 1x Steel/Aluminium 'Pivot Tube' 64mm long 12mm OD with 1.6mm wall thickness --or-- M12 bolt 75mm long, and M12 nylock nut, and 2x washers EBAY LINK
- 2x Limit Switches (SPDT V-155-1C25 Short Hinge Roller Lever Control Limit Micro) EBAY LINK
- 1x Arduino Pro Micro (ATMEGA32U4) EBAY LINK
- 1x Micro USB cable (To connect the arduino to your PC, this will depend on your setup, but 2m is probably the minimum length you will want) EBAY LINK
- 4x M3 (Hex Cap head) bolts 70mm long (To affix the limit switches) EBAY LINK
- 4x M3 Washers (To affix the limit switches) EBAY LINK
- 4x M3 Nylock Nuts (To affix the limit switches) EBAY LINK
- 1x Shift Knob M10x1.
 5 thread (Optional - You may choose to use any real shift knob with an appropriate thread, or try 3d print the included STL shift knob if you wish)
 - 1x M10x1.5 bolt/stud to affix shift knob to shifter shaft ~65mm long (the head of the bolt needs to be cut off to make a length of all thread, it needs to be 60-70mm of threaded length, exact length depends on your chosen shift knob.) EBAY LINK
- 2x Small countersink screws for bottom arduino cover EBAY LINK
- 2x M10x1.5 (Hex Cap head) 30-35mm long bolts (Shift shaft stoppers to set the shift point travel distance) EBAY LINK
- Wire - to wire the arduino to the switches you may choose to solder directly to the switches, or use push on connectors. I'm not sure what size I used exactly, around 1mm perhaps, just use common sense. EBAY LINK
- Solder for wiring EBAY LINK
- 2x Shifter Springs (Spring 1.4mm14mm dia, Length: 40mm ) EBAY LINK
- 2x Shifter ball plungers (Ball Spring Loaded Grub Screw - M12x1.
 75) EBAY LINK
Tools
- Soldering iron
- Hex (allen) keys
- Hacksaw/Angle Grinder to cut bolts to length
- Files to clean up cut bolts
- Drill with 12mm drill bit
- Small pliers to assemble the smaller bolts/nuts
- Wire cutters
- Small hand tools to clean up prints (hobby knife/files etc)
Printing and Assembly Process
Part 1: 3D Printing
There are 6 components (2 of which are optional) that are required to be 3D printed. Their print orientation and required part strength does vary, but is relatively obvious. I have included an image of the ideal print orientation.
In total, print time will be about 1.5 days, and require around 500 grams of filament. I chose PLA and have had no issues with long term use.
Here is a breakdown of each part:
- Main Shifter Body is printed standing upright, and with relatively high wall count and infill percentage, as the top section is under quite a bit of force when you smash through gears, particularly while in an aggressive race.
 I suggest 3 walls and around 50% infill. (Support material is recommended for this part)
 - Shifter Shaft is printed laying on its side, again relatively high wall count and infill percentage, much the same as the main body.
- Bottom Cover is simply to retain and protect the arduino, does not need to be printed with any level of high strength, 2 walls, 10% infill.
- Switch Spacers (4x) are printed on their sides with the holes facing up. These are not under very large forces, but may have some pressure applied when shifting, I went with 2 walls, 30% infill. Note that four of these are required, you may choose to print 2 rotated 180 degrees so that the side touching the bed is mirrored if you are pedantic like me.
- Shift Knob (Optional) I have NOT tested this as I opted to use a real shift knob, but the model is there if you really need it. I would suggest printing it upside down.
- Pivot Pin & Pivot Cap (Optional) These are only required if you opt for the metal pivot tube as I used, not require if you use a standard M12 bolt to retain the shifter shaft to the main body.

- NOTE: You may need to use a 12mm drill bit to lightly ream out the holes of the shifter main body and shifter shaft IF you cannot get your pivot tube/pivot bolt into place cleanly, or if your shifter does not rotate smoothly. However, if you do this, do so carefully, or you will cause damage and need to re-print.
- NOTE 2: You may need to clean up the M10 and M12 threads with a thread tap before assembly.
*Ideal print orientation
Part 2: Arduino Code
I won't detail the finer process on how to program an Arduino, but I have included my code for you with the files to download, plus the Joystick Library by Matthew Heironimus.
If you haven't programmed an Arduino before, there are PLENTY of tutorials and guides to get you started.
Some arduino code reminders:
Ensure you have your board type set to Arduino/Genuino Micro
Note that I have specified inputs 5 and 8 for the two shift switches, you can change them in the INO file if you prefer to use different I/O ports (it doesn't matter which input pin is used for up/down switches)
You need to add the Joystick library to your Arduino IDE.
Once the sketch is successfully uploaded to your arduino, you should now see the Arduino appear as a Joystick in your Game Controllers window (you can access this by typing "joy.cpl" in the windows start menu), and can test the two switch inputs by bridging the I/O port to ground with a length of wire.
Part 3: Wiring Arduino
- Measure out 4x generous lengths of wire, 2 for each of the switches. Wire needs to be long enough to travel from underneath, up through the channels in the main shifter body, to the top where the limit switches will mount. Remember you will need two wires per switch, give yourself some extra length which you can trim down later.
- Strip the ends of your wires and tin them lightly with solder.
- Solder the four wires to your arduino, one wire for each switch will go to the ground pins on the arduino, one wire for each switch will go to the I/O pins. Note by default the code specifies those as pins 5 and 8. If you chose to change those I/O pins to something else, ensure your soldered wires match your updated code.

- Once soldered, route the wires up through the main shifter body and set the arduino in its final position, you may want to install the bottom cover now just to hold the arduino in place while we continue with assembly.
- If, like me, you went for crimped lugs, then you can now trim the wires down to the right length then crimp your wire ends with your lugs to match the pins on the limit switches.
- However if you prefer to solder the wires direct to the switches, we will do this later so move onto the next step (assembly).
*Wiring diagram
Part 4: Assembly
The physical assembly process is not overly difficult or complex, but some components can be a little "fiddly" to get everything to line up or fit in place.
- Start by inserting the shifter shaft into the main body and align the pivot holes up.
- Insert either the pivot tube or pivot bolt (with a washer) to act as the fulcrum of the shifter.
 If you opted for the pivot tube solution, it should sit flush with the inner edge of the main body on both ends, allowing room for the caps to sit flush with the outside of the main body
 - Note, you may wish to lightly lubricate the pivot parts for smoother operation.
- Secure the pivot tube with the pivot pin & cap, these can be simply tightened by hand. Or secure the pivot bolt with the M12 nut and a washer.
- Install the shifter travel stopper bolts into either side of the lower part of the main body, these will limit how far the shifter can swing back and forth, and can be adjusted to define that limit.
- Now is also the time to install the shifter springs. This sit over the travel stopper bolts, and add "tension" to the shifter, and help keep it centered. These are perhaps the hardest part of the install as they can be tough to get in place.
- Install the limit switches to either side of the shift lever. Each limit switch has one of the switch spacers set either side of it, with the long M3 bolts securing them in place.
 Don't forget a washer for each bolt.
 - Take care to route the wiring to the outside of the switches so that it is clear and not snagged in any way.
- Secure the limit switch long M3 bolts with their nylock nuts and washers, I chose nylock to avoid the nuts coming loose.
- Note, there is plenty of adjust-ability in the switches so you can again choose the travel of your shift lever before the switches engage.
- Install the wiring onto the switches, either by soldering them onto the switch pins, or sliding on your crimped lugs.
- Thread the M10 stud into the top of the shifter shaft and then thread on your shift knob of choice.
- If you opted to include ball plungers, thread them into the sides of the shifter main body and leave the relatively loose for now, you can then tension them up later once you start to use the shifter and "wear it in".
- Now connect the micro usb cable to your Ardunio, and if you haven't already done so, secure the bottom cover with two small screws.
Part 5: Install and Test!
- The shifter main body has 4x perimeter mounting holes that accept M6 bolts, their pattern is 116mm apart on the length, and 74mm apart on the width, centre to centre.
- These can be used to affix to your racing sim rig, you will need to find some form of bracket / plate to suit your particular rig.
- Once your new shifter is firmly affixed to your rig, connect the USB cable to your PC, open Windows Game Controllers by typing "joy.cpl" in the windows start menu, and verify your shifter is detected as a Joystick.
- Now, launch your sim game of choice, map your shift up/down keys and enjoy your racing!
Your awesome new shifter is now finished, congratulations!
▷ sequential shifter 3d models 【 STLFinder 】
Sequential shifter
thingiverse
Sequential shifter What do you need? . ..
1X M10 50 mm screw
1X M10 nut
2X M10 washer
4X M3 50 mm screw
4X M3 nut
8X M3 washer
2X foam rubber 28x25x20 mm
2X M6 15 mm wood screw
2X Micro switch 16A 30x15x10 mm
wire 3...
..
1X M10 50 mm screw
1X M10 nut
2X M10 washer
4X M3 50 mm screw
4X M3 nut
8X M3 washer
2X foam rubber 28x25x20 mm
2X M6 15 mm wood screw
2X Micro switch 16A 30x15x10 mm
wire 3...
Sequential shifter
pinshape
Sequential shifter What do you need? ... 1X M10 50 mm screw 1X M10 nut 2X M10 washer 4X M3 50 mm screw 4X M3 nut ...
Sequential shifter
thingiverse
Materials needed 2x 8mm rods, one between shifter knob -> hinge and the second hinge -> bearing holder 2x ball bearings 8mm inner diameter. ...I.e 8x7x22mm
6x 4mm bolts with a length of atleast 45mm
2x 8mm bolts, length around 15mm
a suitable spring...
...I.e 8x7x22mm
6x 4mm bolts with a length of atleast 45mm
2x 8mm bolts, length around 15mm
a suitable spring...
Sequential shifter
prusaprinters
Shortened the mounting plate because it collided with the bearing rail. Either print 2x side covers OR 1x side cover + side cover mount. Materials needed 2x 8mm rods, one between shifter knob -> hinge and the second hinge -> bearing holder 2x...
Sequential Shifter
thingiverse
Raid your hardware store and use what they have) 2x limit switches 4x screws (attach limit switches to the shifter) 4x #10 countersunk head wood screws (for mounting to your wheelstand, use whatever works for your setup) Assembly: Put the 10-24 x. ..
..
sequential shifter MOD g27
thingiverse
IT NEEDS 2 SCREWS AND RUBBERBANDS LEFT + RIGHT MODEL makes the gated to sequential shifter inspired by MADLAP but made with 100% own measurements from the g27 shifter
Logitech sequential shifter knob
thingiverse
I modeled this shifter knob after the same shape used by the ProSim sequential shifter knob. My thought process being that a high-end piece of hardware like that most likely comes with decent ergonomic. I would also recommend printing this one to a...
G27 Sequential Shifter Mod
thingiverse
. .. in a few minutes. ...Add rubber bands for recentering and superglue the top piece to the bottom (or leave it off if you don't care about aesthetics), then pull off the boot from the shifter and slip this in it's place using two of the original screws.
USB Sequential shifter / Handbrake
thingiverse
Keep in mind the travel can be a bit short for the handbrake, but I am using this mainly for the seq shifter and I figured it's better than using a plain old button. Keep that in mind if you're using this for a handbrake. But you can remix it and...
TH8RS Sequential Shifter mod
thingiverse
More details in the video: https://youtu. be/ftoNNL1reJ8 NOTE: after using the mod quite intensively I found a major flaw in the design - the friction between shifter shaft and the spring ball screws is resulting in occasional locking of the shifter...
Sequential Shifter (DSD Inspired)
thingiverse
Sequential Shifter for simracing,highly inspired by http://www.derekspearedesigns.com/2015-dsd-pro-sequential.html The part secuencial_taco.stl is printed on filaflex with 10% infill Rest of parts with PLA and 30% infill I´ve used 2 spare buttons...
G27 Sequential Shifter
thingiverse
I've always felt that the G27 sequential shifter on here is missing some "cluck". Therefore I designed this one with non-linear push/pull force. Hardware needed:
* Bearing-wheels from Ender 3 and alike printer, such as these...
Therefore I designed this one with non-linear push/pull force. Hardware needed:
* Bearing-wheels from Ender 3 and alike printer, such as these...
Sequential shifter
thingiverse
https://www.youtube.com/watch?v=OG0VltRJlRs&t=31s https://www.youtube.com/watch?v=T88DAN9VCXM&t=31s https://www.youtube.com/watch?v=tYhN9EcEfEU&t=76s Micro Switch : size 30mm × 17mm bolt : M6 × 70mm 4ea M8 × 70mm 1ea ...
Sequential_Shifter
thingiverse
based on http://www.thingiverse.com/thing:1513638 Changes from above are: Made the switch carriers correct width, they were original 32mm wide to fit in a 35mm slot.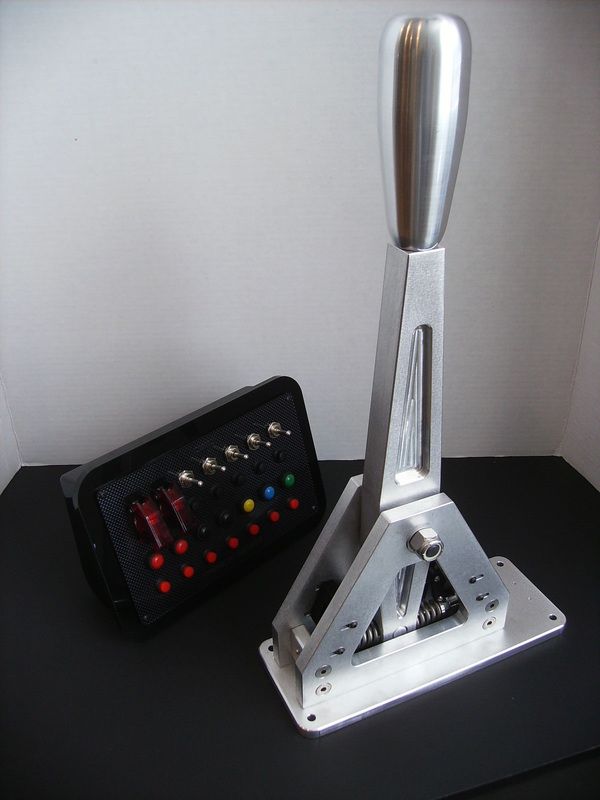 Altered the switch holders in order to accommodate a "guitar foot stomp switch" ...
sequential shifter
thingiverse
parts still required : - 2x 8mm rods , length doesn't matter - 2x 8x7x22 ball bearings , any bearing with a 8mm inner diameter will do - 6x 4mm bolts with a lengt of >4cm - 2x 8mm bolts , lengt around 15mm - a spring , strength and length...
Sequential Shifter for Sim Racing
thingiverse
Sequential Shifter for Sim Racing. ...This is a WIP
Sim Racing Sequential Shifter upgrade
thingiverse
sim racing DIY build . ...3d prints to upgrade the sequential shifter due to the constant stress applied all parts sjould be printed at 100% infill.
except for switch cover. ...
filament used for this project is PLA.
...3d prints to upgrade the sequential shifter due to the constant stress applied all parts sjould be printed at 100% infill.
except for switch cover. ...
filament used for this project is PLA.
DIY Racing Sim Sequential Shifter
thingiverse
## DIY Racing Sim Sequential Shifter ## Thanks for your interest in my DIY 3D printable Racing Sim sequential shifter. The idea was to design it to be strong & long lasting, but also cost effective and without any special components required. In...
Sequential shifter for sim racing
thingiverse
This is a sequential shifter for driving simulators.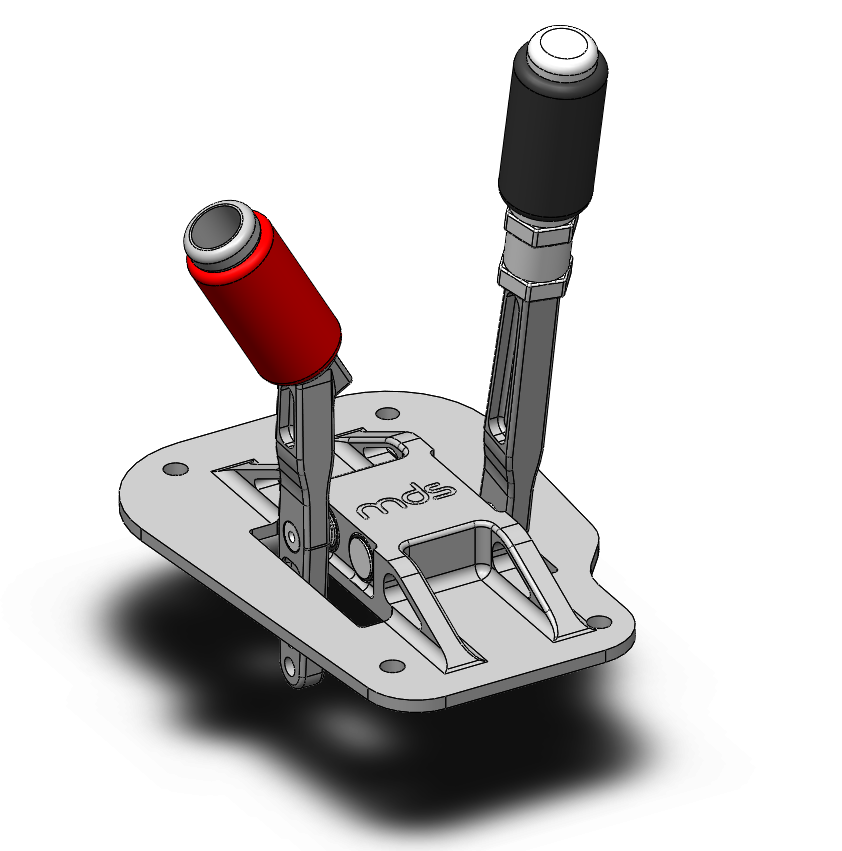 The shift feeling is imitated by two bearings following a track, preloaded with a spring. I think the bearing track come out really good, this is the kind of shifting feel that I wanted to achieve...
Sequential Shifter Simracing (no Electronics)
thingiverse
This is my "heavy duty" sequential shifter for simracing. It's based on a ball bearing that is pushed against two microswitches. I have not included electronics in the design but you can use an Arduino Micro pro (with USB support) or even use an old...
TH8A / TH8RS Sequential Shifter Mod
thingiverse
Here is a sequential mod for Thrustmaster TH8A shifters that i designed. You have to place the round flat surfaces to the bed, i forgot to change the coordinate system.
You need:
2x Sequential MOD_ohne Gewinde_Federspanner.STL
(1x...
You have to place the round flat surfaces to the bed, i forgot to change the coordinate system.
You need:
2x Sequential MOD_ohne Gewinde_Federspanner.STL
(1x...
Sequential Shifter Remixed form LV999Rabit
thingiverse
Ceci est un remix du shifter de LV999rabit. Je n'ai pas pu faire de remix dans la bonne section alors voici ma version. La version originale est très gourmande en filament et à quelques défauts. De plus je n'ai pas trouvé les composants exactes...
Sequential Simracing Shifter
thingiverse
This is my take on a sequential simracing shifter. It is still experimental after som problems and different designs of the "Spring side.stl". The current design and choice of material seems to work
The goal is to get more of a gear shifting feel...
It is still experimental after som problems and different designs of the "Spring side.stl". The current design and choice of material seems to work
The goal is to get more of a gear shifting feel...
Sequential Shifter bracket for Logitech G27
thingiverse
Slips on the mounting knobs and secured with elastics to pull the lever out of gear in order to use it as a sequential shifter.
Sequential Shifter bracket Logitech G27 (sturdier pegs)
thingiverse
Sequential Shifter bracket for Logitech G27 made by TacosForJesus Now with sturdier rubber band pegs Very good design, simple, effective Thanks ! . ..
..
8020 Rig Adapter for Sequential Shifter
thingiverse
As I have a handbrake already attached to my 8020/Aluminium extrusion based rig, I needed an adapter so I could run the sequential shifter alongside it to get it into a comfortable position. Therefore I designed this strong adapter which has 5...
Logitech G29 Sequential Shifter Magnet Mod
thingiverse
Mod to improve the feel of the Logitech G29/920 sequential shifters.
Requires:
2 x M5 Slide in T-nut
2 x M5 x 16mm screws
4 x 8mm diameter x 3mm thickness magnets (2 per side stacked)
Just realized there are already a bunch of these on here. ...
...
G29/G920 sequential shifter/ handbrake knob
thingiverse
This screw can be found on the original knob for the shifter so can be used if needed. At the start the knob may have to use a bit of force to be put on but after a couple of times it is a lot easier. When printing place cap with arrow on the...
Adjustable Sequential Shifter
grabcad
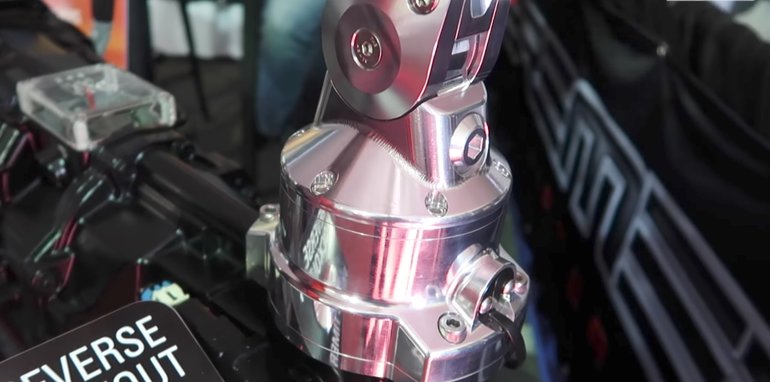
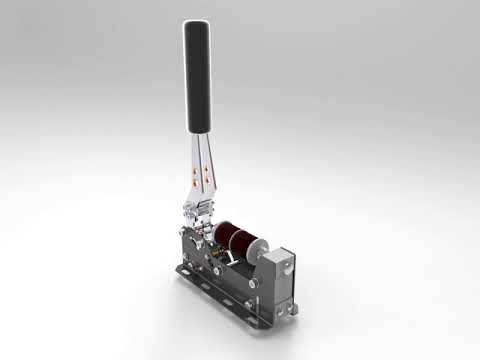
Three position adjustable sequential shift lever assembly primarily designed to suit trans-axle applications. Constructed from billet aluminium and modelled with titanium hardware. It Can be adapted for cable or bar actuation. ...Linkage driven however...
Sequential Shifter for Sim Racing
thingiverse
WIP
File 3MF Logitech G2x Shifter
FANATEC UNIVERSAL PHONE/TABLET HOLDER (SERIES CSL Elite, V2.5, CSL DD, GT DD PRO, PODIUM)
3.49 €
THRUSTMASTER T150/T150 PRO/TMX/TMX PRO - holder for phone or tablet/phone
2,49 €
Pedals Logitech - Double brake pedal modification
2.49 €
QUCIK THRUST WHEEL EXPANDER RING TOOL
1.20 €
THRUSTMASTER WHEEL ADAPTER 6x70mm
2,49 €
FANATEC DIY RGB RPM REVLEDS
2,49 €
FANATEC CSL DD / DD GT PRO - 15 Degree WHEELSTAND /Table holder, table clamp, table mount/
2,99 €
FANATEC CSL ELITE STEERING WHEEL P1 RIM - MAGNET SHIFTER MOD
2,49 €
Best 3D printer files in Game category
Action figure - CLICK & SMILE - Starter pack
Free
Mouse in a cheese box
4. 04 €
04 €
Werebear (supported)
3.50 €
Fidget Shifter
Free
Marble Run Compatible 8 Marble Finish Ramp
Free
28mm Banana Knight v2
Free
buildable shark
1.20 €
LED LANTERN CHRISTMAS SCENE MEDIEVAL WEST SCALE PLAYMOBIL FIGURES
4,37 €
Bestsellers in the Game category
Lazy Cat
4.04 €
Hrafnagud and ROKSS divisions
10.13 €
First Line Attack Troops - Truescale
5 €
Short-range artillery for legionnaires
10 €
Tiny space elves - leaders
5 €
Healer conversion kit SM
6 €
Squataur
3. 03 €
03 €
Catafrac Heavily Armored Warriors - Limbs Set
1.85 €
Fighting director
1.52 €
Articulated dragon
4.04 €
Good flexi dragon
1.77 €
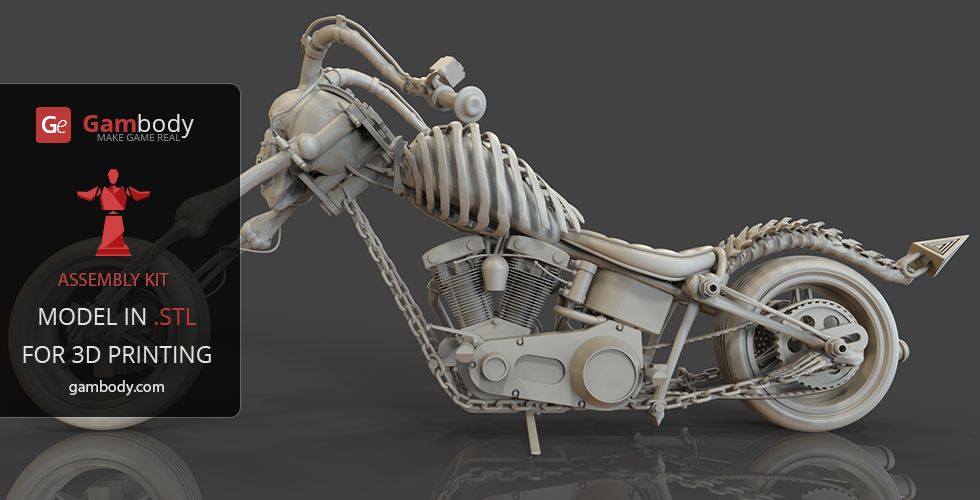
Chopper motorcycle print-in-place
1 €
Krak Shot
5.67 €
Emberfolk Fighters
10.13 €
Vodfolk Explorer
10.13 €
Flying unicorn
1.05 €
Do you want to support Cults?
Do you like Cults and want to help us continue our journey on our own ? Please note that we are a small team of 3 people, so supporting us in maintaining activities and creating future developments is very easy. Here are 4 solutions available to everyone:
-
AD: Disable the AdBlock banner blocker and click on our banner ads.
-
AFFILIATION: Shop online with our affiliate links here Amazon.
-
DONATIONS: If you want, you can donate via PayPal here.
-
* INVITE FRIENDS: * Invite your friends, discover the platform and great 3D files shared by the community!
3MF File FANATEC Style Shift Knob for Logitech G2x / Driving Force Shifters・3D Printing Template Download・Cults
Logitech G2x Shifter - Serial Switch PRO Mod
2.49 €
FANATEC UNIVERSAL PHONE/TABLET HOLDER (SERIES CSL Elite, V2.5, CSL DD, GT DD PRO, PODIUM)
3.49 €
Logitech Pedals - Dual Brake Pedal Modification
2.49 €
THRUSTMASTER T150/T150 PRO/TMX/TMX PRO - holder for phone or tablet/phone
2,49 €
FANATEC DIY RGB RPM REVLEDS
2,49 €
THRUSTMASTER WHEEL ADAPTER 6x70mm
2,49 €
FANATEC CSL DD / DD GT PRO - 15 Degree WHEELSTAND /Table holder, table clamp, table mount/
2,99 €
QUCIK THRUST WHEEL SPACER RING TOOL
1,20 €
Best 3D printer files in Game category
LF1 - Foam Dart Blaster (NERF Compatible)
Free
Playstation 5 trophies SET!
1. 65 €
65 €
LEARNING HOURS CLOCK / learn the hours / RELOJ APRENDER HORAS
6,25 €
Huge Cartoon Style Halloween Pumpkin
Free
boîte "toupie de divination"//box "spinning top of divination
5,28 €
No Care Bear Collection #12
Free
Plesiosaurus
1.80 €
Bestsellers in the Game category
Octopus 2.0
4.04 €
Squataur
3.03 €
Chopper motorcycle print-in-place
1 €
Hrafnagud and ROKSS divisions
10.13 €
Emberfolk Fighters
10.13 €
Articulated dragon
4.04 €
Lev Fu
5. 50 €
50 €
Savages Fotianna
10.13 €
Altair Amberwatch
10.13 €
Cute flexi unicorn
1.05 €
Articulated tarantula
4.04 €
Dancing Skeleton
3.54 €
Snake and rattlesnake
4.04 €
Exolotreftes Truescal
5 €
Lazy Cat
4.04 €
Vodfolk Explorer
10.13 €
Do you want to support Cults?
Do you like Cults and want to help us continue our journey on our own ? Please note that we are a small team of 3 people, so support us in maintaining the activities of and creating future developments is very simple.