How to clean 3d printer extruder
How to Clean a 3D Printer Nozzle (5 Methods) – Clever Creations
Using a nozzle cleaning kit and a cleaning filament is the most effective way to clean your 3D printer nozzle. You can remove the nozzle and soak it in acetone to remove any traces of filament impurities. A brass wire brush with soft bristles will help eliminate any leftover filament residue.
A 3D printer nozzle is a crucial element in the 3D printing process, and it is responsible for the smooth extrusion of your filament. Any clogs or blockages in the nozzles will directly affect your print quality. Clogged nozzles will lead to under extrusion, inconsistent filament flow, and uneven layers.
Even though cleaning a blocked nozzle is easy, it can be challenging to identify the clog in the first place. In this article, we’ll explain how to recognize a nozzle clog, go over the various cleaning methods and what you can do to prevent nozzle clogging in the future.
Read on to learn how to clean a 3D printer nozzle and get a smooth 3D printing experience!
How Can You Tell If a Printer Nozzle Is Clogged?
Image: squid-do via Reddit
It can be tricky to attribute print defects to clogged nozzles. However, a few notable indicators will quickly tell you whether you are dealing with nozzle clogging.
The easiest way to detect a nozzle clog is if you notice a decrease in the overall print quality. Inconsistent extrusion, missing layers, and under extrusion are a few of the side-effects of a blocked nozzle. A partial blockage in the nozzle can cause all of these problems. Similarly, a complete jam can occur due to clogged material stuck in the nozzle.
An improper first layer is another sign of nozzle clogging. If the nozzle does not extrude filament during the first layer or there’s an uneven filament flow, you might have a clog in your nozzle. However, it is helpful to eliminate any bed leveling and Z-offset issues before you check for a nozzle clog.
Additionally, filament curling right after extrusion and thinner print lines are also signs of a clogged nozzle. Recognizing these signs will help you quickly clean your nozzle and prevent further degradation of your 3D prints.
How Do You Clean a 3D Printer Nozzle?
If you start to see filament deposits on the outer surface of your nozzle, it is time to clean it. 3D printer nozzle cleaning is easy, and all you need is a brass wire brush and a wiping cloth.
The brass brush prevents damage to your brass nozzles and lets you scrub any stuck printed material from your dirty nozzle.
Before starting the cleaning process, it is helpful to first heat your 3D printer nozzle. Heating the nozzle softens any stuck filament bits and lets you wipe them off more quickly.
Once you’ve scrubbed the nozzle thoroughly, you can wipe away any leftover material from its surface. A soft microfiber cloth is our go-to equipment for this.
3D printer nozzle cleaning is now complete, and you can start printing again.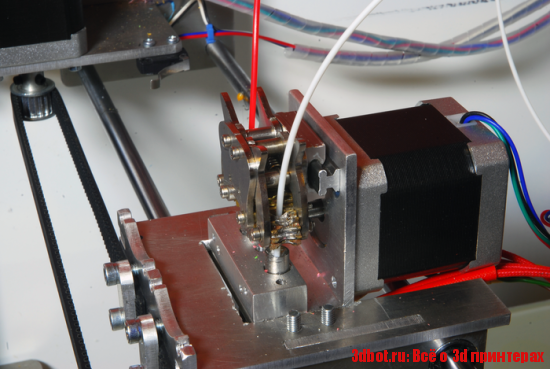 Remember to always keep an eye on the state of your nozzle and clean it regularly to maintain optimal print quality.
Turboom Wire Brush Set Scratch Brush Set for Cleaning Welding Slag...
607 Reviews
Check PriceHow Do You Unclog a Clogged 3D Printer Nozzle?
If your nozzle is already clogged, don’t worry! Cleaning a nozzle is an easy process that can be done through a couple of different methods.
Nozzle Cleaning KitA standard nozzle cleaning kit consists of thin metal needles, tweezers, and a brush. You can use this method to clean out your nozzle by following these steps:
- Start by heating up your nozzle to right under its maximum temperature. This will help to soften any filament that is stuck inside the nozzle.
- Next, use the metal needles to pick out any larger pieces of filament that may be blocking the nozzle.
- Once the larger pieces have been removed, use the nozzle brush to clean out any smaller bits of filament.
- Finally, use the tweezers to remove any final pieces of filament or debris.
3D Printer Nozzle Cleaning Kit - 0.4mm Needles and Tweezers Toolkit...
1,409 Reviews
Check PriceCold Pull
A cold pull or an atomic pull is often used to unclog the nozzle and remove any debris inside it. It is an easy technique and requires no disassembly or cleaning tools to remove the clog.
Using Nylon filament will give the best results. However, you can also use PLA, ABS, or a dedicated cleaning filament (more on this later) if Nylon is not available.
First, you need to heat the nozzle to the printing temperature of your filament. After that, you will have to manually push the filament until it extrudes out of the nozzle. You can now let your hot end cool down while pushing the filament into the nozzle.
In the final step, you need to first remove the extruded material from the nozzle tip. Then set the printer temperature to 85-90 °C. Once it reaches this temperature, slowly pull the filament out of the nozzle completely.
You might have to perform this procedure several times to remove any dirt and filament bits from the inside of your nozzle. You can stop once you notice the cold pulled filament is free from debris.
Soaking the Nozzle in Acetone
A nozzle cleaning kit and cold pull might not always be practical with filaments like ABS, and your nozzle might still be clogged. When it comes to ABS, removing the nozzle and soaking it in acetone is a good way to clear clogs.
Start by heating the nozzle before removing it from the hot end. Heating the nozzle frees it up slightly from the heater block and makes it easy to unscrew. You can use a spanner or a nozzle removal tool to remove the nozzle safely and efficiently.
After you’ve removed the nozzle, soak it in a cup with a layer of acetone for around 30 minutes. The acetone will help to dissolve any ABS filament that is stuck inside the nozzle.
Recommended:
How to Melt and Dissolve PLA Filament
Once the soaking is complete, you can use a wire brush to remove any final bits of filament.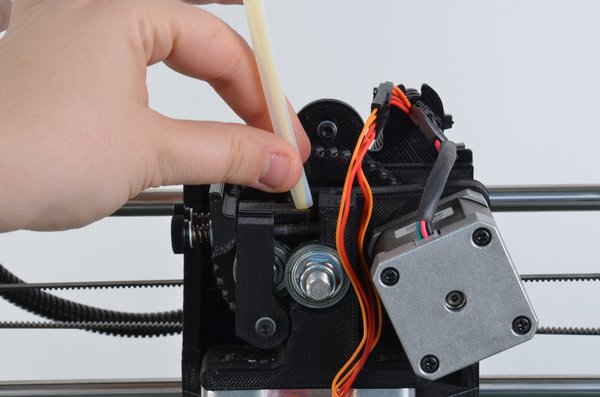 Be sure to also clean the nozzle tip as this is where most of the clogs occur.
You can now reassemble your 3D printer and start printing again. Make sure to properly dry the nozzle first. A paper towel or soft cloth is just fine for this.
Remember to always keep an eye on your nozzle and clean it regularly to maintain optimal print quality.
Using a Heat Gun
While an acetone soak is helpful for ABS filament, it is not as effective on other filament materials. Especially PETG and Nylon are fairly non-reactive to acetone.
When dealing with these filaments, a heat gun will help clear your nozzle clog.
The first step is to remove the nozzle from the 3D printer hot end or extruder assembly. This is the same as what you would do for ABS soaking.
Next, you will need to heat the nozzle with the heat gun until the filament inside melts.
Once the filament has melted, you can use a thin needle or a wire brush to remove any debris from the nozzle. Be careful, the nozzle is hot at this point.
After cleaning the nozzle, you can now reattach it to the hot end assembly and start printing again. Make sure that the nozzle is properly cooled down before reattaching it.
Wagner Spraytech 0503038 HT400 Heat Gun, Dual Temperature Hot Air Tool...
21,408 Reviews
Check PriceHow Often Should You Clean a 3D Printer Nozzle?
At a minimum, you should clean your 3D printer nozzle when you change filament materials. It is easy for nozzles to clog from leftover material after a filament change.
For example, when you switch from ABS filament to PLA, some ABS material might be left in the nozzle. As PLA prints at a lower temperature than ABS, the leftover ABS will not melt and result in a nozzle clog.
Another reason for nozzle clogs is dirt and dust particles that enter along with the filament. If you continuously print with dirty filament, the debris can accumulate in the nozzle over time and clog the nozzle.
Because it can be a challenge to keep your filament free from dust and dirt, you can clean the nozzle after every 100-200 printing hours as prevention.
Generally, if you notice a decrease in print quality, that is usually a sign that your nozzle is starting to get clogged and needs cleaning. You can do this regardless of how long or with which materials you have been 3D printing.
How to Prevent 3D Printer Nozzle Clogs
Regularly Use 3D Printer Cleaning Filament
3D printing cleaning filament is the easiest way to clean your nozzles from the inside. It is made up of a material specifically used to clean and purge plastic out of injection molding machines. You need to extrude it at the printing temperature of your filament until you notice a clean white strand of material coming out of the nozzle, free of any debris or filament color.
Even though cleaning filament may seem slightly expensive, it does work effectively and clears out any partial clogs. And you only need a small amount. You can use it after every 100-200 hours of printing for effective cleaning of your nozzles and to prevent nozzle clogs.
NovaMaker 3D Printer Cleaning Filament 1. 75mm Natural,...
1,709 Reviews
Check PriceReplace Worn-out Nozzles
You want your nozzle opening to look round.This nozzle is already showing some signs of wear, but still has some print hours left in it.Brass nozzles undergo a lot of wear due to the constant friction of the filament. This wear accelerates when you use abrasive filaments like glow-in-the-dark, carbon fiber, and metal-filled filaments.
Not only do abrasive filaments wear out the nozzle opening, but the tiny metal particles of the nozzle material can start accumulating. This can block filament flow and lead to filament jams.
If you regularly use abrasive filaments or notice a lot of nozzle wear, it’s a good idea to replace your brass nozzle more often.
Alternatively, you can use stainless steel or other hardened nozzles. These are more resistant to abrasive filaments and have a higher lifespan than your typical plain brass nozzles.
Fix the PTFE Tube Hot End Gap
In a PTFE-lined 3D printer hot end, the tube goes all the way inside and sits right on top of the nozzle. If the gap is not flush between the PTFE tube and the nozzle, the melted filament will ooze out of it. Eventually, there will be a build-up of plastic filament within the hot end, leading to filament jamming.
The gap is caused due to faulty PTFE tube couplings. As the couplings wear out, the PTFE tube starts sliding in and out of the hot end, creating a gap between itself and the nozzle. Extruder skipping and under extrusion are signs of a filament jam in the hot end.
You should immediately rectify the PTFE tube gap within the hot end if you notice these issues.
The first thing here is to make sure that the PTFE tube has been cut flush at a 90° angle. If it has a slope to it, it will never perfectly align with the hot end.
Secondly, it helps to use replace worn-out pneumatic couplings with new ones on both the extruder assembly and the hot end assembly. This ensures that the PTFE tube stays in place over time.
PTFE Bowden Tube (1M) 1PCS+ 6pcs KJH04-M6 Fittings + 6pcs JP4-01. ..
..
139 Reviews
Check PriceUse High-Quality Filament
A high-quality filament will reduce nozzle clogs while also giving you high print quality. Manufacturers of high-quality filament ensure that their product contains little to no impurities, is produced in a dust-free environment, has a consistent diameter, and is properly vacuum packed to reduce as many imperfections in the material as possible.
We have created an overview of the highest quality filament in our Best PLA, Best ABS, and Best PETG articles. We recommend you check these brands out if you suspect your clogged nozzles are caused by low-quality filament.
While these filaments may be more expensive than budget materials, they are often worth the extra money.
They don’t only save time, but their results are better too. If you are looking to sell your 3D prints and make money with your 3D printer, quality filaments can be a worthwhile investment.
Keep Filament Clean and Dust-Free
A clean 3D printing space contributes significantly to preventing nozzle clogs. If your plastic filament is exposed to the outside environment while printing, it will pick up dust particles that clog your nozzle. After printing with it, you need to store it away from sunlight and in a storage box to prevent the accumulation of dust on it.
Another way you can protect your 3D printing setup from dust and dirt is by using a 3D printer enclosure. These don’t only keep the current filament in the printer clean, but also the 3D printer itself.
Frequently Asked Questions
How do you clean a clogged nozzle with PLA?
In order to clean a clogged nozzle with PLA, you will need to disassemble the printer and remove the nozzle. Once the nozzle is removed, you can use a small wire, needle, or other small pointed tool to clear any debris that may be blocking the opening. You might need to heat the nozzle up with a lighter to melt the plastic filament.
Be careful not to damage the nozzle while cleaning it.
How do you clean an Ender 3 nozzle after printing?
It’s important to clean your Ender 3 nozzle regularly to prevent clogs and ensure quality prints. After every print, it is advisable to clean the nozzle with a brass wire brush. This will remove any debris or build-up that may have occurred during the printing process.
A clean nozzle will ensure that your prints are of the highest quality and avoid any potential issues such as clogging or poor adhesion.
Conclusion
A clean 3D printer nozzle gives you the best print results and helps prevent damage to the 3D printer caused by clogs. Periodic cleaning of your 3D printer nozzle ensures fewer chances of sudden breakdown and prevents downtimes.
Degradation in the print quality, coupled with under extrusion and inconsistent filament extrusion are some of the indicators of a blocked nozzle. You can quickly unclog the nozzle using a nozzle cleaning kit and a wire brush and periodically use a cleaning filament. Especially the cleaning filament is useful for keeping nozzles clean.
When dealing with ABS filament, you can soak the nozzle in an acetone bath to soften the filament.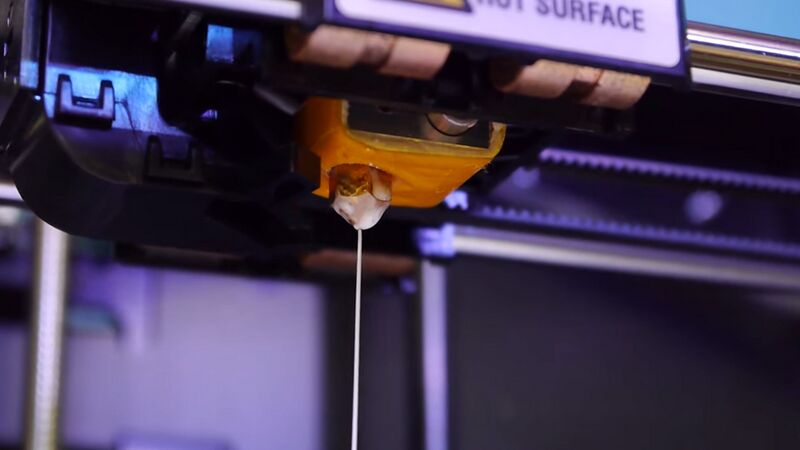 This makes it a lot easier to remove.
Let us know your experience with 3D printer nozzle cleaning. If you find this article helpful, share it with your peers to help them prevent nozzle clogs and keep their 3D printers running smoothly.
How to Clean Your 3D Printer Nozzle & Hotend Properly – 3D Printerly
The nozzle and hotend on your 3D printer go through plenty when it comes to 3D printing, so properly cleaning them is essential. If you don’t properly clean them, you can run into quality issues and inconsistent extrusion.
The best way to clean your 3D printer nozzle and hotend are to take apart the hotend and use a nozzle cleaning kit to clear out the nozzle. Then clean off any stuck filament around the nozzle with a brass wire brush. You can also use a cleaning filament to push through the nozzle.
There are more details and other methods that you can use to clean your 3d printer nozzle and hotend properly, so keep on reading to find out how to get this done.
Symptoms of Clogged Nozzle on Your 3D Printer
Now, there are clear symptoms that the nozzles are clogged or jammed because they are not clean.
Continuous Adjustment of Feed Rate
You would have to adjust the feed rate or the flow settings again and again, which you never did before this time. This shows that your nozzle has started to clog, and the particles are accumulating there.
The Problem in Extrusion
The extrusion, the very first layer of the printing, will start to look uneven and would not stay consistent throughout the whole printing process.
Motor Thumping
Another symptom is the motor that is driving the extruder starts thumping means you would see it jumping backward because it can’t keep up with the other parts that make it turn.
Dust
You would see more dust than usual around the extruder and motor part, which is a clear sign that you need to clean everything starting from your nozzle.
The Odd Scraping Sound
One thing you can notice in terms of noises is an odd scraping sound which the extruder is making because it is grinding the plastic and it cannot push the gear fast enough now.
Other Symptoms
The printer would start showing print blobs, uneven or rough printing, and a poor layer adhesion feature.
How to Clean Your Nozzle
There are a few methods that people use to clean their nozzles, but generally, it comes down to heated up the nozzle to a fairly high temperature and manually pushing through filament.
It’s usually done with a needle from a good nozzle cleaning kit.
A good nozzle cleaning kit that you can get from Amazon for a great price is the MIKA3D Nozzle Cleaning Tool Kit. It’s a 27-piece kit with plenty of needles, and two type of precise tweezers for your nozzle cleaning worries.
When a product has great ratings on Amazon, it’s always good news, so I would definitely go with it. You have a 100% satisfaction guarantee and quick response times if ever needed.
After heating up your material, using a high-quality needle works wonders.
What this does it heat up any built-up material, dust and dirt within the nozzle then push it out straight through the nozzle. You are likely to get a build up of dirt if you are printing with many materials which have different printing temperatures.
If you print with ABS and some filament gets left inside the nozzle then you switch to PLA, that leftover filament is going to have a hard time being pushed out at lower temperatures.
How to Clean Outside of 3D Printer Nozzle
Method 1
You can simply use a paper towel or napkin to clean the nozzle when it has cooled down. This should usually do the trick to clean the outside of your nozzle.
Method 2
If you have larger, stubborn residue on the outside of your 3D printer nozzle, I would recommend heating your nozzle up to around 200°C, then using needle nose pliers to pick the plastic off.
3D Printer Nozzle Cleaning Brush
For rigorous cleaning of your nozzle, I would suggest you buy a good quality cooper wire toothbrush, which will help you get all the dust particles and other residues from the nozzle.
But remember, always heat the nozzle before using the brush to get it to the temperature where it was in its last printing session.
A solid nozzle cleaning brush from Amazon is the BCZAMD Copper Wire Toothbrush, specially made for 3D printer nozzles.
You can use the tool even if the wires get deformed. The best thing about this tool is that it is very handy, and you can easily hold the brush while cleaning the surface and sides of the nozzles.
Best 3D Printer Cleaning Filament
NovaMaker Cleaning Filament
One of the better cleaning filaments out there is the NovaMaker 3D Printer Cleaning Filament, which comes vacuum-sealed with desiccant to keep it in optimal conditions. It does an amazing job cleaning out your 3D printer.
You get 0.1KG (0.22lbs) of cleaning filament. It has excellent heat stability, allowing it to have a wide range of cleaning abilities. It goes anywhere from 150-260°C without giving you issues.
The slight viscosity of this cleaning filament means you can take easily take residual material out of the nozzle without it jamming inside.
Using cleaning needles alongside this is a great solution to prevent your nozzle clogging while transitioning between lower and higher temperature materials.
It is recommended to use the cleaning filament at least every 3 months for regular maintenance and unclogging procedures.
eSun Cleaning Filament
You can use the eSUN 3D 2.85mm Printer Cleaning Filament, which has a size of 3mm and gets easily inside the nozzle.
The good thing about it is that it possesses a certain level of adhesive quality, which clears out everything and will not clog the extruder during cleaning. You can use it for cleaning the nozzle and extruder both before and after the printing.
It has a wide cleaning range of almost 150 to 260 degrees Celsius that allows you to take up the temperature to a good level to let the particles inside the printer soften up for the removal.
How to Use 3D Printer Cleaning Filament
Cleaning filament can be used in your 3D printer to do cold and hot pulls which are popular methods widely used by 3D printer users.
A hot pull is perfect for getting those large carbonized materials out of your nozzle when there is a serious blockage. A cold pull is where you remove the remaining smaller residue so that your nozzle is completely cleaned up.
To use your 3D printer cleaning filament, load the filament as you usually would into your 3D printer until it has replaced your old filament and actually extrudes from the nozzle.
Change the extruder temperature to make sure it stays hot, for a temperature between 200-230°C. Then extrude a few centimeters of filament, wait, then extrude more a few times.
After this, you can remove the cleaning filament, load up the filament you want to print with, then make sure the cleaning filament is completely displaced after starting your next print.
This filament can be used to clean the printers print core by applying hot and cold pulls. Hot pulls are used to get the biggest parts of carbonized material out of the print core and are highly recommended when the print core is clogged.
With a cold pull, the remaining small particles will be removed, ensuring the print core is completely clean.
How to Clean a Hotend Tip Covered in PLA or ABS?
You can use a failed ABS print, push it onto the tip and push it straight up. But first, you have to heat the hotend to almost 240°C, and then when you have applied the failed ABS print, let the hotend cool down for a minute.
After this, pull or twist off the piece of ABS, and you will get a clean hotend.
If you are having trouble with cleaning the hotend covered in PLA, you can follow this procedure, which I am going to explain.
You have to first heat the hotend to a temperature of 70°C, and then you need to grab the PLA from any side with a pair of tweezers, or you can use pliers but carefully.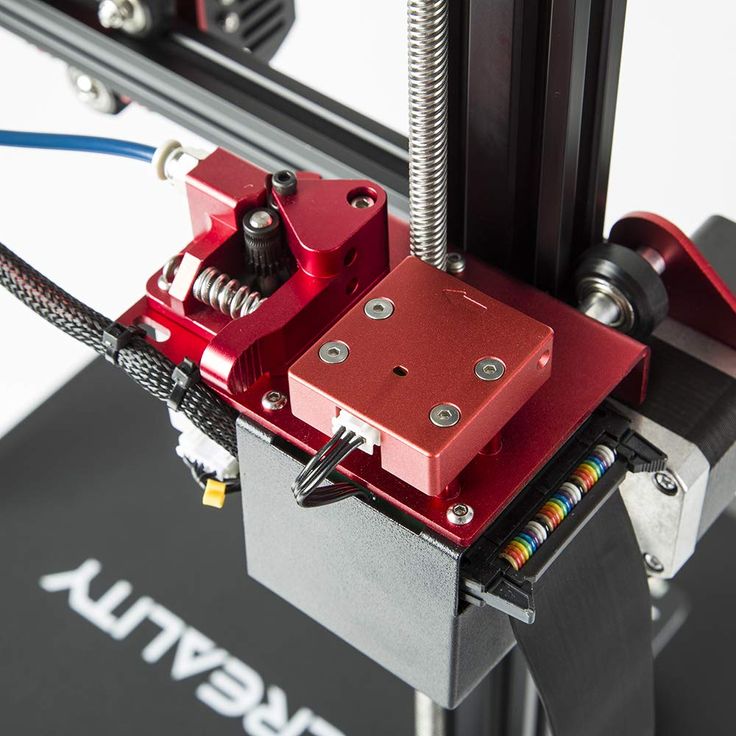
The best thing about PLA is that it gets soft on high temperature and makes it easy to be pulled off, leaving the hotend clean.
Cleaning an Ender 3 Nozzle Properly
Method 1
Cleaning Ender 3 nozzle would require you to open up its fan shroud and remove it from its place to get a more clear view of the nozzle. Then, you can use an acupuncture needle to break the particles which are stuck in the nozzle.
This would help you to make the particle break into small pieces. Then you can use a filament from the top size of the nozzle from the extruder part and enter it from there until it comes out with all those particles.
Method 2
You can also remove the nozzle completely from the printer and then clean it by heating it at a high temperature with a hotgun to let the particles soften up and then use a filament, let it stay inside for a while and then do a cold pull.
Keep doing this cold pull until the filament starts coming out clean.
How Often Should I Clean My 3D Printer Nozzle?
You should clean your nozzle as and when it gets fairly dirty or at least every 3 months for regular maintenance. If you don’t clean your nozzle too often, it’s not the end of the world, but it does help to give your nozzle more life and durability.
I’m sure there are plenty of people who rarely clean their nozzles and things are still working fine.
It depends on how often you print with your 3D printer, what nozzle material you have, what 3D printer materials you are printing with, and your other maintenance.
Brass nozzles can last a very long time if you exclusively print with PLA at low temperatures and have your bed leveling methods perfect.
How to clean the nozzle of a 3d printer: clean the extruder from plastic
The extruder nozzle is one of the most problematic parts in a 3D printer. It can easily get clogged or clogged. Poor plastic feed will affect the quality of the finished model. Print defects will occur. Sometimes the job is completely stuck as the printer needs a nozzle cleaning.
Main Causes of Clogged Extruder
Regardless of the type of print head, it can become clogged. The reason for this is the filament or dirt that accumulates inside the knot. Most often, the nozzle becomes clogged when the printer is not used correctly in conditions:
- Overload, when the device works for a long time without stopping.
- In dusty areas. Sometimes the printing device is placed in a non-residential room or workshop, where cleaning is very rarely carried out.
- Incorrect print settings. In particular, the use of an inappropriate filament or an erroneously set melting point.
In some cases, the design of the nozzle itself can cause frequent clogging. For example, when the printer comes with an initially defective extruder. The geometry of the nozzle is broken. The device should be returned under warranty or the nozzle should be replaced separately.
Information! The filament itself can be the cause of litter. A common factory defect or a burr on the plastic can cause a cork.
Pieces of sintered filament
In any case, it is worth carefully studying the problem of blockage and only then proceed to prevention. If you are afraid to damage the device, it is better to take the printer to a service center.
Dust and debris trapped in the nozzle
The first cause is dirt or dust that has entered from outside. Most often, the nozzle becomes clogged with debris for a long time. Dirt can accumulate for months and even years. It sinters on the walls of the nozzle, plaque is formed. Over time, it can cause the filament to get stuck.
Extruder temperature too high
Beginner 3D makers find that an excessively high melt temperature will help avoid clogging problems. This is an incorrect judgment. When working at an elevated temperature, the plastic is instantly sintered right inside the assembly. Filament jamming occurs. A bottleneck is formed.
Therefore, it is important to follow the temperature regime recommended by the filament manufacturer. Sometimes this figure may differ slightly. Somewhere at +/- 5 ° С. It all depends on the printer model, as well as the extruder itself. The optimum melting point is found experimentally.
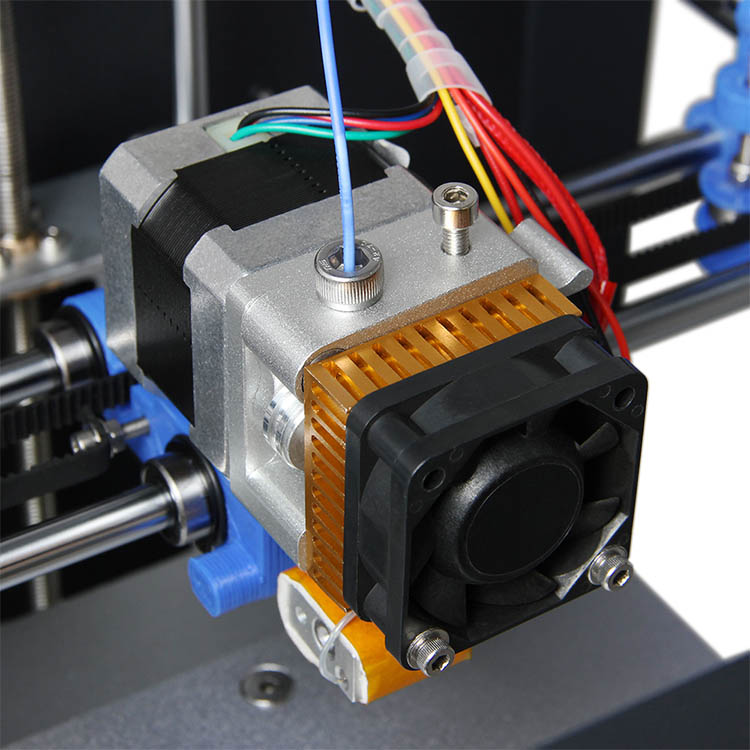
How to clean the 3D printer extruder: step-by-step instructions
You can clean the printer yourself, without going to a specialized workshop. There are several working methods by which you can clean the nozzle. Let's consider each of them step by step.
Clogged extruder nozzle
Manual
The roughest way to clean the extruder. Thin objects are used for it:
- drill with a diameter of up to 0.
 35 mm;
 - guitar string up to 0.33 mm in diameter;
- leg from a diode or transistor.
Special nozzle cleaning tool for different diameters
Cleaning algorithm:
- Shut off the 3D printer. Wait until the nozzle cools down a bit.
- Remove filament residue from nozzle tip.
- Drill or chisel the hole slowly with the tools indicated. Be careful not to make a hole too deep.
- Turn on the printer, feed the plastic to print.
- Repeat the procedure several times until the filament comes out in an even layer.
Some experts advise you to clean the nozzle while the printer is on. This can be done if the primary rubbish has been eliminated.
Attention! Do not use a screwdriver or drill! So you can miscalculate the force and go through the extruder, damaging the plastic capture mechanism. It is better to use a thin drill clamped in pliers.
Cleaning with a thin tool
Thinner
Sometimes mechanical cleaning is only partially helpful. With a drill, you can remove the cause of the blockage, but there are still plaques or influxes of plastic inside the nozzle. This situation is often encountered when working with ABS. To remove the filament completely, you will need to clean the nozzle in an aggressive environment. For example, in acetone or dichloroethane.
Cleaning algorithm:
- Turn off the printer, let the extruder cool down a bit.
- Unscrew the nozzle, put it in a container with acetone or dichloroethane.
- Leave the part for 2-3 hours, then remove and clean the nozzle with a needle.
Screw the nozzle onto the print head. Throw out the plastic.
Important! Spare nozzles can be stored in a jar of acetone. In this way, they will always be ready for use without pre-cleaning.
Filament
Filament cleaning is one of the safest methods that does not involve intervention in the design of the extruder or partial disassembly of this unit. Two types of plastic are used to clean the nozzle:
- Filament with higher melting point. A reel with refractory plastic is placed in the printer. It literally pushes the cork out of the extruder.
- Cleaning plastic. It is usually sold in the form of short sticks or small coils. Its structure resembles nylon. Cleaning filament is the safest way to remove plugs in an extruder.
We recommend using the latter method as an alternative to manual or dry cleaning.
Carbon deposits on the filament
Prevention of clogging - advice from experts
To keep the extruder and nozzle in good condition, it is worth following a number of rules:
- Use the filament melting temperature specified by the manufacturer.
- Perform regular printer maintenance. You can unscrew the nozzle once a week and leave it in a jar of acetone overnight. If the print device works almost every day, it is worth increasing the number of preventive cleanings to 2-3 times a week.
- Clean the area where the printer is located. Do a wet cleaning at least once a week.
The main thing is not to delay cleaning if the printer suddenly stops working.
Nozzle cleaning is an important and necessary procedure. It is carried out in critical cases, as well as in the form of prevention. The cleaning method depends on the availability of improvised tools or chemical cleaners. It is best to buy a few cleaning filament sticks so that the printer is ready for use in just a few minutes after removing the cork.
- March 14, 2021
- 4326
Get expert advice
How to clear a clogged extruder nozzle
A clogged extruder nozzle is a problem that inevitably needs to be addressed immediately, and this article will help you diagnose it correctly, as well as solve it in the simplest and easiest way.
Drill set for cleaning the extruder nozzle in case of blockages.
Unlike many other problems that arise during 3D printing, nozzle clogging negatively affects not only the quality of the print result, but, more often than not, the ability to print at all. Let's take a look at the main causes of a clogged extruder nozzle, and how you can quickly and easily fix this situation.
- 1 Clog causes
- 1.1 Extruder temperature too high
- 1.2 Dust and debris in extruder nozzle
- 2 Step-by-step solution to this problem
- 3 Expert comments (Mikhail Shchekochikhin)
Causes of clogging
Extruder temperature too high
When using PLA plastic, the optimal extrusion temperature can be between 160 and 220 degrees Celsius. Trying to print at too low a temperature will most likely result in no extrusion at all, but the reverse can become more problematic.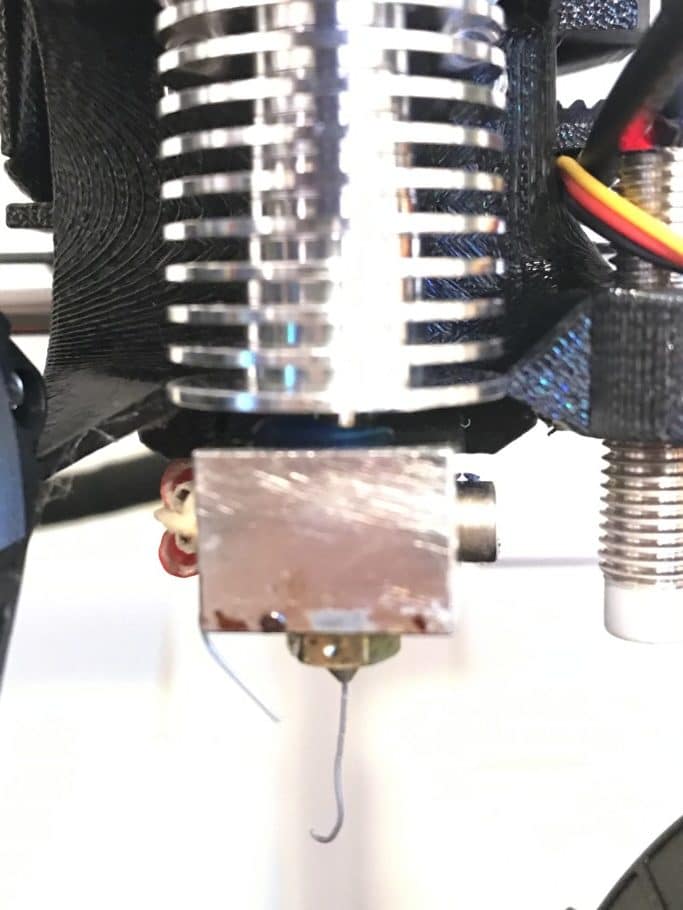 In fact, if you are trying to print at too high a temperature for a given material, your filament may simply vitrify right in the extruder and thus clog it.
Vitrify - turn into a glass or vitreous substance, especially when exposed to high temperatures
Vitrification is a process that causes PLA or other plastics to become extremely hard and clog the nozzle.
The same is true for ABS, nylon, PVA and other plastics.
Dust and debris caught in the extruder nozzle
This often happens after a few jobs, as dust and other debris enter the nozzle along with the filament. Accumulating, they begin to clog the extruder nozzle. This debris can stick to the inside walls of your extruder and obstruct the flow of plastic, eventually clogging the nozzle.
Step-by-step solution to this problem
Cleaning the nozzle with a fine drill.
This problem is fairly easy to solve, but requires the right tools.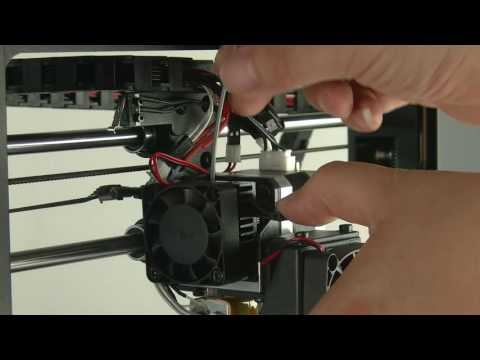
You will need a small <0.35mm drill bit or something else that can serve as a drill but is thin enough to fit into your extruder hole.
It is very convenient to use a 0.33mm thick guitar string for this purpose, which can be easily found in any musical instrument store.
Another alternative is to use resistor or LED legs, as they are thin enough to fit through the hole in the extruder nozzle.
- Remove any remaining filament from the extruder.
- Heat the extruder to the optimum temperature for the material.
- Insert a small drill bit into the nozzle opening and clean it of debris by turning the bit slightly (be careful not to break it!).
Now you can print again!
Comments of specialists (Mikhail Shchekochikhin)
The advice is necessary, but technologically incorrect.
The procedure is as follows:
- stop extruder
- clean the heated nozzle, preferably with special drill
- start the extruder so that the melt flushes the nozzle
- repeat this several times.

Learn more