Hacer scanner 3d casero
Cómo construir un escáner 3d casero.
Habéis leído bien. Existe la posibilidad de hacerse un escáner 3d casero. Con esta entrada inauguro una serie de post sobre cómo hacerte tu propio escáner 3d. Si no sabes lo que es un escáner 3d puede ver este post, en el que explico en qué consiste.
Existen diferentes formas de hacerse uno y a lo largo de varias entradas intentaré explicaros como hacéroslo.
Para ir entrando en materia, el escáner 3d casero puede ser de dos tipos atendiendo a la forma de adquisición de los datos: de luz estructurada o láser. Vamos a empezar por ver cómo montarnos uno láser ya que su coste es relativamente bajo.
Para hacernos un escáner 3d casero láser necesitamos: Un PC, una webcam, un láser, un panel de calibración, un software e iluminación controlada.
Webcam: Lo ideal es que sea de alta resolución como por ejemplo esta, pero para empezar a trastear vale con cualquiera que puedas tener en casa. Cuando cojas un poco de soltura puedes utilizar una de alta definición para conseguir mejores resultados. Es importante que tenga un trípode o algo para poder sujetarla y que la mantenga estable. Ya que una vez calibrada no vamos a poder moverla.
Láser: Pasa igual que con la webcam, si quieres obtener resultados lo suyo es que te compres un buen laser de línea horizontal. Puede ser con batería incluida o alimentado por cable y que se pueda ajustar el grosor de línea. Aunque también vale un nivel láser que puedas tener en tu casa.
Panel de Calibración: Es el tercer elemento que vas a necesitar para montarte el escáner 3d casero. Consiste en unos paneles, que se fijan a 90º y que contienen una serie de marcadores.
Puedes hacértelos tu con unos contrachapados y pegando encima la hoja con los marcadores impresos. Muy importante que el panel de calibración tenga 90º.
Podéis descargar la hoja de marcadores para diferentes medidas de panel de calibración desde este post o si os descargáis el software del punto siguiente, viene incluido los tamaños más generales.
PC: Con el que tenéis en casa os vale apara empezar.
Software: Para poder usar nuestro escáner 3d casero necesitamos un software. Uno que está muy bien y preparado para usarlo con diferentes webcams es el Software David 4. Pertenece a la empresa David 3d Scanner. Podéis Descargarlo desde aquí. Una vez instalado podéis usar todo el programa, la única pega es que, sin licencia, no os dejara exportar los escaneados que hagáis en alta resolución. Lo bueno que tiene, es que la licencia, no es cara en comparación con otros softwares de este estilo.
MODO DE USO
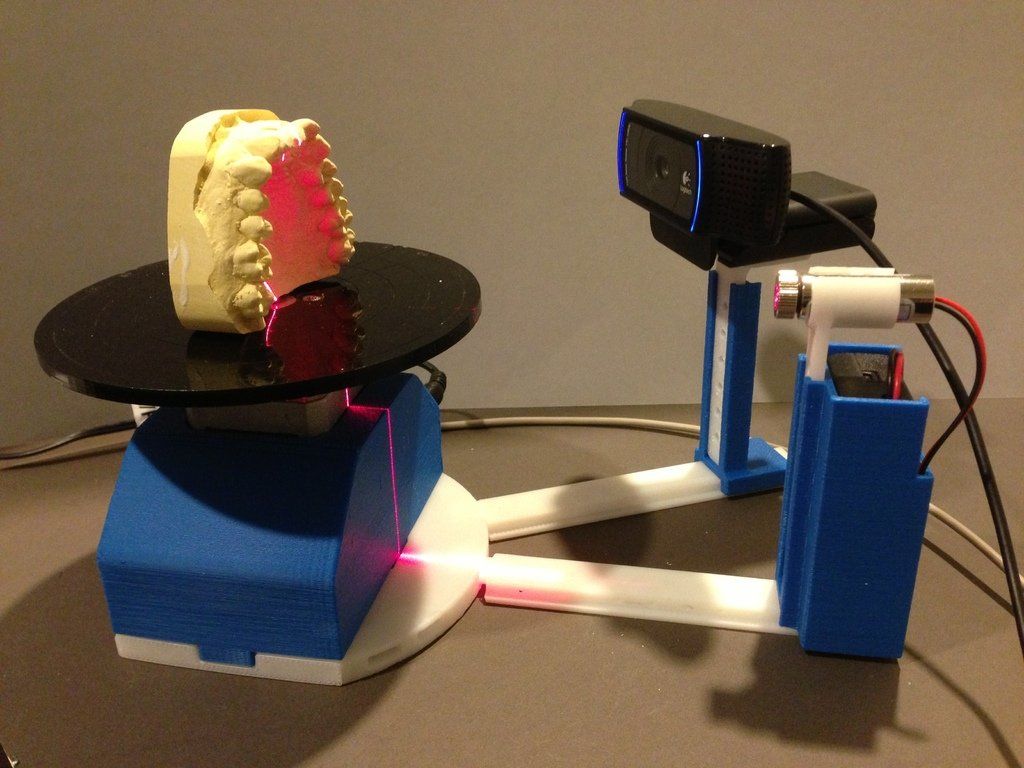
Deberemos tener lo que yo llamo “la zona de escaneado”. Debe ser un sitio, a poder ser oscuro, en el que podamos controlar de alguna manera la iluminación. Tiene que tener espacio suficiente para poder colocar el panel de calibración, la pieza a escáner y la webcam con su suporte. Hay que tener en cuenta que la webcam debe ser capaz de tener en su campo de visión todo el objeto. Con lo que para objetos pequeños deberá estar cerca, pero para uno grande tendrá que estar más separada. Un poco apartado de todo ello tendremos que tener el ordenador.
El espacio es importante porque si vamos a escanear un objeto girándolo 360º deberemos estar rotando la pieza después de cada escaneado, con lo que tendremos que acceder a ella y girarla manualmente sin mover la webcam ni los paneles de calibración. Para ello, ayuda tener una base giratoria.
Un hándicap que tiene este modo de hacerte un escáner 3d casero, es que es manual. Esto quiere decir que tendrás que sujetar con tu mano el láser y moverlo arriba y abajo y viceversa durante varias pasadas. Esto tiene sus inconvenientes pues se necesita mucha práctica para poder conseguir escaneados buenos. Pero no os asustéis, existe la posibilidad de motorizar el escáner, pero lo veremos en otras entradas.
Os recomiendo que empecéis por escanear cosas de un tamaño medio. Más o menos de unos 15 cm. Y si veis que se os da bien continuéis con objetos más grandes y más pequeños.
No os desaniméis cuando veáis que vuestros primeros escaneados son malos. Porque van a serlo. Conseguir una buena técnica de escaneado con este sistema se consigue a base de muchas horas y muchas pruebas. Como he dicho anteriormente la iluminación es muy importante, pero también lo es el material del objeto y su textura. No es lo mismo escanear un objeto de madera que una porcelana. Evitar los objetos brillantes y que produzcan reflejos.
De momento hoy llego hasta aquí. Os dejo un tiempo para que os hagáis con una webcam, un láser y os fabriquéis un panel de calibración. La próxima entrada os enseñaré a como configurar el programa David 4 para que podáis empezar a escanear. Es bastante sencillo, por si alguien no puede esperar y se quiere poner a probar.
¡A escanear amigos!
La imagen del panel de calibración casero la he cogido de aquí
Escaner 3D casero ¿Cómo hacer uno?
En estos momentos la tecnología 3D nos invade por doquier, específicamente las impresoras 3D se han llevado el protagonismo, dado las utilidades de alto impacto que pueden tener. No obstante, una herramienta que sería el complemento ideal para dichos equipos, vendría a ser el escáner 3D. Pues mientras la impresora trae al mundo real objetos contenidos en nuestras computadoras, este equipo lleva al mundo digital las cosas reales.
Esta tecnología hasta hace muy poco resultaba inaccesible para el común de la población. Se relegaba su uso a las grandes industrias o investigadores. Sin embargo, esto ha cambiado de hace un tiempo hasta ahora. Para aquellos amantes de la electrónica, no le es imposible hacer su propio escáner casero. Acompáñenos a descubrir cómo lograrlo.
¿Qué es un escáner 3D?
Vamos primero a ubicarnos en el contexto, este es un dispositivo que reúne datos geométricos de un objeto o superficie que se encuentren dentro de su campo de visión. En algunos casos, incluso pueden obtener la información correspondiente al color de la cosa. Dicho de otro modo, gracias a esta herramienta podemos documentar una realidad física con detalle, precisión y rapidez.
Este dispositivo genera lo que se conoce como nube de puntos, que son los que contienen la información sobre la magnitud y posicionamiento de cada elemento del objeto, mediante pequeños puntos. De esta forma, se podrán construir modelos digitales, fieles a los existentes en nuestra realidad.
En la mayoría de los casos, se requerirá de muchas tomas desde diferentes ángulos para poder obtener toda la información de lo que pretendemos escanear. Luego deberemos integrar las tomas para poder conseguir el modelo completo.
¿Cómo funciona un escáner 3D?
Lo primero que podemos decir es que el proceso es bastante rápido. A grandes rasgos y de forma sencilla podemos explicar el funcionamiento de este instrumento de la siguiente manera:
El equipo calcula la distancia existente entre él y un punto del objeto, esto mediante la proyección de un láser. Mientras tanto, la cámara detecta la luz que a través de triangulación va generando diversos puntos con las distancias existentes entre ellos.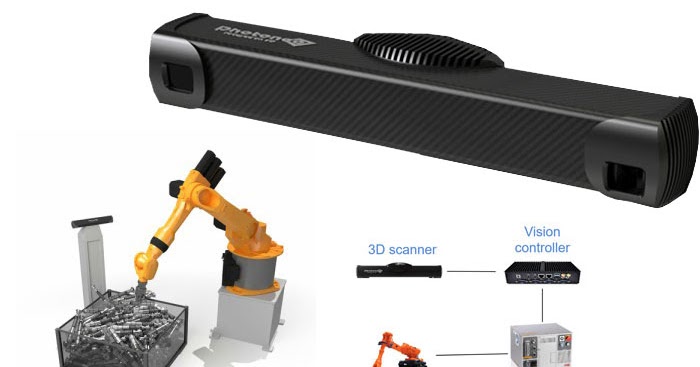 Se produce la nube de puntos, con toda la información. La cual debe ser procesada en algún software para guardar el modelo digital tridimensional.
Otros artículos que te pueden ser útiles:
- Tipos de publicidad que existen en la actualidad.
- Zootropo 3d ¿Qué es y dónde comprar uno?
- ¿Qué es full frame? Ventajas e inconvenientes que puedes leer en este artículo.
- Ejemplos de Inteligenica artificial: Una tecnología asombrosa.
¿Cómo Construir un Escáner 3D Casero?
Ahora que sabemos qué es un escáner 3D y conocemos a groso modo cómo funciona, pasemos a descubrir cómo podemos hacer el nuestro en casa. Esta es una gran solución para tener uno dentro de nuestro presupuesto, si lo que queremos es iniciarnos en el uso de esta tecnología o si sólo nos pica la curiosidad.
En este punto vamos a detallar los implementos que se requerirán para elaborar nuestri propio dispositivo 3D casero. Necesitaremos:
Una webcam
Se puede utilizar cualquier cámara con la que contemos en casa. Claro está que si deseamos capturas óptimas, deberemos buscar una con buena resolución. Lo único que sí es estrictamente necesario, es que la cámara tenga un trípode, en su defecto, tendremos que conseguir la forma para que la cámara mantenga una posición fija, una vez calibrada no se puede mover.
El computador
Con nuestro ordenador personal bastará, no hay mayores demandas técnicas que seguir.
Un software
Existen muchos softwares disponibles, es cuestión de elegir e instalar uno. Tomando en consideración que habrán algunos por los que se debe pagar si queremos llegar a exportar lo que escaneemos.
Un panel de calibración
Se trata de paneles con una serie de marcadores. Los mismos, deben fijarse a 90º. Lo podemos hacer con unos contrachapados cubiertos con una hoja blanca con los marcadores impresos. Las hojas las podemos descargar de internet.
La iluminación controlada
No se trata de otra cosa más que el láser.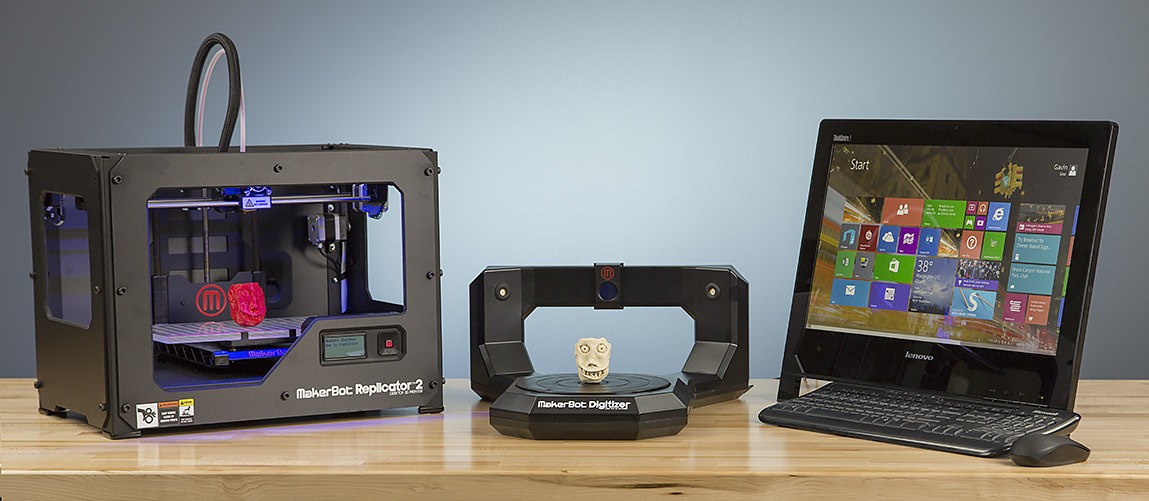 Es ideal tener un láser de línea horizontal de calidad, que permita ajustar el grosor de la línea. Puede ser un láser con batería incluida o con conexión de cable.
Pasos a seguir:
- Lo primero que debemos hacer, será activar el software en nuestro ordenador.
- Luego tendremos que configurar la webcam con el software que hayamos elegido y colocarla en una posición fija (para esto es el trípode).
- Colocaremos el panel de calibración ante la cámara a 90º.
- Colocamos el objeto que deseamos escanear, en una plataforma giratoria, entre el panel de calibración y la cámara. Ésta plataforma no tiene que ser sofisticada, sólo algo que pueda permitir el giro del objeto, aunque sea de forma manual.
- Activaremos la cámara y con el láser por encima de la cámara. Debe apuntar al objeto para que comience a realizar los disparos. Dependiendo de la cosa, haremos varias pruebas con distintos grosores de la línea horizontal, para saber qué tipo de extensión de luz le conviene más.

- Para que todo salga bien, tratemos que la habitación donde vayamos a escanear tenga poca luz o sea oscura y se pueda controlar la iluminación. Debemos ser cuidadosos con la distancia de la cámara. El objeto debe mantenerse en su campo de visión. Si se trata de una cosa pequeña se debe mantener cerca, cuando quieras atreverte con algo más grande, aléjalo.
Almost DIY 3d scanner for home / Sudo Null IT News scanning is out of the question.
But the main plus that I took out from the article is the David-3D scanning program, which really has a good manual in Russian and, importantly, buying a license is the last thing required, since the free version is limited only to saving the scan result. Everything else works in full, which means that it is quite possible to test the program, settings and your hardware as much as you like. And if you don’t need the result with high accuracy, then you can do without buying a license at all. nine0005
I needed accuracy, since the main thing I wanted to scan was miniatures from the Warhammer board game (so that later I could change them as I wanted and print them :)).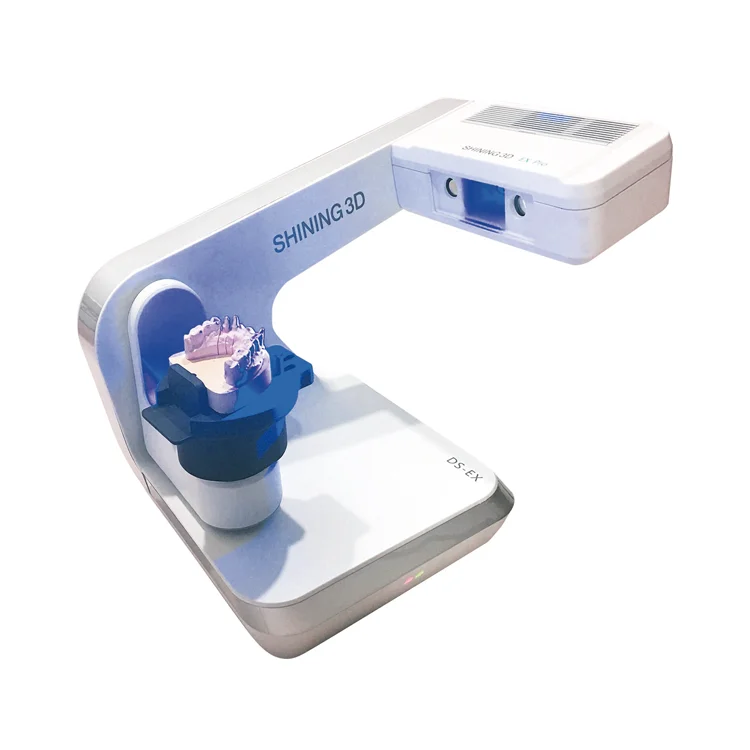 The height of these "soldiers" is only 3 cm, but this does not prevent them from being very detailed.
If you do not need to shoot such small objects, then your equipment requirements will be lower, which means that it will be much easier to assemble a similar scanner for yourself.
The principle of the program, and accordingly scanning, is well described in the article, which was linked above (I think it is not necessary to duplicate this). It is advisable to read that article first, as this one will be in some way its logical continuation. nine0003
But let's start in order. What you need to try 3D scanning at home:
1 - projector.
2 - webcam.
That's all, the short list turned out surprisingly well. However, if you want to get very accurate and high-quality scans, then you will have to modify some things with pens. Of course, you can’t do without additional costs, but in the end it will still cost less than buying any of the commercially available 3D scanners, and the quality of the result can be obtained much better.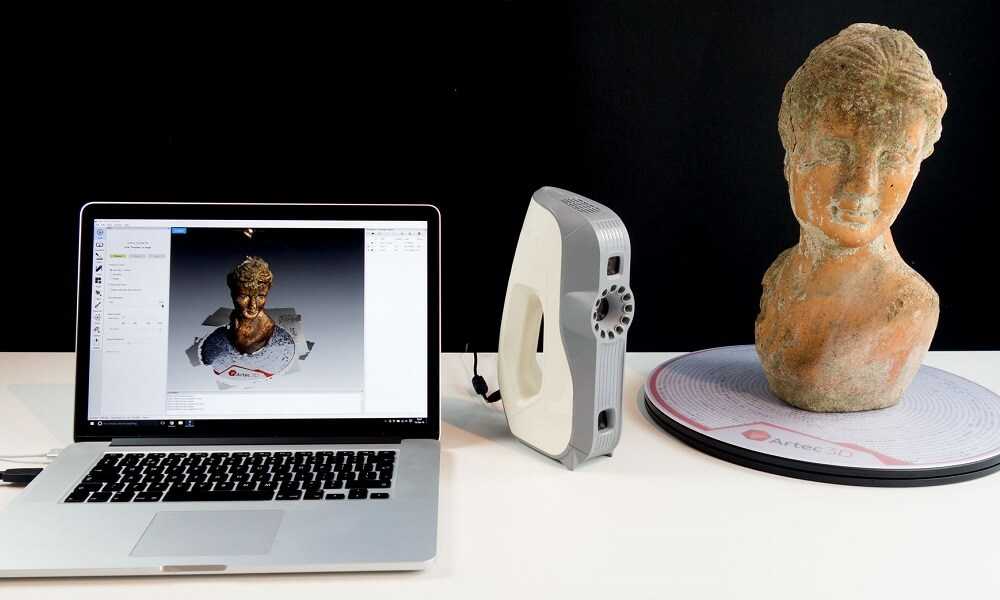 nine0003
Now, in order and in detail.
PROJECTOR.
I, like the author of the previous article, started my first experiments on scanning with a laser pointer, but they immediately showed how inconvenient this method is. There are several disadvantages here at once:
- the impossibility of obtaining a beam with a sufficiently thin line. Moreover, when you turn the pointer, the distance from the lens to the object changes, which means the focus is lost.
- if you need to scan regularly, turn the laser pointer with sufficient accuracy and smoothness by hand is very difficult, and tiringly easy - the hands are not such a stable tool when it comes to a long time. nine0005 - you have to scan in the dark so that only the laser line is visible and nothing more.
And if the second drawback can still be dealt with by creating a special rotary mechanism (although this is already not such an easy task, in any case, this cannot be done in 5 minutes on the knee), then getting rid of the first drawback is more expensive.
When I realized all this, I decided to try scanning with a projector, for which I borrowed some simple model from a friend. nine0003
A small clarification should be made here - in the last article, the author mentioned the possibility of scanning using a projector, although the proposal was, in my opinion, very strange -
A projector with a powerful lamp is suitable, the light of which must be directed through a narrow slit to the object being scanned
This may have been the only option in earlier versions of the program, but in version 3 that I experimented with, the projector was used much better, because there's a feature called Structured Light Scanning (SLS). Unlike laser scanning, the projector immediately projects a grid of vertical and horizontal lines of various thicknesses onto the object, which reduces the scanning time by an order of magnitude and allows you to automatically shoot the color texture of the object.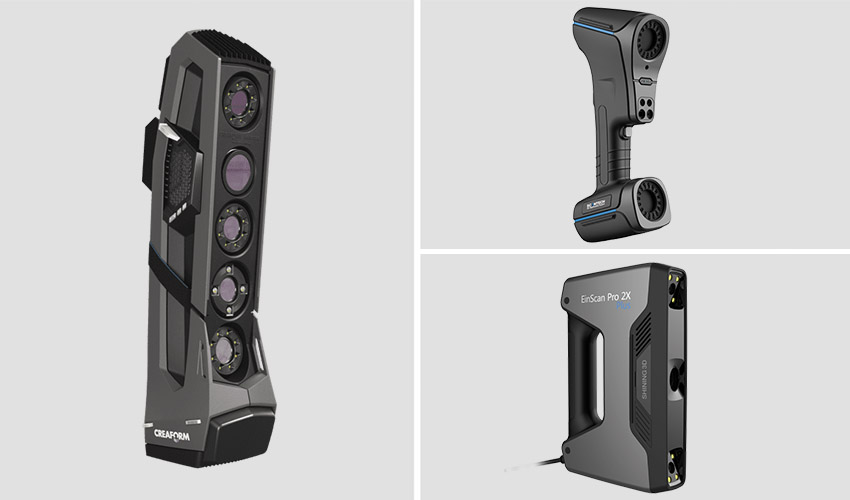 Well, with good focus, a 1 pixel wide line is much thinner than you can get from an inexpensive laser pointer. nine0003
Unfortunately, I didn’t take pictures from those first experiments, and there wasn’t much to take pictures of - the projector is on the table, next to it is a webcam, all of this looks in one direction :) However, even such a simple design showed that this option much better both in terms of scanning speed and quality. Then I decided to buy myself a projector for these purposes.
The criteria for choosing a projector were simple - higher resolution, lower price and dimensions :)
The choice settled on IconBit Tbright x100 - an ultra-compact DLP LED projector, 1080 resolution - at that time it seemed to me that you couldn’t imagine better, but as it turned out later, I was wrong, although while working with it, I got a lot of interesting experience. nine0003
The first problem that occurs when scanning a small object with a projector is that for best results, the size of the projected grid should roughly match the size of the object being scanned. This projector made it possible to obtain the smallest screen diagonal at the closest focus - about 22 cm. Agree that against such a background, a miniature 3 cm high is far from the concept of "approximately equal sizes." The answer was found on the official forum - people in such cases install camera lenses on the projector for macro photography. Given the small size of the projector lens, I opted for marumi lenses with a thread diameter of 34mm. nine0003
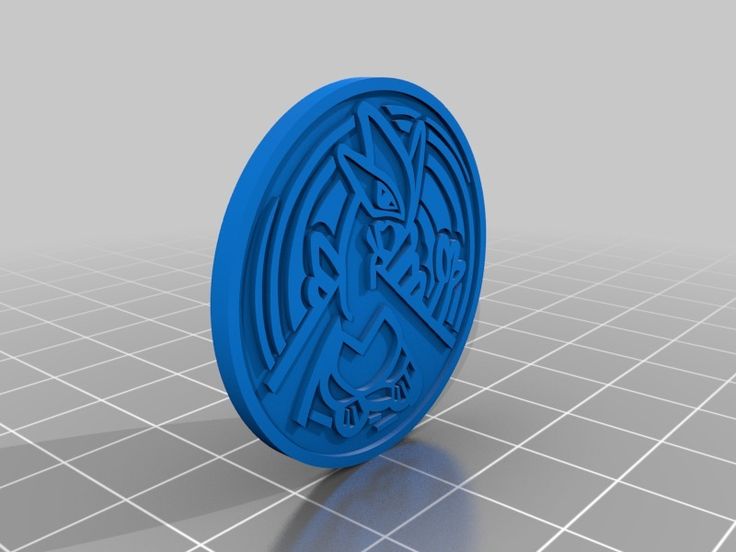
Using two of these kits, I managed to get a projector screen with a diagonal of only about 3 cm. Which turned out to be quite enough to make my first microscan -
This is a single scan, therefore there are “holes” on the model, torn edges and etc. By turning the coin and scanning from different angles, you can get several of these scans, which are subsequently combined into one object (the scanning program itself allows you to correctly combine different scans, stitch them together and save them as a single object). In the process of stitching, the shape of the object is also specified. But saving the results of such stitching is possible only after purchasing a license. nine0003
And now the moment has come for the first thing that is not necessary for scanning, but with it the process is much more convenient - this is a stand for a projector with a camera. The calibration process itself is needed not only for the program to recognize the parameters of the equipment - the software must also calculate the relative position of the camera and the projector. In the course of work, their change is not allowed (as well as changing the focus of the camera), which means that it is necessary to firmly fix all this, because the number of scans can be large even for one object. nine0003
David's main page shows a similar system - it is nothing complicated. Yes, and looking through the forum and seeing how different people organize it for themselves, I realized that nothing complicated is required here.
For these purposes, a stand was taken from a burned-out LCD monitor, and plexiglass from it, cut and glued like this design, as it looked in the first version , which allowed changing the screen diagonal and scanning objects of different sizes. nine0005 It should also be mentioned that scanning with a projector does not require the constant presence of calibration panels in the field of view. After the calibration is done, they can be removed. This allows, having calibrated the installation, to easily transfer it, move it, etc.
That is, you can use a large calibration template to calibrate at home on the walls, and then go outside with this stand and laptop and scan your car, for example. We took a smaller template, put a couple of lenses - and you can scan jewelry. nine0003
Recently, the company has released an improved scanning kit, here the stand looks much more serious and interesting -
2000 euros is not entirely justified, it is not difficult to assemble something like this yourself and much cheaper.
Let's go back to the projector. As it turned out, this projector had one major disadvantage for being used in a scanner, namely its native resolution (854*480). And everything would be fine if it produced the same output, but alas, the picture was converted to standard resolutions (such as 1024 * 768), and as a result, a line one pixel wide was somewhere brighter in different parts of the screen, where - something dimmer, somewhere already and somewhere wider ... All this had a negative effect on the quality of scanning, expressed in the form of ripples and stripes on the resulting model. nine0005 By that time, I was already thinking about buying a projector for a stereolithographic 3D printer (http://geektimes.ru/post/245590/). After considering several options, I settled on the Acer P1500 model, because. it does not need any modifications to be used in a printer (this projector, without any lenses, is able to give a focused image on a screen of about 4 * 7 cm). So, for the scanner, it will fit perfectly.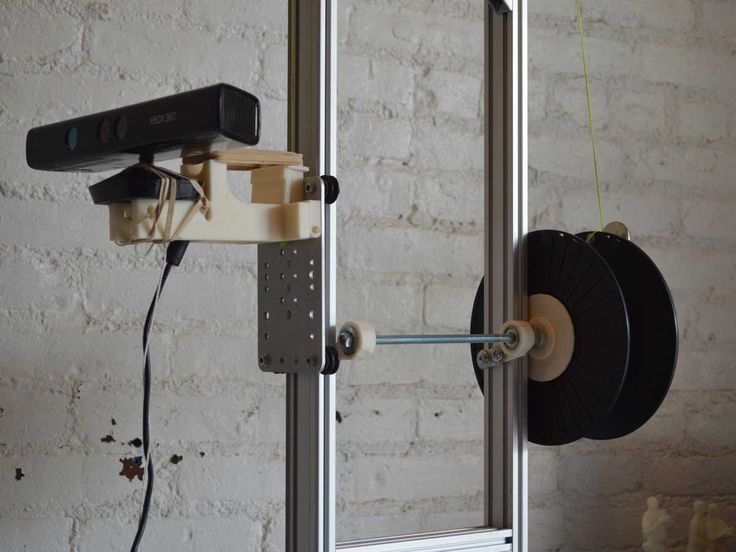 At the same time, the resolution of 1920 * 1080 is real. And so it happened, I still use this projector and am completely satisfied with the results. nine0003
CAMERA.
The criteria for choosing a camera were the same as when choosing a projector. Having gone shopping, I stopped at the Logitech C615. The scan of the coin was made from it, without any modifications. But when I tried to scan the figurine, I ran into a problem called "depth of field". When the object is so small, then in fact we get macro photography, and sharpness with such shooting is achieved only in a small segment, literally just a couple of millimeters (which is why the coin was scanned well - the relief fit perfectly into the sharpness area). It was decided to convert the camera to a different lens. Several different lenses were ordered on Ebay for testing, and a new case was cut out for the camera board. The plan was like this0003
The final result was slightly different
The main idea, I think, is clear.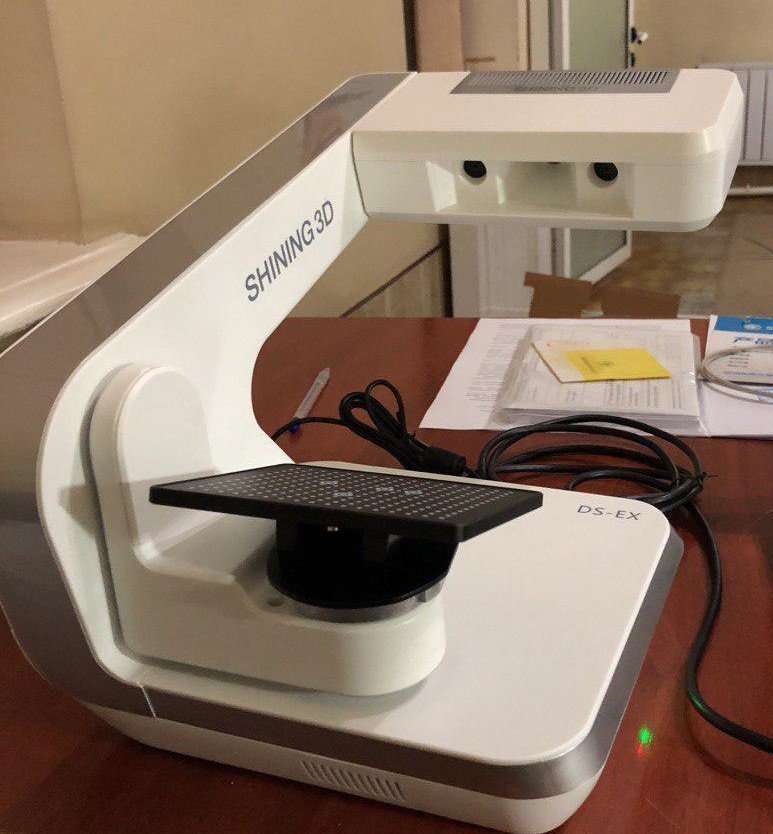 And now, both on Thingiverse and on the forum of the program, you can download stl for printing cases for different types of webcams.
I had to remove the standard lens from the camera board, and as it turned out later, the IR filter was removed along with it, so be careful in this matter. The filter will then come in handy for use with other lenses, although you can buy them separately - the price is cheap. nine0003
Thus, I have formed such a collection of lenses.
While I was waiting for the lenses to arrive, I was reading various photography forums. Studying the issue with depth of field, I found out that you can increase it by closing the lens aperture more. This means that the lens was required one in which it was possible to adjust the aperture (alas, among those ordered, not everyone had such an opportunity, but luckily I got a couple of them). In general, to improve the camera, it is desirable to have a varifocal lens with a zoom and an adjustable aperture.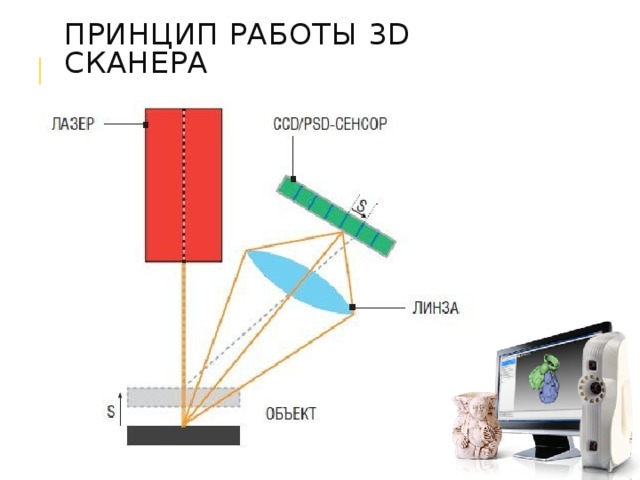 In practice, everything turned out the way it was in theory - closing the aperture, an increase in the depth of field was immediately visible, which made it possible to scan three-dimensional, but small objects. nine0003
The main lens I use is mounted on the camera in the photo above. The second, with an adjustable aperture, is the largest, in the center. I use it for very very small objects. The rest are without a diaphragm, so I don’t use them - it turned out that these two were quite enough.
Now I plan to either find a webcam with a higher resolution (the quality and detail of the scans directly depends on the resolution of the camera), or try to use some digital camera for this purpose with the ability to shoot video - usually you can get a lot more resolution in them, and lenses are better. nine0003
Actually, this could be the end - it seems that he told about everything. I also thought that this was the end of my scanner assembly, but the farther into the forest .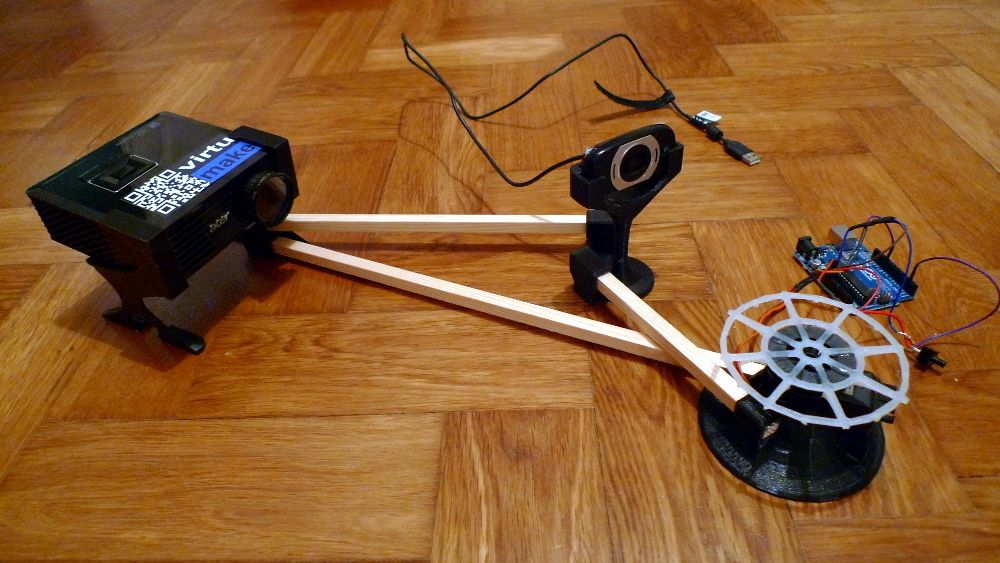 .. While studying the forum of this program, I often came across various schemes of turntables - fortunately, the software allows you to automate the scanning process. After one scan, a command is sent to the com port, the turntable rotates, turning the object by a given number of degrees, and gives a command to the next scan. As a result, with one click of the mouse, we have circular scans of the object - it would seem, what more could you want? I tried this system with interest, but alas, I absolutely did not like this approach, and there are a couple of reasons for this. nine0003
1 – if the object has a complex shape, then simply rotating it will not be enough – you also need to tilt it in different directions so that the camera with the projector reaches all the depressions and other hard-to-reach places.
2 - even if there are no such places, and considering all the scans that were made, there are no parts left on the object that did not fall into the scan, the question of the accuracy of the scan remains.
Let's say that some part of the model on one of the scans came out perfectly. But this does not mean that on all the scans in which this part fell, it also looks perfect, and when stitching scans from different angles, the result will be averaged, which cannot please. The program allows you to slightly edit the received scans (you can cut out the unnecessary part). If we rotate the model by 20 degrees, then after a full rotation we will have 18 scans, the part we need may well be present on half of them, therefore, in order to leave the best result, we will need to remove this piece from 8 scans ... And such pieces with a complex There can be many models, as a result, almost half will be cut off from each scan, which is very laborious and time consuming. nine0003
Instead, it is better to immediately scan adjacent areas after the first scan and check the result. As soon as a piece is ready, we move on to scanning the next one, and so on, until the entire model is in perfect shape.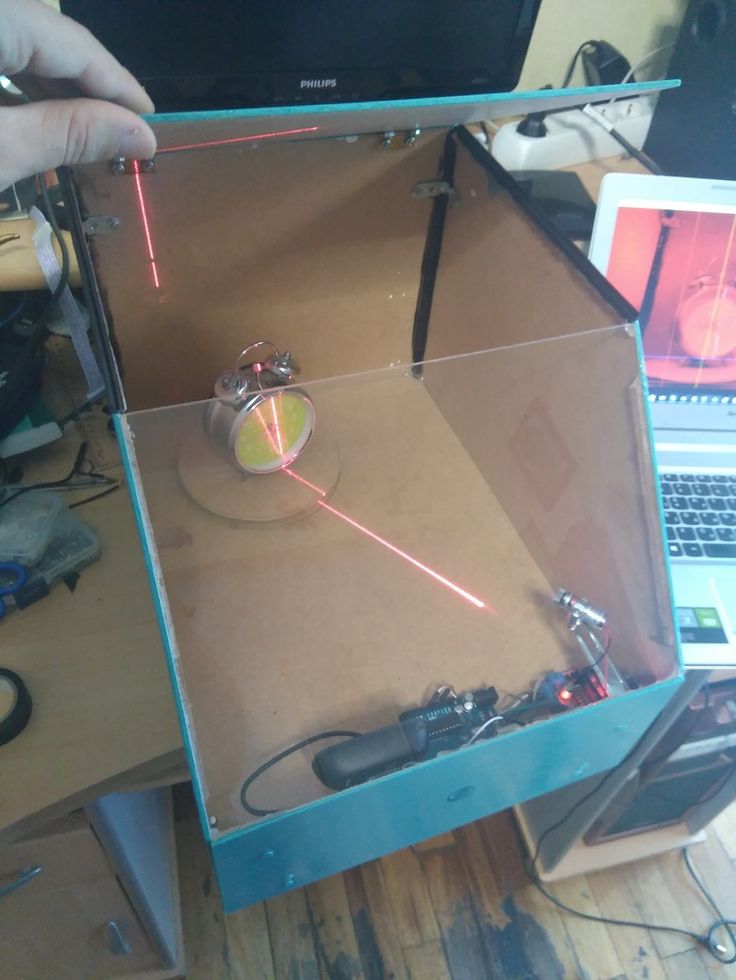 This approach gives the best results in less time.
But the question of convenience arises. Agree, it’s inconvenient to manually try to rotate an object, looking not at it, but at the monitor - in order to control the hit on the lens without changing the distance to the camera and the projector at the same time (so as not to lose focus). With the next similar balancing act, I accidentally touched the camera, which accordingly knocked down the entire calibration, and the whole process had to be started anew. I categorically did not like this alignment, and after some thought I came up with a plan for such a design (which, as you understand, I subsequently assembled). nine0003
This is not a turntable in the usual sense of the term. Thanks to this design, I can not only rotate the model, but also tilt it as I need. In this case, the center of the model remains in the plane of focus, but even if not, you can move the mount with the model back and forth.
All this was assembled on arduino, a small control program was written, and as a result, now I don’t have to get up from the computer when scanning - using the program, I change the position of the object being scanned, and at the same time, right there, in the window cameras I choose the best angle for scanning.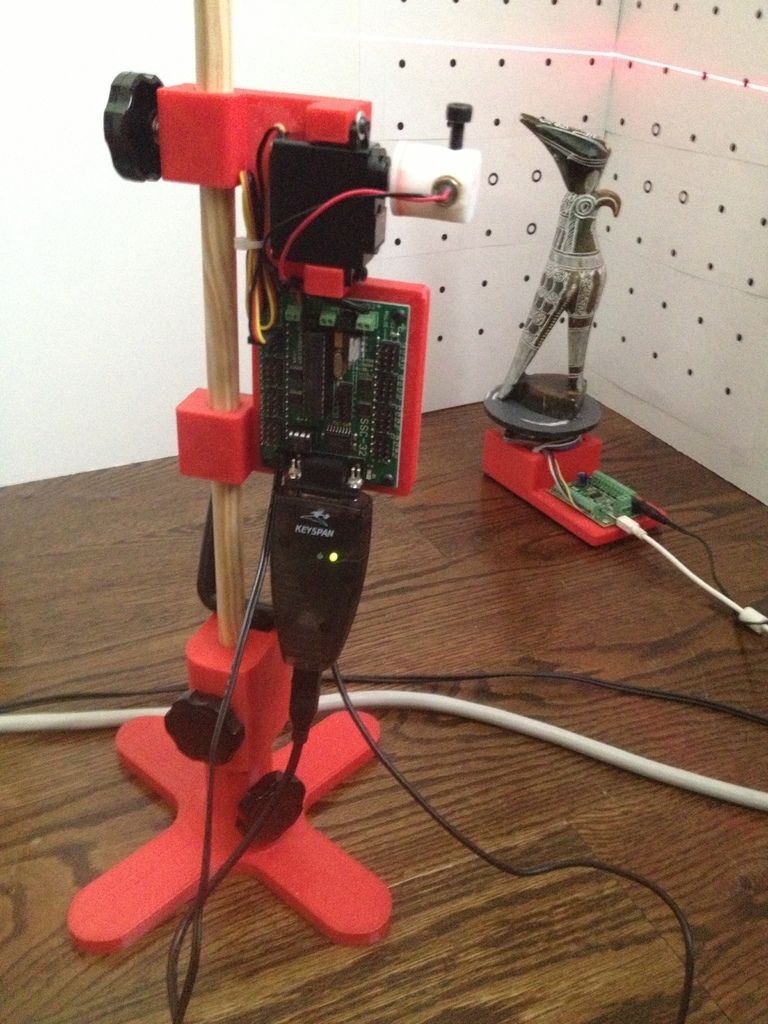 nine0003
Insides
I put the possibility of automatic scanning into the program, as well as scanning not only in a circle, but with inclinations of 45 degrees in one direction and the other, which gives three times more scans. Nevertheless, in the end, I still never use this opportunity - it's too inconvenient to sort through the resulting pile of scans and clean them from unsuccessful pieces.
We should also mention some nuances of scanning.
1 - it is impossible to scan shiny and mirror surfaces. The light from them is reflected, or gives such a glare that the program cannot correctly recognize the line. If there is a need to scan such an object, then such parts will have to be masked with something (washable paint, paper tape, etc.). nine0005 2 - it is more convenient to scan monotonous objects, since when the camera is set to a light color, the projector's brightness is not so high, the exposure is low, etc. And a dark-colored object needs more brightness, so if you have a multi-colored object, then different parts of it require different settings to get the best result. Here, too, it is more convenient to use scanning the object in parts.
3 - if you want to immediately get a color texture, then please note that the settings of the camera and the projector for scanning do not affect the settings for removing the texture (the scan is generally done in black and white mode), so play around with the settings in the texture mode just as you would do in scan mode. nine0003
My scanning process now looks like this:
- Focusing the projector and camera
The projector's light is too bright and the projected grid is not visible in the photo, but here is the view from the camera in the program
- scanner calibration
printed on magnetic paper - so you can very quickly adjust to different sizes of scanned objects. nine0003
Software view
It is recommended that the combined angle between the beam of the projector and the camera be around 20 degrees. Therefore, such a stand is used - when scanning large objects (for example, a person), the camera should be set aside much further from the projector, but here they are close to me.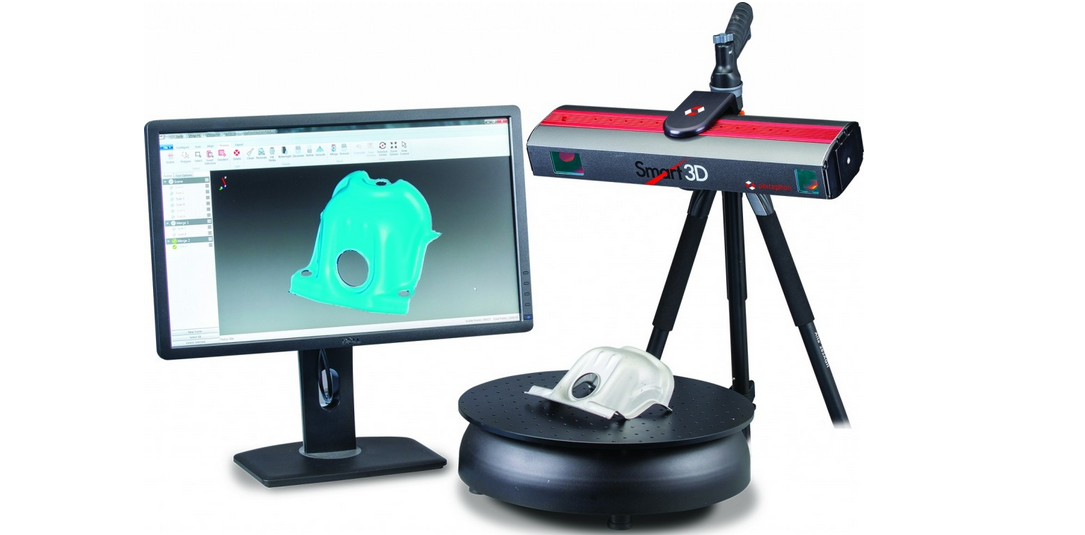 The location of the camera relative to the projector can be only vertical, or only horizontal, depending on the geometry of the object. In this case, the arrangement is diagonal (13 degrees vertically and 36 degrees horizontally). nine0003
Scan results from different angles. These are already cleaned up scans, i.e. all unsuccessful and unnecessary parts (figure stand, mount that got into the frame) parts have been removed.
Combining scans for subsequent merging into one object
Due to the fact that each scan has its own color, it is convenient to control the correct alignment.
Well, after combining the scans from different angles, we get the following models
Miniature of Boromir from Lord of the Rings. nine0005
When scanning a multi-colored object, the result is slightly worse if you don't bother too much. But then you can get an object with a texture right away :) , even fingerprints people scan. And there are even scans of the same miniatures from Warhammer
In conclusion, I would like to say that no matter what hardware you use, no matter what expensive 3D scanner you buy, this is not a panacea for printing anything.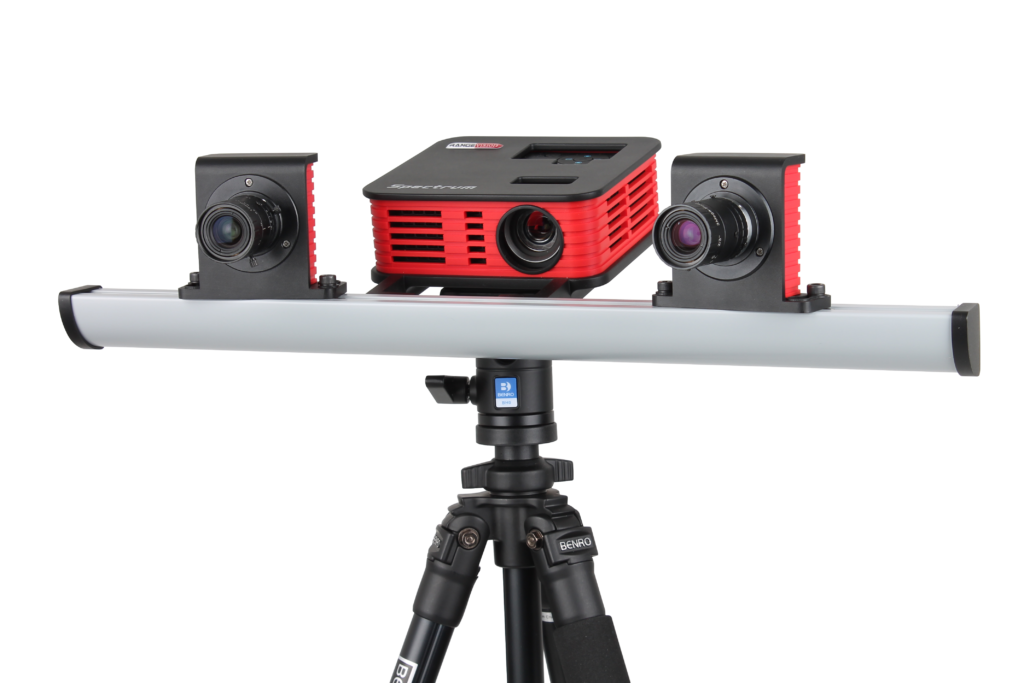 Theoretically, of course, you can send the resulting object to the slicer and print, but there are several reasons why you should not do this, but in any case, you should study 3D graphics packages. nine0003
1 - The resulting scans, with good scan quality (and we want to get the best quality) have a lot of polygons. No, even is VERY a lot. The scan of Boromir after the merger contained more than 8 million polygons - not every slicer will be able to work with such an object.
2 - Any objects bear traces of assembly and manufacture. And if in reality needle files and sandpaper are used to fix this (and sometimes there are still inaccessible places where it is impossible to use tools), then working with a digital copy of an object, we can change it as we like - remove defects, improve detail, etc. . nine0005 3 - As I said at the beginning of the article, when I thought about the scanner, I did not want to print copies of objects, but change them as I please. I am not a sculptor, I do not have the tools, materials and skills to sculpt such a small model.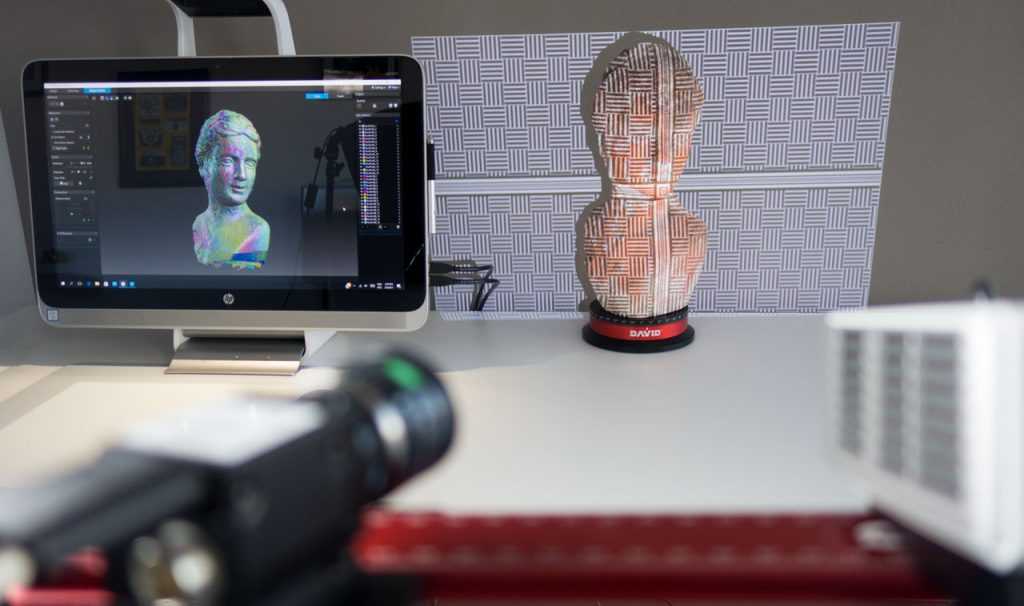 But knowing how to work in 3D, it is much easier for me to scan a similar Boromir and make him some kind of Prince of Denmark.
By the way, this model already contains almost 100 times fewer polygons than the scan result.
How I forged a key using a 3d scanner, holding a skull, a heart and a gun in my hands / Sudo Null IT News0001
Hi Habr!
Once again I visited professionals in the field of 3d printing and 3d scanning.
- Do you have anything interesting?
- That's what we have!
Manual
— Wow, what else?
High-precision industrial optical scanner
— And what do they scan mostly? nine0005 - Teeth and jewelry. There is? Spread it.
- Eh ... and easier? Anything closer to hacking to practical tasks necessary in everyday life?
- Well, you can scan a bent key, straighten it in a 3d editor, and then either print the mold for casting, or immediately recreate it on a metal 3d printer.
- OK, then you just show how the scanning and editing process takes place, and I know how a metal 3d printer works, and I also already made a mold for casting. nine0003
(Caution, many photos)
TTX scanner
Scan method - Phase shifting optical triangulation
Number of cameras - 2
Scan volume - 80x60x60 mm
Camera resolution - 1.4 MP
Accuracy ±0.01 mm
Output data format - STL
google price
Scanning technology
"Phase shifting optical triangulation" patent
en.wikipedia.org/wiki/Structured_light
en.wikipedia.org/wiki/Structured-light_3D_scanner
The principle of creating a 3d-image of a surface from an interference pattern, used in 3d-scanners on structured light.
Scanning process
The key is attached to the platform, thanks to a special "chewing gum".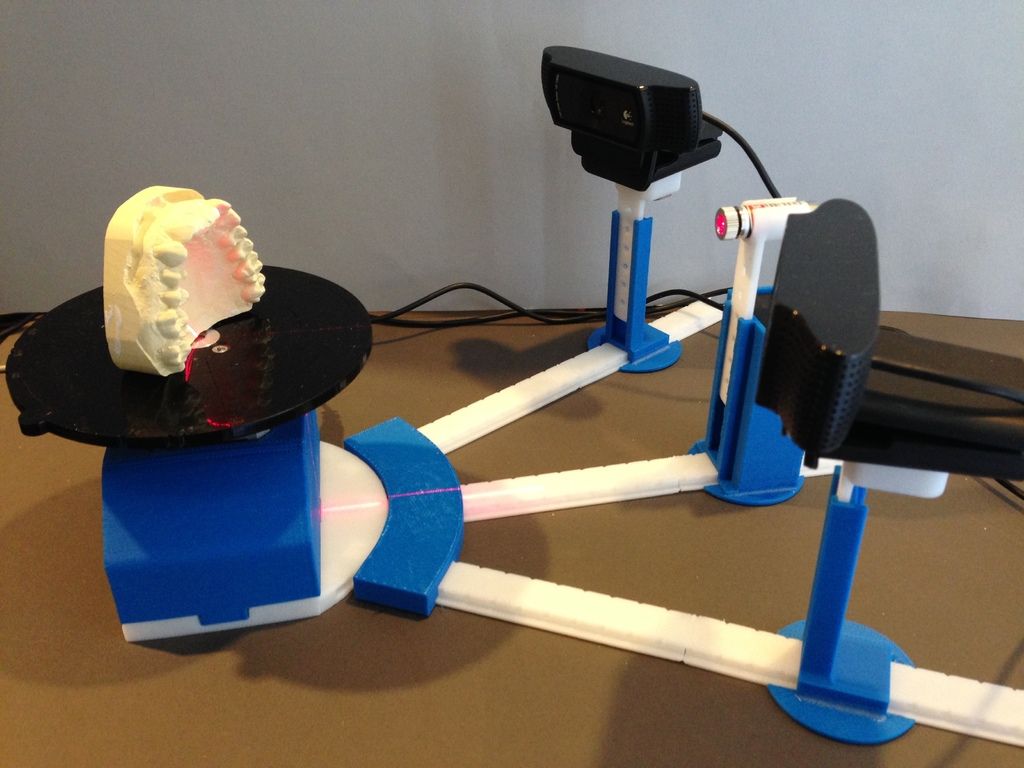
The key is too shiny. First, it must be covered with a matte film.
Talc spray
We place it in the camera for scanning, where it will be twisted and rotated and photographed
The scanned object can move along two axes (oscillation and rotation).
Video of the scanning process.
Scanning takes about 10 minutes, and in parallel the 3d model is developed in the program
Processing in a 3d editor
The platform was removed (but the chewing gum remained)
More serious editor. Allows you to group areas. We clean the model from the "chewing gum".
Almost ready for modification 3d-model.
While the specialist was processing the model in a 3d editor, I looked around and found something interesting
Something else I noticed
Printing based on light-cured acrylate, one of the most accurate technologies
Liberator disassembled
Liberator assembled (75% original size)
the detail is amazing (height of the tree is 2 cm)
Model of the city
Plaster cast
Hand injury splint
It is said to be much more comfortable than classic appliances because it is light and personalized
Skull 1
model was used in a real neurosurgical operation
Skull 2
3d models are created based on x-rays
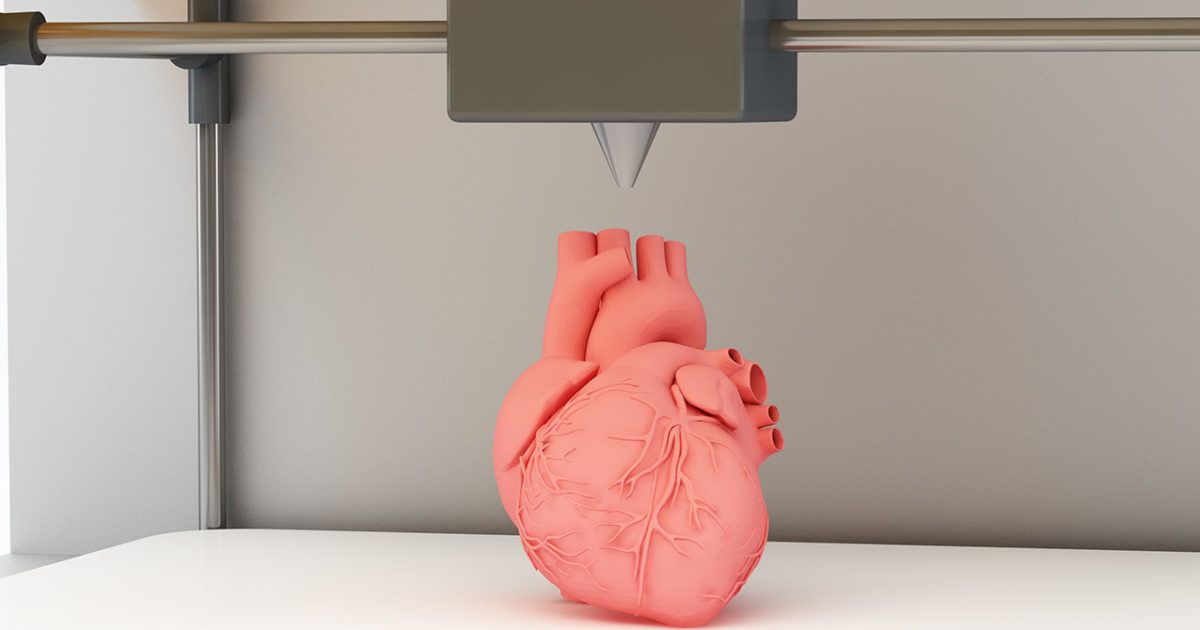
Heart1
Heart2
Not at all like in school anatomy textbooks
Teeth
Dental use of 3d printers and 3d scanners is constantly growing
Micro
Metal 3d printers can produce incredible detail
"See you soon"
P.