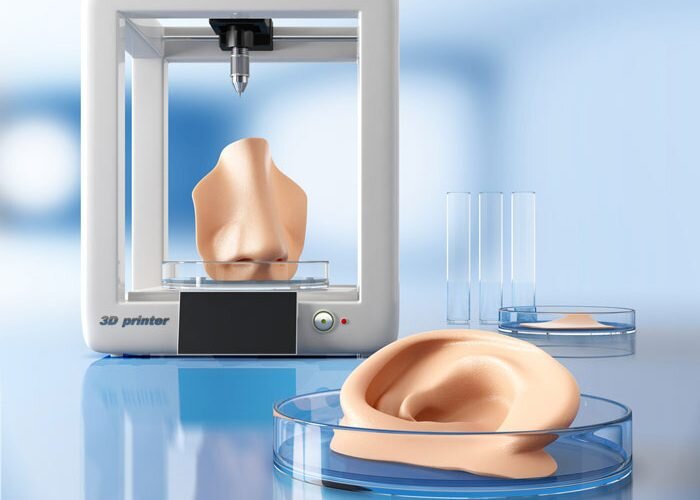
Geetech 3d printer review
Geeetech i3 Pro B User Review; Is it worth getting? – 3D Solved
This article is intended to be a review as complete as possible of the Geeetech i3 Pro B 3d printer, which is one of the most popular printers in the world, given its low cost and the ease of buying it and getting it delivered in any country from its many resellers.
I will go over its assembly process, general characteristics, known issues, print quality, and the pros and cons.
So, without any further ado, let’s get started!
Assembly
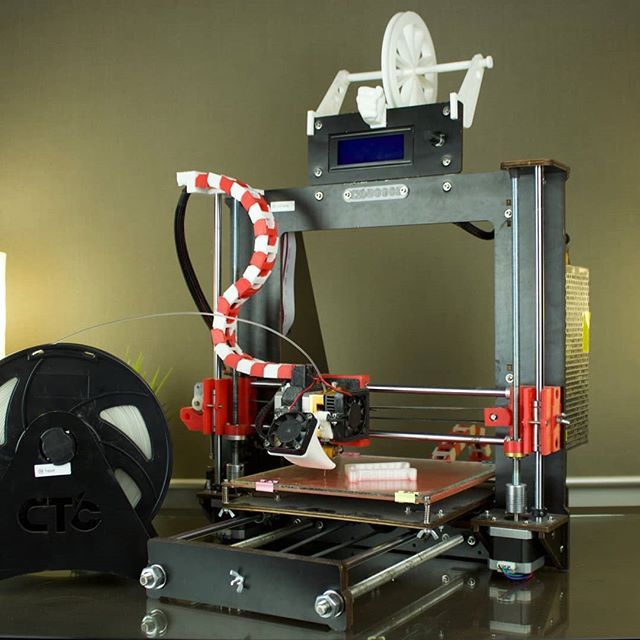
This printer comes in a DIY kit, unlike the Ender3 which comes partially pre-assembled. That means you will have to assemble the entire printer yourself which can be either entertaining or very frustrating, depending on your skills and your desire to learn.
As a first piece of advice, I would say that the i3 Pro B is not the best printer to get started with in the world of 3d printing, although it is inexpensive and can give good results, it is necessary that you master certain aspects related to the mechanics and electronics of a 3d printer before assembling one of them yourself. Otherwise, it is possible to run into simple problems that someone with some basic-level knowledge can quickly figure out, but you can’t.
Before starting, I must clarify that when I bought the Geeetech i3 Pro B I already had some years of experience in the use and assembly of 3d printers. Due to this, I was able to solve many problems during the assembly of the printer that are not clearly explained in the manuals and video that the company provides to guide users.
Having an idea of what I was doing, it still took me more than 10 hours to put all the parts together (in their correct position, by the way…). Perhaps, with the help of a friend I could have done it in half the time, since looking for the necessary piece in the parts list and identifying it sometimes takes more time than the assembly itself.
This is important to keep in mind, especially if you don’t have a large table at home. Do not use the table where you and your family eat, as it will probably take a day or two to finish the assembly and you will get some very disapproving looks.
The printer comes completely disassembled down to the last screw and wrapped in a large cardboard box. You will need a large space to verify that no parts are missing which can be done with the help of the list provided. In case any parts are missing, Geeetech’s after-sales service is very good and will gladly send the missing parts over to you, although this can be somewhat frustrating if you were excited to get started.
You may replace some screws or washers, but a stepper motor or a control board aren’t things you usually have at home (Those will generally not be missing though).
Final assembly, with the addition of a filament guide on top and a 5015 layer fan.On the official Geeetech website you can find the assembly manual, which is very helpful but it is much better to follow the video tutorial available on YouTube. It is normal that you get stuck in some steps, since many pieces are similar or are not perfectly labeled in the assembly manual. Again, take it slow and be VERY patient at this point, as you only need to assembly the printer once.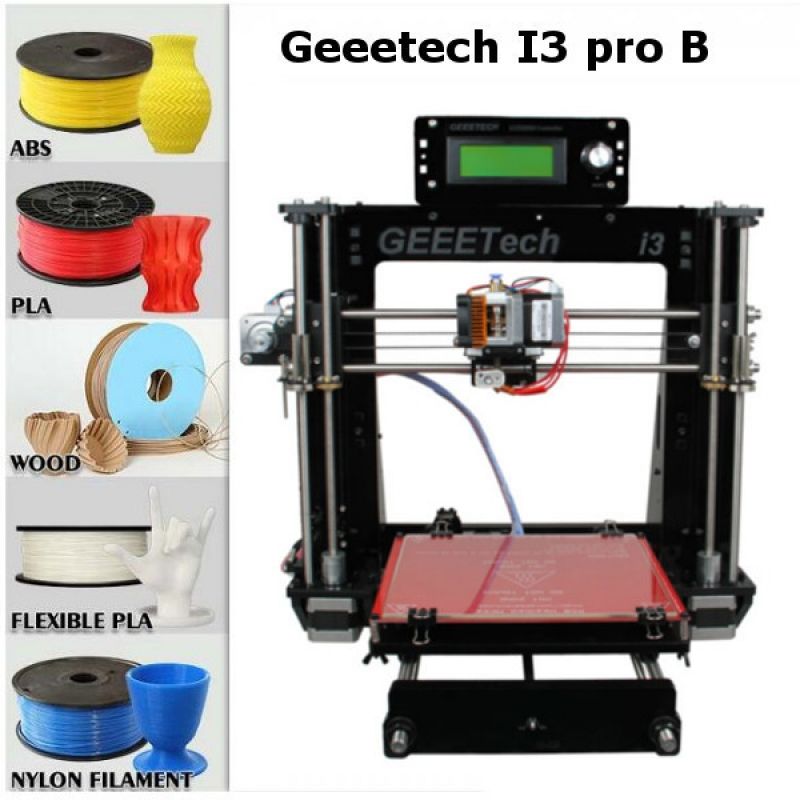
With patience (and a lot of free time), you can have your 3d printer working and won’t need to ever go through the process again. In addition, the complete assembly of this machine will allow you to know in depth each one of its components, which will give you an additional experience that other pre-assembled printers cannot give you.
General characteristics
The i3 Pro B mounts its components on an 8mm thick laser cut acrylic frame held together by heavy duty threaded rods. The dimensional tolerances of its parts are adequate and they tend to generate some friction between them, so it is recommended to use the file provided to wear the joints a little before assembling them. Some users skip this and acrylic tends to break under pressure.
The printer has no printed parts, which is often the weak point of many low-cost Prusa clones. The metal parts are rigid and look very strong.
The X/Y axis belts have their corresponding tensioners, so there is no need to modify the mechanism ever.
The quality of its components is somewhat related to its price: The bearings look low quality and the Z axis brass nuts are a bit loose when mounting. Anyway, once the printer gets assembled it feels stiff. I have a different Prusa i3 clone at home, armed with a steel frame that transmits much more vibrations to its parts than the Geeetech printer.
The control board in this printer is the GT2560, which integrates in a single board all the functionalities of the Arduino Mega + Ramps 1.4 set. The configuration that its firmware brings is adapted to the hardware of the printer, so it does not require any modification such as calibrating the steps of the axis or the extruder. It mounts to one side of the printer, and has a small fan to cool the drivers. As it does not have a case to protect it, it is usually filled with dust that needs to be cleaned frequently.
One point to note is that the printer does not have a layer fan, although the board does have the jack available to place it, and the printer menu allows you to control its speed. Considering that the layer fan is a great help when printing, I think Geeetech could supply it and achieve a more complete 3d printer. As a tip, I suggest that your first piece printed with this machine is a fanduct for a 5015 blower fan.
The printer’s screen is located on top of the acrylic frame and due to this, the filament spool cannot be placed on the frame of the printer. I think it is somewhat uncomfortable and it would be better to have it placed on the front of the machine. If you like modifying your printers, this might be a good idea.
In addition to the printer, a support for the filament spools is included in the kit. To make it stay in place, I fastened it to the table using a wood screw and washer. Of course, it is not a good idea to punch a hole in a table. The downside of this stand is that it is too small, and large spools cannot be fitted. The solution I found is to use an 8mm rod and pass it through the top hole.
Left: material provided. Right: my great solution.
Also, since the filament can catch on some moving part of the printer, I printed this part:
This screen mount doesn’t seem to last much longerThis little upgrade allows the filament to be guided and prevents it from tangling.
The extruder provided is an old acquaintance: the MK8. In my case, it is aluminum, but I know people who received the extruder made of plastic. It works very well and there are no jamming problems.
Usually this extruder is used for Bowden type printers, but the i3 Pro B has a direct extrusion system mounted on it. The way it is assembled, there is a gap between the barrel and the extruder sprocket. This means that when printing TPU, the filament can escape through that space and ruin the whole printing process. I use a small piece of PTFE tube to eliminate the gap, but sometimes it gets out.
There are some pieces available on Thingiverse that allow you to solve this issue, but if you only print stiff filaments, there is no need to use those upgrades.
The hotend withstands very high temperatures, but since the printer does not have an enclosure, it is not easy to print more demanding materials such as Nylon. So far, I had no problems printing PLA, ABS, PETG and TPU.
The Z axis is moved by 2- 8mm trapezoidal rods, which are not bent and do not generate any wobbles.
Since the stepper motors are driven by A4988 drivers (the cheapest ones), they produce some noise during movement, but it is bearable. After a few months of use, linear bearings (also low quality bearings) begin to rattle, so it is advisable to replace them with more expensive ones.
All things considered, however, it is a fairly quiet printer.
Operation and known issues
The Geeetech i3 Pro B is a machine that divides opinions among its users: there are those who think that it is the best 3d printer in relation to price/quality on the market, and there are those who believe that it is not worth spending money and time on a machine that brings more problems than solutions.
My opinion is that this 3d printer is the best you can get for a budget of around $150. In addition, since you are the one who assembles the printer, I believe that the reliability of this machine depends purely and exclusively on your skills. Until now, after more than 2 years of using it, almost all the problems I had were the result of my mistakes when putting it together, that’s just how it is.
For example, I had some issues related to loss of steps in the motors, in the movement axes and with the extruder. This was because the supplied A4988 drivers do not come with the proper voltage/current calibration and that’s because you are the one who should regulate them according to the torque they will need, which is an easy task.
Electronics is simpler than Arduino’s, but you still have to calibrate tension on the driversAt another time, I had problems when changing filament, since there was a clog in the barrel that prevented the placement of the new filament. To fix this, I found that it was necessary to manually extrude some material before making the filament change.
This way, the plastic is soft and does not block the barrel. I suspect this is a recurring problem with the MK8 extruder, as a metal tool is provided inside the box. At first, I didn’t know what it was for, but at the third blocking of the barrel, I realized that this tool allows you to push the hard filament in and unclog the barrel. I did not find this information in the manual or documentation for the printer, however, which they definitely should’ve included.
Another problem I had was during my first printing, after finishing the assembly of the machine, I did not pay attention to the nozzle size and tried to print as I always did with my other printers. The loss of steps alerted me and when checking, I verified that the nozzle provided in the Geeetech i3 Pro B is 0.3mm, when the diameter in my other printers is 0.4mm. Fortunately, the thread on the heater block is M6, which is also used by most nozzle manufacturers. By replacing it, it started working perfectly.
Print quality
Compared to most low-cost clones of the famous Prusa i3, the Geeetech i3 Pro B is the best 3d printer you can get for under $200. Its structure is very firm and the metal parts are rigid. This means that no vibrations are transmitted to the printed objects when printing at 40mm/s. When this value is exceeded, you start to see some ghosting in very sharp corners.
Notable ghosting in the eyes: this was printed at 60 mm/s0.3 layer height at 50 mm/sNo wobble is observed on the Z axis and the geometric precision is at correct values on all axis.
Smaller objects show more flaws but they are still OKPros
- Its price / quality ratio is the best in its range
- assembling it gives you a lot of experience
- The quality of your printed objects is quite good
- The structure is well designed and very resistant
- As this printer is based on the Prusa i3 model, it is very easy to find spare parts and pieces to modify it on the internet.
Cons
- Its low-quality components have a short service life, so they need to be replaced.
- The extruder is difficult to disassemble, and it has no reduction in its gears, so it needs a larger motor to work, adding unnecessary weight to the X axis.
- The glass of the heated bed is too short, and does not cover the entire printing area. You will have to buy one that allows you to take advantage of all the space.
- The assembly process is very complicated and it is normal to make mistakes, causing you to have to disassemble some parts several times until you get to do it correctly.
- The PSU could be of higher power, to speed up heating.
Conclusion
The Geeetech i3 Pro B is a really good printer if you consider the price. Sure, it’s a clone of the Prusa i3 and maybe the components aren’t as high quality, but it also costs about 5 or 6 times less.
Like I mentioned throughout the article, I think that this printer is ideal for anyone who already has experience with electronics and with 3D printer assembly, at least if you want to avoid a lot of headaches.
If you’re a complete newbie, then I’d recommend going with something simpler, like the Ender 3 (link to the review of my own Ender 3 Pro 3D printer) since it comes partially assembled and you should have it running in less than one hour.
I hope this information was useful!
We created a recommended products section that will allow you to remove the guesswork and reduce the time spent researching what printer, filament, or upgrades to get, since we know that this can be a very daunting task and which generally leads to a lot of confusion.
We have selected just a handful of 3D printers that we consider to be good for beginners as well as intermediates, and even experts, making the decision easier, and the filaments, as well as the upgrades listed, were all tested by us and carefully selected, so you know that whichever one you choose will work as intended.
Geeetech A20M Review: A Large 3D Printer
Ash(
362
)
0
This is the Geeetech A20M large scale 3D printer. It comes with loads of cool features, extra goodies, and exciting end results. It features a heated glass bed and even supports multiple filaments.
Are you looking for a new 3D printer? It's time to check out the A20M — this printer is not one to be looked over!
| Feature | Spec |
|---|---|
| Build volume | 255 x 255 x 255 mm |
| Filament types | PLA, PETG, ABS, HIPS, PVA, Wood Filled |
| Filament diameter | 1.75mm |
| Nozzle diameter | 0.4mm |
| Construction | Aluminum Alloy |
| Extruder type | Bowden |
| Heated bed | Yes |
| Weight | 19.4 lb |
| Dimensions | 17.4" x 17.6" x 18.9" |
| Price | Under $400 on GearBest |
Pros
- Big build volume
- Excellent fine detail quality
- Multiple filament support
- One unit
Cons
- Bed wobble on delivery
- Difficult to adjust Y-Axis wheel alignment
| Geeetech A20M 3D printer | × | 1 |
Howchoo is reader-supported. As an Amazon Associate, we may earn a small affiliate commission at no cost to you when you buy through our links.
The Geeetech A20M arrives very well packed in a styrofoam bed. They provide a few extra tools to go along with the printer, along with a set of instructions to get started. I didn't have any problems with shipping and everything arrived in great condition.
Used here
See all
Check Price on GearBest
In the box
- Geeetech A20M 3D printer
- Gantry frame
- Bottom frame
- 2 Extruder motors
- Ejector Nozzle
- 2 Filament detectors
- 2 Filament brackets
- Power cord
- SD card
- 2 Wrenches
- 2 Filament samples
- USB cable
- Cable ties
- Screws
- Mouse pad
The assembly process looked simple on paper, but was much harder to pull off in real life. I highly recommend a second pair of hands to help when assembling the gantry frame to the base. Beyond the awkward logistics of holding everything in place, the printer came together without much hassle.
The biggest problem came when it was time to level the bed. There was a serious bed issue—making it nearly impossible to level. To solve this issue, I removed the bed and tightened the Y-Axis wheels. After some adjustment, the bed glides without a wobble.
I really appreciate the all-in-one construction of the A20M. There's no separate box for the power supply or main screen, everything is assembled into one unit. The frame, constructed using aluminum, is very sturdy.
If one area could be improved, it would be a redesign of the components underneath the bed. It's very difficult to reach the Y-Axis wheels. Easing that access would make the adjustment process easier.
The final build feels very high quality–it's sturdy and doesn't have any extra wobble when printing. The metal frame is has a black matte finish and even comes with some decorative white stripes. I really appreciate having the power supply and electrical components housed in one box under the bed.
The biggest problem you'll have with the motion system involves the Y-Axis wheel system. If the adjustments are too loose, the bed wobbles. If the adjustments are too tight, the bed can't move. The X and Z movements, however, present no issues and have delivered some impressive end results.
I love the heated bed! It heats very quickly and serves its purpose well. While the bed is made of glass, there is a protective layer on top which leaves a pattern imprinted on everything you print. It's impossible to flip the bed for a smooth glass finish.
The printer supports multiple filaments through a bowden extrusion system. You can use a wide variety of filaments 1.75mm in diameter. The filament system feeds to one 4mm extruder nozzle. If you're after a printer with dual filament support, this is definitely a feature you don't want to overlook.
When it comes to 3D printing, safety features can be a huge deciding factor.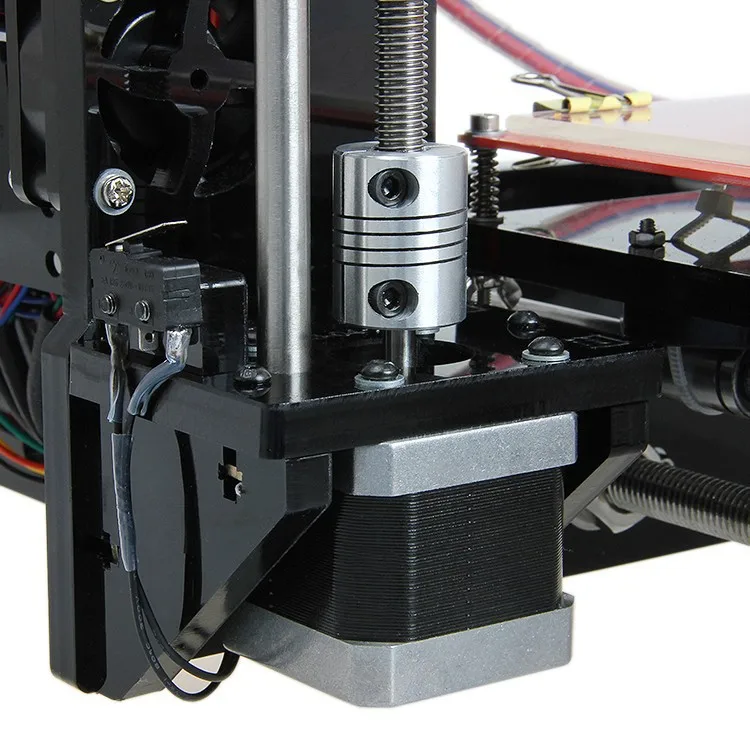 No one wants a printer that overheats or melts your final prints. The A20M tackles those concerns: when your 3D printed item is finished, the nozzle removes itself and moves away from the item to immediately cool down.
Printing on the A20M is exciting! The bed is huge and the detail quality is impeccable. The trick, as always, seems to be dialing in the best settings. It supports so many types of filaments PLA, PETG, ABS, and more. If that wasn't enough, you can use two spools at once for dual color printing.
The print quality of the A20M is surprisingly intricate. From big prints to teeny projects, this printer can make some beautiful things with seriously fine details. Compared to my previous review of the Alfawise U20, the detail quality of the A20M is definitely superior.
The example picture shows the printed head of Robotica, a doll created by Shira. You can see thin design lines, eye details, and even tiny dimples in her cheeks.
The bed size for this printer is huge! It comes with a build volume of 255 x 255 x 255 mm. You can make some big things using the A20M, perfect for big projects. There are bigger printers on the market, but you'll find this build space to be relatively flexible for most projects.
The interface takes a little getting used to. The LCD screen is controlled using a knob button. Finding the feature you need isn't always intuitive, but it's something you can master within a few minutes. I appreciate the location and ultimately it does give you all of the basic controls you would expect like leveling tools and extruder settings.
Prints can be sliced using Cura and drop easily onto your SD for printing. You don't need anything extra to get started—just find some stl files, make some gcodes, and boot up the A20M to get started.
The A20M features an SD port next to the LCD screen. It's very easy to load prints into the A20. Using a computer, drag and drop the gcode files onto your SD card. With the card in the printer, select the file you want to print on the screen.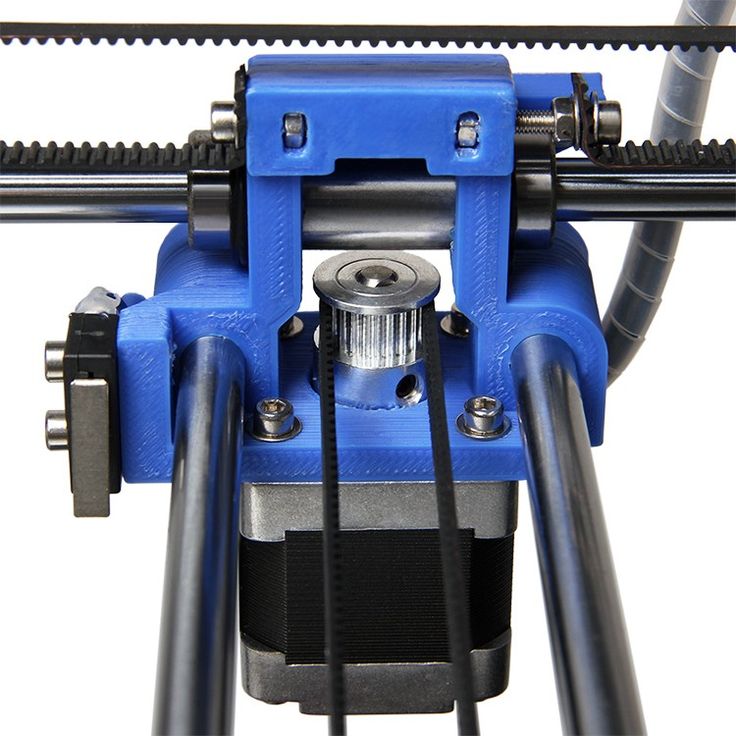
It's a fun printer to experiment with. You can use TONS of different filament types with this printer. It supports: PLA, PETG, ABS, HIPS, PVA, and even wood filled filament! Most of my A20M experience so far has been with PLA.
The coolest feature of the A20M is the super versatile color mixing abilities. The printer comes with software to slowly (or abruptly) transition between two filaments of your choosing. Using the LCD display, you can adjust what level the transition begins and how much of each filament to push through. It takes a little bit of tinkering as there are no instructions provided covering this process. But with a little patience, you can really take advantage of the mix settings to make some beautiful prints.
Overall this is a great printer! The print quality is wonderful and definitely worth a closer look. Compared to other 3D printers on the market, it is not the most affordable. Whether or not this printer is worth the investment depends on your budget and what kind of specs you want out of a 3D printer.
If you're interested in other large 3D printers, check out my CZ-300 review!
NEXT UP
John(
304
)
0
The Prusa i3 is an open-source, self-replicating printer. There are many great 3D printers on the market that are based on Prusa's designs.
Continue reading
10 reasons to choose the Geeetech E180 3D printer
→ GEEETECH E180 INTEGRATED 3D PRINTER $239.99
This is one of the best office-style 3D printers in its price range, which is not ashamed to put on the table, show to colleagues or friends.
Geeetech E180 is a fully assembled printer with great functionality: Wi-Fi access, full print pause, large 3.2" touch screen. The whole design is made very carefully, thoughtfully, in a strict office style.
The printer has been in use for more than six months, I add my summary point by point:
1. A well-thought-out approach to packaging and product packaging
The printer comes with everything that is required for active printing right out of the box.
The printer is packed in a foam shell, in the cells in their places are the parts of the kit (power supply, spare nozzles, filament tester).
2. Interesting "office" design
I liked the printer for its accuracy and rich functionality. Movable table, interesting console design with print head.
Inside the case there is a rather successful design with three (!) vertical rails.
3. Easy to use
Just warm up the nozzle and fill the plastic and the printer is ready to print.
Simple extruder design for reliable feeding and easy maintenance.
4. Touch display 3.2"
A special feature set adds a large touch display. You can configure the printer, control settings, adjust the print mode on the fly.
5. Wi-Fi
Yes, yes. This is one of the few budget 3D printers that comes with Wi-Fi out of the box. It is enough to activate this setting in the options, and find and connect to the network that appears.
6. Pause, full, with saving the results
I will dwell on such a useful function as a print pause. If during printing it was necessary to turn on the pause, just click on the corresponding icon on the display. The printer goes to the “home” position, remembering the place where it stopped. You can check the progress and quality of printing, you can change the color of the filament. If it runs out, replace the coil completely. Then continue printing without any problems. Start coordinates after a pause are stored in non-volatile memory. It is possible to disconnect the printer from the network completely, and transfer it, continue, for example, the next day. Very comfortably.
7. EasyPrint3D cloud application
We raise a Wi-Fi network on the printer, connect, download the EasyPrint3D application, and authenticate the printer.
The application provides printer settings and management, as well as many models in the cloud. Directly from a smartphone, you can select, download a model, select settings and a print profile and immediately send it to the printer, controlling the progress of printing. In this case, a computer is not required, only a tablet or smartphone.
8. Repairability
Geeetech is assembled on the basis of standard components that are available on the market. Maintenance and repair of a 3D printer will not be difficult. Software and firmware are also freely available.
9. Smart design that provides the required rigidity
I mentioned above about the smart design on three vertical rails. For movement, a T8 screw is used. In X and Y, a GT2-6mm belt is used to move.
10. Price
Now you can buy this interesting 3D printer for a modest $ 239.99
→ GeeTECH E180 Integrated 3D Printer $ 239.99
If my article interests you, I propose to get acquainted with a more detailed
Pressure 3d.
News
Publications
In "Traffic Lights" only one model of LED lamps is sold: "Dawn" 15 W 6000-6500K, they cost 53 rubles. I tested such a lamp in my laboratory and was surprised by the results. Brand...
Some time ago we already got acquainted with the flagship magnetic-planar headphones from the company Sivga, and this, I confess to you, was something. Today I propose to plunge into the world again. ..
..
Link2 bal is a great option for turning your media library into beautiful, detailed and noise-free music. The model differs head and shoulders in sound compared to its inexpensive ones...
Currently, many manufacturers are moving away from thin smartphones, increasing battery capacity and display diagonals. But nostalgia for stylish and thin phones remains. BQ...
Ethereum and Solana are leading blockchain projects that enable developers to build decentralized applications (dApps) for all industries. The combined market capitalization of ETH and...
Most often, touchless dispensers can be found in medical institutions, offices, restaurants and other public places. At home, almost everyone uses the usual, ...
normal printing from the first start?
Hello. The review is dedicated to the mid-budget 3D printer from Geeetech. But a little preface: over the past year I have had as many as three such devices in my hands, among which there is even a model for printing with two plastics at the same time.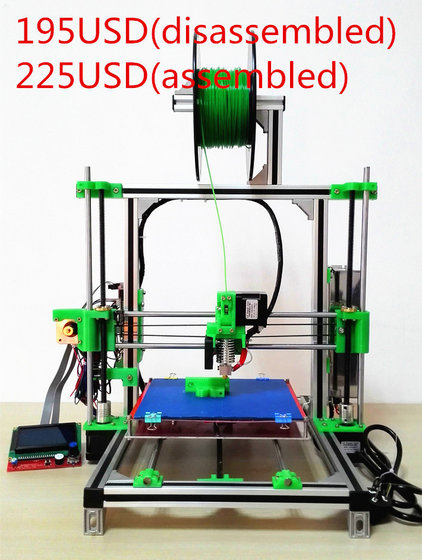 Each had its own potential, some were easier for a beginner, and some were a real torment. Over time, my passion for printers faded away, but my knowledge remained. Thanks to this and, probably, the fact that the A20 turned out to be quite successful, the review turned out to be without superfluous. If you are interested in knowing how good a not the most expensive printer can be right out of the box, then welcome. There will be photos of the assembly, we will turn it on for the first time, print a test figure, deal with the quality and potential of the A20.
Overview summary:
1) Characteristics.
2) Box and delivery.
3) Delivery set more detailed.
4) Inspection and assembly of the printer.
5) First launch and first print + analysis of quality.
6) Study of software and printing problems.
7) Examples of printed models.
8) Conclusions.
There are not very many points, but they will be voluminous. Only at the first stage of the production of the review, more than 100 photos were taken.
Characteristics.
In brief, in the photo:
Characteristics in the form of text, in English and from the official page of the model:
Printing parameters
– Printing technology: FDM
– Build volume: 250*250*250 mm
– Printing accuracy : 0.1mm
- Printing speed: 180 mm/s (max)
- Filament diameter: 1.75mm
- Nozzle diameter: 0.4mm
- Filament: ABS/PLA /wood-polymer/PVA/HIPS/PETG, etc.
- Temp:
> Max temp for hotbed: 100℃
> Max temp for extruder: 250℃
Software resources
- Operating system: Windows, MAC, Linux
- Control software: EasyPrint 3D, Repetier-Host, Simplify 3D , Cura, Slic3r, etc.
Remote App: EasyPrint 3D App (with an optional 3D WiFi module)
File format: .STL, G.code
Electrical
Power supply: Input: 110V/220V
Output: DC 24V/15A
- Connectivity: Wi-Fi (with an optional 3D WiFi module), USB cable,
- SD card (support stand-alone printing)
- Display screen: LCD 12864
Mechanical:
- Frame: Aluminum profile
- Build Platform: Aluminum heatbed+ plastic sticker
- XY Rods: Wear-resistant aluminum profile
Z axis: Lead screw
Physical Dimensions & Weight
Machine Dimension: 442 x 447 x 480mm
Shipping box Dimension: 510 x 495 x 295mm
Machine Net weight: 7. 8kg
8kg
kg
There is nothing that stands out here, except that there is a set of everything you need. I am sure that according to the characteristics you can find a dozen other full-fledged analogues, therefore a lot of advice and explanations on the Internet can also apply to the A20. I think this is a plus.
***
Box and delivery.
Let's start with the big one. Formally speaking, from the largest:
The box weighs about 10 kg, which is within the normal range for such a printer. Inside everything is packed as it should:
In three layers, we have the main part of the printer, frame and accessories.
Total:
Frame, which is very important, fully assembled and ready to install. This is a big plus for beginners, as there are models in which, for ease of transportation and, most likely, to reduce the cost, even it comes unassembled. For someone who is not in the subject, this would add about two, or even three hours of study and assembly.
The delivery set is traditionally large for any 3D printer and it is impossible to describe it in a few words even if you decide to simply list it. For this reason, now I will show it from the side, and then in more detail. Tools:
Spare parts and wires:
Well, a gift from the Chinese:
Also, do not forget about the documentation (will be in the next paragraph) and a printing mat.
In short (in which case you can skip the next paragraph), the box contains everything you need to assemble the printer and start printing.
***
Delivery set more detailed.
As I already hinted, this review item will be of most interest to those who are really thinking about purchasing a printer, and for the first time.
We are now greeted by documentation. Here it is:
This is a short but step-by-step color guide for getting started with the printer. If you do everything as shown there and do not rush, then there should be no problems. But for more confidence, I recommend watching the video instead of the instructions: www.youtube.com/watch?v=8_8TxbP2KjE
The second half of the instructions:
In addition, there is a letter from the company:
And a special sheet of paper for adjusting the height of the printing table. Naturally, it is better to use it, and not some other sheet of paper, because even such a parameter as paper density is important in this adjustment. What is said on the sheet itself, where the process is described point by point.
That's it.
Let's move on to the tools. Although, it is said loudly. All that is and everything that is needed:
In two small plastic bags you can find:
The Chinese put all this with a large margin. Also in the package you can find two spare 0.4 tips.
Cables include USB-A for connecting the printer to a PC and a power cable. By the way, not the longest, about 1.5 meters. But for a working room, this should be enough.
Also, the Chinese did not stint on a spare tube for the filament, a scraper and a small piece of PLA plastic. But there is not much point in trying it, it is better to buy a normal 300m coil and select the print settings for your plastic, and not for a sample. But it is quite possible not to change the complete memory card, it may be know-name, but it works in the printer. And where else can I get the test figure that they left there :)
I will finish the item with a plastic mount. Its original location is on top of the printer, and it fits there more or less organically.
Well, that's it now. It would be possible to paint in more detail, but this is definitely no one needs anyone.
***
Inspection and assembly of the printer.
In the case of the Geeetech A20, most of the assembly work was done by the Chinese. Therefore, the printer really should not cause great difficulties even for a beginner.
Now let's look at it in more detail. I will write in a live format: approximately in the order in which I myself studied it.-kupit-v-soin-store.ru-7.png)
Front frame:
Rear frame:
Extruder:
Back side:
Cooling looks good:
But the airflow is printed on another 3D printer and is of very shameful quality.
I have no idea how this could be missed in the finished assembly.
As you can see, the insides are clearly visible here. Tip (0.4mm):
Hot end:
Place of plastic injection:
The overall impression, if you close your eyes to the airflow, is very good. Even the belts are not tightened with ties:
And the Chinese did not forget the place for 3D Touch (a tool for auto leveling the printed table):
***
This part is sorted out. Now for the little things. Profiles:
Motors:
One of the “stoppers” (the second one is hard to reach, especially with the camera):
Z-axis motor:
five. After him, I realized how big the problems with this were on my other printers.
Additional shots without description:
Everything is tightened, nothing dangles. I hope that Geeetech will not walk from model to model.
***
Let's move on to the main part of the printer.
Display:
Printer specifications duplicated on the front panel:
Heated table:
Inside view:
The table is adjustable in 6 places. At 4 corners with their help:
And with the help of wheels on one side of the relay. If your table is wobbly, then you need here and with a wrench. The table should be moderately tight and should not dangle at all or at least somehow play.
By itself, the design of the printing table here is reliable and does not make you doubt yourself.
We figured out the table, the front panel too. Now the side ones. Behind the table motor:
And the voltage switch, which is well deepened:
The left side of the printer received a power connector and a backlit power button.
The right side of the printer received a connector for connecting to a PC and a slot for MicroSD (sorry, not just SD).
Let's look down:
I'll make do with a few photos:
In every review before, I climbed inside the printer, but this time I decided to allow myself not to do this and get by with the most visual material that could be added:
***
Now briefly about assembly.
All we need is enough space, a little time (1-2 hours) and a lot of mindfulness. As well as paper instructions or the official video, to which I threw the link above (I will duplicate it).
In order to install the frame we need the edge of any table. We put the printer in this way:
And we have access to the attachment points:
We tighten it harder, because the rigidity of the structure will depend on this. Next, I attached a plastic spool holder.
Then the white tube for plastic must be inserted into the feeder until it stops.
It's about the wires. You should not make mistakes here (as at any stage of the assembly). Well, it's not so easy to make a mistake here. Both the instructions and the video show pretty well what should be inserted and where. Some wires can't be put in the wrong place. For example, this:
And each has its own marking:
The final touch is filling the plastic. It must be inserted into the already familiar mechanism by first pulling the clamp. The plastic will enter the tube and it will need to be filled all the way until the plastic thread gets to the extruder.
This completes the assembly. In truth, when not doing it for the first time, the assembly takes no more time than examining the printer box itself.
After assembly and before printing, the printer table must be level. This will need to be taken as carefully as possible and done as advised on that special leaflet for this case.
This process took me about 5 minutes and I was satisfied with the result.
***
First run and first print + quality review.
Here it is, assembled:
We insert the memory card:
Turn on the button and the display lights up:
It displays all the basic information about printing: both the elapsed time and the temperature of the extruder, table; indicates the power of the cooling operation and simply the name of the printed file.
The screen is non-touch and the menu items must be navigated using a single control, but this will not cause problems.
You can read about the basic printer settings using the display in my previous review on the A20M: mySKU.me/blog/china-stores/81589.html
Now I will not focus on this. But I will mention the main thing: using the display, you can control the position of the extruder, heat it, heat the table, adjust the cooling speed and configure other, more complex parameters. Not to say that in a printer for a beginner it’s worth climbing there at all.
Instead, it's better to run a test figurine that was uploaded to the supplied memory card. The figurine didn't have a description, so I didn't know what would be printed. Test figures, according to the idea, should be printed perfectly. Still, this is a demonstration of the capabilities of the printer.
And the first time I was successful: the printer circled the figure along the contour so that the nozzle developed and began to print. Plastic immediately stuck and nothing anywhere bullied or peeled off. This was a miracle for me because I had adhesion problems on all previous printers.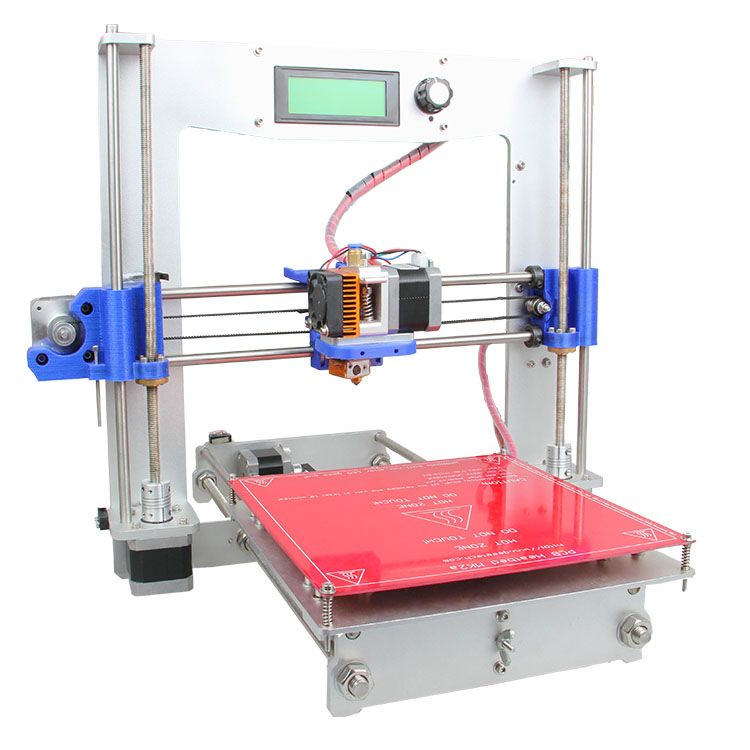
GIF:
The figurine was printed for three hours and during the printing process the only thing that bothered me was that I did not understand what would come out of it.
It gradually became clear:0143 The print quality in the end was rated at 6-7 points out of 10, and all for the most part due to poor printing of attachments. At the same time, the surface quality even with a layer of 0.2mm was excellent (when 0.1mm or less is taken for miniatures).
More photos:
So the first impression was positive. But after all, a printer is bought not only in order to print what the Chinese recorded on a memory card. Further it is always more difficult, then you need to write the necessary files to the card yourself and start printing, and for this you need to figure out what it is all about - a model for 3D printing.
***
Without going into details, the model for 3D printing is a 3D model :)
If desired, each of us can make it special. programs or just find it on the Internet. For example, on the site www.thingiverse.com/, where models can be downloaded for free.
Let's say you found a model, downloaded it and… what's next? Next, we need a program in which we will set all the necessary printing parameters, which can quite vary greatly from model to model, which comes with experience, and considerable.
***
Investigate software and printing problems.
In order to find the right program (it is also a slicer), you don’t have to go far. Although the Chinese could have thrown the .exe file on their memory card:
Nevertheless, we go to the Internet and download Ultimaker Cura. At the time of writing the review, the latest version of the free program was 4.9.1. When you start the program, you will either need to configure the printer manually or select from the existing ones. The program and Geeetech have grown to such a level that here you can find our model - A20.
This, it would seem, is all over: we select one of the profiles for printing (which often vary only in the layer height, i. e., the detail of the study), write the file (already in the form of .gcode, not .stl) to the memory card and go to print.
I did just that: I found a model, loaded it into the program, chose a profile with a standard layer of 0.2mm, wrote it down on a memory card and went to print it. And I got my share of problems: for reasons unknown to me, the print settings were completely different from those that I observed on the printer display while printing the dog. At least because the table was left without heating. It turned out that in Cura, in the profile for the A20, there is no checkmark next to the presence of a heated table. For this reason, porridge has formed on the table, which is better to notice in time and turn off the seal. So it's best to never risk leaving the printer until it's printed the first layer.
Finding and ticking the program is not difficult (why did the Chinese make a mistake?), but this, unfortunately, did not solve the problem. The quality of printing and adhesion was so far from ideal that it is better not to say anything extra about it.
I'll go straight to the solution: while cursorily searching for a proven print profile for the A20 (because the main profiles in Cura were no longer trustworthy), I came across an English-language review of our printer - www.starfightersitalia.com/geeetech-a20-test-a -great-first-3d-printer-on-a-budget/
In it, a kind person shared more than 100 hours of printing experience, during which he picked up successful settings for printing with three different levels of detail. Believe me, this is a real gem - the settings for the printer, which someone has already checked and recognized as successful. For each, absolutely each printer, you need to look for them on your own experience, and this can take several times more than one hundred hours. I am familiar with this, therefore I am aware of the value of these profiles.
Then the next step is small: import them into the program and write the desired model with the desired settings to the memory card.
The result was not long in coming. Two hours later, the perfect components for the future model flaunted on my table.
In order not to be unfounded:
Detailed:
Everything was really good: from adhesion from the first layer, to minimal seams on the surface and the absence of consequences of plastic rollback when moving to a new print area (in the screenshot with the components these are blue stripes and their , as you can see, a lot). In other words, the press really pleased.
This should be the end of the description of the seal, but unfortunately I can't. Because I had a completely different problem. Of a different nature, I would say that some will not believe in this: the models not only stuck well to the rug from the very first layer (if you knew! How many problems with the fact that it may not stick), but they stuck tightly to me . Nothing, absolutely nothing, and in no way without deformation, I could not remove them from the rug. No heat, no alcohol (recommended for printing on glass), no half-day downtime after printing.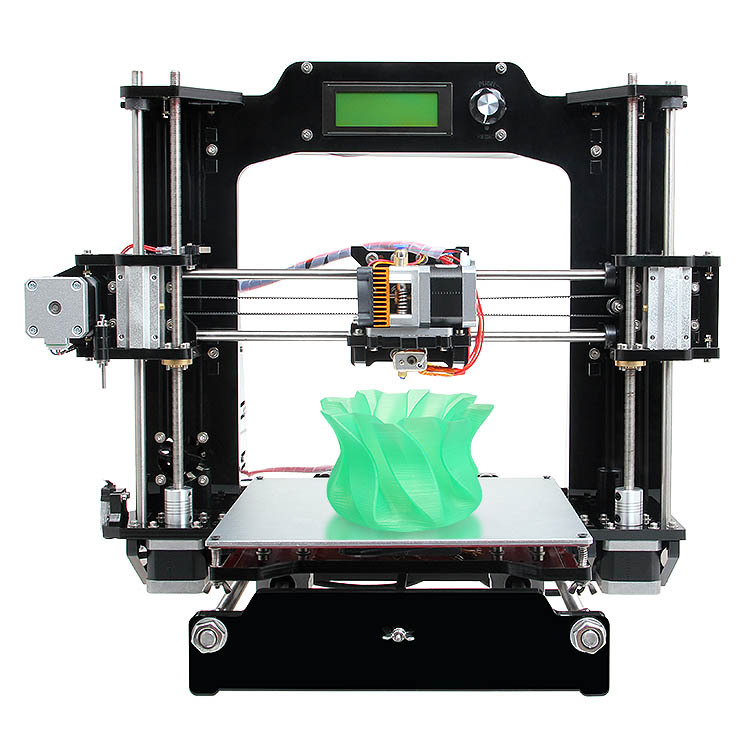 And no, all models were printed on a perfectly even layer and nowhere was the effect of the “elephant foot” (when the model is imprinted too much on the table) anywhere. They really were perfectly printed and just pasted into the rug.
I did not find a solution. Or rather, logical. I had to take the glass (2-3mm thick and the right size) and replace the mat. Which, by the way, is almost disposable. I really did not want to do this, and I was afraid of losing the gift that the printer had awarded me - perfect adhesion. But you can’t live like that: the figures existed only on the printed table, and could not be used anywhere.
This is a very strange problem that everyone who owns this printer seems to have. My last guess was to use a different plastic, but my PLA completely suited me and still does.
That's why I installed the glass.
***
Printed examples.
The problem of poor adhesion on glass did not touch me (the second miracle of the day) and on this the difficulties of printing left me alone.
I printed the model I wanted completely.
All details in one photo:
And the finished result:
Detail:
Model link: www.thingiverse.com/thing:1921091
I want to say that the installation of glass did not reduce the overall quality of the print. The absence of problems with rollbacks and the good quality of the outer walls played a good service and now I rated the final result at 9out of 10. You can see for yourself from the photos above. Again, a huge merit of this result was the use of an already proven print profile and, according to my tests, the use of a height of 0.3mm for the first layer plays a significant role. The rest of the settings are quite typical (205 degrees for PLA, 60 degrees for the table and gradually increasing the blowing power from the second layer). But from their simplicity, they did not become worse.
We can end here.
***
Conclusions.
At the very beginning, I hinted that this printer model might look interesting for a beginner or a person who is generally dipping his toes into 3D printing for the first time. And, in fact, I did not change my opinion, but only strengthened it.
The Geeetech A20 is a fairly easy printer to learn. From the box itself, it is easy to assemble, has a normal instruction and its video version. It has a solid construction, familiar filling and a full range of basic functions for full-fledged 3D printing: it can work with most plastics, there is a table heating up to 110 degrees, an informative display, it can resume printing, and all this with a working area of 25x25x25cm. For its 250 dollars, the thing becomes on par with other proven options.
We add here the excellent print quality when using ready-made profiles for Cura Ultimate (link to them and their author in the review) and a really nice “machine” comes out.
The only drawback of the printer is the re-adhesion that has appeared (so to speak): models stick tightly to the complete mat, which, unfortunately, puts an end to the absence of all those problems that could be encountered at all other stages of printing.