Flashforge 3d printers review
FlashForge Finder 3D Printer Review 2022
4
See Price
| Printing Area | 140mm x 140mm x 140mm |
| Layer Resolution | 100 to 500 Microns |
| Supported Filament | PLA |
| Filament Diameter | 1.75mm |
| Extruders | 1 |
| Extruder Diameter | 0.4 mm |
Dubbed as an easy to use, safe, and affordable 3D printer designed for novices and children, does the Flashforge Finder follow in the company’s illustrious footsteps and fit this ostentatious bill? Nothing short of a resounding yes on our part, but let’s get into the details.
Table of ContentsShow
Design and Features
In keeping with its purported entry-level target market, the Finder dons a compact, yet sleek cuboid design with smooth contours and edges. The color scheme sandwiches a glossy black central shell with astonishing red top and bottom casing that also runs up the sides of the filled-in back panel. A series of tasteful blue LED strips also illuminate the build area.
The Finder is constructed through and through with quality plastic-alloy that respects Flashforge’s aim of providing a cost-effective 3D printer without skimping too drastically on quality. Plastic-alloy isn’t necessarily as desirable as a full aluminum frame and body, but given the Finder is open on all sides except for the back panel, the choice of material works and isn’t out of place.
The innards are concealed within the frame propping up the Finder’s prim overall look. The cabling and mechanical parts are all but invisible with this carrying over to the contained extruder casing. The Finder is comparatively small in 3D printer terms, but weighs a sturdy 27 lbs and holds its ground on any surface thanks to low-profile rubberized feet; in other words, portable with a rigid build.
Sticking to the tried and tested FFF technology formula coupled with the now ubiquitous XYZ Cartesian configuration, the Finder proposes a 140mm x 140mm x 140mm build area suited to novices who want a printer to cut their maker teeth. Don’t get us wrong, the build area is tiny compared to usual standards, but as with many features sticks to the ethos of the Finder.
A no-nonsense, direct drive single extruder takes charge of laying down filament with a standard 0.4 mm nozzle diameter capable of layer resolutions anywhere from a chunky 500 microns down to what we consider a remarkably detailed 100 microns if we take into account the price tag associated with the Finder.
The extruder moves the X and Y axes running on the usual dual rod setup, while the bed navigates the Z axis with a threaded rod and two smooth pilot rods. Nothing innovative here, but Flashforge are ensuring consistency by falling back on a proven configuration prized for its reliability.
In what is probably the most limiting feature of the Flashforge Finder, the printer only supports PLA filament with a standard diameter of 1.75 mm. If we were reviewing a printer sold at three times the price, this would be a huge negative, but in the case of the Finder, this lack of versatility is in many ways a positive.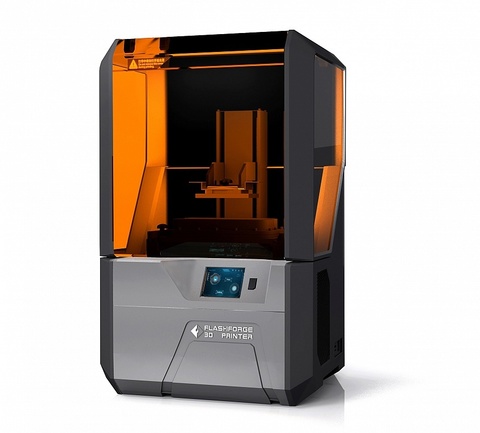 Beginners will appreciate the simplicity of only having to worry about using PLA (arguably the most straightforward material to work print with) and benefit from a printer wholly designed around it.
The filament cartridge is implemented into the build of the Finder via a vertical compartment located at the top of the back panel. Once loaded in the spool tray and clipped back into the printer, you wouldn’t know there’s a whole cartridge of PLA waiting to be used from merely looking at the Finder. Due to size constraints, it does limit usage to a maximum spool size of 0.6 kg but conversely protects the filament from environmental degradation from light, dust, and moisture.
PLA support is third-party so you can buy directly from Flashforge or save a few dollars and buy wholesale from an alternative vendor. Equally, if you have a stock of 1kg spools, you can print or buy a standalone spool holder which will work great with the Finder as well.
The printer is also fitted with a filament detection feature that determines how much material is left before a print begins and pauses the process to allow the user to exchange the filament cartridge.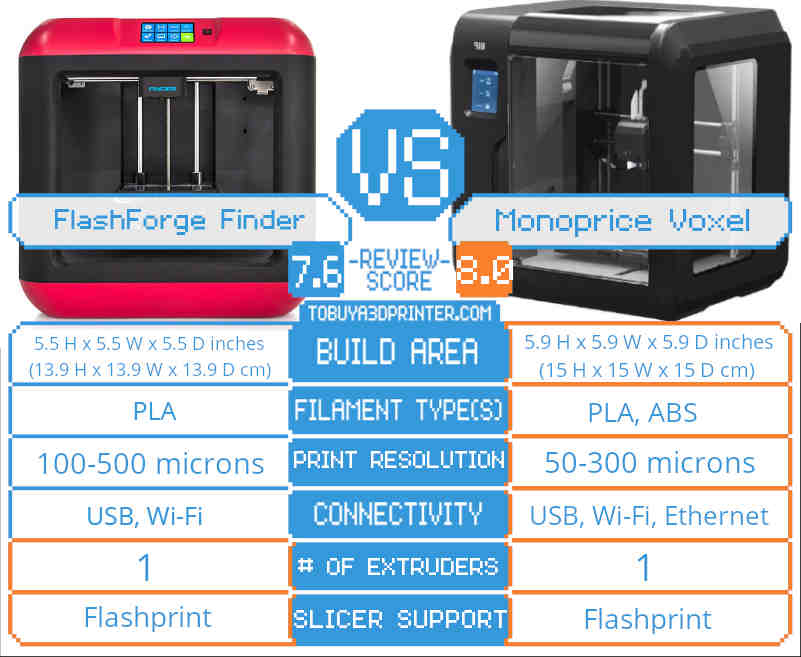
The glass build plate is non-heated and as we aren’t dealing with ABS this isn’t a problem. In a further attempt to simplify the Finder’s overall functionality, the build plate is detachable thanks to a slide-in mechanism designed to facilitate the removal of finished prints and minimize inadvertent damage.
Although the Finder has no SD card slot, it makes up for this omission with Wi-Fi, USB-to-PC, and USB flash drive port connectivity. Additionally, the printer has an internal memory of 4GB to store print files. You can finish up a print without having to run a PC for the duration of the process, or run the printer completely untethered after sending over the print files through USB or Wi-Fi.
A 3.5-inch full-color HD IPS touchscreen adorns the top of the printer with intuitive smartphone-inspired controls. It allows the adjustment of a range of settings from homing and pre-heating the extruder to filament loading/unloading and triggering prints as well as monitoring the nozzle temperature and print progression.
Flashforge ships the Finder with its own slicing software called FlashPrint, which is among the most intuitive we’ve come across with settings suited to beginners and versed tinkerers alike (scaling, rotating, supports, resolution, cut, shell thickness, infill amount, 2D to 3D conversion, preset profiles, skirt/brim/raft).
The Finder is also compatible with your favorite third-party slicer such as Sli3er or you use software like 3DMax to generate STL and OBJ files to then port them over to FlashPrint. The printer is also ”Polar Cloud Enabled”, meaning it is compatible with Flashforge’s remote monitoring and printing features.
Assembly
The FlashForge printer comes pre-assembled sandwiched in two thick styrofoam cutouts housed inside a standard cardboard box. Styrofoam trays sit in the chamber containing the various components that ship with the printer.
The package contains the printer, a quick start guide, power cord and adapter, filament guide tube, one spool of PLA, USB cable, glue, and a tool bag containing Allen keys, a wrench, screwdriver, unclogging pin tool, PTFE tube, and grease..jpg)
Unpacking is straightforward and the only real difficulty, if we can even call it that, is raising the bed plate to remove the final layer of styrofoam. Four zip ties secure the rods in place and are easily removed.
The instructions are clear and given the few small unboxing steps are more than enough to guide the wariest of first-timers.
As for hardware assembly, the filament needs loading into the cartridge holder, the filament tube fitting, and filament loaded into the extruder (after preheating). Again the instructions are clear and the process very easy. To finish off the hands-on assembly, we plugged in the power cord and adapter.
At this point we expected the printer to spring to life only for it to do nothing. A bit of curious prodding later we realized the button next to the LCD was the power button. The instructions made no mention of this, which slightly marred our overall experience of setting up the Finder especially given it is geared towards beginners.
Next, we had to level the bed using the in-built assisted leveling system, which couldn’t be easier. The printer provides clear instructions as to which leveling screw you need to adjust and by how much thanks to audio beeping cues. It took no more than five minutes and is entirely fit for a beginner with no levelling experience.
From our many journeys on various 3D printing forums, we established that updating the firmware was imperative before embarking on our first print job. Flashforge is continuously at work trying to better the software side of their products and users have recorded markedly enhanced performance by staying up to date with the latest firmware update. We followed suit.
Printing
Our first few prints with the Finder were nothing short of disastrous with the first layer continuously dislodging from the bed plate about halfway through each print. A little ingenuity and the use of a draft coupled with a good dose of either hair spray, builder’s tape, or the provided glue and the Finder sprung to life.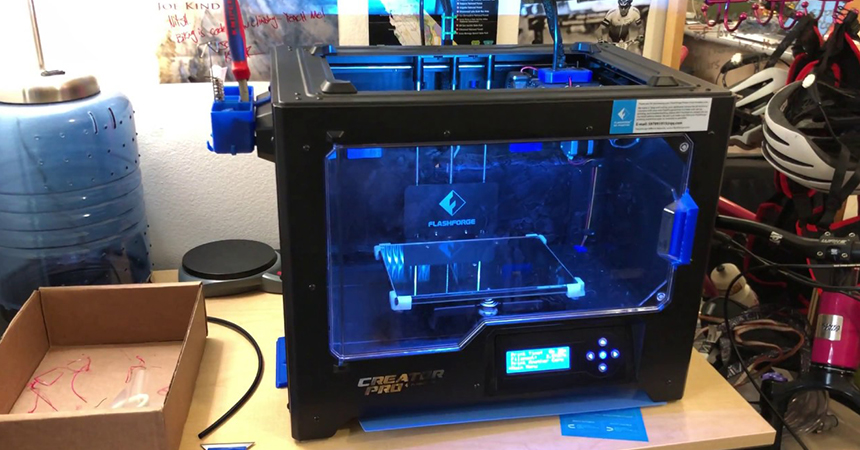
The quality of the prints is pretty marvelous if we consider the price of the Finder. We noticed very few structural issues. There was the occasional blemish here and there, and a few layering discrepancies, but nothing that a bit of post-print sanding and TLC couldn’t fix. Overall, we are hard pressed to find much wrong with the prints once the Finder finds its groove.
Of course, the limited build volume did limit our ambitions somewhat, but given the printer is targeted towards educational and beginner markets, the chances are it is more than enough for most situations.
FlashPrint was a pleasure to use and the process for selecting a file, running it through the software, porting it to the printer, and triggering the print from the LCD was nothing short of child’s play.
Finally, we have to note how silent the Finder is. It is by far the quietest we’ve used.
Support
The Finder has a standard 180-day manufacturer’s warranty, with the ability to boost it to 12 months via Flashforge’s illustriously named ProCare Extended Warranty, but you’ll pay handsomely for the pleasure.
As for hands-on support, the Flashforge support team is responsive and knowledgeable bolstered by a rich library of walkthrough videos, troubleshooting guides, and general learning material over on the company’s well designed and accessible web site.
Verdict
A compact printer that works out of the box, the Finder is entirely geared towards beginners and curious students in an educational context. The setup is among the simplest we’ve come across, and the Finder earns points for breaking down assembly without dumbing it down utterly.
After weathering a few adhesion challenges (more than likely fruit of our ineptitude and a lack of clear instructions rather than the printer itself), the quality of the prints is high and reliably so.
In our estimation, the Finder is well worth the price tag and given its affordability is an ideal first printer for any budding maker eager for a soft and gentle introduction to the world of 3D printers.
FlashForge Creator Pro Review 2022
3. 9
9
See Price
3D printers aren’t usually the cheapest products around, which means that it’s important to find one that’s actually worth your hard-earned money. Today, we’ll be examining the FlashForge Creator Pro – a mid-budget printer that’s the successor to the fan-beloved FlashForge Creator. Is the Pro an improvement, or should you stick with the classic? Read on to find out.
| Filament Diameter | 1.75mm |
| Extruders | 2 |
| Supported Materials | PLA, ABS, PVA |
| Connectivity | USB, SD card |
| Printing Speed | 100mm/s |
| Build Volume | 225mm x 145mm x 150mm |
Table of ContentsShow
Design
The first thing to note is that the Creator Pro is a closed unit. As such, it lacks the raw building volume of more open models, but it does ensure that you can maintain a consistent temperature at all times.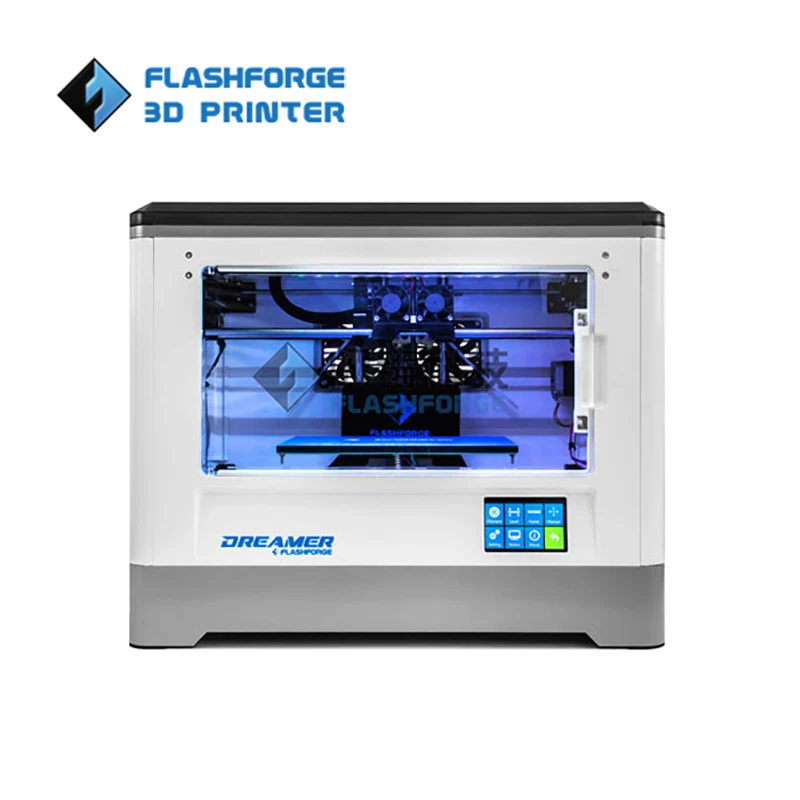 Further, this removes the need for constant ventilation during the printing process.
It’s also worth mentioning that this model comes fully assembled. Further, it boasts a universal power supply, so regardless of which country you’re in, you can count on it working as intended. Instead of being completely vertical, the controls are now at a 45° angle – a small touch, but a helpful one nonetheless.
Now, while the original Creator had a wooden case, this one is almost entirely made of heat-resistant metal. As a bonus, the front door opens to almost 180°, making it easy to remove all but the largest prints.
Printing
The FlashForge Creator Pro comes with two extruders, so you can print supporting structures, or even two different colored materials at once. Better yet, because this printer supports PVA filaments, you don’t even have to have snap-off supports. Just soak the finished model in water and you’re done.
That said, the Creator Pro doesn’t support a huge range of filaments. Other than PVA, you’re limited to PLA and ABS. Don’t get us wrong – this is fine for people new to printing or occasional printers, but if you’re serious about experimenting with this tech, you’ll want something with a wider range of supported materials.
The layer resolution can be set between 100 and 500 microns. However, even at the highest setting, we found that small objects often had ragged edges or other imperfections. As such, the Creator Pro is better suited to creating medium or large items.
Features
This printer uses a 6.3mm aluminum build plate. It’s temperature-resistant and won’t warp even after prolonged exposure to heat. Of course, you can heat this to whatever temperature you like (up to 130°C), but we’d recommend about 90°C to prevent your materials from sticking.
Unfortunately, there’s no way to automatically level the print bed. This isn’t a huge problem, it just means a few minutes of extra prep work whenever you want to print. This can seem a little daunting to beginners but once you get the hang of it, it’s really not a big deal.
While this model doesn’t support WiFi connectivity as standard, this feature can be added using a WiFi SD card. It does, however, support printing from USB or SD cards, so you still have the most common options to choose from.
Cost
The FlashForge Creator Pro costs around $900 on its own, or you can throw in a copy of Simplify3D for an extra $30. Considering this software retails for about $150, that’s a pretty good deal. If you buy two printers at the same time, you can get this software for free, but without a further discount, this isn’t really worth it.
The price is about average for a mid-level printer like this one. Despite coming as a pre-assembled unit, all of the vital parts like the extruders can be removed and swapped out if you’d like. Really, the maintenance costs shouldn’t be too high as long as you take care of the components. Of course, this depends on how much filament you use!
Support
While the instructions that come with this model leave a lot to be desired, FlashForge provides detailed documentation, troubleshooting guides, and tips on their website. There are even tutorials for people who have never used a 3D printer before, which is great to see.
The company offers a 30-day money back guarantee, as well as a guaranteed response to another customer support issues within eight hours. That’s pretty good, but there is a rather significant drawback.
While this product comes with a one-year warranty, it has a couple of stipulations. Firstly, you have to register the printer within 30 days of purchase. No problem, right? However, the warranty states that you (i.e. not a shipping company) have to personally deliver the product to the company for any repairs. So what’s the issue?
Simply, the company is based in Hong Kong. Even if you live there, you’re potentially facing an hour’s drive. If you live overseas, the costs will be considerably higher and, in some cases, more than the cost of just buying a new printer. This is almost certainly intentional and can only be described as bad business. It’s a real shame considering that the printer itself is of such high quality.
Summary
The FlashForge Creator Pro is a great little entry-level 3D printer. It’s reasonably priced, capable of handling the most common filaments, and includes a wide selection of customization features. However, it’s marred by a warranty that is intentionally difficult to redeem and as such, it’s important to take very good care of it.
Overview of FlashForge 3D printers / Sudo Null IT News
Hello everyone. Today we have prepared a review of two models of 3D printers - FlashForge Dreamer and FlashForge Creator Pro.
- FlashForge is a Chinese company Zhejiang Flashforge 3D Technology Co., Ltd. Established in 2011 and today is one of the largest in China. Last year, the company produced 30 thousand 3D printers and ranked 4th in terms of sales of 3D printers in the world. The
- FlashForge Dreamer and FlashForge Creator Pro is a top 10 printer on the 3DHUBS 3D printing enthusiast site.
3DHUBS has a lot of positive feedback from both beginners and advanced users.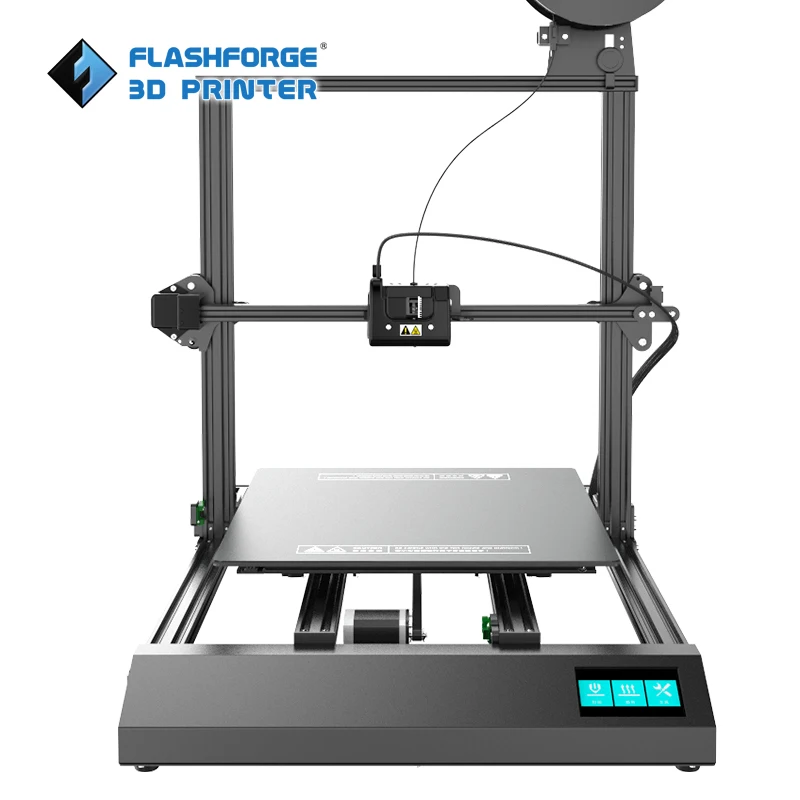 These printers are valued for their very good value for money.
Specifications
As you can see from the technical specifications, the printers are almost the same. Unless Dreamer is a newer and more advanced model, with a bunch of small improvements that may be useful to the user.
Appearance.
There are more differences in appearance. Dreamer has become more compact compared to Creator Pro.
Plastic spools stow away inside the printer instead of hanging outside. On the one hand, this allows you to additionally dry the plastic inside the printer chamber, on the other hand, it will be problematic to shove a spool of 1 kg or more. And if you “start” the plastic from the outside, you will have to remove the cover.
FlashForge Creator Pro does not have this problem. You can hang the spools on the case or print the spool holder. The lid has a space for feeding plastic outside the chamber.
Mechanics.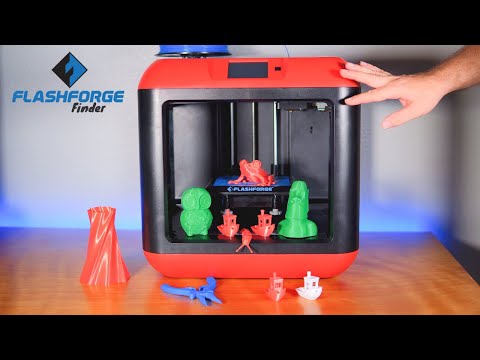
The kinematics of the printers is similar and made according to the most popular scheme. Nothing new here.
The head moves along the X and Y axes, the platform along the Z axis. The printer prints without problems not only ABS and PLA, but also more whimsical, softer types of plastic.
Or say Woodforce from Fiber Force.
By the way, plastic turned out to be very interesting. The nozzle does not clog and smells like wood. Very easy to skin.
The most interesting thing is the Dreamer airflow. In appearance, the blower casing is only on the left nozzle. And there are no more differences from the same Flash Forge Greater Pro.
The main difference was noticeable on the first print. At the back of the printer are 2 fairly large fans. They blow air out of the chamber.
There are ventilation grilles on the sides that draw air into the printer.
It turns out that air is constantly circulating inside the camera during printing. Surprisingly, this turned out to be a great solution for PLA printing. Airflow occurs from all sides of the printed part. Even small details are excellent, without “streaks”.
Creator Pro cannot boast of such stability. In hot weather, small PLA products may lack airflow.
FlashForge Dreamer is equipped with a convenient touch screen and Wi-FI.
Slicer.
It is proposed to use FlashPrint as a slicer. A fairly convenient program with a pleasant interface, also partially Russified. This can be a big plus for beginner printers.
The program has several rather useful functions. For example, the ability to cut the model.
The cutting plane can be set with the mouse or along one of the axes.
The ability to place supports manually is what I so often missed in Cura. There are 2 types of support.
Tubes (they are by default)
And bollards.
BUT the most interesting feature in my opinion is the ability to convert drawings into three-dimensional bas-reliefs.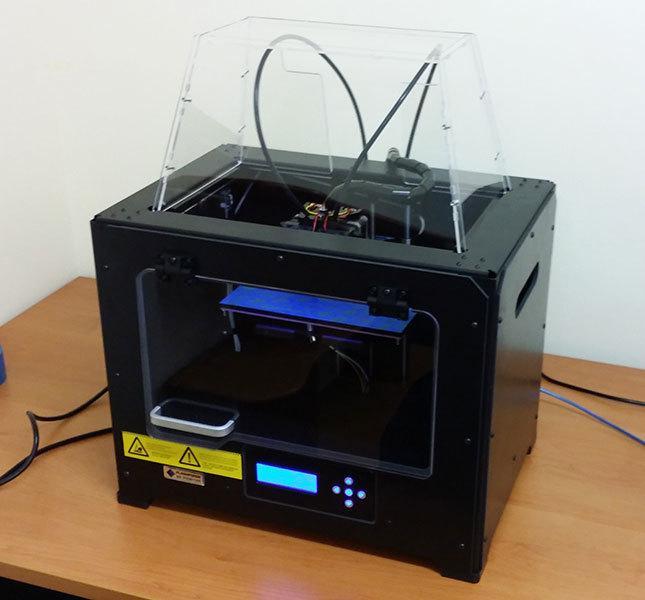
The program has quick print settings. (low - 0.30mm standard - 0.18mm and high - 0.14mm. When choosing PLA plastic, the best print quality appears is a layer of 0.08mm.). It will be convenient for beginners during the first steps.
There are also advanced settings for fine-tuning print settings. To enable advanced settings, you need to open the file tab - settings and switch from Basic Mode to Expert Mode.
Adjustments for retraction, support print speed, wall width for nozzle cleaning when printing with two types of plastic and much more.
Printed tests
And of course the review would not be complete without printed tests.
FlashForge Creator Pro
ABS from ESUN, layer 0.15.
PLA from ESUN, layer 0.15.
And the most interesting thing is printing with supports.
ABS+HIPS
PLA+PVA
FlashForge Dreamer
ABS+HIPS from ESUN, layer 0. 15.
15.
PLA+PVA
CARBON FIBER from NYLFORCE, layer thickness 0.15
PLA, Bronze, Esun, layer thickness 0.14
Woodforce plastic from Fiber Force and blue PLA from ESUN, layer thickness 0.18
Ninjatek Soft Cheetah Post-apocalyptic duck, 0.18 layer thickness, 0% infill
0.18 layer, Flashforge Dreamer printer. Esun eCopper and eAlfill plastic.
Results
Both printers surprisingly give a very decent print result “out of the box” without any “finishing” and shamanic settings.
FLASHFORGE Creator Pro keeps up with its older brother FlashForge Dreamer in print quality. The maximum that you can find fault with is the insufficient airflow of small PLA models in the Creator Pro.
Visually, FlashForge Dreamer is, in my opinion, more of a "home" printer. Neat, compact. Plus the ability to connect via WI-FI so as not to pull extra wires. But here everyone will decide for himself whether it is worth overpaying for aesthetics and comfort or not.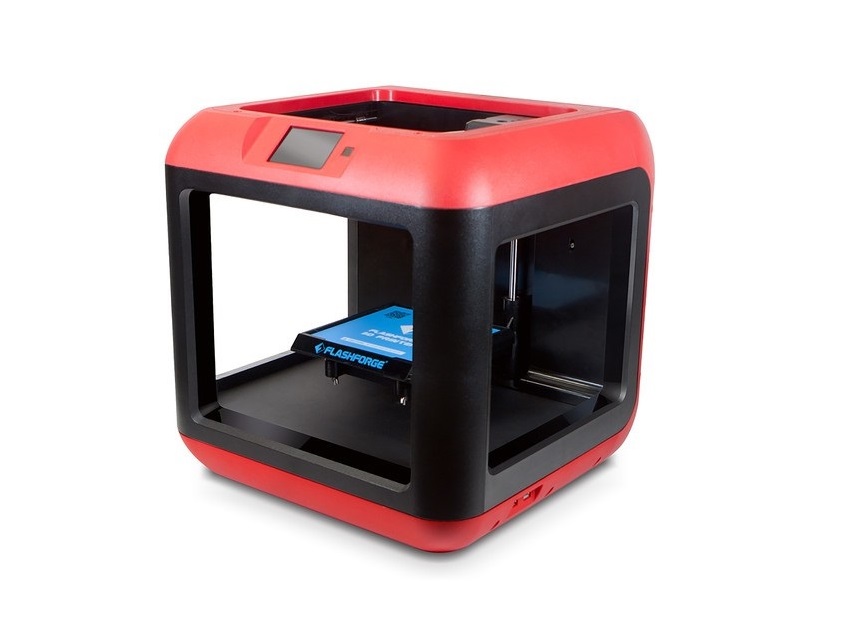
By tradition, a minute of advertising)
Buying equipment from our company, you get 10 advantages:
1. Opportunity to use the Trade In program.
2. Warranty - 12 months
3. Instruction in Russian
4. Technical support throughout the life of
5. You buy a 3D printer from an official distributor in Russia
6. Free shipping.
7. Free training in our office.
8. Opportunity to buy a printer on credit through TKS, OTP, Renaissance banks.
9. 10% discount on plastic forever.
10. Opportunity to get acquainted with the printer in our demo room.
Review prepared by Anna Panfilova, 3D printing specialist at Tsvetnoy Mir.
Subscribe to our Facebook and VK groups to keep abreast of the latest events.
www.facebook.com/groups/cvetmir3d
vk.com/cvetmir3d
www.youtube.com/channel/UCnfeyFh4TKIVpMCMi1zd0fA
Flashforge Dreamer
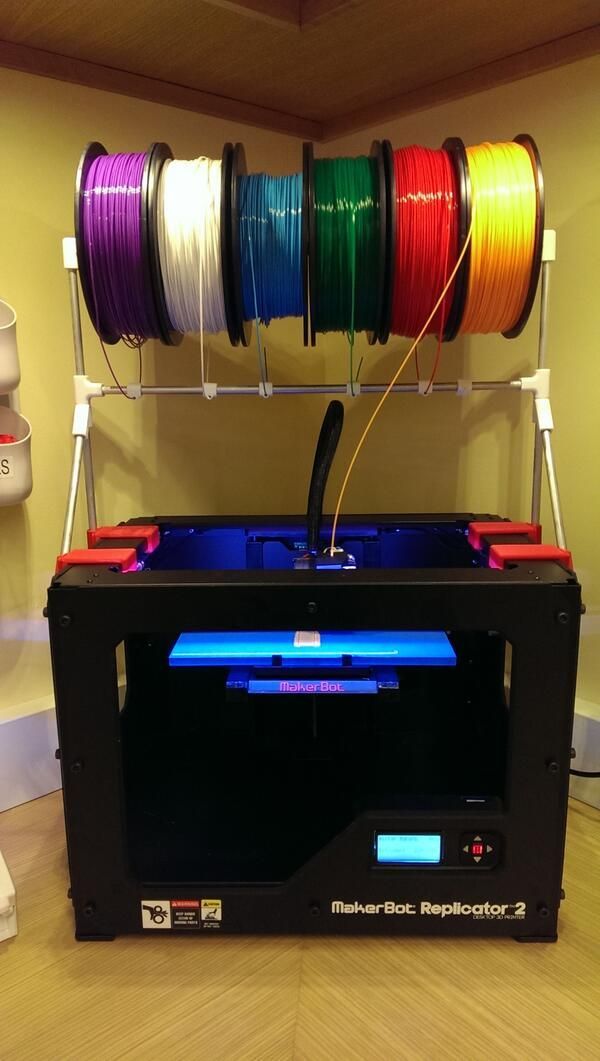
3D printer overview 3d printing has been my passion for the last 2-3 years. I purchased a Makerbot Replicator 2 3D printer a little over a year and a half ago and have since printed everything from Christmas ornaments and necklaces to toys for my son. I eventually got used to my Replicator 2, although at first I had some difficulty setting it up, loading it, leveling the desktop, and keeping all the settings up and running. When I was asked to review a new 3d printer, I admittedly hesitated a bit with the answer.
First impression
When I first unpacked the Flashforge Dreamer, I thought "they must have sent me the microwave by mistake". The new 3D printer in appearance reminded me of a small microwave oven, and even guests sometimes asked why I have a microwave in my office. It weighs about the same as the Replicator 2. It really looks good, so you're not afraid to put it in a prominent place in the house. I have seen quite a few 3d printers that are ugly on the outside. and Flashforge Dreamer is definitely not one of them, and the reason is primarily in a completely closed chamber. It looks good and seems solid enough. The only slight complaint about the appearance is the plastic surfaces of the case, which add a sense of cheapness to its appearance. But after a while, I changed my mind. The design of the case is made so that you can see most of the parts of its design that make it work.
Installation
As I found out later, all 3d printers are similar, but not quite. It seemed to me that my experience with the Replicator 2 would be enough, but unfortunately this was not the case. Installation went quickly and without difficulty. I took it out of the box, secured the extruder with two screws, turned on the power, and loaded the plastic. The model I tested had two extruders and came with a spool of red PLA plastic and white ABS. Loading took place on time to spit. There were buttons for loading and unloading filament on the touch screen. I pressed the button, waited for it to warm up and loaded the plastic through the hole on top. Just 30 seconds and the printer was ready to go.
The first stupidity
Without reading the instructions, I immediately downloaded a few files and decided to print them. This was a big mistake. I forgot to level the platform before starting to print. In short, as a result, the extruder was clogged, and I had absolutely no idea how to clean it. I wrote a message to the support service and within an hour I received detailed instructions for disassembling the extruder and clearing the blockage. The whole process took me 20-25 minutes.
First print.
I finally set up my printer and printed a small frog. I decided to start small, just to make sure everything was in order with the settings. The result was great. The frog looked flawless even though it was printed without support. The next model was a spinning wheel toy car that was printed in one go. I tried to print it on other 3d printers, but the result was worse every time.
I was expecting similar results from the Flashforge Dreamer , but to my surprise the ABS printed car came out almost perfect.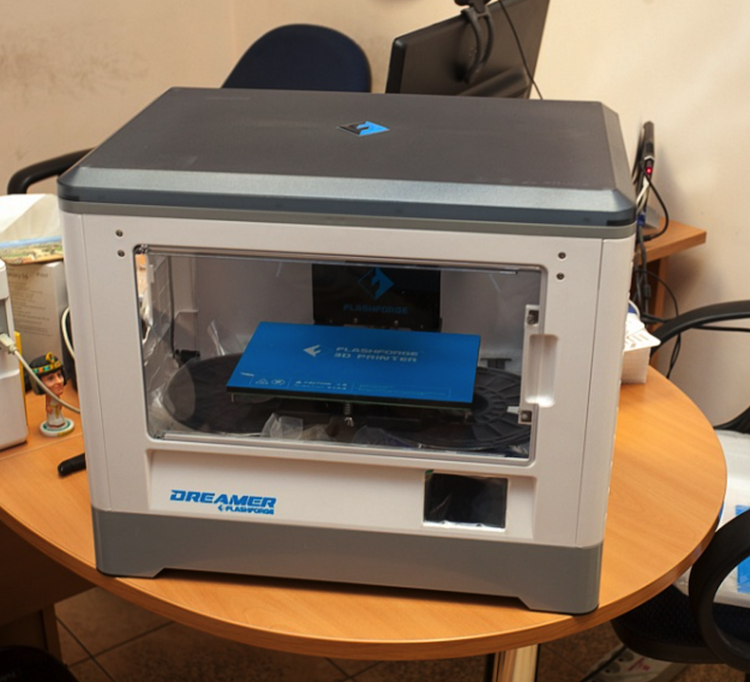 Spoiled the impression of a small defect on one side. But the wheels turned, and I could roll it without difficulty, just like any of my son's other cars.
Resolution and print quality.
I was surprised by the print quality. It was commensurate with the quality of my Replicator 2, and in some cases even higher than I'm used to.
Dual Extruder
I have never used a 3d printer with two extruders before. They allow the support to be printed in a material that is different from that of the main model. It also makes it possible to print in two colors, and get more vibrant 3d objects. Colors add charm to any object, whether it's a toy car, a pretty box, or a piece of jewelry. I probably don't want to go back to a printer with a single extruder anymore.
Software.
One of the most time-consuming and complex processes in 3d printing is, of course, cutting layers of objects, and the process of generating gcode, which is sent to the printer in order to control the printing process. The Flashforge software proved to be easy to use. I just installed it, loaded the object and hit print. I was offered several options for slicing, the choice of extruder and printing temperature. I left most of the parameters by default, since they were in the values I needed. A couple of minutes after pressing "OK", the printer began to print. This was probably the fastest print submission I have ever made. Yes, this printer gives you the choice of settings you need, and it's great for beginners and advanced users alike.
Unsuccessful
If you still talk about the negative aspects of this 3d printer, because it should be an honest review. I would like a little more volume. Of course, the 9.1” x 5.9” x 5.5” volume is sufficient for printing small objects, but I am used to the larger volume of my Replicator 2. I have not yet had to print an object that was larger than the maximum possible, but I feel that in one fine day I may need extra centimeters. The cheap appearance of the extruder, made of powder-coated steel, did not immediately convince me of the high quality of the 3d printer. But at the same time, the printer mechanism was made of high quality and executed with high accuracy, and this is what matters when printing.
Specifications
- Interfaces: Wi-Fi, USB, SD
- Positioning accuracy: 0.1 mm - 0.2 mm
- Layer thickness (resolution): 100 - 500 microns
- Print volume ” x 5.5”
- Nozzle diameter: 0.4 mm
- Print speed: up to 200 mm/s
- Platform temperature: 120°C maximum
- Power: 100 – 240V, 50/60Hz Power: 30005 W
- Overall size: 19 x 16 x 13 inches / 485 x 400 x 335mm
- The size of the box: 25 x 23 x 19 -inch / 565 x 535 x 430mm
- Grutto weight: 32LBS
- Weight Neto: 27LBS
Software
Consumables
- Materials: ABS, PLA, PVA, etc.600005 Body colors, black, yellow, red, blue, green, transparent
- Filament diameter: 1.

Learn more