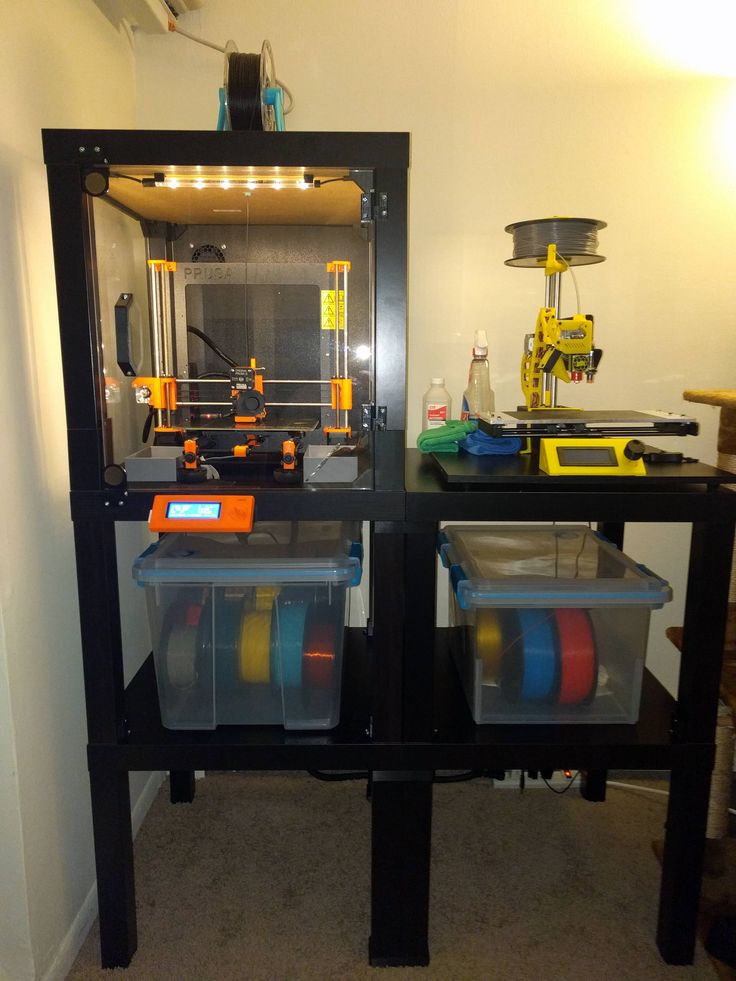
Fireproof 3d printer enclosure
Creality 3D Printer Fireproof Enclosure Review – Worth Buying or Not? – 3D Printerly
Many people have 3D printers that don’t have enclosures which can definitely hold back 3D printer quality in some cases. The Creality 3D Printer Enclosure is a major solution in the market that many don’t know about which does a lot more than just protect your 3D printer.
This enclosure has been gaining popularity because it works so well, although fairly premium. The way I think about the value of an item is to think how many years it will last you, and what value it provides in those years.
If something costs $100 and lasts 10 years ($10 per year) while providing plenty of value in time saved and higher quality, then all it would need to do is provide more than $10 per year worth of value to be worth the purchase.
With that in mind, let’s get into whether the Creality 3D Printer Enclosure (Amazon) is worth buying by looking at its features, benefits, downsides, what current customers say about it and more.
Below is a quick visual which shows just how simple and effective this enclosure is.
I’ll start off with the features.
- Constant Temperature
- Dustproof & Noise Reduction
- Installation & Stable Structure
- Pure Flame-Retardant Aluminum Film
- Folding Storage & Tool Pockets
- After-Sales Service
Constant Temperature
We get a nice increase of print quality by constantly regulating our printing environment temperature. There is a possible negative environmental impact present without using an enclosure, so this is a great solution for that.
I’ve had cool operating temperatures ruin prints, as well as drafts through my window, so using a Creality Enclosure in these instances would be a great problem solver. Printing stability is also improved.
Overall, in the years that you will be 3D printing, you can be getting significantly better results, especially with materials like ABS or Nylon. Bed adhesion also improves at higher, stable operating temperatures which the enclosure brings about.
Dustproof, Noise & Sound Reduction
When we have our 3D printers in a dusty room, it can actually ruin filament quality and cause clogs in the long run. Although it doesn’t often happen, dust can build up over time which we notice every so often across the top of our 3D printers.
With the Creality 3D Printer Enclosure, we simply reduce the dust that comes into contact with our filament, extruder, nozzle and other important parts, giving us a better printing experience.
3D printers are now getting much quieter, but I know there’s plenty of people who still have pretty loud machines so this can help you out in the sound & noise area. It’s not going to completely block out sound, but it should reduce noises from your machine.
Along with dust, noise and sound, you also have an extra level of protection from strong odors and particles that are emitted from your 3D printer. It should stay in the tent for the most part.
If the enclosure exterior gets dusty you can just clean it with a damp cloth.
Simple Installation & Stable Structure
Creality isn’t new to creating a product with a stable structure. The simple, yet very stable enclosure keeps its shape using iron pipes and high quality material to build up this product.
You don’t have to worry about accidentally knocking this over, and it’s really built to last. There is enough space to hold your printer without issues.
The installation side of things are simplified, where it can be assembled very quickly.
Pure Flame-Retardant Aluminum Film (Safety)
The main feature that gives people peace of mind is the flame retardant properties, which means if there was a fire, the enclosure would melt rather than be set on fire and won’t spread either.
With some of the stories previously heard in 3D printing, a few of which can be found in my previous article 3D Printing When Not At Home, we don’t want to take any chances, so this is a great addition to our 3D printing arsenal.
It is equipped with pure aluminum film and flame retardant material.
Folding Storage & Tool Pockets
The Creality Enclosure (Amazon) comes with reserved tool pockets and is easy to carry. You also have the ability to fold the product away with its folding storage for top efficiency.
There is easy printer access through the zipper at the front of the enclosure, which is see-through, so you can monitor your prints at all times.
This enclosure weighs just 6.08lb (2.76 kg).
After-Sales Service
This isn’t just purely a transaction, it’s a service that you are receiving to make sure what you get actually provides value and a positive experience. Most people know of Creality’s after-sales service but if you don’t, just know that you are well taken care of.
Creality has a track record of great customer service, before and after sale.
Benefits of the Creality Fireproof Enclosure
- Very easy to install and begin to implement
- Effective safety measures that give you peace of mind
- Easy folding storage if you want to put it away
- Abundance of space and a tool pocket on the side for simplicity
- Constant temperatures give better chance of successful prints
- Reduces frustrating noises from your 3D printer
- Eliminates dust from affecting your prints
Downsides of the Creality Fireproof Enclosure
One of the downsides mentioned is how the zipper area isn’t big enough to work on your 3D printer easily. It’s more so designed for the Ender 3 rather than the Ender 5 making it difficult to reach things on the other side of the printer.
To use the Ender 5, you need to adjust the position of the filament holder and the LCD screen.
The stitching could be better done in some cases, because some people reported the stitching becoming undone while trying to fit the enclosure. These are pretty rare cases though.
You’ll probably need to add lighting to your 3D printer to proper see things.
Doesn’t fit the CR-10 Max, CR-10 S4+S5.
The metallic liner may actually interfere with the signal strength of parts such as a Raspberry Pi, a webcam, or other wireless device.
Also, the enclosure is designed to actually fit 3D printers which have filament guides or holders which don’t extend out past the frame, so keep this in mind.
There aren’t many downsides out there which is a great sign of the Creality 3D Printer Enclosure (Amazon).
Specifications of the Creality Fireproof Enclosure
- Applicable: Ender 2/Ender 3/Ender 3 Pro/Ender 5/Ender 3X/Ender3 Pro X/CP-01/CR-10/CR-20
- Function: Constant Temperature / Soundproof / Dustproof / Fireproof
- Storage Size: 445 x 565 x 685mm
- Product Size: 495 x 615 x 735mm
- Iron Pipes Diameter: 16mm
What Comes With the Creality 3D Printer Enclosure
- Package Included:
- x4 440 Iron Pipes
- x4 560 Iron Pipes
- x4 645 Iron Pipes
- x8 Fixed-Angle Bracket
- Folding Shed
Customer Reviews on the Creality Enclosure
You’ll see much praise for the Creality Enclosure from several customers who really feel like it’s a great product.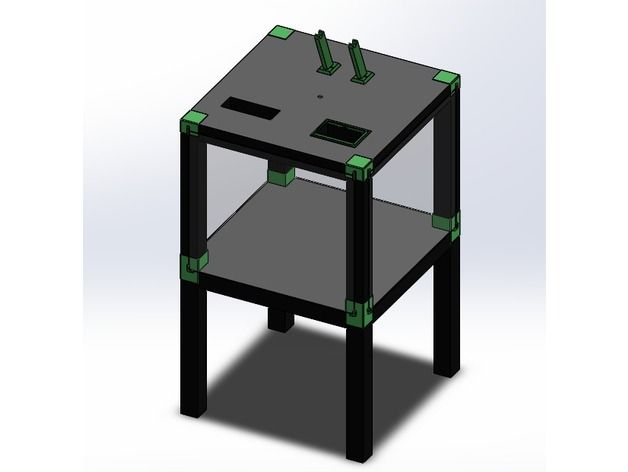
‘It’s worth the money, build thick and strong!’ is one review that clearly loves the build quality and effectiveness of the enclosure.
Not every product is a perfect fit for you so in some cases you’ll want to return it. One user who found it didn’t fit hit CR-10 max which is a very large 3D printer, found the seller very responsive and helpful in offering a refund. The after-sale experience is great!
Now for the people who have 3D printers which fit just fine like the Ender 3, they love it and find it very hard to point out any negatives in this product. The frame is painted steel tubing which is held together with sturdy plastic connectors.
The outer shell is a heavy nylon material, also with reinforced stitching. It will do a great job keeping heat in and dust out, especially great for those longer prints in cool environments like the garage in the winter.
Rather than spending money and time building an enclosure, this is a much more efficient and simple way to incorporate an enclosure into your 3D printing.
It could take many hours building a DIY enclosure which, along with materials, time & possible frustration could cost you a lot more than a Creality Enclosure. This is a product I’d recommend most people get on board with. It’s expensive but definitely worth it.
The level of quality and attention to detail of this enclosure is top-notch, and you can tell some time and effort really went into creating it.
Verdict – Worth Buying or Not?
This is a product that many people needed, but it was just never around, so we can all appreciate its release.
People have been slowly finding out about the Creality 3D Printer Enclosure and snatching them up all around. Reviews are great, product does the job plus more, and it looks great.
I’d definitely say this product is worth purchasing yourself.
There are two main sizes to fit your 3D printing needs:
Small/Medium Creality Enclosure (Amazon)
Large Creality Enclosure (Amazon)
Click the links above to purchase from Amazon, and happy printing!
3D Printers Can Burn Down Your House! Fireproofing Guide
- Author
- Recent Posts
Martin
Besides many test devices, Martin now has his fourth own 3D printer running and prints as a hobby for friends, family and himself. He is happy to share his experience with each new article.
Latest posts by Martin (see all)
- Ender-5 S1 vs. Ender-5 Plus | Comparison, Specs, Pros & Cons - November 8, 2022
- Ender-5 S1 | Cura Settings & Profile – Guide & List - November 7, 2022
- Atomstack X7 Pro: Hands-On Review + Results - November 5, 2022
Disclosure: Links marked with * are Affiliate Links. I earn from qualifying purchases if you decide to make a purchase through these links – at no additional cost for you!
Basically, there is a danger that your 3D printer could catch fire. This starts at the machine itself, spreads throughout the room, and eventually burns down the entire house.
It is not particularly complicated to take preventive measures and to prevent such a catastrophe. At the very least, damage can be limited in the event that the 3D printer does catch fire.
There is always some risk of fire when using a 3D printer. The question is whether this can be controlled. If you’re in the same room as the 3D printer, turning off the power is usually enough. But if you’re away from home when a fire breaks out, what can you do?
The following text not only provides an overview of the various risks of a 3D printer and its environment that can result in a fire but also provides important tips for remote monitoring and control. It also describes effective prevention measures to ensure that you can sleep without worry at night while your 3D printer is still working on a new 3D model.
Although the 3D printer tends to be one of the less dangerous manufacturing equipment, it does present some risks. Users who have had experience with burning 3D printers are unanimously advised never to leave them unattended. This is especially true for models that have a heated chamber.
Table of Contents:
- 1 Negative Example: The Anet A8
- 2 Why is there an Increased Risk of Fire in 3D Printing?
- 3 How Does the 3D Printer Cause a Fire?
- 4 General Information on Fire Protection
- 5 Preventive Firefighting Begins at the 3D Printer Itself
- 5.
 1 The Frame
 - 5.2 Filament
- 5.3 Hot End Temperature Monitoring
- 5.4 Housing
- 5.5 Power Supplies
- 5.6 Connections
- 5.7 Bolted Connections
- 5.8 Cable Connectors
- 5.9 MOSFET
- 5.10 Fuses
- 5.11 Excessive Cable Elongation
- 5.12 Proper Functioning of the Firmware
- 5.
- 6 Other Preventive Fire Measures
- 6.1 Keep your device clean
- 6.2 Ensure a tidy work area
- 6.3 The execution of remote printing and its monitoring
- 6.4 Cameras
- 6.5 Alarm
- 6.6 Plug
- 7 OctoPrint – The Ultimate Solution for Remote Control of your 3D Printer
- 8 Related Questions
- 8.1 Is there an alternative to the MOSFETS?
- 8.2 What components are required to install an SSR?
- 8.3 What else is needed so that an SSR already installed can contribute to fire protection?
Negative Example: The Anet A8
The Anet A8 3D printer was long considered a very popular model, as it was available for under 100 dollars. This made it a great Christmas gift for children to introduce them to 3D printing through play. It could not only be found on various Chinese shopping portals but could also be bought at Amazon*.
Over time, however, it became known that the Anet A8 3D printer is a time bomb, as it regularly goes up in flames. In many places on the web, you can find shocking photos of burnt Anet A8 3D printers and the devastation they caused.
Burned Down Anet A8. (source: reddit)Often the user was able to extinguish the fire in time, but all that was left of the printer, the filament and the surrounding area was a black heap of plastic. In some cases, even half the house fell victim to the flames. The most common cause of fire in the Anet A8 is the thermistor, which actually has the task of measuring the current temperature of the print head and thus provides the values for controlling the print temperature.
It turned out, however, that this temperature sensor regularly loosens and thus gives significantly lower values than those actually present in the heating element in the print head.
In addition, the Marlin firmware, which is outdated or modified by the Chinese manufacturer, attempts to readjust the temperature drop. This results in a red-hot print head, which not only melts the filament that is still being fed and heats it up to its flashpoint but also reaches the plastic parts in the surrounding area.
Melting cables and high currents cause short circuits, among other things. Furthermore, the undersized terminals on the printer board are not designed for the prevailing operating currents. Therefore many users of the Anet A8 reported that the boards are scorched and have to be replaced afterward.
Of course, the easiest way to avoid such a risk with the Anet A8 3D printer is not to buy it in the first place, but to opt for a higher quality model.
The Anet A8 can at least not be put into operation without having made some modifications in advance. For this, you need the appropriate technical knowledge, professional tools and craftsmanship. You should also be able to update the firmware accordingly.
If you have practical experience with 3D printers and their electronics, you will be able to upgrade the Anet A8 to keep it from going up in flames. If not, you will either need a professional or, for your own safety, look for an established 3D printer in the 250-300 dollar price range.
Why is there an Increased Risk of Fire in 3D Printing?
During the printing process, hot plastic is applied to an equally hot building plate. The average temperature is 220 degrees Celsius, which is also the temperature in an oven.
The causes of fire are usually not to be found in the actual process, but rather in the equipment used. The consequences are plate fires, flared nozzles or destroyed power supplies. But often there are also a multitude of possible fire sources at the workplace.
These include spray cans of cleaning and lubricating agents or flammable hairspray placed near the 3D printer. Exposed or poorly routed cables pose an additional hazard.
How Does the 3D Printer Cause a Fire?
The wide variety of 3D printers available on the market is compliant with government regulations and therefore considered safe.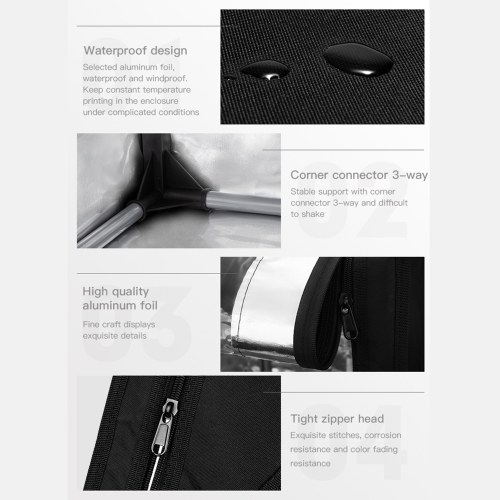 However, this is also reflected in the purchase price of such a secure printer, which can quickly exceed 1000 dollars.
In particular, users who prefer 3D printing as a hobby are increasingly turning to very affordable 3D printer kits from China, which are available for hundreds of dollars. You should know, however, that such a kit is potentially very dangerous. The power supplies built into the printer are not tested, the circuit boards often have insufficient solder joints and the other processed components are often of poor quality.
In addition, such 3D printers are increasingly made of acrylic glass, which further promotes the spread of a developing fire. In addition to the high risk of fire, these kits also have an increased risk due to wiring work, which can normally only be carried out by qualified electricians. If not expertly executed, such work carries the risk of being injured or even killed by an electric shock.
General Information on Fire Protection
First and foremost, you should always ensure that your apartment or house has a sufficient number of functioning smoke detectors*.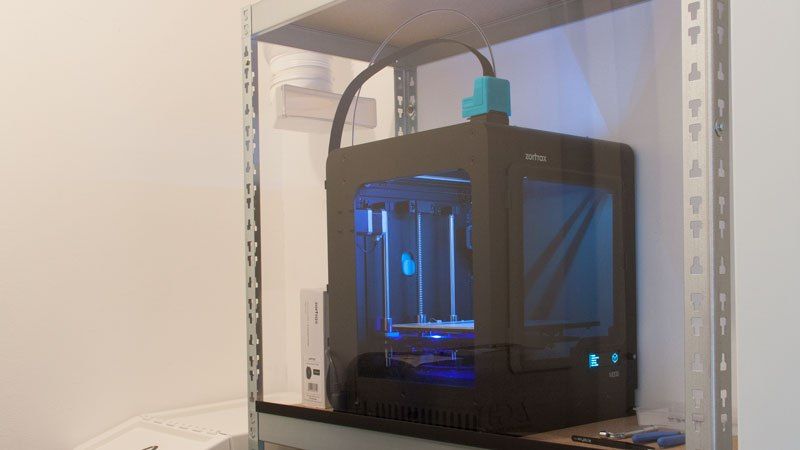 This is easy to check and is not only advisable when using a 3D printer.
When the 3D printer is used to produce complex or large print jobs, they can be time-consuming. However, if you do not want to spend 20 hours or more next to your device, it is recommended that you arrange for automatic fire extinguishers to be placed near the printer.
The range of fire protection solutions available on the market, specifically designed for 3D printing technology, is also constantly expanding. For example, 3DPrintClean has developed an automatic fire extinguishing system that is especially useful when you cannot monitor your 3D printer around the clock.
Smoke Signal is another protective measure developed by a full-time aeronautical engineer and part-time tinkerer. This smoke detector is connected to the 3D printer by attaching it partially near the nozzle or to the electronics inside the 3D printer. If smoke is detected, the device immediately detects it and automatically shuts down the printer.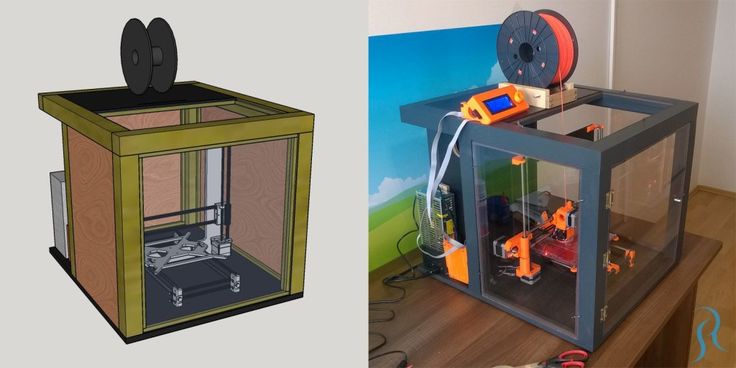
In order to be prepared for the worst case, you should have household insurance. This is highly recommended even if there is no 3D printer in your home.
Preventive Firefighting Begins at the 3D Printer Itself
Especially if you want to print jobs remotely in the future, the right printer functions will help to minimize risks. Most fires caused by 3D printers are electrical fires.
These are mainly caused by wires, terminals or individual components becoming so hot that either plastic insulation develops fire or other parts are ignited which are in direct contact with the wire. Many variants of wire insulation and connectors are already flame retardant.
So if overheating occurs, the plastic melts first. However, the plastic has an additional chemical that prevents it from actively catching fire, even in contact with an open flame. By contrast, most of the other plastic parts of a 3D printer are not normally flame retardant, so a single defect can set fire to the entire device.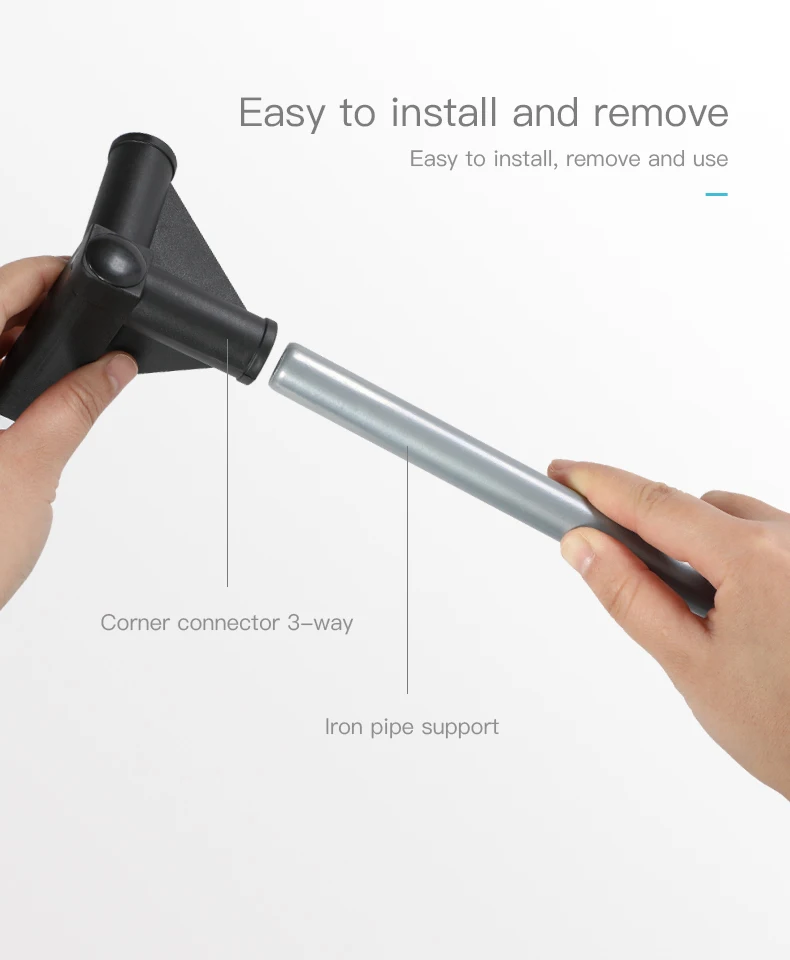
So, you should first carefully check all the components of your 3D printer.
Some points you should pay special attention to are:
The Frame
The frame of a 3D printer represents the largest combustible part when it is actually a flammable material. For example, wood is a suitable material from a mechanical point of view, but it is an extremely hazardous material from a fire safety standpoint.
While even an acrylic frame can catch fire, the best choice is an all-metal frame, which does not burn under normal conditions. But even with a metal frame, the printer has numerous other plastic parts, such as spiral wraps on the cables or various V-slot covers.
Filament
Ordinary filament is highly flammable. You should consider using one of the newer, flame-retardant filaments in 3D printing in the future. This is especially true if you store the filament in locations close to cables, electronics or heaters.
Many 3D printers with filament sensors will suspend or stop the print job if a material shortage is detected. Make sure that both the hot end and the heated print bed are turned off.
Hot End Temperature Monitoring
Always make sure your 3D printer monitors nozzle temperature and shuts off power to the hot end when safe limits are exceeded. Prusa printers in particular are characterized by this feature.
Housing
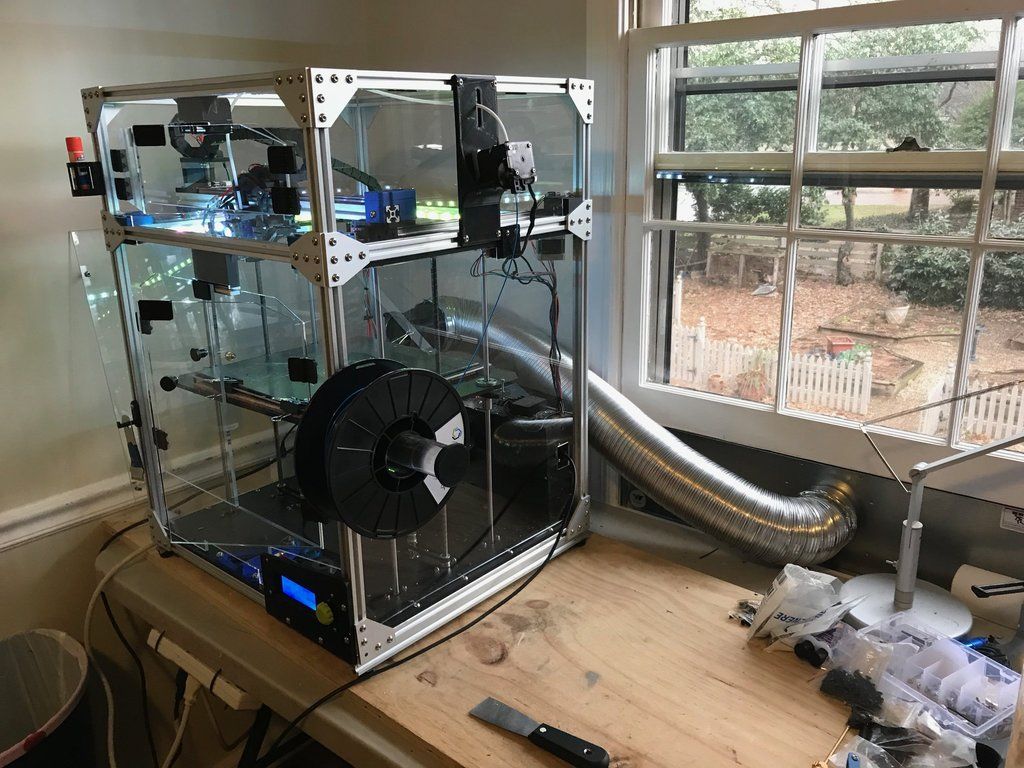
The housing not only controls the temperature, but also reduces noise and improves air quality. A suitable housing can also help prevent the spread of a fire that has started. Refractory panels for lining air ducts are an excellent way to add an extra layer of refractory material to an enclosure.
You should also take a good look at your 3D printer’s electronics and check for weaknesses. The most important things to consider here are the connectors, as well as the general resilience of the individual components.
Power Supplies
Cheap power supply units can mean an increased danger. However, the market has encouraged manufacturers to upgrade their units. Check your power supplies for both certification and fuse, adequate wire size and connectors.
The connectors should be designed for the current drawn from hot ends and heated printing beds. If you feel that your 3D printer’s equipment is inadequate, it is advisable to consider upgrading.
Connections
3D printers offered by reputable manufacturers usually have high-quality connectors. However, you should always make sure that the connector supports and can handle the resistance that is created. Especially the heated bed should be mentioned here.
If the resistance is too high, the connections are heated up so much that overheating can occur. As a result, the plastic covers surrounding the connections may melt. In the worst case, this can lead to fire development.
Bolted Connections
What all screw connections have in common is that they have a kind of flap to protect the cabling. So it is not only the screw itself that presses on the copper strands but also an intermediate layer that prevents the individual strands from breaking off.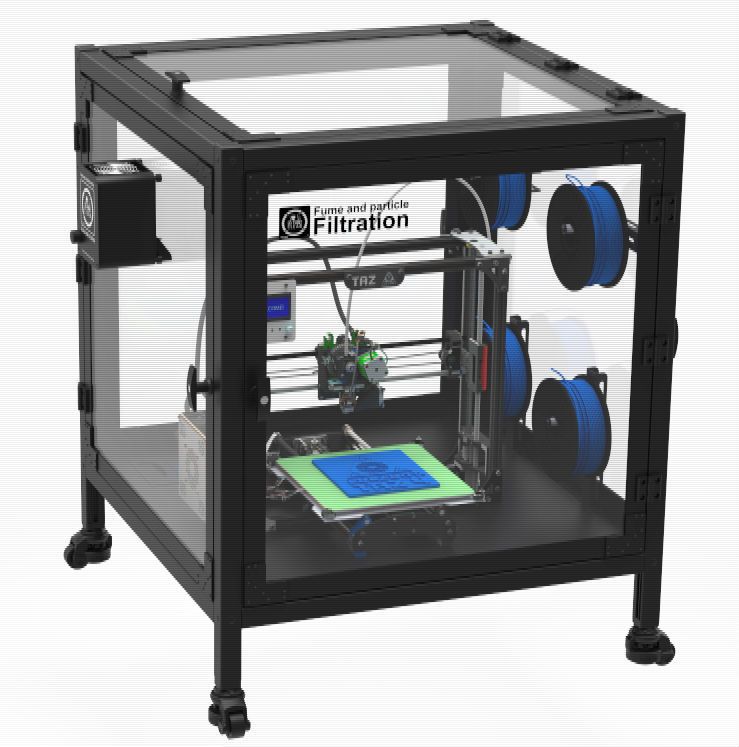
However, if you are using a screw connection that does not include an intermediate layer, you should either include a solid core wiring or add a crimp to the end of the wire.
Cable Connectors
Loose connections can cause resistance. This in turn causes heat, which in turn can cause a fire. Therefore, it is recommended to replace insufficient connectors. Check the amperage indicated on the connector to ensure that the correct power rating is available.
MOSFET
A MOSFET represents only a simple switch. It allows switching even large currents, which are needed for example for the operation of the heating bed, by a low current input as the control signal.
In general, every printer has MOSFETs. However, in order to avoid a possible fire hazard, an external MOSFET module next to the board is meant, which can be used to bypass the power needed for the heating bed or other large consumers via separate cables from the power supply unit to the board. In this function, a MOSFET can reduce higher fire risk in case of low-quality terminals or bad boards.
Since the expected currents in a 24 V system are much lower than, for example, in a 12 V system, this can usually be achieved without an external MOSFET. In general, a high-quality board does not require any additional MOSFETs. However, if you own a cheap printer kit from China, you should check it carefully in this respect.
Fuses
You should also carefully check the fuses to reduce the risk of fire to your 3D printer. Your power supply usually has a possible resistance of 25 or 30 amps, so that it can output a maximum of this current before it is automatically turned off for safety reasons.
So if you short-circuit the output directly at the supply, this is no problem at all. The power supply is simply cut off. If you imagine that a short circuit occurs directly at the cartridge heater, the only resistance at the output is the MOSFET and the wires.
This can often result in enough current flowing now to melt the wiring, which of course is not designed for the strength of such currents.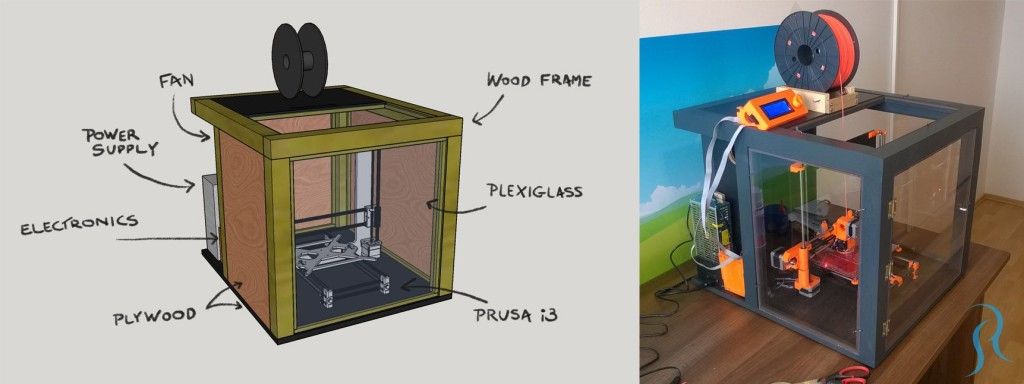 However, there is not enough current to trigger the overcurrent protection of the power supply. So what you need are single fuses, which must be located not only at the input but also at each separate output.
Again, the power supply itself already has built-in self-protection, but this is not sensitive enough to protect every single power with lower power consumption.
A rule of thumb is that a good and reliable safety level should be at least 20 percent above the expected current. This means that for a 12 V 30 W cartridge heater, which normally consumes about 2.5 A, you should use a 3 A fuse.
For a 12 V heating bed, which normally consumes about 12 A, a 15 A fuse is the optimal choice. You can look around for car fuses, for example. You can also find suitable holders for them in specialist shops and they are usually available at a reasonable price. Such a purchase is definitely cheaper for you than replacing a completely burned out printer.
Excessive Cable Elongation
Heating cables without appropriate tensile load represent a further source of danger. Basically, this is a ticking time bomb, as the individual cable strands become weaker over time and eventually break.
This can also often be observed in charging cables for smartphones. At the point where the cable strands begin to break, they reduce the strength of the cable to the few remaining strands, but the intensity of the current is still the same so that this point heats up continuously faster.
This can result in an electrically triggered fire. Cheap 3D printers, in particular, with inadequate quality often show this problem.
To avoid excessive cable stretching and the resulting risks, you should first create a strain relief. Make sure that the cables are spread over a longer length and that there are no sharp bends at individual points.
A good and effective solution can be to put a flexible wire around all cables. This bundles the existing cabling in an attractive and at the same time stable way and thus creates the stability you want. However, make sure that both ends are attached in such a way that they cannot bend. Flexible cables are available in all possible sizes, but you should try to use the smallest size, as the larger models often become very bulky and stiff at the same time.
Another option is a spiral winding. The cables are now well bundled, but it still does not completely prevent them from kinking. A semi-flexible filament such as nylon can prevent them from kinking at the same place over and over again and then tangling with the rest of the cables.
Proper Functioning of the Firmware
There are two factors that will ensure that your 3D printer can work properly: The first is the hardware, which should be optimally prepared for each step of the printing process. The next point is the firmware included in the printer. This is usually activated in time before serious malfunctions can occur. So you should also examine this carefully.
A modern, well-configured firmware will thoroughly check the 3D printer and make sure everything is correct. It will calculate appropriate temperatures in the hot end and the heated print bed and take into account the time it takes to reach these temperatures. The firmware also allows you to check all values once the previously calculated temperature has been reached. If the temperature of the hot end is close to the previously determined maximum temperature, the firmware ensures that the printer is switched off before this temperature can be exceeded and, in the worst case, the heating element falls out.
These verification features are enabled by default in newer versions of Marlin firmware. However, some manufacturers deactivate them, as these protective measures can be triggered for no reason in individual cases and a print can be stopped erroneously. In general, however, it is recommended that you enable them and update the firmware again. Normally you will benefit from a wider range of functions, better performance and increased reliability of your device.
Other Preventive Fire Measures
Checking your equipment is only the first step. Other aspects you should consider are:
Keep your device clean
Fans and stepper motors in amateur 3D printers are typically small enough to tolerate slight blocking without overheating.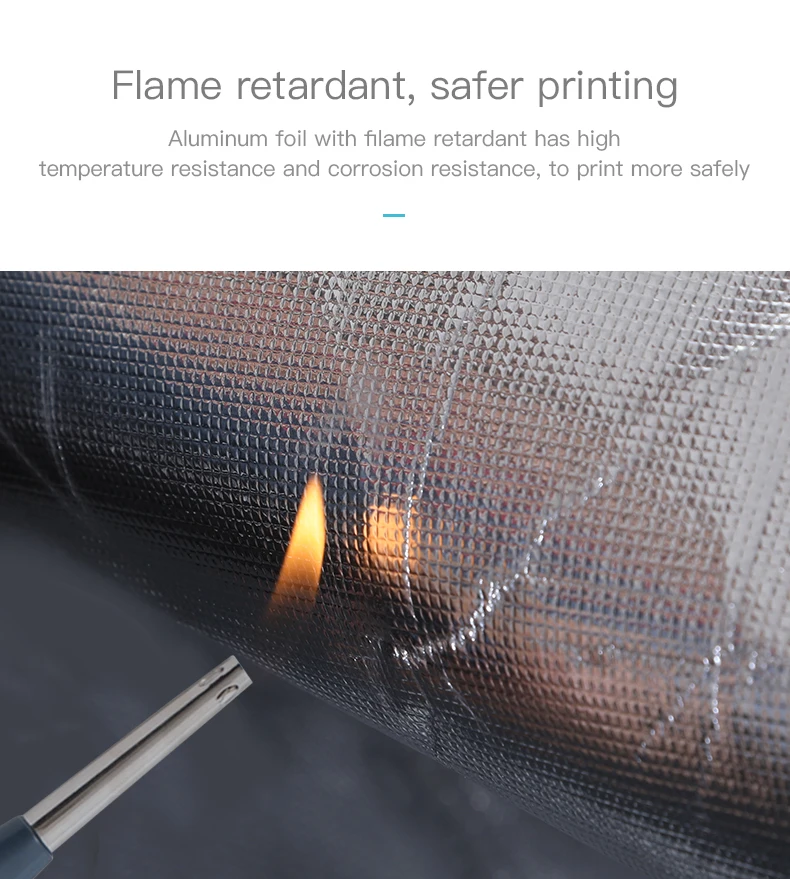 However, it is still a good idea to carefully remove the small pieces of lint or plastic from time to time. Also, check the bottom of the heating bed. Small accumulations of dust are also excellent sources of fire.
Ensure a tidy work area
As already mentioned, the environment of your printer should always be tidy. A room where a 3D printer is located is not the right place to stack books or various papers. Keep the work area clear so that nothing in the immediate vicinity can heat up.
For remote printing in particular, the ideal place for a 3D printer is a fireproof room, but most users will not have that. So it’s even more important to remove the hazards you can control. The printer should not necessarily be placed on a wooden shelf or cabinet, but on a metal shelf instead.
The execution of remote printing and its monitoring
With printing processes that take many hours or even days to complete, you may not be able to stay at home all the time or keep an eye on your 3D printer. But there are different ways to maintain some control and ensure that you can intervene if necessary.
With the cloud-enabled cameras now available on the market, as well as a variety of security alarms and switches, remote monitoring and control over long distances are both straightforward and affordable. Remember, all of these devices also pass through the cloud application and storage of the respective provider. To prevent unauthorized access to your cameras or switches, it is imperative that you use a random login and a complex password.
Cameras
Virtually any surveillance camera with WiFi connectivity can be connected to a smartphone for remote viewing. Get a device with near-focus capabilities and real-time Internet access. For example, Reolink offers a range of different cameras at an affordable price. These allow you to monitor your printing process free of charge. In general, you should always look for free remote access, since many providers’ devices only require a paid subscription.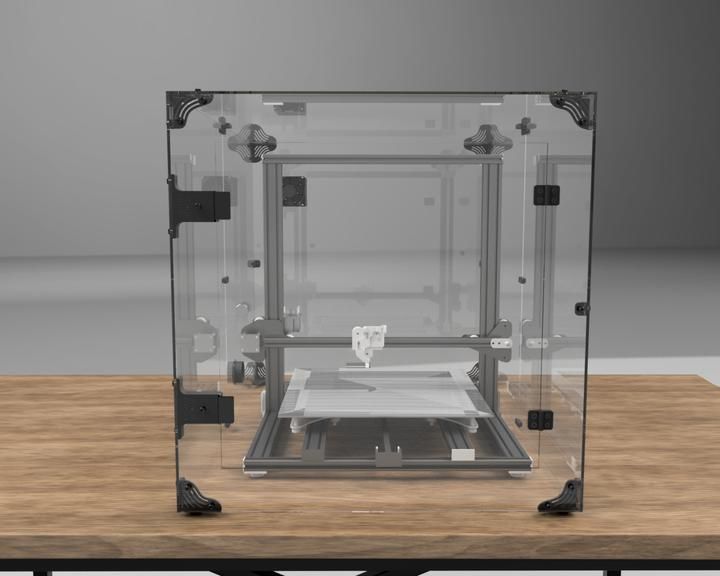
Cameras for surveillance connect via a WLAN router. It is best to set up this router in another room. Here you have the possibility of a two-channel setup. This allows you to point one camera at the print bed while the other is focused on the printer control screen. This gives you control over both the printer status and the printing status itself. This can also be useful if you are not out of the house, but are in an adjacent room.
Alarm
A fire alarm* is another mandatory measure for remotely monitoring your 3D printing. Of course, you may not be able to keep a constant eye on the cameras. A WLAN-enabled alarm, on the other hand, calls a pre-defined number when it is triggered by a fire.
Plug
As you already know, the fastest way to solve a printer problem is to simply turn it off. One way you can do this remotely is to use a smart connector*.
These can be controlled with Alexa, Google Assistant or IFTTT, for example, and can be used from anywhere via a simple application on the smartphone. Combined with some remote cameras, this allows you to have both your eyes and your virtual hands on your 3D printer at all times.
OctoPrint – The Ultimate Solution for Remote Control of your 3D Printer
OctoPrint is an open-source application that provides you with an embedded webcam feed that keeps track of both the hot end and the print bed temperatures. In addition, you can remotely control the position of the print head and start, stop or pause a print job.
However, to use this advanced software, you need to add a so-called Raspberry Pi* to your 3D printer as an intermediate control. While this is not as easy as connecting a camera, it’s a great way to add control to your remote printing.
Careful preparation, comprehensive remote monitoring and WiFi control are all essential to prevent a potential fire from entering the 3D printer. However, there is no complete guarantee that the printer will not catch fire due to unfortunate circumstances.
If you can’t constantly monitor your printer remotely and turn off the power when necessary, you’ll wonder what other options you have to avoid taking a greater risk in 3D printing. In this case, the key is carefully considered automation. Professional 3D printing facilities use halon systems, which immediately cover the affected area with fire extinguishing gas. However, there are also various solutions for hobby printers:
- First of all, the mentioned fire alarm is the simplest and most basic measure against possible damage caused by fire. This is an absolute must unless you have a professional security service that continuously monitors your house.
- The next step is a camera to protect against possible false alarms.
- An automatic fire extinguisher is another effective option. Usually the AFO (Automatic Fire Off) balls contained in the fire extinguisher are automatically activated within five to ten seconds after contact with a flame. You can attach them to a cabinet or simply place them on the frame of your 3D printer. When activated, they leave quite a mess, but they can prevent even greater damage.
Related Questions
Is there an alternative to the MOSFETS?
Instead of a MOSFET, an SSR* can be used as an alternative to reduce the load on the printer board. SSR stands for Solid State Relays and represents electronic switches that are able to control other components by processing the control signals of a transmitter. When an SSR is integrated into a 3D printer, it processes the control signals from the control board to control the heating bed.
An SSR offers the advantage that the heating current does not flow as usual from the power supply via the control board to the heating bed, but can run exclusively via the SSR. The connections on the board are spared as the control board only has to control the SSR with a low load.
However, the SSR also has the disadvantage that it has a relatively high electrical resistance, which is higher than in a normal cable. As a result, the SSR can become very hot under certain circumstances. An additional mounting of a heat sink, which can affect the SSR, is therefore advisable.
What components are required to install an SSR?
An SSR for the heating bed is installed to relieve the load on the current-carrying components of the printer board.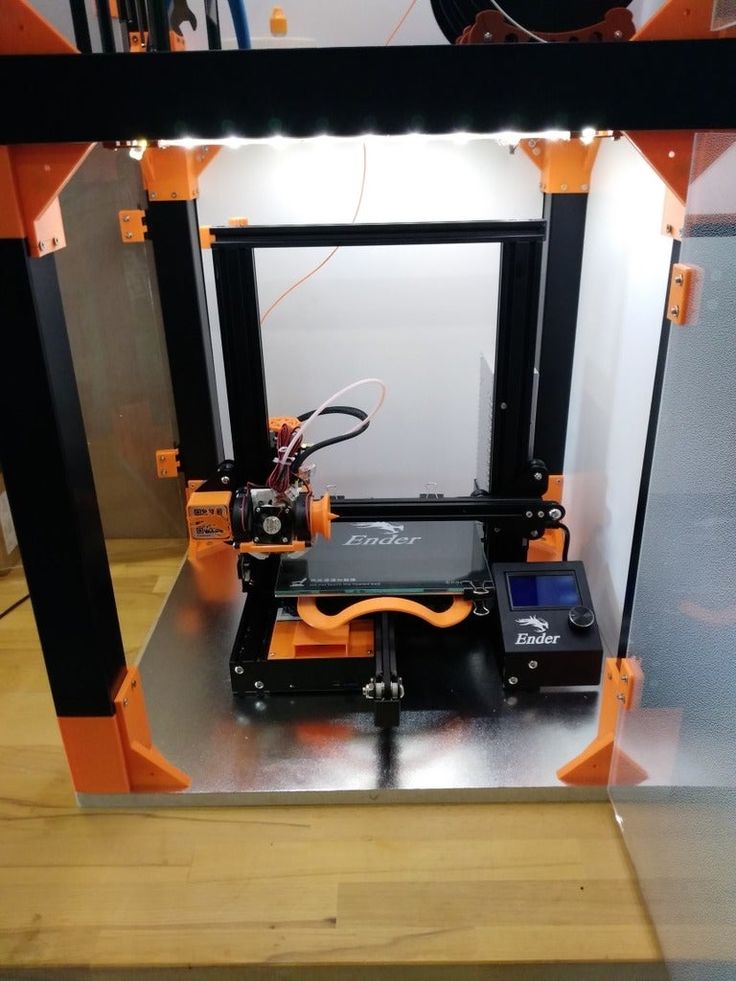 For this purpose, the components are first positioned as they are required in the final setup.
These ideally include a highly flexible silicone cable, wire end sleeves or cable lugs, which are attached to the ends of the stripped cables for safety reasons, a crimping tool and the solid state relay. Furthermore, it is recommended to mount a heat sink for the SSR. The cables can optionally be additionally insulated with insulating tape or shrink tubing.
What else is needed so that an SSR already installed can contribute to fire protection?
Installing an SSR also helps to protect the 3D printer from fire, as both the printer board and power connections do not become as hot as they used to. However, an additional safety measure should be taken: The use of Marlin firmware is a further step, in addition to the SSR, to increase the safety of the 3D printing process.
This firmware includes Thermal Runaway Protection, which further protects the 3D printer by ensuring that if a certain temperature is exceeded, the power to both the nozzle and the heating bed is cut off and the printer is disabled. To ensure that this feature is enabled within the Marlin firmware, it is recommended that you update the firmware when you start up the printer.
Disclosure: This website is the property of Martin Lütkemeyer and is operated by Martin Lütkemeyer. Martin Lütkemeyer is a member of the Amazon Services LLC and other Affiliate Programs. These are affiliate advertising programs designed to enable websites to earn advertising revenue through advertising and linking to Amazon.com and others. Links marked with * are affiliate links.
Printer fire safety approach
sendel
Loading
11/16/2018
4306
Personal diaries
WANHAO Duplicator 4X
After reading and looking at the horror photos, I decided that I needed to think seriously about the fire hazard. My printer is made of acrylic, which is no better than wood in terms of fire hazard.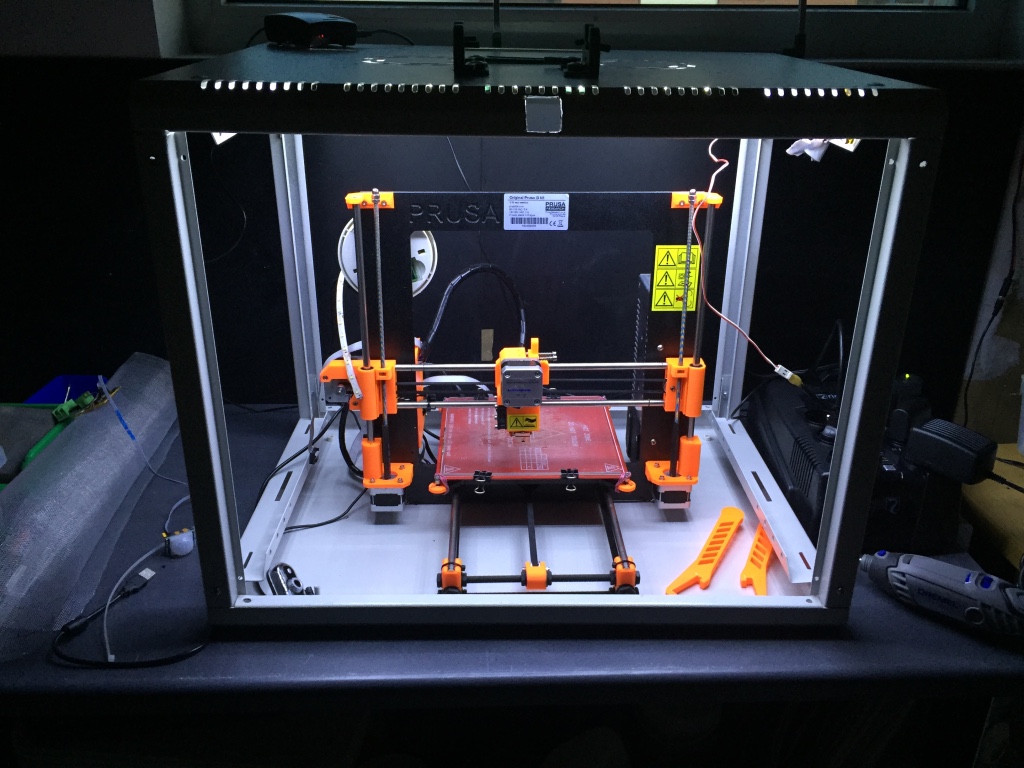 In the future, a transition to alumina frame and sheathing is planned, but in order for the future to come, you need to protect yourself from the identified problems. I think the most dangerous problem is the freezing of the control controller at the time of heating the extruder, because. examples are creepy and when printed with PLA, the model puffs with a high probability.
Fire safety must be carried out comprehensively, of course, but in reality you have to choose what can be done faster. For me (and many) it's quicker and easier to install a fire suppression device in the first place, and you can get smarter with electronic protection later. So the choice fell on self-actuating powder fire extinguishers. Took 'OSP-2 mini' and 'Orion alpha'.
The first is triggered by temperature, the other is triggered by direct contact with fire, so they complement each other.
OSB mini
And Ironon alpha.
Then there will be a thermal switch attached to the aluminum carriage of the extruders. How do I share.
Subscribe to the author
Subscribe
Don't want
19
Article comments
More interesting articles
AlekS
Loading
10/19/2022
530
eight
Subscribe to the author
Subscribe
Don't want
I will leave here this collection for Exorcism and resurrection of boards from BTT
https://g...
Read more
filmeh
Loading
11/05/2022
1571
four
Subscribe to the author
Subscribe
Don't want
Well, and I have reached the level of writing articles, hello to everyone who came, enjoy reading, I will try not to. ..
..
Read more
103
Subscribe to the author
Subscribe
Don't want
So I had the opportunity to try to implement everything based on MMU2 (1h, 2h, 3h, 4h, 5h,). I have...
Read more
Welcome to NIOZ.RU
Sort by
Product Name +/-
Product Price
Featured Products
Product Availability
Displaying 1 - 60 of 621
153060150
Products
400 ml
RUB 1940.00
Product description
RUB 390.00
Product description
350 ml
RUB 850.00
Product description
Print ready
RUB 23700.00
Product description
Ready to print out of the box
RUB 14500.00
Notify me when available
Item description
Print ready
RUB 20900.00
Notify me when available
Item description
Ready to print out of the box
RUB 43500.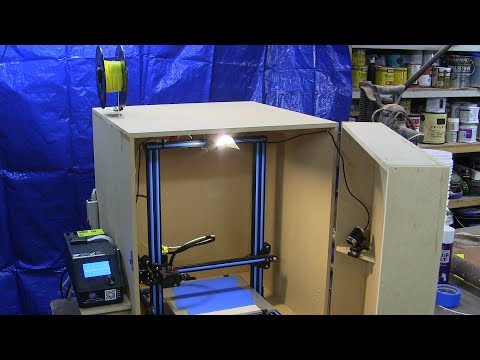 00
00
Item description
Print Ready
RUB 39000.00
Product description
LCD 0.7/1.75 mm
RUB 1550.00
Notify me when available
Item description
RUB 650.00
Product description
Wiznet W5100 Arduino Shield
RUB 650.00
Notify me when available
Item description
RUB 550.00
Product description
Assembly kit
2500.00 RUB
Notify me when available
Item description
Volume: 1 l.
RUB 3100.00
Product description
Boscam 200mW, 5.8GHz
Chimera, e3d
RUB 1700.00
Product description
Printhead 1.75mm 0.4mm
RUB 1100.00
Product description
Dual print head 1.75mm 0.4mm
2500.00 RUB
Notify me when available
Item description
Long
RUB 750.00
Item description
Short
RUB 700.00
Item description
RUB 1900.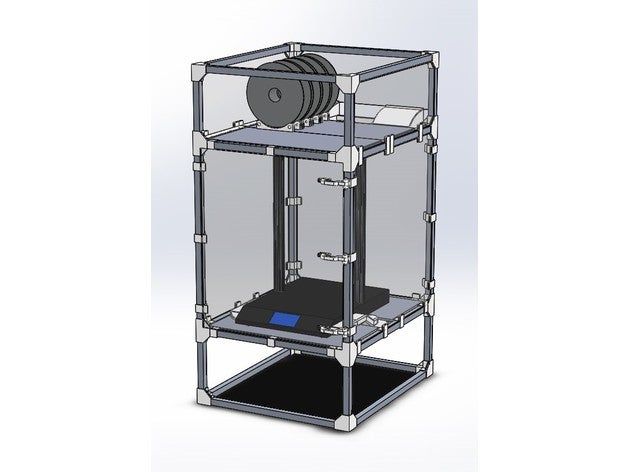 00
00
Report Admission
Product description
APM2.6 mavlink
RUB 1350.00
Product description
RUB 250.00
Product description
11.1V, 20C
RUB 1900.00
Item description
11.1V, 25C
RUB 1250.00
Notify me when available
Item description
11.1V, 25C
RUB 2100.00
Item description
Heat block v6
RUB 150.00
Item description
cartridge type thermistor
190.00 RUB
Item description
Heat block Volcano
48V 12A
RUB 2700.00
Report Admission
Product description
12V 20A
RUB 1550.00
Product description
12V 30A
RUB 1950.00
Notify me when available
Item description
12V 5A
RUB 450.00
Notify me when available
Item description
24V 15A
RUB 2100.00
Notify me when available
Item description
RUB 250.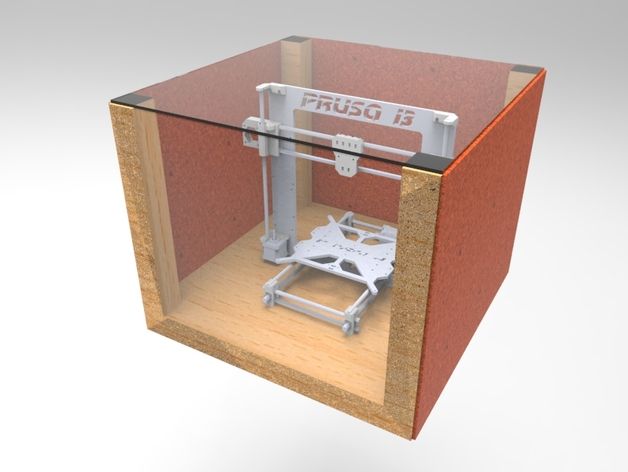 00
00
Product description
Hobbed bolt
$150.00
Item description
Price for 10mm (free cutting)
RUB 13.00
Product description
Price per 10mm (free cutting)
RUB 17.00
Item description
Section 400mm
RUB 650.00
Product description
Price for 10mm (free cutting)
RUB 25.00
Product description
10mm (cut to size)
RUB 70.00
Item description
10mm (cut to size)
RUB 90.00
Item description
Price per 10mm (free cutting)
RUB 7.00
Product description
Price for 10mm (free cutting)
RUB 10.00
Item description
Section 400mm
RUB 400.00
Product description
2x400mm, 2x350mm, 2x325mm
RUB 2100.00
Product description
2x420mm, 2x405mm, 2x350mm, 1x20mm
RUB 2200.00
Product description
25x25x10mm
RUB 150.