Filament cleaner 3d printer
How to Use 3D Printer Cleaning Filament (& What Not to Do)
This article is going to simply explain what 3D printer cleaning filament is. We’ll explain why it could be a time (and in some instances a life) saver for you.
Then we’ll cover how best to use it, and what to avoid so it’s as easy for you to use as it should be.
Why you need cleaning filament
You don’t have to have used a 3D printer for long to realise that regular maintenance is a necessary evil.
With plenty of things that can go wrong, and many moving parts, it’s no secret that the better you look after your printer, the less time you’ll spend scratching your head over it.
Or more aptly, experience the “I’m going to chuck this thing out of the window” level frustration of coming back to your machine printing in ‘thin air’, because it stopped extruding part way through your print.
In some instances it’s not a blockage that annoys you the most, but an other-wise perfect print finishing with little specks of your previous colour filament embedded in it.
The extruder and nozzle components of your printer are no exception – in fact they’re arguably the most sensitive parts to your printer.
They need the most maintenance yet they’re traditionally the hardest part to keep in top condition – often you can’t tell a blockage is lurking until it’s too late.
How not to clean your nozzle
Now there are antiquated methods to cleaning your nozzle, which are usually (if you admit it) only done after you’ve experience a blockage.
Before it’s happened though, you don’t really give a conscious thought to that blockage that’s lurking in that nozzle, waiting to happen.
And that’s where cleaning filament comes in. Use it proactively and it’s the best preventative measure, yet it’ll also help to unblock all but a fully clogged nozzle.
We’ll briefly cover the current after-its-blocked nozzle cleaning methods such as ‘Atomic method’ or ‘cold pull’ technique and the ‘insert micro drill bit the size of your nozzle’ method and then compare them to the newer, proactive method of a cleaning filament review below.
If you’ve currently got a fully blocked nozzle, you can read our full guide to unclogging your nozzle here.
In this article we’re going to cover:
- What is cleaning filament
- Advantages/disadvantages over other methods
- What to look for when buying it (and where to buy it)
- How to use it
Feel free to scroll to the specific section of this guide for the information you’re looking for, although I recommend reading it all so that you get the best help for how to use 3D printer cleaning filament.
It could save you a lot of hassle and time later on.
How does cleaning filament work & what is it?
You’re likely skeptical that cleaning filament is a bit of a gimmick. Or just as likely, you’re not convinced you even need it.
Never had a blockage before? I don’t believe you It can happen to anyone at any time.
Some think cleaning filament as just made from Nylon or HDPE filament – which is the material of choice for the cold pull method. It isn’t by the way (and you don’t use the cold pull method with cleaning filament).
Or perhaps it’s just a cheap, highly abrasive material that strips everything out? And presumably erodes the inside of your nozzle over time…
Again, no. It’s actually (we can only speak for ours, of course) a non-abrasive industrial-grade compound for purging hard-stuck chemical residues out of injection moulding machines.
We’ve sourced the best we could find, modified it for a larger range of operating temperatures and extruded it into 3D printer-friendly filament form.
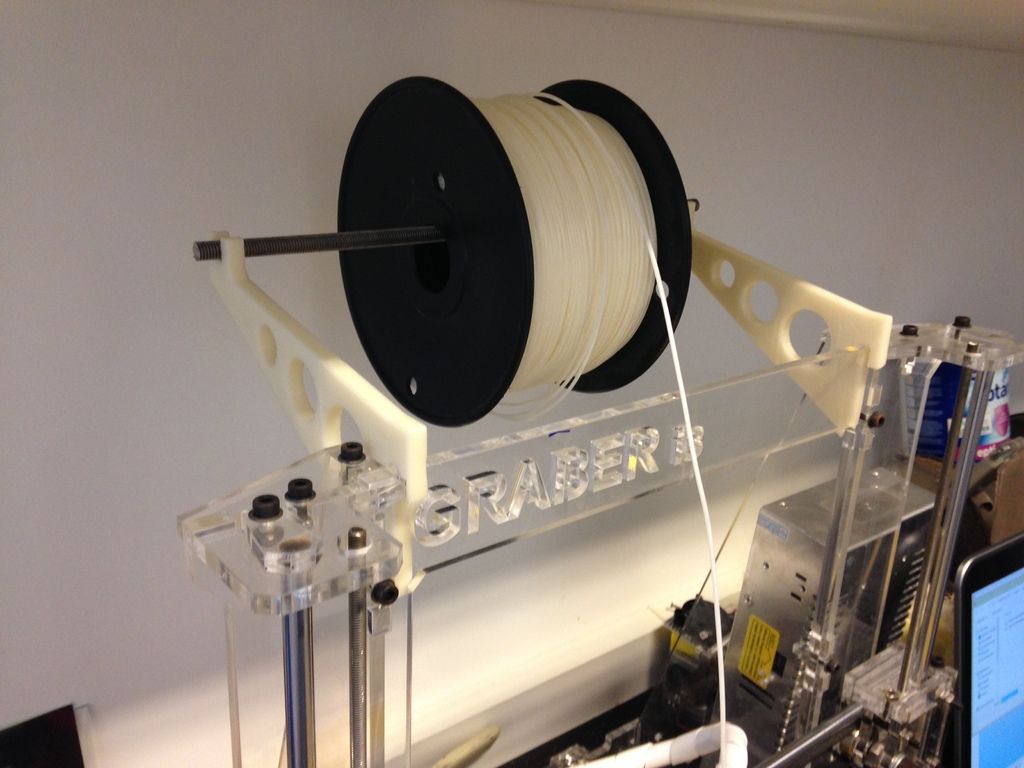
Why use cleaning filament over traditional methods?First on the left, towards a cleaner nozzle on the right. You can see how this can easily take 5-6 ‘pulls’
The well-known ‘atomic method’ or ‘cold pull’ has long been the method of choice to clean out your nozzle.
Often done after you’ve experienced a full or partial blockage, the general method goes like this:
- Heat up your nozzle to around 250°C and insert Nylon filament as far as it will go, then cool the nozzle back down to about 30°C while maintaining the pressure.
- Once cool, quickly pull the Nylon out. Usually takes a good hard yank (you may need one hand on your printer to prevent it being pulled off the desk).
- Do this procedure 3-5 times or until the end of the filament you’re pulling out is clear and has a well-defined tip (indicating a clear and residue-free nozzle).
In our opinion this process is a little bit, well, brutal. The whole process puts a lot of strain on some relatively delicate parts in your machine.
It also takes time heating and cooling your nozzle each time, and waiting around (you don’t want to leave the material hot in the nozzle for too long either; it definitely won’t help your situation).
The other option is if the cold pull method won’t work, you’ll likely need to insert a very thin drill bit or hypodermic needle up there. You’ll want to use the same size as the nozzle.
For 0.4mm nozzles, this is just about possible, but if you’re printing with 0.2mm nozzles or small – you’ll probably be best off just replacing it.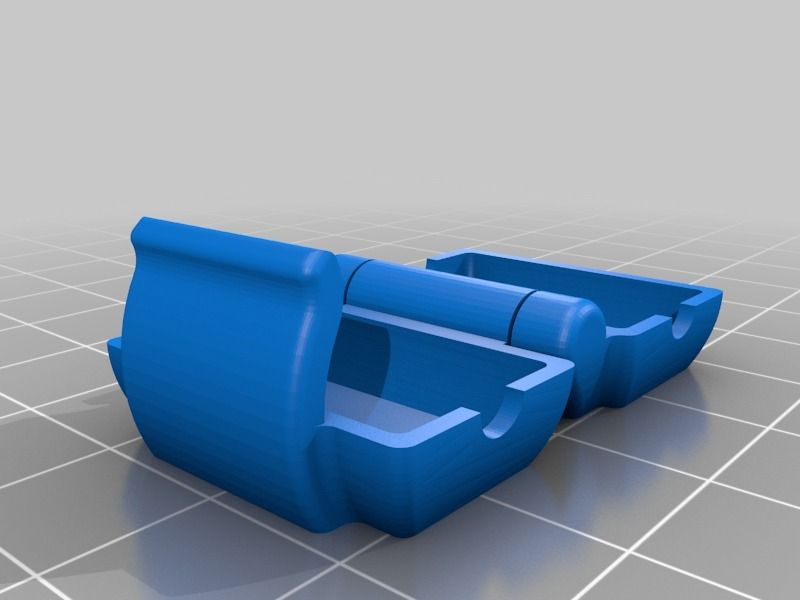
The risk here, apart from the obvious dangers of using very small, thin needles (we don’t recommend it, for the record) is that they can snap off inside the nozzle.
You’ll notice neither of these methods are really fool proof, or that user friendly. Luckily, there’s a better way that’s fairly new on the scene.
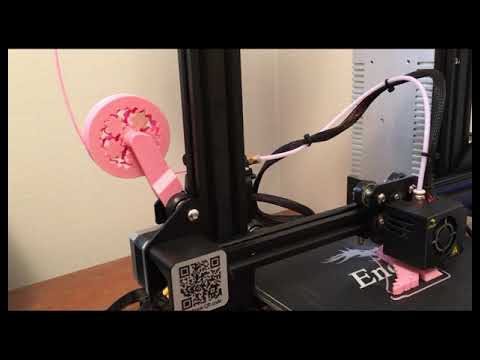
3D Nozzle cleaning filament takes far less time to clean out your nozzle. Often in as little as 30 seconds, and you don’t need to do anything out of the ordinary, except changing filament. Which you should be pretty comfortable with by now…
Disadvantages to using cleaning filamentThis wouldn’t be a fair review without telling you what you can’t use it for, and why it’s not for everyone.
- You can’t unblock a fully clogged nozzle with it. You need to have at least some flow rate to work. That’s why it’s always best having and using nozzle cleaner filament before you need it.
As long as some filament comes through with a small amount of force, you should be able to unclog your nozzle. And we promise we won’t stand back, arms folded saying “told you so” the whole time…
- It’s expensive. Well, it isn’t. But at first glance. You see, you really don’t need much. About 0.5 to 1 gram per use, maximum. Luckily you don’t need to buy a whole KG spool of it then (if you did, ours would be £360/KG).
For around £18 you’ll get 50 grams, which will get you a solid 70-100 nozzle purges. That’s just 20p per clean, in 30 seconds. Which compared to 20 minutes yanking your 3D printer around for each clean, well – it’s a no-brainer.
What to look for when buying, and where to buy cleaning filament?
Make sure you know what you’re getting. Some cleaner filaments could just be re-branded cheaper materials that don’t perform as advertised. Make sure you read the reviews, and factor in the price.
There may be cheaper ones on the market, but it’s worth weighing up – you may need more grams per clean if they’re not as effective, so it could end up being more expensive overall.
Other known brands we’re aware of are Lulzbot and eSun cleaning filament, so it may be worth doing your own testing.
Reviews are usually a pretty good indicator that it does as advertised. As for where to get it, you can find a few popular brands on Amazon.
How To Use Cleaning Filament:
This is a screenshot from 3D Printing Revolution’s Youtube Floss Cleaning Filament review videoIf you’ve bought some already and you’re left wondering what to do with this un-printable filament – or you’re just wanting to read up on cleaning filament instructions before you begin, here we explain what you should and shouldn’t be doing with your new one-stop 3D printer cleaning kit.
For most machines, there’s no need to cut the cleaning material, just load and unload like a regular filament.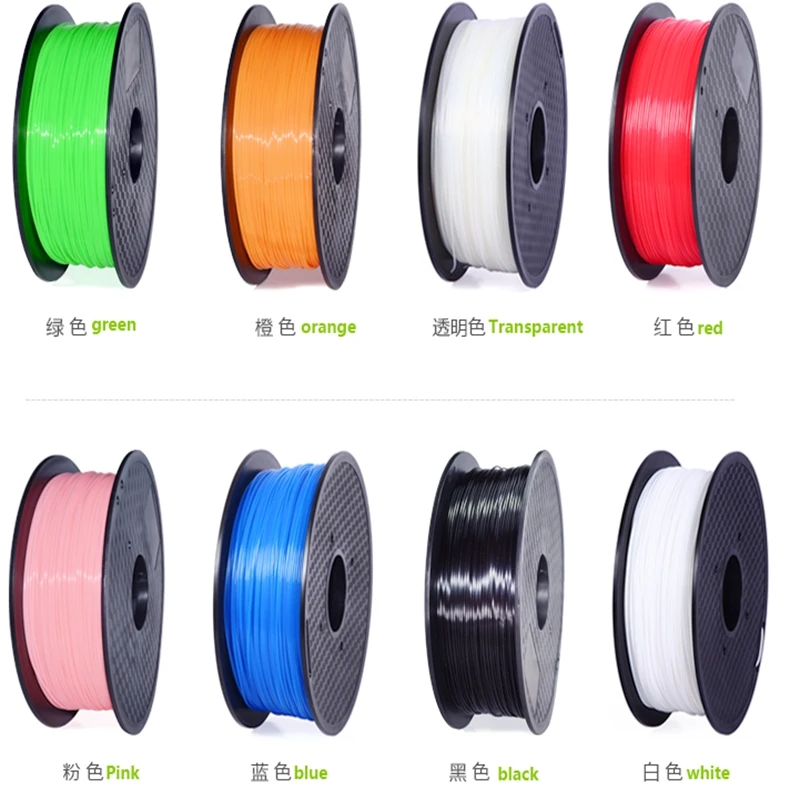
For other machines or if you have an under extruding partial blockage, you may wish to unplug the Bowden tube to manually push the Floss filament through the nozzle.
When printing with the same material:
- Printing with one material like PLA, all the time? How often you need to use your cleaner filament will depend on how often you print, and the quality of filament that you use. Poor quality or cooked/burned filament can leave residue in your nozzle. Even PLA can solidify in the nozzle over time, so we advise flushing it through at least every 200 – 400 printing hours.
- Depending on your printer design, there are a few ways to use cleaning filament. In most instances, simply unload the previous filament and load your cleaner filament as you would any other filament.
- Keep the printing temperature the same as your printing filament and begin to extrude the new cleaner material into thin air (don’t try to print with it!).
 Many printers will extrude a set amount as part of the loading process anyway. Keep extruding until you cannot see residue of the previous material, or contamination specks. Once it runs clear, simply unload and reload with your printing filament. No need to try a cold pull (although you can if you’re still not convinced it worked).
When printing with different materials:
- Always run the cleaner filament through at the last printing temperature. So if you were using PLA, and you’re changing materials to ABS, run the cleaner through at around 200C, not 230C. Likewise if your last material was Nylon and you’re changing down to PETG, you’d run the cleaner through at around 260C. Our Floss cleaning filament has a temperature range of 200-280C+
- As before, run enough filament through until you’re sure you cannot see any specks or residue. Then just unload and proceed as normal with your new material, ensuring the nozzle is at the correct temperature for the new material before you load it.

And that’s it, that simple. You may need to manually feed it if your nozzle is partially blocked to get some to feed through, just to apply a little extra pressure.
Although don’t force it, if your nozzle is completely blocked unfortunately you’ll just have to use one of the previously mentioned unblocking methods.
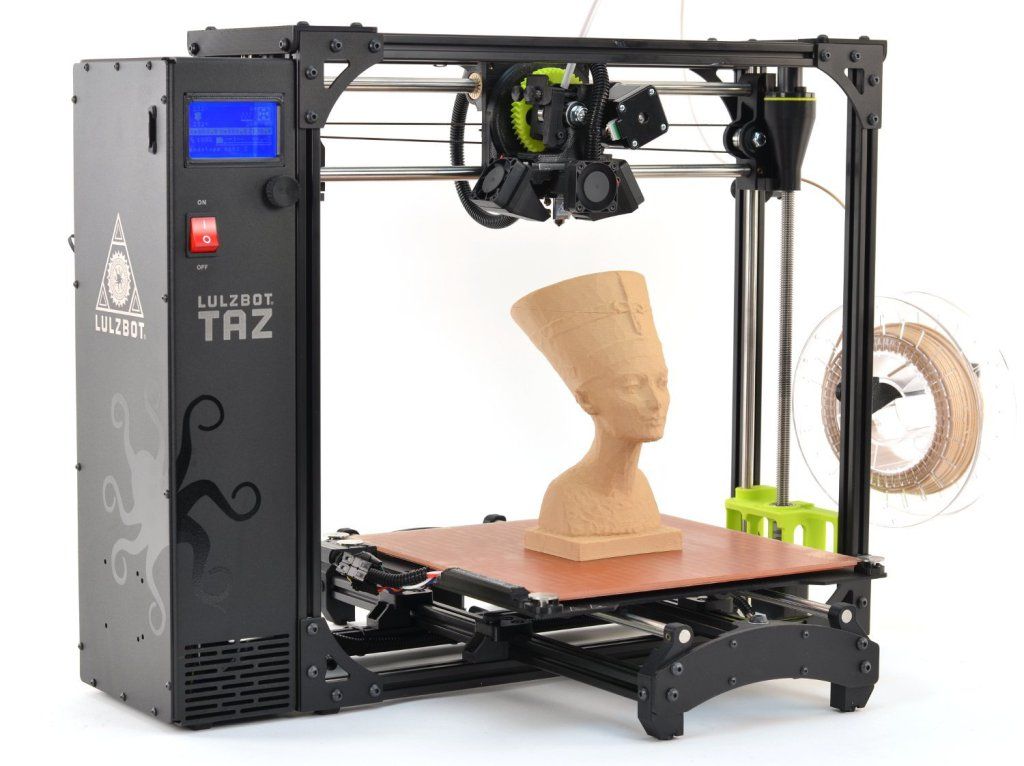
Esun Cleaning Filament | LulzBot 3D Printer Maintenance
3D Printer Cleaning Filament is valuable when transitioning between filaments that require different printing temperatures or have very different colors. eSUN Cleaning Filament cannot be used to create objects, instead it is a complementary filament to properly maintain your LulzBot® 3D printer.
Read more
Use Cleaning Filament to purge the tool head of your LulzBot® 3D printer when going from a high temperature filament to a lower temperature filament, or when transitioning from a dark color filament to a light color filament. Cleaning Filament can also be valuable to purge the tool head after using composite materials. This significantly reduces the likelihood that residual particles might remain in the tool head to affect future prints. Using Cleaning Filament also requires cutting a short length of 100mm -200mm (3.44in - 7.87in) from the coil, and manually controlling the software to transition between the temperature of the last material you printed with and the next material you are going to print with.
Filament Specifications
Filament Diameter: 3 mm (.118 inches)
Amount of Filament: .1 kg (.22 lbs)
Printing Specifications
Special Tool Head Requirements: None
Hot End Temperature Range: 150°C - 300°C
Temperature varies based on the filaments you are using.
Print Surface: Extrude cleaning filament over the print bed.
Packaging Information
eSUN Cleaning Filament is loose packed as a coil in a plastic bag.
Print Profiles
Find the most up-to-date print profiles, including hot end and print bed temperatures, by selecting your Free Software program of choice:
Cura LulzBot Edition
Slic3r
More Information
Manufacturer website
Material Safety Data Sheet
Prop. 65 warning
 Zoom
Previous Next
Save
-63%
$ 7 00
7.0
Quantity
Product models
Filament Diameter
2.85 mm
Filament Weight
Coil, 0.1 kg
Filament Color
Natural
Filament Type
Cleaning
Overview
2.85 mm Coil, 0.1 kg Natural Cleaning
Save
-63%
$ 7 00
7.0
Quantity
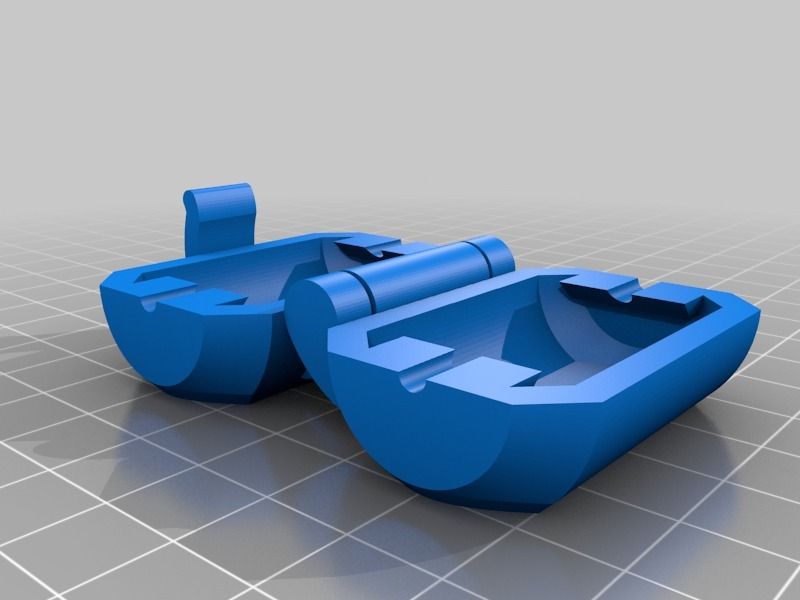
Free STL file Clamp and filament cleaner・3D printed model for download・Cults
Filament clip and cleaner V1
0. 65 €
65 €
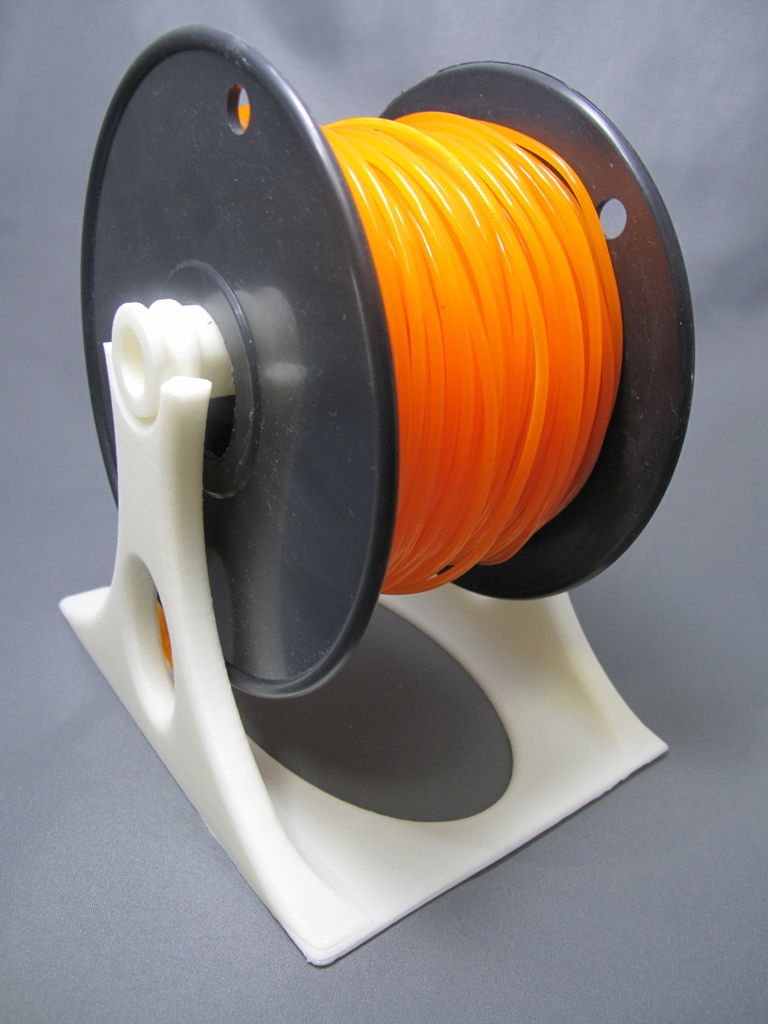
Adjustable spool bracket
5 €
The best files for 3D printers in the Tools category
nine0003 *NEW* Strong Flex door Carabiner ddf3d CustomizedFree
SNAKE BOOKMARK
Free
Star Trek Alarm Clock - Adafruit PyPortal
Free
Ultimate-er Stringing Test
Free
Ski pole basket
Free
nine0003 Giant LED ClockFree
Aeropic 7-segment magneto-mechanical display
Free
12mm and 15mm bicycle thru axle holder for pegboard
Free
Bestsellers in the Tools category
UNIVERSAL BED LEVELING INDICATOR FOR VERY ALL PRINTERS
2. 82 €
82 €
PRECISE DIAL INDICATOR 3D PRINT DIY
1,92 €
PRECISION CALIPER 3D PRINT DIY
3,15 €
Paint stand with scissors
5.21 €
Cut-Man - PET bottle cutter with handle!
€3.49
nine0003 Ender 3 S1 pro fan duct 5015 40201.30 €
SUPERBOX
1,50 €
Ender 3 S1 BEST cable guide - vertical
€2.50 -25% 1.88 €
3D printed wave transmission (harmonic drive)
€4.99
Shrek Pooping Toothpaste Topper
2. 83 €
83 €
Display holder FLSUN v400
€9.99 -fifty% 4.99 €
ARTEMIS -> Shop for Alligator 2 || 6.5" Arrows || Repeating Crossbow
6.25 €
Ender 3, 3 V2, 3 pro, 3 max, dual 40mm axial fan hot end duct / fang. CR-10, Micro Swiss direct drive and bowden compatible. No support required for printing
1.55 €
Trailer hitch with steel helmet
10 €
Business card embossing system
3 €
Case for Chill Buddy lighter
0,93 €
Do you want to support Cults?
Do you like Cults and want to help us continue our journey on our own ? Please note that we are a small team of 3 people, so supporting us in maintaining activities and creating future developments is very easy.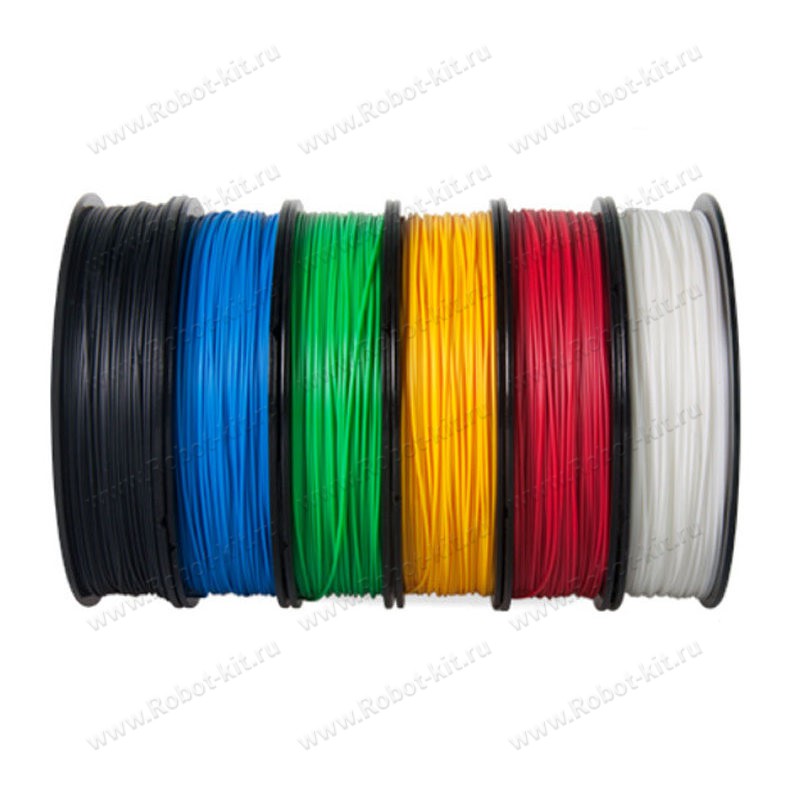 Here are 4 solutions available to everyone:
-
AD: Disable the AdBlock banner blocker and click on our banner ads.
-
AFFILIATION: Shop online with our affiliate links here Amazon.
-
DONATIONS: If you want, you can donate via PayPal here.
-
* INVITE FRIENDS: * Invite your friends, discover the platform and great 3D files shared by the community! nine0006
Plastic processing for 3D printer. Plastic post-processing after 3D printing ABS, PLA, Nylon, Petg
Contents:
- Post-processing of FDM parts
- Remove supports
- Removing Soluble Supports When Printing With Dual Extruder 3D Printer
- Sanding plastic 3D printed products
- Use of Acetone in ABS Plastic nine0134 Filling irregularities in ABS plastic products
- ABS/PLA polishing
- Priming and painting 3D printed products
- Acetone Baths for ABS Products
- Chemical solvent baths
- Using epoxy to finish prints
Hello everyone, Friends! With you 3DTool!
With the FDM 3D printer , you can quickly and economically produce plastic parts of any geometric shape.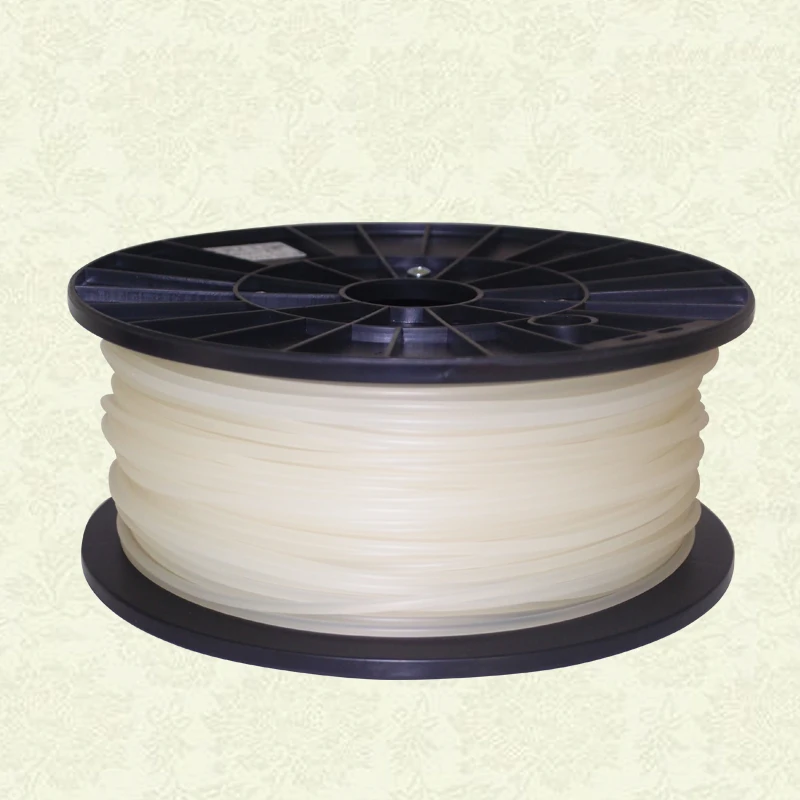 Finished parts show visually the lines of the layers they were printed on, making post-processing an important consideration if a smooth surface is required. Some post-processing techniques can also increase the strength of finished products by helping to reduce their anisotropic properties. nine0192 This article will discuss the most common post-processing techniques in FDM 3D printing .
Catalog of FDM 3D printers
Post-processing of FDM parts
This picture above (from left to right) shows the post-processed parts FDM :
- gap filling
- raw
- ground
- polished
- painted
- epoxy coated
Remove supports
Support removal is typically the first step in post-processing for any 3D printing technologies if the part requires support to be built for precision manufacturing. Supports can usually be divided into 2 categories: standard and instant .
Unlike other post-processing methods discussed in this article, support removal is a requirement and does not result in improved surface quality.
Removing supports mechanically is necessary when printing with a 3D printer with a single extruder (for example, PICASO Designer X, Hercules 2018, Zenit, Prusa i3 Steel Bizon) When using 3D printers with two extruders, as a rule, the supporting part of the product is made of special soluble materials. nine0006
Catalog of 3D printers with two extruders
Left to right. Original printing with support, poor support removal and quality support removal.
Tools and materials you will need for this job:
- Pliers
- Set with small tools (eg watchmaker's set).
nine0248 Support Removal Process: The support material can usually be removed from the finished model without much effort. Cleaning of the substrate material in hard-to-reach places (for example, in holes) can be done using an awl and pliers. Properly positioned support structures and proper print orientation can greatly reduce the impact of the support material on the aesthetics of the final result.
Pluses
- The overall geometry of the part does not change
- Fast on time
Cons
- Does not remove visible layer lines, streaks or spots on print surface
- If support structures leave excess material or marks behind, the accuracy and appearance of the part will be reduced
Removal of soluble supports when printing with a 3D printer with two extruders
As we said earlier, the removal of supports printed from soluble materials is done differently than manually, mechanically, so the use of 2 or more extruder printers is preferable. (e.g. PICASO Designer X PRO, Raise3D PRO2) nine0006
Catalog of 3D printers with two extruders
Tools and supplies you will need for this job:
- Solvent safe container
- Thinner
- Ultrasonic cleaner (optional)
Process : the final model is placed in a bath with the appropriate solvent (for example, for PVA plastic it will be ordinary water, for material HIPS it will be D-limonene ) until the support material dissolves. Support is usually printed with:
- HIPS (in conjunction with ABS )
- PVA (in conjunction with PLA )
Glass storage containers such as jars are excellent receptacles for diluting limonene. For dissolution in water, any non-porous container will do. For prints using HIPS/ABS bath with 1:1 ratio of limonene and isopropyl alcohol works very well for fast support removal. Many other auxiliary materials such as PVA (used with PLA ) are water soluble.
Helpful Hint: Speed up the dissolution time of the support material by using an ultrasonic bath and changing the solution as soon as it becomes saturated with plastic dissolved in itself. Using a warm (not hot) solvent will also speed up the dissolution time if you don't have an ultrasonic cleaner available. nine0192
Catalog of ultrasonic baths
Pros
- Great for complex geometries where standard support removal would be impossible without damaging the base model.
- This results in a smooth surface where the support structure is in contact with the base piece.
Cons
- Improper dissolution of the material can lead to discoloration and deformation of the entire part. nine0139
- Does not remove visible layer lines, streaks or spots on part surface
- May cause small spots or holes in the final print if soluble material gets on the object during printing
-
3D plastic sanding
Sanded brown ABS plastic part
Tools and materials you will need for this job:
- Sandpaper up to grit 1000
- Rags
- Toothbrush
- Soap
- Face mask
Sanding Process: After removing or dissolving the supports, sanding can be performed to smooth the part and remove any visible stains or traces of the supports. The initial grit size of the sandpaper depends on the layer height and print quality.
For layers with a height of 0.2 mm or less, or if there are no spots left on the part after printing, sanding can be started with a paper grain of - 150.
If there are obvious spots or the object was printed at a layer height of 0.3 mm or more, start sanding with 100 grit paper.
purity. The print should be cleaned with a toothbrush in soapy water and then with a rag, between sanding gradations to prevent the accumulation of dust and " sintering ". Your FDM parts can be sanded down to 5000 grit to achieve a shiny part surface. nine0006
Helpful Hint:
Always sand evenly over the entire surface of the part in small circular motions. Of course, it is more convenient to sand perpendicular or even parallel to the print layers, but this can lead to indentations in the model. If the part becomes discolored or if there are many small scratches after sanding, you can use a blow dryer. With it, you gently heat the part, thereby softening the surface a little and visible unnecessary defects will weaken or disappear altogether. nine0006
Pros
- With this method, you get an extremely smooth surface
- This method facilitates additional post-processing (such as painting, polishing, or epoxy coating)
Cons
- Not recommended for thin wall prints as this may damage part
- Difficult for surfaces with difficult geometries and fine details
- May affect overall print accuracy if sanding is too aggressive and too much material is removed
Acetone for ABS plastics
Two white printed halves of ABS bonded with acetone and diluted plastic.
Tools and materials you will need for this job:
- Acetone
- Cotton buds or brush
Machining process: When the size of the finished part exceeds the maximum size of the 3D printer's camera, the model often has to be broken into smaller parts and reassembled later by gluing. For PLA and other materials, bonding can be done using the appropriate adhesive (selection of adhesive will depend on the plastic) . For ABS plastic, multi-piece assemblies can be glued with acetone. The mating surfaces should be lightly moistened with acetone and held firmly together or, if possible, clamped until most of the acetone has evaporated. At this point, the two parts of your model will stick together. nine0006
Helpful Hint: increasing the contact area with acetone will increase the strength of the joint. This can be done by including block connections in the design.
Pros
- Acetone will not discolor the part surface like other adhesives
- After drying, the seam will exhibit ABS properties, making further processing easier and more uniform
Cons
- The joint formed by this cold welding is not as strong as a solid impression
- Excessive use of acetone can cause the part to dissolve aggressively and negatively affect the final result and tolerances
-
Filling irregularities in ABS plastics
The gray ABS model had voids after sanding. The surface became smooth. nine0006
Tools and materials you will need:
- Epoxy (for small voids only)
- Automotive Putty (large voids and joints)
- ABS plastic and acetone (for small voids only and for ABS parts only)
Process: After sanding or removing soluble backings, gaps often appear in the print. During printing, gaps are sometimes formed, and often this pattern is unavoidable. Small gaps and voids can be easily filled with epoxy and no further treatment is required. Large gaps, or gouges, left from attaching model assembly parts can be successfully filled with automotive putty, which will require additional sanding after drying. nine0192 The putty gives excellent results and can be easily sanded and painted after it has fully cured. The connection will be strong, and will not weaken the plastic. Conversely, autofiller parts tend to be stronger than native plastic.
Gaps in an ABS print can also be filled by making a slurry of ABS filament and acetone ( ABS juice or ABS juice ) that chemically reacts with the part and penetrates any surface voids. A ratio of 1 to 2 between ABS and acetone is recommended. This method will not significantly affect the cleanliness of the surface around the gap if properly applied. nine0006
Help Tip : If gaps are visible on FDM parts before sanding, fill them with epoxy and then sand once until dry. This will greatly reduce the overall time required to achieve a smooth surface.
Pros
- Epoxies are easy to sand and prime, making the surface easy to paint
- ABS juice will be the same color as your part, as long as you use the same filament by color and manufacturer. Therefore, there will be no discoloration of the surface
Cons
- Auto putty or other polyester epoxy will dry opaque resulting in discolored spots on print
- Requires additional sanding to achieve uniform coverage
- May affect overall print accuracy if sanding is too aggressive and too much material is removed
ABS and PLA polishing
nine0555 Catalog of ABS plastics
Catalog of PLA plastics
Tools and supplies you will need
- Polish
- Sandpaper
- Nonwoven wipe
- Toothbrush
- Microfibre cloth or polishing pad
Process: Plastic polish can be applied after sanding to give standard filaments such as ABS and PLA a glossy finish. After the part has been sanded to 1000 grit, wipe off any excess dust from the Non-woven » cloth, then clean it in a bath of warm water with a toothbrush.
Let the piece dry completely and buff it with a buffing pad, or by hand with a microfiber cloth and a jewelry polish designed specifically for plastic and synthetics that provides a long lasting shine.
Other plastic polishes, such as car headlight polishes, work on the same principle, but some may contain chemicals that can damage the original material. nine0006
Helpful Hint: For polishing small parts, attach the polishing pad to the Variable Speed Drill (or other rotating tool such as a drill) . Bench grinders equipped with a polishing wheel can be used for larger, stronger prints, but don't polish too long in the same spot. This can cause the plastic to melt due to friction.
Pros
- Polishing is applied without the use of any solvents that can deform the part and change the precision tolerances.
- When properly ground and polished, the part will give the impression of a mirror finish that mimics plastic injection molding
- Plastic polish and cleaner are very economical, making this method quite profitable for a quality finish
Cons
- The part must be carefully sanded before polishing if a mirror finish is required. This may affect tolerances
- Primer/paint may not adhere to surface after polishing and you will need additional products
Priming and painting 3D printed products
White PLA part spray painted gray
Tools and materials you will need:
- Non-woven cloth
- Toothbrush
- Sandpaper
- Aerosol Acrylic Primer
- Polishing agents
- Masking tape (only if using multiple colors)
- Gloves and petal mask
Finishing process: after the part is properly sanded (up to 500 grit sandpaper is required at this stage) , the print can be primed. The primer should be applied in two coats using an aerosol can.
An aerosol primer designed for painting models will provide an even coverage and be thin enough not to darken the part before painting.
A thick primer, such as one available at the hardware store, may stick together and require more sanding.
Apply the first coat in short, quick strokes at a distance of about 15 - 20 cm from the part to avoid the formation of a thick layer of primer. Let the primer dry and sand down any imperfections with 9 grit sandpaper.0190 500. Apply the final coat of primer with light, quick strokes.
Once the primer is complete, painting can begin. Painting can be done with acrylic paints and artist's brushes, but using an airbrush or spray can give a smoother surface.
Hardware store spray paint tends to be thicker and harder to control, so it's best to use paints made specifically for painting models. nine0192 The primed surface should be sanded and polished (sanding and polishing sticks used in nail salons are ideal for this application) and then cleaned with a non-woven cloth.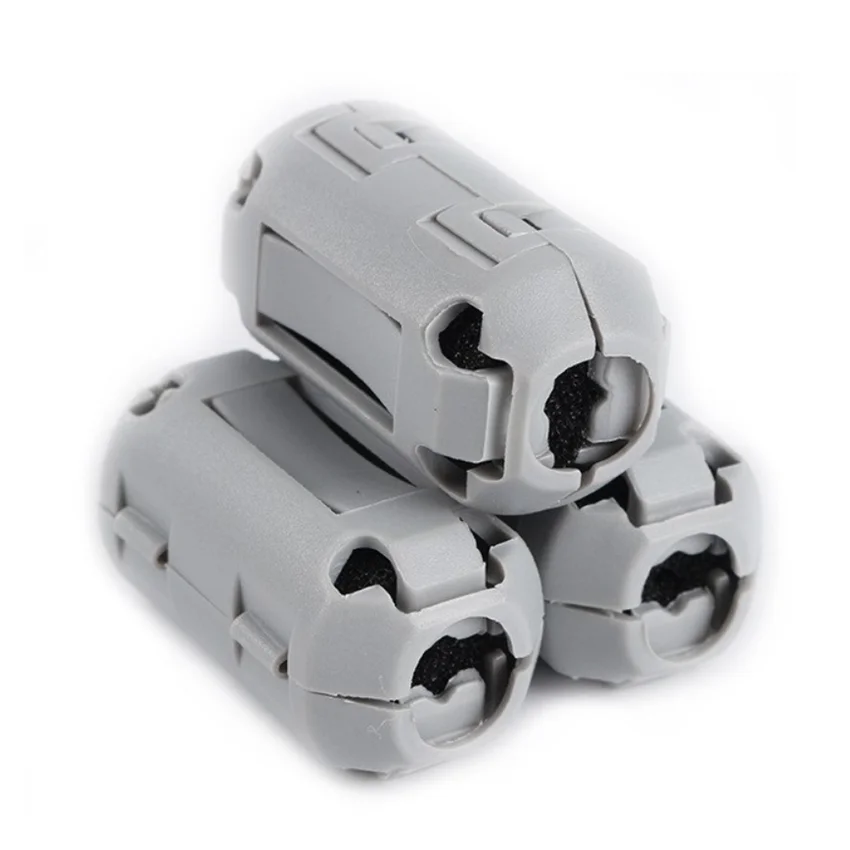
Paint over the model using very light layers; the first few layers will look translucent. Once the paint has developed an opaque coat of (usually after 2-4 coats) , allow the model to dry for 30 minutes to allow the paint to set. Carefully polish the paint layer with nail sticks. nine0006
Multi-colour models can be painted with masking tape. Once all layers of paint are ready, remove the tape and buff the paint using polish paper. Polishing paper such as 3M or Zona can be purchased in a variety of grit sizes. You can buy it in a pack in many online stores. It will give the paint a shine that cannot be achieved in any other way.
Helpful Hint: Do not shake the can when using spray paint! The goal is to mix the pigment or primer, shaking the propellants will cause bubbles to form in the aerosol. Instead, rotate the jar for 2-3 minutes. The stirring ball should roll, not rattle. nine0006
Pros
- Professional results with attention to detail
- Excellent appearance of the final product, regardless of the material/color in which the object was originally printed
Cons
- Paint and primer will increase the volume of the model, which will change the tolerances and can cause problems if the part is part of the assembly
- Buying a high quality spray paint or airbrush is not cheap
Acetone baths for ABS products
Smoothed black model of a petal with a spherical surface made of ABS plastic after an acetone bath.
Tools and materials you will need:
- Non-woven cloth
- Sealed container
- Thinner
- Paper towels nine0134 Aluminum foil (or other solvent resistant material)
- Face mask and chemical resistant gloves
Process: line the chosen container with paper towels along the bottom and, if possible, up the sides. It is very important that the steam does not disturb the chamber itself. The chamber may be sealed.
It is recommended to use glass and metal containers.
Pour in enough solvent to dampen but not drown the paper towels. This will also help them stick to the side walls of the container. nine0192 Acetone is well known for its ability to smooth out ABS parts. For PLA, smoothing is possible with various solvents, they work well, but as a rule, with PLA, it is more difficult to get a smooth surface, unlike ABS.
IMPORTANT! When working with any solvent, please follow the safety regulations for the chemical and always follow the appropriate safety precautions !
A small "raft" of aluminum foil or other solvent-resistant material should be placed in the middle of a lined paper towel container.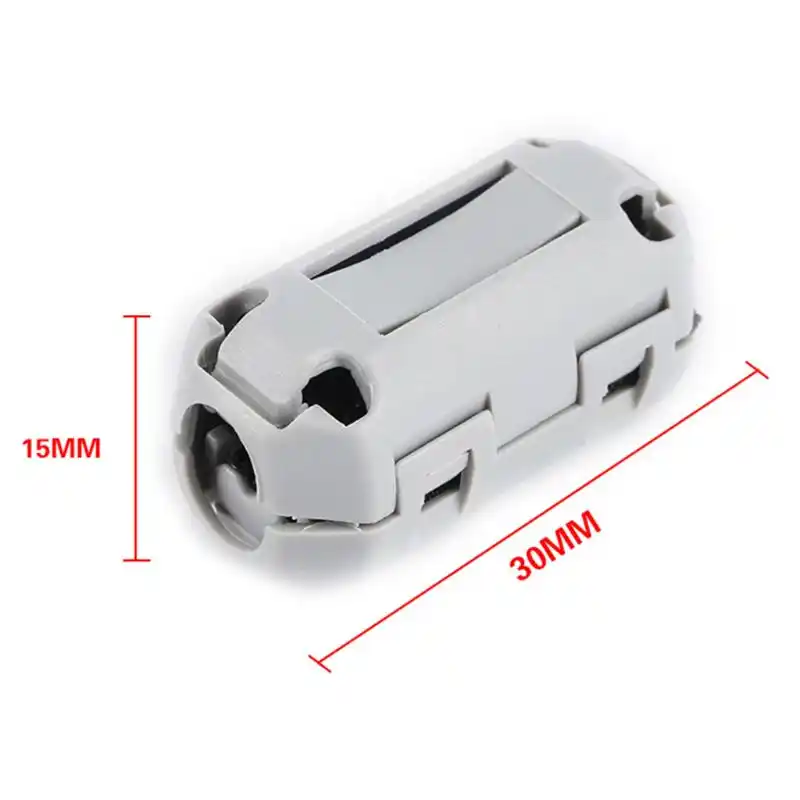 nine0192 Next, place your part on this raft (either side selected as the bottom on the raft) and close the lid of the container.
Steam polishing can vary in duration, so check the print periodically. Heat can be used to increase polishing speed, but care must be taken to prevent the buildup of potentially explosive fumes.
When removing the part from the chamber, try not to touch it at all, leaving it on the raft and removing it from the container. Any points of contact with the part will generate surface defects because the outer shell will be half dissolved. Allow parts to dry completely before use. nine0006
NOTE . Many aerosol and/or spray solvents are flammable/explosive and solvent vapors can be harmful to human health. Be especially careful when heating solvents and always work in a well ventilated area.
Pros
- Smoothes out many small spots and reduces layer lines present in the print without any additional work
- Creates a very smooth "shell" around part
- A very fast method that can be implemented with improvised means
Cons
- Doesn't heal gaps or completely mask layer height
- The smoothing process "dissolves" the outer shell of the print, and therefore this greatly affects the tolerances
- Negatively affects print strength due to changes in material properties
Chemical solvent baths
Tools and supplies you will need:
- Solvent safe container
- Thinner
- Hook or small screw
- Wire
- Drying rod or stand
- Face mask and chemical resistant gloves
Process: Make sure the container you are using is wide enough and deep enough to hold the part and solvent.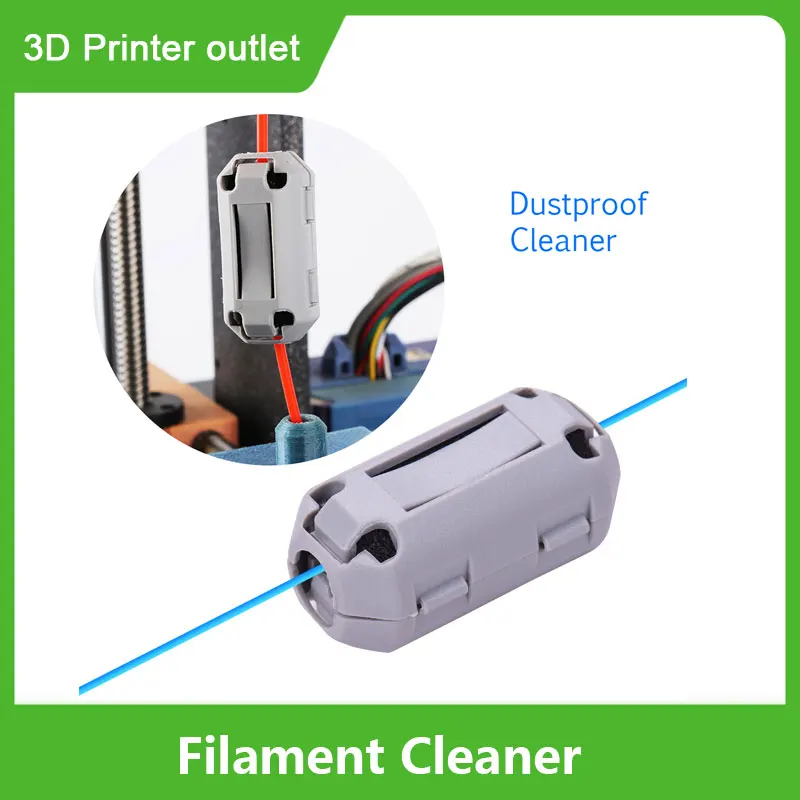 Fill the container with the appropriate amount of solvent, taking care to minimize splashing. As with steam smoothing, acetone should be used to dip the ABS. nine0192 PLA is sufficiently resistant to solvents, so it may take several passes to achieve the desired result.
Prepare the part for dipping by screwing an eye hook or small screw into an inconspicuous surface of the imprint. Pass the wire through the eye of the hook or around the screw so you can lower your piece into the wire bath. If the wire is too thin, you won't be able to submerge the part in the solvent.
Once the part is prepared, quickly immerse the entire object in the solvent for no more than a few seconds using wire. Pull out the print and attach it to a wire over a dryer rod or rack to allow the solvent to completely evaporate from the surface. The part should be gently shaken after you remove it to facilitate drying and avoid solvent build-up in depressions on the surface. nine0006
Helpful Hint: If the part has an opaque whitish color after drying, it can be hung over a solvent bath for a while so that the evaporating vapors slightly dissolve the surface.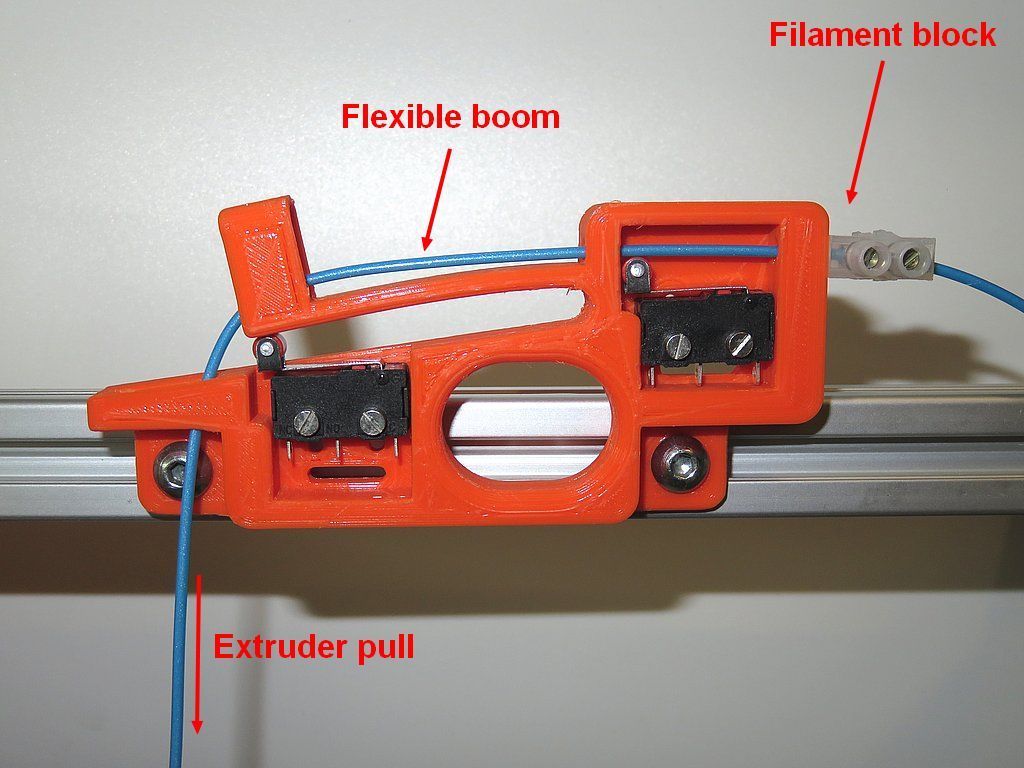 This will restore the color of the print and provide a glossy outer layer.
Pros
- Print surface smoothes much faster than steam polishing
- Produces much less fumes than other solvent polishing methods and is safer
Cons
- Very aggressively smoothes the surface of the part, so the tolerances deviate very much from the specified
- Immersion for too long can lead to complete deformation of the part and a significant change in material properties
Using epoxy to finish prints
The part is sanded and coated with epoxy resin.
Tools and supplies you will need:
- Two part epoxy resin (e.g. XTC-3D)
- Foam applicator
- Brushes
- Mixing container
- Sandpaper 1000 grit or finer
Process : After the print has been sanded (sanding first will give better end results) , completely clean it with a non-woven cloth. nine0192 Mix the correct ratio of resin and hardener as directed in the resin instructions. Make no mistake about the proportions. Epoxies are exothermic when mixed, so glass containers and containers composed of materials with a low melting point should be avoided.
Containers specifically designed for mixing epoxy resins are recommended. The wrong ratio will lengthen the drying time and the epoxy may never fully cure, resulting in a disastrous and sticky part. nine0006
Mix resin and hardener thoroughly according to instructions. Stir gently to minimize air bubbles. The faster the epoxy dries, the better. Most epoxies have a working dry time of only 10-15 minutes, so do your post-processing in the proper order.
Apply the first coat of epoxy using a foam applicator and try to minimize resin buildup on recessed surfaces or other details of the print. Once your part is sufficiently covered with resin, allow it to fully cure according to the manufacturer's instructions. One coat may be enough to smooth the detail, but for optimum appearance, the print should be lightly sanded with fine sandpaper (1 000 grit or finer) . Remove dust with a non-woven cloth and apply a second coat of epoxy in the same manner.
Pros
- A very thin coat of epoxy will not significantly affect part tolerances (unless the part has been sanded first)
- Resin provides an outer protective sheath around the part
Cons
- The layer lines will still be visible, they are under the "smooth" shell
- Applying too much epoxy can cause surface dripping and over-smoothing of print details
Tools and supplies you will need:
- Electroplating solution. It can be prepared by mixing a metal salt with acid and water, but if the proportions are not accurate, it will be difficult to get a professional result.
 Buying a ready-made solution guarantees that there are no problems with plating. nine0139
 - Sacrificial anode. The anode material must match the metal of the plating solution, so if copper sulfate is used in the solution, then a copper anode should be used. You can use any item made of metal plating (copper wire, for example), or you can purchase a thin strip of metal plating that is made specifically for electroplating.
- Conductive paint or acetone and graphite. The print surface must be conductive for coating, which can be achieved with conductive paint or a 1:1 solution of graphite and acetone. Conductive ink will work on any printed material, but a solution of acetone and graphite will only work on ABS. nine0139
- Power Rectifier - A battery can be used instead of a rectifier, but a battery is not as efficient and will not produce results as quickly and consistently as a rectifier. A rectifier is also a safer option. It can simply be turned off to stop the current flow during electroplating.

- Conductive screw or eyelet
- Non-conductive vessel
- Lead set
- Non-conductive gloves and goggles. nine0139
Electrophoresis solutions are acids and can cause eye damage if splashed, so appropriate goggles are required. Also, these solutions can irritate the skin and conduct a charge when used. Therefore, non-conductive gloves should always be used.
Process: metal plating can be electroplated at home or in a professional workshop. Proper plating requires a deep knowledge of materials, and what you can do at home has certain limitations compared to what can be done in a professional workshop. nine0192 For a better finish and a wider range of plating options, including chrome plating, a workshop would be the best option. For clarity, the copper plating process will be described below.
At home, galvanization can be done using copper or nickel plate. It is imperative that the surface of the print to be processed is as smooth as possible before coating; any unevenness and visible lines of the layers will start to stand out after coating.
Prepare a cleaned and sanded print. By coating the plastic with a thin layer of high quality conductive paint or a solution of acetone and graphite (if made of ABS) . Allow the conductive coating to dry completely and sand if necessary to ensure a smooth finish. It is extremely important to minimize contact with the print or wear gloves as the sebum on your fingers will interfere with the coating process.
Insert a screw or hook with an eye into an inconspicuous surface of the part, similar to dipping in solvent.
Attach to one of the rectifier leads. This will serve as the cathode. The connection must be made to the negative terminal of the rectifier. Connect the copper anode to the positive terminal of the rectifier using the second power wire and fill the container with enough electroplating solution so that the imprint and the copper anode are completely hidden. Turn on the power rectifier. After the rectifier is turned on, make sure that the part does not touch the anode in any way. nine0006
IMPORTANT! Be very careful at this stage. After the part is lowered into the bath and the system is energized, any contact with the solution, anode or cathode may result in personal injury !
Set the power supply rectifier to 1-3 volts. After that, the metallization process will begin until the part is completely covered with metal. Voltage may be increased to reduce coating time, but should not exceed 5 volt. Simply turn off the straightener and remove the print after a satisfactory finish has been applied. Dry the print with microfiber towels. Coat the part with a special varnish for metal after drying. This will protect it from corrosion.
Pros
- The metal shell increases the strength of the plastic part, which greatly expands the possibilities of its application and use
- The outer metal coating is very thin so if properly applied, tolerances of 9 can be held tightly0139
- Creates a beautiful surface that, if done correctly, will not look like a 3D printed object
Cons
- It's usually very expensive to do it professionally, and home plating requires a decent amount of professional processing equipment
- Electroplating at home can cause electric shock if not followed
Well, that's all we have! We hope this article was useful for you!
Order 3D printer or FDM consumables , you can
- Email: Sales@3dtool.
Learn more