Extreme 3d printing
Large Scale 3D Printers - Builder 3D Printers
Name
Company
Phone Number
Over 1 x 1 meter in build capacity with the Extreme 3000 PRO
With a build capacity of over 1 meter x 1 meter (XY axis), it is the perfect machine for creating large and full size parts, tools, jigs & fixtures in-house and on demand. Within days you can have a fully functional high quality prototype. Features such as automatic bed leveling, a battery pack and filament detection, make large scale 3D printing worry free. Manufactured to the highest standards.
Discover more
Your browser does not support the video tag.3D PRINT FULL SIZE PARTS - TOOLS - PROTOTYPES
IN-HOUSE PROTOTYPING
REDUCE PRODUCT DEVELOPMENT TIME BY WEEKS
Builder Extreme 3000 PRO
IN STOCK
The Extreme 3000 PRO is the perfect fit for industrial 3D printing applications. The extremely large build volume of 1100x1100x820 mm YXZ, allows you to 3D print large and complex shaped parts and prototypes on full scale. The frame has been designed in a way that you have easy access to the build plate from both sides by removing the side panels. 3 different nozzles diameters, 0.4, 0.8 and 1.2 mm, are included to optimize print quality and time for your specific needs.
Find out more
Builder Extreme 2000 PRO
IN STOCK
The Builder Extreme 2000 PRO is one of the tallest industrial 3D printers available today. With a print volume of 700 x 700 x 1700 mm (XYZ), it is the perfect 3D printer for extremely tall objects. Elements such as a 7-inch touch display, filament detection, UPS system that resumes operation after a power outage, door locking system and available extension for a BOFA air filter, make it a fully equipped large format 3D printer.
Find out more
Your browser does not support the video tag.Business Cases
Interested to see how other companies have integrated large industrial 3D printing into their product development process?
Take a look at the different business cases. 54% of our European customers invested in a second, third or fourth Builder Extreme within 6 months after their initial purchase.
From extremely large prototypes to customized mannequins, marketing displays and dinosaurs, industrial 3D printing is great asset for all industries.
View business cases
Builder Extreme 1500 PRO
IN STOCK
The Builder Extreme 1500 PRO is one of the longest industrial 3D printers available on the market. With its unusual large X axis size, it fits perfectly into the smallest office corners. The print volume is 1100 x 500 x 820 mm (XYZ), and the machine is comes with features such as a 7-inch touch display, filament detection system and the UPS system that resumes the print job after a power cut. This combination makes it a fully equipped large format 3D printer.
Find out more
Builder Extreme 1000 PRO
IN STOCK
The Builder Extreme 1000 PRO is one of the biggest industrial 3D printers available on the market. With a print volume of 700 x 700 x 820 mm (XYZ), it is the perfect printer for large prototypes, molds, tooling or even functional parts. Features such as a 7-inch touch display, filament detection and a UPS system that resumes printing after a power cut, make large scale 3D printing uncomplicated.
Find out more
The Builder Extreme is preferred by industrial leaders
“We needed to print larger prototypes in 1 piece and without worrying about failed prints – the Builder 1500 ticked all the boxes”.- Eventuri
This website uses cookies to improve your experience. We'll assume you're ok with this, but you can opt-out if you wish.Accept Read More
Installation - Builder 3D Printers
Thank you for your trust in our company and products. Please, read the following information carefully so as you can install your Builder Extreme smoothly and start printing your first project soon.
Step 1. Installation / Quick start of the Builder Extreme
Please find the Quick Start for the Builder Extreme 3D printer here. The page guides you through the process of removing the printer from the pallet, installing filaments and running the test print. Following the Quick Start enables you to start your first project without any issues. If you have any questions during the set-up, please fill in this form.
Step 2. Install Simplify3D and import the FFF profileSimplify3D is the slicing software used to convert your 3D model (.STL) into a gcode. The software is used to determine print speed, infill percentage of the print and more.![]() You have received the Simplify3D license for 2 devices by email, so you can now create your personal log-in.
You have received the Simplify3D license for 2 devices by email, so you can now create your personal log-in.
Note: The Builder Extreme is not listed in Simplify3D as a standard printer, so choose Other printers and click OK.
We have created standard FFF profiles for a 0.4, 0.8 and 1.2 mm nozzle. With these optimized settings, you are able to use the Builder Extreme directly after installation. Please download the FFF profile for your model of the Builder Extreme here. Open Simplify3D and go to File, Import FFF profiles and import the FFF profile. Now you are ready to start slicing.
Builder
Extreme 1000 PRO
ZIP
Builder
Extreme 1500 PRO
ZIP
Builder
Extreme 2000
ZIP
Builder
Extreme 2000 PRO
ZIP
Builder
Extreme 3000 PRO
ZIP
Trouble shooting for Simplify3D can be found here: https://www. simplify3d.com/support/
Step 3. Manual Builder Extreme 3D printer
Please find the manual of the Builder Extreme 3D printer below. Make sure you download the correct version for your Builder Extreme as we have also listed manuals for the previous models. Read the manual carefully before 3D printing your first project.
Step 4. Check whether your software is up to date (V1.35)
Every few months we upload an updated version of the software for the Builder Extreme PRO 3D printers. Please, make sure you have the latest software version to keep your machine up to date. NOTE: IF YOUR SOFTWARE IS V1.21 OR LOWER, PLEASE CONTACT US BEFORE YOU DO THE UPDATE. You can download the latest software version here:
Please follow these steps:
The Builder Extreme has now successfully been updated. Note that the software recognizes which Builder Extreme you have, so please follow the instructions to prevent issues with updating and upload all 6 files.
If you need any help during the update, please contact us on helpdesk@builder3dprinters. com
com
Extreme printing without filling, bottom, cover, registration and SMS
Creativity
Subscribe to the author
Subscribe
Don't want to
24
Something new 3D ideas fell like buckets. I continue the theme of puppet modeling - I wanted to print all sorts of small things.
I came across a model Zhong Li on the Internet with funny horns on her head. It can be seen that the model is from the game, but she herself could not be found. Maybe some mod or fanart:
I think you don't have to search - it's a simple matter to model and print. Only I will print in a special way. In order for the horns to have a texture, we need to turn the FDM printing bug into a feature and set a larger layer height. And so that everything glows beautifully, use transparent plastic in one wall, then paint it with a transparent composition. The task is quite extreme - the process here can be even more interesting than the result.
Modeling right on the head, using that photo as the only reference. In the same way, relaxing for fun, like head off:
If you put it flat on the table, there will be a lot of supports, and the texture is not very beautiful:
It should be placed vertically, then there will be less supports and the texture of the layers is similar to natural horn:
Material - PETG transparent yellow with alica. The settings are: nozzle 230, table 70, nozzle diameter 0.6 mm, layer height 0.4 mm, 1 wall, 0 bottom and lid layers, 0% infill. The speed is less - 25 mm / s on the perimeters and 60 on the supports. I wonder if ender will take it out?
He took it out, of course. Only the thin top warped from lack of airflow, and when the supports were removed, it broke:
Reprinted with 100% airflow and less supports, it's already better. It was easy to take off the support:
A new idea came right away - it is necessary to use a sacrificial tower so that the tip that has not yet cooled off does not warp with a hot nozzle:
I decided to print both horns at once, together with a turret that is a couple of millimeters higher. Everything OK:
The tips led, but the turret took the brunt of the hot nozzle - it was her fate.
The texture is there, it's time to remove the supports and paint. Remember that the layer is too greasy for its nozzle diameter, which does not add any pluses to adhesion. The little twig survived the removal of the support, but not the wire. I had to glue it with super glue:
I paint with an experimental composition (actually a UV resin with an epoxy dye). The last layer is a matte top coat for gel polish. The effect seems to be the same as I wanted, but I don’t like the shade of plastic, it gives off green:
The texture of the layers is preserved and sealed with gel, the flaws on the tips are smoothed out with it. Just in a nail lamp, such 3D things are inconvenient to dry. It seems that I will have a backlight camera before a photopolymer printer...
I still don't know how to attach them to my head. While I cling to the wire for a row of hair. I don't want magnets:
Wow what a beautiful amber texture. For a long time I have not had a feeling of satisfaction with my own work, and maybe never before. Maybe it was necessary to print from completely transparent PETG, but for the first time it will do. The main thing is that the painting method works as it should, and the printer coped with suboptimal settings.
More interesting articles
53
Subscribe to the author
Subscribe
Don't want to
I always use a shoehorn when putting on sneakers, boots, boots - I almost never have them...
Read more
19
Subscribe to the author
Subscribe
Don’t want to
I didn’t seem to plan to print this model, but everything came out almost as spontaneously as with the state . ..
..
Read more
299
Subscribe to the author
Subscribe
Don't want
Hi all!
For a long time I did not write on the Portal, because the Chukchi in the majority of their roles ...
Read more
3D printing stylus for extreme conditions
Share on Facebook Share on Twitter Share on Vkontakte
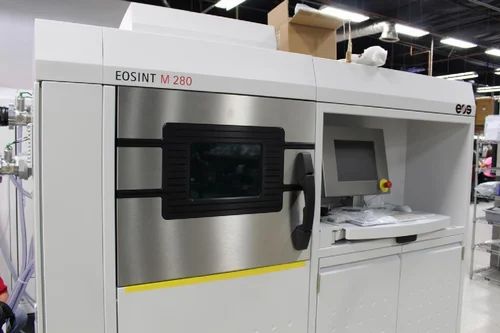
Today we will tell you about one very extreme order from our SLS printing portfolio. Extreme in the truest sense of the word - the item printed by us is now actively used beyond the Arctic Circle. Meet the unique tactile stylus for scientific and surveying tablets.
Our customer needed the stylus, which is extremely strong, light and frost resistant, to work with tablets in polar tundra conditions where temperatures easily reach -50C°. Challenge: The stylus must be durable and resistant to any adversity (this is especially important where the nearest place where it can be replaced is several days away). But the most specific requirement is that it must have a strictly defined texture: matte moire. Such a surface cannot be obtained by casting, but the native shagreen texture of polyamide PA 2200 is very similar to it.
Gathering all the requirements together, we developed a model and printed a single copy - so that the customer can test it and make sure that the resulting stylus has all the desired properties. This is very important: you should never waste a client's money by launching a print run with unpredictable properties in 3D printing. It is much better to lay the intermediate phase , print a test sample and offer it to the customer for testing. And having received the necessary feedback, you can safely make improvements to the model and begin production of the series.
But our stylus didn't know what to expect! The customer approached the issue of testing extremely responsibly and sent his new accessory to the climatic test chamber. There he spent 8 hours at a temperature of -52C °.
Results:
- flexibility - no change;
- color - no change;
- smell - no change.
The customer tried to break such a completely “frozen” stylus, failed, was extremely happy ... and immediately sent it back to the camera. Only this time in its "hellish" version - a furnace with a temperature of + 72 ° C. Eight hours in this hell - and a new test.
Results:
- flexibility - no change;
- color - no change;
- smell - no change.
The client was satisfied with the quality of the prototype and its specific moiré texture (very important!) and immediately ordered us another 20 units.
We were able to achieve such excellent results because we combined several strengths of SLS 9 technology with 0127 :
- The technology itself provides extremely high mechanical qualities of the part;
- The polyamide PA2200 we used withstands temperatures from -100° to +150° - it is not afraid of the conditions of the polar tundra;
- We have applied a deep dyeing technology that makes the color of the part very durable and resistant to scratches (they do not leave white marks on the part because the dye penetrates deep inside).
Learn more