Easythreed 3d printer
Easythreed K7 mini 3D printer review - How good is a sub $100 3D printer?
We use affiliate links. If you buy something through the links on this page, we may earn a commission at no cost to you. Learn more.
REVIEW – 3D printers are no longer just for people who know how to use CAD programs to create 3D models and they are no longer for people who have 1000’s of dollars to spend. 3D printers are now available for everyone even a newbie who only has $100 to spend. What kind of 3D printer can you get for less than $100? That’s what I’m going to find out today when I show you the Easythreed K7 mini 3D printer. Let’s check it out.
What is it?
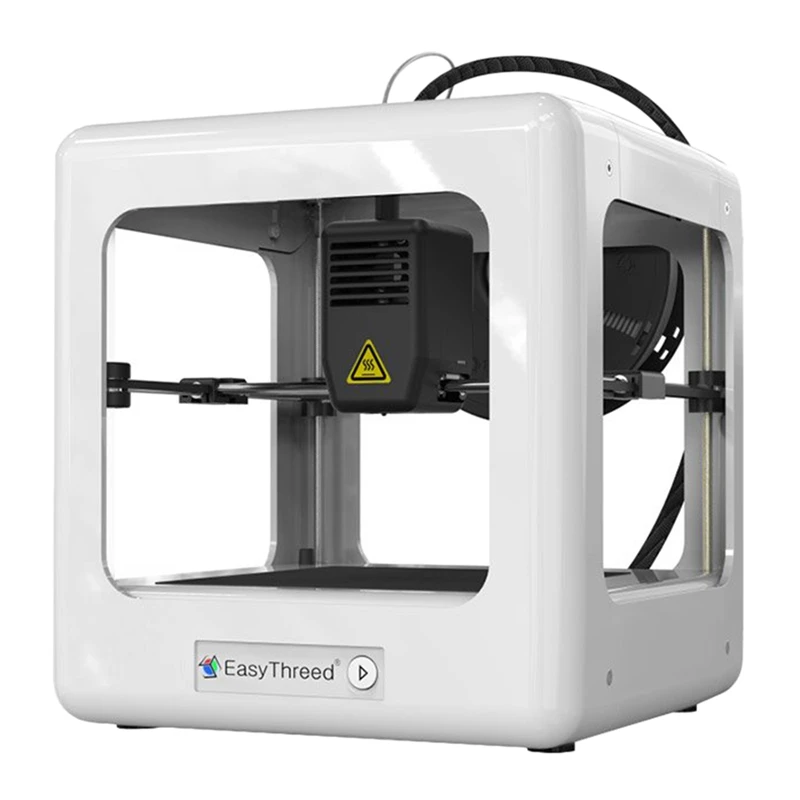
The Easythreed K7 mini 3D printer from MadetheBest is a very small 3D printer that is priced at less than $100.
What’s in the box?
- Easythreed K7 mini 3D printer
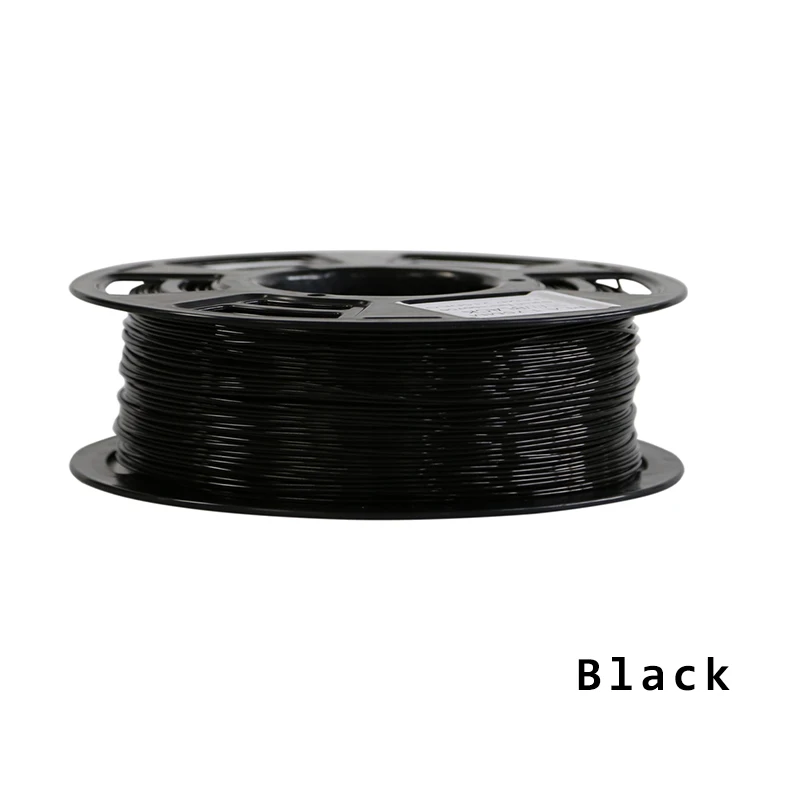
- A small amount of white PLA 1.75mm filament
- USB host cable
- USB drive with manuals, instructional videos, slicing software, and 2 sample GCODE models
- User manual
Hardware specifications
Print Technology: FDM
Building Size: 100X100X100mm
Number of Nozzles : 1
Nozzle Diameter: 0. 4 mm
Layer Thickness: 0.1-0.4 mm
Printing Filament: PLA
Diameter of Filament: 1.75 mm
Printing Accuracy: 0.1-0.2 mm
Slicer Software: Easyware K7, CURA, Simplify3D
Extruder Temperature: 180-230℃
Print Speed: 10-40 mm/s
FilaFormat: Input:.Stl/obj, output:.gcode
Power: 12V, 30W
Machine Size: 175x235x270mm
Some assembly is required
You will have to put together the printer but don’t worry because it’s quick and easy. There are just two main parts. There’s the base with the print bed and the nozzle mechanism which snaps into the base.
From there you just connect several small plugs and secure the nozzle mechanism with 4 screws.
Then you snap on the filament holder and you’re all set!
You can watch me put the Easythreed K7 3D printer together in my demo video below.
Design and features
On the left side of the Easythreed K7 3D printer, you’ll find a Home button that moves the printing nozzle to the back left corner of the print bed.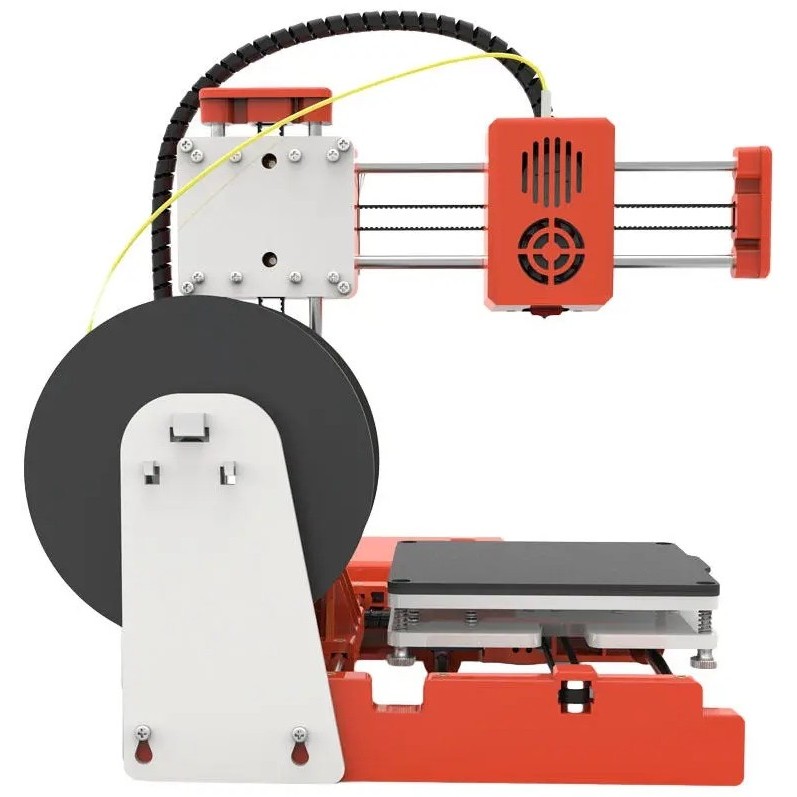 On this side of the printer, you will also find a microSD card slot, feed mode selector switch, USB host port, and power connector.
The opposite side of the K7 does not have any buttons or ports but the front of the printer has a Print/Pause button.
You’ll notice that I didn’t mention a power switch. That’s because there isn’t one! Yeah, what the heck right? In order to turn the printer off, you have to yank out the power cord. Not exactly an elegant solution.
Calibration
Before you can print your first 3D model, you will need to calibrate the printer.
To do this, you use the four corner screws below the print bed to lower and raise the bed so that a sheet of paper can just fit between the print nozzle and print bed surface. You have to do this for all four corners.
Let’s make our first print!
A USB card reader with a microSD card is included with the Easythreed K7 3D printer. This card has manuals, instructional videos, slicing software, and 2 sample g-code 3D model files.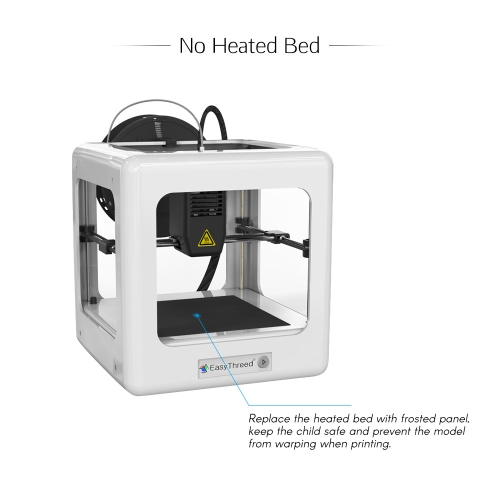 What is g-code? G-code is the computer language that tells a 3D printer how to control the nozzle movement to print a 3D model.
The K7 3D printer can only print g-code files. If you want to print other 3D models and search the net for free models you’ll find a lot of STL files. STL stands for Standard Tessellation Language or STereoLithography. This type of file is in a format that describes the surface geometry of a 3D object. More about STL files later…
To load the filament, you place it on the spool holder, feed one end of the filament into the printer, make sure the feed switch is set to FEED, and plug in the power cord. The printer nozzle will heat up and within a minute or so, and you’ll be able to start pushing the filament into the printer. When you see melted filament coming out of the nozzle above the print bed, you’re ready to start printing.
With a g-code file stored on the microSD card and the card inserted into the printer, you flip the feed switch to the center position and press the “play” button on the front of the printer. A minute or two later the printer will start printing.
The first thing it will do is print a “raft” which is a base for the print.
When printing is finished, the nozzle will lift and you can remove the magnetic print bed and peel off the print. The raft breaks away from the bottom of the print revealing the 3D model.
The time it takes to print a 3D model is dependant on the size of the print. Some models like this little rocket can take 30 minutes or so.
The Easythreed K7 3D printer comes with a small amount of white filament, but I wanted to try some other colors so I purchased a box of 4 spools from Amazon.
Here’s the other g-code model from the included micro SD card printed in orange filament.
With two successful prints under my belt, I was feeling like a 3D printing guru and decided it was time to branch out and find other g-code models. Remember, Google is your friend. I ended up on Thingverse.com
I found a model file, loaded it on the microSD card and… this happened. The print nozzle went from the home position to the front and sat there making a blob. Ok, I’m not a guru after all… <sad>
I don’t give up so I found another model file and tried again.
This will be great in a few weeks for Halloween! This print was also my first experience with the supports that some models have that help the printer span voids. You can see a small support under the skull’s cheek bone. There was more under the back of the skull. I had to use needle-nose pliers to remove the extra material.
For my next test, I decided to really flex my 3D printing powers and slice up an STL file to turn it into a g-code file. Remember, the K7 can only print g-code files and most of the 3D models that you find on the net are STL files. How do you convert them? You have to use slicing software. Luckily, Easythreed provides two programs for Windows and Mac on the included microSD card. There’s Cura and Easyware. The Cura software would not run on my M1 MacBook so I downloaded and installed the latest version.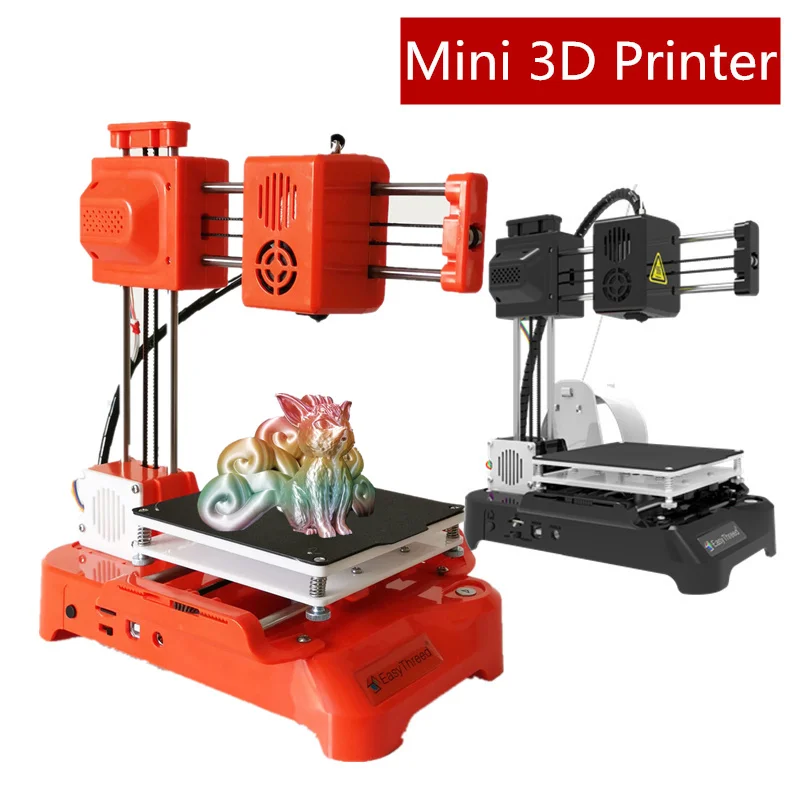
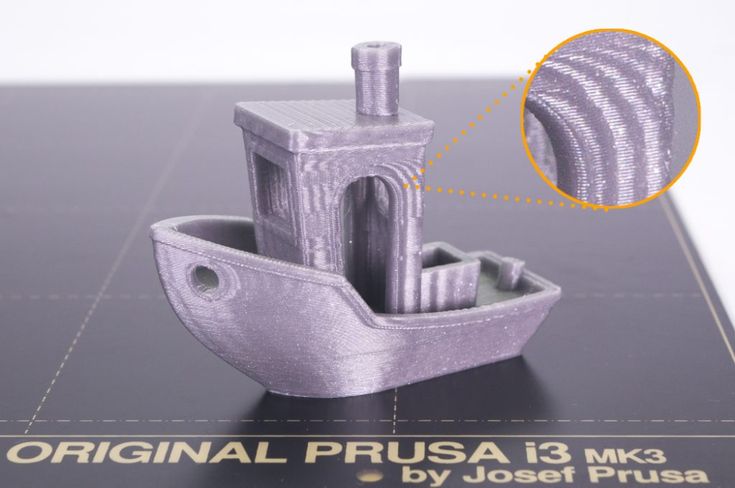
My plan was to print Benchy, which is a small boat that is the equivalent of programming “hello world” for 3D printers.
I downloaded the Benchy STL file and sliced it with Cura and printed it… Hmmm…. look at all that extra material.
Even after pulling the outside stuff off, the interior of the boat’s cabin was solid material that I could not remove.
Back to the drawing board…
I took the same STL file and used Easyware to slice it into a g-code file and this was the resulting print. Looks a lot better!
After removing the supports and raft. Yay!
Now it was time to create my own model from scratch!
Using a free online app called Tinkercad, I created a… Ummm… it was supposed to be a phone stand. Hey, cut me some slack, I’m not a CAD person (yet). The software provides you with a variety of shapes that you can stretch, shrink, and rotate to create objects.
Then when you’re done modeling, you export from Tinkercad to an STL file and then use slicing software (I used Easyware again) to create a . gcode file.
And there it is! My model was a successful print, but it wasn’t a successful phone stand because the front edge wasn’t tall enough to keep my phone from slipping out. Oh well. I’ll try again at some point because experimenting is what makes 3D printing such fun.
See it in action
What I like
- The price
- It’s portable!
- Easy to use for a beginner
What I’d change
- Add a power switch
Final thoughts
I didn’t know what to expect when I accepted the offer to review the Easythreed K7 mini 3D printer. As a complete novice, I figured a 3D printer for kids would be a good place for me to start and it was! Assembling the printer was simple, and printing wasn’t difficult once I figured out which slicing software to use. Am I a 3D printing master now? Ha! Far from it. But this sub $100 3D printer has sparked an interest in this hobby and I can’t wait to try a “real” 3D printer. But until then, if you’re looking for an inexpensive and easy way to try out 3D printing without spending a lot of money and head-scratching, I can recommend the Easythreed K7 mini 3D printer.
Price: $99.99
Where to buy: MadeTheBest (use ETK7 to bring the price to $85.99 – expires 10/14/21)
Source: The sample for this review was provided by MadeTheBest.
Review - EasyThreed X1 - 3D PRINTING UK
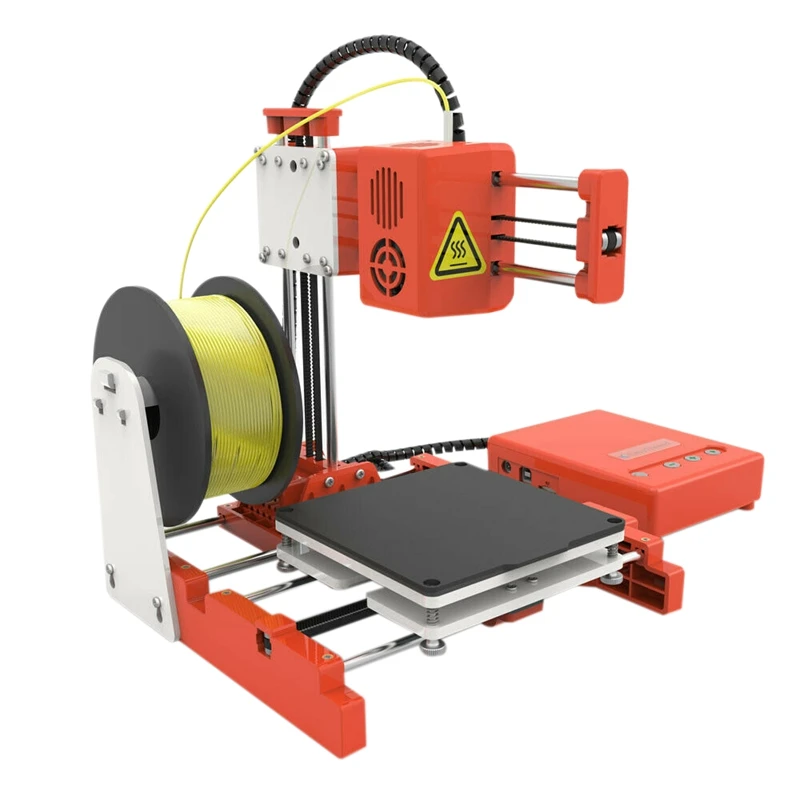
A couple of weeks ago I mentioned that our trusty Ender 3 now has a little friend. I’ve been playing with an EasyThreeD X1, and now I’m going to tell you how it went.
If you’ve looked at 3D printers on Amazon or ebay recently you’ve probably seen the X1. It’s sold under a variety of brand names; Amazon was calling our one the WZTO Mini 3D Printer, but they also have the TOPQSC, GJCrafts and Kacsoo mini 3D printers, which all cost the same and (apart from the colour of plastic) look exactly the same.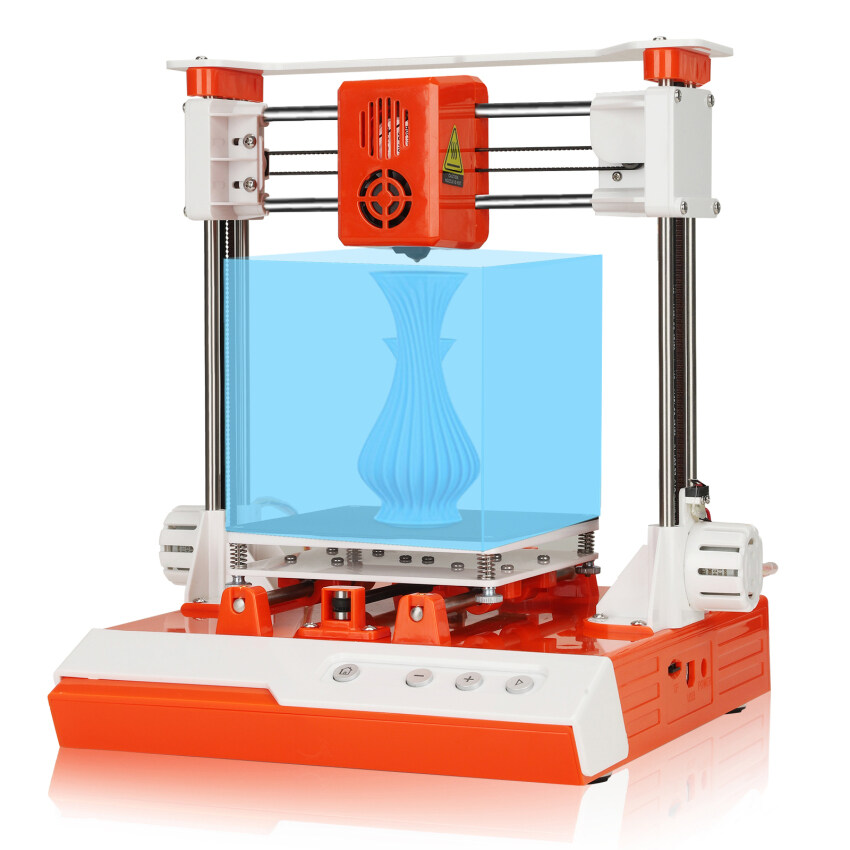 The box that arrived, however, says EasyThreed X1, so that’s what I’m calling it.
The X1 is marketed at kids and beginners, and sells for just under £90. For that sort of price you don’t expect a lot, and indeed the X1’s specs are fairly low. The most noticeable is its small print volume of just 100x100x100mm, but there are some other serious limits, too. For example it doesn’t have a heated bed, so it’s really limited to printing in PLA. On the other hand it comes almost fully assembled and looked simple to use, so we thought we’d give it a try.
What’s In The Box?
When the box arrived it was hard to believe any 3D printer, even a small one, could fit in there. Inside, however, I found three polystyrene trays. The top one held a small bag of accessories and a 10m coil of white PLA, and the bottom two contained the printer in three parts, all of them already wired together.
Assembling the X1 only takes a couple of minutes. The main section holds the bed and the X and Y axis motors; the Z axis clips into this, then all you have to do is secure it with a pair of screws and plug a cable into a connector. Finally, assemble the filament holder and slot it over two screws that are already fitted to the base, and stick on the four non-slip feet. It took me less than five minutes to put everything together. The electronics are all housed in a separate box that’s permanently connected to the printer with one of the cables.
So, now that everything’s assembled, what do we have? Well, you’re not going to mistake it for the Ender anytime soon. The body of the EasyThreed X1 is made of moulded plastic and 6mm steel rods. It’s very lightweight and everything has a scaled-down feel about it – the stepper motor housings are tiny – but it also feels quite solid. Allowing for how it’s built it doesn’t seem at all flimsy.
The most obvious thing about the X1 is its simplicity. The electronics box has four buttons, a TF card slot and a power socket. There isn’t even a screen. The extruder and hot end are both enclosed in the same plastic housing; all that’s visible of the extruder is a short length of PTFE tube poking out the top. There are no tensioners or anything else to worry about, so if you’re looking for something kids can use this is definitely ideal.
The print bed is as tiny as you’d expect, given the small build volume. It consists of two plastic plates separated by spring-loaded standoffs, with a thumbscrew at each corner so you can level it. The actual print surface is magnetic and flexible, so getting finished prints off it is easy. According to the listing on Amazon a heated bed is available as an option, but I can’t see any way to order it.
Loading the X1 with filament is ridiculously easy. All you need to do is power it up and feed the end of the filament into the extruder tube, then press the + button. The hot end will heat up – the plastic housing makes it hard for curious little fingers to get themselves burnt – and when it’s hot enough molten filament will start squiggling out. Then you can power it down again and find something to print.
The bag of accessories that comes with the X1 includes a USB TF card reader and a TF card, which is preloaded with a couple of test prints and EasyThreed’s own Easyware slicer. I installed Easyware on my PC and tested it, and it’s actually not too bad apart from being partly in Mandarin even with the language option set to English. It’s certainly simple enough to use. However, you’ll get a lot more options with Cura, so I downloaded a profile from Thingiverse and used that for most of my prints.
So How Does It Print?
The first thing I have to say about the EasyThreed X1 is that the filament holder is rubbish. It’s not big enough to take a standard 1kg spool, although 250g ones work fine. I just took it off and printed a couple of simple spool rests fitted with skateboard bearings. Yes, this will print on the X1 – just stand it upright and turn it diagonally. Four of them and four 608 bearings will assemble into a pair of rests that can handle any size of spool. I found it’s easiest to use my own versions with the filament coming off the underside of the spool; if it’s coming off the top, sometimes the extruder will pull the spool right off the rests.
You might be wondering how you select print files when the X1 has no screen and so few buttons. Well, you can’t. When you press the print button it will print the most recent file on the TF card. It’s not flexible, but it is simple.
When it comes to actual printing, the X1 isn’t bad at all. Print speed is good – actually faster than the Ender 3 on default settings, although the Ender can be tweaked to beat it easily enough. Print quality is also surprisingly good. Its little steppers work in 0.05mm increments, so default layer thickness is 0.15mm. Combined with a 0.4mm nozzle that means it’s capable of reasonable precision, and it generally lives up to that promise. Larger surfaces show some signs of vibration, but considering how light the X1 is that’s to be expected. Otherwise it’s pretty good. When everything works properly, this little 3D printer can turn out a very decent 3D Benchy.
Why did I say “When everything works properly”? Well, because sometimes it doesn’t.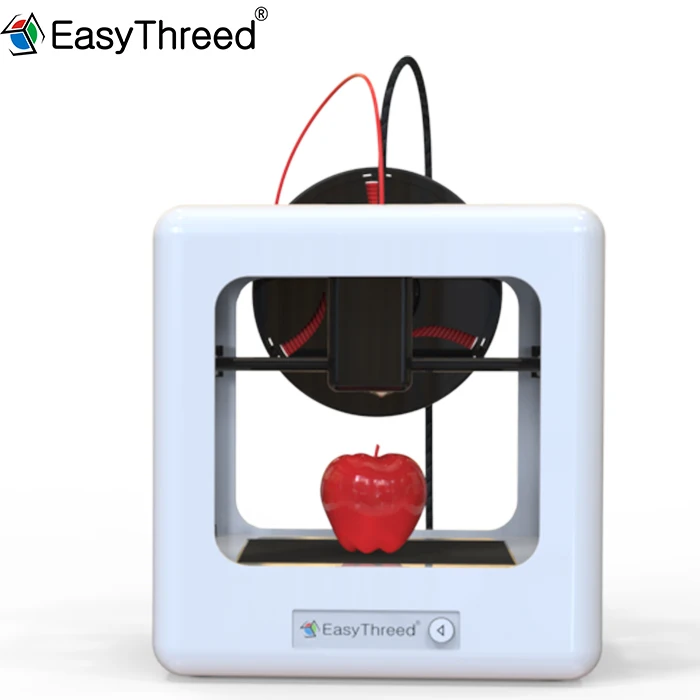 Occasionally our X1 will glitch halfway through a print and shift the next layer a quarter of an inch or so to one side. The first time that happened I thought it was a snag in the filament putting tension on the head, but it wasn’t. It just seems to happen randomly.
When it doesn’t happen, though, the X1 works much better than I expected for the price. If I want to print something small, and the Ender 3 is busy (which it usually is) I’m quite comfortable just loading it into the X1 and hitting the start button.
The Verdict
If you want to introduce kids to 3D printing, or experiment with the technology yourself, the EasyThreed X1 is a great starter printer. It doesn’t have much in the way of upgrade potential, but for what it is it works very well. I’d go so far as to say that if you want to print the occasional small object, and can work with the limited build volume, it’s a viable option. Yes, this is a simple, low-budget printer, but (as long as it doesn’t glitch) it’s as good at making small PLA objects as most people will need – and it’s great value.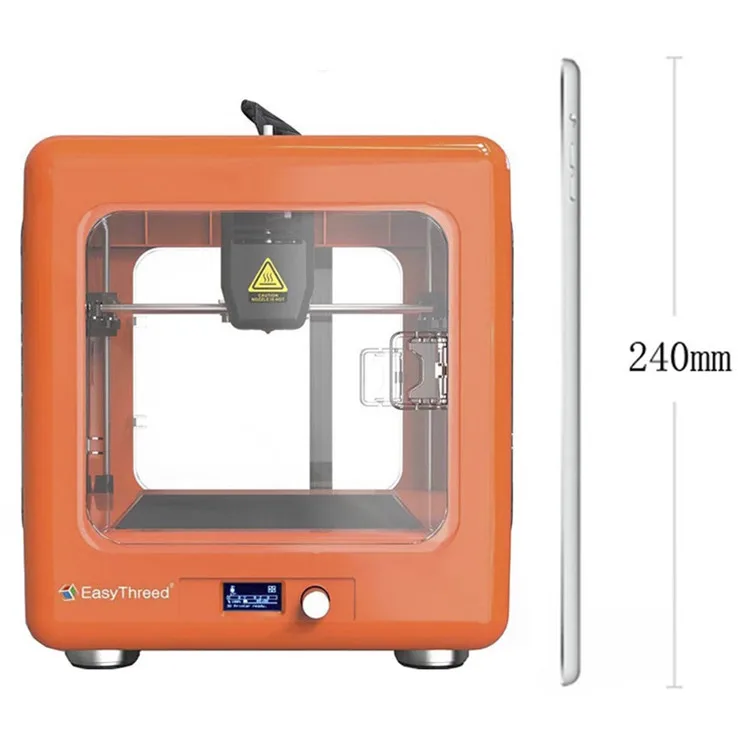
Easythreed K7 miniature 3D printer, for kids and more.
Good day!
I offer you a review of a miniature and one of the cheapest 3D printers Easythreed K7. The manufacturer positions it as a printer for children. I must say right away that this is my first 3D printer, so I can get confused in terminology and perhaps draw too subjective conclusions.
For starters, the specifications from the store page.
Specification:
- Model Name: Easythreed K7
- Print Technology: FDM
- Maximum Print Size: 100X100X100mm
- Number of Nozzles: 1
- Nozzle Diameter: 0.4mm
- Printing filament: PLA, TPU
- Filament diameter: 1.75 mm
- Printing accuracy: 0.1-0.2 mm
- Slicer software: Easyware K7, CURA, Simplify3D 230℃
- Print speed: 10-40mm/s
- Slicer input file: .stl/obj, output: .gcode
- Power: 12V, 30W
- Size: 175x235x270mm
- Box size: 270x100x310mm
- Support OS: Windows XP10/7 (32 bit / 64 bit)
- Printing capability: TF card, USB cable
The printer arrived in a branded box, which was slightly damaged at customs during an autopsy check.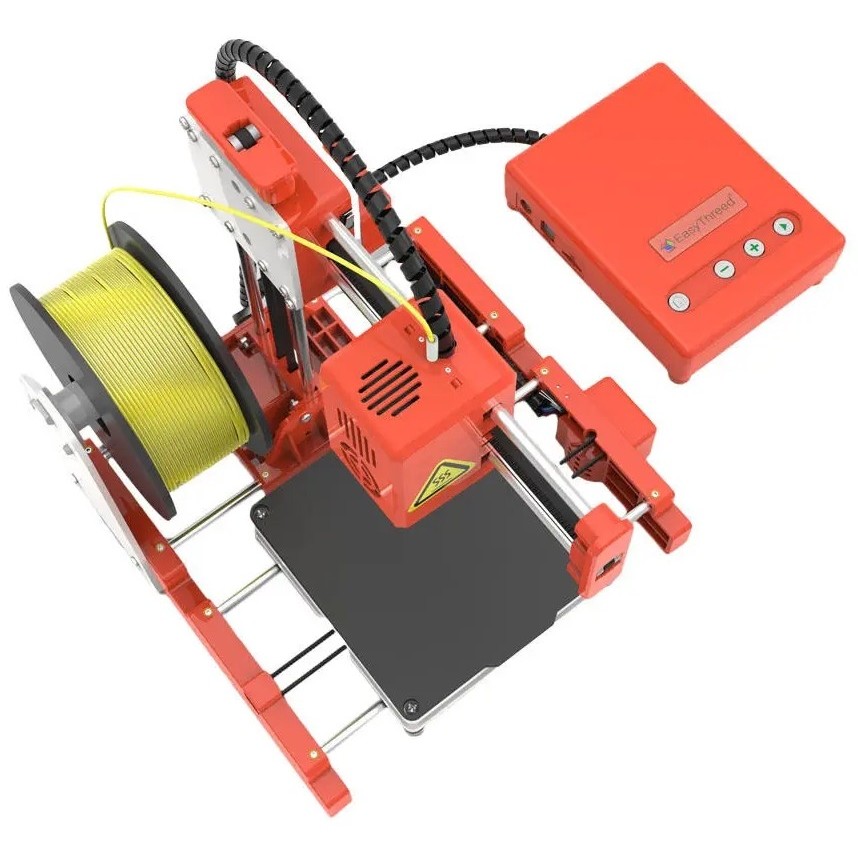 The fact that the printer is primarily for children is hinted at even by the richness of its colors indicated on the box.
Inside the box, the printer itself is in a foam plastic briquette.
And under it, everything that did not fit in the main package: instructions, USB cable, card reader with a flash drive, a screwdriver with screws for assembly, a starting supply of filament and a holder for the coil.
The holder is designed for some small spools, so fit a 750g spool there. will not work.
We open the top of the foam and we are greeted by a bright orange printer in all its glory.
The printer consists of two parts that are interconnected by a cable.
The whole assembly consists in installing the upper part into the base and tightening 4 screws. Then connect the three connectors and you're done.
The manufacturer installed a removable magnetic mat on the printer's print table so that the printed models can be removed from the printer without any extra effort.
At the corners of the table there are adjusting screws with lambs.
A small panel with the main printer controls is assembled on the side face of the printer base. There is a connector for connecting the power supply, a slot for a memory card, a USB connector for direct connection to a computer, a home button and a three-position switch for selecting the operating mode.
The home button in this printer performs the only function, lowers the print head to its lowest position to perform printer calibration, while the movement occurs only along the Z axis, the X and Y axes do not move at all. For the first time, this put me a little in a stupor, according to the manufacturer's instructions and videos, the head should have dropped exactly into the corner of the table, but alas, this did not happen. At first I thought that I had a problem with other axes, but no, the developer just apparently thought that since you still have to move the table and head with your hands, then why bother and position them for the first time.
The mode switch is responsible for filament loading (if you switch it to the leftmost position), filament extraction (rightmost position) and print mode (middle position).
To start the printing process, there is a separate Start button on the front side, it also allows you to pause printing, cancel printing, and raise your head above the table. To raise the head, you need to press the button and hold it for about 3 seconds, after releasing the button, the head will rise 10mm up.
Dismantling
On all axes of the printer and on the extruder are the same stepper motors 24BYJ28
They are attached to the plastic case of the printer through an adapter metal plate. The engine can be moved slightly relative to the plate, as I understand it, this is a reserve for adjusting the belt tension.
The drives on all three axes are made on belts, on the X and Y axes the belts are rolled into a ring, one of its edges is dressed on the motor shaft (as seen in the photo above), the second on a bearing inserted into the plastic at the edges of the guides.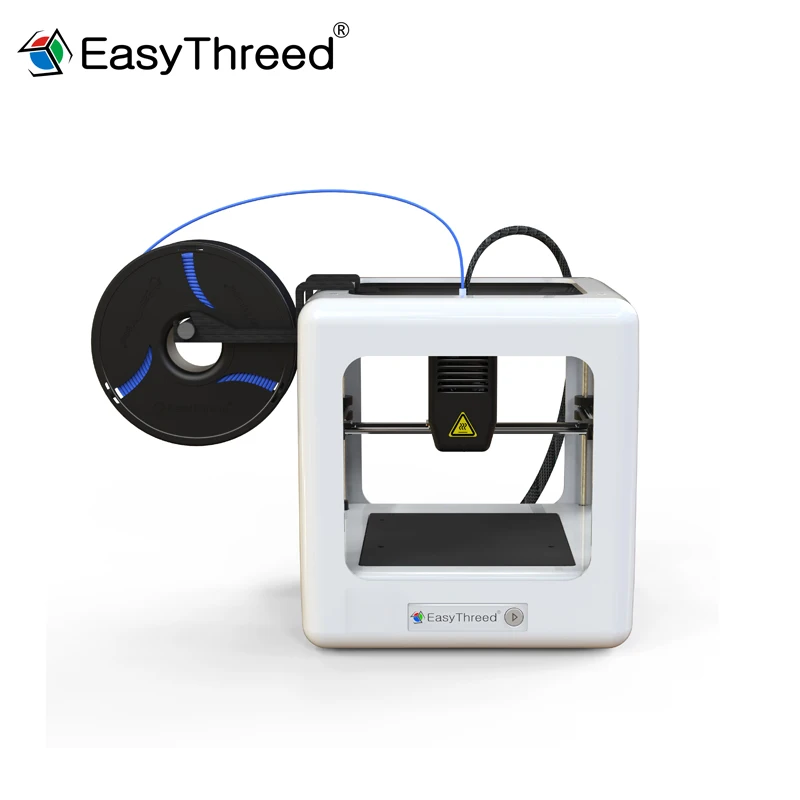
And in the table drive, there is only one belt and it is looped over the motor shaft, pressing against it with two bearings.
The extreme positions when moving along the axis are usually determined by one or two limit switches. Everything is exactly the same here, or rather almost the same, there is only one limit switch on the Z axis, it helps the extruder not to rest against the table surface. The remaining axes do without limit switches, after reaching the extreme point, the motor tries to move on for some time, but then the controller realizes that it has reached the edge, and the attempts stop.
The extruder at the printer is hidden in a separate casing. There are two fans inside, one cools the extruder itself and starts immediately after the printer is turned on, the second one directs the flow through the air duct to the print area and turns on its printer after the start of printing. Most often, the printer prints the substrate without blowing the print area, and starts blowing for the model itself.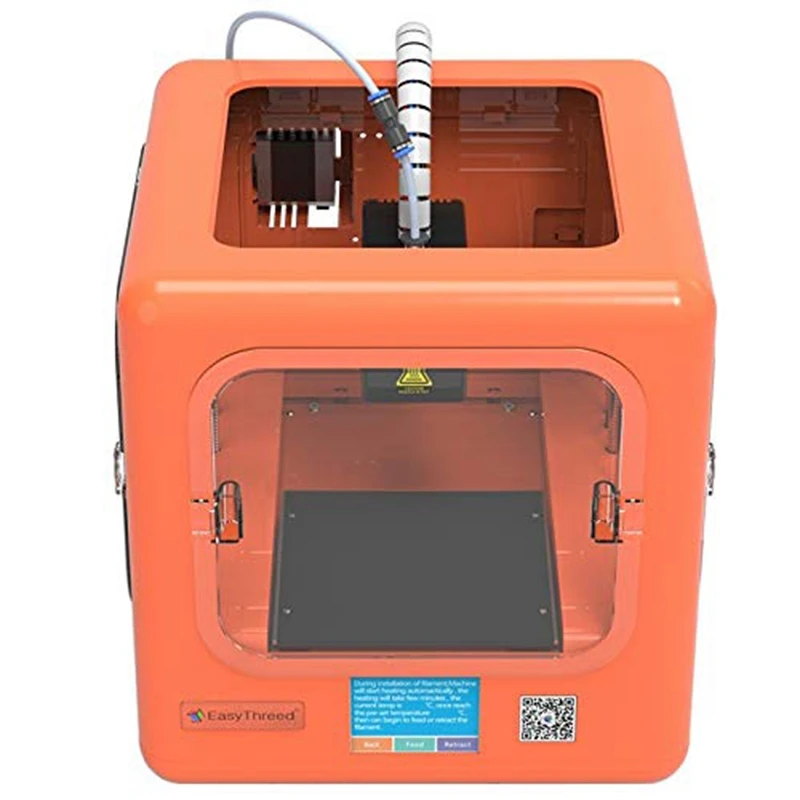
From the side of the fans, the extruder itself is not visible, so I had to disassemble this assembly to the end.
The entire feed mechanism is made on an iron base. There is a feed gear on the motor shaft, a bearing on the reverse side and all this is covered with a plastic cover.
I did not find any mechanism for adjusting the pressure of the bearing to the feed gear, it seems that the size between them is set once at the factory and cannot be adjusted.
The control board is located inside the base of the printer.
I did not find any documentation for this board on the ET4000+ board, but the board was clearly made for some more mature printer.
Main controller STM32F103
Stepper motor drivers are soldered to the board HR4988SQ
There are a number of unused connectors on the board. For example, this is clearly a place to install a WiFi module or bluetooth
The table heater should have been connected here.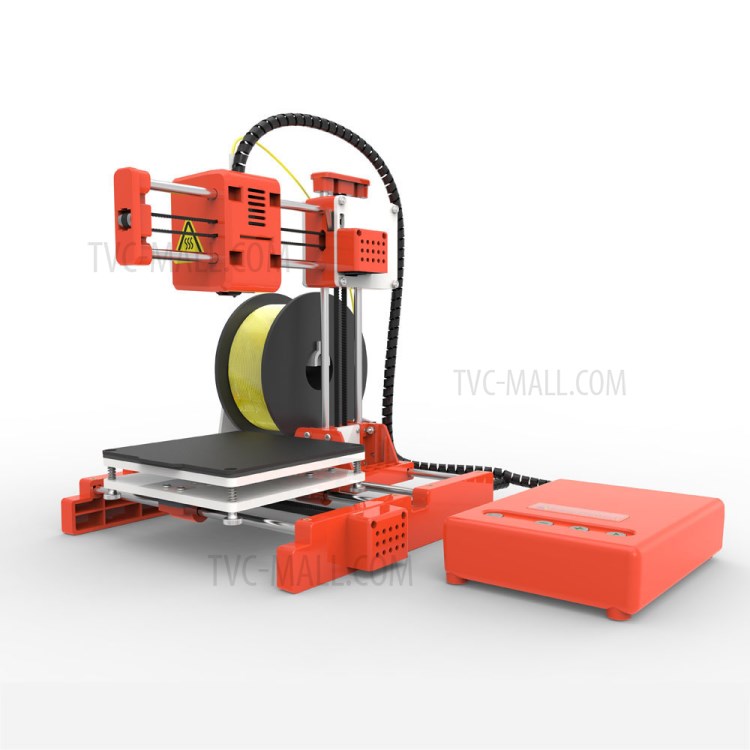
And here, in my opinion, there is a place for two more limit switches and a second motor for the Z axis
Software, printing and the first problems
After assembling and calibrating the table, I wanted to test the printer in operation. The USB flash drive that comes with the kit comes with a couple of models ready for printing, so if you have the same intolerance as I do, you can immediately insert the USB flash drive into the printer and start printing. Since the printer does not have a screen, the model for printing is selected by the date the file was created. No matter how many gcode files you have on the card, the printer always prints the file with the newest creation date. And another small remark, the printer does not like too long file names and characters other than numbers and letters in the name, especially does not like Russian file names.
After starting printing, after about 37 minutes, I became the proud owner of such a rocket. Of course, I knew that 3D printing was not a fast process, but I did not expect that such a baby would take so much time, and about half of this time (about 17 minutes) the printer was printing the substrate.
The model is hollow, the printing went in two layers and this is how the place where the printer went from the far layer to the near one and back looks like.
During the first print, I found out that the printer axles are not lubricated, and when moving, they hold together quite strongly, especially when moving the table. I had to take on the grease and carefully lubricate the plain bearings on the axles. After the second print, it got better, but still not perfect, for a long time I couldn’t understand what else was making a sound, as it turned out, in some places the belt clings to the plastic case, I had to work a little with a file, after that the printer became relatively quiet. I still can’t sleep next to him, but now it almost doesn’t interfere with watching a movie.
Then there was an attempt to check the artistic component of the printer. This funny kitten took almost 2.5 hours from the printer.
But I wanted to not only print something made by someone, but also create it myself.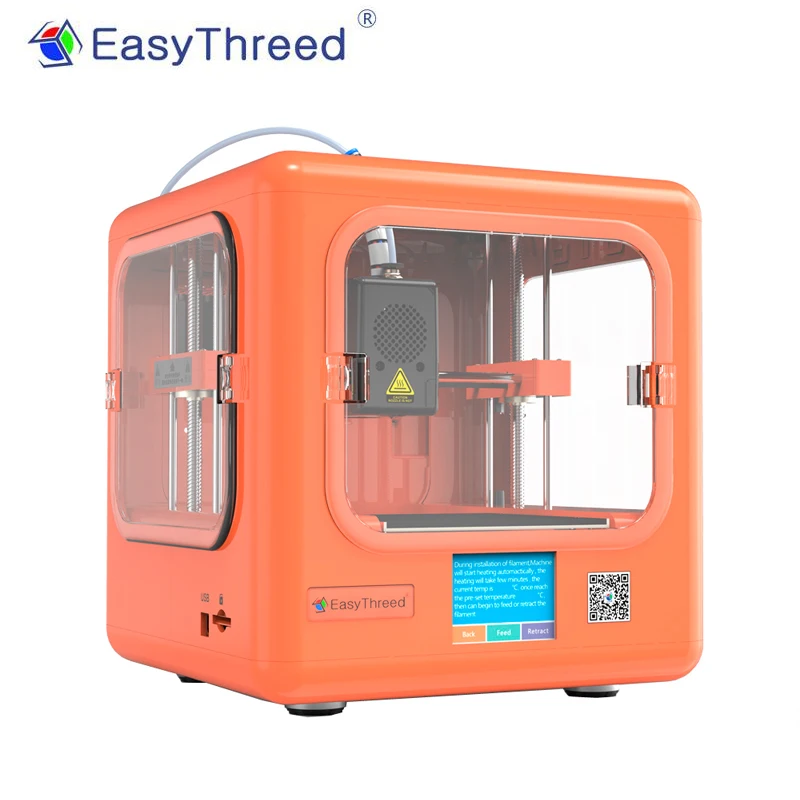 And then the reason arrived in time, one of the cartridge clamps broke on the Samsung SCX-4200 MFP.
Attempts to model it on their own were not successful, but with the help of friends everything worked out.
At the same time, the part was slightly modified, I don’t understand why it was impossible to do this from the factory, there is enough space in the case, and the window for the stop initially fits under the stop of this shape, but the manufacturer decided to save a little here, or vice versa to earn money, then let everyone decide for himself that It was.
After the model was ready, it had to be cut. The printer comes with an EasyWare slicer and files for connecting this printer to the Cura slicer on the same memory card. In principle, EasyWare as a start, in my opinion, is even nothing, there are some settings, but there is also a button to cut in one click. That's just the print quality, to put it mildly, is not very good.
I tried to print my model sliced in Cura and EasyWare and here is the result.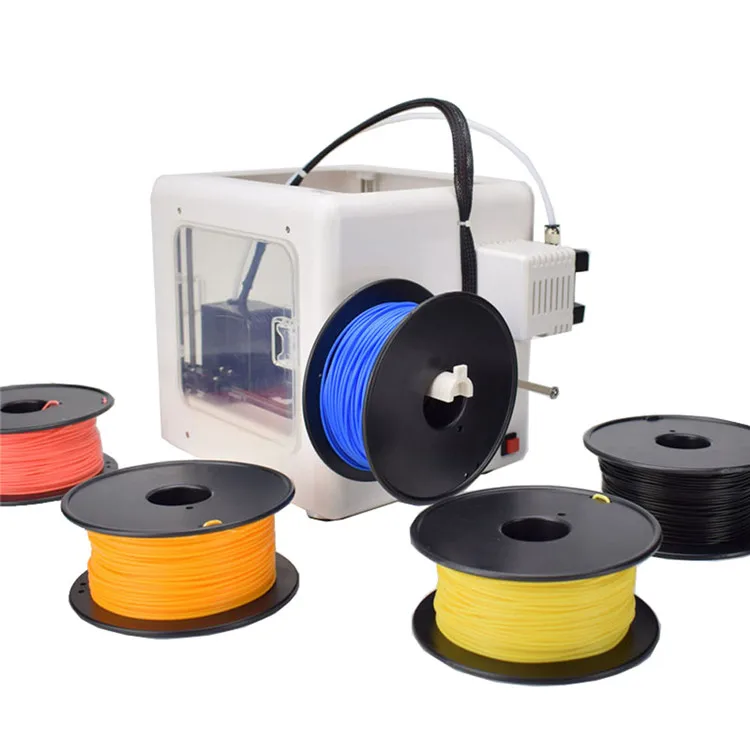
On the left is EasyWare on the right Cura default settings as suggested by the manufacturer. In general, the detail turned out both there and there, but in Kure, even without settings, the edges turned out to be smoother, the corners are better sustained and, in general, the detail looks more professional or something.
But with the quality, I ran a little ahead. Since the part was modified in the process, I decided to print both parts in order to close the issue with a possible re-breakage.
I prepared the left clamp for printing and sent it to print and went about my business. I come in about 20 minutes and see that the printer printed out the right one for me. I was a little surprised, but I decided that it was my hands that were crooked and I sent the wrong model for cutting. And since I have the right part, I opened the model of the left part, made sure it was the left one, cut it and sent it for printing. Came again in 20 minutes and became the happy owner of another right part :)
It was after that that I started to sin on the slicer and started to figure out how to install Cura. I installed it, opened the left part, sent it to print, and after 25 minutes (in Cura with default settings, printing takes 5 minutes longer) I became an even happier owner of the right part :)
After that, I went to the forums and found out that printers can have the so-called mirroring effect along one of the axes. There are two reasons, either software (controller firmware), or incorrect motor connection. Since by that time I had already managed to dig inside the printer, I had to check all the connectors. It turned out that they all had keys and it was impossible to make a mistake there.
I asked a question on the printer manufacturer's website. And there it was as if they were waiting for me, they didn’t even ask on which of the axes I had a defect, they just immediately gave me an update for the firmware.
Installing the update is simple to disgrace. Write two files lite_cfg.txt and mksLite.bin to the memory card, insert the card into the printer and turn it on. Wait 60 seconds, just in case I waited a couple of minutes and turn off the printer. Remove the memory card and check it, if the file extension has changed to cur, then the firmware was installed successfully.
And here is the result of installing the update. This is how the test cube looks in the slicer.
And here is the result I got. On the right is a cube before installing the update. and on the left after.
The print quality is quite good for me, and if it weren’t for the jamb with the firmware, it would be possible to say that the printer started up and works right out of the box without any settings :)
Only on the die, towards the end, one row of printing got out a little, but I'm not sure if this is a printing glitch or I didn't follow it and the plastic went into a little tightness. The fact is that, for joy, I bought a 750-gram plastic spool for the printer, but it’s impossible to install it on the complete stop, so for now it just lies on my table and I need to periodically approach and turn it with my hands so that it touches the plastic in the air .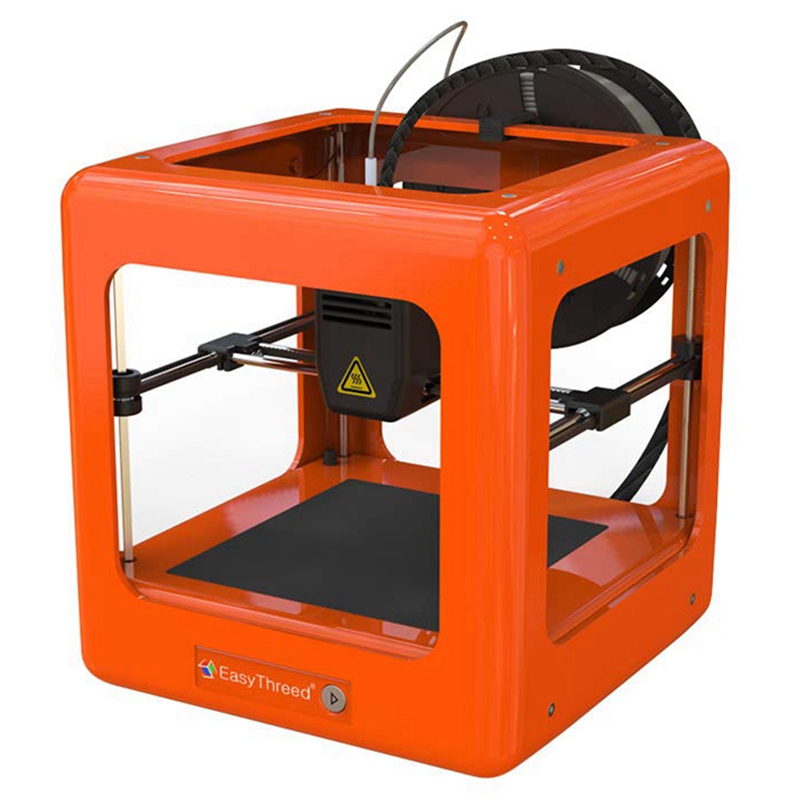
The printer also seemed to fit into the dimensions, the cube was printed 2x2x2 and the dimensions were almost ideal, although if you look closely you can see that the cube added about 0.1 mm in height, and if you measure all the side faces, then there is also a difference of about 0.1- 0.2 mm.
And this influx at the bottom is a little annoying, although it is only if you print with a skirt, when printing with a substrate, everything seems to be smoother, but the substrate takes so long to print.
After I flashed the printer and printed out a set of parts normally, it turned out that I missed the dimensions and the part simply does not fit into the mounting hole. An attempt to finish it with a file did not lead to anything, so I had to change the model and print again.
But as a result, the printout got into the printer and so far it has served faithfully
Assembly and first printing video:
A small conclusion: Personally, I am delighted. Yes, I agree in advance with everyone who writes that this is just a toy, and adding a little to its price, you can take ...
Yes, a toy, yes you can take it, but the toy is very interesting and even useful. The printer has a very small print area, and a frankly meager list of supported plastics, and this is its undoubted minus. You can probably add its slowness to the minuses, but for the first printer this is a very, very interesting thing. For some, such a toy will open the way to the world of modeling and 3D, and then the person will be able to more consciously choose the first adult printer for himself, while someone, on the contrary, will understand that modeling and printing did not give up on him and will be glad that he spent on this the sample is not $200-300, but $80.
Coupon to buy BGdd5af9 price with $79 coupon until November 30th.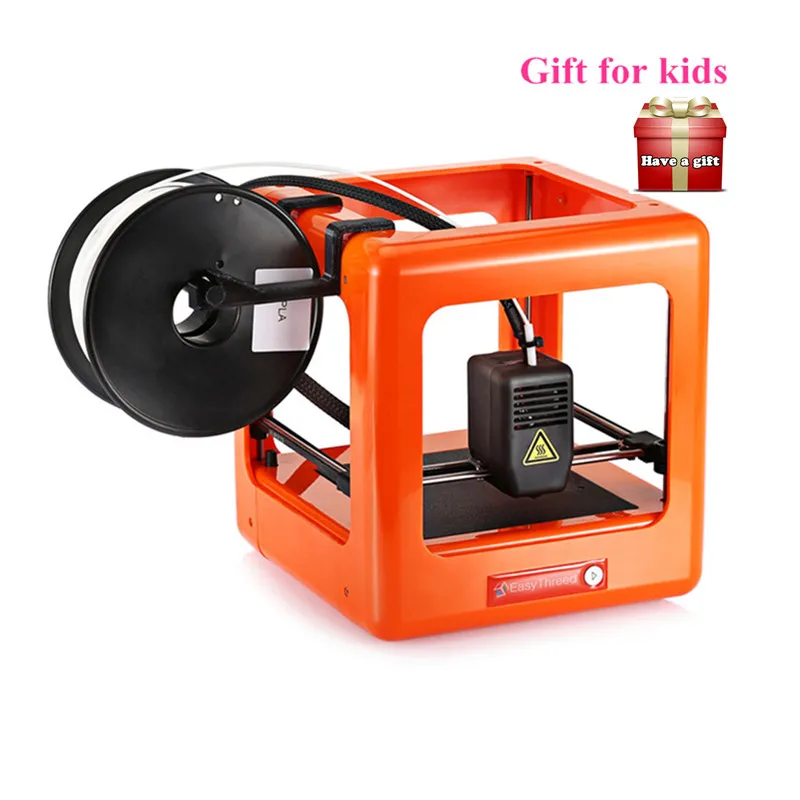
I apologize in advance for the spelling and grammar of the text, all the mistakes made were not made on purpose, but only out of ignorance and due to the imperfection of automatic text checking programs.
Product for writing a review provided by the store. The review is published in accordance with clause 18 of the Site Rules.
EasyThreed X3 Mini 9 1D Printer User Manual0001
MINI 1D PRINTER X3
USER MANUAL
WARNINGS AND SAFETY INSTRUCTIONS Be sure to read the following contents and use this machine before installing Please do not use this machine in ways not described in this user manual.
- Do not touch hot parts, including heater blocks, extruder nozzle, filament, and heated print bed.
- Keep the machine and all accessories out of the reach of children.
- Use the power cord supplied with this device.

- This machine is applicable to 110-240V power supply.
- Never pull or twist the black cable.
- Do not climb inside the machine while it is working.
- Always allow the printer and extruded filament to cool before getting inside.
- Do not place the machine on an unstable surface where it could fall.
- When printed with PLA filament, the plastic will emit a slight odor. Place the machine in a ventilated, cool and dry place.
- Do not expose the machine to water or moisture. If moisture gets into the machine, unplug it and let it dry completely.
- If the machine emits smoke while printing, unplug it immediately to stop using it.
INTRODUCTION
ABOVE PRODUCTVIEW
- After inserting the XZ axis, fix the XZ axis to the build platform with two screws.
- Connect the Z axis motor wire to the printer control box black wire as shown in the figure below.
- Install the filament holder as shown below. Important note: This thread holder can only be hung on a 250 g thread.
- Hang the thread on the holder. .
- Pass the thread through the Teflon hose.
INTRODUCING STARTING UP
- Turning on
Insert the power supply into the power port of the printer control unit. Once turned on, the button will light up. (Note: if printing is completed or does not need to be used for quite a long time, please turn off the power supply to turn off the power).
Precaution: Do not move the X and Y axes by hand when the printer is on.
- Slicer software installation and setup
(1) This 3D printer has self-developed slicing software named Easy ware, which is pre-installed on the TF card.
♦ Copy the Easyware file to your computer and does not require installation. Or you can download the Easyware program from the EasyThreedofficial website. website directly. And you can watch a video about the slicer on the EasyThreed 3D Youtube channel. The Easyway slicer recognizes the STL file format. if you want to improve your print quality, you need to learn how to use the CURA 9 slicer0003 ♦ Convert STL file Format in G-code format, save it to TF card and insert TF card into printer, then create the selected model.
(2) Create your own G-code file using other open source programs such as Cura or Repetier-Host. These programs use machine dependent information to generate G-code. file.
For more information on how to install and manage the slicer software, please visit www.easythreed.com
Warm notice: there is a geode file inside the IF card when it comes from factory
PRINTING
- Bleeding platform
You need to align the build platform for this printer for the first time.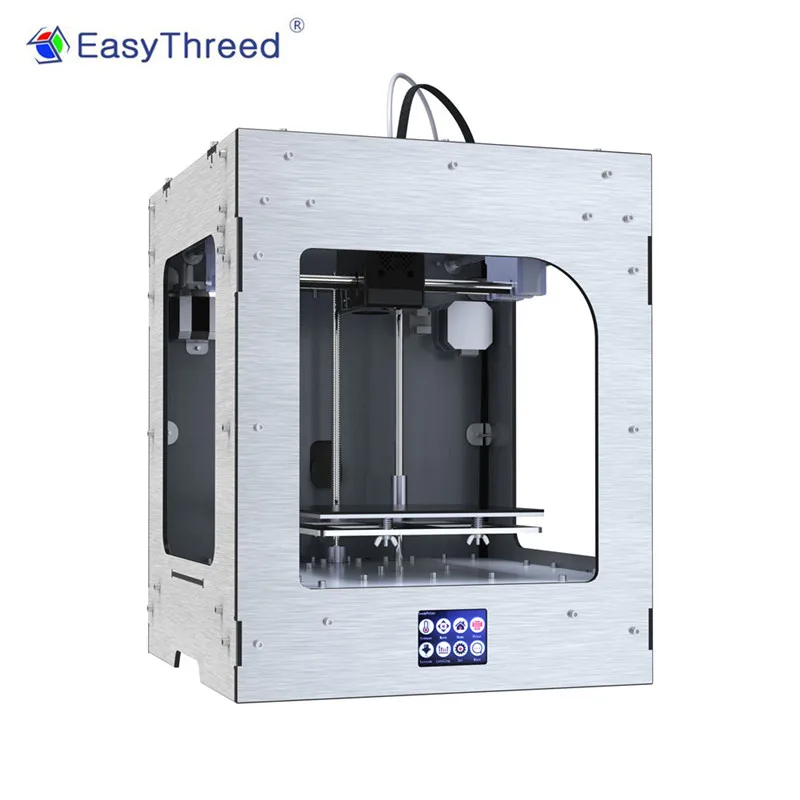 Adjust the distance between nozzle and platform at points (1) (2) (3) (4). The height of the nozzle above the print platform should be 0.1 mm, which corresponds to the thickness of a sheet of A4 paper.
- Press the button, the Z axis will move to the home position.
please turn off the power. After turning off the power, you can manually move the X and Y axes - Move the nozzle to point (1). Place a sheet of paper between the nozzle and the print bed. If the distance is too large, turn the hand-tight nut counterclockwise to raise the print bed to the standard distance. If the distance between nozzle and platform is too small. Turn the hand-tight nut clockwise so that the print platform drops the standard distance. (Check the distance is correct or not. That is, when drawing an A4 sheet, the nozzle must be attached to the A4 sheet without scratching it).
- Adjust 3 more ee points in the same way.
- When the distance between nozzle and platform is correct at four points (1) (2) (3) (4), alignment is complete and successful.

Please turn on the power again after leveling the platform.
Loading filament and feed
(1) Insert the filament into the printhead tube until it stops moving further, and gently press the filament so that it does not run back.
- Press the button, the button light turns on and flashes quickly (for 1 minute), the nozzle heats up; After the button goes out, the machine starts feeding, it feeds successfully when ordinary silk comes out of the nozzle. Then you can press the button to finish feeding.
Caution: Make sure there is at least 3 cm between the nozzle and the print bed. If there is not enough space. press the button for 3 seconds, then release your hand.
The Z axis will go up 1cm (when the machine stops printing, press for 3 seconds then release, each time the nozzle goes up 1cm, users can choose the height).
- printing
Press the button, and the button indicator flashes regularly, printing starts (the printer will select the last G-code file for automatic printing).
- Pause / Resume
While printing, click, the button light stops flashing, then printing is paused.
If you want to continue printing, press to restore, the button indicator flashes again, the printer returns to printing.
- Stop printing
If you want to stop printing during printing, press and hold the button for 3 seconds, then release, the machine will stop printing, then printing will be canceled.
- Unload filament, retract
If users want to change the filament or make the machine stop working for quite a long time, need to unload the filament, press the button and pull out the filament.
(If the machine has stopped printing for more than 5 minutes and the extruder has cooled down, you must wait 1 minute to reheat before retracting.) Press again to complete retraction.
After printing, remove the platform, and easily remove the object.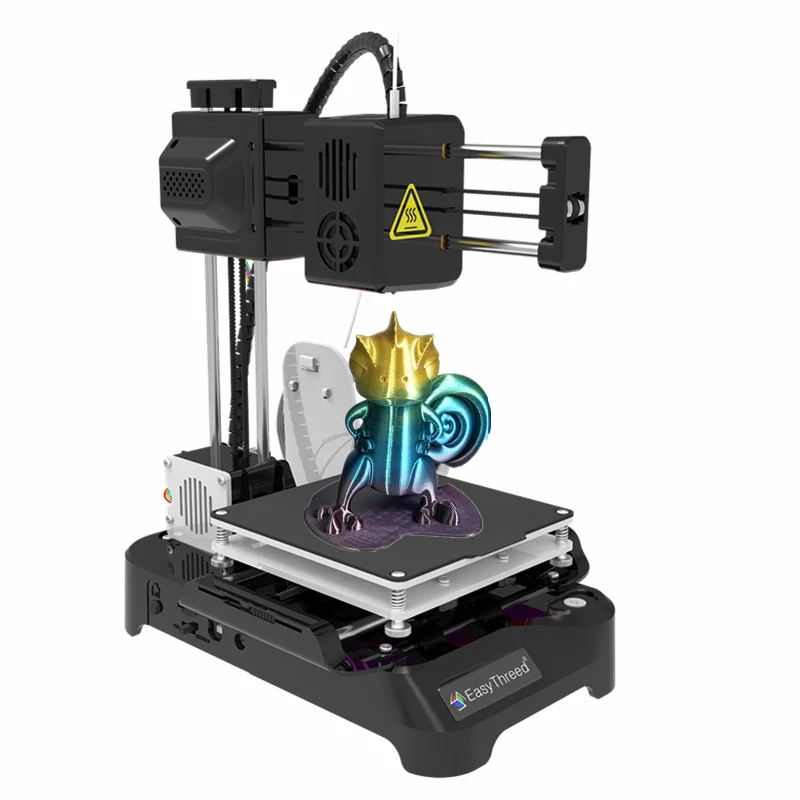
High quality thread is preferred.
Different fibers are available on the market and the quality also varies greatly. Poor quality filament can cause the nozzle to break or jam. Choose high quality thread.
Safety Warning
Keep your fingers away from the NOZZLE and BLACK INSULATOR when the printer is in operation as the temperature in this area reaches over 200 degrees Celsius. Always keep your hands away from moving parts during operation.
MAINTENANCE
- Do not use methods other than those mentioned in this manual to disassemble or modify this product to avoid damage to this printer or other serious accidents.
- When the power is off, clean the machine regularly with a piece of cloth to wipe off dust and residue, if the cloth is wet, do not use flammable liquids to contact the internal circuit to avoid fire or electric shock.
- Clean the nozzle and extruder after printing to avoid clogging the nozzle the next time you print.
- The recommended working environment temperature is 5°C -35°C. Do not ventilate the machine case with a fan while the printer is in operation.
Recommended humidity for working environment 30%-90%.
FAQ
01: Why doesn't the printed model adhere to the printing platform?
A4: The nozzle is too far from the bed, the correct distance between the nozzle and the bed must be as thick as a sheet of AXNUMX paper.
Q2: Why does the filament not come out of the nozzle?
E: Check the filament feeder. If it is an external gear feeder, then see if the gear is rotating or not. If it is a built-in stepper motor feeder, then observe if the motor runs with little noise. Otherwise, check if the filament feeder is connected to the main board correctly.
A2: Check temperature. The printing nozzle temperature for PLA material is 180-230°C.
A3: Check if the nozzle is blocked.
Heat the nozzle to 230 C for PLA, gently press the filament, if the filament still does not come out, then you need to disassemble the nozzle, clean or replace it.
A4, check if the nozzle is too close to the platform if so. The filament cannot come out, so adjust the distance between the nozzle and the platform with an A4 piece of paper.
Q3, print model misplaced problem
Al, model was not sliced properly, need to re-cut or reposition model to generate new Gcode file.
A2, Model file problem, if the model is still out of place after reslicing, it is the original problem file.
A3. the nozzle is forced to stop printing. Path:
First, make sure you don't touch the nozzle while printing. Secondly, if there are filament residues on the top layer, the residue area will gradually increase, when they accumulate to a certain amount and become rigid enough, the nozzle will be forced to move abnormally.
A4, power supply is unstable
Check if high power electrical equipment is running during printing. dislocation occurs when some equipment is turned off, such as an air conditioner, in which case it is necessary to connect a voltage stabilizer to the printer's power supply.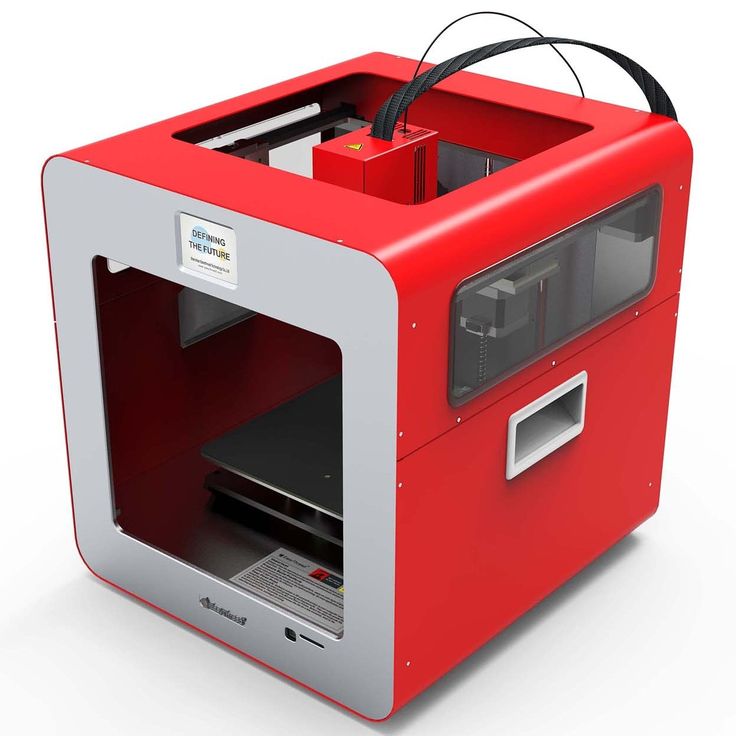 Otherwise, pay attention if the atomizer is locked in a certain position, if so, the X, YZ axis power supply is uneven, then it is necessary to adjust the XY, Z electric current on the motherboard.
HOW: If the above solution cannot solve the problem of out of place, the offset in most cases occurs at the same height for different models, then the motherboard must be replaced.
- Why print accuracy is very different from the real model
Al, a lot of filament has accumulated on the surface of the model.
Al.l, nozzle temperature too high, filament melts too quickly and causes overflow.
A1.2, the thread flow is too large, there is a thread flow setting in the slicing software, change the default value of 100% to 80%.
A1.3, There is a problem with filament diameter setting, it is in the slicing software, the default settings are different, there are 1.75mm and 3mm filament on the market, for 1.75mm, the diameter should be 1.75, but for 3mm, the diameter should be 2.