Diy 3d printer workbench
The 10 Best 3D Printer Tables and Workbenches in 2022 – Clever Creations
A 3D printing workspace is so much more than the 3D printer itself. Along with it come the filament rolls, various tools, accessories, and post-processing setup. Initially, you can do with a bare minimum table for a 3D printer; however, as you progress with the hobby, you will likely find the need for a dedicated 3D printing setup.
A 3D printer table or workbench allows you to organize your stuff and find it quickly when you need it. But, with loads of options available in the market, it can get confusing to select the ideal one for your needs.
In this article, we’ll get into the different criteria for choosing a 3D printer table or workbench and then look at the options available in the market for you to buy. Read on to learn more about these tables and choose the best 3D printer table that suits your setup.
| Best 3D Printer Table | Surface Area | Storage | Price (~) | Best Offer |
|---|---|---|---|---|
| Seville Classics UltraHD Lighted Workbench | 48" x 24" 122 x 61 cm | ** | $399 | Amazon |
| Safco Products Deskside Wire Machine Stand | 24" x 20" 61 x 51 cm | *** | $109 | Amazon |
| Seville Classics Rolling Cabinet Workbench | 77" x 37. 196 x 95 cm | ***** | $999 | Amazon |
| Gladiator Steel Cabinet | 31" x 28" 79 x 71 cm | **** | $299 | Amazon |
| Seville Classics Workbench Desk Table | 48" x 24" 122 x 61 cm | * | $189 | Amazon |
| Gladiator Wide Hardwood Workbench | 66.5" x 19.96" 169 x 51 cm | * | $299 | Amazon |
| 2x4 basics 90164 MI Custom Workbench | Customizable | **** | $76 | Amazon |
| Husky Extra Deep 46 in. 9-Drawer Mobile Workbench | 46" x 25" 117 x 64 cm | ***** | $655 | Amazon |
| Mighti Foldable Heavy Duty Workbench | 44.5" x 27.5" 113 x 70 cm | ** | $229 | Amazon |
| IKEA LACK table(s) | 21.65" x 21.65" 55 x 55 cm | * | $31 | Amazon |
Best 3D Printer Tables and Workbenches in 2022
Seville Classics UltraHD Lighted Workbench
Best overall
Check Price
Amazon
If you have a single 3D printer and need a robust and sturdy table, the Seville Classics Ultra HD is an ideal desk for you. It has solid steel construction, a thick wooden flat surface, and fluorescent light along with a cantilever top shelf.
The workbench features a huge pegboard that you can use to hang large tools that you need to use frequently. You get a power surge protector included with the workbench with six power sockets and 2 USB plugs, giving you an easy solution to plug in all your 3D printers and accessories, like a UV curing station.
The table can hold an evenly distributed weight of 500 lbs (227 kg), and the drawers are designed to hold an additional 60 lbs (27 kg) of weight. With its industrial design, durable build quality, and wide desk surface, the Seville Classics Ultra HD is in our book the best 3D printer table for beginner and advanced hobbyists.
Standout Features
- Fingerprint-resistant drawers
- Easy-to-reach power strip
- Powder-coated finish
Technical Details | |
|---|---|
Dimensions (W x D x max. H) H) | 48" x 24" x 65.5" 122 x 61 x 166 cm |
| Weight capacity | 500 lbs 227 kg |
| Material | Crafted solid steel body and solid beech wood top |
What We Like
- Rigid build quality
- Perfect area for printing essentials
- Adjustable legs
Could Be Better
- Limited storage capacity
- Limited tabletop depth
Find Seville Classics UltraHD Lighted Workbench at
Amazon
Safco Products Deskside Wire Machine Stand
Best on a budget
Check Price
Amazon
The Safco Deskside machine stand is a budget 3D printer table that can be used for a single 3D printer, and it can fit an Ender 3 V2 or small resin 3D printer like those from the Elegoo Mars series. The table was initially intended for paper printers and office stationery, but its rugged build quality and low price make it equally suitable for 3D printing.
This table has three shelves, with the top desk surface designed to hold up to 100 lbs (45 kg) of weight. The bottom shelves have a mesh design and can hold 50 lbs (23 kg) of materials each. One great way to use this arrangement is to keep a 3D printer on the top work surface, with filament spools in the middle rack and the other tools on the bottom shelf.
The table is supported on four swivel wheels for easy mobility. The assembly is easy, with straightforward guides and an easy setup process. Overall, the Safco Wire stand is a decent quality table for small-sized 3D printers and beginners on a budget.
Standout Features
- Swivel wheels
- Adjustable shelf height
- Lightweight design
Technical Details | |
|---|---|
| Dimensions (W x D x H) | 24" x 20" x 27" 61 x 51 x 69 cm |
| Weight capacity | 100 lbs 45 kg |
| Material | Steel and Laminate |
What We Like
- Easy to move around
- Durable build quality
- Affordable
Could Be Better
- Lacks drawers or cabinets
- Limited weight capacity
Find Safco Products Deskside Wire Machine Stand at
Amazon
Seville Classics Rolling Cabinet Workbench
Most futureproof
Check Price
Amazon
The Seville Classics rolling workbench comes with an elegant yet purposeful design. It has a rugged and durable build quality, with a solid wooden flat work surface, metal frame, and drawers. It is suitable for holding multiple 3D printers at once, including their accessories.
The workbench features eleven drawers that you can use to store and organize tools, spare filament spools, and more. It also has a two-door cabinet with a full-width shelf with four adjustable positions. All front surfaces are coated to prevent fingerprint marks, and you can lock the drawers and cabinet to protect your equipment.
To move the workbench quickly, it comes with five heavy-duty wheels. You can lock two of these to fix the table in one place. Overall, the Seville Classics is a solid, durable, and rugged table that you can use to accommodate all your 3D printing stuff and still have room for future expansions.
Standout Features
- Multi-sized drawers
- Hard rubber 5" wheels
- Polyurethane bumpers
Technical Details | |
|---|---|
Dimensions (W x D x max. H) H) | 77" x 37.5" x 20" 196 x 95 x 51 cm |
| Weight capacity | 500 lbs 227 kg |
| Material | Stainless Steel |
What We Like
- Versatile design
- Wide tabletop
- Lots of storage capacity
Could Be Better
- Costly
- Large footprint
Find Seville Classics Rolling Cabinet Workbench at
Amazon
Gladiator Steel Cabinet
Best 3D printer storage cabinet
Check Price
Amazon
The Gladiator steel cabinet is a heavy-duty table suited for use in a garage space. It can accommodate a single 3D printer, and you can store the rest of your accessories on the cabinet shelves below the tabletop.
Its shelf is adjustable to fit a variety of 3D printer tools, and you can use it to hold up to 75 lbs (34 kg) of weight. You also get adjustable legs so that you always have an evenly leveled desk surface. Optionally, you can add caster wheels if you need more mobility and want to move your 3D printer cabinet around.
The included instructions are not particularly detailed, and you will need to have some experience and be careful during the assembly process. The Gladiator steel cabinet is best suited for storing filament spools, small tools, and 3D printer electronics.
Standout Features
- Adjustable storage shelves
- 10-year limited warranty
- Steel cabinet panels
Technical Details | |
|---|---|
| Dimensions (W x D x H) | 28" x 18" x 31" 71 x 46 x 79 cm |
| Weight capacity | 300 lbs 136 kg |
| Material | Alloy Steel |
What We Like
- Solid build quality
- Ideal for heavy-duty use
- Can be stacked on top of other table
Could Be Better
- Poor quality instructions
Find Gladiator Steel Cabinet at
Amazon
Seville Classics Workbench Desk Table
Best adjustable table
Check Price
Amazon
The Seville Classics workbench table is a heavy-duty, height-adjustable desk. Its height can be easily adjusted between 28.5″ (72.4 cm) and 42″ (106.7 cm) at 1.5″ (3.8 cm) increments. It gives you the flexibility to adjust the table surface according to your needs and get easy access to the 3D printer without compromising on your posture.
The table’s construction is solid with a metal frame and a 1.5″ (3.8 cm) thick wooden work surface that lets the desk hold 1000 lbs (454 kg) of evenly distributed weight.
This workbench does not have cabinets or drawers to store your extra 3D printing stuff. Nonetheless, considering its adjustable nature, large surface area, and ability to hold large weights, the Seville Classics workbench is an ideal 3D printer table for a large 3D printer.
Standout Features
- Adjustable height
- Easy to assemble
- Multi-purpose desktop
Technical Details | |
|---|---|
| Dimensions (W x D x max. H) | 48" x 24" x 41.5" 122 x 61 x 106 cm |
| Weight capacity | 1000 lbs 454 kg |
| Material | Wood, Alloy Steel |
What We Like
- Wide range of height options
- High weight capacity
- Durable build quality
Could Be Better
- No storage options
Find Seville Classics Workbench Desk Table at
Amazon
Gladiator Wide Hardwood Workbench
Most minimalist table
Check Price
Amazon
The Gladiator Wide Hardwood workbench is an excellent solution if you need a simple yet sturdy 3D printing table.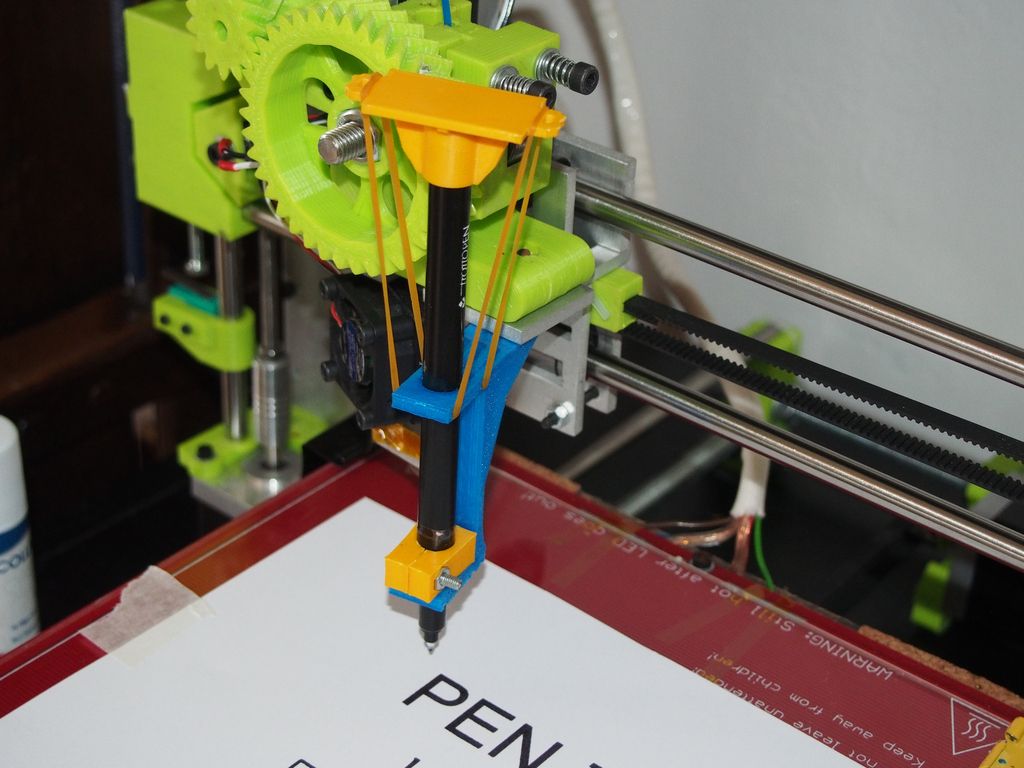 It comes with a generous desk surface, solid construction, and is easy to set up for any workspace.
Its 1-1/2″ (38 mm) tabletop can support up to 1500 lbs (680 kg) of weight, making it ideal for heavy 3D printers. The top of the desk is treated with a UV cured coating that helps it resist any chemical stains, ideal if you work with a resin 3D printer.
The Gladiator Wide hardwood workbench also comes with steel leveling legs that will help you get a perfectly level work surface. There is no option to add caster wheels for more mobility, however.
One limiting factor of the workbench is its depth, and it restricts the maximum size of the 3D printers you can use it for. Aside from that, the Gladiator hardwood workbench is an excellent option if you’re looking for a heavy-duty yet basic 3D printing table.
Standout Features
- UV-cured coated tabletop
- Supports 1500 lbs / 454 kg of weight
- Minimal assembly
Technical Details | |
|---|---|
Dimensions (W x D x max.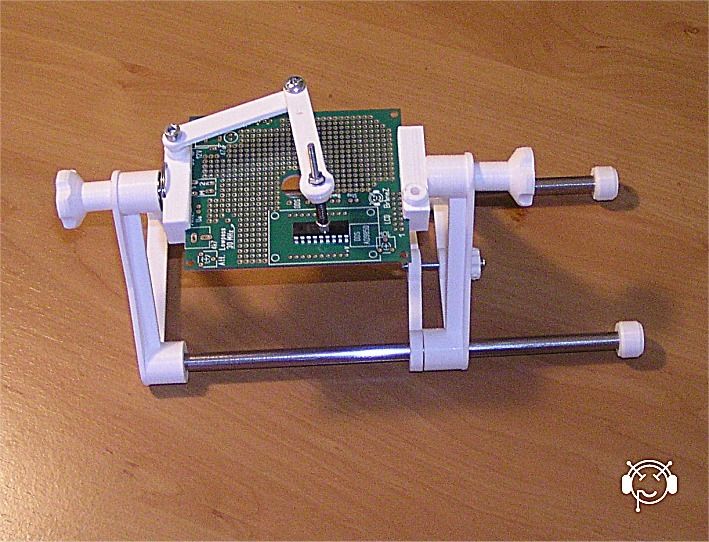 H) H) | 66.5" x 19.96" x 38.31" 169 x 51 x 97 cm |
| Weight capacity | 1500 lbs 680 kg |
| Material | Steel |
What We Like
- Good for large 3D printers
- Chemical-resistant surface
- Simple to assemble
Could Be Better
- Lacks storage space
- A bit overpriced
Find Gladiator Wide Hardwood Workbench at
Amazon
2x4 basics 90164 MI Custom Workbench
Most customizable
Check Price
Amazon
If you need a fully customizable solution for your 3D printing workspace, the 2×4 custom workbench is probably the best table for your needs. It comes with four workbench legs and six shelf links that you can set up in various configurations and get the perfect table for your 3D printing setup.
This workbench is somewhat of a DIY project, and you will need to provide your own lumber to build the table and shelves. This means this workbench needs more time and effort than the others on this list, but you can also fully customize it to your needs.
The brackets are made up of heavy gauge structural resin that can support 1000 lbs (454 kg) of weight when combined with the lumbar. For the construction process, you only need to execute straight and 90-degree cuts, removing the need for more serious equipment like a miter saw.
While purchasing, you can select various options and choose which one best matches your requirements. Because of its high configurability, the 2×4 basics Custom Workbench is the best table for DIY enthusiasts and experienced users who need a custom-built solution for all their 3D printing needs.
Standout Features
- Pre-bored screw holes
- Durable construction
- Versatile use cases
Technical Details | |
|---|---|
| Dimensions | Customizable |
| Weight capacity | 1000 lbs 454 kg |
| Material | Heavy-gauge resin |
What We Like
- Completely customizable design
- High weight capacity
- Only straight cuts required
Could Be Better
- Requires additional components (lumber)
- Needs extra time and effort
Find 2x4 basics 90164 MI Custom Workbench at
Amazon
Husky Extra Deep 46 in.
 9-Drawer Mobile Workbench
 Most rugged
Check Price
Amazon
The Husky extra deep mobile workbench has an all-metal construction and it comes with nine lockable 24.5” (62 cm) deep drawers. Each drawer can hold up to 100 lbs (45 kg) of weight, with the bottom ones rated for 200 lbs (91 kg).
This workbench comes with a power strip with four outlets and two USB ports for easy access to power for all 3D printers and other powered tools. The four castor wheels and ergonomically designed handle let you quickly move your table to your desired location, whenever you need.
At almost $700, the Husky mobile workbench is undoubtedly not a cheap option. You should only consider it if you’re a serious professional who needs a rugged and heavy-duty 3D printer cabinet for long-term use.
Standout Features
- Ball bearing slides
- Lockable
- Extra deep drawer storage
Technical Details | |
|---|---|
Dimensions (W x D x max. H) H) | 46" x 25"x 37" 117 x 64 x 94 cm |
| Weight capacity | 1200 lbs 544 kg |
| Material | Steel, wood |
What We Like
- Rugged construction
- Easy to move around
- Integrated power strip
Could Be Better
- Heavy
- Costly
Find Husky Extra Deep 46 in. 9-Drawer Mobile Workbench at
Amazon
Mighti Foldable Heavy Duty Workbench
Best foldable 3D printer workbench
Check Price
Amazon
If you have limited space in your garage and need a 3D printer table that you can move easily out of the way, the Mighti Foldable workbench is perfect. It folds up when you don’t need it and reclaims your space for other activities.
It comes with a pegboard for organizing and attaching your tools with ease. The pegboard also substitutes the lack of storage drawers with a cantilevered shelf on the top.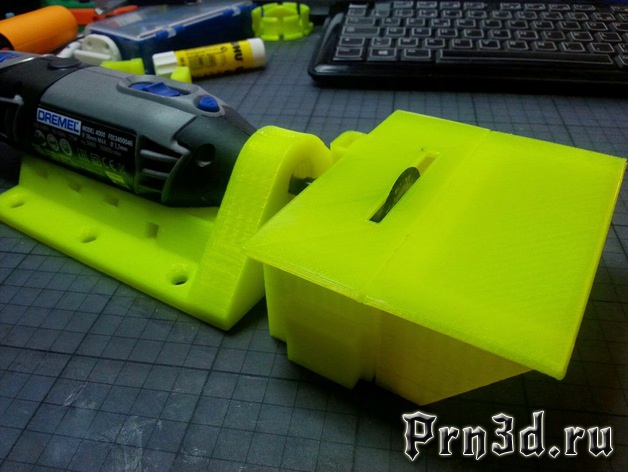
The thick MDF tabletop supports 400 lbs (182 kg) of weight, making it suitable for heavy-duty applications. The table needs no assembly, and you can get started using it within a few minutes from unboxing.
Overall, the foldable design and the metal construction make it suitable for use in cramped spaces and for holding heavy 3D printers. It is ideal for people who have a small-sized 3D printing workspace but still need a solid 3D printer table.
Standout Features
- Foldable design
- Large surface area
- Big pegboard
Technical Details | |
|---|---|
| Dimensions (W x D x max. H) | 44.5" x 27.5" x 62" 113 x 70 x 158 cm |
| Weight capacity | 400 lbs 182 kg |
| Material | Stainless steel |
What We Like
- Easy assembly
- Saves space
- Study construction
Could Be Better
- Limited storage space
- Advertised weight limit differs from actual
Find Mighti Foldable Heavy Duty Workbench at
Amazon
IKEA LACK table(s)
Best DIY 3D printer table
Check Price
Amazon
IKEA LACK tables are one of the popular 3D printer tables you can buy right now. They’re highly modular, cheap, and easy to build. You can stack these tables on top of each other and create a basic yet effective 3D printing workbench for your 3D printer.
Due to its design, stacked LACK tables also help enclose your 3D printer from all sides. 3D printer enclosures let you print with additional materials and isolate your 3D printer from the external environment. Prusa3D has an excellent guide on how to construct your own enclosure with these tables.
It is an elegant and versatile table/enclosure solution that you can use in your home, garage, and offices. The LACK IKEA table is an excellent choice for someone who wants to build a cheap DIY 3D printing table, but still needs flexibility in terms of design and features.
Standout Features
- Minimal design
- Easy assembly
- Versatile use
Technical Details | |
|---|---|
| Dimensions (W x D x max. H) | 21. 7" x 21.7" x 17.7" 7" x 21.7" x 17.7"55 x 55 x 45 cm |
| Weight capacity | 55 lbs 25 kg |
| Material | Particleboard, Fibreboard, ABS plastic |
What We Like
- Budget-friendly
- Aesthetic looks
- Can be used as enclosure frame
Could Be Better
- Not sturdy
- Limited weight capacity
Find IKEA LACK table(s) at
Amazon
What to Look for in 3D Printer Tables & Workbenches
Surface area
An important criterion for choosing the best table for your 3D printer is the surface area you get. It dictates the maximum size of the printer that you can fit on the table. A large surface area will guarantee that you have ample workspace for your 3D printer and extras. Especially when you work with (M)SLA/DLP printers, there are many resin 3D printing accessories that you need space for.
What is critical here is to ensure that the table will fully support the base of your 3D printer.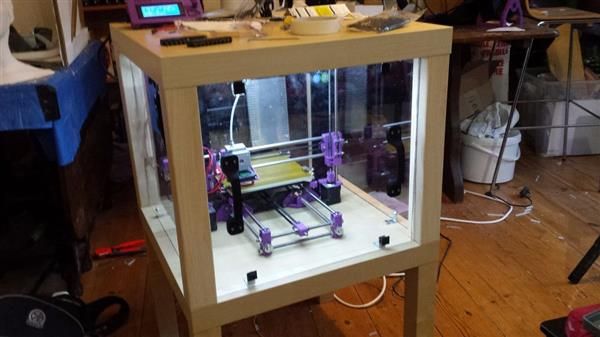 Any overhanging edges or corners can lead to wobbling and leveling issues. Additionally, having a rigid, stable surface underneath your printer will reduce vibrations and help you get better print quality.
Most 3D printer tables mentioned in this list have sufficient length to support a medium-sized 3D printer like the Ender 3 V2 or the Prusa i3 MK3S+. However, we recommend measuring your 3D printer’s footprint and matching it with the table’s surface area to guarantee that your printer will be fully supported.
Storage Space
3D printers come with loads of printing accessories. Allen keys, flush cutters, repair tools, post-processing equipment, and extra filaments are only a few of them. The best workbenches will have sufficient space and allow you to store all these things in an easily accessible place.
Drawers and cabinets help you to organize and find your stuff quickly. Adjustable shelves will let you store oversized items without problems. If you want to 3D print with multiple 3D printing materials, like PLA, ABS, PETG, TPU, it can be helpful to have a dedicated drawer for each of them.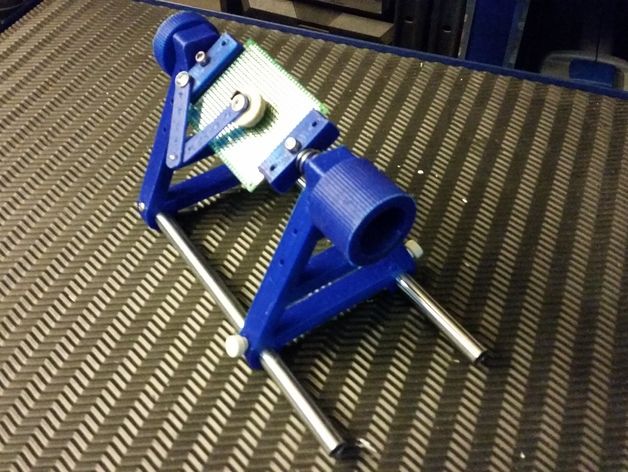
Stability
A 3D printer needs to be as stable as possible to get a high print quality during the printing process. A weak or shaky table will cause the printer to wobble and results in poor print outputs.
Stationary tables that do not have wheels will give maximum stability while printing. These have a solid foundation and will not move along with the motion of your 3D printer. In contrast, a table with wheels can sway with the movement of your hot end or the print bed at higher print speeds.
Material
If you’re looking for a heavy-duty and sturdy table, looking at its material will probably help you in the long run. A metal frame with a solid wood top tends to give the best stability and structural integrity for heavy loads.
While selecting a metal table, you will need to consider its post-processing. A corrosion-resistant coating offers you good protection against rust and exposure to the spilling of 3D printer resin, for example.
The same goes for a solid wood top.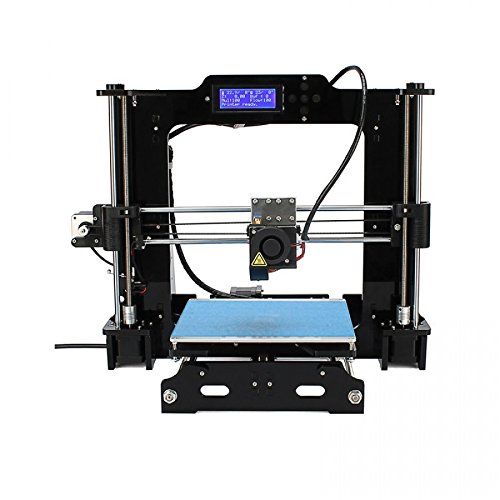 An epoxy or other coating for the wood top is likely to improve its long-term appearance.
Accessories
Power surge strips, pegboard clips, and lights are some of the additional accessories you can get with your table. These accessories will help you organize and use your workspace in a better way and 3D print more efficiently.
Basic tables will skip on other accessories to save on the cost. But if you’re getting a premium desk, it will be helpful to get one with as many attachments as possible. The Seville Classics Lighted Workbench is one of the best tables that comes with extra attachments designed to enhance your user experience.
Adjustability
Adjustability is not the prime factor for 3D printer tables. However, an ergonomically designed table that can be adjusted will be better suited for many users.
An adjustable height table will let you position your printer as per your preferences. You can quickly adapt the table to suit your workspace, and it will give you the flexibility to work on the 3D printer with more ease.
However, an adjustable desk will lose out on storage space and might have a less stable surface than fixed tables, reducing its stability and negatively affecting its user experience.
Weight Capacity
A 3D printer table should be strong enough to support the weight of multiple 3D printers at once. You will need to factor in the drawers and cabinets’ weight capacity, and it will inform you what items you can store within your table.
A solid table with a metal frame and wooden tabletop will be durable and have more weight-bearing capacity. Meshed structure or plastic legs will reduce the weight capacity of your table and result in a less sturdy table.
If weight capacity is your primary factor, the Gladiator Hardwood Workbench can support 1500 lbs (680 kg) of weight at once and is the best table in the list.
Frequently Asked Questions
Where is the best place to put a 3D printer?
The best place to put a 3D printer is on a 3D printer table. This will allow you to have a flat surface to work with and it will also provide stability for the printer. You will want to make sure that the table is level and that it is large enough to hold the printer and printing accessories without taking up too much space in your room.
Does a 3D printer need a stable table?
Yes, a 3D printer needs a stable table or desk to work properly. The table needs to be sturdy so that it doesn’t move around as the printer is working.
An unstable surface can cause the printer to produce inaccurate and low-quality prints. A big waste considering the time and effort that can go into optimizing a 3D printer’s performance.
Does a 3D printer need to sit on a level surface?
Yes, a 3D printer needs to sit on a level surface in order to print correctly. If the table, workbench or desk is not level, the printer’s frame can end up misaligned and prints might not come out correctly.
Can 3D printers make furniture?
Yes, 3D printers can most definitely make furniture! A lot of people don’t realize that 3D printing technology has come a long way in recent years and is now capable of printing out all sorts of objects, including furniture. In fact, there are even companies that specialize in manufacturing 3D-printed furniture.
So if you’re interested in getting some new furniture but don’t want to go through the hassle (and expense) of buying it from a store, then you might want to consider getting a 3D printer and making it yourself. It’s a great way to save money and have some fun too!
Can you put a 3D printer on the floor?
It is possible to put a 3D printer on the floor, but it is not usually recommended. Most printers are designed for use on a table or desk, and putting them on the floor can lead to problems with stability and printing quality.
If you do need to place your printer on the floor, there are a few things you can do to improve its stability. For example, you can set it on a non-slip surface like a rubber mat. Also make sure to keep any cords or cables clear of traffic areas so they don’t get stepped on or tripped over.
Can 3D printers be left alone?
Leaving a 3D printer unattended is not recommended, as it may cause a fire.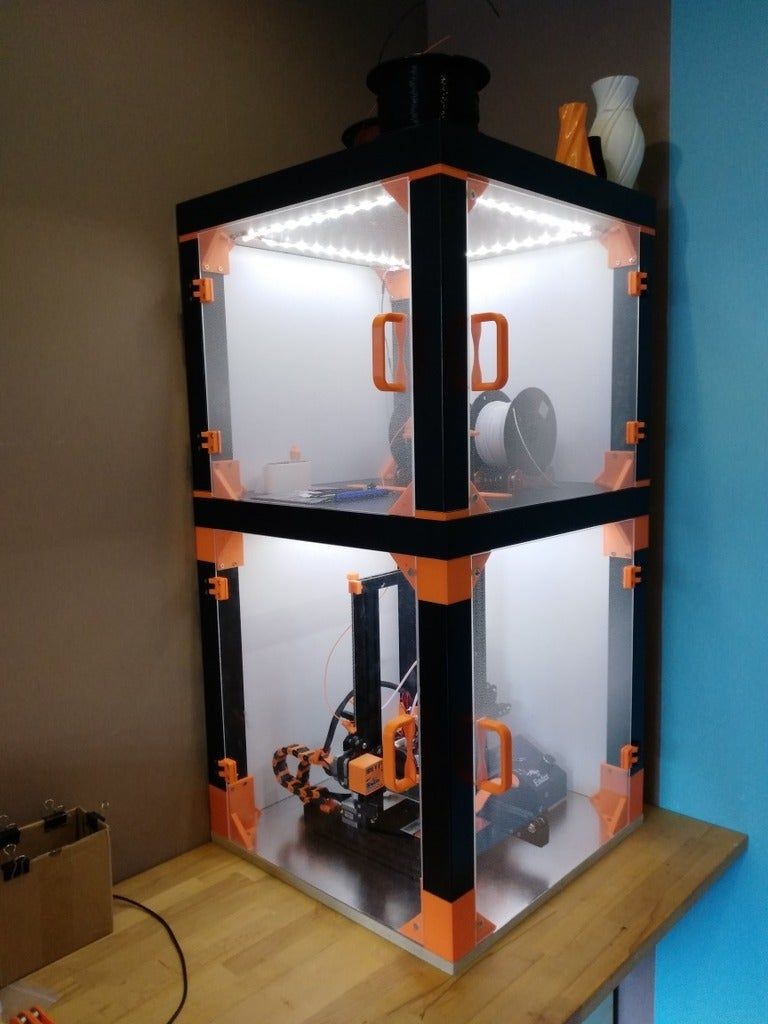 The printers use heat to create objects from plastic filament, and if something goes wrong while the printer is printing, the heat can build up and cause a fire.
In addition, many 3D printers require active cooling to keep them from overheating, and if the cooling system malfunctions or is turned off, the printer can overheat very quickly.
Conclusion
A 3D printer table will help store all your materials in one place and let you organize your work efficiently. It needs to be robust, sturdy and has lots of storage space to accommodate all your 3D printing accessories and filament spools with ease.
The Seville Classics Ultra HD lighted workbench is overall the best 3D printer table that you can buy. It has a sturdy tabletop, sufficient storage space, pegboard, and an industrial design that easily fits any garage, home, or office space.
If customizability is your primary criterion and you love to DIY, the 2x4basics 90164 MI Custom WorkBench and Shelving Storage System is an excellent choice for you.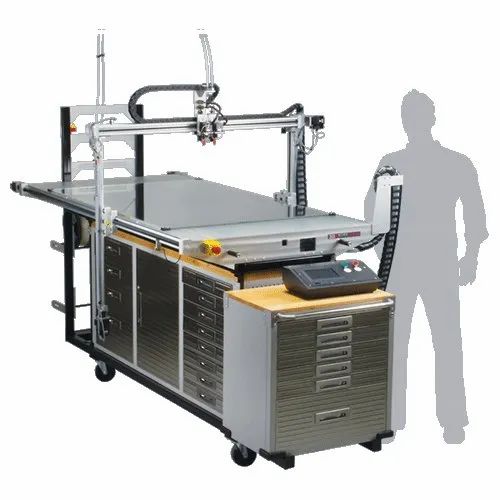 Alternatively, if you need a versatile and future-proof table, the Seville Classics Rolling Cabinet Workbench is a well-rounded option for your needs.
Let us know your experiences with the 3D printer tables, and if you have any questions, feel free to comment below.
Best Tables/Desks & Workbenches for 3D Printing – 3D Printerly
There is nothing like having a high-quality printer in your possession, but a sturdy table, workbench or desk for it to sit on is more or less equally important as well.
A solid foundation is definitely a factor that can impact your print quality, so this article will list down some of the best surfaces 3D printer users make use of in their printing journeys.
What Makes a 3D Printer Workstation a Good One?
Before getting into the best 3D printer surfaces, I’m going to quickly go through some key information about what makes a good 3D printer workstation, so we’re all on the same page.
Stability
When buying a table for your 3D printer, make sure of its sturdiness beforehand. Stability is a crucial factor that determines your print quality, so be wary of this when you’re going to make the purchase.
As 3D printers are prone to vibrations and sudden movements, a well-built table will be tremendously useful in helping the printer do its job properly.
In addition, a sturdy workstation means that it is capable of holding the 3D printer according to its weight comfortably. Moreover, it should have a robust base.
This will attribute to the overall smoothness of the printing operation and certify the firmness of the whole procedure. Chances of something going wrong are drastically reduced from here on out.
Abundant Space
A good workstation should not only include a strong foundation and sturdy build, but also an ample amount of space, which is fundamental for usability, especially with larger 3D printers.
First off, the workbench or table must have large enough dimensions to appropriately accommodate a 3D printer and handle its weight.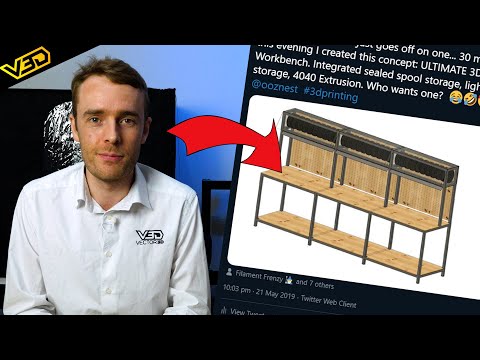 The cherry on top with a great workstation is having a wide surface.
Why? Because a spacious worktable that can host a 3D printer will also have storage options available for printing accessories. Thus, you can arrange and organize everything related to 3D printing in one place.
Getting a table that genuinely confines your 3D printing to a specific, single location pays off very well. In this way, you won’t have to go to a different part of the house or lose focus. It can be your own 3D printing area that you have ahold of.
May it be post-processing or tweaking your 3D printer using a set of different tools, the ideal workstation has sufficient space for all requirements. We recommend getting a table that ticks all these boxes.
A Flat, Even Surface
Even if you see a durable, firm table with lots of room to spare, there’s still no point in buying it if the surface isn’t totally even. One of the most principle needs of a 3D printer that it has to be placed on a flat surface, no questions asked.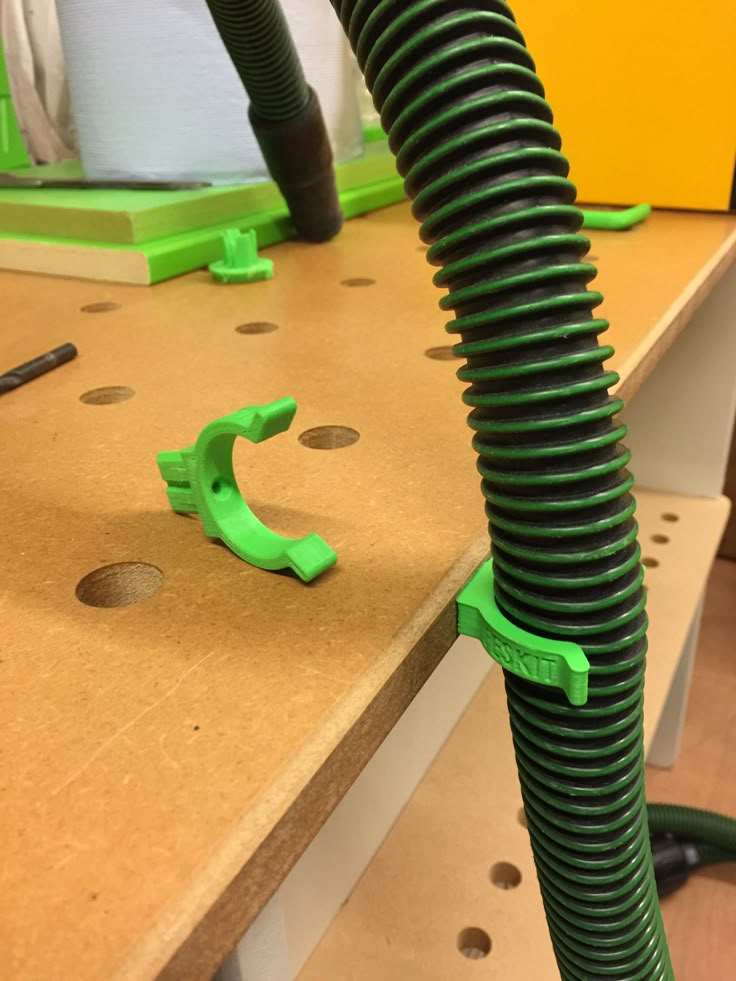
The floor or ground area where you 3D print may not be evenly levelled at all. In addition, many tables and workstations also might not be totally flat. We recommend a thorough inspection of this factor before you buy anything.
There are specially dedicated adjustable tables out there for 3D printers as well that allow the height of their legs to be correctly optimized. A feature like this guarantees that the workstation you’re getting is indeed worth the money.
How Does a Wobbly/Shaking Table Impact Print Quality?
When your 3D printer is working at higher speeds, especially during sections like infill, it causes vibrations, jerks, and rapid movements. All this leads to imperfections such as wavy lines or poor surfaces.
You don’t want to be 3D printing on a plastic table with frail supporting legs. You would rather set your 3D printer on the floor than use a surface like that.
Additionally, your prints may experience what is known as ghosting or ringing.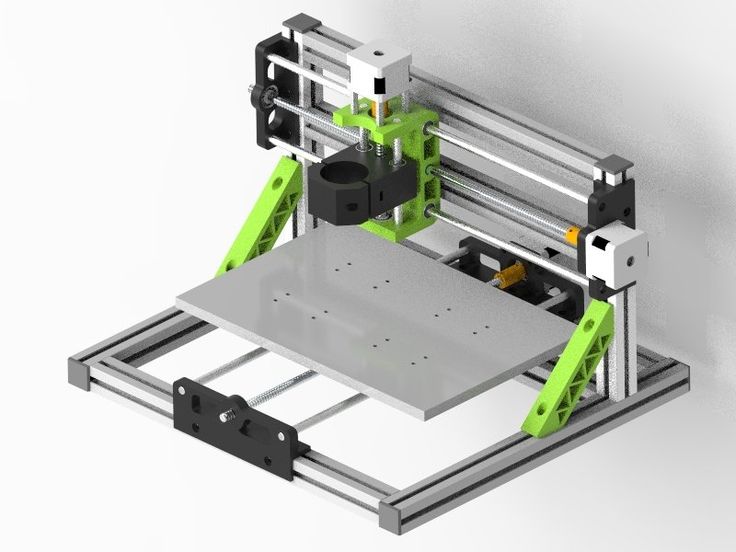 This is another term for vibration but particularly for 3D printing.
I wrote an in-depth article about Ghosting/Ringing and how to fix it which you can check out. Tons of users experience this and don’t realize it for months of 3D printing!
Ringing is basically a wavy texture on the surface of your print that occurs when your 3D printer’s extrusion shakes or wobbles. The impact could worsen if the table on which your printer is placed is also prone to vibrations.
Moving parts of a printer aren’t entirely steady, especially around corners when they’re about to change direction. Usually, this is where ghosting or ringing takes it toll the most.
Therefore, the ringing artifacts that will leave marks on the print are mostly in the form of repeated lines on the model’s surface, ultimately reducing the quality and sometimes, even ruining the whole print.
This is why it’s essential to place your 3D printer on an appropriate table or workbench that never compromises on stability and sturdiness.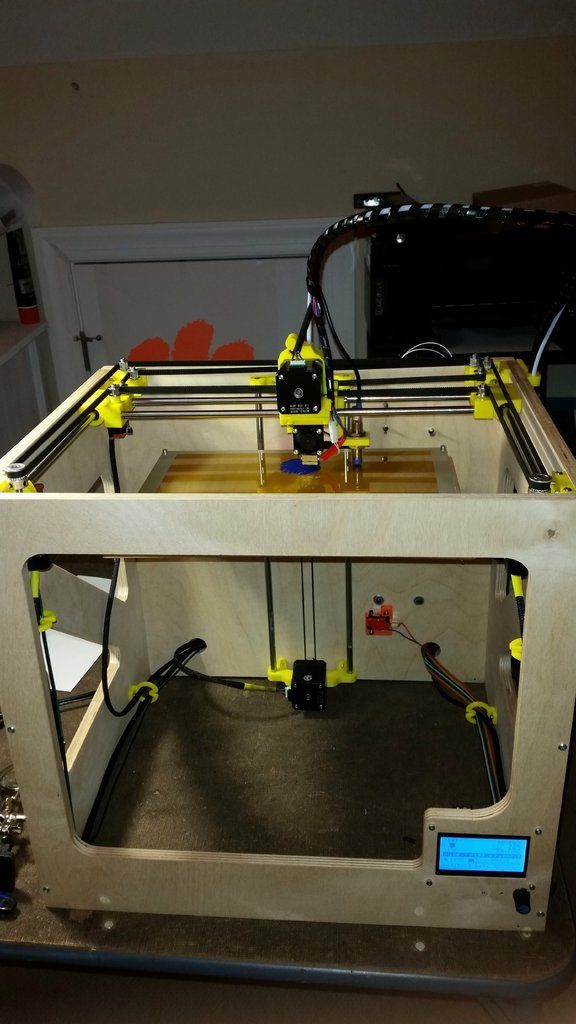
If you’re buying a $300+ 3D printer, you might as well invest a bit extra into a well-made workstation for your machine too so you can really get the best out of it, and take away complications that wouldn’t exist in the first place.
Another incident that could happen if your table is overly wobbly is that you may not be able to print at all.
A 3D printer prioritises steadiness and accuracy and is built on this very foundation, so with a table that’s consistently shaking, I doubt your printer can manage to extrude anything in place.
Therefore, the result will be a flabbergasting mess of plastic on your worktable. This is why it’s equally important to get a table that has perfectly made supporting legs, an evenly levelled surface, and enough room to host your printer and other useful items.
How to Make a DIY Workbench
Workbenches don’t always have to be bought, and in the case of 3D printing, it’s quite straightforward to make your very own workstation. The outcome may also be cheaper than you think, and on par with effectiveness when compared to an expensive table.
Here’s a well-crafted DIY workbench tutorial that’s pretty much ideal.
The tools and materials required to build this kind of a workstation aren’t over the top, as you can comprehend. On the contrary, the work is purely minimalistic and yields a convenient result.
The following steps show you exactly how to make your very own DIY workbench, and by the end of that, I’ll also mention a few handy additions.
- Start off with the proper assembly. The wood workbench frames will play their part here as you arrange for the workbench surface along with the lower shelf.
- Once you’ve got that sorted, continue by screwing the legs of the bench and subsequently attach the lower frame by turning the workbench upside down (you can use support during the attachment if you’re facing difficulty).
- Proceed with the surfaces of the worktable now.
 Screw them tightly to the frames you’ve just added. After this step, you’ll have to assemble the frame of the top shelf.
 - Next, give a proper finish to this top-shelf frame, so anything that is placed on it has a compact yet harmless contact with the frame. Continue by adding legs for the top shelf.
- Finally, screw your top shelf to the workbench you’ve previously developed. After carefully doing that, you’ll be looking at your very own DIY worktable!
Additionally, you can mount an extension cable on one of the legs of the top shelf, and even mount a strip of lights atop your workbench. Apart from an aesthetic overhaul, proper lighting is necessary to make your workbench look like the jack-of-all-trades.
Not getting a step correctly? Here’s the video that shows the DIY process in action.
DIY IKEA Lack 3D Printer Enclosure
Illustrating the significance of DIY in the 3D printing field is a simple enclosure that you can make using IKEA Lack tables. Simple, but elegant, might I say.
An enclosure becomes almost a necessity when you’re working with high-temperature filaments like ABS. It helps keep the internal temperature stable, prevents warping and curling, reduces the noise level, and even keeps your printer away from the dust.
There are many expensive enclosures out there, but opting for a cheaper option by building one yourself with an IKEA table that costs about $10 is really something else.
Originally coming from a Prusa blog article, the video below shows you the whole process in the flesh.
I wrote an article specifically about 3D Printer Enclosures: A Temperature & Ventilation Guide that you can check out for some key information about the best types.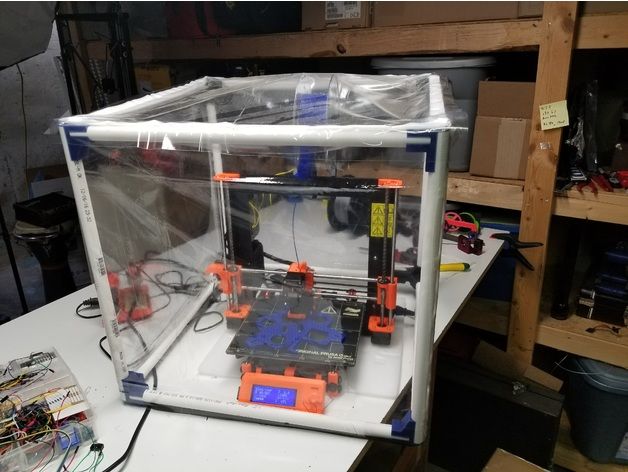
Best Tables/Desks for 3D Printing
Now that we’ve pointed down the essentials of this topic, let’s get to the main part. The following are two of the best tables for your 3D printer that are also well-grounded on Amazon.
SHW Home Office Table
This SHW 48-Inch Table is a great option to get you started with 3D printing. It’s also listed as one of the best sellers on Amazon while being labelled as the Amazon’s Choice, and that’s all for good reason.
For starters, the table has the dimensions of 48″ W x 23.8″ D x 28″ H, which is more than enough for printers like the Creality Ender 3. Moreover, it has pre-determined metal chambers so you don’t have to worry about the screws going too far in to damage the table.
The material of its surface is made with engineered wood while the rest of the framework is consolidated with powder-coated steel. Furthermore, its shape is fully rectangular and the table itself adapts to your workspace environment in a highly diverse manner.
At its core, this SHW table is truly a versatile product that suits a multitude of occasions, and not just 3D printing. It’s adorned with an intricately stylized design and hosts a combination of three different colours where you can choose the one you like.
Subsequently, when it comes to this table’s quality, people have been genuinely surprised. Most of the reviews say that this is their sturdiest bought table yet and that the underdog product has delivered beyond their expectations.
Its top-grade stability allows it to comfortably host a 3D printer and minimize all prospects of any vibration. The table boasts a smooth surface and measures up to be the perfect size for your printing requirements, considering that you may want to put down a handful of accessories besides your printer.
People also say that this was just the thing they were looking for. The firm foundation of the table is truly multipurpose and with its strapping quality, you can rest assured that you won’t be experiencing wobbling when 3D printing.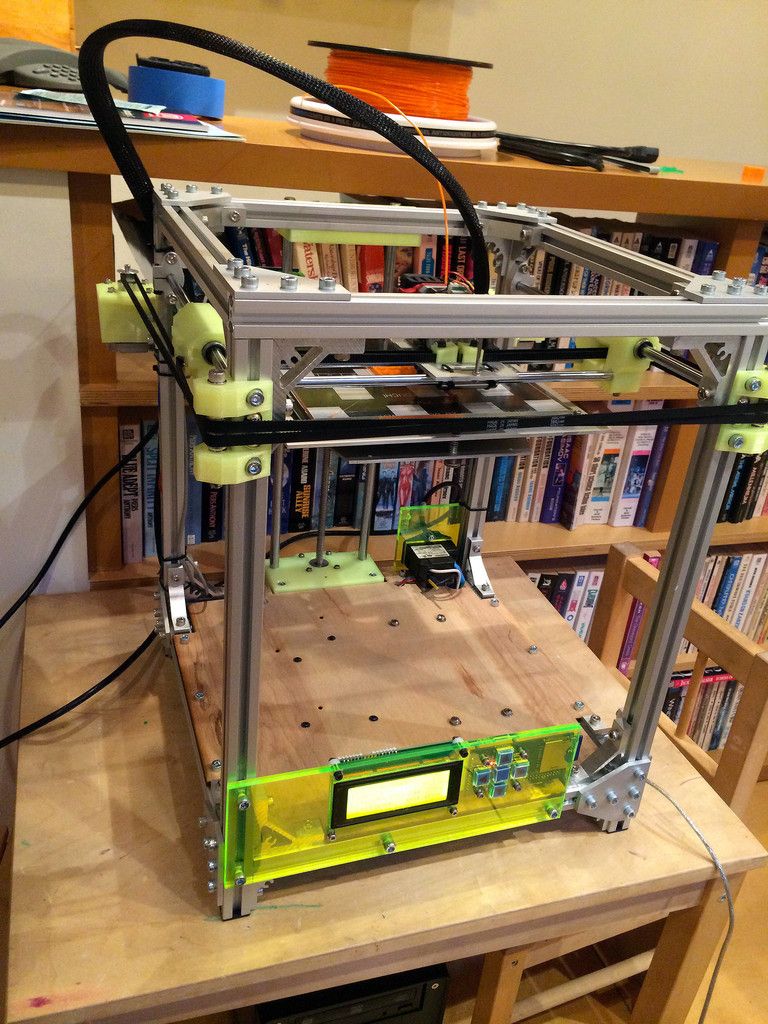
It’s easy to move around and quite possibly the biggest selling factors of this table is the very easy setup that hardly even takes 10 minutes. The table leaves you ample workspace on the top and appreciable legroom below.
Get yourself the SWH Home Office 48 Inch Computer Desk from Amazon today.
Foxemart 47-Inch Worktable
The Foxemart Worktable is another top of the line option for your 3D printer in the premium range. It’s a bit pricier, but with the level of quality it’s packing, you won’t regret a single penny.
The table boasts a 0.6″ thick surface board and comes with a frame that’s consolidated with metal. Additionally, it’s very spacious and has the dimensions of 47.27″ x 23.6″ 29.53″, being able to host large printers and a lot beside that as well.
Not to mention the matte black legs and the table’s space-saving design, but this product simply brings you value for your money. There are expensive yet similar tables as well out there but the bang for your buck doesn’t compare when it comes to this Amazon’s bestseller.
For a 3D printer, it can be effectively used as a sturdy workstation and can even look quite good at that too. This is because this Foxemart table comprises a rustic wooden colour combined with a dashing black top that does nothing except leave a luxurious impression.
Besides, people have really liked how this table isn’t hard to assemble. In fact, you can do so with the most minimal of efforts, and not even begin to break a sweat. Comfort and stability are all over the place with it, in all honesty.
Continuing with the prominent features, the table is very easy to clean and even waterproof. This is why it’s truthfully low maintenance, and sets you up for a long time because of its top-quality standard.
In your work environment, the Foxemart table looks like a costly product and is an eye-catcher for anyone who passes by. However, when its practicality is assessed, the legs of the table can be adjusted up to 2 cm so stability isn’t compromised by any means.
This worktable holds its ground even when the floor isn’t even.
Underneath the table is two small shelves that do a great job of keeping your necessary items organized and secure. The bottom shelf is big enough to host a tower while the top shelf can manage your tools related to 3D printing painlessly.
The multipurpose and ultra-strong build standard of this table vouches for the quality itself.
Check out several positive reviews on Amazon and purchase yourself a high quality Foxemart 47-Inch Office Table for your 3D printing adventures today.
Best Workbenches for 3D Printing
To carry on with the article, here are two of the best workbenches that can handle 3D printing nicely.
2x4basics DIY Workbench
A solid option for all those seeking the budget range is this first-rate buildable workbench that falls under the category of do-it-yourself.
What’s really admirable about this 2x4basics product is its immense customization. There are literally endless ways to configure this bench, and you can use it for any purpose you like. Us getting it for 3D printing, are no exception of taking a massive advantage here.
In terms of 3D printing, this purchase will set you up for good. Reviews repeatedly affirm how this custom workbench attributes to be very sturdy and stable.
In order for you to make this at the right amount of size, the manufacturers decided not to include the lumber, for this will only limit your modifications. This is because the benefit here is to make a workbench for whatever size you want, and adding in lumber may quite not meet your demand.
Therefore, to accommodate your wishful thinking, the kit only contains the 4 workbench legs and 6 shelf links. Lumber isn’t very costly, especially if it’s been bought from the right place, and the fact that you need only 90° cutting and none of those complicated angular hassles, setting this DIY workbench up is a breeze.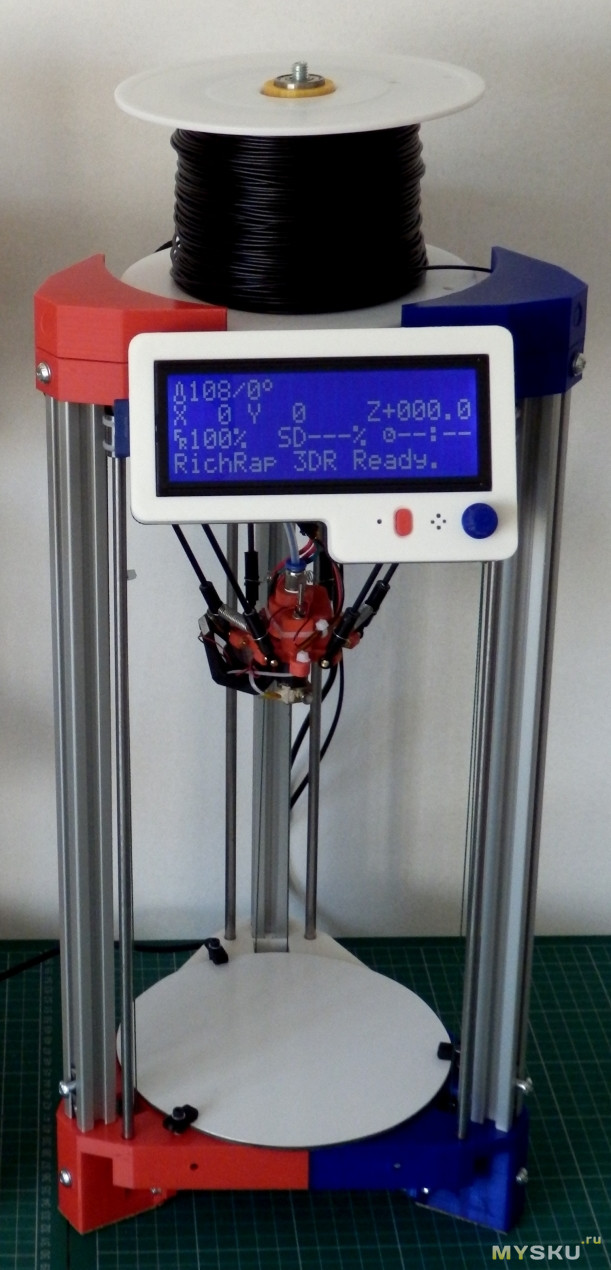
Having said that, the assembly won’t take more than an hour. To talk concerning your possibilities with customization, you can paint and prime this workbench prior to assembly, giving it an aesthetic appeal.
Apart from the fact that the 2x4basics brackets are made out of heavy gauge structural resin, the workbench you’ll make will be fit to withstand harsh conditions. And when 3D printing goes wrong, you’ll see how this characteristic is substantially beneficial.
People have found this method of building a workbench truly lively and fun. Since there isn’t a great deal of endeavour involved, you’ll soon find yourself having a cheap yet great workstation of your own.
Plywood and a number of 2×4 lumber will do the trick here, coming off as a relatively cheap way to treat your 3D printer.
For a nice budget option workbench that gets the job done, get yourself the 2×4 Basics Custom Workbench from Amazon.
CubiCubi 55″ Workbench
Welcoming a dive into the premium class here, the CubiCubi 55″ Workbench is a sight to behold. It’s a smartly built table that perfectly fits a 3D printer and ensures the utmost stability- everything that a perfect worktable should be proud of.
After all, it isn’t the Amazon’s Choice for nothing.
Offering a vintage vibe, the contrasting colour difference of the table fits in attractively with the rest of the furniture. It’s big enough for a 3D printer to be easily placed on it while leaving room for even more accessories.
Many buyers said that the table was bigger than they thought it would be, coming off as a pleasant surprise.
The four legs of this workbench being 1.6″ have been made extra-strong alongside the power-coated and highly durable steel frame. Moreover, it features a triangular junction design beneath that ups the stability and acts as an anti-wobble mechanism.
In addition, there is a plentiful of legroom too.
Assembly will hardly take up to 30 minutes, thanks to the carefully detailed instructions page that teaches you how to put everything together from A to Z. You just have to install the 4 legs and finish with a prompt fix of the desktop board on the top.
To speak of the shape, the table is fashionably modern and has dark and rustic brown wooden boards, boasting a splice board design.
The size in numbers is 55″ L x 23.6″ W x 29.5″ H which shows that your 3D printer will cherish its stay while enjoying a wobble-free contact with the surface.
Inclusive in your order is a small table as well. In terms of 3D printing, you can use this as a neat accessory alongside your printer and keep your stuff either above or below it. Furthermore, the table comes with a hook too.
This could be screwed on a wall or directly attached to the table instead to hang an extra spool of filament, perhaps.
CubiCubi offers a 24-month warranty on this product with the promise of an excellent customer service experience. As the plethora of reviews precedes them, this investment seems candidly worthy.
The professional look and sturdiness of the CubiCubi 55-Inch Office Desk makes it a great choice for your 3D printing needs, so get it on Amazon today.
We make a heated table for the 3D printer MC2 with our own hands
We make a heated table for the 3D printer MC2 with our own hands
We make a heated table for the 3D printer MC2 with our own hands
MS2 printer from Master Kit. And what if we make this table heated and adjustable, eliminating the AUTO_BED_LEVELING function?
https://masterkit.ru/blog/articles/delaem-podogrevaemyj-stol-dlya-3d-printera-mc2-svoimi-rukami
Having enjoyed experimenting with the MC2 printer and fine-tuning it, I came to the conclusion that it would be time for me to get a heated table. There's more that the printer's electronics support this feature. And at the same time try to make this table adjustable by eliminating the AUTO_BED_LEVELING function. In principle, the function works well, I wrote about this in this article, but I wanted to try this option as well.
Actually, for this you need to purchase only the heater itself, the thermistor and springs for adjustment - this can be done on the website 3d.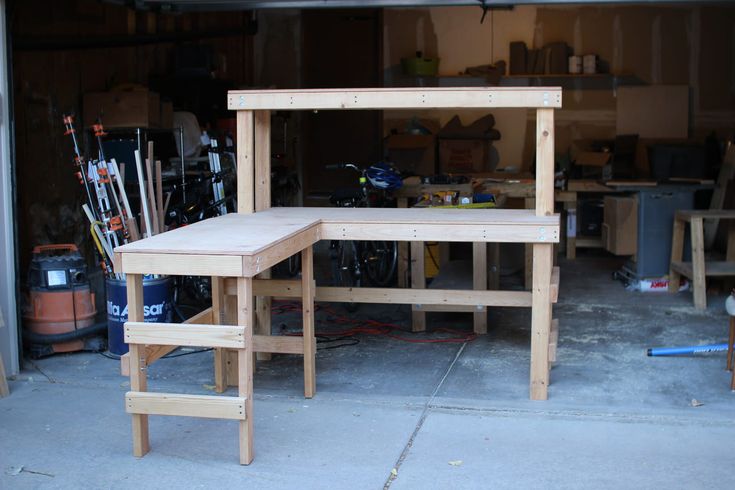 masterkit.ru. And figure out how to thermally untie the plastic parts of the printer, designed to mount the table, and the heater.
Digging through the cupboards, I found a piece of fiberglass. Good, smooth, 2 mm thick. I sawed off a square 220x220 mm from it. (Heater size - 214x214 mm) And, without thinking twice, I drilled 4 holes in it for M3x10 screws with a sunk head for fastening the textolite to standard glass holders and 4 holes for mounting the heater. I drilled holes of 2.5 mm in the details for fastening the glass and screwed the textolite with screws like self-tapping screws.
Now you need to attach the heater to the textolite through the springs. For a while I thought about how to make sure that the nuts of the adjusting screws were fixed, but then I decided to do without nuts at all. I cut the M3 thread directly in the fiberglass, it turned out somewhere around 4 turns. I tried several times to screw in and unscrew the spring-loaded screw. If you do this carefully, the thread holds well, does not deform. Let's see how the solution will behave during long-term operation; if the thread deteriorates, I will stick a metal nut-washer with an M3 thread on the textolite, you can print a retainer from ABS, or something like that.
Next, glue the thermistor into the central hole in the heater with heat-resistant tape or paper tape. It connects to the control board at connector T1. Also in the Marlin firmware, you must allow reading data from this sensor. To do this, in the Configuration.h tab, you need to change 0 to 1 in the line #define TEMP_SENSOR_BED 1
After that, in the RepetierHost program, you can see and set the table temperature value.
Printing glass - how could it be without it - it is convenient to fix it with stationery paper clips. You can find them in any stationery department. This is how the sandwich turned out. Pretty hefty, I must say. I decided that it would be necessary to reduce in connection with this acceleration along the Y axis, and at the same time X. We climb into the firmware again. And we halve the following parameters in Configuration.h (new values are indicated):
#define DEFAULT_MAX_ACCELERATION {4500,4500,100,9000}
#define DEFAULT_ACCELERATION 1000
Probably a little slower typing, oh well, we're not in a hurry.
In order to eliminate the influence of the extruder mounting on positioning accuracy and to fully realize the possibility of adjusting the table, I decided to rigidly fix the extruder in its holder, for which I drilled through the details of its fastening and tightened it with screws. In this regard, I had to rearrange the Z-axis limit switch under the platform on which the X-axis is implemented. I printed a part with two slots for adjusting the limit switch and simply glued it with dichloroethane to the base connecting the three stepper motors from the bottom of the printer. Just in case, I also tightened it with a screw. Now the limit switch is triggered when the platform is lowered to the desired level.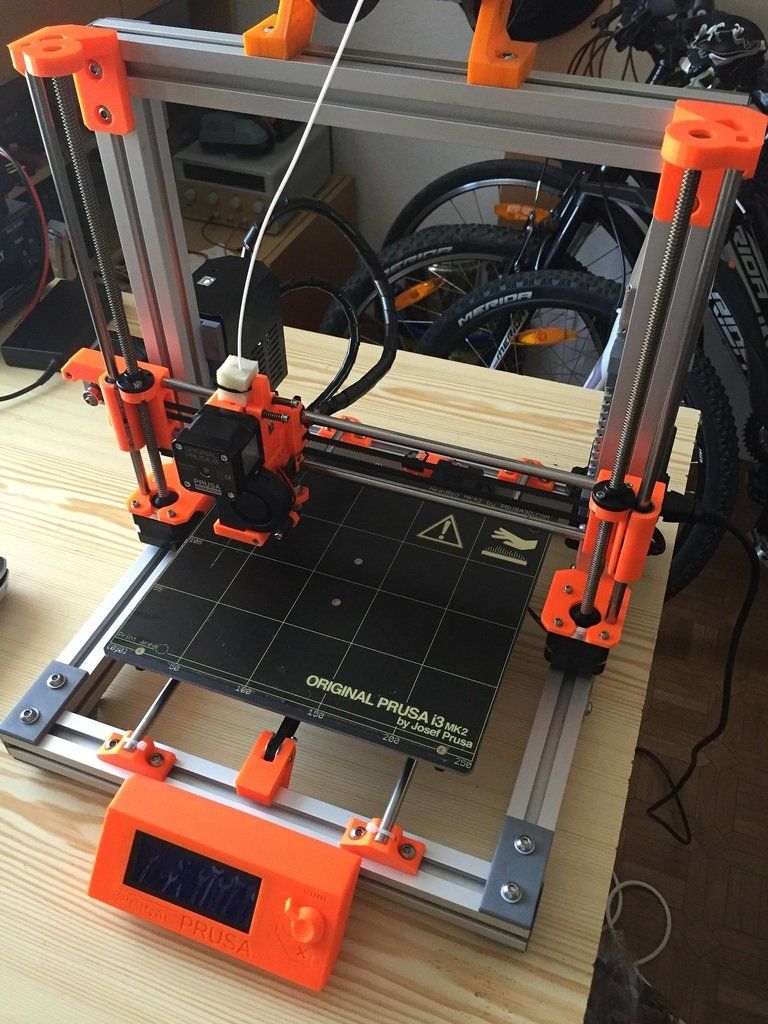
As a power supply, taking into account the current consumption increased by 10A (!) I used an ownerless power supply from an old computer with a power of 350W. It gives 15A current on the 12V yellow wire. The heater is connected to the terminals D8 of the control board. I checked the voltage at full load, it stays at the level of 11.5-11.6V. The block does not heat up. Good!
Now let's try to print something with ABS. Test cube 30x30mm, for example. We see in RepetierHost: 100 degrees on the table, 250 on the extruder. 200 µm layer, blowing off.
Smells a little, but with the window open it's quite bearable. For me, let it smell like that, even nice!
It turned out quite a decent cube, agree! By the way, when printing, the part was not blown, because it cools the extruder by 10 degrees. Adjust the driver current or switch what ... that's an ambush. It turned out that if you loosen the fasteners and carefully remove the polished shafts along which the table moves, then it can be removed in a wonderful way and opens access to the board.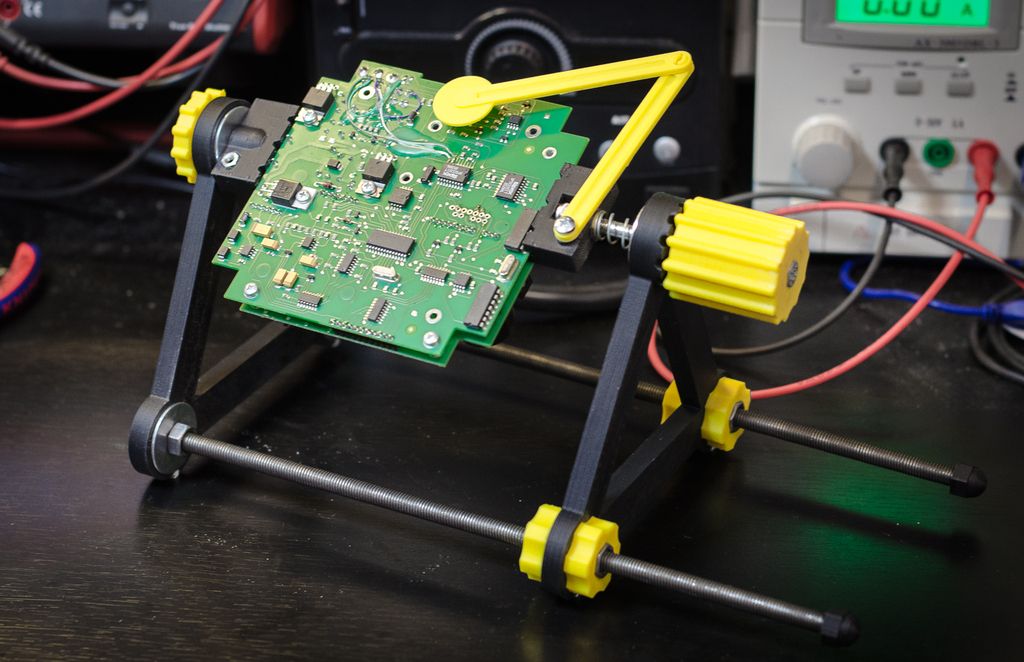 At the same time, all settings of the table with springs are completely preserved. Phew!
So far I haven't decided which calibration I like best, autoleveling or springs on the table...
Have a nice print everyone!
Workbench for a child with DIY tools! Drawings attached!
Let's make a children's toy workbench and tools for it! Support and train the next generation of carpenters!
Materials:
- Hardwood such as maple or cherry;
- Furniture panel 60 by 120 cm;
- 1/4" - 20 threaded inserts;
- 1/4" - 20 screws;
- Wood glue.
Step 1: Workbench
The desktop consists of two 18" x 18" maple wood frames and four L-shaped rails connecting the front and back. The frame parts are 3/4" thick and the connections are made with a slat router, but you can use mortise/studded or pocket style connections. I built the workbench in such a way that it can be taken apart for storage. To connect the front/back to the side rails, I used threaded wood inserts and 1/4"-20 stainless steel screws. Bottom shelf 8" by 16-1/4".
PDF file with drawings and detailed views included.
Workbench drawing (values are in inches).pdf 103 Download
Step 2: Worktop
The table top is made from a planed and sanded furniture board 30 x 55 cm. I carefully chose the board so that there were no knots or any defects on it. If you want your countertop to look prettier, use hardwood of your choice. To attach the top to the frame of the workbench, I glued two strips of hardwood to the base and used threaded inserts and screws. The workbench assembly is quite strong and easy to disassemble. I covered the workbench and countertop with several coats of polyurethane. You can remove and replace the top of the workbench with a nice wooden table top to make a cute little kids table.
Step 3: Hole pattern
PDF file for hole pattern included, feel free to drill holes where you see fit.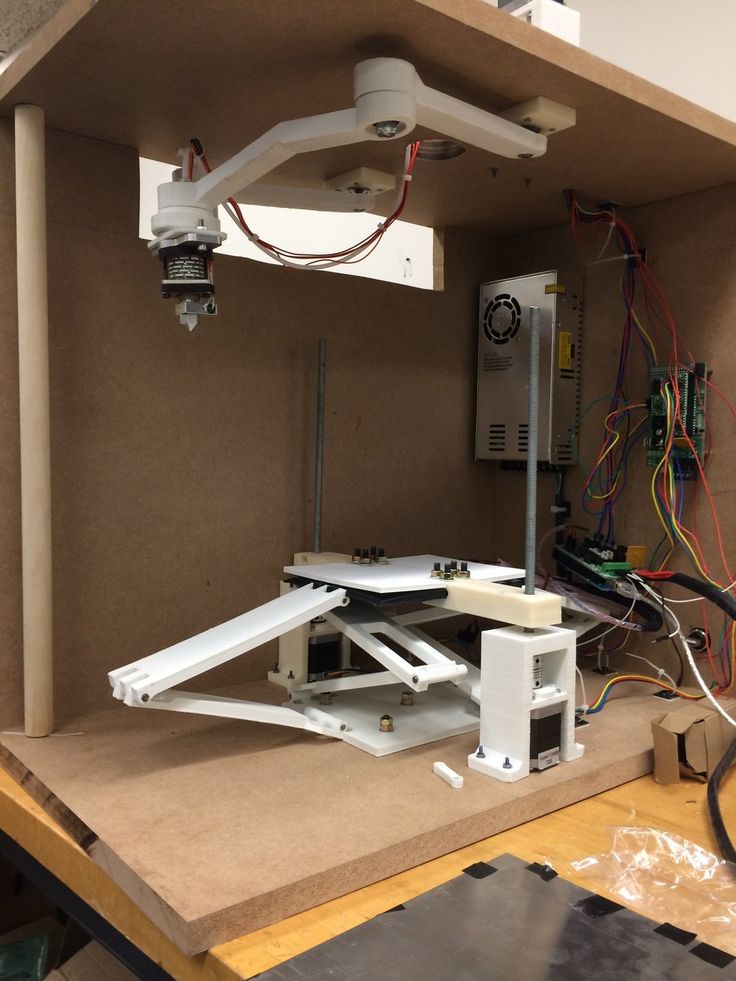 I drilled most of the 1/2" holes, but I also made a few 3/4" holes. These holes are for 1/2" and 3/4" dowels, wood "nails", screws and tools. Hole spacing is 1-1/2 inches in both directions. This spacing is only important if you want to use the gears from step 11.
Hole pattern.svg 100 Download
Step 4: Now for the fun part - accessories and tools
Nails - plain and slotted.
Cut 1/2" or 3/4" hardwood nail heads. Mark a 1" diameter circle and drill the center hole with a 1/2" bit. Cut it close to the outer circle on a bandsaw or jigsaw, then sand down to the circle for a nice look. Cut a 1/8" deep groove in the 1/2" dowel, this is for the "screwdriver". Then glue the dowel to the round head. My "nails" are about 3 inches long.
Nail heads without dowel can also be used as washers.
Depending on the dowels used, the "nails" may fit snugly or loosely into the 1/2" holes on the bench. You can sand some of them down so they go in easily, while others sit tight and have to be hammered in.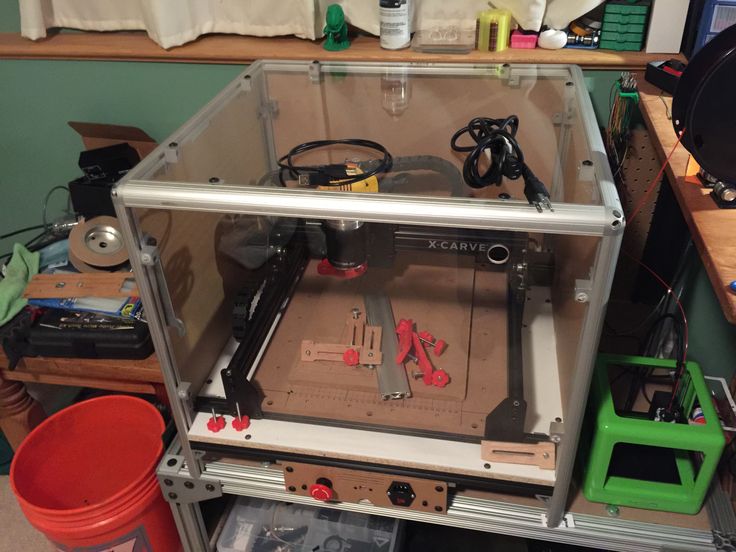 You can also cut through the bottom ends of the nail for a tighter fit. In any case, you will have to experiment with your specific materials.
Step 5: Hammer
Cut the hammer according to the template provided from a piece of hardwood 3" by 1", 3/4". Drill a 1/2" hole in the bottom, then glue a 6" dowel for the handle. I had some fun with laser engraving! The hammer is fairly light, so it shouldn't pose much of a hazard to your little one. If you have a lathe, you can make a more durable hammer.
Hammer.svg 72 Download
Step 6: Screwdriver
Drill a 1/2" hole 3/4" deep in the center of the 1" dowel. Glue a 1/2" dowel into this hole, then shape the tip to make a flat head screwdriver. The tip should fit into the slots you cut in the "nails" in the previous step.
Step 7: Saw
Hand saw glued from three pieces of maple 5 mm thick - saw blade and two pieces of handle. The template is attached. I used a laser cutter for these parts, but you can easily use a jigsaw.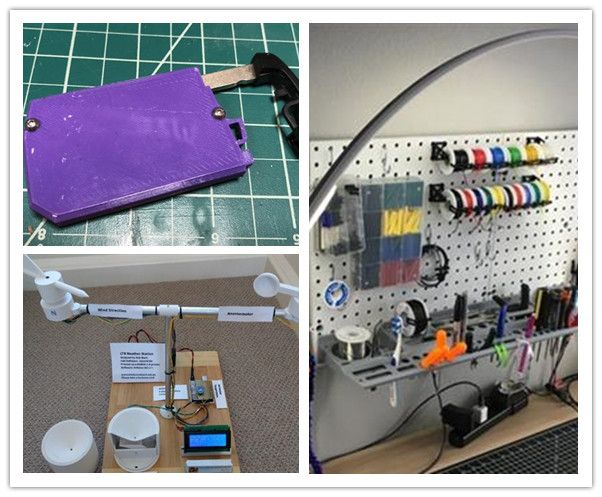
Saw.svg 76 Download
Saw handle.svg 135 Download
Step 8: Pliers
Here's how I made some functional pliers. Laser cutting or sawing separately according to the attached template. I used cherry wood, which I sawed (cut) on my table saw to a thickness of 5 mm. Laminate the parts with wood glue. Pay attention to the orientation when gluing the lamination; I found this out the hard way and ended up making two pairs of pliers. Either way, both plier handles are identical. Before further assembly, sand the handles and round the edges. Glue a short 1/2" dowel to one of the washers to make a pin. After it dries, assemble the pliers with the pin and put the second washer on the pin. Apply glue to the second washer, the top edge of the pin, make sure the joint can move as it should. Think before you apply glue, I hope you can see it in the photos!
Pliers.svg 69 Download
Step 9: Scissors
Use the included template to cut out the scissor pieces, you will need two pieces. Fold and glue the pieces, then sand and round the edges. The scissors are connected with a 1/4 inch dowel and wooden washers. Use glue only in the right places as described in the previous step to attach the washers and dowel to the scissor handles and make sure the joint can still move!
Scissors.svg 67 Download
Step 10: Pliers
Use the included templates to cut out pieces for the pincers. I used 5mm cherry, folded and firmly glued four layers. Sand and round the edges. Assemble the pliers with a 3/8" dowel and washers as you did with the pliers and scissors in the previous steps. Use pliers to pry the "nails" out of the countertop.
Ticks.svg 66 Download
Step 11: Gears
Gears are rated for 1-1/2 in. hole spacing. Gears are easiest to cut with a laser cutter; but with some patience it can be done on a jigsaw. I cut the gears out of 1/8" birch plywood, then glued them onto 1/2" maple rims for looks and durability.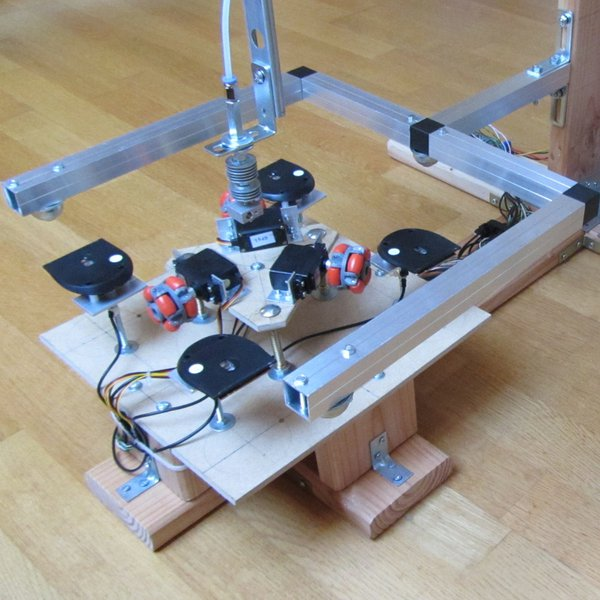 Cut a finger hole in the maple disc to use the gears or attach a handle. I made a small detachable handle. Templates included for 28 tooth gear, 25 tooth gear and 9- tooth gear. I folded the small gears in half and glued them onto a 1/2" dowel and a 1-5/8" maple disc. The larger gears are attached to the tabletop with the "nails" you made earlier.
Gear 28.svg 68 Download
Gear 9.svg 67 Download
Gear 25.svg 70 Download
Step 12: Screws, nuts and wrenches
To make wood screws, nuts and washers with a diameter of 1/2" and/or 3/4" refer to the manual "Wooden screws and nuts with a DIY router table and 3d printer". If you are making screws and nuts, you can also make a hex wrench to tighten the screws. Use the included templates to cut out the pieces with a laser cutter or jigsaw, then glue them (in two or more layers) for strength. Sand and lightly round the edges.
Wrench 27 mm.