Diy 3d printer tutorial
How to build a DIY 3D Printer step by step at Home
DIY 3D Printer: In this blog, you can make your own homemade DIY 3D Printer projects by assembling scratch parts with Arduino board.
This 3D Printer technology is playing a very important role in the 21st century. Maybe everyone knows about 3D Printers. If you don’t know then don’t worry, I will explain everything here so you don’t need to go to another place.
In this article, you can learn the introduction of 3D Printer and you can also make your own 3D Printer at homes by following below step. This 3D Printer you can make it for your school or college projects for science exhibition.
I made this 3D Printer approx cost of ~250$.
Table of Contents
What is a 3D Printer?
These machines are used to convert the 3D designs that a person can do with the help of the computer into a real object. To attain this, they use liquid plastic (or other materials) rather of the ink to which we are habituated, which after the impression solidifies and made the object.
They are usually big machines that can cost approx five thousand dollars, but technological progress is making them available to the general public easily.
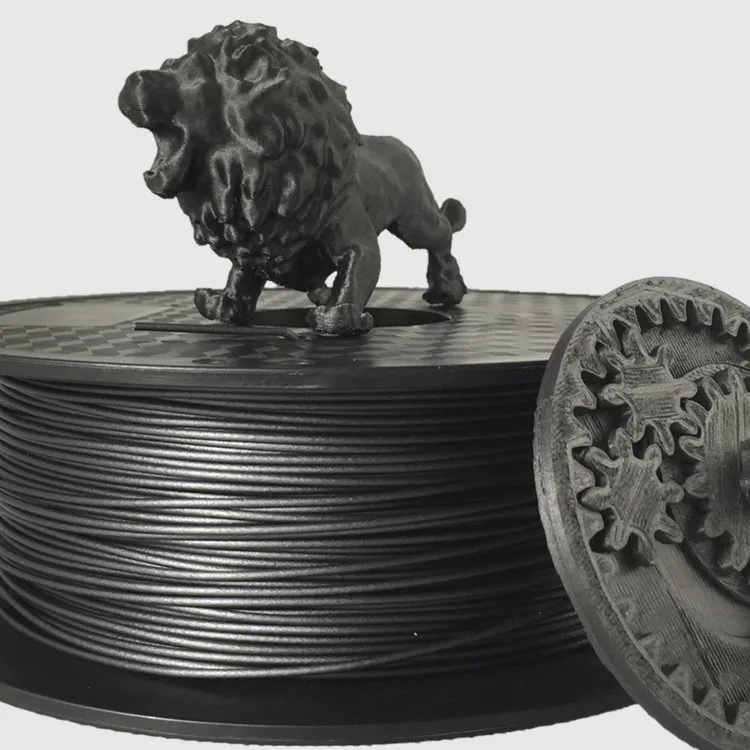
An object that made in 3D Printer shown in below image.
How 3D Printer Work?
There are various ways to get it, but the most common is to disjoin the 3D model into a very thin layer that is printed one on top of the other, and after that fix them, we have a 3D object.
To make it better sympathize, let’s check at one of the most used processes, stereolithography: the printer produce a thin layer of resin and “draws” a thin straight section of the product with a laser beam. That laser solidifies the pattern he drew and sticks it to the next layer of resin, and so the process is repeated layer by layer. At the end of all that resin come forth the 3D object designed.
You can see below image for better understanding.
This is not the only method and different materials like as dust or metals can be used, or even liquid plastic material that solidifies when leaving the printer, but the concept of layers constantly implement.
3D Printing objects are commonly measured in centimeters (it is a small object). but some printers can reach up to several meters. It is also a slow process that needs solitaire: for a 100-gram object, something build complex objects may require several hours. Finally, mention that the materials they use in the 3D Printer are not cheap.
Types of 3D Printer
When you ask me what type of 3D printer is great, I constantly answer with another question: What do you wish to print? You could say that there is no one type of printer great than another.
All Printer has its advantages and disadvantages. The different technologies are complementary and each one put up something different. For this reason, I have decided to make a list in which the different types of printers are classified:
- Extrusion (Fused Deposition Modeling)
- Resin (Photopolymerization)
- Powder (Powder)
- Others
Here we talking about only Extrusion 3D Printer.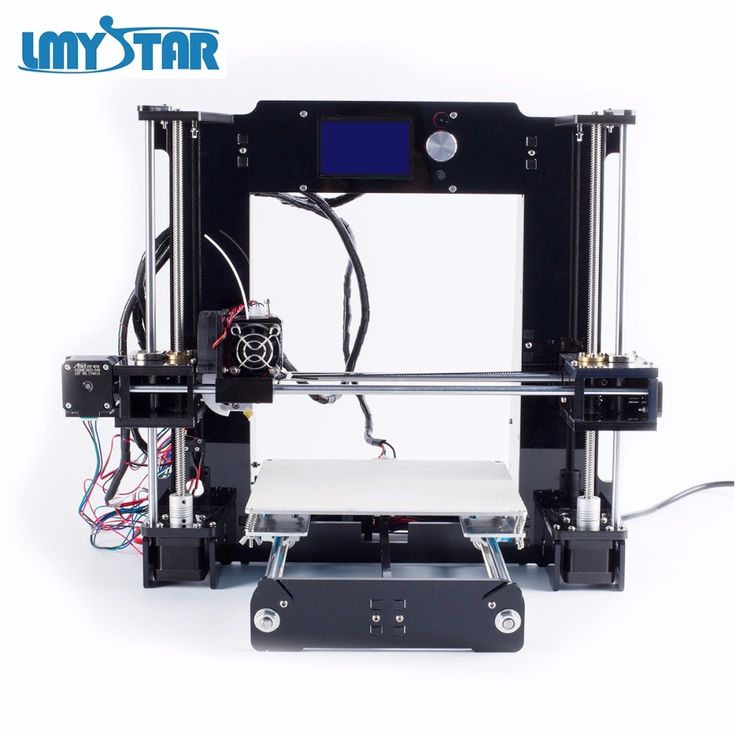
Application of 3D Printer
- Rapid prototypes of industrial products
- Medical Prostheses
- Create your own ornaments and then paint them
- Figures of your favorite character
- The very fast Manufacturing process
- Little skill required to make parts
DIY 3D Printer Homemade
If you are planning to make Science fair projects or Arduino projects for your school or college than follow this below step to make 3D Printer at home.
I also made that Video Tutorials for making these projects. so you can easily understand all the step easily.
Step:1 3D Printer Parts
To make 3D Printer you need to buy below parts. I will give the link of all the parts with cheap price. This link is an affiliate. so I get some little amount of commission. If you buy these part from below link, These would motivate me to do more new creative projects for you.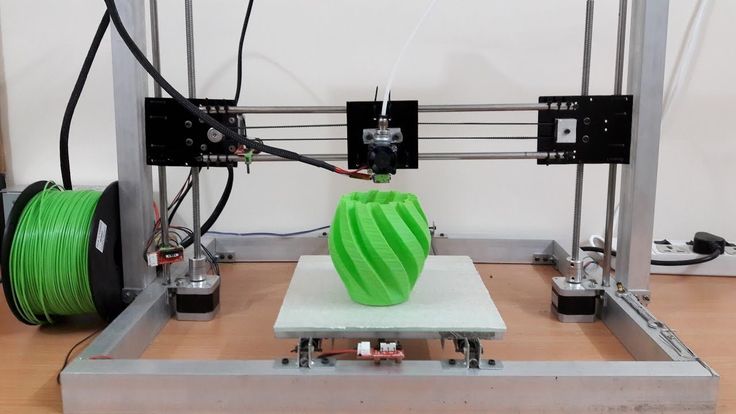
I will give two links to the same product. One is from Amazon and the other is from Banggood website. You can buy the parts by comparing both the website rate.
- 3D Printer Arduino kit………………………[Amazon/Banggood]
- Hot end…………………………………………………[Amazon/Banggood]
- Extruder………………………………………………[Amazon/Banggood]
- Stepper motor (4 no)………………………….[Amazon/Banggood]
- 12 Volt 10 Amp Power Supply……………[Amazon/Banggood]
- PLA Filament 1.75 mm……………………….[Amazon/Banggood]
- 5 x 8 Shaft Coupler(4 no)……………………[Amazon/Banggood]
- Trapezoidal Threaded Screw(2 no 150 mm length)……………………………………………………………………[Amazon/Banggood]
- Trapezoidal Threaded Screw(1 no 200 mm length)……………………………………………………………………[Amazon/Banggood]
- Pencil (or Smooth road)………………………..[Amazon/Banggood]
- 8 x 22 x 7 mm Radial Bearing(5 no)……………….
 [Amazon/Banggood]
 - Limit Switch(3 no)…………………………………………..[Amazon/Banggood]
- Heat Bed(optional)…………………………………[Amazon/Banggood]
- Linear Bearing LM8UU(optional)……[Amazon/Banggood]
- Acrylic Sheet
- Wooden Block
Other remaining material you can buy it from a stationery shop or near to your home easily available.
If you cant find than comment your requirement in the comment box. I will reply to you as fast as possible.
I want to give some information about some important parts of 3D Printers so you can easily understand what’s going on here.
3D Printer Arduino Kit
Buy the below circuit in the pack so you get a good discount. This pack includes the below parts.
- RAMPS 1.4
- Mega 2560 R3 board
- A4988 Driver
Extruder
This Part is very important in 3D Printer. The extruder is used for the pushes the plastic filament inside the hot end nozzle.
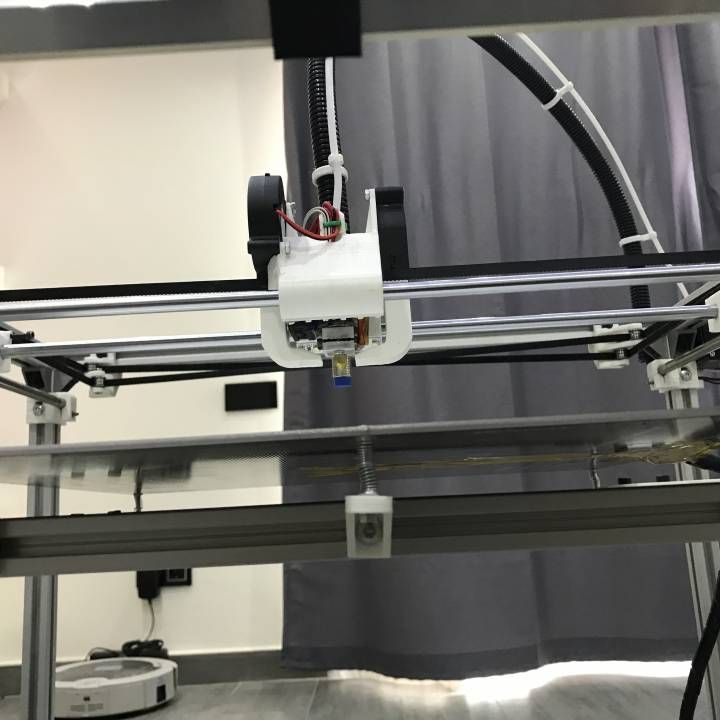
There number of small component there in the extruder. see the below image and assemble as per video tutorials.
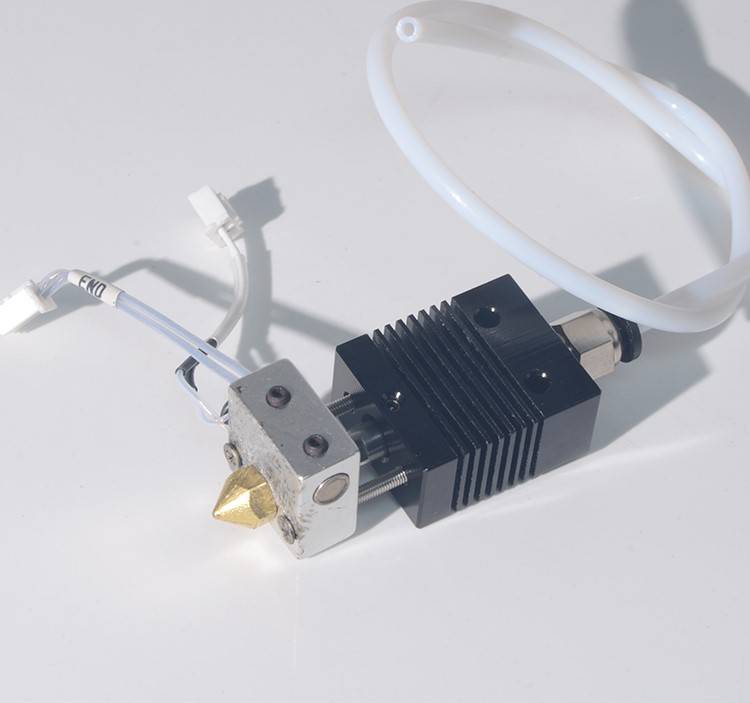
Hot end
This Part is melting the plastic filament, and this melted plastic goes inside the hot nozzle. It will solidify on the hotbed.
A hot end consists of the below parts:
- Cooling Fan
- Nozzle
- Heater
- Temperature Sensor
- Teflon Tubing
Power Supply
Here we use 12V and 10 amp Power supply. Please keep in mind that you must use thick gauge wire for output. because heater consumes lots of power so high current flow through this wire. If you use thin wire than it chances to heat up and it will be fire.
PLA Filament for DIY 3D Printer
This Plastic filament is pass through the hot end nozzle and solidified on the bed of the machine. There is a different color of filament available in the market. you can choose what you like.
Required Features of PLA Filament:
● It must have good quality PLA material
● Work with all type of 3D printers
● PLA is a biodegradable filament which is made from renewable resources, like corn starch, tapioca roots, chips or starch, or sugarcane
●It must permit higher print speed, more accurate locating of material with easy cooling.
● PLA smells out like cotton candy perfume when it is used
Step:2 Homemade 3D Printer(Video Tutorial)
Before starting to read blog see below video for better understanding. This Video is uploaded on my youtube channel CreativityBuzz. This Video is crossed more than 530000+ views. If you are interested to watch these type of electrical creative video than subscribe to my youtube channel for more updates.
https://www.youtube.com/watch?v=x5X6Gp-XMEs
Step:3 Axis of 3D Printer
3D Printer is working on 3 Axis, X, Y, Z.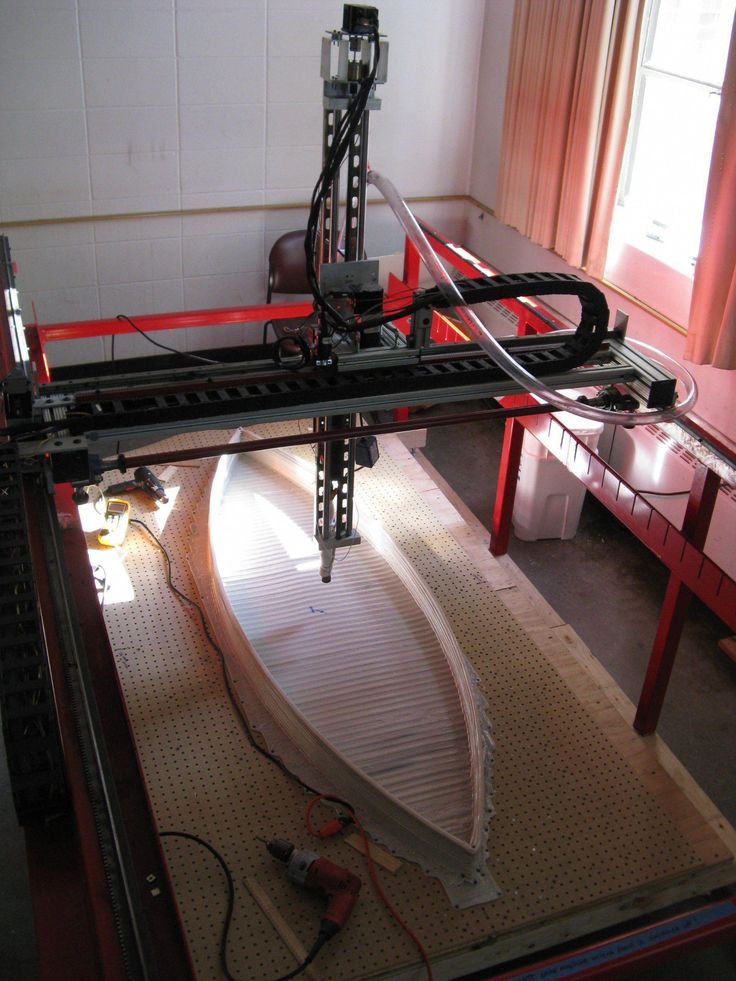 The main thing to learn in the 3D Printer is his axis.
If your axis is not properly managed than your machine is not working better.
Here I will show you an image of the 3D Printer Axis.
You can see that from image
X-Axis: It Controls the movement of the nozzle left an right
Y-Axis: Control the movement of Bed
Z-Axis: It Controls the movement of the nozzle up and down
Step:4 Y-Axis Making
The Y-axis controls the movement of the bed. To make a Y-axis arrangement we need 2 stepper motor. follow the below step to make it.
- Take the two acrylic sheet. Make a hole of the size of one hole is 8 mm and another hole size is equal to an outer diameter of bearing (22 mm).
- Stick this acrylic sheet with a wooden plate of length 22 cm
- Insert the Threaded Screw of length 150 mm inside the bearing
- Join the Stepper motor with the threaded screw by Coupling.
- Take a Syringe and cut both the end of it
- Cut both ends of a Ball pen cap
- Insert this cap into the syringe, so this is working like linear bearings. This is made because of the smooth movement of smooth toad when the operation is done.
- Now Insert the big size pencil inside the small hole of acrylic. You can also use a plain rod of diameter 8 mm
- Our one parts of Y-axis done
- Repeat the above 9 steps and make the same frame
- Now join both the parts by 3 pencils attach at the side of wooden plate
- Our Y-axis ready
Step:5 Bed Making
3D Printing is done on a bed. Keep in mind that bed must be at the proper leveling. If it is not in level than your object will not be accurate.
We can also measure the leveling of bed with the help of your smartphone. You can adjust the leveling of bed by nut fitted over the spring.
You can also make bed hating arrangement. But in this video, I was not use heating of bed.
Follow the below step for making bed arrangement for 3D Printer.
- Take wooden plate as per your size and fix on the nut of a threaded screw
- Make a hole of size 2 mm on that wooden plate
- Put the acrylic sheet on the wooden plate and fix it with the help of 4 screw
- Insert 4 screw on acrylic sheet
- Add Ball pen spring on that 4 screws. You can adjust the leveling of bed by this spring
- Now tight these spring by a nut
- Check your leveling by smartphone until it shows 0 reading. If it does not show than adjust the nut of that 4 spring.
Step:6 X-axis Making
The x-axis is very simple to make. You can make it by reading the instruction given in y-axis.
Here the length of Threaded screw is 200 mm.
One thing new is you have to choose the wooden plate length is 27cm.
You can see the image of x-axis that I made.
Step:7 Z-axis Making
This Z-axis is made on the X-axis with the help of Old DVD Writer Parts.
Z-axis is used for the up and down the movement of 3d printer nozzle.
Check below step to make z-axis.
- Attach the wooden block on the x-axis as per image
- Take an old DVD Writer from the Computer shop
- Attach the parts of DVD Writer as per above image
- Our Z-axis is ready to perform
Step:8 Attach X & Z-axis with Y-axis
Now its time to join X & Z-axis with Y-axis. For that, you have to attach two wooden blocks on the x-axis.
Attach this full assembly with Y-axis by fevistick or screw.
Step:9 Extruder Making
To make an Extruder for 3D Printer is very easy. Because you only have to assemble the parts of an extruder.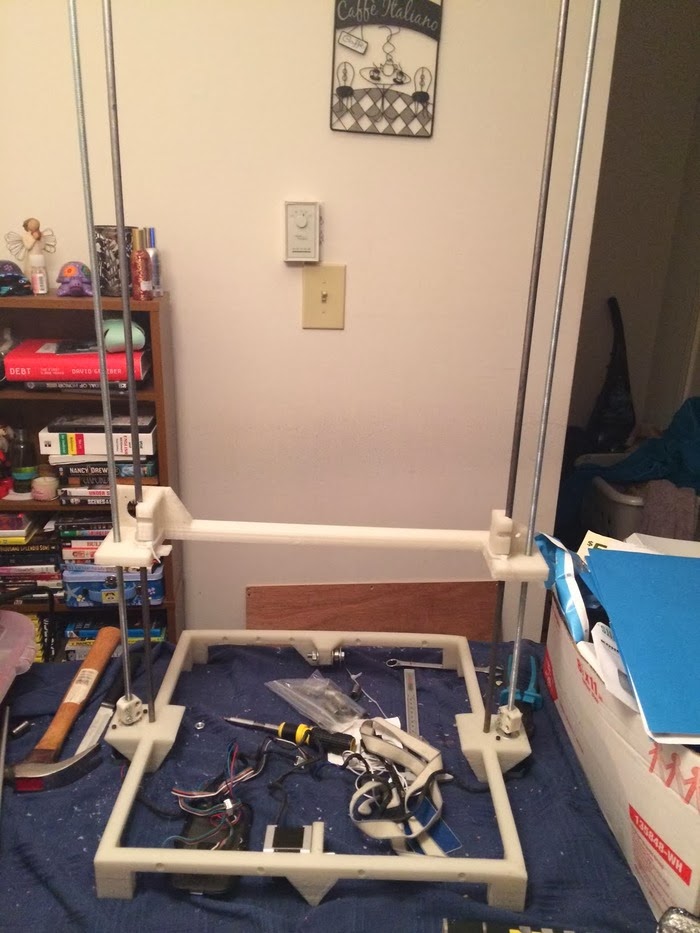
Follow the step as per pictures, you can be made yourself easily.
When your extruder is ready at that time you can install it in our frame of 3D Printer.
Step:10 Hot end Fixing
After Extruder its time to fix hot end assembly with DIY 3D Printer. You need to make one L shape parts for fixing the hot end with the z-axis assembly.
You can get some idea from below images.
Step:11 Insert PLA Filament
PLA Filament is inserted inside the Extruder. So when Stepper motor is rotated at that time filament is come in hot end nozzle through the extruder.
The diameter of the nozzle is equal to the diameter of the PLA Filament.
Step:12 Wiring Diagram of DIY 3D Printer
DIY 3D Printer wiring diagram is very easy if you follow the instruction in video and follow the below image wiring diagram.
Below diagram is with LCD & Hotbed. This LCD is not necessary if you have a laptop.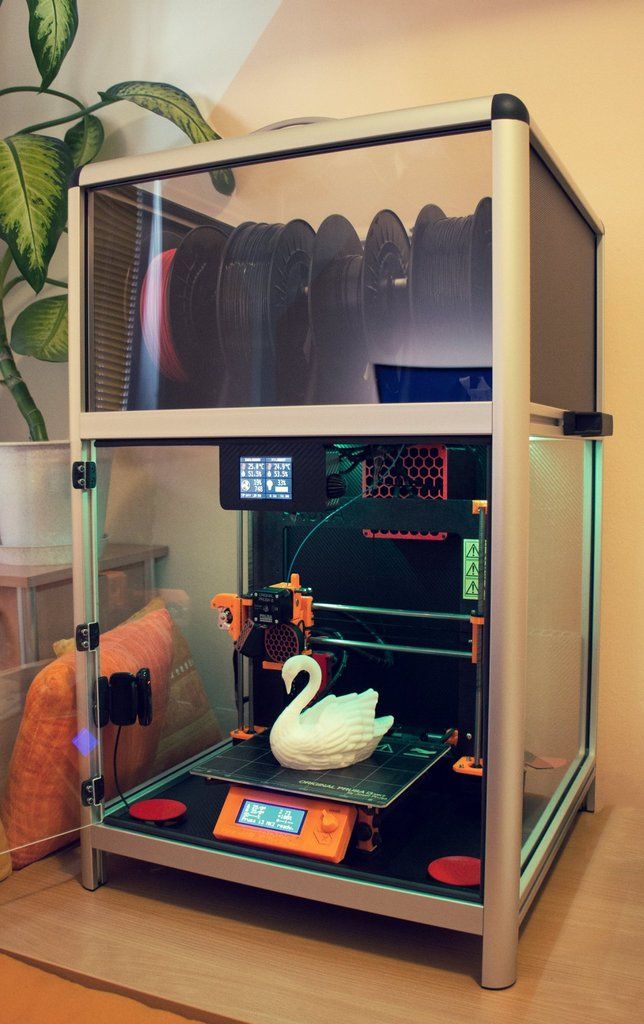 but your use of 3D Printer is high than every time connect the laptop with 3D Printer is not a good idea.
In LCD you can get the slot for micro SD card. So you can feed that G-code through the SD card.
Step:13 Software for DIY 3D Printer
Main things to do in 3D Printer is software. There is a different type of software available for 3d printing. here we use 4 software for 3d printing listed below.
Fusion 360: This software is used for making 3D Model. You can also use other 3D design software like Solidedge, Catia, Creo, Solid work, Autodesk Inventor, etc.
If you don’t know the above software then you can direct download STL file from a number of websites available.
- Cults
- Thingiverse
- YouMagine
- Pinshape
- MyMiniFactory
- GrabCad
- Autodesk 123D
- 3Dagogo
Cura: All the 3D Software understands the language of G-code. This software is used for the convert the 3D File into G-code.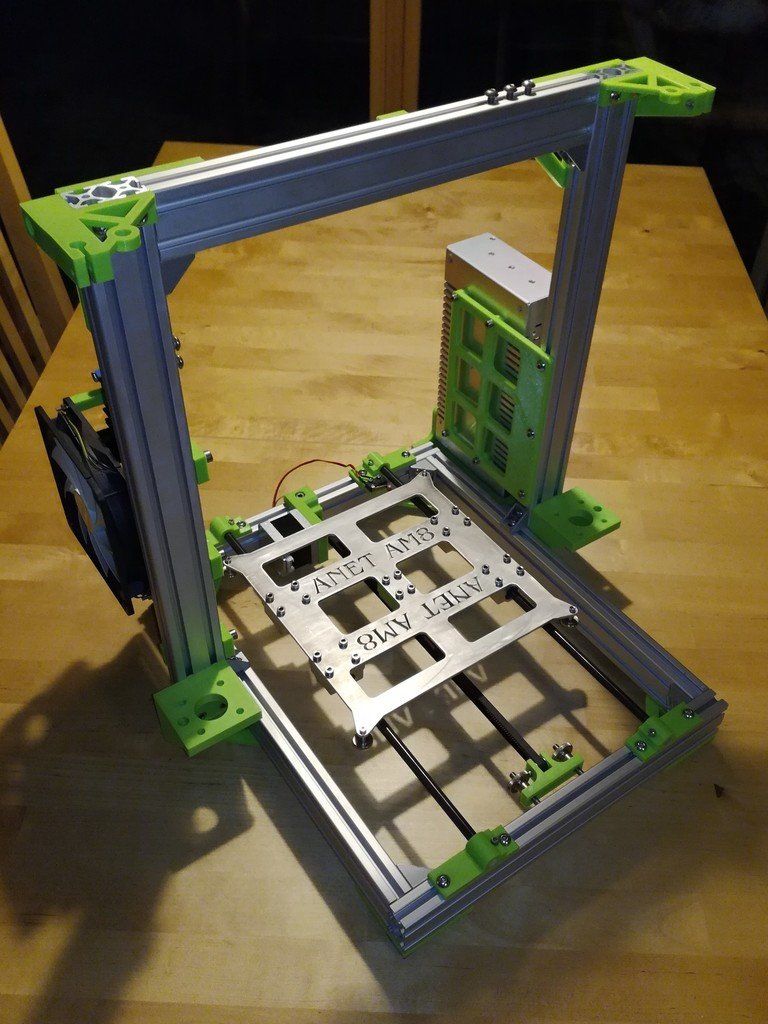
If you are a beginner of this software then this tutorial is for you: Click here
Xloader: It is used for upload the Hex file into Arduino.
Pronterface: This was the main software in 3D Printer. It will Operate your 3D Printing process.
Step:14 Enjoy the DIY 3D Printing
Now your 3D Printer is ready for printing. Make your favorite design on 3D Printer. If you are made this printer than show me your pictures on my facebook page creative buzz. If you getting any problem then comment below.
Read: 3D Printers
Conclusion:
I hope you are made this 3D Printer at your home easily. This printer is not giving you accurate precision like a standard company 3D Printer. But also not a bad precision by this 3D Printer.
If you are planning for your school or college projects than you definitely do this project. It will enhance your skill and mind.
How to Build a 3D Printer From Scratch
If you are reading this article that means that you’ve probably decided to join the community of 3d printing enthusiasts and find out more about 3d printers, or maybe you have already got some experience in it and are ready to try to create your own 3d printer from scratch.
In this article you will find general understanding how 3D printers can be built as well as links to really useful resources where you can find more detailed information with step-by-step description.
Currently there is a big variety of 3d printers in the Internet that already assembled and are ready to print right after you unpack them from a box, of course you also need to buy a 3d printer filament for it. Do not forget that not all 3d printers can use the same filament types, so please read the instruction before you purchase it.
But for some people who love to make something new with their own hands can be more interesting to build their own 3d printer from scratch. Based on our research the 3D printing community is filled with many enthusiastic people so called DIY’ers (Do It Yourself’ers), who are fascinated with building 3d printers literally almost from scratch.
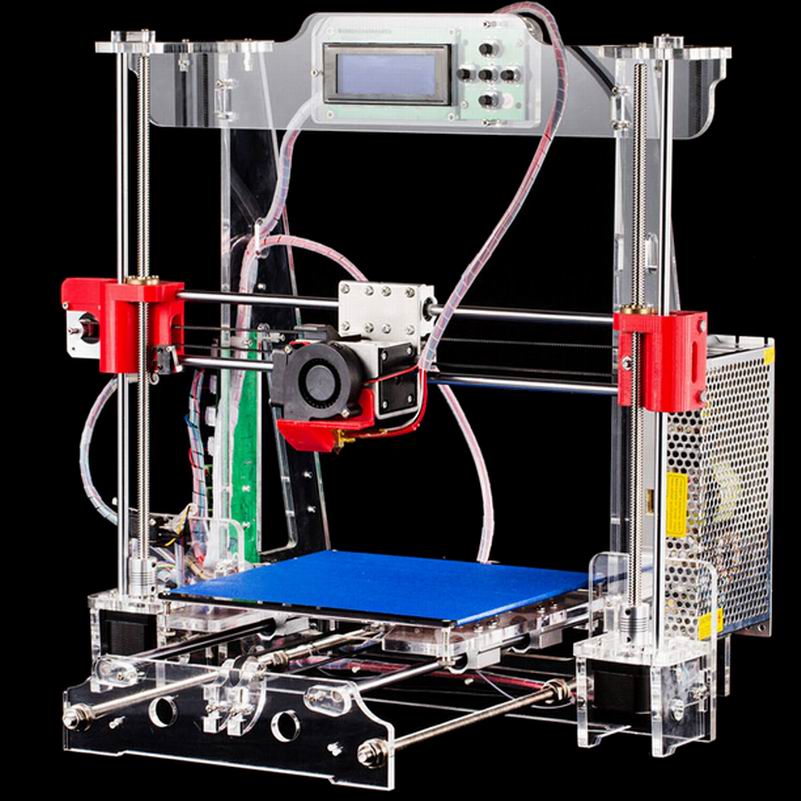
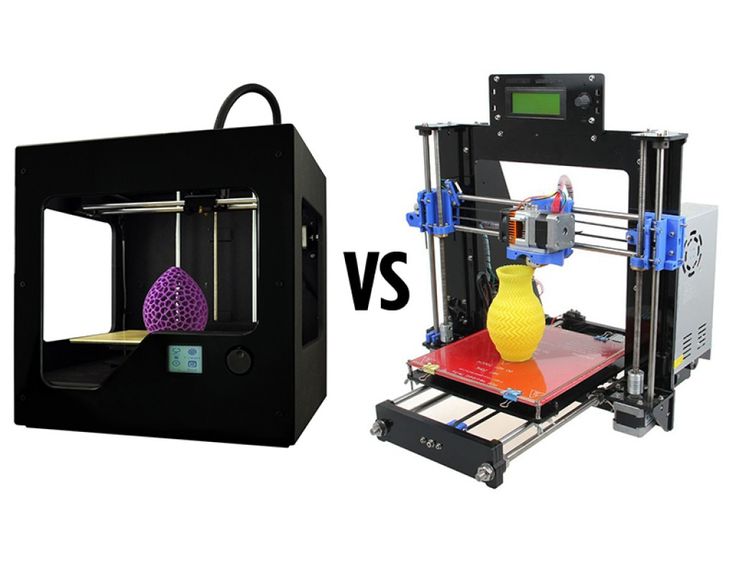
Good example of it is RepRap movement. RepRap is short for a Replicating Rapid-prototyper. In other words it is the self-replicating 3d printer. In fact most of today’s top consumer level 3D printers (picture above) are originated in one way or another from RepRap.
You can find a lot of examples on how to build a 3d printer from scratch on RepRap website, but we also want to describe some of more essential steps in order to give an overall understanding of what to expect if you really decide to make your own 3d printer.
The first step is to find and buy 3d printer DIY kit. Kits usually contain most of parts needed to assemble the printer and can be divided into two main types:
Scratch Built 3D Printer – This 3d printer DIY kit is for those who prefer to build thing from scratch, or in other words go to DIY RepRap route.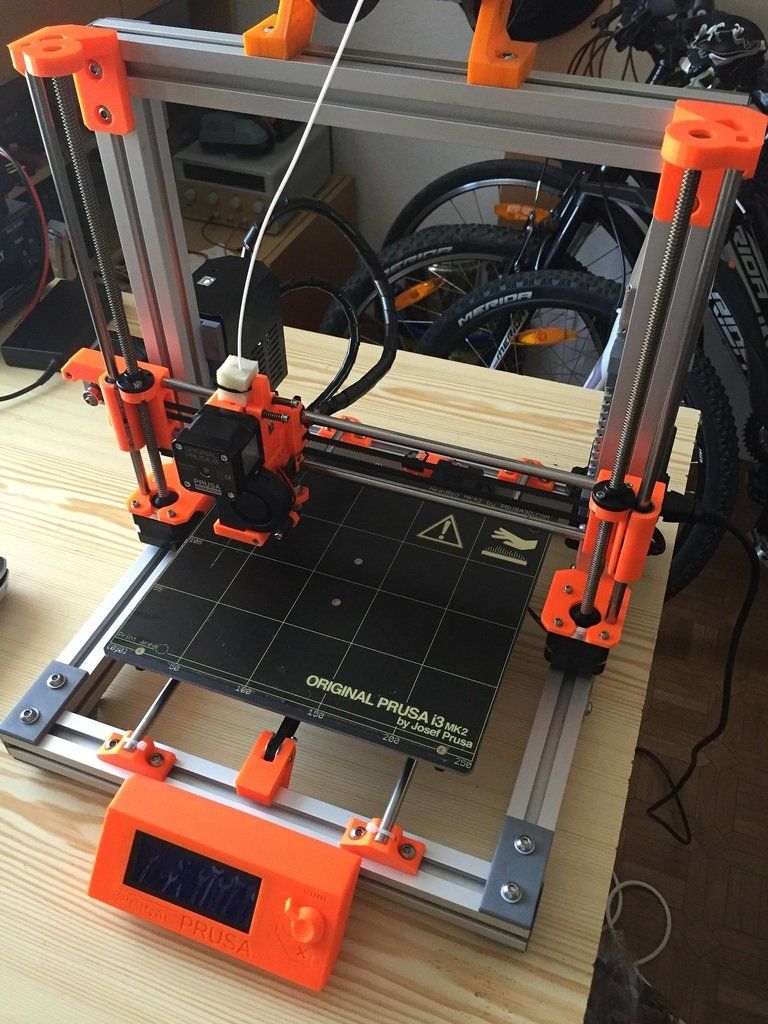 Apart from some essential advantages this approach has also its disadvantages. In theory it can save you some money and since you build it from scratch you will know every nut and bolt in it by the time you can use it and successfully print your first object. Main disadvantage of this method is time. Literally it will take a lot of time to deal with all these hundreds of bolts, wires, belts and much other stuff. In the end you still need to select and purchase or build a controller board, but it depends on your skills level.
Kit Built 3D Printer – This type of kit is good if you want to save some money and at the same time not to deal with all challenges described in the 1st kit type. Many manufactures sell such kits with “easy-to-assemble” instructions included. I doubt that it will be as easy as assemble a chair from IKEA, so you still have to be mechanically inclined and able to understand basic geometry. Some of such kits contain not all parts and you may need to buy something in addition.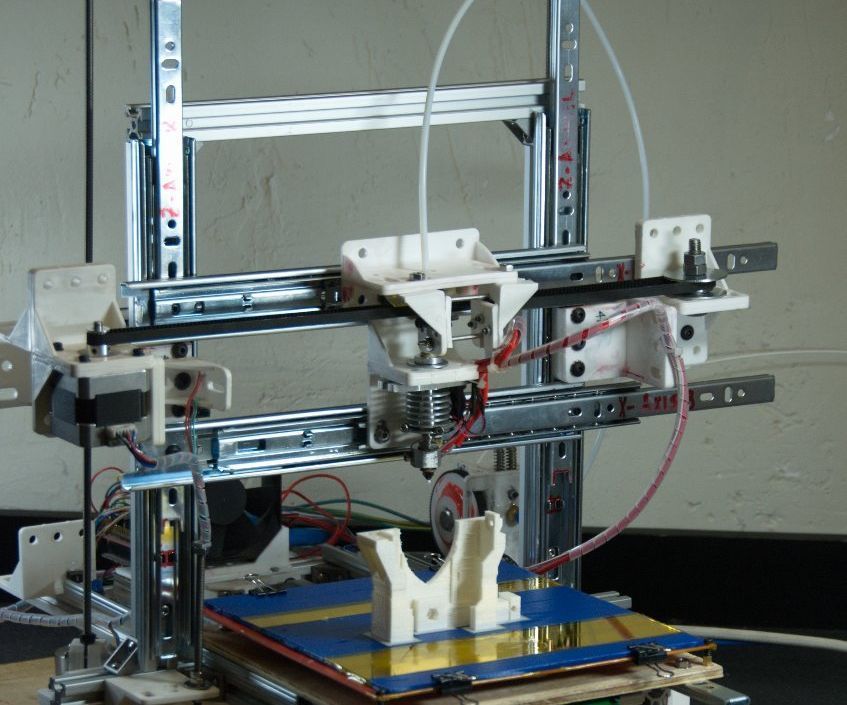
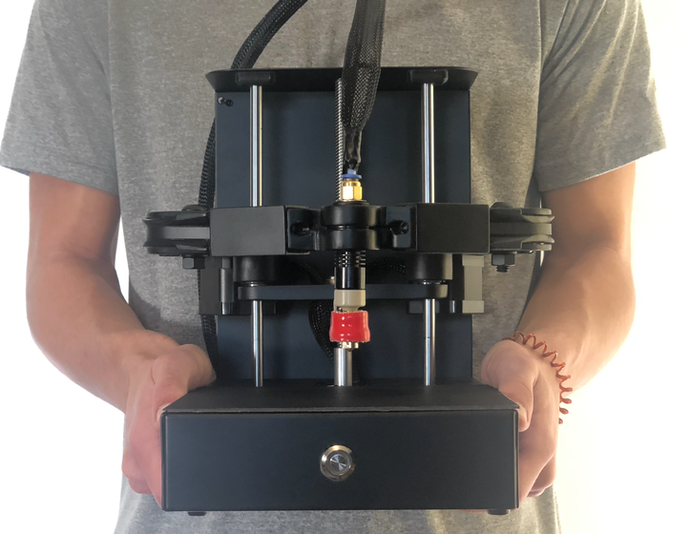
The next step will be to determine the design for your 3D printer. In my humble opinion most of DIY 3D printers have not very breathtaking and futuristic design in comparison with MakerBot and other brands. But it is also a matter of taste, for some people the design is not very important.
Once you have got your 3d print DIY kit and chosen the design you could go ahead and start the most fascinating and time consuming part – build your own 3d printer. Be prepared for sleepless nights and a lot of fun. Maybe you will make up something new and present your findings to RepRap community.
When the hardware part of the 3d printer is ready you also need to add a software component to it. It basically does the following things: allows you to view and alter 3d graphical objects, as well as converts the 3d images into instructions that 3d printer can understand.
Finally you can 3d print your first object! If you do not have anything to print, you can find a big variety of objects on specialized marketplaces such as Shapeways, Thingiverse and others.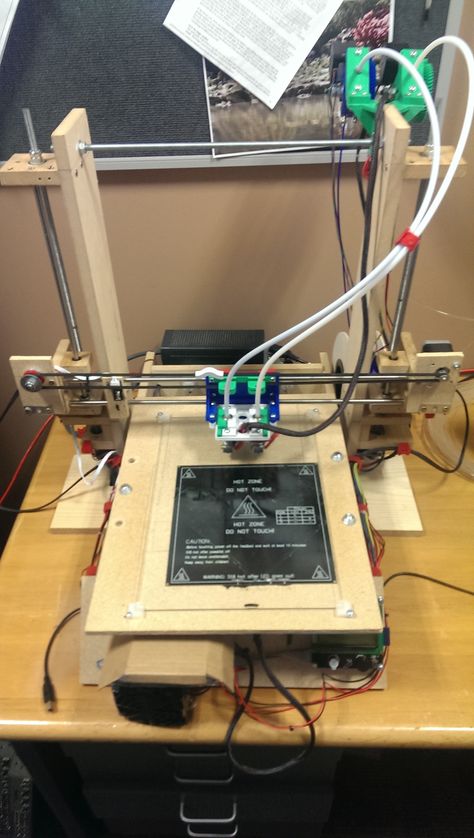 Before printing make sure that the object you want to 3d print has the right size and fit on the printer frame.
At the end there is a list of some links where you can find more information about how to build your own 3d printer from scratch:
- RepRap options
- 3D Printer DIY: How to Build Your Own 3D Printer from Scratch
- 3D Printing: Build Your Own 3D Printer and Print Your Own 3D Objects
- Arduino Controlled CNC / 3D Printer Hybrid
- El34 World – 3D Printer Build using 1 inch T-Slot extrusions
- CNET 3D Printer Build Week
Also watch a video from Ben Heck in which he answers on some 3d printing related questions.
Related Articles:
- What is 3d printing – 3D printing technologies overview
- What is 3D Printing?
- History of 3D Printing
- Direct and Binder 3D Printing techniques
- Photopolymerization and Sintering
- 3D Printing Process
- 3D printing revolution
- 3D Printing Materials
- How to choose a right 3D printer filament type
- 3D Printer Filament Types Overview
- Types of 3D printers or 3D printing technologies overview
- How to find and buy a right 3D printer
- History of 3D printing in one picture
- Places to download 3D printer files and files formats overview
- 3D Printing Services Overview
- You Should Know These Important 3D Printing Concepts
3d printer tutorial
back to contents
Application of 3d printers in modern world
AT Currently, 3D printers are used quite widely.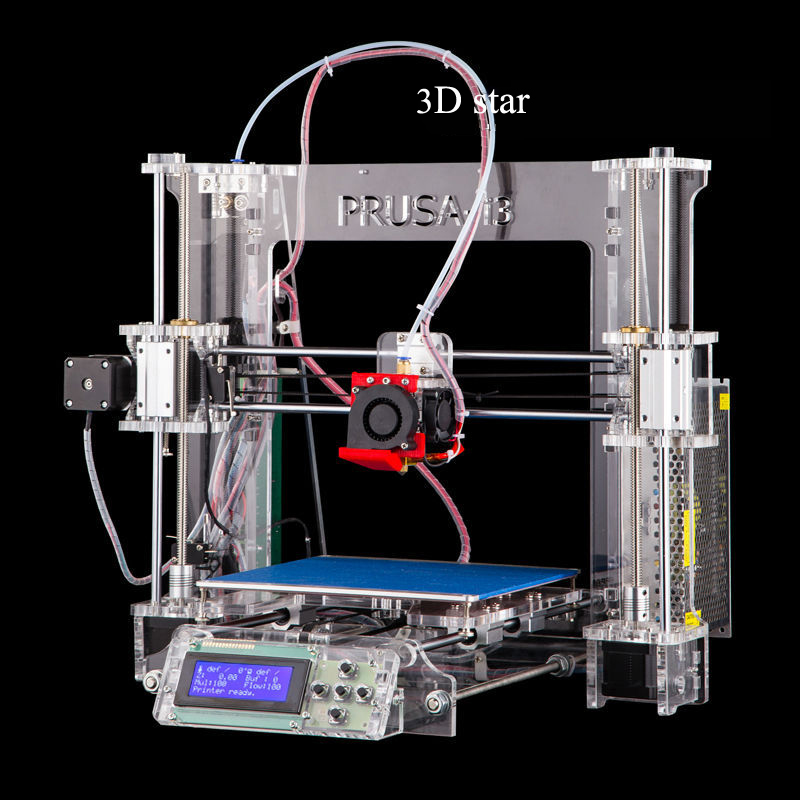 AT areas such as industry and architecture, they have become are simply irreplaceable because they are an important part of the process of creating prototypes of objects in three dimensions. Prices on this technology is constantly declining, and already now it available not only to large companies, but also to individuals. Therefore, it is to be expected that the 3D printer business will become very successful due to increased demand for 3D printing.
Having a 3D printer makes it easy print a three-dimensional image in digital format. The cost of some Chinese-made models is less than two thousand dollars. At the same time these devices are getting smaller. All this gives an opportunity not only to organize a business on 3D printers, but also to engage in creativity using 3D printing.
Business idea, by use The capabilities of a 3D printer are not limited to one printout of graphics. Consumers can offer other services. For example, creating 3D models, after all, not every person has for this the necessary skills. Purchasing an additional equipment, such as a 3D scanner, will greatly expand the range of modeling and 3D printing services various objects. In this case, the business will definitely successful, which has already been proven by the experience of many entrepreneurs from different countries of the world.
back to index
Appearance bulk printers has become a revolution not only in industry, but also in the arts. Now the masters artistic compositions reach a new level implementation of your ideas. Most people still don't even imagine what a jewelry 3D printer is, and at the same time time, tens and even hundreds already own printed decorations. In addition to direct printing of the finished product on plastic jewelry printer, you can use it in as a manufacturer of molds for subsequent casting, or buy a jewelry 3D printer to create wax models of the future product.
Among jewelers, such printers called "plants" - according to the principle of creating waxes for future castings by extension method.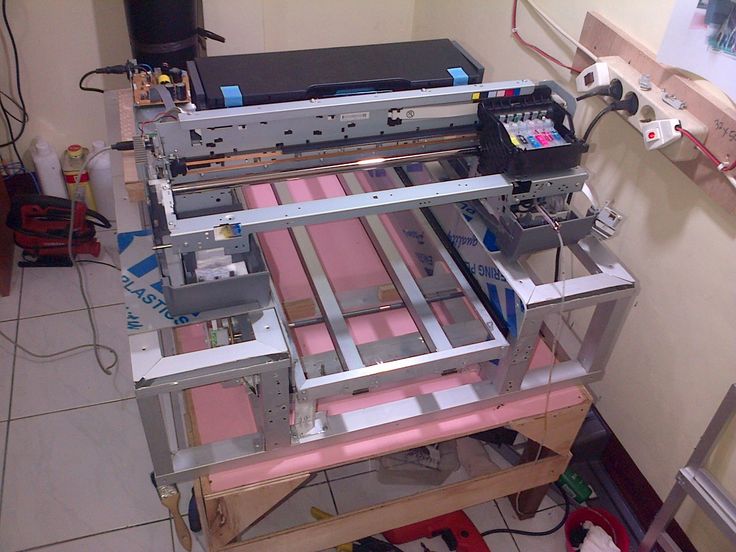 Most Popular 3D printer for jewelers of the American company Solidscape, attracting high construction accuracy, familiar to jewelers with a material based on foundry wax, and low cost of consumables for one model. At this is the “printing” speed that a jewelry 3D printer gives, up to 10 rings per day. Planned in the future the use of clays containing gold and silver, already now there are printers that can work with metal.
back to index
3D printers, although they are in the stage of rapid development, but already able to compete with conventional production technologies. This is especially true for small scale manufacture of products for which it is not only unprofitable, but not the entire production line is needed, requiring both time and and funds. Home, relatively inexpensive 3D printers significantly simplified, giving out reduced object accuracy, low overall quality. Industrial 3D printer, on the contrary, it is distinguished by high accuracy, speed of the process printing, the quality of the finished "prints", which allows use it both to create models for casting, and to produce fully functional parts.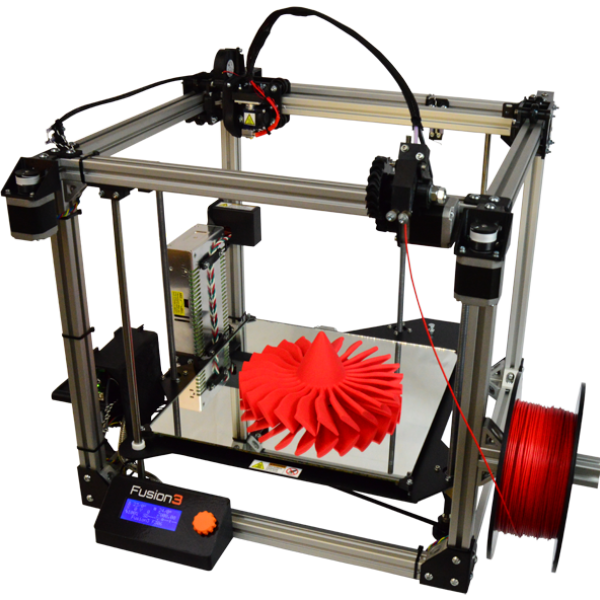
The main characteristics of industrial 3D printers - the highest quality, accuracy up to several microns, large print area, full control process, almost complete automation. For installation such a unit requires a fairly large room, high-voltage line, gas outlet, and the cost will make it many times to think over further use - lay out hundreds of thousands of dollars (or even a million) for the sake of printing one or two products is simply unreasonable. In this case better think about renting or even custom printing - unless, of course, the production is not of the highest level of secrecy.
As an industrial material A 3D printer can use almost all those that used for 3D printing: plastic, metal (titanium), gypsum, ceramic masses, cement, glass powder, etc. Further. Constantly researched (and identified!) New and new substances that can turn into a "bulky printed impression" using a 3D printer.
back to index
The appearance of the first 3D printers produced a real revolution in architectural design and brought with presents many new opportunities for engineers, architects and construction companies.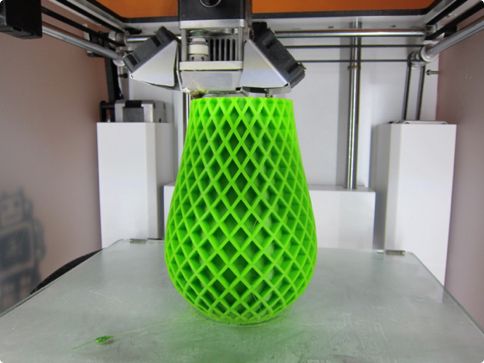 3D printing allowed reproduce 3D models and use them on the most different stages of the project.
Using 3D printers, architects received not only the opportunity to materialize their projects, but also significantly save time and money. Before prototypes were made by hand, and this process was so time-consuming and time-consuming that the creation of such architectural model itself turned into standalone project.
Today, most architectural companies have been using 3D printers since the early days of project, from early layouts to the creation detailed 3D prints for constructive elaboration (previously, layouts were created only at the final development stage). This reduces the possibility of errors in the late stages of prototyping and helps complete projects with the greatest efficiency and least costs.
Application in construction and architecture of 3D printers, infers relationships with customers to the next level.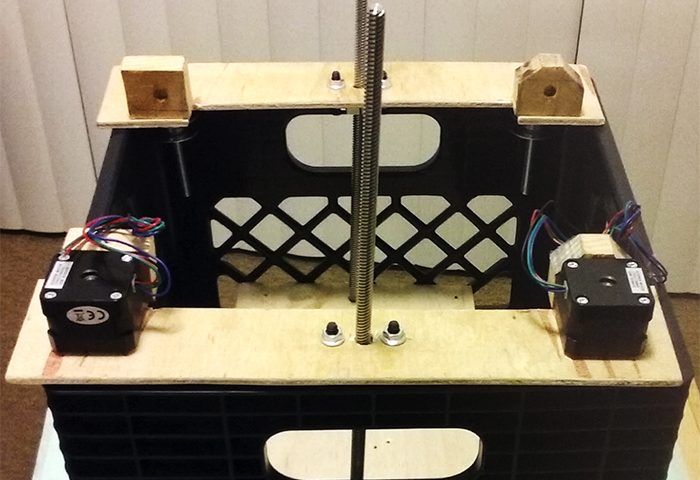 Working with 3D printers, architects get the opportunity to convey to client's thoughts and ideas accurately, quickly and clearly.
back to index
Application 3D printers in the field of education is gradually becoming an ideal solution for involving pupils and students in educational process. The use of 3D printing in schools and universities makes learning interesting and exciting, understandable and intelligible, allows students to touch what are complex and not always clear abstractions and theories reflected in their notebooks, to get acquainted with characteristics and properties of the subject being studied, to obtain visual representation of its functions.
Prototyping is used by many leading Western, and increasingly domestic, higher and educational institutions. 3D printers improve the learning process, develop students and students imaginative thinking, accustom future specialists to automated programming and design.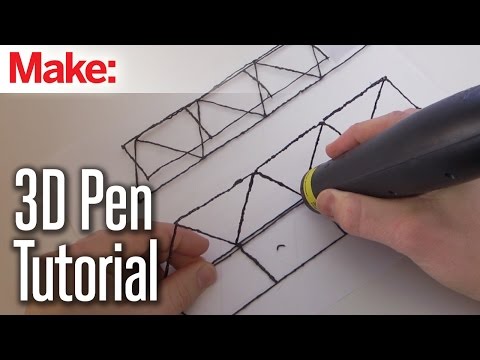
In the education of a 3D printer, the thing is not replaceable, especially when it comes to technical universities. Students can design objects, details and layouts right in the audience, print, evaluate and test them. 3D printing included in the curriculum engineering disciplines, enables students to embody in life their design ideas and ideas, thereby increases the share of innovation in their projects.
Students using a 3D printer in educational purposes, have the opportunity to study at own mistakes. After all, there are flaws on paper or a computer it is not always possible to notice one or another model, but creating layout or some detail, the student, having modeled it on computer in a 3D program, after a short period time holds it in his hands. If something doesn't work, then it's no problem, you can try again and again.
back to index
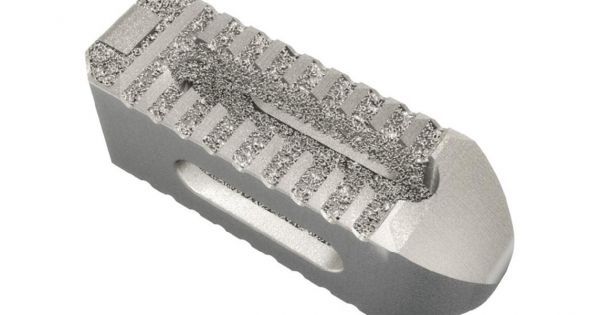
The use of 3D printers in medicine allows you to save human lives.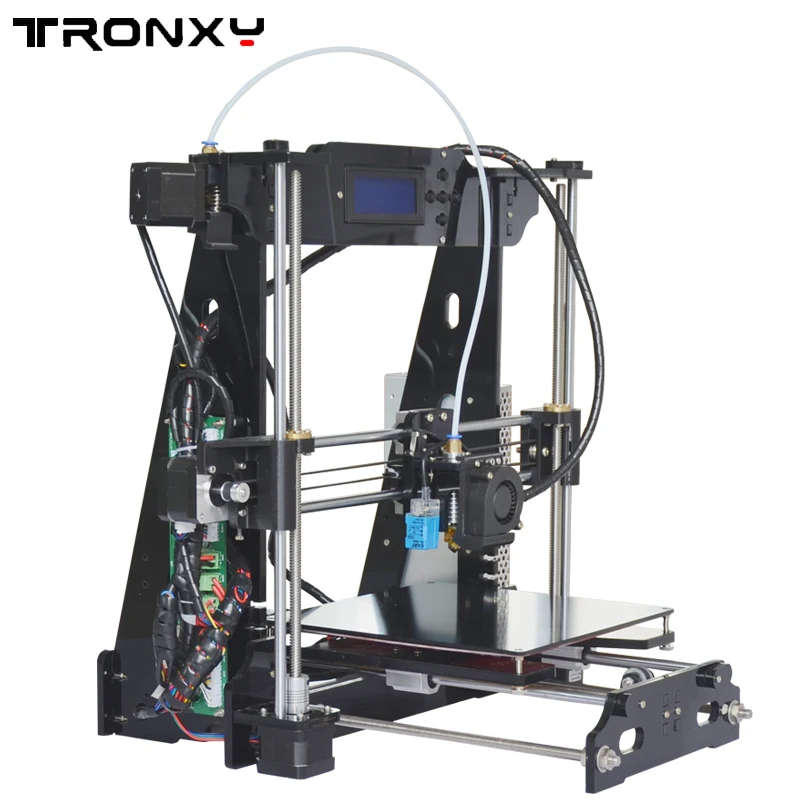 Such printers can recreate the exact a copy of the human skeleton for practicing techniques, guaranteeing a successful operation. Increasingly 3D printers are used in prosthetics and dentistry, as 3D printing makes it possible to obtain prostheses and crowns much faster than conventional production technology.
3D printed dental crown prototypes
Medical 3D models can be made from a range of materials, including living organic cells. The choice of one or another material for medical prototyping depends on the goals and objectives facing physicians, and problems related to the health of the patient.
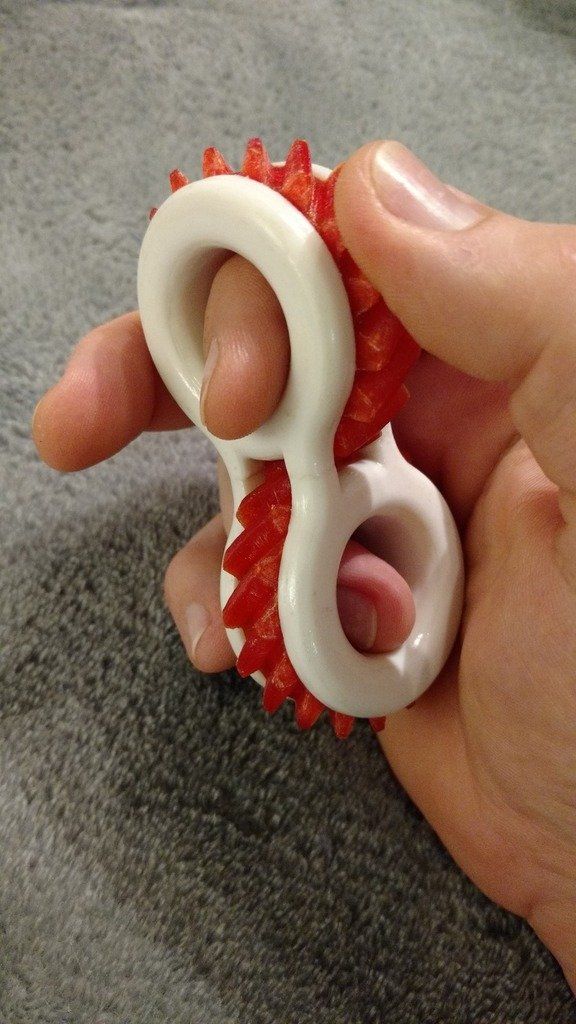
The picture below shows baby Emma Lavalle (Emma Laval), suffering from a rare congenital disease in which the muscles of the hands atrophy, and the child cannot even pick up light toy. Doctors designed and 3D printed printer a special plastic exoskeleton, which helps the girl to live a full life.
3D printed exoskeleton for a girl with trained arm muscles
As the girl grows, specialists print new spare parts for the exoskeleton, so it always fits her.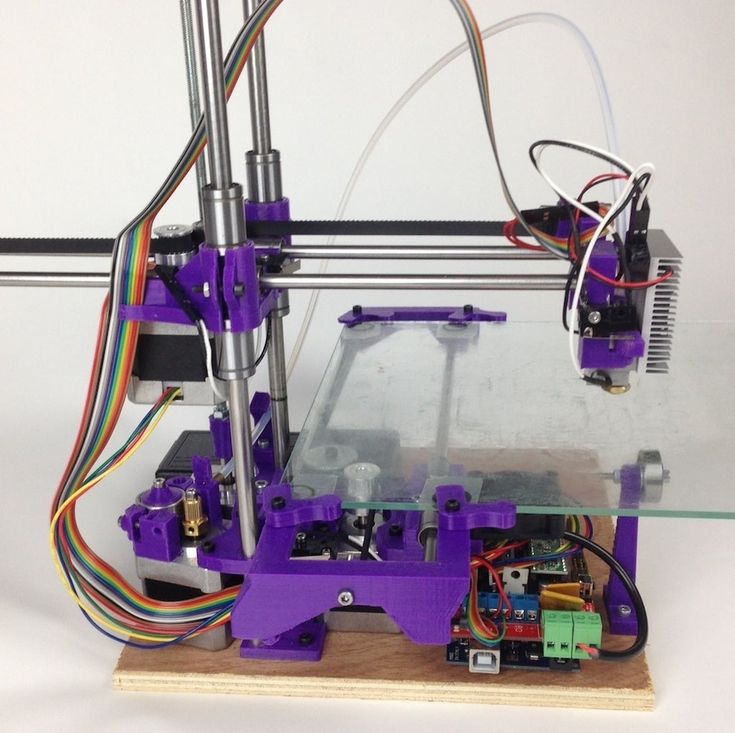
Not resting on their laurels, doctors have learned to print "patches" for damaged human skin. As materials for printing uses a special gel from donor cells. According to scientists, for printing skin can be used even the most common office printer, a little modified for the task at hand.
"Patch" for human skin, 3D printed bioprinter
In 2011, scientists were able to reproduce a living human kidney. To do this, the 3D printer took only 3 hours.
3D printer prints a living kidney
back to index
Working principle of school 3d printer "Alpha" (FDM-technology)
Fused modeling deposition modeling (FDM)) – additive manufacturing technology, widely used in creating 3D models, prototyping and industrial production.
FDM technology involves the creation of three-dimensional objects for by applying successive layers of material, repeating contours of the digital model.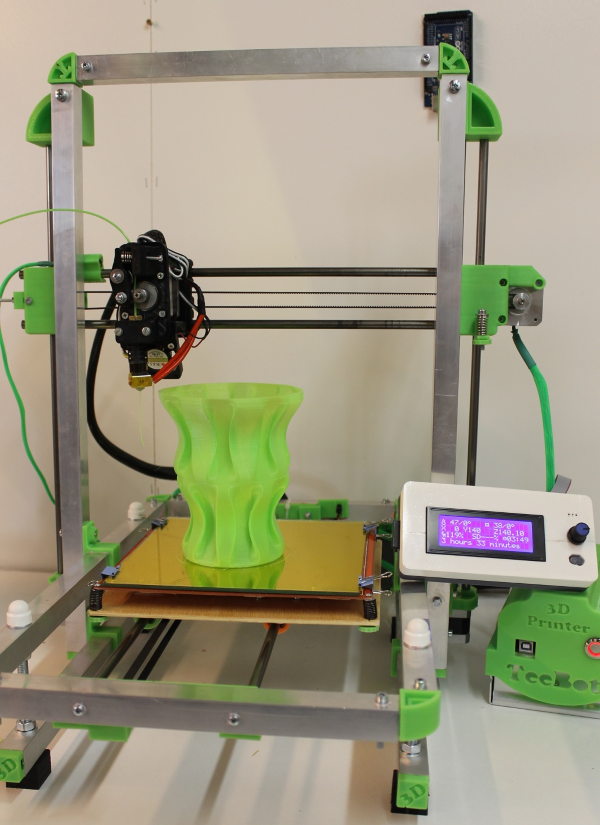 As a rule, as materials for printing are thermoplastics supplied in the form spools of thread or rods.
FDM technology was developed by S. Scott Trump at the end 1980s and entered the commercial market in 1990.
Original term "Fused Deposition Modeling" and abbreviation FDM are trademarks of the company Stratasys. 3D printing enthusiasts, members of the RepRap project, coined the similar term "Fused Filament Fabrication" (“Filament Filament Fabrication”) or FFF for use without legal restrictions. FDM terms and FFFs are equivalent in meaning and purpose.
The production cycle begins with the processing of three-dimensional digital model. The STL model is divided into layers and oriented in the most suitable way for printing. At necessary, supporting structures are generated, necessary for printing overhanging elements. Some devices allow the use of different materials during one production cycle. For example, it is possible to print models from one material with printing of supports from another, highly soluble material, which makes it easy to remove supporting structures after the process ends print.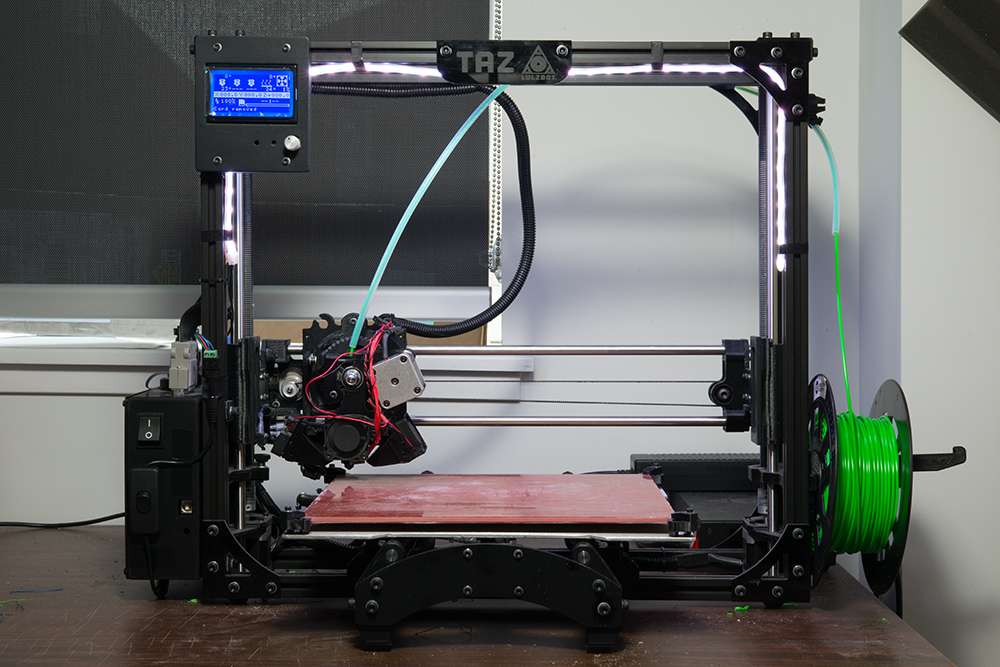 Alternatively, printing in different colors is possible. the same type of plastic when creating a single model.
The product, or “model”, is produced by extrusion ("extrusion") and the application of microdroplets of molten thermoplastic with the formation of successive layers, cured immediately after extrusion.
Plastic thread is unwound from the spool and fed into extruder - a device equipped with a mechanical drive for thread feed, a heating element for melting the material and nozzle through which it is carried out directly extrusion. The heating element is used to heat nozzle, which in turn melts the plastic filament and feeds the molten material to the model under construction. How as a rule, the upper part of the nozzle, on the contrary, is cooled by fan to create a sharp temperature gradient, necessary to ensure a smooth feed of the material.
The extruder moves in horizontal and vertical planes under the control of algorithms similar to used in numerically controlled machines. The nozzle moves along the trajectory set by the system computer-aided design ("CAD" or "CAD" according to English terminology). The model is built layer by layer, upwards. Typically, an extruder (also called "print head") is driven by step-by-step motors or servos. most popular system coordinates used in FDM is the Cartesian system, built on a rectangular three-dimensional space with axes X, Y and Z. An alternative is a cylindrical system coordinates used by the so-called "delta robots".
FDM technology is highly flexible, but has certain restrictions. While the creation of overhanging structures possible at small angles of inclination, in the case of large corners, it is necessary to use artificial supports, as rule created during the printing process and separated from models at the end of the process.
Various consumables available thermoplastics and composites, including ABS, PLA, polycarbonates, polyamides, polystyrene, lignin and many others. Usually, different materials provide a choice of balance between certain strength and temperature characteristics.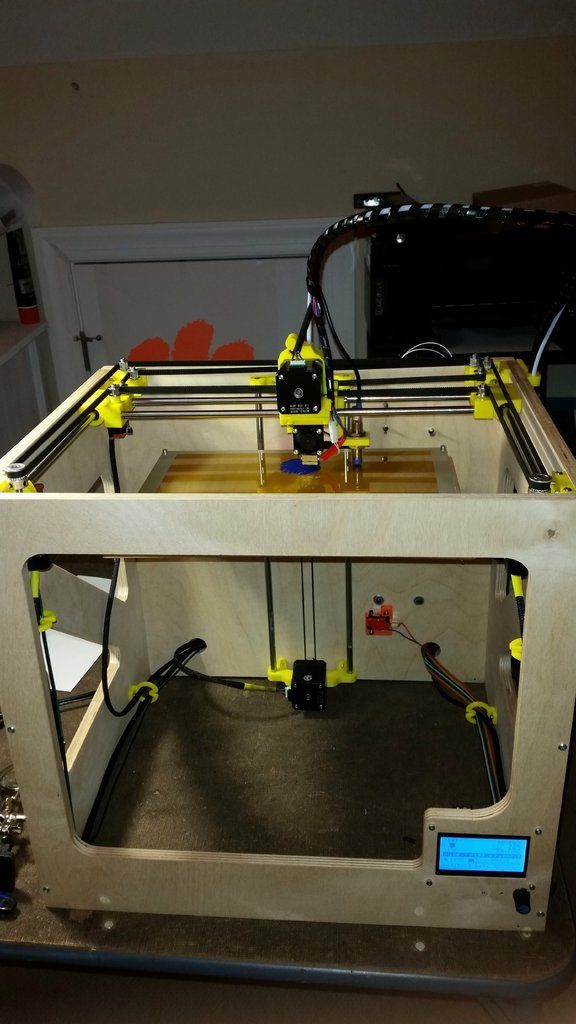
back to index
Demo video
To start playing the video in the video window, click right mouse button and tick "Play"
To stop playing the video in the video window, click right mouse button and uncheck "Play"
download video printer operation
back to index
General characteristics of school 3d printer "Alpha"
| Dimensional dimensions of 3D printer | 410x420x390 mm |
| Weight | 13 kg |
| Enclosure type | closed |
| Print area | 200x200x200 mm |
| Table type | heated |
| Quantity extruders | 1 PC.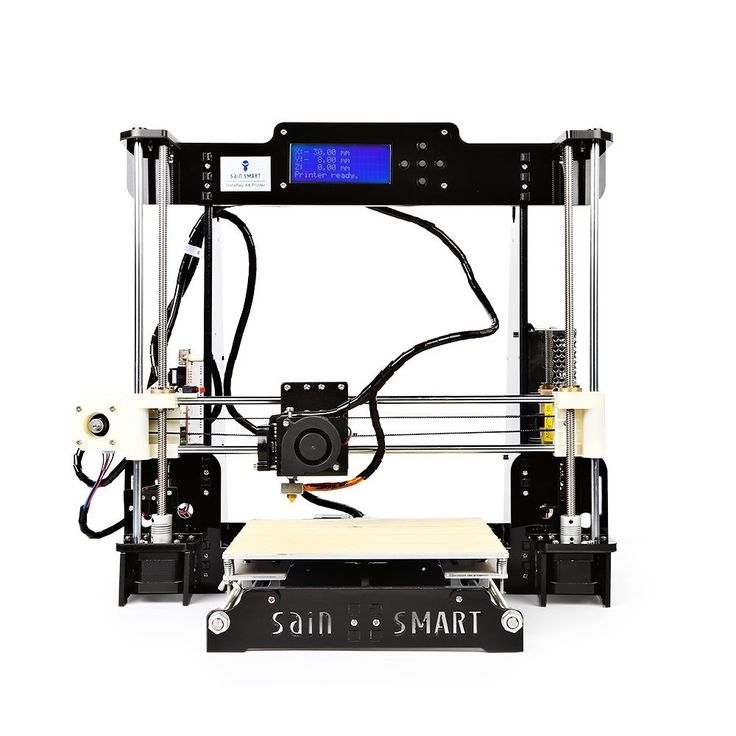 |
| Nozzle diameter extruder | 0.3 mm |
| Print speed | 50 mm/s |
| Minimum layer thickness | 0.1 mm |
| Minimum wall thickness | 0.4 mm |
| Plastic type | ABS/PLA |
| Print Technology | FDM |
back to index
School device school 3d printer "Alpha"
School 3d printer consists of:
1.Outer body
2.Extruder
3.Worktable (panel)
4.Control board
5.Marine motors and various actuators
6. Power supply
To start playing the video in the video window, click right mouse button and tick "Play"
To stop playing the video in the video window, click right mouse button and uncheck "Play"
download video instruction
back to index
PC Minimum Technical Recommendations to which 3d will be connected printer "Alpha"
Computer: 2-core, clock frequency is not below 1500 GHz, 64 bit
Processor: Intel Celeron/AMD FX2
RAM: from 2 GB (preferably 4-8 GB)
Hard disk: from 250 GB
Video: both built-in and external with an internal memory of at least 1 GB (only for printing, and for 3d simulation preferably gaming video cards)
Software : Windows 7 (64 bit), with English account (e. g. 3d ). Russian language DO NOT USE! There may be problems with the slicer (software) when using Russian characters.
back to index
Connecting a 3d printer to a PC and familiarization with the controls
To connect a printer to a PC you need:
1. Remove the printer
from the packaging 2.Connect the printer to the computer via USB
3.Turn on printer power
4.Install drivers and software to work with the printer from installation disc
5. Set up the software to work
To start playing the video in the video window, click right mouse button and tick "Play"
To stop playing the video in the video window, click right mouse button and uncheck "Play"
download video instruction
back to index
Software installation and printer driver
To start playing the video in the video window, click right mouse button and tick "Play"
To stop playing the video in the video window, click right mouse button and uncheck "Play"
download video instruction
back to index
Setting gap between the extruder and the desktop (panel) of the school 3d printer "Alpha"
1.![]() Remove from the packaging and place on a stable hard its base (for example, a table)
Remove from the packaging and place on a stable hard its base (for example, a table)
2. Open the transparent front cover of the printer to access internal details.
3.Connect the printer's USB cable to PC. Turn on the printer power.
4. Run the previously installed Repetier-Host software on computer and connect programmatically to the printer.
5. On the Repetier-Host software "Management" tab, enable "Heat extruder" and wait until the extruder is heated to the required temperature (230-250 degrees Celsius).
6. Only on a hot extruder can you insert / change line for printing. To do this, carefully on the extruder itself press the yellowish button from above, while from below, immediately after main cooling fan, with another finger gently hold the extruder itself to avoid damaging it. (Caution! The temperature of the heated extruder is 230-250 degrees Celsius). Without releasing this button, take the end fishing line and insert carefully into the hole from the top side (straight near the button itself) until they appear from the extruder from below "plastic threads". (in the previous paragraph on the video this the procedure is shown in detail!)
7. Now you need to adjust the gap between the desktop and yourself extruder. To do this, you need to take an ordinary sheet A4 paper and fold it in half.
8. Then through the program Repetier-Host, tab "Management" alternately move the extruder along the desktop to the extreme 4 points of the table.
9. For each of the 4 points, do the following: lower the extruder programmatically along the Y axis and check the gap between the work table and the extruder itself. Normal is such a gap through which it is difficult to passes a regular sheet of A4 paper folded in half. You can set the gap by screwing / unscrewing adjustment screws on 4 corners of the work table.
10. After installing all 4 gaps at the corners of the desktop and installation of the fishing line in the extruder, you can start a test print.
To start playing the video in the video window, click right mouse button and tick "Play"
To stop playing the video in the video window, click right mouse button and uncheck "Play"
download video instruction
back to index
Filling the cartridge with fishing line in 3d printer "Alpha"
To thread the line into the printer you need:
1. Connect printer to PC
2. Using the R.H. heat the extruder to the melting temperature of the line
3. Press the special button on the extruder and thread the line through extruder.
To start playing the video in the video window, click right mouse button and tick "Play"
To stop playing the video in the video window, click right mouse button and uncheck "Play"
download video instruction
back to index
Removing (replacing) the cartridge with fishing line on a 3d printer
To replace the cartridge with fishing line need:
1. Connect printer to PC
2. Using the R.H. heat the extruder to the melting temperature of the fishing line
3. Press the special button on the extruder and pull out the fishing line from the extruder.
4. Fix the line in the cartridge
To start playing the video in the video window, click right mouse button and tick "Play"
To stop playing the video in the video window, click right mouse button and uncheck "Play"
download video instruction
back to index
Loading ready-made 3d models in computer and preparing them for printing
To download ready-made 3d models required:
1.Start R.H. on computer
2. In the program menu, select the submenu "File" ---> "Open G-code"
3.Check scale and placement of model
4.Start "Slicing"
5.Prepare the printer for printing
6.Start printing
To start playing the video in the video window, click right mouse button and tick "Play"
To stop playing the video in the video window, click right mouse button and uncheck "Play"
download video instruction
back to index
Book 3D printing from scratch (D.
 Gorkov)
 Book “ 3D printing from scratch ” – title page
The book 3D printing from scratch (a detailed guide to learning how to work on a 3D printer) was written by one of the prominent Russian-speaking authors on the topic of 3D printing - Dmitry Gorkov in 2015. The publication is rightfully considered one of the best sources of information on 3D printing technology and related equipment for beginners.
On this page of the electronic library of the portal you will find a description of this book, content and a direct link to a third-party source on the Internet, where you can download this book for free and without registration.
Description of the book “3D Printing From Scratch”
The purpose of this book was to fill an empty niche in teaching 3d printing technology. This technology is just beginning to massively penetrate into the life of society.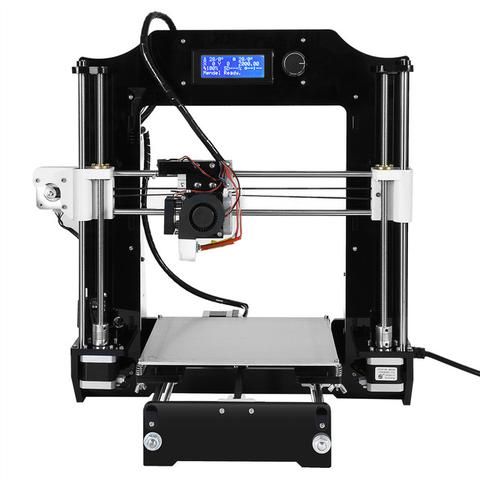 One of the reasons that this process does not happen quickly (according to the author) is the lack of structured information on the topic “where to start”.
The Internet is filled with advertising articles about the use of industrial printers. But you have to look for information on how to work on a “regular” (household / desktop) FDM printer bit by bit on specialized forums. Much of the information is teeming with specific terms and can be difficult for beginners to understand.
The purpose of the book “3D printing from scratch” is to convey all the basic information to the end user in an accessible language without trying to “break the brain”. The author tried to create a step-by-step guide that will allow even a beginner in the field of 3dp to choose the right 3D printer for individual needs. The book also takes a detailed look at how to work with different types of 3D printing plastics. The book also pays special attention to such an important issue as 3d printing software: it discusses the currently used (at the time of writing the book - 2015) computer programs for 3D printing on a printer with practical examples of designing in a 3D editor of simple objects.
After studying this book, you will receive the necessary basic knowledge to start your work in the field of 3D printing - one of the most promising and rapidly developing branches of science and business in the modern world. Study programs Cura, Tinkercad. Master the skills of post-processing printed products. Learn about all the top causes of poor print quality and how to avoid them.
| Author : | Dmitry Gorkov |
| Issued : | 3D-Print-nt.ru |
| Release date: | 2015 |
| Free download (direct link) | PDF (36.3 Mb ) |
| Volume: | 400 pages |
Contents of the book “3D printing from scratch”
- Brief summary of the book
- Introduction
- Children's dreams.
 Or like everything, someday it will come true
 - Suitable 3D printers and where to buy them
- Which 3D printer to choose?
- Basic circuits used in 3D printers
- 3D printer device
- 3d printing supplies
- Used file types
- 3D printing software
- Cura 3d
- Useful features of Cura. Part 1
- Useful features of Cura. Part 2
- Tinkercad Simulation Editor
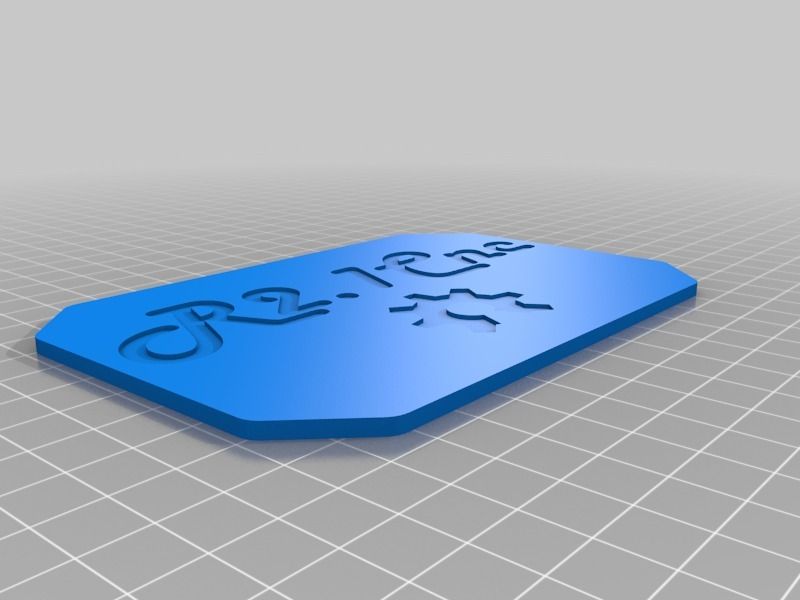
- Making a bumper for Iphone
- Metric thread in Tinkercad
- Useful resource Thingiverse
- 3D printing post-processing
- How I design parts in the 3D editor
- Types of defects in 3D printing
- 3D Scanners
- Robot with 3D scanner Cyclop
- Processing models in MeshLabs
- 3D Printing Use Cases
- Spare parts for cars (3D printing)
- Auto tuning with 3D printing
- Souvenir printing
- Products for fishermen
- Hobby and model parts
- 3D printing and industrial design
- Souvenirs for organizations
- Parts for small-scale production using 3D printing
- Coffee mask
- 3D printing parts for household appliances
- Tool and Equipment Repair Parts
- Extreme
- Print accessories for GoPro cameras
- Photo and video equipment
- Models
- Subculture
- Phone cases
- Fittings for clothes and various accessories
- Appendixes to this book
- Printer and hardware reviews
- My Replicator from China.
Learn more