3D printer nozzle wipe
Cura Wipe Nozzle Between Layers
- Author
- Recent Posts
Martin
Besides many test devices, Martin now has his fourth own 3D printer running and prints as a hobby for friends, family and himself. He is happy to share his experience with each new article.
Latest posts by Martin (see all)
Disclosure: Links marked with * are Affiliate Links. I earn from qualifying purchases if you decide to make a purchase through these links – at no additional cost for you!
Sometimes it can be very difficult to get over-extrusion or stringing under control. Especially with stubborn filaments like PETG it can sometimes seem impossible.
For such cases, however, there is a feature in Cura with which you can wipe the nozzle after each layer to avoid stringing or ugly blobs.
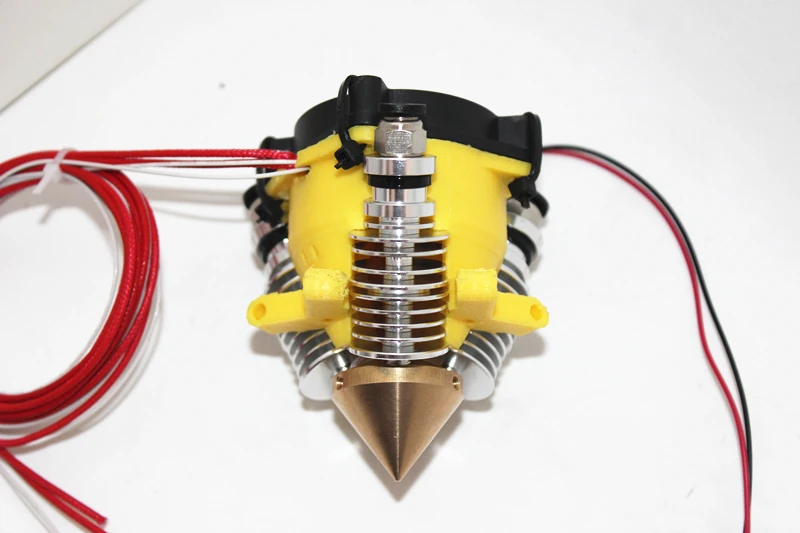
By activating the Wipe Nozzle Between Layers setting, the nozzle moves to a specific location on the X-axis after each layer. A brush can be installed there to wipe the nozzle each time to avoid stringing.
Where you can find this option and how it works in detail you will learn in this detailed guide. At the end you will also learn how to avoid stringing or over-extrusion in general.
Table of Contents:
- 1 How to Activate Wipe Nozzle Between Layers in Cura?
- 2 How Does Wiping the Nozzle Between Layers Work in Cura?
- 3 When to Use Wipe Nozzle Between Layers in Cura?
- 4 Alternatives
- 4.1 How to Avoid Stringing
- 4.2 How to Avoid Over-Extrusion
How to Activate Wipe Nozzle Between Layers in Cura?
The Wipe Nozzle Between Layers option is located under the experimental options in Cura. The visibility of the option can be toggled in the settings. After activating it, more options appear to optimize the wiping movement.
Many options are not visible by default. You can adjust their visibility via the settings to show only the settings you need.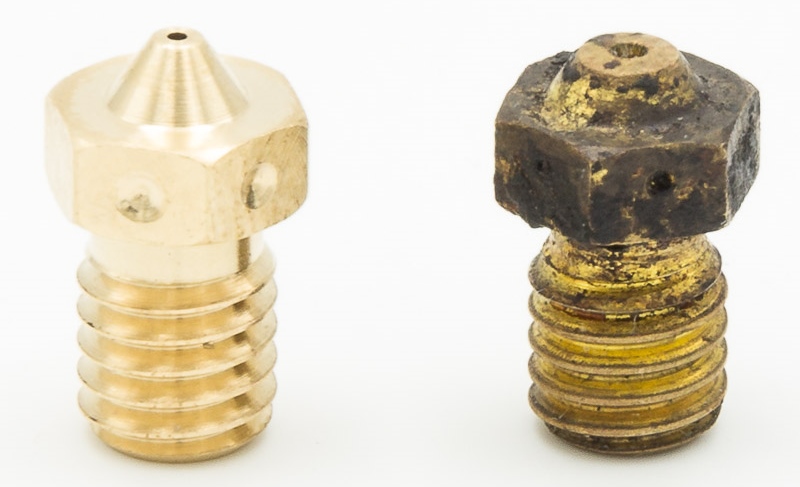
After you have activated the option, further settings will appear to adjust the wipe individually. What the individual options do and which settings you should start with can be found further down in the text.
So that you can already see in the slicer how the settings affect the print, you can activate the visibility of the movements in the preview. This way you can see exactly how the nozzle moves during printing.
Red Arrow = Wiping Travel MovementsHow Does Wiping the Nozzle Between Layers Work in Cura?
Standard Options for Wipe Nozzle Between Layers without brush.With Wipe Nozzle Between Layers, the nozzle moves to a specific position after each layer, where it is automatically wiped off by a brush after each layer. In the case of stringing or over-extrusion, this can improve print quality.
The nozzle moves to a specific position on the X-axis. The Y or Z coordinates cannot be determined. Therefore, the brush must be installed so that it moves upwards with the print head.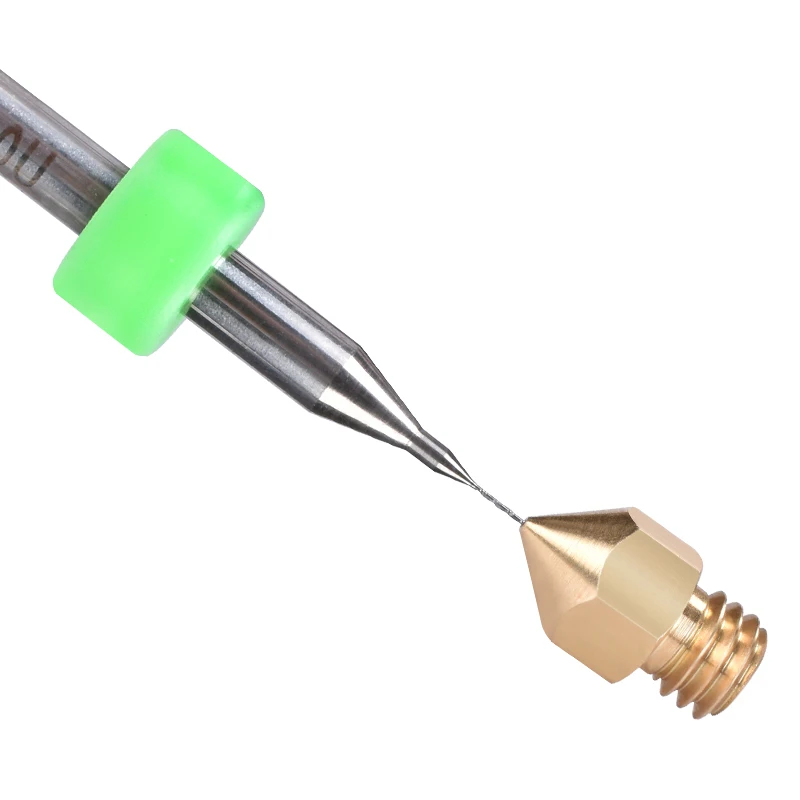 If you install the brush to the side of the print bed on the X-axis, it would probably make the most sense.
The default settings for wiping between layers are already very good, but the X position will probably not fit your setup. To help you optimize the settings, here is a simple explanation of each option:
Material Volume Between Wipes: With this parameter, you can set after how much extruded filament the nozzle should be wiped. If the specified volume is less than the filament required for the layer, the nozzle is wiped at most once per layer.
If the value is greater than twice the filament volume required for a layer, the nozzle is wiped only every two layers, and so on. The default value of 10 mm³ usually causes the nozzle to be wiped once per layer.
Wipe Retraction Enable: Enabling this option makes sense to avoid stringing while the nozzle is moving to the brush. When the option is activated, the filament is retracted a bit into the nozzle to prevent it from escaping uncontrollably.
Wipe Retraction Distance: Here it is best to use the default settings for the retraction. Cura uses the default settings automatically and you should only change this value if you still observe strong stringing.
Wipe Retraction Extra Prime Amount: So that you don’t have to change the default settings for the retraction distance, there is this additional option. Since the distance between the print object and the brush can be quite long, the liquid filament could flow downwards and escape despite the retraction due to gravity and time. If you observe this, you should try to keep the filament in the nozzle with small steps.
Wipe Retraction Speed: Just as with the default retraction settings, there is an option here to set the speed for the retraction. I would also stick to the standard settings here.
Wipe Pause: This is the duration of the pause after retraction. Recommended setting: disabled.
Wipe Z-Hop: The Z-hop raises the nozzle or lowers the print bed, depending on how your printer is set up.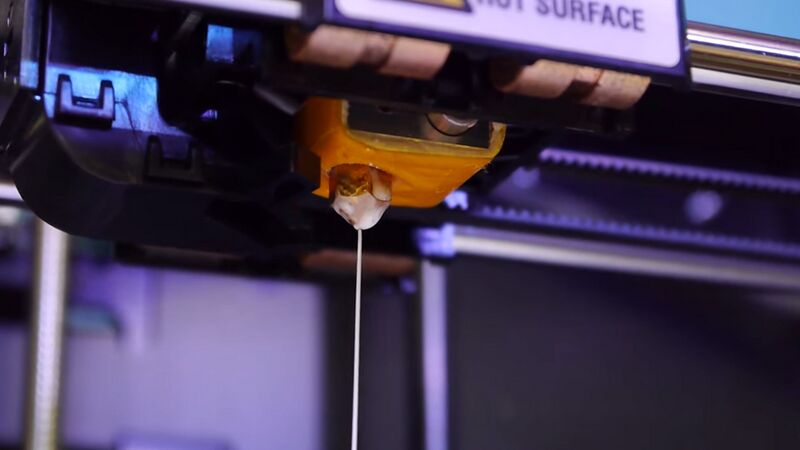 This prevents the Nozzle from damaging already printed parts of the object when moving to the brush. I recommend you enable this option and leave the distance and speed options that appear at their default settings.
Wipe Brush X Position: This setting is the most important. Here you specify where the brush is located on your 3D printer. The wiping process starts at the set position. The preset 100 mm are mostly not suitable.
Wipe Repeat Count: The wiping of the nozzle is repeated with the number set here on the brush. In my experience, a higher number is better for PETG and the preset 5 repetitions are sufficient for PLA.
Wipe Move Distance: This setting is defined by the size of your brush. It determines the distance the nozzle moves back and forth while wiping. The larger the brush, the greater this distance can be.
The recommended settings may differ depending on the filament and 3D printer used. I tested them with an X-Max with PLA and with the Ender 3 V2 with PETG.
When to Use Wipe Nozzle Between Layers in Cura?
Extreme StringingWiping the nozzle between layers is helpful when stringing or other symptoms of over-extrusion occur and cannot be avoided by normal measures. Especially with filaments like PETG this function can be helpful.
Sometimes print defects can be very stubborn and difficult or impossible to fix. In addition, some combinations of 3D printer and filaments are unfavorable for certain errors. Especially with filaments that tend to string, such as PETG, it can be useful to wipe the nozzle between layers.
In my experience, wiping the nozzle between layers only makes sense with stringing-prone filaments like PETG and low-budget 3D printers. All other combinations of filaments and 3D printers can be optimized with the right extrusion settings so that this feature does not have to be used at all.
It also takes some effort to install the brush correctly on the 3D printer. There are suitable objects for various 3D printers that you can use for assembly. You can find the models on sites like Thingiverse.
Alternatives
The disadvantage of the feature of wiping the nozzle between layers is that the printing time is considerably increased. The additional movements of the print head are clearly noticeable. And you may want to try something else first before you have to modify your 3D printer by mounting a brush.
Therefore, you should not use the function by default and enable it only when all other measures have failed. So before you enable this option, you should first try to avoid stringing or over-extrusion in general.
How to Avoid Stringing
Activate retraction: Filament retraction prevents uncontrolled leakage of liquid filament. When this option is activated, the extruder retracts the filament into the nozzle by the specified length. This prevents or at least significantly reduces the formation of strings.
Reduce temperature: The higher the printing temperature, the more liquid the filament is inside the nozzle. And the more liquid the filament is, the easier it can escape uncontrolled from the nozzle and create strings. If you want to know which temperatures are best for which filament, you can check out this article.
Dry Filament: Moist filament can cause all kinds of printing errors and stringing is one of them. So it’s important to keep the filament dry. In this article you will find everything you need to know about that topic.
Increase print speed: It is often sufficient to slightly increase the printing speed. The increased speed gives the filament less time to escape uncontrollably. However, too high a printing speed can lead to inaccuracies.
Keep the nozzle clean: A dirty or worn-out nozzle can also lead to stringing. So you should make sure that you clean the nozzle regularly and replace it if you have worked too much with abrasive filaments like wood* or metal* filaments.
How to Avoid Over-Extrusion
Filament diameter: Fluctuating filament diameters on a filament roll are fortunately becoming increasingly rare. However, with some cheap filament brands, there can still be variations in filament diameter over the length of the filament. This can lead to over extrusion. So make sure that you only buy high quality filament.
Reduce flow rate: You can set the flow rate directly in the slicer. If you increase it, more filament will be extruded, if you decrease it, less filament will be extruded. This allows you to calibrate the extrusion accurately and avoid over- or under-extrusion.
Reduce print temperature: As with stringing, too high a temperature is a classic error that triggers over-extrusion. Therefore, stick to the recommended temperatures and perform a temperature calibration with a temperature tower. You can find corresponding objects either on platforms like Thingiverse or in the Calibration Shapes plugin in the Marketplace of Cura.
Disclosure: This website is the property of Martin Lütkemeyer and is operated by Martin Lütkemeyer.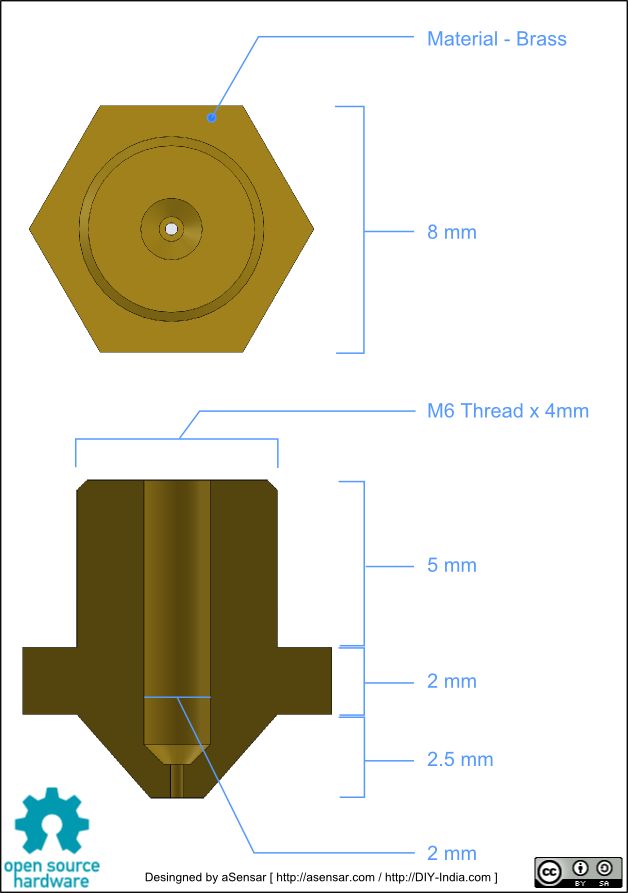 Martin Lütkemeyer is a member of the Amazon Services LLC and other Affiliate Programs. These are affiliate advertising programs designed to enable websites to earn advertising revenue through advertising and linking to Amazon.com and others. Links marked with * are affiliate links.
What Is Wipe Nozzle Between Layers in Cura? (When to Use It?)
Last Updated: September 2, 2022
Stringing is perhaps one of the most commonly encountered issues in 3D printing regardless of the filament type you use, and the fact that it can quickly ruin a print when it gets excessive makes it a high-priority problem.
While preventing stringing usually comes down to configuring the retraction settings correctly in the slicer, it’s also possible to find extra features in slicer software that are helpful to combat stringing in different ways.
One such example of a feature that can be incredibly helpful to prevent stringing is wipe nozzle between layers in Cura, which will be the focus of our discussion today as it offers a quick and easy way to solve stringing-related issues.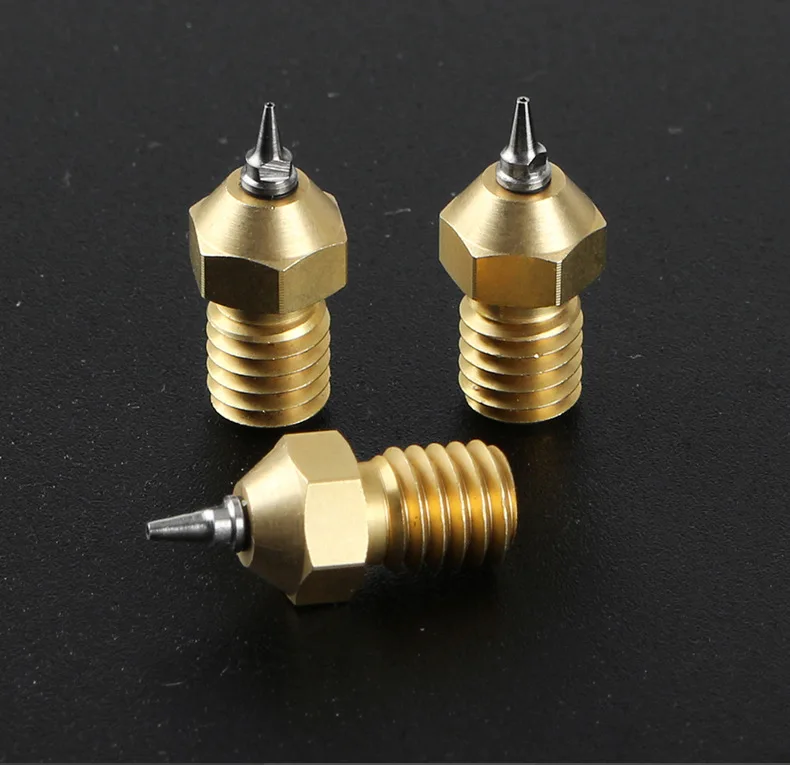
So, what is the wipe nozzle between layers feature in Cura?
The wipe nozzle between layers feature in Cura instructs the printer to wipe the nozzle on a brush after completing each layer to ensure that the nozzle is free of any residue that may damage the upcoming layers.
As activating the wipe nozzle between layers parameter adds a decent amount of parameters that you will need to configure to ensure that the feature works as intended, we will take a deeper look at everything this feature has to offer in the upcoming sections.
Table of Contents
What Is Wipe Nozzle Between Layers in Cura?
Wipe nozzle between layers is a feature that Cura classifies as experimental, meaning that it’s vital to configure its parameters correctly to ensure that the printing process does not fail.
Activating the wipe nozzle between layers setting in Cura essentially adds G-codes that instruct the printer to start a wipe sequence whenever it completes printing a layer.
While it’s possible to customize it further, in a nutshell, the wipe sequence involves the printhead moving away from the model to the location of the brush and wiping itself to get rid of the residue on the nozzle.
As the wipe nozzle between layers feature offers a wide variety of parameters to fine-tune the entire process, it’s vital to configure them correctly to ensure that everything works as intended.
Without further ado, let’s take a look at the parameters:
- Material Volume Between Wipes – Determines the maximum amount of material the printer can extrude before initiating a nozzle wipe. This value cannot cause the printer to wipe more than once in the same layer.
- Wipe Retraction Enable – Retracts the filament while the nozzle moves over a non-printed area during the wipe sequence.
- Wipe Retraction Distance – The amount of retraction the printer will perform during the wipe sequence.

- Wipe Retraction Extra Prime Amount – The amount of extra plastic that the printer will extrude after performing a retraction to compensate for oozing during travel moves.
- Wipe Retraction Speed – The speed of retraction and priming during the wipe sequence.
- Wipe Pause – The amount of idle time after unretract.
- Wipe Z Hop – Determines whether Z-hop will be active or not during the wiping sequence.
- Wipe Z Hop Height – The height of the Z-hop during the wipe sequence.
- Wipe Hop Speed – The Z-axis speed of the nozzle (or build plate) during the z-hop.
- Wipe Brush X Position – The X-axis location of the brush where the wipe sequence will start.
- Wipe Repeat Count – The number of times the nozzle will move across the brush to wipe itself.
- Wipe Move Distance – The distance the nozzle will move back and forth across the brush.

While the wipe nozzle between layers feature comes with a large number of parameters, you may have noticed that most of them are familiar-sounding settings, with the sole difference of these parameters only being active during the wiping sequence.
How to Activate the Wipe Nozzle Between Layers Feature in Cura?
Activating the wipe nozzle between layers feature in Cura is as easy as it comes as it’s possible to do so by following the quick steps we have listed below:
- Navigate to the Prepare tab, which you can find at the top of the Cura window.
- From the three options below, click the rightmost one to display Print Settings.
- If you see the Custom button, click it to switch the Print Settings to Custom mode.
- Click the three lines icon next to the search input, and choose All from the dropdown menu to make the Wipe Nozzle Between Layers setting visible.
- Type “wipe” into the search input.
 3, increase if you experience oozing during wipe travel moves.
 - Wipe Retraction Speed – While it depends on the filament type, 30 mm/s is a good starting point.
- Wipe Pause – Disabled.
- Wipe Z Hop – Enabled.
- Wipe Z Hop Height – Use a value that will give enough height between your model and the nozzle.
- Wipe Hop Speed – 5 mm/s.
- Wipe Brush X Position – This value purely depends on where your brush is.
- Wipe Repeat Count – Start with 5. Increase if your nozzle still has leftover plastic after the wipe sequence.
- Wipe Move Distance – This value entirely depends on how long your brush is.
- Overload, when the device works for a long time without stopping.
- In dusty areas. Sometimes the printing device is placed in a non-residential room or workshop, where cleaning is very rarely carried out.
- Incorrect print settings. In particular, the use of an inappropriate filament or an erroneously set melting point.
- drill with a diameter of up to 0.35 mm;
- guitar string up to 0.33 mm in diameter;
- leg from a diode or transistor.
- Shut off the 3D printer. Wait until the nozzle cools down a bit.
- Remove filament residue from nozzle tip.
- Drill or chisel the hole slowly with the tools indicated.
 Be careful not to make a hole too deep.
 - Turn on the printer, feed the plastic to print.
- Repeat the procedure several times until the filament comes out in an even layer.
- Turn off the printer, let the extruder cool down a bit.
- Unscrew the nozzle, put it in a container with acetone or dichloroethane.
- Leave the part for 2-3 hours, then remove and clean the nozzle with a needle.
- Filament with higher melting point. A reel with refractory plastic is placed in the printer. It literally pushes the cork out of the extruder.
- Cleaning plastic. It is usually sold in the form of short sticks or small coils.
 Its structure resembles nylon. Cleaning filament is the safest way to remove plugs in an extruder.
 - Use the filament melting temperature specified by the manufacturer.
- Perform regular printer maintenance. You can unscrew the nozzle once a week and leave it in a jar of acetone overnight. If the print device works almost every day, it is worth increasing the number of preventive cleanings to 2-3 times a week.
- Clean the area where the printer is located. Do a wet cleaning at least once a week.
- March 14, 2021
- 4643
Please note that the settings we have mentioned are by no means conclusive, meaning that you should only use them as a guide to experiment and find optimized values that work the best for you.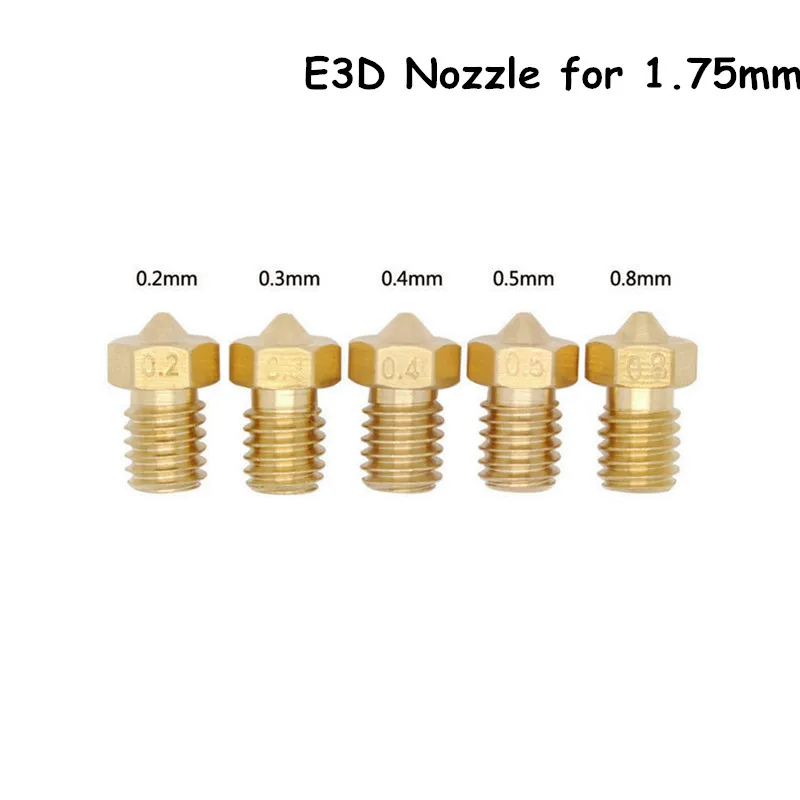
When Should You Use Wipe Nozzle Between Layers in Cura?
As the wipe nozzle between layers setting in Cura comes with the cost of the printing process taking longer, it’s not a feature that you should always keep enabled.
In a nutshell, you should only use the wipe nozzle between layers feature in Cura if you are experiencing stringing, blobbing, and other similar problems caused by the excess filament residue that stays on the nozzle after the printer completes a layer.
While activating this setting isn’t the only way to combat issues related to filament residue, it’s one of the most surefire ways to ensure that excess filament from the previous layers won’t damage your print if you don’t mind longer print times.
Wrapping Up
The wipe nozzle between layers in Cura offers a quick and easy solution to reduce or prevent stringing issues on your 3D printed models, which is highly welcome in most cases.
To recap, the wipe nozzle between layers feature causes the printer to wipe the leftover plastic on the nozzle off on a brush after completing each layer, ensuring that the nozzle is clean before moving on to the next one.
While this process increases the overall print time, it’s a great tool to prevent or reduce blobbing and stringing-related issues that leftover plastic can cause.
Happy printing!
Mike Davies
Mike started his 3D printing journey with the Anet A8 when it first came out back in 2017, and has been obsessed with 3D printers ever since. Nowadays, he primarily uses his Ender 3 to print functional parts that make his life more convenient whenever possible.
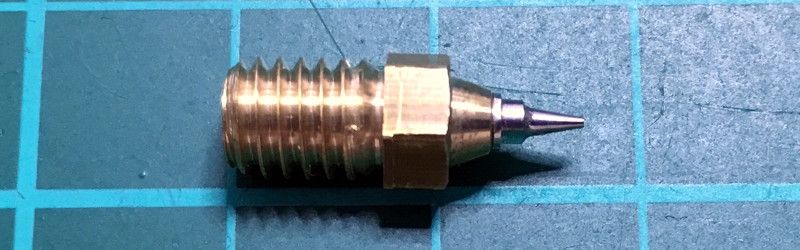
How to clean the nozzle of a 3d printer: clean the extruder from plastic
The extruder nozzle is one of the most problematic parts in a 3D printer. It can easily get clogged or clogged. Poor plastic feed will affect the quality of the finished model. Print defects will occur. Sometimes the job is completely stuck as the printer needs a nozzle cleaning.
Main Causes of Clogged Extruder
Regardless of the type of print head, it can become clogged. The reason for this is the filament or dirt that accumulates inside the knot. Most often, the nozzle becomes clogged when the printer is not used correctly in conditions:
In some cases, the design of the nozzle itself can cause frequent clogging. For example, when the printer comes with an initially defective extruder. The geometry of the nozzle is broken. The device should be returned under warranty or the nozzle should be replaced separately.
Information! The filament itself can be the cause of litter. A common factory defect or a burr on the plastic can cause a cork.
Pieces of sintered filament
In any case, it is worth carefully studying the problem of blockage and only then proceed to prevention.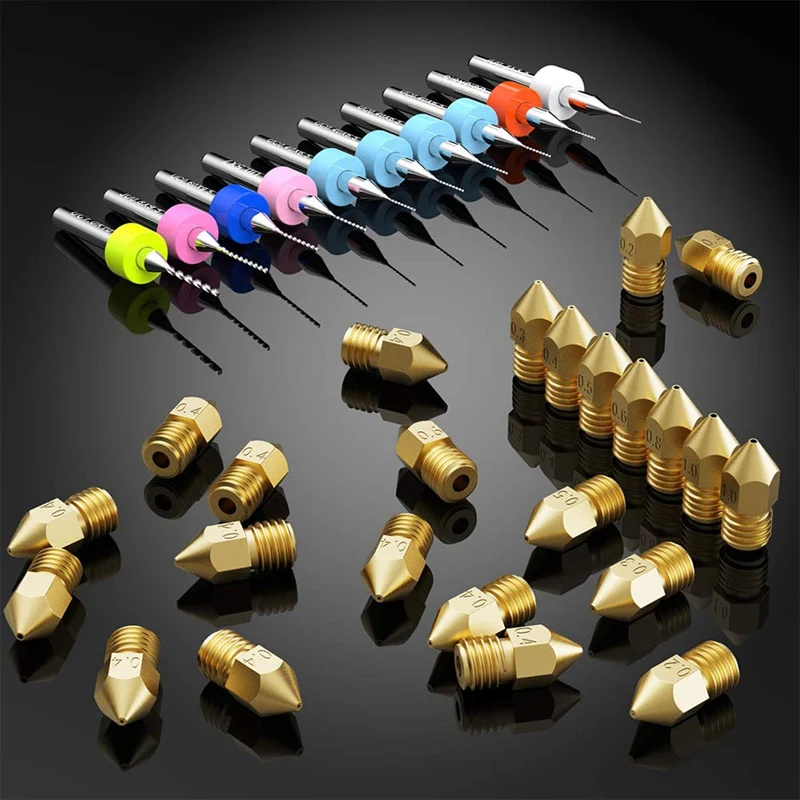 If you are afraid to damage the device, it is better to take the printer to a service center.
Dust and debris trapped in the nozzle
The first cause is dirt or dust that has entered from outside. Most often, the nozzle becomes clogged with debris for a long time. Dirt can accumulate for months and even years. It sinters on the walls of the nozzle, plaque is formed. Over time, it can cause the filament to get stuck.
Extruder temperature too high
Beginner 3D makers find that an excessively high melt temperature will help avoid clogging problems. This is an incorrect judgment. When working at an elevated temperature, the plastic is instantly sintered right inside the assembly. Filament jamming occurs. A bottleneck is formed.
Therefore, it is important to follow the temperature regime recommended by the filament manufacturer. Sometimes this figure may differ slightly. Somewhere at +/- 5 ° С. It all depends on the printer model, as well as the extruder itself.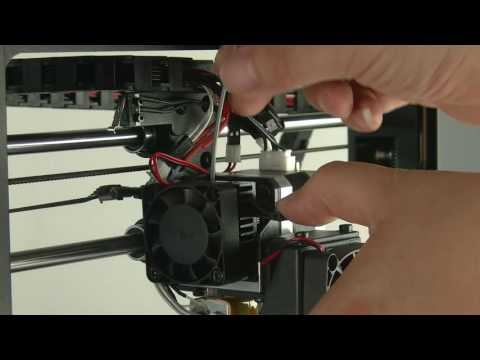 The optimum melting point is found experimentally.
How to clean the 3D printer extruder: step-by-step instructions
You can clean the printer yourself, without going to a specialized workshop. There are several working methods by which you can clean the nozzle. Let's consider each of them step by step.
Clogged extruder nozzle
Manual
The roughest way to clean the extruder. Thin objects are used for it:
Special nozzle cleaning tool for different diameters
Cleaning algorithm:
Some experts advise you to clean the nozzle while the printer is on. This can be done if the primary rubbish has been eliminated.
Attention! Do not use a screwdriver or drill! So you can miscalculate the force and go through the extruder, damaging the plastic capture mechanism. It is better to use a thin drill clamped in pliers.
Cleaning with a thin tool
Thinner
Sometimes mechanical cleaning is only partially helpful. With a drill, you can remove the cause of the blockage, but there are still plaques or influxes of plastic inside the nozzle. This situation is often encountered when working with ABS. To remove the filament completely, you will need to clean the nozzle in an aggressive environment. For example, in acetone or dichloroethane.
Cleaning algorithm:
Screw the nozzle onto the print head. Throw out the plastic.
Important! Spare nozzles can be stored in a jar of acetone. In this way, they will always be ready for use without pre-cleaning.
Filament
Filament cleaning is one of the safest methods that does not involve intervention in the design of the extruder or partial disassembly of this unit. Two types of plastic are used to clean the nozzle:
We recommend using the latter method as an alternative to manual or dry cleaning.
Carbon deposits on the filament
Prevention of clogging - advice from experts
To keep the extruder and nozzle in good condition, it is worth following a number of rules:
The main thing is not to delay cleaning if the printer suddenly stops working.
Nozzle cleaning is an important and necessary procedure.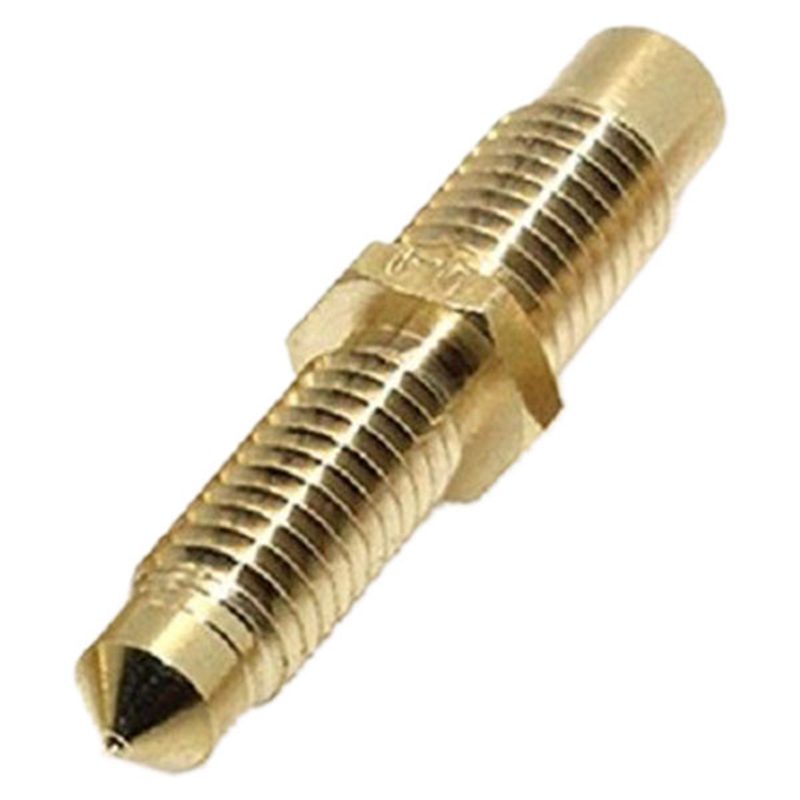 It is carried out in critical cases, as well as in the form of prevention. The cleaning method depends on the availability of improvised tools or chemical cleaners. It is best to buy a few cleaning filament sticks so that the printer is ready for use in just a few minutes after removing the cork.
Get expert advice
The 3 most common 3D printer errors and how to fix them・Cults
One-click printing is available for professional machines, but hobby printers often need more setup and troubleshooting. In this article, you will learn about the most common problems you will face as a designer and how to solve them.
When moving through the empty space, a filament sometimes oozes out of the nozzle, which then sticks to the surface of the print. This is called stringing and it shows up as small webs between prints that can be a hassle to remove.
Using shrinkage:
Adjusting shrinkage values is the best thing you can do to combat strings in 3D printing. As your nozzle passes through the gap, the extruder pulls the filament in and out through the hot end to prevent it from escaping. Done right, this is effective for removing strings.
The main variables to keep in mind when considering retraction are speed and distance. Speed determines how fast the extruder moves the filament up through the hot end, and distance determines how far the filament travels.
If the speed is too low, spots may form on the print surfaces or balls may form between the surfaces. Pulling too hard can block the nozzle or create areas where the filament does not settle.
If the distance is too long, the printout will be smudged and the filament will jam. Too little spacing won't prevent the threads from covering your prints.
Adjusting the shrink distance and speed in your slicer is the best thing you can do to fight strings. Some slicers also include special rib and rub settings. They can be powerful tools for setting shrinkage values, and consult a specific slicing machine to find out how they are used.
To determine optimum shrinkage values, first determine whether you are using a Bowden or Direct Drive extruder. Direct drive extruders generally require less shrinkage distance than bowden extruders. Next, determine which material you are using, as different materials require different shrink settings.
Materials such as PLA and ABS generally work well with speeds of 40mm/s - 60mm/s and distances of 0.5mm - 1mm on direct drive units. Bowden systems usually win at speeds from 30 mm/s to 50 mm/s and distances of about 2 mm. More exotic materials such as TPU often require slower shrink rates and longer shrink distances.
Set the travel speed for non-printing movements:
The faster the nozzle passes through the gaps, the less time there is for the filament to flow out of the nozzle. Most slicers have a variable "travel speed for non-printing movements" that you can change to adjust the speed at which your nozzle travels through the gaps. MatterHackers has done a lot of experimentation tweaking things like zoom distance, zoom speed, and move speed, and you can find the results here. Their experiment showed that 150 mm/s is the ideal travel speed for many machines.
Adjust the temperature of the nozzle:
If after changing each of these values you still notice tension in the thread, it is likely that the temperature is too high. Heat reduces the viscosity of the molten filament and makes it more prone to stringing, so if all else fails, adjust the extrusion temperature. Note that this will generally reduce print strength, so the extrusion temperature should not be lowered below the minimum specified by the manufacturer.
Many of us have experienced the situation when, upon returning to the printer, we found that the part had come off the bed and formed either an amorphous clot or plastic spaghetti, shown below. For an in-depth look at treatment methods to improve the adhesion of your bed, check out this guide. We will give you some general advice.
The first layer of your print is the most important factor when it comes to layer adhesion. A reliable first layer will increase your chances of a successful print.
Level the bed:
Leveling the bed is one of the most difficult steps in printer calibration, but one of the most important for a reliable first coat. A misaligned bed will cause some parts of the print to be less compressed than others and will likely cause buckling in the later stages of printing.
Adjust the Z Offset:
In most 3D printers, the Z axis is the vertical axis that defines the space between the bed and the nozzle. For the first printing layer, it is necessary that the nozzle be displaced relative to the bed by 0.10-0.25 mm. This will ensure that the first layer is pressed lightly against the substrate without causing poor extrusion due to over-compression.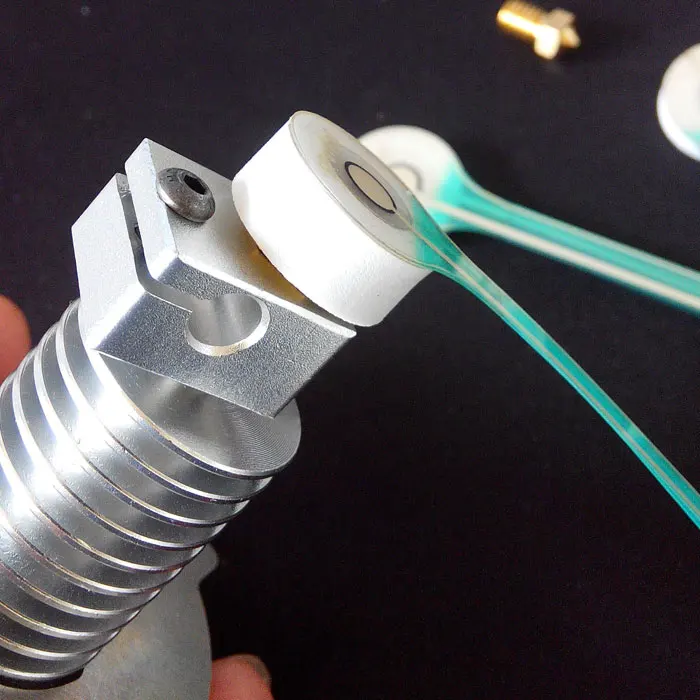
Too much offset will reduce the contact area between the first layer of the print and the bed, which can lead to delamination of the part. Too low an offset will prevent the nozzle from extruding plastic and may result in engine misfiring.
Adjust the temperature of your bed:
Plastics shrink when cooled, causing an effect known as warping. When the plastic is compressed, it pulls inward, causing the edges of the print to curl up, which can cause the print to peel off. The thermal pad keeps your base layers warm and prevents them from shrinking inwards. If you notice that the edges of your print are curling, try increasing the bed temperature.
Plastic extruded at too high a temperature often gives inaccurate and incomprehensible characteristics. This problem is most typical for layers having a small cross section.
Layers with a small cross-section are printed quickly, which can lead to gradual heating. This creates layers that become soft and warp with continuous printing. Models such as the Eiffel Tower illustrate this effect at the top of the tower. As each layer decreases in size, the oven spends time in the same area, causing the layers to heat up and eventually deform.
Multi-layer cooling:
The best way to deal with this problem is to install a fan designed to cool the layers of the print. This fan should be directed so that it doesn't cool the heating block of your hot end, but cools the melted plastic as soon as it hits the hot end. Many machines use two fans to cool the bed only.
Slow down print speed:
Slow down print speed can help with some details by allowing layers to cool before applying more plastic. Note that for some geometries this can worsen warping as the nozzle gets more time to heat up the print layers.
Lower print temperature:
If all else fails, consider lowering the extrusion temperature. This should be used as a last resort, as it is generally only marginally effective in reducing warping and reducing print strength.