Diy 3d printer table
The 10 Best 3D Printer Tables and Workbenches in 2023 – Clever Creations
Image: Ultimaker
Our site is reader-supported. When you buy via the affiliate links on this site, we will receive a commission at no cost to you. All opinions remain our own. Learn more
Best overall
Seville Classics UltraHD Lighted Workbench
- Rigid build quality
- Perfect area for printing essentials
- Adjustable legs
Check Price
Best on a budget
Safco Products Deskside Wire Machine Stand
- Easy to move around
- Durable build quality
- Affordable
Check Price
Most futureproof
Seville Classics Rolling Cabinet Workbench
- Versatile design
- Wide tabletop
- Lots of storage capacity
Check Price
A 3D printing workspace is so much more than the 3D printer itself. Along with it come the filament rolls, various tools, accessories, and post-processing setup. Initially, you can do with a bare minimum table for a 3D printer; however, as you progress with the hobby, you will likely find the need for a dedicated 3D printing setup.
A 3D printer table or workbench allows you to organize your stuff and find it quickly when you need it. But, with loads of options available in the market, it can get confusing to select the ideal one for your needs.
In this article, we’ll get into the different criteria for choosing a 3D printer table or workbench and then look at the options available in the market for you to buy. Read on to learn more about these tables and choose the best 3D printer table that suits your setup.
| Best 3D Printer Table | Surface Area | Storage | Price (~) | Best Offer |
|---|---|---|---|---|
| Seville Classics UltraHD Lighted Workbench | 48" x 24" 122 x 61 cm | ** | $399 | Amazon |
| Safco Products Deskside Wire Machine Stand | 24" x 20" 61 x 51 cm | *** | $109 | Amazon |
| Seville Classics Rolling Cabinet Workbench | 77" x 37. 5" 5"196 x 95 cm | ***** | $999 | Amazon |
| Gladiator Steel Cabinet | 31" x 28" 79 x 71 cm | **** | $299 | Amazon |
| Seville Classics Workbench Desk Table | 48" x 24" 122 x 61 cm | * | $189 | Amazon |
| Gladiator Wide Hardwood Workbench | 66.5" x 19.96" 169 x 51 cm | * | $299 | Amazon |
| 2x4 basics 90164 MI Custom Workbench | Customizable | **** | $76 | Amazon |
| Husky Extra Deep 46 in. 9-Drawer Mobile Workbench | 46" x 25" 117 x 64 cm | ***** | $655 | Amazon |
| Mighti Foldable Heavy Duty Workbench | 44.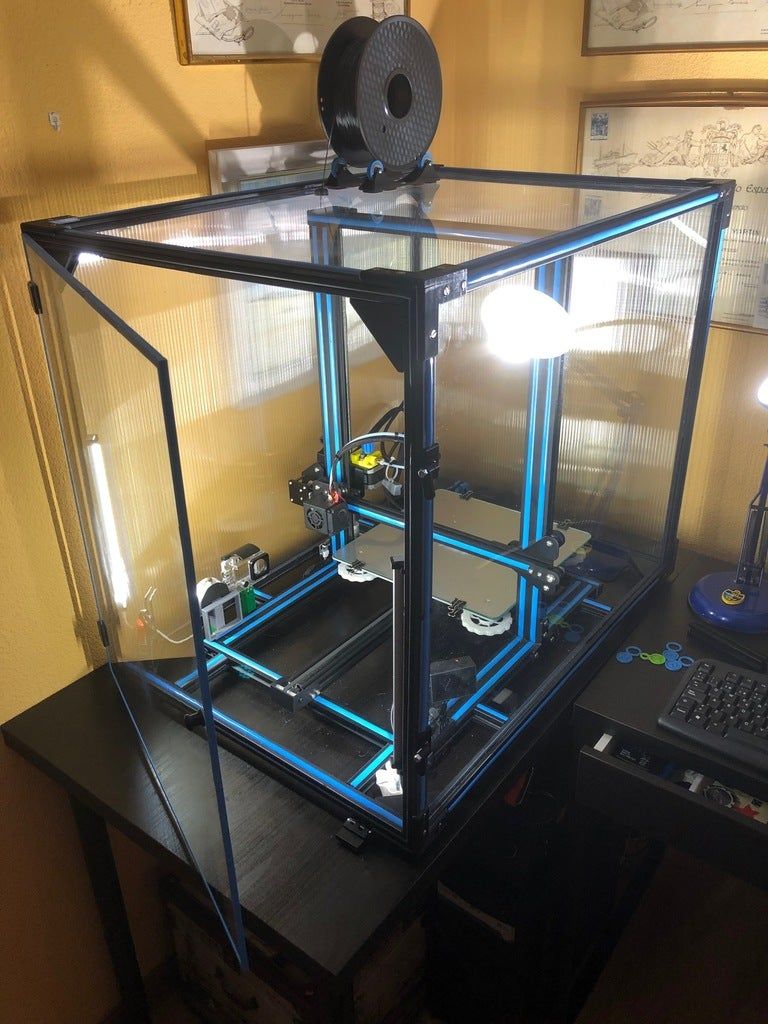 5" x 27.5" 5" x 27.5"113 x 70 cm | ** | $229 | Amazon |
| IKEA LACK table(s) | 21.65" x 21.65" 55 x 55 cm | * | $31 | Amazon |
Best 3D Printer Tables and Workbenches in 2023
Seville Classics UltraHD Lighted Workbench
Best overall
Check Price
Amazon
If you have a single 3D printer and need a robust and sturdy table, the Seville Classics Ultra HD is an ideal desk for you. It has solid steel construction, a thick wooden flat surface, and fluorescent light along with a cantilever top shelf.
The workbench features a huge pegboard that you can use to hang large tools that you need to use frequently. You get a power surge protector included with the workbench with six power sockets and 2 USB plugs, giving you an easy solution to plug in all your 3D printers and accessories, like a UV curing station.
The table can hold an evenly distributed weight of 500 lbs (227 kg), and the drawers are designed to hold an additional 60 lbs (27 kg) of weight. With its industrial design, durable build quality, and wide desk surface, the Seville Classics Ultra HD is in our book the best 3D printer table for beginner and advanced hobbyists.
Standout Features
- Fingerprint-resistant drawers
- Easy-to-reach power strip
- Powder-coated finish
Technical Details | |
|---|---|
| Dimensions (W x D x max. H) | 48" x 24" x 65.5" 122 x 61 x 166 cm |
| Weight capacity | 500 lbs 227 kg |
| Material | Crafted solid steel body and solid beech wood top |
What We Like
- Rigid build quality
- Perfect area for printing essentials
- Adjustable legs
Could Be Better
- Limited storage capacity
- Limited tabletop depth
Find Seville Classics UltraHD Lighted Workbench at
Amazon
Safco Products Deskside Wire Machine Stand
Best on a budget
Check Price
Amazon
The Safco Deskside machine stand is a budget 3D printer table that can be used for a single 3D printer, and it can fit an Ender 3 V2 or small resin 3D printer like those from the Elegoo Mars series.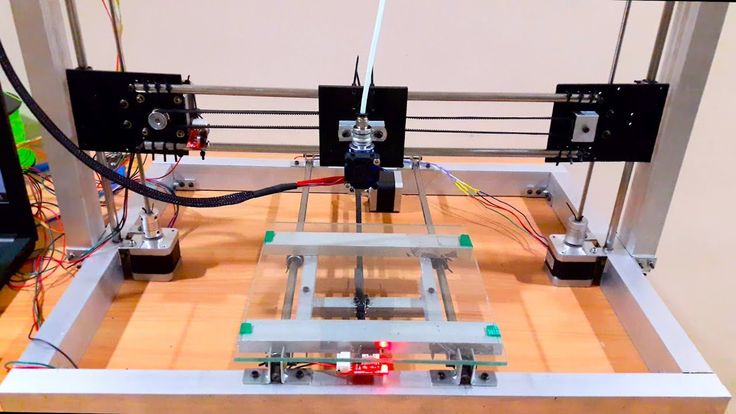 The table was initially intended for paper printers and office stationery, but its rugged build quality and low price make it equally suitable for 3D printing.
This table has three shelves, with the top desk surface designed to hold up to 100 lbs (45 kg) of weight. The bottom shelves have a mesh design and can hold 50 lbs (23 kg) of materials each. One great way to use this arrangement is to keep a 3D printer on the top work surface, with filament spools in the middle rack and the other tools on the bottom shelf.
The table is supported on four swivel wheels for easy mobility. The assembly is easy, with straightforward guides and an easy setup process. Overall, the Safco Wire stand is a decent quality table for small-sized 3D printers and beginners on a budget.
Standout Features
- Swivel wheels
- Adjustable shelf height
- Lightweight design
Technical Details | |
|---|---|
| Dimensions (W x D x H) | 24" x 20" x 27" 61 x 51 x 69 cm |
| Weight capacity | 100 lbs 45 kg |
| Material | Steel and Laminate |
What We Like
- Easy to move around
- Durable build quality
- Affordable
Could Be Better
- Lacks drawers or cabinets
- Limited weight capacity
Find Safco Products Deskside Wire Machine Stand at
Amazon
Seville Classics Rolling Cabinet Workbench
Most futureproof
Check Price
Amazon
The Seville Classics rolling workbench comes with an elegant yet purposeful design.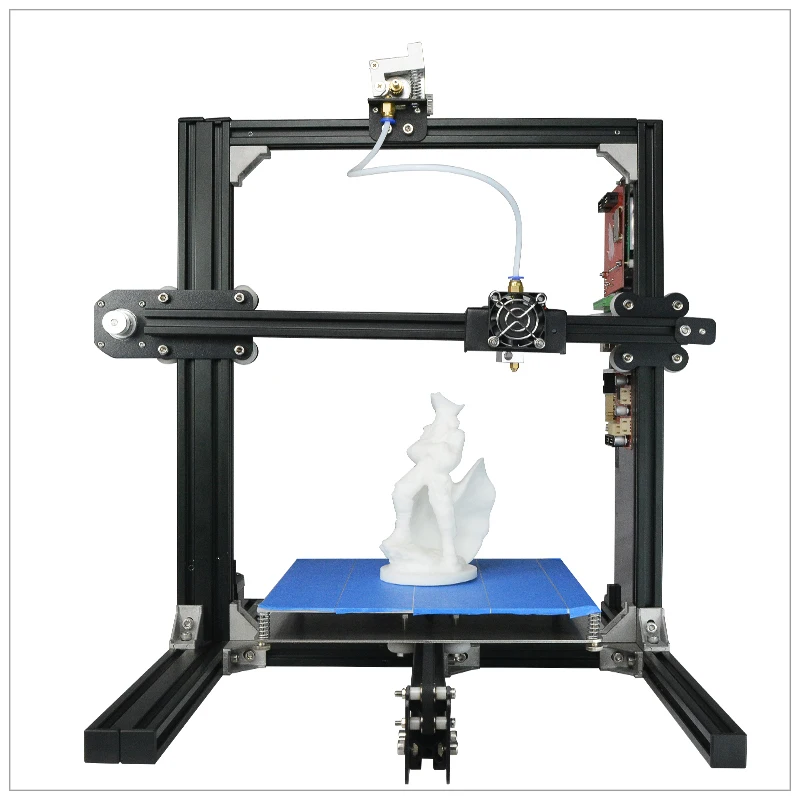 It has a rugged and durable build quality, with a solid wooden flat work surface, metal frame, and drawers. It is suitable for holding multiple 3D printers at once, including their accessories.
The workbench features eleven drawers that you can use to store and organize tools, spare filament spools, and more. It also has a two-door cabinet with a full-width shelf with four adjustable positions. All front surfaces are coated to prevent fingerprint marks, and you can lock the drawers and cabinet to protect your equipment.
To move the workbench quickly, it comes with five heavy-duty wheels. You can lock two of these to fix the table in one place. Overall, the Seville Classics is a solid, durable, and rugged table that you can use to accommodate all your 3D printing stuff and still have room for future expansions.
Standout Features
- Multi-sized drawers
- Hard rubber 5" wheels
- Polyurethane bumpers
Technical Details | |
|---|---|
Dimensions (W x D x max. H) H) | 77" x 37.5" x 20" 196 x 95 x 51 cm |
| Weight capacity | 500 lbs 227 kg |
| Material | Stainless Steel |
What We Like
- Versatile design
- Wide tabletop
- Lots of storage capacity
Could Be Better
- Costly
- Large footprint
Find Seville Classics Rolling Cabinet Workbench at
Amazon
Gladiator Steel Cabinet
Best 3D printer storage cabinet
Check Price
Amazon
The Gladiator steel cabinet is a heavy-duty table suited for use in a garage space. It can accommodate a single 3D printer, and you can store the rest of your accessories on the cabinet shelves below the tabletop.
Its shelf is adjustable to fit a variety of 3D printer tools, and you can use it to hold up to 75 lbs (34 kg) of weight.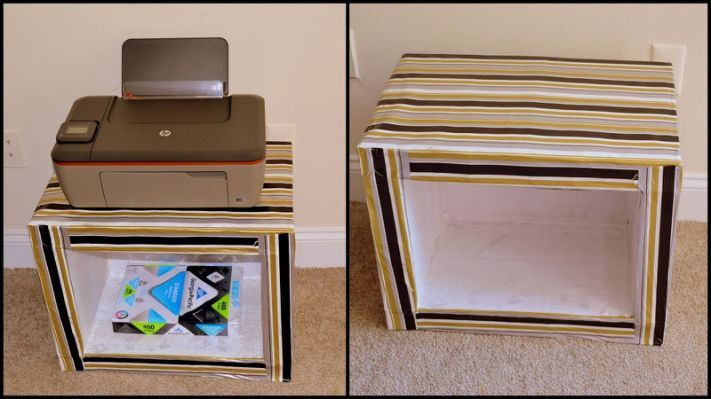 You also get adjustable legs so that you always have an evenly leveled desk surface. Optionally, you can add caster wheels if you need more mobility and want to move your 3D printer cabinet around.
The included instructions are not particularly detailed, and you will need to have some experience and be careful during the assembly process. The Gladiator steel cabinet is best suited for storing filament spools, small tools, and 3D printer electronics.
Standout Features
- Adjustable storage shelves
- 10-year limited warranty
- Steel cabinet panels
Technical Details | |
|---|---|
| Dimensions (W x D x H) | 28" x 18" x 31" 71 x 46 x 79 cm |
| Weight capacity | 300 lbs 136 kg |
| Material | Alloy Steel |
What We Like
- Solid build quality
- Ideal for heavy-duty use
- Can be stacked on top of other table
Could Be Better
- Poor quality instructions
Find Gladiator Steel Cabinet at
Amazon
Seville Classics Workbench Desk Table
Best adjustable table
Check Price
Amazon
The Seville Classics workbench table is a heavy-duty, height-adjustable desk. Its height can be easily adjusted between 28.5″ (72.4 cm) and 42″ (106.7 cm) at 1.5″ (3.8 cm) increments. It gives you the flexibility to adjust the table surface according to your needs and get easy access to the 3D printer without compromising on your posture.
The table’s construction is solid with a metal frame and a 1.5″ (3.8 cm) thick wooden work surface that lets the desk hold 1000 lbs (454 kg) of evenly distributed weight.
This workbench does not have cabinets or drawers to store your extra 3D printing stuff. Nonetheless, considering its adjustable nature, large surface area, and ability to hold large weights, the Seville Classics workbench is an ideal 3D printer table for a large 3D printer.
Standout Features
- Adjustable height
- Easy to assemble
- Multi-purpose desktop
Technical Details | |
|---|---|
Dimensions (W x D x max.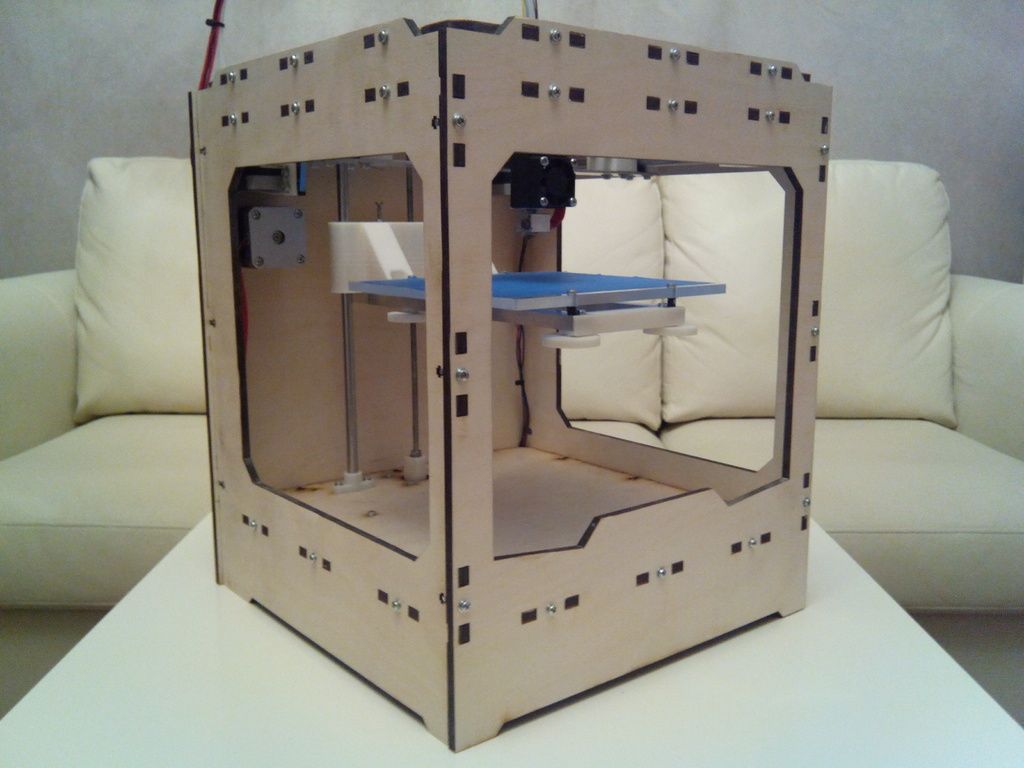 H) H) | 48" x 24" x 41.5" 122 x 61 x 106 cm |
| Weight capacity | 1000 lbs 454 kg |
| Material | Wood, Alloy Steel |
What We Like
- Wide range of height options
- High weight capacity
- Durable build quality
Could Be Better
- No storage options
Find Seville Classics Workbench Desk Table at
Amazon
Gladiator Wide Hardwood Workbench
Most minimalist table
Check Price
Amazon
The Gladiator Wide Hardwood workbench is an excellent solution if you need a simple yet sturdy 3D printing table. It comes with a generous desk surface, solid construction, and is easy to set up for any workspace.
Its 1-1/2″ (38 mm) tabletop can support up to 1500 lbs (680 kg) of weight, making it ideal for heavy 3D printers.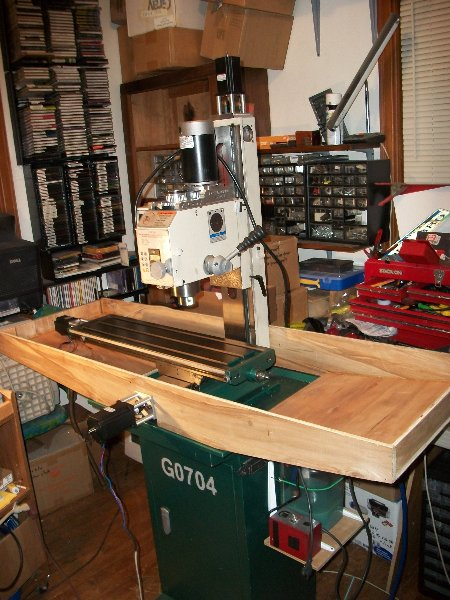 The top of the desk is treated with a UV cured coating that helps it resist any chemical stains, ideal if you work with a resin 3D printer.
The Gladiator Wide hardwood workbench also comes with steel leveling legs that will help you get a perfectly level work surface. There is no option to add caster wheels for more mobility, however.
One limiting factor of the workbench is its depth, and it restricts the maximum size of the 3D printers you can use it for. Aside from that, the Gladiator hardwood workbench is an excellent option if you’re looking for a heavy-duty yet basic 3D printing table.
Standout Features
- UV-cured coated tabletop
- Supports 1500 lbs / 454 kg of weight
- Minimal assembly
Technical Details | |
|---|---|
| Dimensions (W x D x max. H) | 66.5" x 19.96" x 38.31" 169 x 51 x 97 cm |
| Weight capacity | 1500 lbs 680 kg |
| Material | Steel |
What We Like
- Good for large 3D printers
- Chemical-resistant surface
- Simple to assemble
Could Be Better
- Lacks storage space
- A bit overpriced
Find Gladiator Wide Hardwood Workbench at
Amazon
2x4 basics 90164 MI Custom Workbench
Most customizable
Check Price
Amazon
If you need a fully customizable solution for your 3D printing workspace, the 2×4 custom workbench is probably the best table for your needs.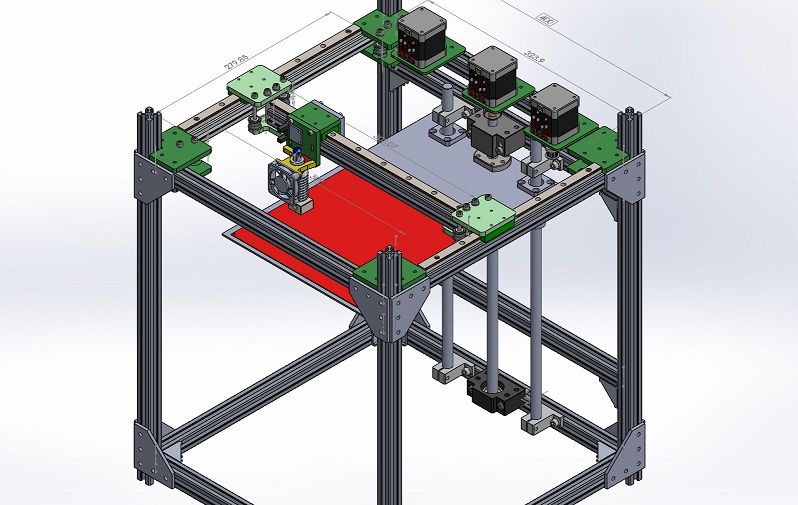 It comes with four workbench legs and six shelf links that you can set up in various configurations and get the perfect table for your 3D printing setup.
This workbench is somewhat of a DIY project, and you will need to provide your own lumber to build the table and shelves. This means this workbench needs more time and effort than the others on this list, but you can also fully customize it to your needs.
The brackets are made up of heavy gauge structural resin that can support 1000 lbs (454 kg) of weight when combined with the lumbar. For the construction process, you only need to execute straight and 90-degree cuts, removing the need for more serious equipment like a miter saw.
While purchasing, you can select various options and choose which one best matches your requirements. Because of its high configurability, the 2×4 basics Custom Workbench is the best table for DIY enthusiasts and experienced users who need a custom-built solution for all their 3D printing needs.
Standout Features
- Pre-bored screw holes
- Durable construction
- Versatile use cases
Technical Details | |
|---|---|
| Dimensions | Customizable |
| Weight capacity | 1000 lbs 454 kg |
| Material | Heavy-gauge resin |
What We Like
- Completely customizable design
- High weight capacity
- Only straight cuts required
Could Be Better
- Requires additional components (lumber)
- Needs extra time and effort
Find 2x4 basics 90164 MI Custom Workbench at
Amazon
Husky Extra Deep 46 in. 9-Drawer Mobile Workbench
Most rugged
Check Price
Amazon
The Husky extra deep mobile workbench has an all-metal construction and it comes with nine lockable 24. 5” (62 cm) deep drawers. Each drawer can hold up to 100 lbs (45 kg) of weight, with the bottom ones rated for 200 lbs (91 kg).
This workbench comes with a power strip with four outlets and two USB ports for easy access to power for all 3D printers and other powered tools. The four castor wheels and ergonomically designed handle let you quickly move your table to your desired location, whenever you need.
At almost $700, the Husky mobile workbench is undoubtedly not a cheap option. You should only consider it if you’re a serious professional who needs a rugged and heavy-duty 3D printer cabinet for long-term use.
Standout Features
- Ball bearing slides
- Lockable
- Extra deep drawer storage
Technical Details | |
|---|---|
| Dimensions (W x D x max. H) | 46" x 25"x 37" 117 x 64 x 94 cm |
| Weight capacity | 1200 lbs 544 kg |
| Material | Steel, wood |
What We Like
- Rugged construction
- Easy to move around
- Integrated power strip
Could Be Better
- Heavy
- Costly
Find Husky Extra Deep 46 in. 9-Drawer Mobile Workbench at
Amazon
Mighti Foldable Heavy Duty Workbench
Best foldable 3D printer workbench
Check Price
Amazon
If you have limited space in your garage and need a 3D printer table that you can move easily out of the way, the Mighti Foldable workbench is perfect. It folds up when you don’t need it and reclaims your space for other activities.
It comes with a pegboard for organizing and attaching your tools with ease. The pegboard also substitutes the lack of storage drawers with a cantilevered shelf on the top.
The thick MDF tabletop supports 400 lbs (182 kg) of weight, making it suitable for heavy-duty applications. The table needs no assembly, and you can get started using it within a few minutes from unboxing.
Overall, the foldable design and the metal construction make it suitable for use in cramped spaces and for holding heavy 3D printers. It is ideal for people who have a small-sized 3D printing workspace but still need a solid 3D printer table.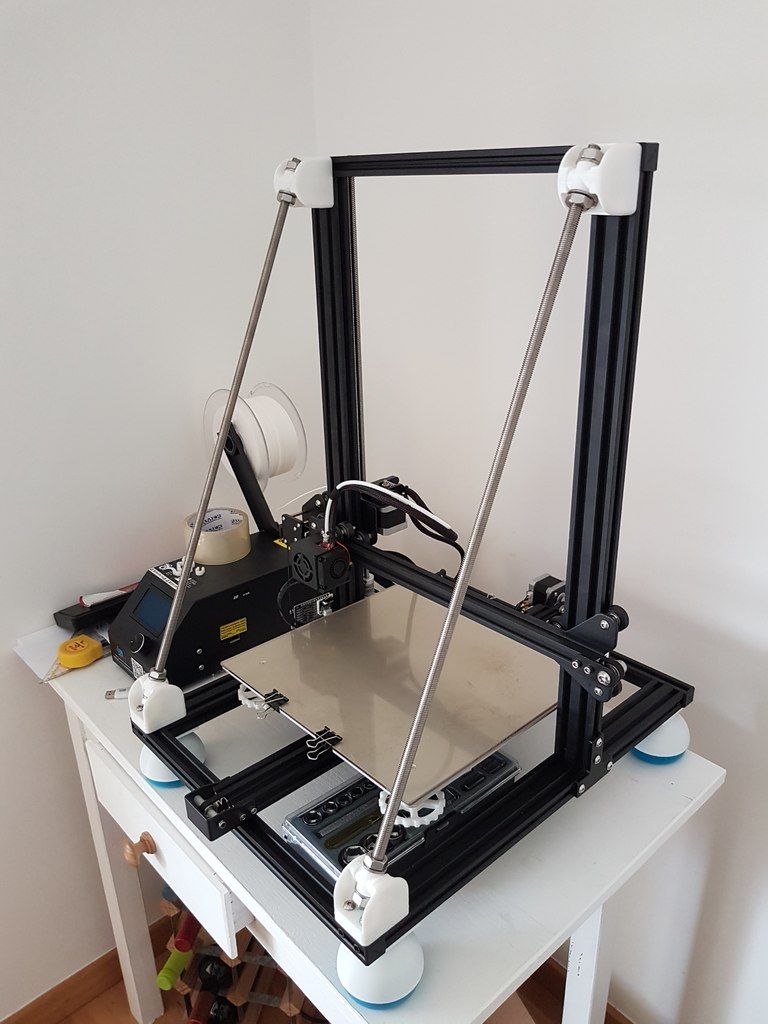
Standout Features
- Foldable design
- Large surface area
- Big pegboard
Technical Details | |
|---|---|
| Dimensions (W x D x max. H) | 44.5" x 27.5" x 62" 113 x 70 x 158 cm |
| Weight capacity | 400 lbs 182 kg |
| Material | Stainless steel |
What We Like
- Easy assembly
- Saves space
- Study construction
Could Be Better
- Limited storage space
- Advertised weight limit differs from actual
Find Mighti Foldable Heavy Duty Workbench at
Amazon
IKEA LACK table(s)
Best DIY 3D printer table
Check Price
Amazon
IKEA LACK tables are one of the popular 3D printer tables you can buy right now. They’re highly modular, cheap, and easy to build. You can stack these tables on top of each other and create a basic yet effective 3D printing workbench for your 3D printer.
Due to its design, stacked LACK tables also help enclose your 3D printer from all sides. 3D printer enclosures let you print with additional materials and isolate your 3D printer from the external environment. Prusa3D has an excellent guide on how to construct your own enclosure with these tables.
It is an elegant and versatile table/enclosure solution that you can use in your home, garage, and offices. The LACK IKEA table is an excellent choice for someone who wants to build a cheap DIY 3D printing table, but still needs flexibility in terms of design and features.
Standout Features
- Minimal design
- Easy assembly
- Versatile use
Technical Details | |
|---|---|
Dimensions (W x D x max.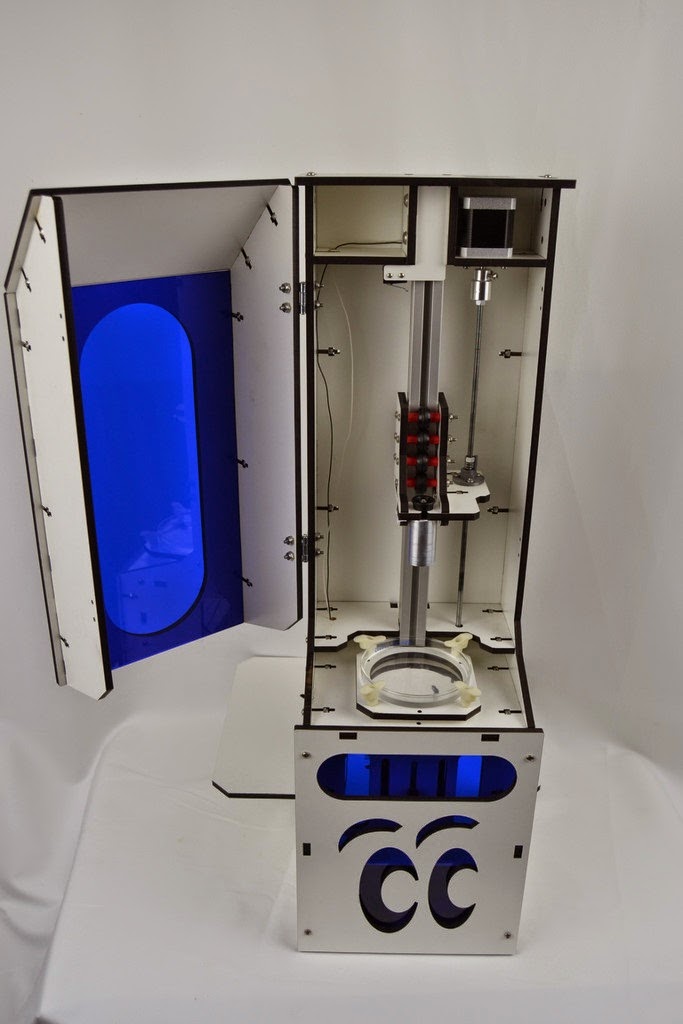 H) H) | 21.7" x 21.7" x 17.7" 55 x 55 x 45 cm |
| Weight capacity | 55 lbs 25 kg |
| Material | Particleboard, Fibreboard, ABS plastic |
What We Like
- Budget-friendly
- Aesthetic looks
- Can be used as enclosure frame
Could Be Better
- Not sturdy
- Limited weight capacity
Find IKEA LACK table(s) at
Amazon
What to Look for in 3D Printer Tables & Workbenches
Surface area
An important criterion for choosing the best table for your 3D printer is the surface area you get. It dictates the maximum size of the printer that you can fit on the table. A large surface area will guarantee that you have ample workspace for your 3D printer and extras. Especially when you work with (M)SLA/DLP printers, there are many resin 3D printing accessories that you need space for.
What is critical here is to ensure that the table will fully support the base of your 3D printer. Any overhanging edges or corners can lead to wobbling and leveling issues. Additionally, having a rigid, stable surface underneath your printer will reduce vibrations and help you get better print quality.
Most 3D printer tables mentioned in this list have sufficient length to support a medium-sized 3D printer like the Ender 3 V2 or the Prusa i3 MK3S+. However, we recommend measuring your 3D printer’s footprint and matching it with the table’s surface area to guarantee that your printer will be fully supported.
Storage Space
3D printers come with loads of printing accessories. Allen keys, flush cutters, repair tools, post-processing equipment, and extra filaments are only a few of them. The best workbenches will have sufficient space and allow you to store all these things in an easily accessible place.
Drawers and cabinets help you to organize and find your stuff quickly.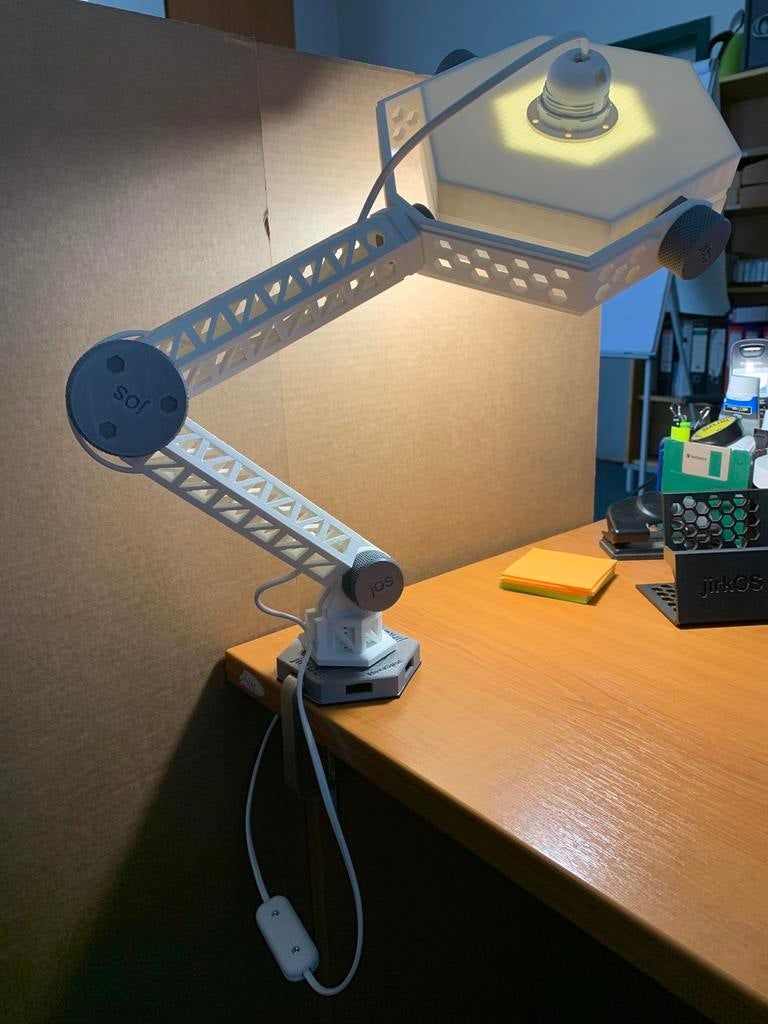 Adjustable shelves will let you store oversized items without problems. If you want to 3D print with multiple 3D printing materials, like PLA, ABS, PETG, TPU, it can be helpful to have a dedicated drawer for each of them.
Stability
A 3D printer needs to be as stable as possible to get a high print quality during the printing process. A weak or shaky table will cause the printer to wobble and results in poor print outputs.
Stationary tables that do not have wheels will give maximum stability while printing. These have a solid foundation and will not move along with the motion of your 3D printer. In contrast, a table with wheels can sway with the movement of your hot end or the print bed at higher print speeds.
Material
If you’re looking for a heavy-duty and sturdy table, looking at its material will probably help you in the long run. A metal frame with a solid wood top tends to give the best stability and structural integrity for heavy loads.
While selecting a metal table, you will need to consider its post-processing. A corrosion-resistant coating offers you good protection against rust and exposure to the spilling of 3D printer resin, for example.
The same goes for a solid wood top. An epoxy or other coating for the wood top is likely to improve its long-term appearance.
Accessories
Power surge strips, pegboard clips, and lights are some of the additional accessories you can get with your table. These accessories will help you organize and use your workspace in a better way and 3D print more efficiently.
Basic tables will skip on other accessories to save on the cost. But if you’re getting a premium desk, it will be helpful to get one with as many attachments as possible. The Seville Classics Lighted Workbench is one of the best tables that comes with extra attachments designed to enhance your user experience.
Adjustability
Adjustability is not the prime factor for 3D printer tables. However, an ergonomically designed table that can be adjusted will be better suited for many users.
An adjustable height table will let you position your printer as per your preferences. You can quickly adapt the table to suit your workspace, and it will give you the flexibility to work on the 3D printer with more ease.
However, an adjustable desk will lose out on storage space and might have a less stable surface than fixed tables, reducing its stability and negatively affecting its user experience.
Weight Capacity
A 3D printer table should be strong enough to support the weight of multiple 3D printers at once. You will need to factor in the drawers and cabinets’ weight capacity, and it will inform you what items you can store within your table.
A solid table with a metal frame and wooden tabletop will be durable and have more weight-bearing capacity. Meshed structure or plastic legs will reduce the weight capacity of your table and result in a less sturdy table.
If weight capacity is your primary factor, the Gladiator Hardwood Workbench can support 1500 lbs (680 kg) of weight at once and is the best table in the list.
Frequently Asked Questions
Where is the best place to put a 3D printer?
The best place to put a 3D printer is on a 3D printer table. This will allow you to have a flat surface to work with and it will also provide stability for the printer. You will want to make sure that the table is level and that it is large enough to hold the printer and printing accessories without taking up too much space in your room.
Does a 3D printer need a stable table?
Yes, a 3D printer needs a stable table or desk to work properly. The table needs to be sturdy so that it doesn’t move around as the printer is working.
An unstable surface can cause the printer to produce inaccurate and low-quality prints. A big waste considering the time and effort that can go into optimizing a 3D printer’s performance.
Does a 3D printer need to sit on a level surface?
Yes, a 3D printer needs to sit on a level surface in order to print correctly. If the table, workbench or desk is not level, the printer’s frame can end up misaligned and prints might not come out correctly.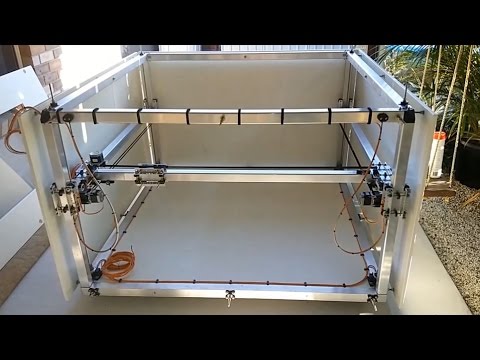
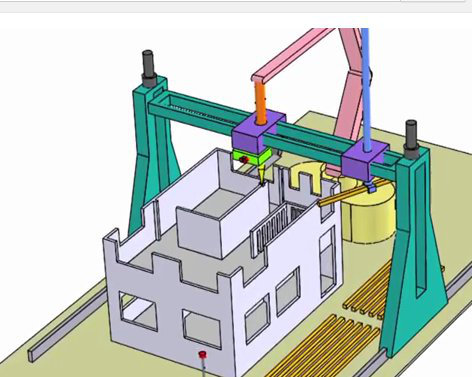
Can 3D printers make furniture?
Yes, 3D printers can most definitely make furniture! A lot of people don’t realize that 3D printing technology has come a long way in recent years and is now capable of printing out all sorts of objects, including furniture. In fact, there are even companies that specialize in manufacturing 3D-printed furniture.
So if you’re interested in getting some new furniture but don’t want to go through the hassle (and expense) of buying it from a store, then you might want to consider getting a 3D printer and making it yourself. It’s a great way to save money and have some fun too!
Can you put a 3D printer on the floor?
It is possible to put a 3D printer on the floor, but it is not usually recommended. Most printers are designed for use on a table or desk, and putting them on the floor can lead to problems with stability and printing quality.
If you do need to place your printer on the floor, there are a few things you can do to improve its stability.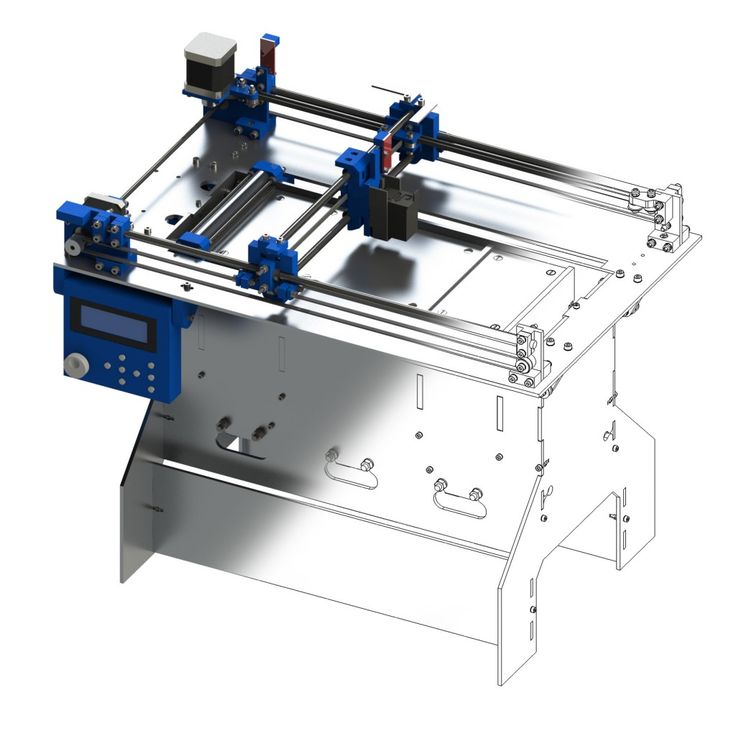 For example, you can set it on a non-slip surface like a rubber mat. Also make sure to keep any cords or cables clear of traffic areas so they don’t get stepped on or tripped over.
Can 3D printers be left alone?
Leaving a 3D printer unattended is not recommended, as it may cause a fire. The printers use heat to create objects from plastic filament, and if something goes wrong while the printer is printing, the heat can build up and cause a fire.
In addition, many 3D printers require active cooling to keep them from overheating, and if the cooling system malfunctions or is turned off, the printer can overheat very quickly.
Conclusion
A 3D printer table will help store all your materials in one place and let you organize your work efficiently. It needs to be robust, sturdy and has lots of storage space to accommodate all your 3D printing accessories and filament spools with ease.
The Seville Classics Ultra HD lighted workbench is overall the best 3D printer table that you can buy.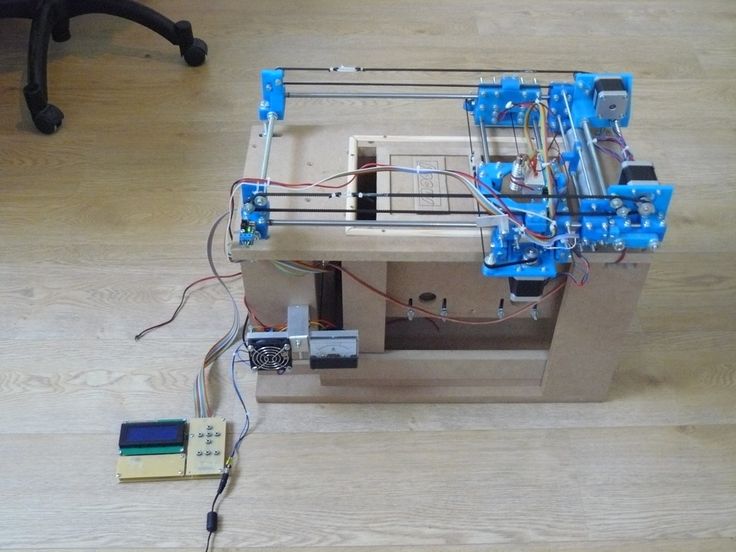 It has a sturdy tabletop, sufficient storage space, pegboard, and an industrial design that easily fits any garage, home, or office space.
If customizability is your primary criterion and you love to DIY, the 2x4basics 90164 MI Custom WorkBench and Shelving Storage System is an excellent choice for you. Alternatively, if you need a versatile and future-proof table, the Seville Classics Rolling Cabinet Workbench is a well-rounded option for your needs.
Let us know your experiences with the 3D printer tables, and if you have any questions, feel free to comment below.
9 Amazing DIY 3D Printer Enclosure Ideas – Clever Creations
Image: Jure Korber
Our site is reader-supported. When you buy via the affiliate links on this site, we will receive a commission at no cost to you. All opinions remain our own. Learn more
Open-frame 3D printers, like the Ender 3, have become a common sight amongst consumer printers. Open frames help to keep the manufacturing costs low but make it difficult to 3D print with high-temperature filaments such as ABS and Nylon.
A 3D printer enclosure is an ideal solution for this issue. It increases the safety of your printer and isolates it from the external environment. 3D printer enclosures can be bought off-the-shelf, but there are also plenty of DIY enclosures made of cardboard, plastic, or metal.
Let’s take a look at some of the best DIY 3D printer enclosures that you can build for your printer that do not cost a fortune!
Why Use a 3D Printer Enclosure?
Open-frame hobbyist 3D printers offer limited material compatibility and safety. They expose components to dust and dirt and have no air-filtration system. There is also a risk of pets and children interfering with the 3D printing process or touching the hot elements of the printer.
An enclosure minimizes these drawbacks by isolating the 3D printer in an enclosed space. It helps to maintain a constant temperature which comes in handy when 3D printing with high-temperature filaments like ABS and Nylon.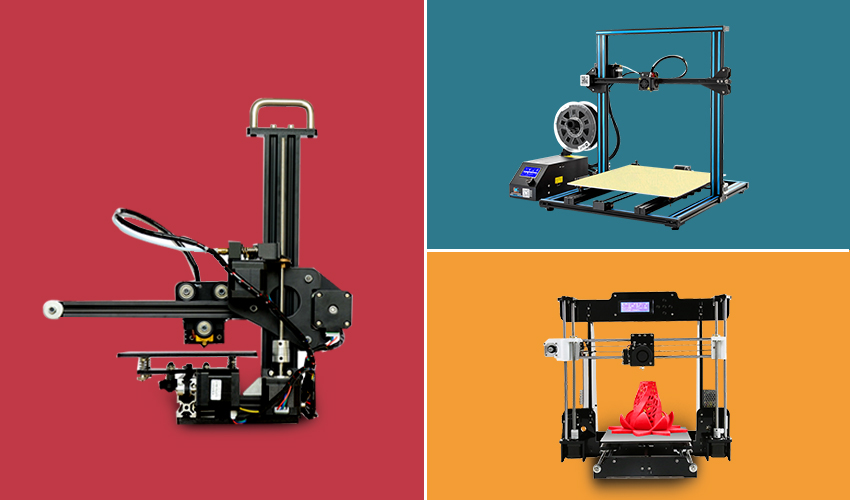 It further aids in noise reduction, making 3D printing at home or in offices more convenient.
You can also add an air filtration system to the enclosure to filter out any 3D printer fumes, thus increasing the safety of your 3D printing area. Not to mention, enclosures also make 3D printers more aesthetically pleasing and easier to integrate into your workspace.
To summarize, a 3D printer enclosure increases the material compatibility, print quality, and usability of your printer.
Which Enclosure to Get?
There are a few options when it comes to 3D printer enclosures. You can buy an enclosure off-the-shelf or make your own from scratch.
DIY 3D printer enclosures can be cheap if you want them to be, but they do require a bit of effort and time to put together. The best enclosures are made from materials that are both sturdy and have good thermal insulation properties.
If you’re looking for an enclosure that is easy to set up and does not require any DIY skills, then we suggest buying an off-the-shelf 3D printer enclosure.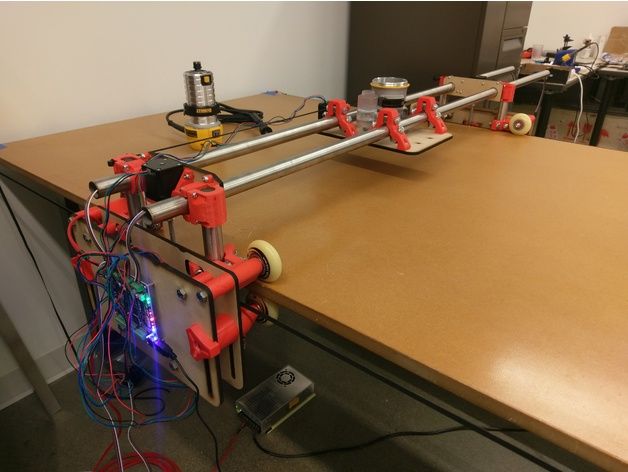 These are typically made out of plastic or aluminum and come with all the necessary fixtures and fittings.
Another alternative is to simply buy an enclosed 3D printer, but those come at a significantly higher cost.
Recommended:
The 9 Best Enclosed 3D Printers
Whichever direction you choose to go in, make sure to measure if you have enough space on your 3D printer table or workbench.
If you want a 3D printer enclosure that is fully customized to your 3D printer model and specific needs, then you will have to make your own. Now let’s look at some cheap and creative DIY 3D printing enclosures!
Cheap 3D Printer Enclosure Ideas
DIY Enclosures
IKEA LACK 3D Printer Enclosure
Image: Mikolas Zuza via Prusa3D
The IKEA Lack enclosure is a recognizable and robust DIY 3D printer enclosure. It is cheap, easy to build and customize, and is modular enough to accommodate any future changes in the enclosure design.
This enclosure uses a couple of IKEA Lack tables stacked on top of one another. You can use these tables as per your preferences. Usually, though, the top one is used as a 3D printer bay, with the bottom one for storing tools. The design allows you to move your power supply outside and protects the electronics from high temperatures.
There are a variety of designs available for free with detailed guides, and you can build them within a day. The IKEA Lack table enclosure is great for small to medium-sized 3D printers like the Prusa i3 MK3S+ and Creality Ender 3 as it is. And with some 3D printed leg extensions, you can even fit taller printers like the Creality CR-10 Smart Pro.
If you want to make things as easy as possible, you can even buy the required plexiglass panels as a pre-made kit.
DIYE Pack of 5 Plexiglass V1 1/8 Acrylic Sheet for IKEA Lack 3D...
Check PriceAluminum Extrusion Enclosure
Image: Namsted via Imgur
Aluminum extrusions are a great and easy way of building a structural frame.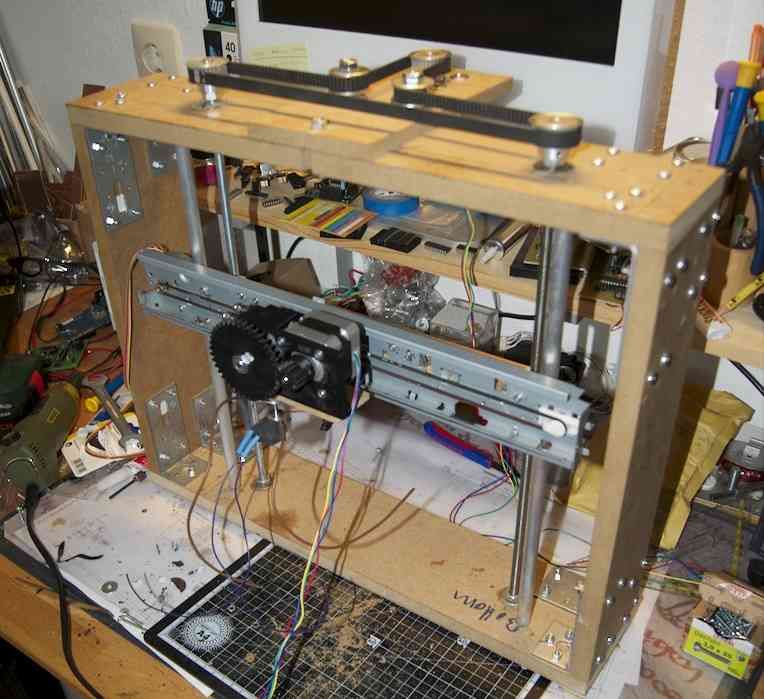 These are lightweight, strong, and easy to machine, making them ideal for building a 3D printer enclosure.
This aluminum extrusion enclosure gives better stability and durability than the IKEA Lack design. The maker has used custom-sized aluminum extrusions to accommodate a Prusa i3 MK3S+ 3D printer in the middle. The top is used for filament spools, and you can store your tools in the bottom section.
The enclosure is covered up with acrylic panels on all four sides, giving the print chamber good visibility. You can adjust the height of all four feet to get a leveled horizontal plane.
The project is not for beginners, as you will need to have some experience with machining and building things. But, if you’re up for it, it will prove to be an excellent learning project for you. An aluminum enclosure is very customizable, lasts longer, and acts as a perfect house for your 3D printer.
DIY Smart 3D Printer Enclosure
Image: Jure Korber
This smart 3D printer enclosure comes with a suite of electronics and sensors.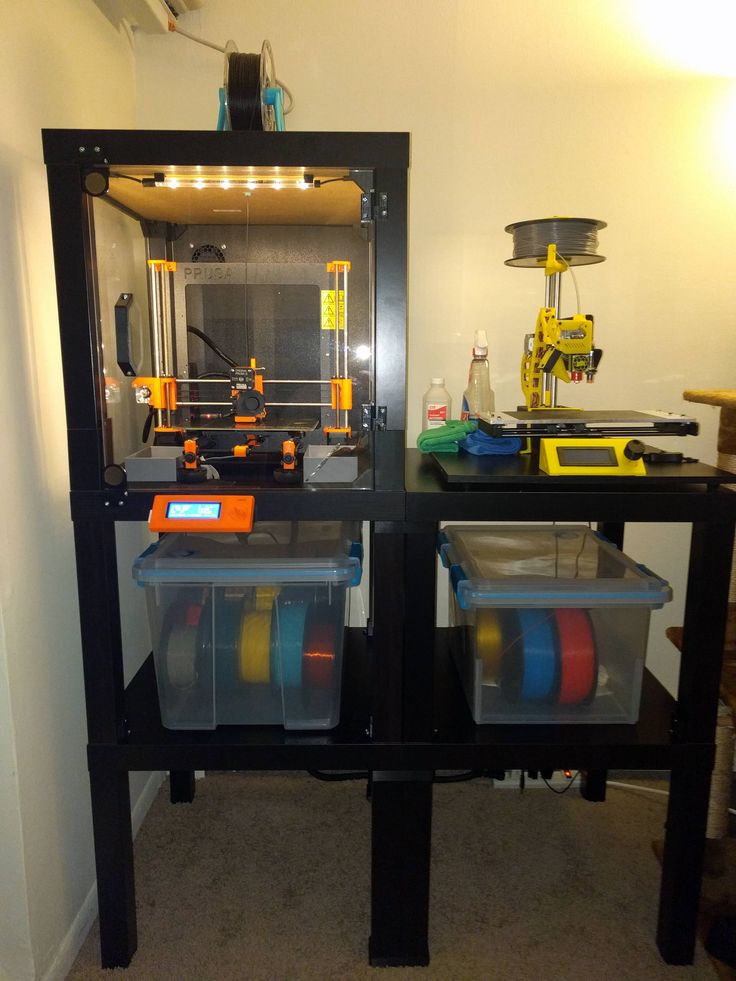 It has a 3.5 inch LCD screen, a smoke detector, door sensors, air filtration, temperature, humidity sensor, and controllable LED lighting.
The 3D printer enclosure is divided into two compartments. The bottom one is explicitly designed to fit a Prusa printer and the top one to store eight spools of 1 kg filaments at a time. The enclosure has a custom PCB board that lets you easily wire up and control its various features.
You can get the STL files of certain 3D printed parts for free on Thingiverse. But if you want a detailed guide, along with BOM, build photos, and other aids, you will have to pay a fee to the designer. If you have the time and money, a smart 3D printer enclosure like this is an excellent DIY 3D printer enclosure for most popular open-frame 3D printers
Sound-Insulated Enclosure
Image: Spare Time Shop via YouTube
Open-frame 3D printers can get noisy, and the constant buzzing and the whirring of stepper motors can get irritating after a while.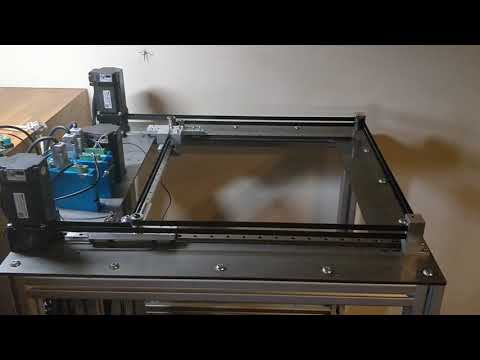 This issue is most relevant if you 3D print in a living space or an office environment. This is where this sound-insulated enclosure steps in.
As far as traditional enclosures go, they reduce noise up to a certain extent; yet, a sheet of acrylic can only do so much in terms of noise reduction. This sound-insulated enclosure, on the other hand, is made of wood, which has an acoustic foam lining to absorb the 3D printer noises.
This enclosure is big enough to accommodate a Creality CR-10 with filament spool and has dual doors and a transparent window to easily view your 3D printer. You can place the electronics of the CR-10 on the outside of the box, letting you control your 3D printer without opening the build chamber.
The enclosure is relatively easy to build and reduces noise considerably. The sound-insulated enclosure is a great option to get rid of any noises and 3D print in your living areas.
IKEA Pax 3D Printer Enclosure
Image: DollaSign via Reddit
This IKEA Pax enclosure is a wardrobe for your 3D printers. It is cost-effective and saves a lot of floor space when you want to enclose many 3D printers. Compared to the Lack enclosure from above, it offers similar functionality, albeit in a smaller footprint and relatively budget pricing.
You can stack up to three 3D printers in the PAX enclosure and still have some room left for filament spools, tools, and other electronics. All power supplies can sit outside the enclosure, thus protecting them from high temperatures. To add to its functionality, you can include some Neopixel LED lights.
Because the shelves are modular, you can easily move them around to fit 3D printers of varying heights. The major drawback of the PAX design, however, is its lack of transparent panels. Other than that, the IKEA PAX enclosure is an easy, quick and cheap solution for enclosing many 3D printers at once.
Resin 3D Printer Enclosure
Image: majorbrogains via Reddit
Even though resin 3D printers come with an enclosure, you need a separate space to store the printers, resin bottles, and prints like your 3D printed miniatures. This enclosure is an IKEA BRIMNES cabinet with ample space to store and display all your resin 3D printing equipment and minis.
The entire cabinet is divided vertically into two separate parts, giving you the ability to efficiently sort out your goodies. You can store the 3D printer itself in one half, while the other half can take in a washing station. And with a bit of DIY, you can vary the shelves’ heights and customize them to perfectly fit your minis’ collection, resin bottles, and other resin 3D printer accessories.
There is air ventilation within the enclosure with the exhaust on the top. It helps to throw out harmful 3D printer fumes and keep away the foul smell. You have enough space to accommodate popular resin printers like the Elegoo Saturn S and Phrozen Sonic Mighty 4K.
Considering the price, ease of use, and accessibility, using an IKEA BRIMNES as DIY 3D printer enclosure is an excellent solution for clearing up your resin workplace.
Repurposed Dishwasher Enclosure
Image: antialiasedpixel via Reddit
Repurposing things is an excellent avenue in the DIY area, and what better way than to use an old dishwasher as a 3D printer enclosure. This one easily fits an Prusa i3 3D printer and still has room at the top to mount a filament spool.
The Prusa’s footprint is 16.5×16.5×15 inches, while the area within the dishwasher is 21x23x25 inches. This dishwasher has enough room to fit in the Creality Ender 3 (Pro/V2) and others of similar sizes. And the spare room that’s left can be utilized to fit in some LEDs, a Raspberry Pi, and a webcam for remote monitoring and control of the 3D printer.
The main disadvantage is that there is not much room for further customization. You will need to change the dish washer to accommodate any future updates to the 3D printer, not very practical!
Otherwise, the enclosure is one of the best ways to repurpose an old machine into something useful and save some money.
Ready-to-Buy Enclosures
Official Creality Enclosure
The official Creality enclosure is one of the best ready-to-use designs to cover up your 3D printer. While it is designed for Creality 3D printers, you should have no issues using it for other 3D printers of similar sizes.
The enclosure uses aluminum rods for its structural strength and an aluminum-lined fabric to enclose the 3D printer on all its sides. The internal aluminum lining is made up of flame-retardant material.
The Creality enclosure does a good job at keeping hot air inside and maintains stable temperatures well. It also comes with a single window on the front of the box to view your 3D prints in progress.
With a little bit of wiring, you can move out the LCD controller and power supply to the outside of the enclosure to work with even higher temperatures. For just under $70.00, the Creality’s Enclosure is an effective solution to print with warping filaments while keeping fumes in and dust out.
Creality Ender Enclosure for 3D Printer, Fireproof Dustproof 3D. ..
..
Photography Lightbox
Image: Make360
While a photo lightbox is not designed for 3D printers, it does a great job as a 3D printer enclosure. It doubles as both a photo studio tent and an enclosure and gives you great lighting for pictures of your 3D prints.
This lightbox has two adjustable LED bars that cumulatively house 126 LED lights giving you a bright and well-lit inside area. It also gives you four PVC backgrounds for shooting various scenes and highlighting different shades of your 3D prints. And you can adjust the front cover to either fully cover up the 3D printer, or keep it open for ventilation.
It is a decent step up over the Creality enclosure and aids in photographing and taking videos of your 3D prints. The enclosure is easy to assemble and use, while also being convenient to store when necessary.
This enclosure is an ideal choice for enclosing your 3D printer and still having the flexibility to use it as a photo lightbox when you need it.
Photo Box, SAMTIAN Photo Light Box 32x32x32 Inches 126 LED Light...
2,456 Reviews
Check PriceBuying or making a DIY 3D Printer enclosure: What to consider
Size
The size of the DIY enclosure should be just enough to fit your 3D printer. It should not be too big, as this makes it more difficult to heat the print area and makes it harder to move around if you need to.
Ease of Access
You should be able to easily access your 3D printer when it is in the DIY enclosure. Locking latches are a great addition that lets you lock and open the enclosure at will
Material
A DIY 3D printer enclosure should be made of a durable and heat-resistant material. The material should also be easy to clean. Plexiglass is a good option for 3D printer enclosures as it is durable, easy to clean, and heat resistant.
Smoke Alarm
Installing a reliable smoke alarm at the top of the enclosure can alert you in time if your 3D printer catches fire. It is a worthwhile investment that can help keep you safe.
First Alert SCO501CN-3ST Wireless Interconnected Combination Smoke...
4,171 Reviews
Check PriceFire Suppression
If you want to be extra safe, you can install a fire suppression system that kicks in when the 3D printer enclosure gets too hot. A popular choice is the Blazecut T-series.
Soundproofing
One of the main disadvantages of 3D printing is the noise it produces. This can be a problem if you are trying to print in a shared space or if you just want to keep the noise down.
3D printer enclosures can help with this by soundproofing the area around the printer. Adding acoustic foam panels to your enclosure will help reduce sound levels significantly. Always make sure you get fire resistant ones, however.
TroyStudio Acoustic Studio Absorption Foam Panel, 12 X 12 X 2 inches...
Check PriceWindows
Adding a window to the 3D printer enclosure can help you monitor the progress of your 3D prints.
Lighting
You might want to consider installing LED lights inside the 3D printer enclosure. This will help you see the 3D prints better and also aid in taking pictures or videos of them.
Price
The price of 3D printer enclosures can vary depending on the size and features. 3D printer enclosures can be bought or made. If you are making your own 3D printer enclosure, you will need to factor in the cost of all the materials as well as your time.
Frequently Asked Questions
Is a 3D printer enclosure necessary?
A 3D printer enclosure is not strictly necessary, but it can be beneficial in terms of safety and maintaining optimal printing conditions. Enclosures can help to minimize drafts and other external factors that can impact the print quality, and they also provide a barrier between the hot printer components and curious fingers (especially important if you have young children or pets in the home).
If you are interested in purchasing a 3D printer enclosure, there are many different options available on the market to suit a variety of budgets and needs.
How do 3D printer enclosures work?
3D printer enclosures work by creating a controlled environment for the 3D printer. This helps to protect the 3D printer from dust, debris, and fumes. It also helps to maintain a constant temperature around the 3D printer, which is important for preventing warping of high-temperature filaments.
How do you enclose a 3D printer?
A 3D printer can be enclosed in a variety of ways. Some printers come with an enclosure that is already built in, while others use the addition of an enclosure for safety reasons.
One common way to enclose a 3D printer is by using a box made out of cardboard or plastic. The box should be large enough to fit the printer and the printing material, and it should have openings for the print head, filament feeder, and other cables. The box can be sealed shut with tape or clamps to keep fumes and heat from escaping.
Another option is to build an enclosure out of plywood or acrylic sheeting. This type of enclosure is more permanent and can be customized to fit the specific needs of the user and 3D printer.
Do 3D printer enclosures need ventilation?
3D printer enclosures do not need ventilation if the material being printed is not fumes-emitting. If you are printing with PLA, for example, there should be no issue with keeping your enclosure sealed. However, if you are printing with ABS, it is recommended that you provide some form of ventilation to deal with the build-up of fumes.
Do I need an enclosure for PLA printing?
PLA prints very well without an enclosure, so you likely don’t need one unless you’re printing in extremely cold temperatures. If you do want to use an enclosure, make sure it’s well-ventilated so your print doesn’t overheat.
How hot should a 3D printer enclosure get?
There is no definitive answer to this question as it depends on the specific 3D printer and filament being used. As a ballpark range, a temperature somewhere between 30 and 60 degrees Celcius is the right range for FDM 3D printer enclosures.
Should I enclose my Ender 3?
You should enclose your Ender 3 if you want to protect it from dust, dirt, and other debris. Additionally, enclosing your printer will help to maintain a consistent temperature and protect against accidental contact.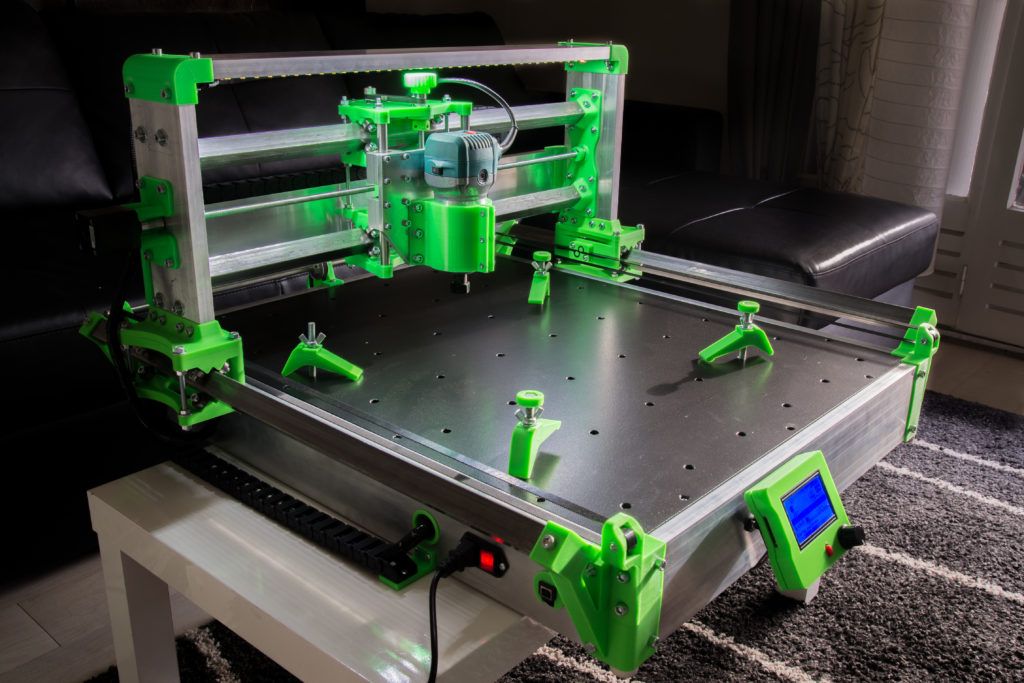
An enclosure is one of the top Ender 3 upgrades we recommend people to start with when modding their printer.
Recommended:
The Best Ender 3 (V2 / Pro) Upgrades
Should a 3D printer enclosure be airtight?
There is no single answer to this question as it depends on the specific printer and application. In general, though, airtight enclosures can be helpful in preventing fumes and particles from escaping the printer and contaminating the environment. They can also help protect the printer from dust and other debris.
However, if the enclosure is too tight, it can create problems with heat retention and airflow, which could lead to a decrease in printing quality or even damage to the printer. It’s important to find a balance between creating an effective enclosure and maintaining optimal printing conditions.
Conclusion
A 3D printer enclosure is an effective way to increase your 3D printer’s material compatibility. It further aids in printing with warping filaments like ABS and Nylon by maintaining a constant temperature.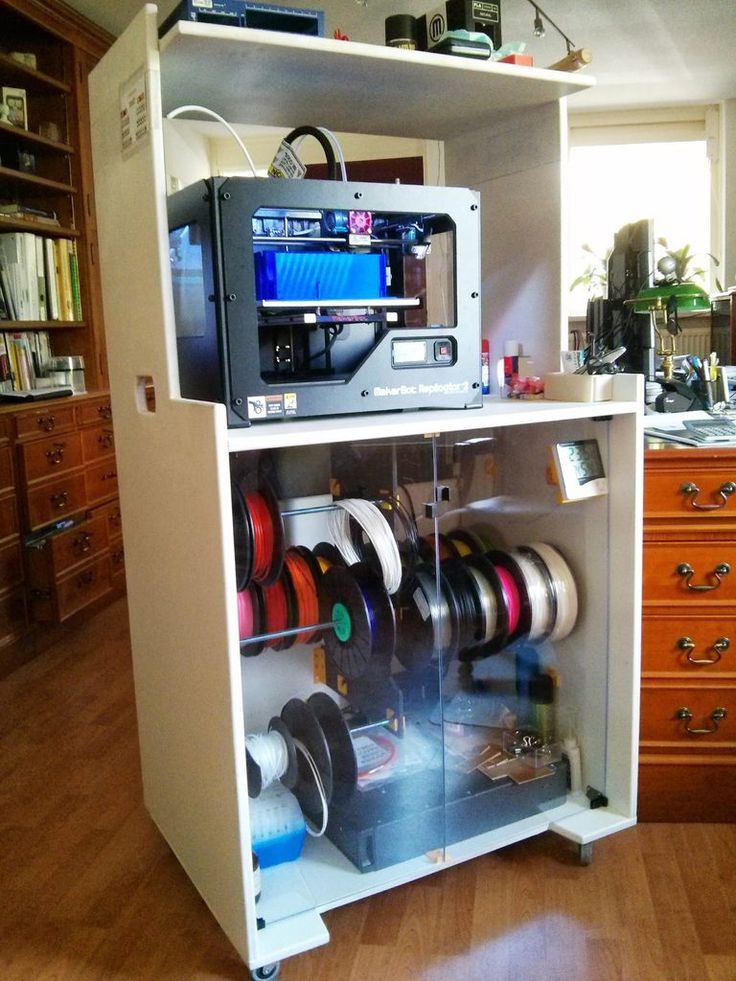 It saves the printer from external dirt and dust and improves the print quality.
With DIY 3D printer enclosure designs, you have the flexibility to customize the enclosure to your specific needs and install as many features as you’d like in it. It is also relatively easy to build a cheap, low-cost solution, for example with a simple cardboard box.
But, it can be tedious for many users, requiring lots of time, effort, and money. Whereas the ready-to-buy designs lack customizability but offer an easy, quick, and cheap solution.
Let us know your thoughts on the list, and if you have anything else to add, feel free to comment below.
heating connection, from which to make heating from 220 volts
Depending on what plastic will be used during printing, heating of the 3D printer desktop may be required. In addition, budget devices do not always have such a function. Therefore, many make a heating table with their own hands.
Heating table for 3D printer
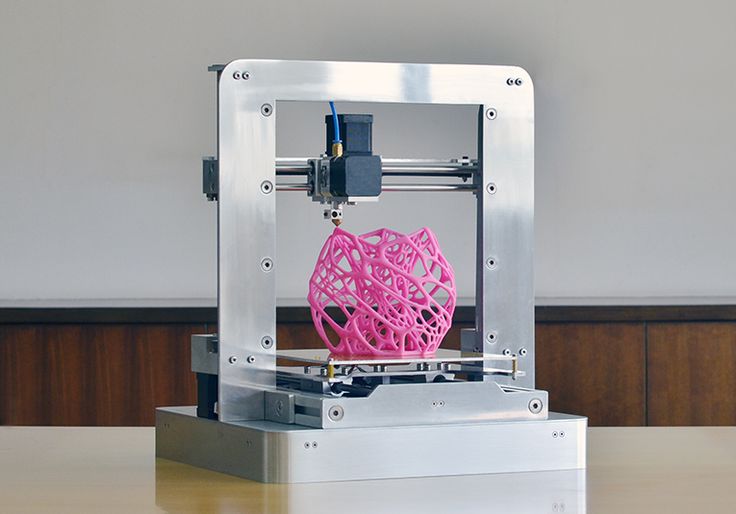
The heating table is a working surface consisting of several layers, one of which has a heating element. On the heating table and prints the printer.
The heater usually has a serpentine pattern.
Why is heating needed?
Using a heated bed during 3D printing is a simple and reliable way to protect finished products from uneven cooling, which often causes deformation of the part. Even on the cheapest printer, you can get good quality models using a heated work surface.
How to make a table for a 3D printer with your own hands?
Types of heating tables:
- Textolite. This is the most affordable option. The textolite table consists of a textolite plate with copper tracks applied to it. Most often, they are powered by 12 or 24 V. Direct printing on a textolite sheet will not work, since it is quite flexible and deforms during heating. Glass is attached to it from above to stiffen and level the surface.
- Aluminium. Textolite is also used in aluminum tables, but instead of glass, an aluminum sheet is laid on top.
- Silicone. Can be flexible or rigid, depending on the design. It consists of a heating element, which is filled with heat-resistant silicone.
Step-by-step instructions
The easiest way to make a table is based on silicone. To do this, you will need to prepare the following materials:
- nichrome wire with a diameter of 0.2 mm;
- sheets of cardboard;
- mounting tape;
- nails with small head;
- glass;
- heat resistant silicone sealant.
Manufacturing process:
- Several sheets of cardboard are stacked on top of each other and held together with adhesive tape.
- An ordinary checkered sheet is attached with the help of studs.
- Hats are recessed and aligned.
- Tape strips are glued on the sides (next to the hats).
- The studs are carefully pulled out so that everything stays in place.
- The paper is also carefully removed.
- Glass wiped with alcohol. After that, the resulting design is glued to the glass. First you need to glue one strip, and then the second with a stretch.
- Everything is generously lubricated with heat-resistant sealant (except adhesive tape). The layer must be at least 2 mm.
- After drying, the adhesive tape is removed and the empty spaces are also smeared with silicone.
- A wire is soldered to the end of the wire to connect to the network.
Mistakes and how to avoid them
It is important to correctly calculate the length and thickness of the wire. Otherwise, there will be either overheating (which will lead to a short circuit or burnout of the wire), or too little heating. For calculations, you can use special online calculators. They include the required power and voltage of the network.
Making your own heating table for a 3D printer is quite simple. All materials are available. Home-made manufacturing is especially important for those who have budget printer models.
- March 28, 2021
- 4028
Get expert advice
We make a heated table for the 3D printer MC2 with our own hands
We make a heated table for the 3D printer MC2 with our own hands
We make a heated table for the 3D printer MC2 with our own hands
3 was presented in one of the previous articles
3 printing technology with ABS plastic on the cold table of the MS2 3D printer from Master Kit. And what if we make this table heated and adjustable, eliminating the AUTO_BED_LEVELING function?
https://masterkit.ru/blog/articles/delaem-podogrevaemyj-stol-dlya-3d-printera-mc2-svoimi-rukami
With pleasure experimenting with the MC2 printer and refining it, I came to the conclusion that it was time I wish I had a heated table. There's more that the printer's electronics support this feature. And at the same time try to make this table adjustable by eliminating the AUTO_BED_LEVELING function. In principle, the function works well, I wrote about this in this article, but I wanted to try this option as well.
Actually, for this you need to purchase only the heater itself, the thermistor and springs for adjustment - this can be done on the website 3d.masterkit.ru. And figure out how to thermally untie the plastic parts of the printer, designed to mount the table, and the heater.
After rummaging through the cupboards, I found a piece of fiberglass. Good, smooth, 2 mm thick. I sawed off a square 220x220 mm from it. (Heater size - 214x214 mm) And, without thinking twice, I drilled 4 holes in it for M3x10 screws with a sunk head for fastening the textolite to standard glass holders and 4 holes for mounting the heater. I drilled holes of 2.5 mm in the details for fastening the glass and screwed the textolite with screws like self-tapping screws.
Now you need to attach the heater to the textolite through the springs. For a while I thought about how to make sure that the nuts of the adjusting screws were fixed, but then I decided to do without nuts at all. I cut the M3 thread directly in the fiberglass, it turned out somewhere around 4 turns. I tried several times to screw in and unscrew the spring-loaded screw. If you do this carefully, the thread holds well, does not deform. Let's see how the solution will behave during long-term operation; if the thread deteriorates, I will stick a metal nut-washer with an M3 thread on the textolite, you can print a retainer from ABS, or something like that.
Next, glue the thermistor into the central hole in the heater with heat-resistant tape or paper tape. It connects to the control board at connector T1. Also in the Marlin firmware, you must allow reading data from this sensor. To do this, in the Configuration.h tab, you need to change 0 to 1 in the line #define TEMP_SENSOR_BED 1
After that, in the RepetierHost program, you can see and set the table temperature value.
Printing glass - how could it be without it - it is convenient to fix it with stationery paper clips. You can find them in any stationery department. This is how the sandwich turned out. Pretty hefty, I must say. I decided that it would be necessary to reduce in connection with this acceleration along the Y axis, and at the same time X. We climb into the firmware again. And we halve the following parameters in Configuration.h (new values are indicated):
#define DEFAULT_MAX_ACCELERATION {4500,4500,100,9000}
#define DEFAULT_ACCELERATION 1000
Probably a little slower typing, oh well, we're not in a hurry.
In order to eliminate the influence of the extruder mounting on the positioning accuracy and to fully realize the possibility of adjusting the table, I decided to rigidly fix the extruder in its holder, for which I drilled through the details of its fastening and tightened it with screws. In this regard, I had to rearrange the Z-axis limit switch under the platform on which the X-axis is implemented. I printed a part with two slots for adjusting the limit switch and simply glued it with dichloroethane to the base connecting the three stepper motors from the bottom of the printer. Just in case, I also tightened it with a screw. Now the limit switch is triggered when the platform is lowered to the desired level.
As a power supply, taking into account the current consumption increased by 10A (!) I used an ownerless power supply from an old computer with a power of 350W. It gives 15A current on the 12V yellow wire. The heater is connected to the terminals D8 of the control board.