3D print hotend
E3D v6 Hotends | MatterHackers
Technical Specifications
- Filament Diameters available: 1.75mm and 3.00mm
- Nozzle Diameters available range from 0.15mm with 1.20mm
- When changing nozzles, be sure to have the hotend at operating temperature to avoid damaging either the nozzle or heatbreak.
E3D v6 Hotends
RapidChange Revo
Change nozzles easily and quickly with E3D's revolutionary hotend ecosystem.
Fully Assembled v6 Hotends
Fully-assembled hotends ready to tackle all your 3D printing projects.
v6 Hotend Kits
Hotend kits to assemble that fit almost any 3D printer
Guides & Articles
How to Succeed When 3D Printing with Polypropylene
Successfully produce 3D printed parts out of polypropylene filament with these tips on achieving stronger bed adhesion and minimizing shrinkage.
How To Succeed When 3D Printing With PLA Filament
Discover the best practices for 3D printing with PLA filament - from finding the right temperature, to which surfaces to 3D print on, this step-by-step guide will help you succeed with 3D printing PLA.
How To Succeed When Printing With ABS
ABS filament is a versatile material that's a great option for when you need your 3D-printed parts to be strong and heat-resistant. Learn how to print this material like a Pro in this in-depth guide.
Printing Tips & Tricks: ABS Bed Adhesion
ABS: stronger, more durable, and more heat-resistant than PLA. An excellent 3D printing material, but ABS is prone to warp. Stop warping on your ABS prints, and create strong bed adhesion to produce flat prints by following these tips.
Living Hinge: Design Guidelines and Material Selection
Bring your prints to life by adding an additional degree of motion to your designs - living hinges are the foundation of expanded mechanical solutions.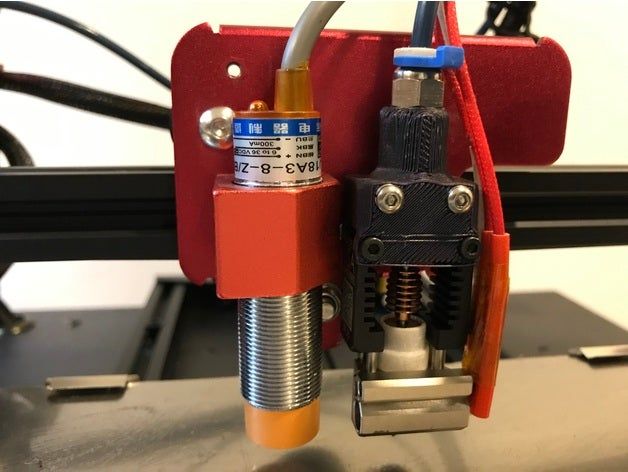
Printing with Bronzefill
Bronzefill filament is made with real bronze powder and offers a unique look and feel for your decorative 3D printed parts
How To Succeed When 3D Printing With Nylon
Learn how to 3D print Nylon like a pro. Nylon is a stronger and more durable alternative to PLA or ABS and easy to 3D print with using these Tips and Tricks.
3D Printer Troubleshooting Guide
Use this guide to help you identify and solve the most common issues that may occur while 3D printing.
3D Printer Filament Comparison Guide
There are many different kinds of 3D printer filament, and each one has it's own strengths for different projects. Knowing these differences is key to a successful 3D printing experience and so we have created a Filament Comparison Guide with everything you need to know about every type of filament available.
3D Printer Hot-Ends - 3DJake International
Sort byRelevanceBestsellersCustomer ReviewsPrice, Low to HighPrice, High to LowNew arrivalsHighest Discount
-
Micro-Swiss All Metal Hotend Kit for CR-10- All metal
- Better heat dissipation
- No adjustments required
-
Micro-Swiss Silicone Socks Set for MK7 / MK8 / MK9 1 set- High-temperature resistant
- Set of 3
- Non-stick
-
Creality Hotend 27 Model types- Original spare part
- From Creality
-
Phaetus Dragonfly Hotend BMS- Temperature resistance up to 500 ° C
- All-metal design
- Good heat dissipation
-
Micro-Swiss All Metal Hotend Kit for CR-10S Pro- All Metal Hotend
- Better heat dissipation
- Can be used without any modifications
-
E3D V6 Silicone Socks 1 set- Non-stick surface
- For V6 heating blocks
- Keeps your heating block clean
-
Phaetus Dragonfly Hotend BMO- Temperature resistance up to 500 ° C
- All-metal design
- Good heat dissipation
-
Micro-Swiss All Metal Hotend Kit for the CR-6 SE- Titanium alloy heat break
- Well defined melting zone
- Aluminium heating block
-
E3D Revo Six 2 Model types- Direct replacement for E3D V6 Hotend
- Including a 0.
 4 mm nozzle
- All-metal hotend
-
Micro-Swiss High Temperature MK8 Heating Block Upgrade- M6 thread size
- Special alloy
- High printer compatibility
-
E3D Revo Micro Full Kit 2 Model types- Complete set including 4 nozzles
- Compatible with Bowden or Direct Drive setup
- Small & light heat sink
-
E3D Prusa V6 Hotend 3 Model types- Replacement hotend
- With V6 parts
- Improved version
-
BROZZL All Metal Hot-End Upgrade Kit for Ender & CR-10- Easy to use
- Fast assembly
- Precise manufacturing
-
FLSUN Hotend Assembly 3 Model types- Original spare part
- For FLSUN 3D printers
-
Termopasty AG Silver Thermal Paste 4 Model types- Thermally conductive
- Addition of silver compounds
- Fills in micro intolerances
-
E3D V6 All-Metal Hotend Bowden - 1.75 mm 4 Model types- High temperature performance
- All-Metal
- Compact design
-
E3D Volcano Silicone Socks- Non-stick surface
- For Volcano heating blocks
- Keeps your heating block clean
-
E3D Revo Six Full Kit 2 Model types- Direct replacement for E3D V6 Hotend
- Complete set
- Incl.
 4 nozzles (0.25 mm, 0.4 mm, 0.6 mm, 0.8 mm)
-
Slice engineering Mosquito Magnum- High printing speed
- Temperatures up to 450 ° C possible
- Flexible installation
-
E3D Revo Micro 2 Model types- Including a 0.4 mm nozzle
- Quick nozzle change by hand
- Compatible with Bowden or Direct Drive setup
-
E3D V6 Silicone Socks Pro 1 set- Non-stick surface
- For V6 heating blocks
- Keeps your heating block clean
-
Zortrax Hot-end V3- Original spare part
- Zortrax M200 Plus
- Zortrax M300 Plus
-
Phaetus Rapido Plus Hotend HF- Uniform heating
- Thin-walled heatbreak
- Different printheads
-
Micro-Swiss MK10 All Metal Hotend Kit- Higher temperatures possible
- Faster extrusion possible
- Abrasion secure
All prices incl.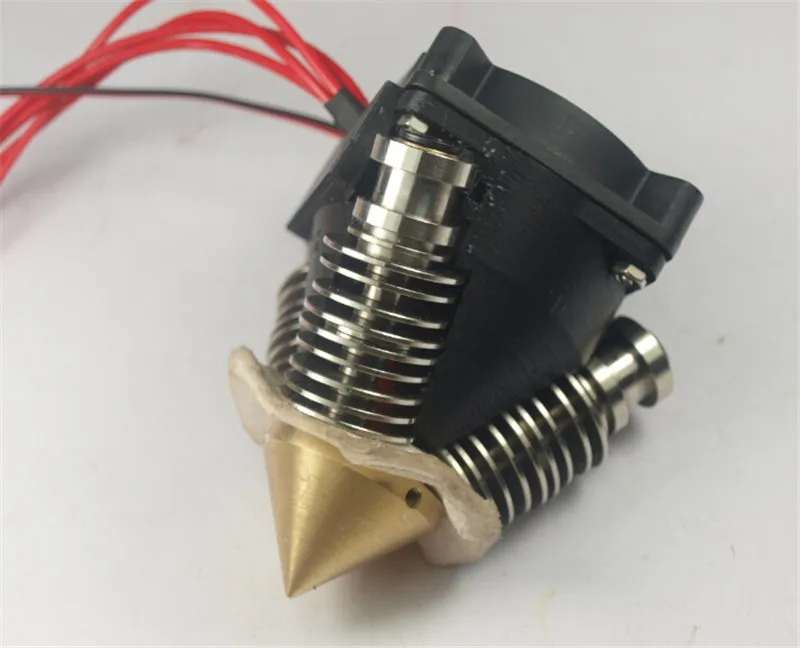 VAT.
VAT.
REC Wiki » FDM 3D Printer Basics
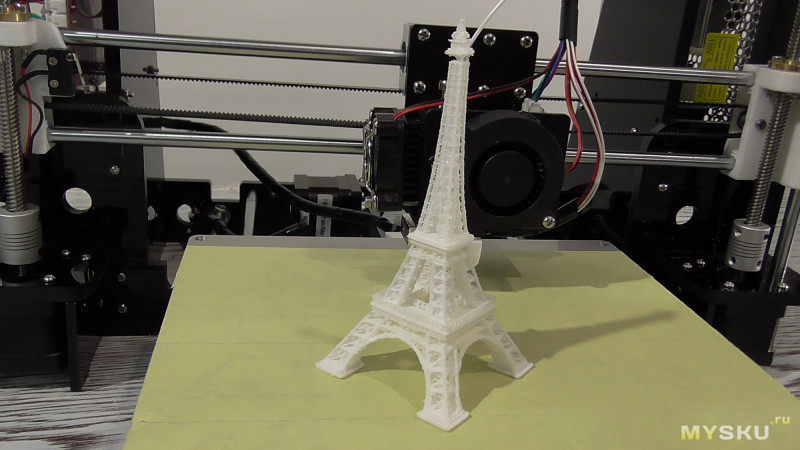
Thinking about buying a 3D printer and don't know where to start? Then you are welcome under the cat: in this article we will try to explain as clearly as possible what FDM 3D printing is and how to work with FDM 3D printers.
To begin with, let's immediately deal with possible confusion in terms. In industry literature, FDM (Fused Deposition Modeling) and FFF (Fused Filament Fabrication) 3D printing technology is abbreviated. What is the difference between them? Absolutely none, it's all about patent law. Initially, the technology was called FDM, and the patent belonged to the American corporation Stratasys. Competitors had to come up with an alternative name - FFF. Patent expired in 2009year, so nowadays these designations are completely interchangeable - a matter of taste.
The technology itself involves the layer-by-layer application of a polymer melt with thin threads - layer by layer, until the entire model is grown.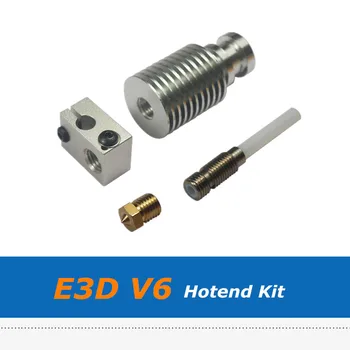 It is the most affordable and at the same time highly versatile 3D printing technology thanks to a huge range of compatible materials. This includes conventional polymers, and refractory structural thermoplastics, and even composites with various reinforcing and cosmetic fillers - fiberglass, carbon fiber, metal, ceramic, wood, and so on.
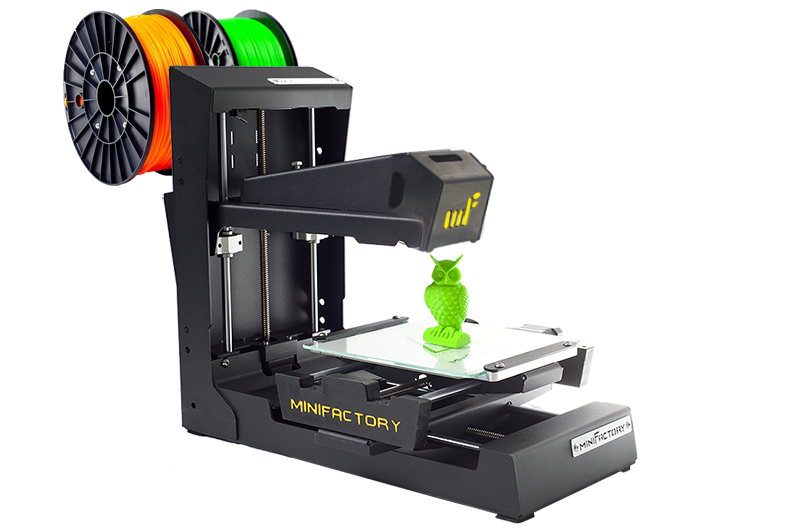
To understand how FDM 3D printing works, you first need to understand how FDM 3D printers work. Most of them are three-axis systems, relying on a conventional, rectangular coordinate system (aka Cartesian, aka Cartesian): left-right on the X-axis, front-to-back on the Y-axis, and up-down on the Z-axis.
How FDM works 3D printer
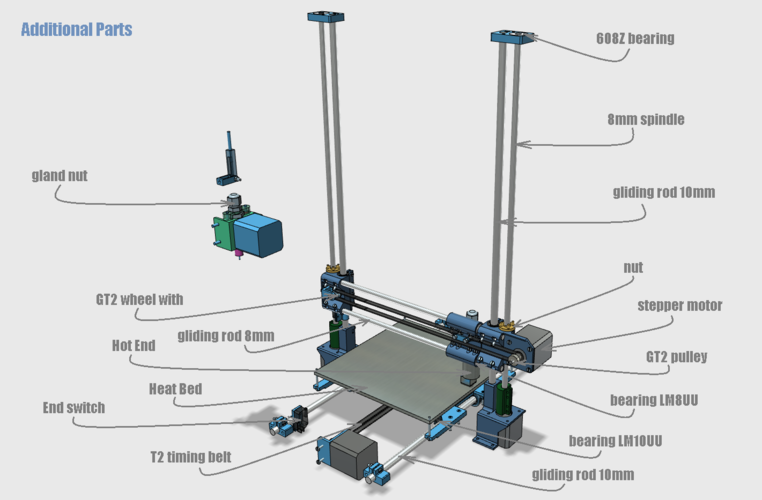
Main components:
Stage . This is the work surface on which products are built. Tables can be made of different materials (glass, aluminum and others) and are mounted on the platform. The platform can be cold or heated: heating often helps with adhesion (i.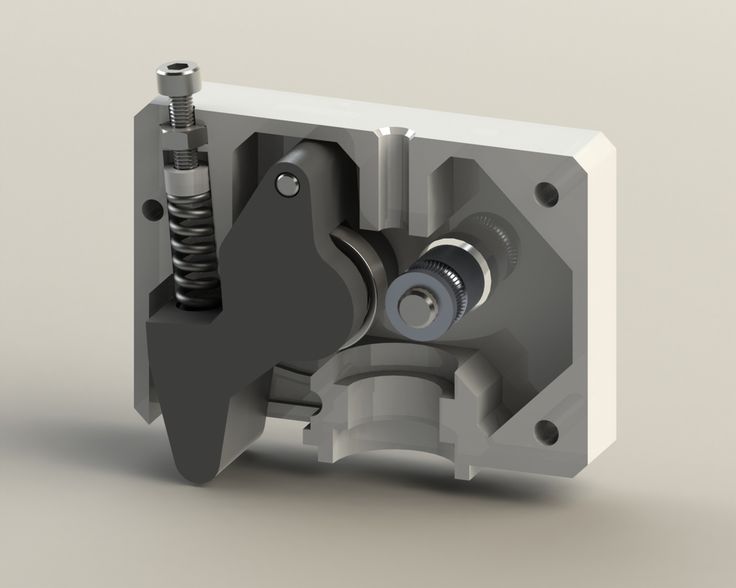 e. sticking) and shrinkage. More on this below.
Extruder . Mechanism responsible for feeding the filament, heating the material and applying the melt. Extruders, in turn, consist of two parts:
- cold part, including a filament feeder with a motor and gears;
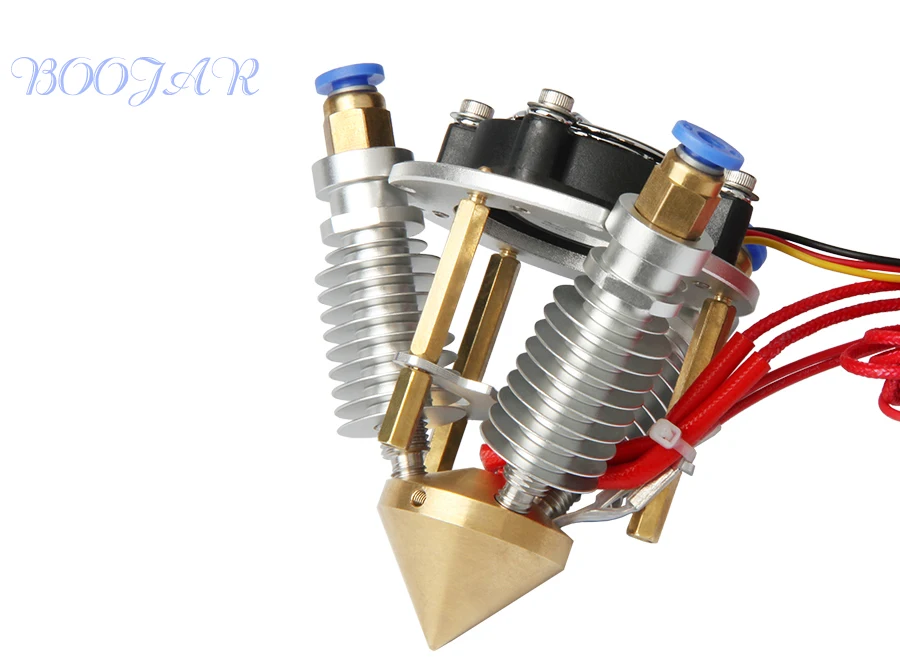
- hot end, which includes a hot end (a metal tube in which plastic is melted), a heating block, a nozzle, a radiator, and fans to cool the thermal barrier and the material to be laid.
3D printer with Bowden extruder
Extruders can also be divided into two types - Bowden extruders and direct extruders - according to the material feeding method. If only the hot part is installed on the carriage, and the cold part is attached to the frame of the 3D printer, such a scheme is called Bowden - in honor of the Bowden tube connecting the two parts and conducting the filament from the feeder to the hot end ( in the illustration above ).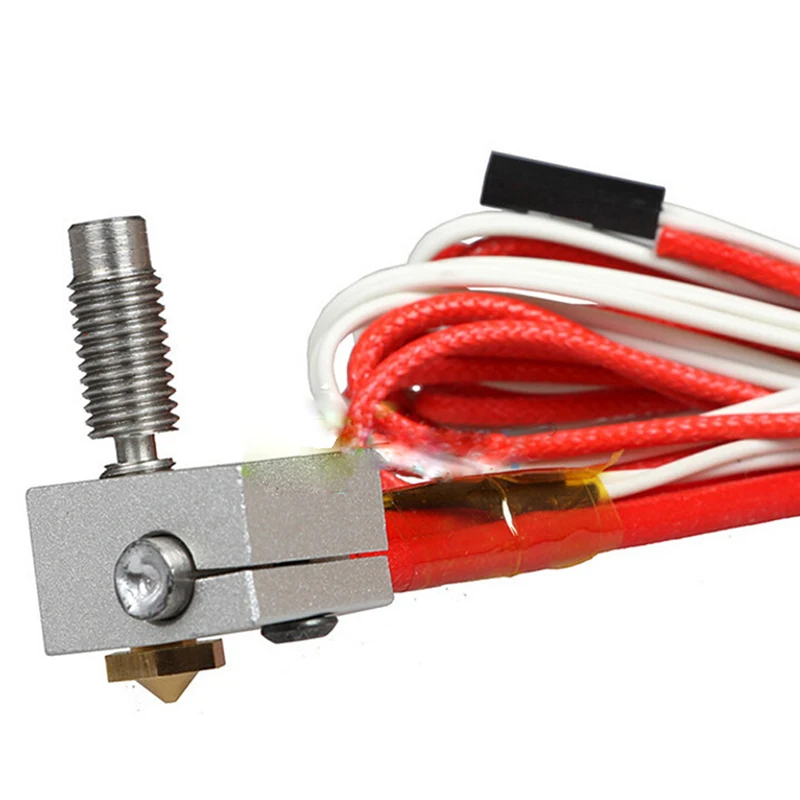 If the cold and hot parts are installed on the carriage together as a single unit, such a scheme is called a direct feed or direct extruder ( in the illustration below ).
3D printer with direct extruder
There can be several extruders on a 3D printer to work with different materials at the same time, but most systems, especially budget ones, are equipped with only one.
Control system . The operation of the electrical and mechanical components of the 3D printer is controlled by a board with a connected interface. These can be either simple LCD screens with an encoder, a USB port and a card reader, or more advanced options with touch screens, built-in memory, wireless communication modules, and so on. It all depends on the manufacturer and the cost of the equipment.
How an FDM 3D printer works
The process begins with transferring a file with a digital 3D model converted into machine code (G-code, Gcode) to a 3D printer. Such files contain a complete set of step-by-step commands that tell the 3D printer to what temperatures the hotend and platform need to be heated, at what speed to feed the material, along which trajectory to move the head.
After receiving the start command, the 3D printer heats up the hot end and the stage to the set temperatures, depending on the plastic used. When the hot end is ready, the filament feed begins. At this point, the 3D printer is ready to print. Further, the head is lowered (or the table is raised towards the head, depending on how the equipment is arranged), and the melt begins to be applied to the table through the nozzle. Depending on the material being used and the print speed, one of the fans on the head can blow over the plastic being laid to allow it to harden before applying the next layers. After applying the layer, the head rises slightly (or the table lowers), and then the laying of the next layer begins - and so on over and over again until the whole model “grows”.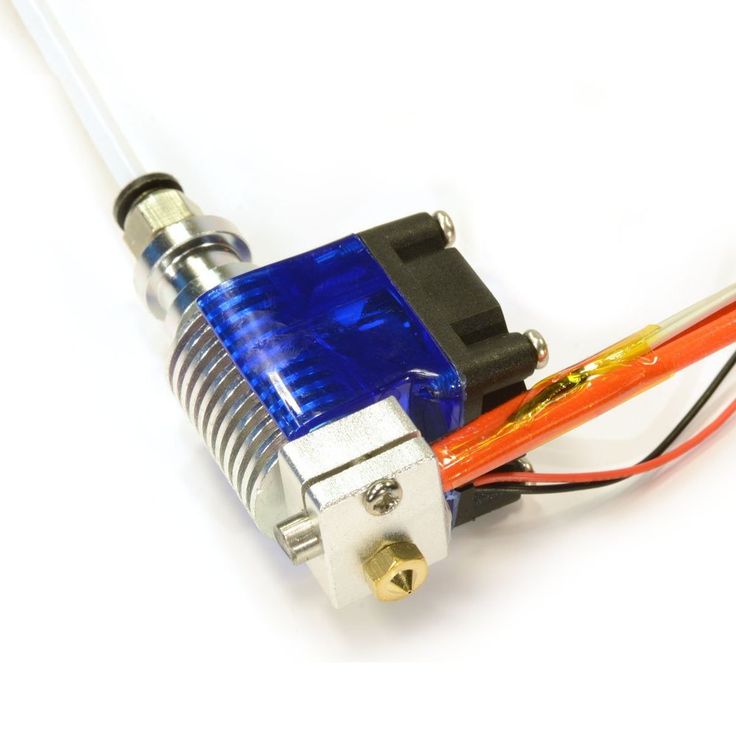
How to make or find a digital 3D model
To print products, you need to have a digital copy on hand. There are two options here: you can model it yourself or to order, or you can find a ready-made 3D model on the Internet.
3D modeling requires special editing programs or computer-aided design systems such as Fusion 360, SolidWorks, Blender, Compass-3D and others. Some are offered for free, while others require payment. If you are ready to try your hand at 3D modeling, we have prepared a special article with links to the most popular programs, including free ones.
If you do not have the time or desire to model yourself and are not ready to pay professional modelers, there is also a way out: many sites, such as Thingiverse, 3Dtoday or MyMiniFactory, offer libraries with again paid and free 3D models designed specifically for 3D printing. A list of the most popular sites can be found in the article at this link.
Preparing digital 3D models for 3D printing
As we have already mentioned, 3D printers accept files with machine code, so having a digital model on hand is not enough - it must be processed into G-code using a special program called a slicer .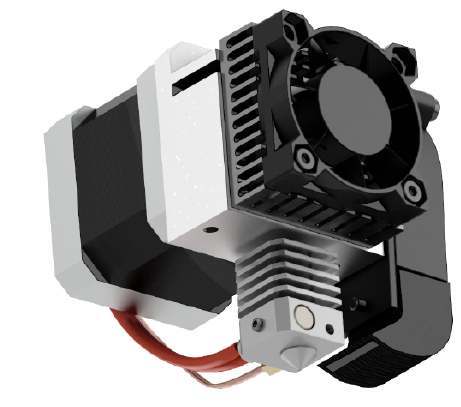
Slicers allow you to manually set 3D printing parameters such as temperature and speed, wall and layer thicknesses, infill density, and more. The program then “slices” the 3D model into horizontal layers (hence the name: to slice means “cut”), converts each layer into a series of machine instructions (G-code) understandable by 3D printers, and saves the code in a separate file, ready to 3D printing.
Support structures (supports)
One of the key functions of slicers is the generation of support structures, also called supports. FDM 3D printers cannot print by air - the nozzle must apply the material either to the table or to the already laid material. Accordingly, at strong angles of inclination or when building long "bridges" between different segments of the part, overhanging sections need some kind of support. The supports are just temporary structures, also printed by a 3D printer with the sole purpose of supporting the hinged sections of the model itself. Once the 3D printing is complete, such supports are removed - either by hand or with a solvent or even water if a special water-soluble filament such as REC PVA is used to print the supports. The option with soluble supports is relevant in cases where the 3D printer is equipped with at least two extruders - one prints the base material, and the other the support one.
Results of 3D printing of models with soluble support structures before and after removal of supports plastic will turn into garbage at the end of the work. There are other nuances: for example, supports should not touch vertical walls, otherwise it will be difficult to remove them later, and at the same time the risk of damage to the product will increase.
Fortunately, all popular slicers can analyze 3D models and place supports automatically. A detailed list and descriptions of the most popular slicers are available in the article at this link.
Preparing the FDM 3D Printer
Loading Filament . Consumables for FDM 3D printers are round bars of plastic called filaments. The filaments are wound on spools or supplied in coils. Coils are cheaper, but they need to be rewound onto spools by hand or the plastic can get tangled up during 3D printing.
The filament must be fed into the extruder before printing can begin. To do this, the hotend must be heated to a temperature depending on the selected plastic. This information can be found on the packaging.
The filament is then inserted into the feeder, which feeds the filament into the hot end. If the automatic loading function is not provided, the filament can be threaded manually: to do this, you need to depress the drive gears of the feeder and gradually push the bar into the hot end until molten plastic flows from the nozzle.
Platform adjustment . Calibration of the 3D printer is very important, as the successful laying of the first layer depends on it. Before starting 3D printing, you need to make sure that the platform sits level.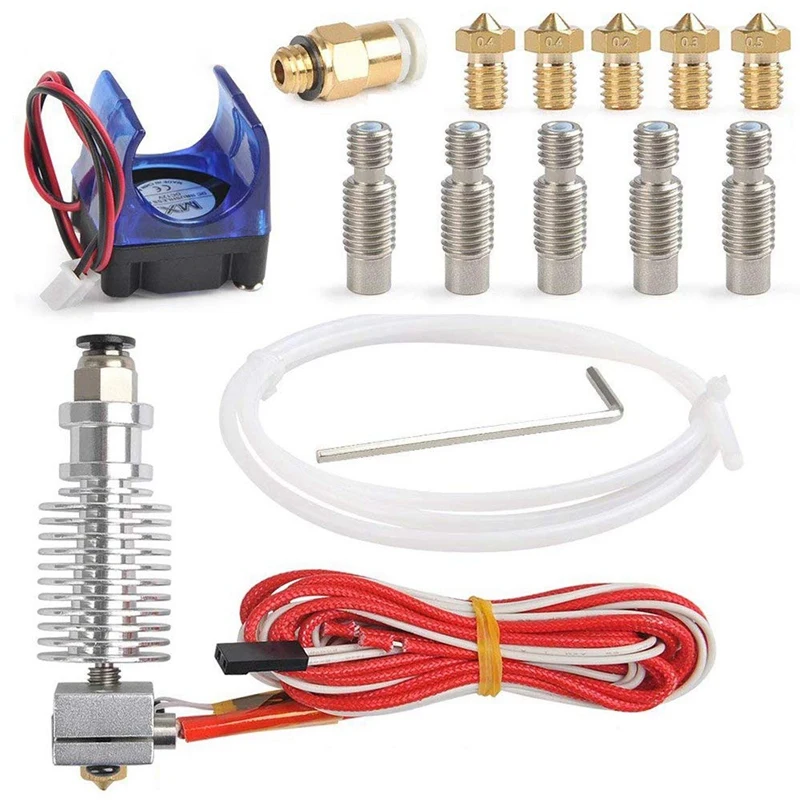 Many modern 3D printers are able to perform calibration automatically using built-in sensors, such as BL Touch. Otherwise, the platform must be manually leveled: for this, special adjustment screws must be provided under the platform.
The correct zero on the Z axis is the key to a successful start of printing
At the same time, do not forget to correctly set the zero on the Z axis, that is, the distance between the nozzle and the platform at the very beginning of 3D printing. If the distance is too low, then there will be problems with the supply of the melt, and if it is too high, then the plastic will not set to the surface of the stage.
Consumables
As we have already mentioned, FDM 3D printers are loaded with spools of filaments. The most common bar diameter is 1.75 mm, but there are also printers that work with filaments with a diameter of 2.85 mm. This point must be taken into account when buying plastic for 3D printing. The mass of the coils can be different - from 500 g to 3 kg and even higher.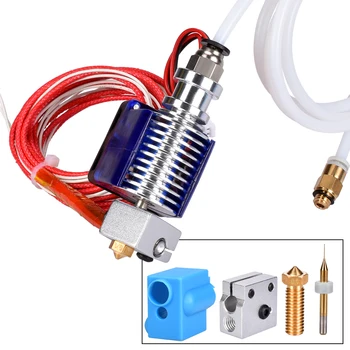 Pay attention to the recommendations of the manufacturer of your 3D printer and the design of the system itself: in some 3D printers, the spool mounts are located inside the working chambers or special compartments, so a spool that is too large may not fit.
Compatibility of 3D printers with different materials depends on the maximum extrusion temperature, nozzle material, the need for a heated stage and the use of a heat chamber. For example, to work with polysulfone, you will need an extruder with a hot end temperature of 350-380 ° C, and if you are going to work with abrasive materials, such as composites of the X-Line, Clotho and Technika lines, the brass nozzle should be replaced with a more wear-resistant one, such as steel. Key parameters are always indicated on the packaging and in product descriptions.
Some examples of 3D printing plastics:
Polylactide (PLA, PLA), acrylonitrile butadiene styrene (ABS, ABS) and polyethylene terephthalate glycol (PETG, Relax) are the most common and inexpensive polymers with different properties, well suited for most applications .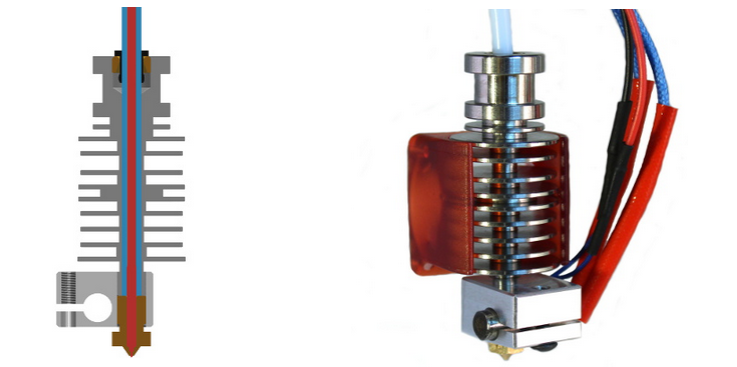
Thermoplastic polyurethane (TPU, Easy Flex), styreneethylenebutylene styrene (SEBS, Rubber), and thermoplastic polyester elastomer (TPEE, Flex) are flexible, elastic polymers that replace rubber and silicone. They require special working conditions, a detailed guide is available at this link.
FormaX, GF Max, UltraX, Clotho and rPETG GF are carbon and glass reinforced composites with increased strength and wear resistance.
Polyetheretherketone (PEEK) and polysulfone (PSU) are refractory engineering thermoplastics that can replace metals in some applications.
A complete list of consumables is available in our catalog.
Post-processing
Post-processing is the last production step. Depending on the geometry of the product, the material used and the task at hand, this may include:
Remove supports . Support structures are often essential and need to be removed once the 3D printing is complete. This should be done carefully so as not to damage the product itself. If you have a 3D printer with at least two extruders on hand, the supports can be printed with soluble materials, such as water-soluble polyvinyl alcohol (PVA). This is somewhat more expensive, but greatly simplifies the procedure and improves the final quality.
Sanding . The visibility of the layers depends on the diameter of the nozzle, but ribbing in general cannot be avoided - this is the specificity of the layer-by-layer 3D printing technology. When working with hard plastics, the surfaces can be sanded to the desired smoothness.
Painting . Items can be printed in different colors using multiple extruders or manually changing the filament, but this approach is limited. Fortunately, most polymers lend themselves well to being primed and then painted.
Polishing and smoothing . Perfectly smooth, glossy surfaces can be achieved in two ways: either by polishing after sanding, or by chemical treatment. In the latter case, a suitable solvent will be required for surface treatment. Which one depends on the polymer. For example, acetone is good for ABS, but not effective for PLA.
Bonding and welding . Connections are necessary in cases where the products simply do not fit into the working area of the 3D printer. Many polymers can be bonded, but in some cases welding may be required, such as with a hot air gun.
Read more about post-processing in the article at this link.
Common problems
Web (left) and twist (right)
Curl . This usually occurs when the material to be laid cools, contracts and simultaneously pulls previously laid layers towards itself, causing them to break away from the table at the corners and edges.
Web . Thin threads of plastic between different parts of the model, appearing when the head is idle, may be the result of incorrect temperature, speed and retract settings.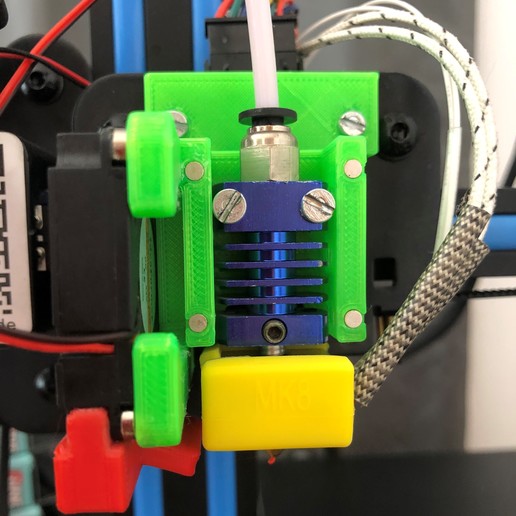 Some materials, such as PETG, are particularly prone to web formation due to their high fluidity.
Clogged nozzle . One of the most annoying faults that has ruined many models in the history of FDM 3D printing. Signs of a clogged nozzle are feed mechanism clicks and no melt flow from the nozzle. The reasons may be different: defective filament, incorrect temperature settings, inefficient cooling of the thermal barrier, and others.
Layer offset . Ripples or the so-called "ringing" on the walls of products most often indicates play or curvature of the shafts along the Z axis.
Under extrusion . Efficient material feeding problems can cause gaps in layers.
Overextrusion . The opposite is true here: Applying the melt too quickly leads to sagging.
A guide to troubleshooting the most common problems is available at this link, at the same time we suggest that you familiarize yourself with separate articles on cleaning nozzles and combating deformations.
Maintenance of the 3D printer
To keep the 3D printer in good condition, the following operations should be carried out regularly:
Cleaning the stage Before starting 3D printing, it never hurts to clean the stage with a cloth soaked in isopropyl alcohol and apply a fresh coat of glue, varnish or other adhesive if necessary. Read more about adhesion here.
Nozzle cleaning . Corks and carbon deposits are easier to prevent than to remove, so be sure to wipe the nozzle clean immediately after or at least before starting 3D printing.
Waste collection . During hot end warming up, 3D printers often "snot" - they squeeze out a small amount of melt before starting to build a model. Such "snot" should be promptly removed so that they do not interfere on the table and inadvertently do not fall into the moving mechanisms.
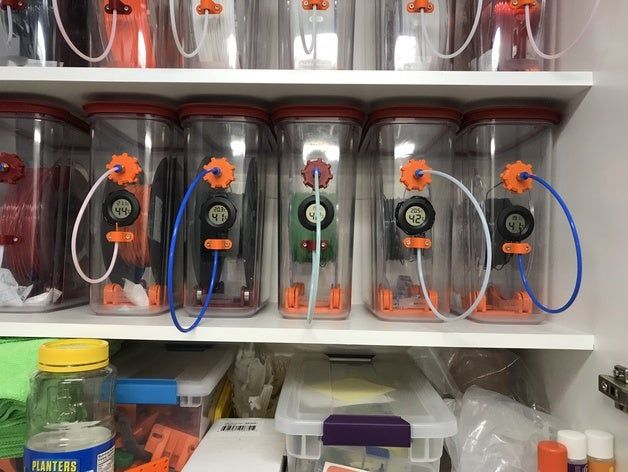
Consumable storage
Proper storage of filaments is a separate and very important aspect. First, many plastics age when exposed to ultraviolet light, so it is advisable to store the filaments in a dark place or opaque containers. Secondly, dust deposited on the bar can contribute to the formation of plugs in the nozzles. Thirdly, some plastics are very hygroscopic, that is, they easily absorb moisture, and this can lead to the formation of all kinds of defects.
The best option is to always store unused filaments away from sunlight in airtight bags or containers with silica gel sachets inside. The storage and drying of filaments are described in more detail in separate articles - here and here.
3D Printer Extruder - Complete Manual Heatle
Learn the basics of direct drive and Bowden extruders, hot and cold ends, nozzle sizes and materials, and find the best 3D printer cartridge for your needs.
The 3D printing process can be briefly described as follows: a filament of plastic material is fed into a heated metal block with a nozzle, where it is melted and extruded in a given form. This path is repeated, gradually building up until a solid three-dimensional object is formed.
The entire business task of handling the material, melting it and exiting for printing takes place in a block called extruder 3d printer .
In this article, we will look at the main sections of the 3D printer extruder, the options and advantages of different styles of extruders, popular models on the market, as well as cartridge heaters for 3D printers and other items.
What is an extruder
The 3D Printer Extruder is a set of parts that together process and move a plastic filament.
Some consider the extruder to be just the motor and associated parts that push and pull the filament, others the entire assembly including the heated part that melts and deposits the filament.
For simplicity, this article treats the entire assembly as an extruder. To begin with, while explaining the key components of a 3D printer extruder, we will divide it into two elements: a cold zone and a hot zone.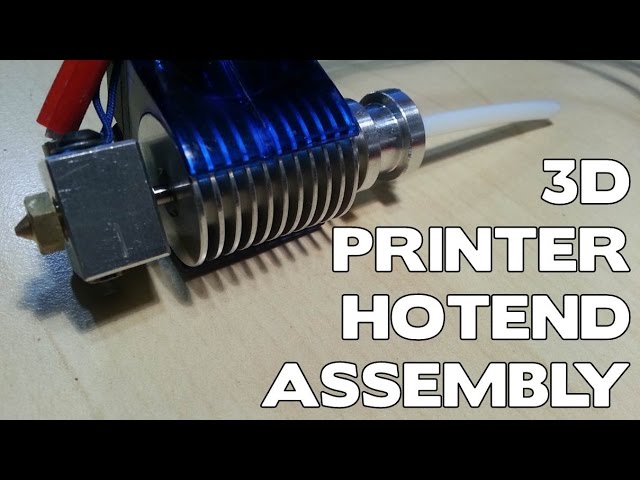
Cold zone
As the name implies, the cold zone is exactly that - cold. It's The top part of the 3D printer's extruder system, into which the filament is fed and then passed into the hot zone to be melted and extruded onto the print bed.
The appearance and location of the cold zone on your 3D printer depends on whether it is a direct drive or Bowden drive extruder (both of which are detailed below).
There is no filament heating here. The cold zone consists of the extruder motor and gear train, which are usually mounted either on the printer frame or on the print head itself, depending on the type of extruder, and a PTFE tube to smoothly guide the filament into the hot end.
What happens in the cold zone?
With the heatsink removed, on this e3D Titan Aero we can see the inner workings of the 3D printer's extruder.
Essentially, the cold zone consists of a stepper motor, some form of gear, a toothed bolt or gear, a spring-loaded idler (usually a bearing of some kind) to hold the filament, and then a PTFE tube to guide the filament.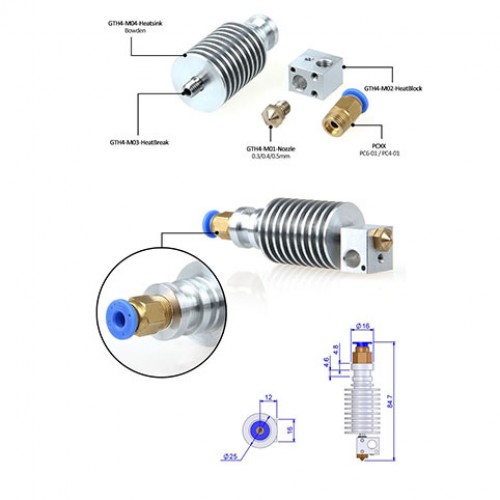
A humble stepper motor with a metal gear required for a 3D printer's extruder drives the filament extrusion in most if not all modern desktop 3D printers.
However, one stepper motor is not enough to feed the filament to the hot end. The parts attached to and operating the stepper motor drive shaft must physically grab the filament and push it on its way to the hot end.
In this cutaway view of a 3D printer extruder, we see a metal gear and a plastic gear with a toothed shaft.
This usually uses a combination of toothed gears and toothed bolts or shafts (in the image above we see a metal gear and a plastic gear with a toothed shaft) serving as a pressure wheel along with a bearing or other rigid frictionless material.
Here we see a plastic lever with an integrated bearing, an extension spring and a plastic gear with a toothed shaft. Together they apply pressure to the filament and force it through the extruder.
Alternatively, there are versions of the cold end of the 3D printer extruder that use a slightly different arrangement of parts to feed the filament. Such deviations are often claimed to provide increased traction and yarn delivery.
Here we see both sides of the Prusa i3 Mk3 cold end, including the Bondtech extruder gear.
As mentioned, there are varieties of 3D printer extruders that use these parts in slightly different layouts. Each has its pros and cons. Next, we will look at what is the difference between a direct drive 3D printer extruder and a Bowden 3D printer.
Direct drive extruders
The Direct Drive 3D Printer Extruder is different in that it places the extruder motor directly above the heating unit. This arrangement minimizes the travel distance of the filament to the hot end and can enable more reliable 3D printing of flexible filaments.
The advantage of using direct drive is more precise retraction control.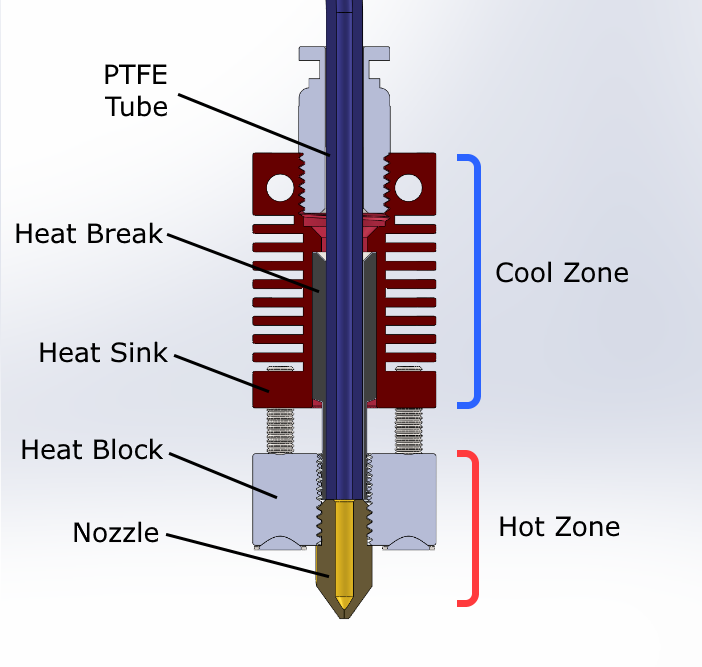 Due to the location directly above the hot end, there is less distance between the clamp and the thread passing through the thermal barrier into the heating block. Consequently, the filament has less room to bend and deform under pressure.
Bowden extruders
Bowden Style 3D Printer Extruder The does not mount directly on the top of the hotend like a direct drive 3D printer extruder, but the motor and gear assembly mounts on the frame of the printer. This gives this type of extruder an advantage over its head-mounted direct drive brother: speed.
By placing the mass of the 3D printer's extruder on the frame instead, the printhead is freed up to print at higher speeds without sacrificing print quality.
A side effect of placing the 3D printer's extruder this way is that the filament now has to travel a long way in a tube that's a fraction wider than it is. There should be enough room along the entire length of the tube for a slight bend in the thread.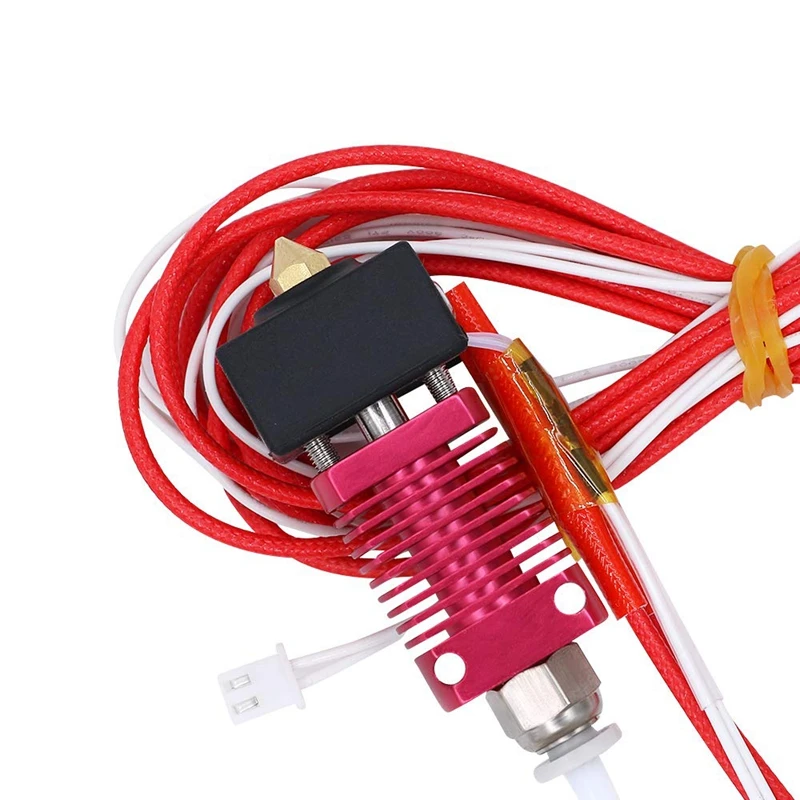 When pulling in the thread between strokes, this slack in the thread shortens the pull-in distance. Without correction (i.e., an increase in retraction), this results in a delay in relieving the pressure exerted on the hot end. In short, you can get confused if you don't change your retract settings.
Heating block (Hotend)
Inside the knot, known as the hot end, the filament passes into a heated chamber where it changes from solid to liquid. Sounds simple, and mostly it is. Although there is a lot more to make the filament silky extrude onto the build plate.
What happens in the heating zone?
The E3D Titan Aero combines a heating block and an extruder in one compact unit. The hot end usually only has the central parts of this image: the heatsink (and fan), the heating element (micro cartridge heater), the heater block, the thermistor, and the nozzle.
A typical 3D printer hot end consists of a specific sequence of parts.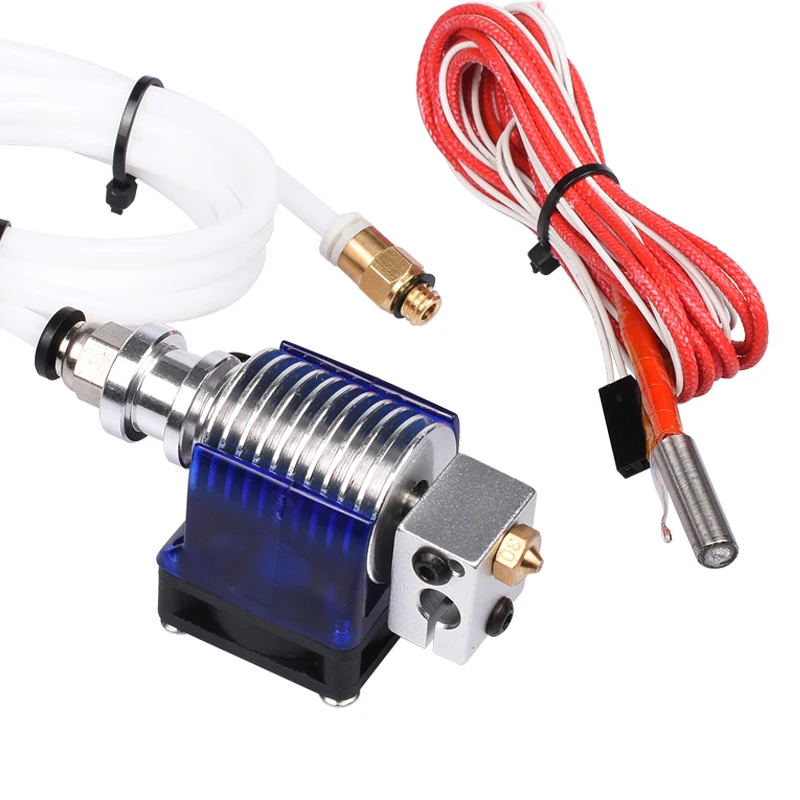 There is a slight difference depending on whether you are using PTFE/PEEK or a full metal hot end. Here we explain the all-metal hot block.
First, it is a filament supply tube. In both a Bowden 3D printer extruder and a direct drive extruder, it will just be a PTFE tube coming from your cold filament feeder.
You can sometimes find direct drive 3D printer extruders where the filament runs straight into the print head.
On a Bowden 3D printer's extruder, this feed tube inserts the filament directly into the thermal barrier via a heatsink. The thermal barrier that is screwed into the heatsink is often a threaded stainless steel (or other non-conductive metal such as titanium) tube.
Split in two (note the two separate threads in the image below - longer for the heatsink, shorter for the heater block) and machined on the inside, the thermal break allows the filament to pass freely into the extrusion nozzle.
Clockwise from bottom left: steel thermal barrier, aluminum heating block and brass nozzle.
But since we're dealing with precision and a material that liquefies for rapid recooling, the 's temperature management is critical. The thermal barrier, in combination with the heat sink, maintains a certain limit at which the filament is exposed to high temperatures.
The top, which is actively cooled by a heatsink and dedicated fan, prevents heat from escaping from the hot end and weakening the filament before it is where it needs to be for extrusion. This unwanted phenomenon is known as thermal creep.
The lower part of the thermal barrier is located inside the heater block together with the cartridge heater, the temperature switch thermistor and the nozzle.
The heater block, usually made of aluminum, ensures a smooth transition of the filament from the open end of the thermal break tube to the nozzle.
The temperature to melt the filament has to come from somewhere, and this is where the cartridge heater comes into play.