Dirty 3d prints
Dirty best 3D printer models・Cults
Clean / dirty switch for dishwasher
Free
Sliding Word Dishwasher Sign with Staggered Layers for Letters
Free
shower tile towel holder
€0.50
Spider web set
€0.59
Joe Dirt Movie
€2
STREET ART STENCILS VOL 4 PACK OF SIX
Free
Small Trash Can with Lid
Free
Oogie Boogie
€5.31
Apocalyptic Concrete PBR Texture
€11.33
Leaf Sack 3D Model
€11.33
Go Pro Hero 2014 Dust Cap
Free
Dishwasher Clean/Dirty Sign
€0. 92
Dirty Diesel logo car
Free
Indicatore Pulito / Sporco per lavastoviglie - italian dirty/clean indicator
Free
STEPBRO_KEYCHAIN
Free
Yuri's pistol from Dirty Pair
€4.64
Kei's gun from Dirty Pair
€4.64
Cake Topper - Dirty 30
Free
Pastic scraper solid
Free
Dishwasher Kanban Card
€0.93 -35% €0.60
GARDENA SAUGPUMP ADAPTER 1 1/2 inch to 1 inch
€1.60
Shit cookie cutter
€1. 02
02
Yes master cookie cutter
€1.02
Cum slut cookie cutter
€1.02
Dishwasher Clean Dirty Sign
€1
Show me more cookie cutter
€1.02
Burlesque dancer cookie cutter
€1.02
CLINT EASTWOOD
€10
Sinkhole Ornamented 01
€5
(American flag, ibew, dirty hands clean money)impact bit case and holster
Free
DIRTY JOBS SPONGE HOLDER
€4
PIG / COCHON
Free
Cupboard Cupboard
€1.50
Clean/Dirty Dishwasher Sign
€2. 30
30
Dirty Clean Indicator Dishwasher
Free
Dishwasher CLEAN-DIRTY sign
Free
Japanese Text Flip
€0.60
Dirty Seagulls – GPS TBS M8.2 and receiver mount
€6.50
Dirty Seagulls – arm guard
€10
Planet of the Apes Army Men Miniatures
€2.79
Laundry Label
€0.70
HD People 02 Washing clothes
€14
Spongebob Squarepants Bubble - SpongeBob SpongeBob
Free
bathroom deodorizer cover
Free
Dish Scrubber Holder with Attachment for Kitchen Sink
Free
Feudal Guard Contamination Mini - 28mm Scale Miniature
Free
2-Tone Mini Garden Rake
Free
Naughty best 3D printing models・Cults
Pole Dance CHRISTMAS BALL - Set of 40 models
€1
Naughty Leprechaun stash container
€0. 65
65
Pedro Joel
€15
CANDLE HOLDER - NAUGHTY MODEL
€0.51
Joel Miller Bust The Last Of Us TLOU
€4.52 -50% €2.26
CANDLE HOLDER - NAUGHTY MODEL
€0.51
CANDLE HOLDER - NAUGHTY MODEL
€0.51
CANDLE HOLDER - NAUGHTY MODEL
€0.51
CANDLE HOLDER - NAUGHTY MODEL
€0.51
CANDLE HOLDER - NAUGHTY MODEL
€0.51
CANDLE HOLDER - NAUGHTY MODEL
€0.51
CANDLE HOLDER - NAUGHTY MODEL
€0. 51
51
CANDLE HOLDER - NAUGHTY MODEL
€0.51
CANDLE HOLDER - NAUGHTY MODEL
€0.51
CANDLE HOLDER - NAUGHTY MODEL
€0.51
CANDLE HOLDER - NAUGHTY MODEL
€0.51
CANDLE HOLDER - NAUGHTY MODEL
€0.51
CANDLE HOLDER - NAUGHTY MODEL
€0.51
CANDLE HOLDER - NAUGHTY MODEL
€0.51
CANDLE HOLDER - NAUGHTY MODEL
€0.51
CANDLE HOLDER - NAUGHTY MODEL
€0.51
Vega Ship 2nd generation - goldorak
€2
Cute corgi bath bomb mould
€6. 16
16
Cinderella's chariot bath bomb mould
€9.86
Hogwarts letter Harry Potter bath bomb mould
€9.86
Lush style cute cow bath bomb mould
€6.16
Sweet dreams bath bomb mould
€12.33
Naughty peach emoji bath bomb mould
€9.86
Naughty eggplant emoji bath bomb mould
€9.86
Crash Bandicoot Angel Statue
€4.24
Family Tree Of Love Decor
€0.75
The Last of Us - Bloater Bust
€24.89
3D MULTICOLOR LOGO/SIGN - UNCHARTED (2022 Film)
€1.99
The Last of Us - Clicker Bust
€23. 48
48
Water Bottle Bubbler
€4.69
The Last Of Us Firefly Emblem
€1.41
decoration / candle holder / phosphor
€0.50
decoration / candle holder / phosphor
€0.50
decoration / candle holder / phosphor
€0.50
decoration / candle holder / phosphor
€0.50
decoration / candle holder / phosphor
€0.50
decoration / candle holder / phosphor
€0.50
decoration / candle holder / phosphor
€0.50
Decoration/ candle holder/ disney phosphor
€0.50
Krampus
€10. 33
33
Do not disturb
€0.75
Tentacles
Free
Bad Santa
Free
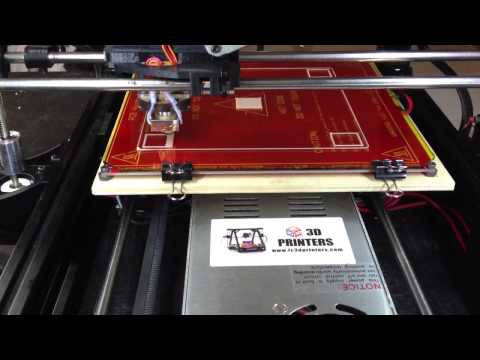
Mud Frontiers: Dirty Construction 3D Printing
News
Including the dirt itself, which was demonstrated in practice by designers and architects from Emerging Objects.
The project is called Mud Frontiers or Mud Frontiers. Yes, yes, it’s not at all necessary to sculpt the beautiful from God knows what with your hands, because you can use a 3D printer. On the other hand, the experiment began with the reproduction of just all sorts of ancient stucco and handmade pottery found in the mountains of San Juan and Sangre de Cristo, in the US states of Colorado and New Mexico. Having messed with the 3D printing of clay pots, the team took on a larger project, because the Indians in these places have been sculpting not only dishes, but also dwellings from past material for centuries.
The result of the efforts were four experimental structures from a mixture of clay soil with milled straw. On one of them, Beacon, they worked out the minimum thickness of the walls, and it got its name (“Lighthouse”) for external lighting. 3D printing of a spiral staircase was tested on the Lookout structure (“Observation post”). The Hearth building was equipped with an internal bench running along the wall and around the hearth, and the Kiln (Oven) was turned into a simple pottery workshop, returning to the production of clay pots.
The potter's kiln is fueled by juniper, which was also used as reinforcement for the Hearth: in the illustration below, you can see the bars sticking out of the walls. And the walls were printed using the Potterbot XLS-1 3D printer, developed by 3D Potter. This is also an unusual design in the sense that the system is based on a rather rare SCARA mechanic in the world of 3D printing.
In conjunction with one or two operators, the 3D printer effectively replaces a team of six Yakut sculptors, printing pieces up to 2. 75 meters high and up to 2.5 meters in diameter, as the 360-degree rotating arm system prints around itself. More details can be found in the material at this link.
Well, why all these experiments? The team was stirred up by one of the articles in a series called "40 Things You Need to Know About the Next 40 Years," published in the Smithsonian Institution's Journal. In particular, it states that we will have to eat jellyfish (because there will be nothing else left in the sea), artists, musicians, comedians and other creative personalities will rule the world (apparently because you can’t drink real talent), and advanced building structures will be built from mud. Something, but this good is still enough.
Do you have interesting news? Share your developments with us, and we will tell the whole world about them! We are waiting for your ideas at news@3Dtoday. ru
ru
20 most common 3D printing problems (Part 1)
Good afternoon dear 3D Today community! I would like to present you a translation of the article Troubleshooting Guide to 20 Common 3D Printing Problems, which will be divided into 2 parts.
Everyone has problems with printing. We had enough of them to analyze and find solutions for the 20 most common 3D printing problems. In this article, we share our experience and hope that now you do not have to spend extra time diagnosing and solving problems that have arisen.
If you cannot determine what the problem is, compare it with the description.
3D Printing Issue #1: Warp - First Layer Peeled
Issue Description
The print is lifting up on the base of the model and does not stick to the platform. This problem can also cause horizontal cracks in the top sections of the printout.
Why did the problem occur?
Deformation of the print base is due to the nature of the plastic. ABS and PLA plastic cools very quickly and this is what can cause the first layer to come off.
Solve 3D printing problem: Printout warped
1. Use heated bed. The simplest solution to this problem is to use a heatbed and set the temperature just below the melting temperature of the plastic. If you set the temperature correctly, the first layer will not come off the platform. The printer bed temperature is often set automatically by the slicer. The recommended temperature for your plastic is listed on the side of the package or reel.
2. Use adhesive . If your printout is lifting around the edges, apply a thin layer of glue (or hairspray) to the platform to increase adhesion.
3. Try another platform. Change the platform to a platform with more adhesion. Manufacturers like Lulzbot use a PEI (Polyetherimide) coating that provides a good grip even without the use of glue. XYZPrinting Some printers include a few pieces of thermal tape for the liner. This is a good solution for cool platforms. Zortrax 3D choose a different solution - a perforated backing to which the printout adheres, thereby relieving the user of the problem of deformation at the base.
4. Calibrate the platform. Improper platform calibration can also affect the print quality of the first layer. Check the level of the platform and correct the height if necessary.
5. Increase contact between printout and platform. Often this problem also occurs due to insufficient contact between the model and the substrate. It can be easily corrected using the printer software by adding a skirt or backing.
6. Optimize temperature settings. If none of the methods worked, check the advanced settings of the printer software and the printer itself. Try increasing the platform temperature by 5 degrees.
7. Pay attention to the fan settings. As a general rule, the fans should switch to full power as soon as the print reaches a height of 0. 5 millimeters, but you can increase the height to 0.75 millimeters to allow the layers to cool naturally.
8. Even if your printer has a heated bed, it is recommended that you use glue (or varnish) and constantly adjust the bed level.
3D Print Warping: Checklist to Avoid Problems
- Use Heated Platform
- Use Glue (Varnish) for More Adhesion
- Use Kapton/Heat Tape/Glue/Varnish Instead of Glass Platform
- Recalibrate Platform
- or substrate
- Adjust temperature and fan settings
3D printing issue #2: First layer misalignment (Elephant's foot)
Problem description
The base of the model is slightly off.
Why did the problem occur?
Generally, the base of the model is shifted due to the weight of the print, which presses on the first layer when the lower layers have not had time to cool yet. Often happens with heated bed printers.
3D Printing Solution: First Layer Offset
1. Correct balance. To get rid of the problem of first layer displacement, printed models must be sufficiently cooled to support the weight of the entire structure. Here you should be careful: excessive hypothermia can lead to deformation of the first layer. Finding a balance is hard enough. Start by lowering the platform temperature 5 degrees (but no more than 20 degrees below the recommended temperature). If Bottom / Top Thickness is set to 0.6 millimeters, turn on the fan immediately at a height slightly lower.
2. Platform level. Most 3D printing problems are related to the wrong platform level. For each printer, there is a specific approach for platform level calibration. Check the manufacturer's recommendations to determine what you need. Print out a calibration cube and look at the quality of the plastic feed. The calibration cube will help you determine if the plastic has been laid flat, and if the nozzle is too close to the platform and scrapes the melted plastic, or too high causing the plastic to bubble.
3. Raise the nozzle. Raising the nozzle a little can often help. The main thing is not to raise it too high.
4. Smoothen the corners of the model. If all else fails, try chamfering the corners of the model base. Of course, this is only possible if you created the model yourself or if you have access to the source file. Start with 5mm and 45º bevel and experiment to get the best result.
3D Printing First Layer Offset: A Checklist to Avoid Problems
- Balance Platform Temperature and Fan Speed
- Raise Printer Platform
- Check Floor Height
- Make model corners smoother 9 3036
Description of the problem
The first layer does not look right, some fragments are missing. There are unnecessary lines at the bottom.
Why did the problem occur?
Such 3D printing problems usually indicate that the platform level has not been set correctly. If the nozzle is too far from the platform, unnecessary lines often appear at the bottom of the printout or the first layer does not stick. If the nozzle is too close to the platform, this can cause formation bubbling.
Also note that the platform must be clean. Fingerprints on the platform may cause the first layer to not adhere to the platform.
3D printing problem solution: Other first layer problems
1. Set the platform level. Each printer has its own platform level configuration process. For example, the latest Lulzbots use auto-calibration, while Ultimaker offers step-by-step manual calibration. But to set up the Prusa i3 platform level, you will need to spend a lot of time studying the issue.
2. Set nozzle height. If the nozzle is too high, the plastic will not stick to the platform, if it is too low, the nozzle will scrape the printout.
3. Clean the platform. Be sure to clean the printer platform regularly, especially if you are using adhesive. Fingerprints, dust and adhesive residue affect how well the model sticks to the platform.
4. Use glue (varnish). Apply a thin layer of adhesive to the platform to increase the adhesion of the model to the platform. Remember to clean the platform regularly as excess glue can cause the opposite effect. 9Problem Description
Layers shift in the middle of the printout.
The printer straps are not tight enough. The top plate is not attached and moves independently of the bottom plate. One of the rods in the Z axis is not perfectly aligned
3D Printing Solution: Layers misaligned in the model
1. Check the belts. First of all, check how tight the straps are: they shouldn't hang loose, but they shouldn't be too tight either. If you pull on the straps, you should feel a slight resistance. If you feel that the top strap is tighter than the bottom strap, this is a sure sign that they are not tight enough.
2. Check the cover. Check the cover, rods and other parts on top of the printer (if you have coreXY). Make sure all parts are properly fastened.
3. Check the z-axis screws. Many printer manufacturers use threaded studs more often than trapezoid screws, and while both do the job, the studs tend to bend over time. No need to disassemble the printer to check if the rods are straight. Simply use software such as Printrun to move the print head up and down. If one of the Z axis bars is bent, you will definitely notice it. Unfortunately, it is almost impossible to straighten a bent stud, but on the other hand, this is a great reason to replace old threaded rods with trapezoidal screws.
Supreme displacement: Cheklist
- Check belt tension
- Check if the upper cover is moved
- Evise that the hairpins along the zasa are even ,000 description of 3D describ problems
- Check the printer mechanism to make sure the moving parts are tight.
- Recheck printer design and alignment
- Check for worn bearings and bent pins
- Use some oil to lubricate parts
- Check the maximum possible temperature of the extruder and increase the current temperature by 10ºC in one attempt.
- Check the direction and speed of the cooling fans.
- Use a larger diameter
- Mrive that the direction and speed of the fans are correct
- manually set the fan speed
- Enlarge the thickness of the upper layer
- Check the diameter of the Philiment
- Use the caliper diameter
- Check whether
- EXTRITITION is 5% EXTITION OF THE 901AT
Gaps in the model appear due to the fact that some layers are missing (partially or completely).
The printer was unable to produce the required amount of plastic to print the missing layers. In 3D printing, this problem is also known as under-extruding. The essence of the problem may lie in the plastic itself (for example, a different diameter of the material), in the coil, in the feed mechanism (extruder) or in a clogged nozzle.
Friction can cause plastic to get stuck. It could also be that the z-axis screws (studs) are not properly aligned with the linear bearings.
There may also be a problem with screws (studs) in the Z axis and with the bearings themselves.
3D Printing Solution: Missing Layers
1. Mechanical Check . If suddenly you find missing layers in the print - it's time to take a little care of your printer. Start by checking the screws (studs) and make sure they are firmly attached to the bearings or clamps.
2. Check rod alignment. Check that all screws (studs) are aligned and not misaligned. Turn off the power and gently move the print head along the X and Y axes. If there is any resistance, then there is some problem. It is easy enough to understand what exactly the problem lies in - a slightly bent rod or bearings.
3. Worn bearings. Worn bearings make noise. You may also feel the rattle of the print head, while the printer vibrates slightly. In this case, turn off the power and move the print head along the X and Y axes to find out where the worn bearing is.
4. Check the oil. Be sure to regularly lubricate the moving parts of the printer. Sewing machine oil is ideal for lubrication - you can buy it at any hardware store at an affordable price. Before applying oil, make sure the studs (screws) are clean. If the studs(screws) have dirt or print material residue, clean them.
Then connect to the printer via a program (eg Pronterface) to move the print head in the X and Y axes and check that the studs are evenly lubricated. If you apply a little more oil, just wipe off the excess.
5. Underextruded . The last cause of the problem may be insufficient extrusion. There can be many solutions to this problem, and all of them are described in Section 9.
Checklist
3D printing issue #6: Cracks in tall objects
Problem Description
Cracks on the sides of the model, most commonly in tall models.
The problem can occur unexpectedly, and most often occurs in large printers, especially if you do not monitor their work.
On the upper layers, the material cools faster because the heat from the platform does not reach the required height. Because of this, the adhesion of the upper layers is lower.
3D Printing Solution: Cracks in Tall Objects
1. Extruder Temperature . Start by increasing the extruder temperature - 5-10ºC is best. On the side of the plastic box you will find the highest temperature for plastic, try not to raise the temperature to this value.
2. Fan direction and speed . Double check your fans and make sure they are pointed at the model. If the direction is correct, reduce their speed.
Checklist
3D Printing Issue #7: Holes in the top layer
Description of the issue
Holes and gaps in the top surface of the printout.
The two most common causes of this problem are improper top coat cooling and top coat not thick enough.
Solution to 3D printing problem: Holes on the top layer
1. Filament diameter . Often the problem happens with plastic with a diameter of 1.75 mm. Holes in the top layer are a problem with all 3D printers, but they happen more often with printers that use 1.75mm filament than with printers that print with filament larger than 2.85mm.
2. Check the location of the fan . Cooling can cause this problem, so check the fans first. When the printer starts printing, the fans are at their lowest speed or off. After printing the first layer, the fans start to work. Check if they start working and also check if they continue working when printing is finished. If all is well, double-check if the direction of the fan is set correctly - they should blow over the model.
3. Set fan speed in G-Code. Another cooling issue is related to excessive plastic in the top layer. It must cool quickly so as not to fall between the already printed supporting elements. The fan speed can be adjusted with G-Code ( is usually G-Code for Fan On is M106 and M107 Fan Off ).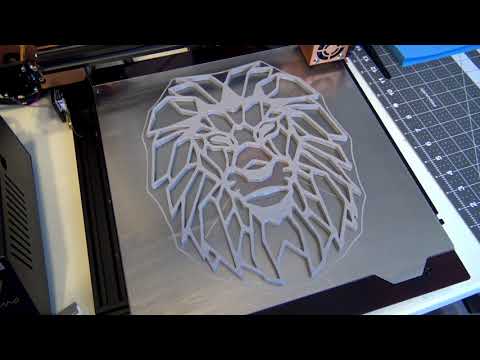 Also set the fan speed to maximum for the upper layers.
For example, for a 1cm x 1cm cube, the height of the top layer would be 0.1mm. In this case, when generating a G-code through CURA for Prusa i3, the G-code indicates that the number of layers for the cube is 100. Considering that we specified heights of 0.6 mm for the top and bottom layers, it is worth editing the value to LAYER: 94
4. Increase the thickness of the top layer . One of the simplest solutions to the problem is to increase the thickness of the top layer. In most applications, you will be able to adjust the thickness using the ‘Bottom / Top Thickness setting’ advanced settings. You need to increase the thickness of the top and bottom layers up to 6 times the other layers and up to 8 times for smaller nozzles and plastics. If the layer height is 0.1mm, then the height of the top and bottom layers should be 0.6mm. If there are still holes and bald spots in the top layer, increase the thickness to 0. 8mm.
8mm.
Cheklist:
Description of the problem
Cobwebs or hairs appear between model elements when printing.
When the printer head moves over an open surface (without extrusion), i.e. from one object to another, the plastic flows out of the nozzle.
3D printing solution: Hairs, webs
1. Turn on retract . Retraction is an important factor for the quality of the finished model and can be enabled in the slicer. It functions quite simply and works by pulling the filament back into the nozzle before the head starts to move. The bottom line is that it prevents plastic from flowing out of the nozzle, which creates a "spider web" between objects.
2. Retraction activation in settings . Most apps like Cura offer pull activation in settings and this is set by default. However, if you want more options, you can customize them further. For example, you can set the minimum head path before activating retraction.
3. Minimum distance (mm) . If retraction is not working correctly, the easiest way to fix this is to reduce the minimum distance. Reduce it by 0.5mm until hairiness disappears. Activate retraction (retract) to increase the speed of printing.
This problem has several causes. First of all, the thread diameter may not match the diameter set in the slicer. Also, the amount of extruded material may be lower due to incorrectly configured firmware. Another problem is that the nozzle can become clogged and this will cause under extrusion.
Solution for 3D printing problem: Underextruding
1. Check filament diameter . Start with the simplest solution - check the filament diameter settings in your slicer. If you are not sure about the filament diameter and the recommended temperature, check the information on the packaging.
2. Measure thread . If you still can't get the desired result and filament separation remains a problem, use a caliper to check the filament diameter. After measurement, adjust the settings of the slicing software. ( author's note - if you have a bowden hotend, then you need to unscrew the fitting from the hotend, enter the command (for example, in Pronterface) M302 : Allow cold extrudes and extrude a meter of plastic. If more or less is extruded, then you have an incorrect number steps per mm for the extruder If you have a direct hotend, then you need to unscrew the nozzle ( the nozzle can only be unscrewed when it is hot! ). It is also worth noting that even with the correctly set steps per mm value, when retracting, the distance traveled will be less than when extruding. This is because more resistance is experienced when retracting )
3. Check printhead . After starting printing, most printers lift the print head off the model base. Check if the nozzle is clean.
4. Set the extrusion factor to . If there is no difference between the actual extrusion diameter and the software settings, check the extrusion multiplier settings (or flow rate or flow compensation), they may be too low. Each slicing application solves the problem differently, but try increasing the ratio by 5% and restarting the print process.
5. Open the Edit Process Settings window in Simplify3D and go to the Extruder tab - the extruder factor should be set to 1.0 which corresponds to 100%. Open the Material tab in Cura and increase the Flow settings (you may need to enable Flow in the Preferences window).
Cheklist:
Description of the problem
Excessive extrusion means that the printer is supplying more material than needed.