Delrin 3d printer
Acetal 3D Printer Filament - Gizmo Dorks
Gizmo Dorks
$26.95
Size *
1.75mm 3mm (2.85mm)
Color *
Black White
Qty:
Share:
Add to Wishlist
Current stock: 0
Polyoxymethylene (POM) filament is also known as Acetal or Polyacetal. The company DuPont uses the trade name Delrin for Acetal Resin. It is a commonly used thermoplastic to engineer specific parts. Acetal filament has high stiffness, low friction, and excellent wear resistance. It has good elastic resilience and great dimensional stability. The filament has good chemical and heat resistance. Because of it's low friction, POM is routinely used as gear wheels, ball bearings, etc. It has high impact resistance, which is one of the reasons the M16 rifle's stock is made out of POM.
The recommended print temperature is between 210°C - 220°C. POM can be printed on a heated bed plate 100°C - 130°C. Acetal does not adhere well to any of the typical 3D printer bed surfaces. Using wood or cellulose based platforms to print on is the best alternative. A cheap and quick alternative is to use a thick resume or sketch paper, roughly 80 pound weight. Glue down the paper with Elmer's glue stick on top of your printer bed which is typically metal or borosilicate glass. Some users print using blue tape covered with hairspray. Not all blue tape and hairspray are the same. If you have a heated chamber, then please remember to pre-heat your chamber to reduce warping. Printing in an enclosed chamber will help with delamination. Please keep Acetal away from moisture and always keep filament in an airtight container with a desiccant.
- Net weight = 1 kg or 2.2 lbs
- Printing temperature : 210°C - 220°C
- Bed temperature : 100°C - 130°C
- Print speeds : 30mm/s
- Great strength and low friction
- Print on a heated bed
- Use in well ventilated areas or ventilated systems
Size Options
1. 75mm
75mm
3mm (2.85mm)
Please note that Acetal degrades when overheated and may give off small amounts of formaldehyde gas. Do not keep Acetal heated above 230°C. Please always use in a well ventilated area or in a ventilation system. Decomposition of the material depends on the length of time it is exposed to elevated temperatures. At typical print temperatures of 210 - 220 C, decomposition is not significant until after 30 minutes. At melt temperatures, acetal is incompatible with halogenated polymers and can cause spontaneous formaldehyde gas formation. Print using an all metal hotend.
Your shopping cart
Account
Log in
Email Address *
Password *
Forgot password?
New Customer
Create an account with us and you'll be able to:
- Check out faster
- Save multiple shipping addresses
- Access your order history
- Track new orders
- Save items to your wish list
Create Account
Forgot Password
Fill in your email below to request a new password. An email will be sent to the address below containing a link to verify your email address.
Email Address *
Reddit - Dive into anything
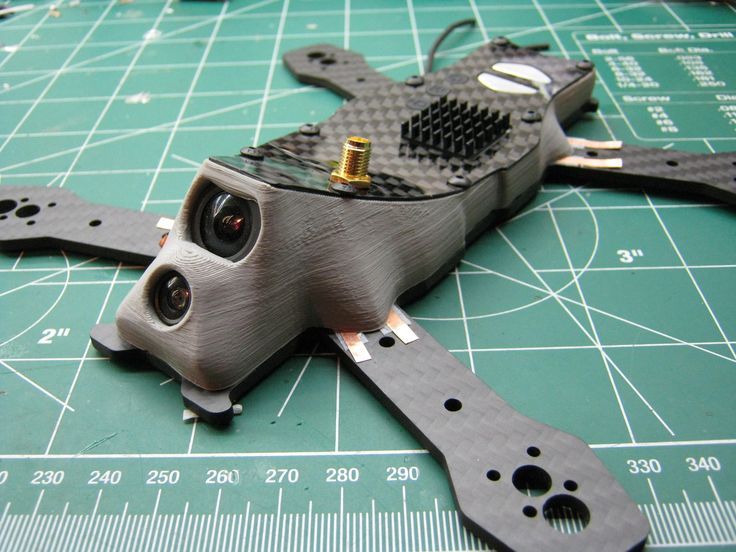
I could not find any info on the net, so I thought I would post my experience. Hopefully some others can contribute more and help us all. First, I am a big time amateur, but I’m also an engineer so I at least do things methodically. I have a printer in my shop where I build and service my race cars. Printing is just another tool in the toolbox and my ultimate goal was to design and print some carbon-nylon ready to use parts. I achieved that easily and then realized I could do some real fun stuff with Acetal. That’s when my smile turned upside down. In my research I could not find anyone successfully printing anything in the size I wanted or with any sort of home-based printer. Nor could I find anyone to print the parts for me.
Why Acetal?
It is relatively cheap, rigid, good strength, dimensionally stable, easy to sand or machine, low moisture absorption, wear and abrasion resistant, chemically resistant, self-lubricating, suitable for useable parts.
Why not Acetal?
It is HARD to print and requires printer upgrades. Self-lubricating means it does not stick to anything. Like frying bologna on a Teflon pan. And if that is not enough, when heated it gives off harmful vapors that can cause cancer.
In summary, a good print is all about adhesion to the base. Ever heard that before? Well after 6 months of trials I finally gave up on that. But this is what I did to get close and can print some usable parts with the compromises I made. This is by no means a recipe for success for others. I came up with a process that gets me what I need but I can’t tell you exactly which variables you can change and get better or worse success with your projects. At this point I have frozen my process and I am no longer experimenting.
Material
I have been using the Gizmo Dorks version of Acetal filament in 0.4mm size. I purchased from Amazon and a 1kg roll seems to go for a long way. I read somewhere Acetal is somewhat hydroscopic and could cause print problems if left in high humidity area. I keep the roll in a sealed box with a small Peltier plate dehumidifier that keeps it around 50% or less. This was not a problem because I was already storing and printing Nylon. So far part shrinkage has been around 2.5%.
From Gizmo Dorks: “Please note that Acetal degrades when overheated and may give off small amounts of formaldehyde gas. Do not keep Acetal heated above 230°C. Please always use in a well ventilated area or in a ventilation system. Decomposition of the material depends on the length of time it is exposed to elevated temperatures. At typical print temperatures of 210 - 220 C, decomposition is not significant until after 30 minutes. At melt temperatures, acetal is incompatible with halogenated polymers and can cause spontaneous formaldehyde gas formation. Print using an all metal hotend.”
Print Size
My initial project was a suspension bearing that fits into a piece of square tubing. The final part is 34mm x 34mm x 75mm tall with a 25mm hole through the center. I mention this because size matters. Smaller parts should be slightly easier to print and larger parts will be more difficult. All my development so far has been getting this project to work.
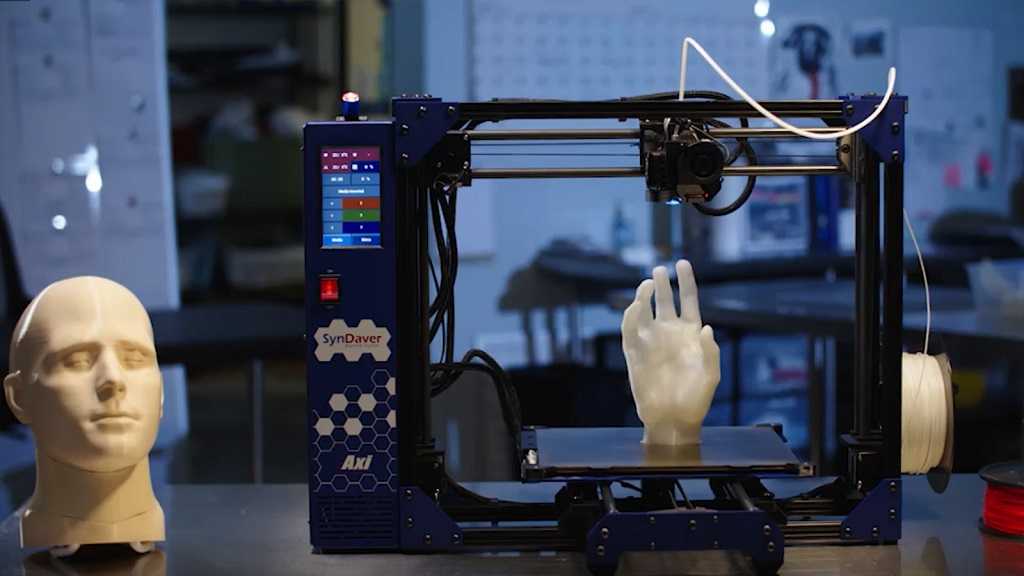
Machine
I am using a Creality CR-10S I have been running for over a year. It has several modifications to be able to print the Carbon-Nylon material and also the Acetal. It has a V3 hot end upgrade with carbon-nylon housing to hold it, tool steel 0.4 nozzle and a 110V heating bed upgrade. The Acetal seems to be very easy on the nozzle and brass is probably fine. I checked my tool steel nozzle after 100+ hours of printing Acetal and it had 0 wear. I also upgraded the feeder to an aluminum piece. This mod is required for the Acetal. It will slip in the stock plastic feeder.
Environment
This is where things started getting tricky. I had a polycarbonate enclosure surrounding the printer with a vent fan for fumes. I noticed I was getting better prints as the internal air temperature went up and suspected the vent fan was not helping.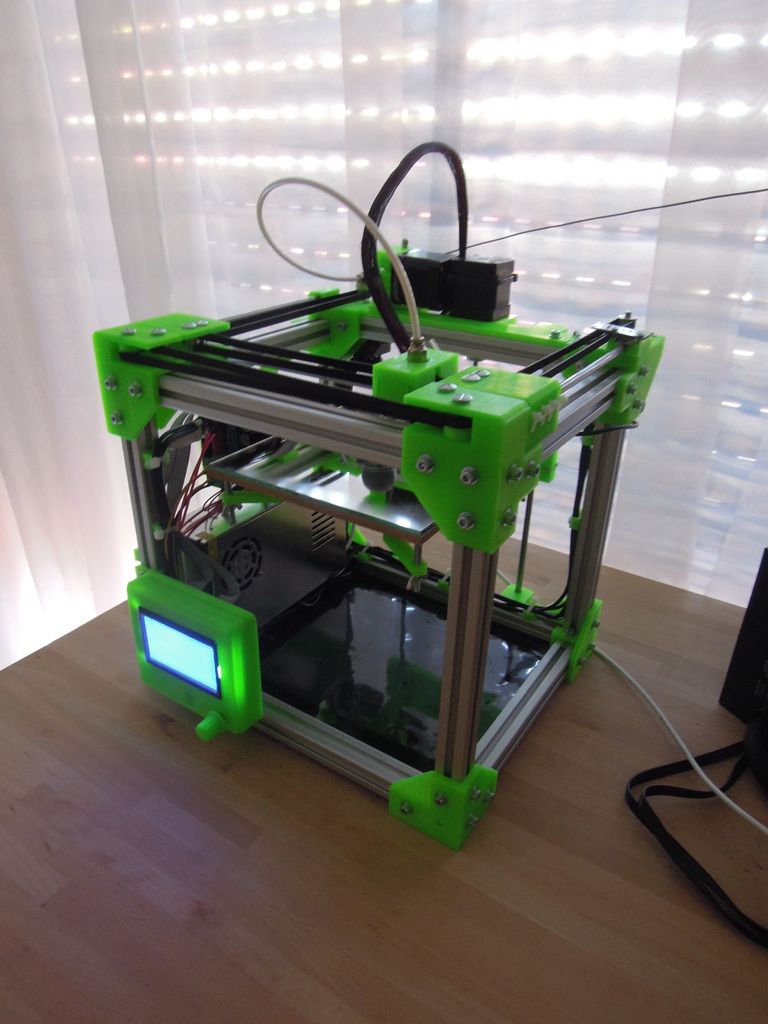 I then built an enclosure inside the enclosure with insulation board and masking tape. This seemed to stabilize the printing environment and improved the quality again. The vent fan pulls air from around the inner enclosure without drafting the print area and allows higher air temperatures inside. I initially melted all my PLA brackets inside the enclosure and upgraded them to ABS. When everything has stabilized the air temperature in the inner box remains between 32 and 37 Degree C depending on the room temperature. I suspect a fully heated chamber would be required to print larger projects and get better reaults.
Machine/Slice Settings
To getting a structurally good print I tried several nozzle temps. Acetal seems to like hotter settings for good internal fusion. I ended up at 255C. At this temp, it prints clear and is hard to see. It takes a few minutes to cool down and whiten. At this elevated temperature, Acetal gives off formaldehyde gas, and quite a bit of it. One time I had the vent fan wired backwards and my print room smelled for a week. I ended up venting the gases up into the loft of my shop near an attic fan. The formaldehyde is easy to detect and produces burning eyes and throat.
I kept cranking and cranking up the surface plate temp and getting better results. I assume it slows down the shrinking. I was afraid to go too high with my set up because I don’t want to fry the printer. It is only rated at 135C. I ended up building the raft out at 150C and printing the part at 135C. I experimented backing on down to 90C after the raft, but it caused some problems. I noticed the cloth build surface does insulate somewhat so the bottom layer of the print is less than the plate temp, but I have not directly measured it.
This stuff likes to print slow. Limiting the amount of wet material out there reduces shrink rate and helps with structural integrity. I currently print and infill at 40mm/s with at with a 20mm/s outer wall and initial layer speeds. I tried to go even slower but then the flows got all out of whack. Layer height is 0.15 and infill is 100%.
I ended up with a 20mm margin 8-layer raft with 0 gap. I could never get a brim to work. The raft WILL lift on its outside edges hopefully no more than about 1/8 inch. If it gets to ¼ inch it will throw the print head off track and possibly break things. This stuff is rigid. I must observe the full raft construction to make sure everything is sticking as planned. If it lifts too much, I abort and start over.
Build plate surface
Tried all normal stuff like tape, glues, etc. even birch wood. Nothing seemed to work. Then I started trying cloth glued on glass with Elmer’s glue stick. I had a bag of rags from local hardware store and one was like a t-shirt on 1 side and had some extra knitting on the other. I got the best print yet out of that cloth. Then as I tried other similar cloth from the bag, I lost the recipe. T-shirt, denim, canvas do nothing. I tried texture like a towel which is knitted on both sides, it sticks well to the model but not the plate. I didn’t have any more of the special rag, so I began trying cheap athletic socks. The smooth on 1 side (plate) and knitting on the other (model side) gives just about the best holding ability I have gotten so far. That is when I essentially gave up on ever getting a final part off a plate. The first 10mm or so still pulls the raft up and distorts slightly plus you must cut or sand he raft off anyway. This is where I stopped developing the surface.
Engineering Solutions
Even with cloth surface and 20mm raft, I still get too much lift in the corners of the actual part. The lift was still enough to destroy the print cause structural problems. I decided to design some features on bottom of the models to compensate for the initial corner lifting. I needed roughly 10mm build height for the shrinking to settle out ON TOP OF THE RAFT. I tried a few things like supports on the sides, a sort of side raft, corner anchors, etc. but anything that increases the footprint goes bad in a hurry. The 2 geometry designs that seem to work the best are the pyramid and reverse pyramid. I really liked the reverse pyramid because so much less material is required and have a few good trials from it. But the expanded base pyramid gave the best overall results if the cloth to glass bond is marginal, which is 50% of the time. Even with these solutions, I get some dimensional inconsistencies over the length of the part. I have seen up to 0.25mm differences in the part width but that is acceptable for me. I judge the success of the print by the raft distortion directly underneath the part.
That is about everything I can think of. If you contribute to this discussion, please detail any success or failure you have had and what you tried.
PHOTOS
Typical lifting if raft failure
https://flic.kr/p/2iJDeFJ
https://flic.kr/p/2iJDeDK
Clogged nozzel
https://flic.kr/p/2iJyQKx
Base lifting too much failure
https://flic. kr/p/2iJDewA
Structural failure due to lifting
https://flic.kr/p/2iJyQBG
https://flic.kr/p/2iJBzQ4
Failed raft next to a good print
https://flic.kr/p/2iJDenh
https://flic.kr/p/2iJBzK9
Very failed raft
https://flic.kr/p/2iJyQu7
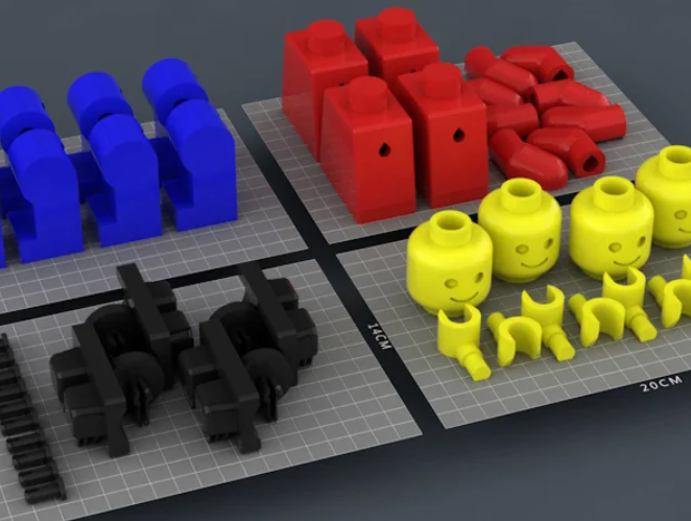
My 2 engineering solutions, pyramid and reverse pyramid
https://flic.kr/p/2iJBzFg
https://flic.kr/p/2iJDecs
https://flic.kr/p/2iJyQmG
Detail of Pyramid design
https://flic.kr/p/2iJDG79
Base and corner failures. Should have canceled print early.
https://flic.kr/p/2iJBzzV
Sock detail
https://flic.kr/p/2iJBzpz
My enclosure inside an enclosure
https://flic.kr/p/2iJBzkg
https://flic.kr/p/2iJBzi2
Sock dissection
https://flic.kr/p/2iJyPYC
https://flic.kr/p/2iJDdK5
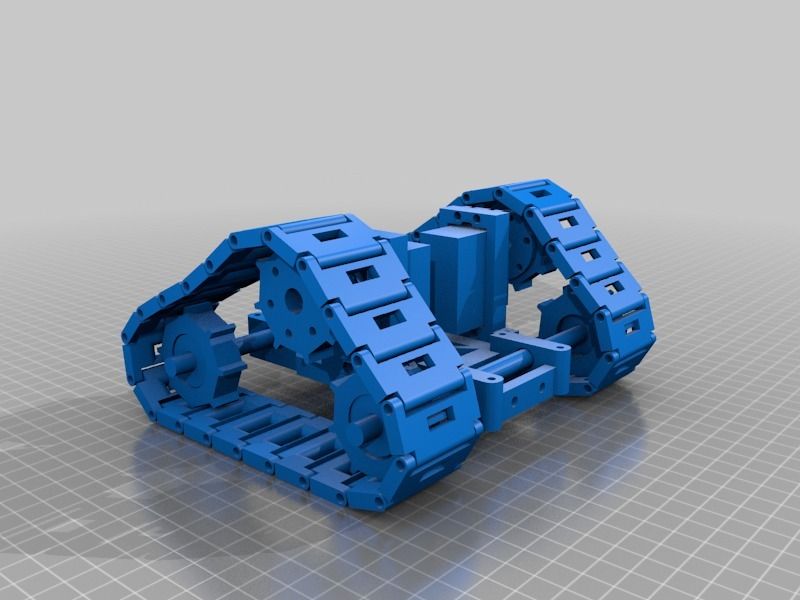
Free STL file Delrin bearubg 15mm od 8mm id・3D printing template to download・Cults
Ball cube candle mold
3. 35 €
35 €
geometric 5 pointed star
1,30 €
Crown chakra mold
1,30 €
HIV / AIDS candle
1,30 €
Om candle mold
1,30 €
Sacral chakra mobile
1,30 €
Eye chakra mold
1,30 €
root chakra candle mold
1,30 €
The best files for 3D printers in the Tools category
Mini Sledgehammer Wall Mount (1350g) 032 I ENFORCE I for screws or peg board
Free
Laboratory Vial Container
Free
Miter Box
Free
Windscreen ice scraper
Free
Universal Dual Filament Dragon Clip
Free
Fiat Freemont shift knob cap
3 €
Origami-Nozzle-box
Free
Bestsellers in the Tools category
telephone ring holder
0,90 €
DnD Terrain Rollers - Tiles
4. 61 €
61 €
PET-Machine, make your own plastic bottle filament at home!
50 € -70% 15 €
Ender 3 S1 BEST cable guide - vertical
2,50 €
well designed: Hemera 9 fan duct0004
2.50 €
Case for Chill Buddy lighter
0,91 €
Business card embossing system
3 €
ENDER 3 S1, S1 PRO, SPRITE, HOT END DUCT 4020 OR 5015 FAN, NON-OFFSET Y PROBE, ABL BETA ADAPTER
€2.24 -18% 1.84€
gb-22 mini
0,90 €
'ELEGANCE' Bambu lab set and general 3d printers
5 €
Fire hydrant container
1. 84 €
84 €
Printer boxes for Ikea Lack Table
1,99 €
ENDER 3 S1/S1 PRO, 2020 ALU PROFILE, REEL SEAT AND DEPORTED COIL
€2.09 -18% 1.71 €
SUPERBOX
1,50 €
Cut-Man - PET bottle cutter with handle!
5 € -thirty% 3.50€
Paint stand with scissors
5.09 €
Do you want to support Cults?
Do you like Cults and want to help us continue our journey on our own ? Please note that we are a small team of 3 people, so supporting us in maintaining activities and creating future developments is very easy. Here are 4 solutions available to everyone:
-
AD: Disable the AdBlock banner blocker and click on our banner ads.
-
AFFILIATION: Shop online with our affiliate links here Amazon.
-
DONATIONS: If you want, you can donate via Ko-Fi here 💜.
-
* INVITE FRIENDS: * Invite your friends, discover the platform and great 3D files shared by the community!
3D printer mechanics - 3DPrinter
Showing 1-25 of 57
Initial SortBy PopularityBy RatingSort By Latest Price: Ascending Price: DescendingPlatform hard spring kit
55 UAHHard springs for the 3D printer platform - 4 pieces.
Colour: blue
Please note! Only springs from the new batch remained in stock - D 10 mm, d 5.5 mm, height 25 mm . When choosing the product option “External D 10 mm, internal d 5.5 mm, height 20 mm” – sending will be springs with a height of 25 mm.
Roller U-shaped for machine profile 2020
10 UAH – 20 UAHU-roller for machine profile 2020
Bore diameter: 5 mm
Roller outer diameter: 23 mm.
Roller width: 7 mm
Profile type: 2020
Colour: black
Bearing: 625zz
Price is for 1 piece.
Add to cart
V-roller for aluminum profile 2020
52 UAHV-roller for 2020 aluminum profile for 3D printers Creality, Ender, Anet, Artillery, Tevo and others.
Bore diameter: 5 mm
Roller outer diameter: 24 mm.
Profile type: 2020
Colour: black
Bearing: 625zz
Add to cart
Timing belt T2.5-10 for 3D printer
105 UAHHeavy Duty Reinforced 3D Printer Belt.
The use of this belt will require the installer to use special spools.
Any size - for any printer.
Standard: T2.5
Material: polyurethane
Reinforcement: steel
Price per meter.
Reinforced belt GT2 for 3D printer (in meters)
65 UAH – 70 UAHReinforced polyurethane belt compares favorably with its rubber counterpart in terms of technical characteristics.
Standard: GT2
Height: 6mm and 10mm
Material: polyurethane with steel cord
Reinforcement: steel
Price per meter.
M8 Bronze Z-Axis Nut
35 UAHBronze nut for regular M8 screw.
The use of this nut will improve the travel of the Z axis.
The nut has 3 mounting holes.
If you need screw + nut kit for 3D printer , you can buy it here.
Screw for Z-axis - 4-way trapezoid
170 UAH – 235 UAHTrapezoidal screw (Trapezoid screw set) T8-2-D8.

The ideal solution for the Z axis of a 3D printer. The hardened and machined screw pair is capable of withstanding heavy loads and has high wear resistance.
Features :
- length - 300-500m
- diameter - 8 mm
- thread pitch - 2 mm
- pitch - 8 mm
- number of visits - 4
Please note! Only the screw is included in the package. The nut for the trapezoid screw can be purchased here.
A more expensive and accurate alternative to the trapezoid is the ball screw.
Add to cart
Nut T8 for screw - Z axis 3D printer
51 UAHNut for screw pair 8mm - trapezoid.
Optimal application for the Z axis of a 3D printer.
A system like this has proven itself on many 3D printers.
According to a number of characteristics, the trapezoidal pair outperforms even ball screws.
If you need screw + nut kit for 3D printer , you can buy it here.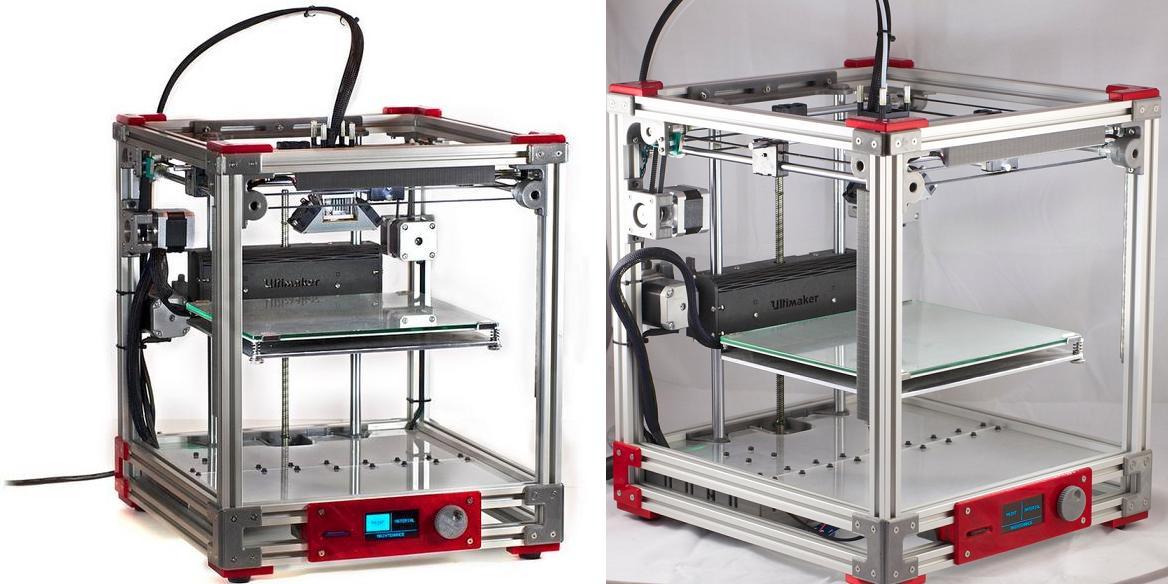
Carriages for X-axis 3D printer (left and right)
230 UAHX axis carriages are one of the most complex parts of a Prusa kinematic 3D printer.
The manufacture of these elements is best left to professionals.
Housing for trapezoid nut T6/T8
134 UAHT8 nut fastening system, allows you to turn the screw fixing plane by 90 degrees.
This solution can be especially required in X and Y axis motion systems.
If you need screw + nut kit for 3D printer, you can buy it here.
Trapezoidal nut housing T6 / T8 for carriage MGN12H
158 UAHThe ideal solution for aligning rail and trapezoid screw in a CNC machine tool movement.
If you need screw + nut kit for 3D printer , you can buy it here.
Add to cart
Spring anti-play nut T8 for 8 mm screw
87 UAHSpring-loaded nut for 8mm screw set - trapezoid.
Optimum application for all axes of a 3D printer or CNC machine.
The classic nut has significant play, which complicates the use of a screw pair in high-precision devices.
Standard set screw + nut, you can buy it here.
Long nut for trapezoidal screw 8 mm
72 UAHNut for screw pair 8mm - trapezoid.
Optimal application for the Z axis of a 3D printer.
High precision nut allows 3D printing with minimal deviations from the specified dimensions. The precision of the extended nut is even greater than that of ball screw systems.
A similar system has proven itself on many 3D printers.
If you need screw for 3D printer, you can buy it here.
Ball screw ball screw SFU1204
750 UAH – 2000 UAHSFU1204 ball screw is the most reliable and high precision type of torque transmission from 3D printer motor.
In classic 3D printers, it is most often used in the Z axis of elite models.
Features :
- length - 400mm / 800mm
- diameter - 12 mm
Nut sold with screw.