Cube 3d printer linux
Guide to Open Source and Linux-Compatible 3D Printers, Part Two
Editor’s Note: This article, part two in a series by Eric Brown, includes a buying guide for open source and Linux-friendly 3D printers. For more background on open source printers see part one: Open Source Pushes 3D Printers to Success.
3D printers run on simple microcontrollers – many of them based on the open Arduino hacker platform — and are controlled by desktop PCs like any other printer. Almost all the open source printers — and almost none of the proprietary designs – support Linux desktops, in addition to Windows and Mac.
With MakerBot and RepRap printers, users can draft their own designs using any CAD software, including open source programs like TinkerCAD and 123D Design, or download a CAD-generated .stl file from an open repository like Thingiverse or GrabCAD. The designs are run through a slicing program, such as the open source Slic3r, which converts the designs into layer data. This data is processed by a printer program that translates the sliced CAD drawings into machine code. More and more printer programs like Printrun or Repeteir-Host bundle a slicing program.
One of the most popular programs continues to be ReplicatorG, which supports RepRap and MakerBot machines. (For more on 3D printing with Linux, see Kyle Rankin’s recent guide in LinuxJournal.)
3D Printers on the Make
There’s considerable overlap between 3D printer hackers and open hardware developers using embedded Linux. For example, O’Reilly’s Make Magazine, the leading 3D printer resource, also regularly covers open Linux projects like Raspberry Pi. At Make, and the related Maker Faire, 3D printing is just one part of the wider, FOSS-oriented “Maker” movement, which spans everything from Arduino- and Linux-based gadgets to digitally-designed crafts. Last week O’Reilly spun off the Maker division as a company called Make Media.
Ten of the 15 desktop models on Make’s 3D printer review page are open source. In addition to the previously mentioned Printrbot, Solidoodle, Type A, and Ultimaker “original” systems, other open models listed include the low-cost RepRap Huxley derivative SeeMeCNC, as well as other RepRap-based printers that range from $1,300 to $1,700, including Trinity Labs’ MendelMaxPro, Deezmaker’s Bukobot 8, MakerGear’s M2, and Aleph Object’s Lulzbot AO-100.
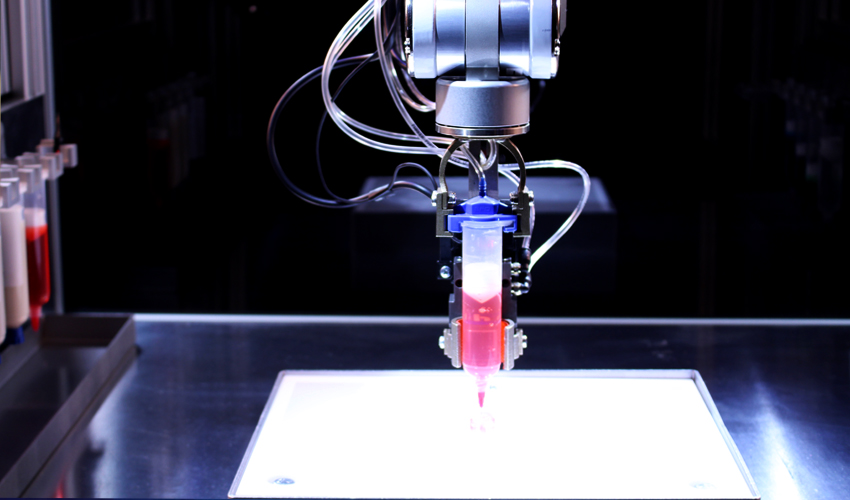
Castle Island’s The Worldwide Guide to Rapid Prototyping offers another recent 3D printing guide, which also lists open source models like PP3DP’s Up! printers, Bits from Bytes’ RapMan, and the Fab&Home project’s printer kit design. The latter, which emerged from Cornell University, uses a different syringe-based additive fabrication technology that is less precise than thermoplastic extruders, but supports a a variety of liquid materials, including silicone, cement, stainless steel, and even chocolate and cheese. The craft market is literally eating it up.
Most of the open source desktop models support both biodegradable PLA and stronger, non-degradable ABS plastics, and some can extrude water-soluble PVA plastic to form plastic supports for the object during fabrication. Some offer dual extruders for making PVA supports and applying multiple colors.
Other feature criteria include speed, resolution, chassis type, axis extendability, heating platform temperature, accessories, and the presence of an SD slot, which enables printing without an attached PC. Print volume generally ranges from four- to 10-inch cubes.
Future Print: Metal, Resin, and Web Interfaces
According a survey conducted last year by Statistical Studies of Peer Production, wish-list items include lower printer and materials prices, as well as high-end features like faster speed, better quality, and metal printing. In particular, Jarkko Moilanen, founder of the P2P Foundation funded research group, expects metal to come to more desktop 3D printers, which would greatly expand the range of end products. Already, a RepRap spinoff called MetalicaRap is developing an electron beam 3D printer that supports metal and can also be used to fabricate solar cells.
At CES, Kickstarter darling Formlabs unveiled its Form 1 stereolithographic desktop printer, which is touted as printing high-precision 3D objects using lasers and plastic resin. It appears to be a proprietary product, however, and it’s being contested by 3D Systems in a patent lawsuit.
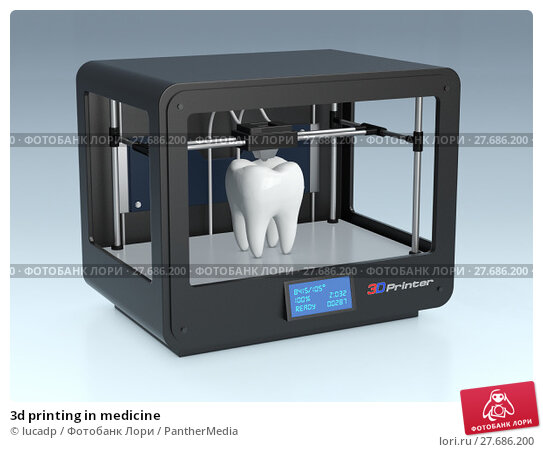
Eventually, Moilanen expects even more exotic materials to be supported, including nano materials, which will open up applications such as custom medical devices and tissue engineering. Here, open source has an early champion with the openMaterials project.
As far as we know, there are no embedded Linux 3D printers, which would likely be overkill. Yet, some 2D printers run Linux, and the Raspberry Pi has already been hacked to control 3D printers. Moilanen says he has considered using the Pi in an integrated design.
The need for more powerful processors and embedded firmware may grow, says Moilanen, as the devices grow more complex and start requiring direct web access. “I’m expecting we’ll see web connections arrive on 3D printers, so they can be used just like laser printers are used now,” he says.
One key future direction is cloud-based 3D printing. Already, services like market leader Shapeways, as well as Ponoko and i. Materialise, have found success with designers and engineers who would rather upload CAD files than tinker with hardware. Since their more advanced fabrication devices support multiple plastics, as well as metal and ceramics, some 3D printer owners use the services when their designs outgrow their own machines. As easy-to-use, browser-based CAD programs like TinkerCAD and 3DTin mature, cloud-based 3D printing services could greatly expand their reach to consumers, says Moilanen.
Open source and Linux compatible 3D printers
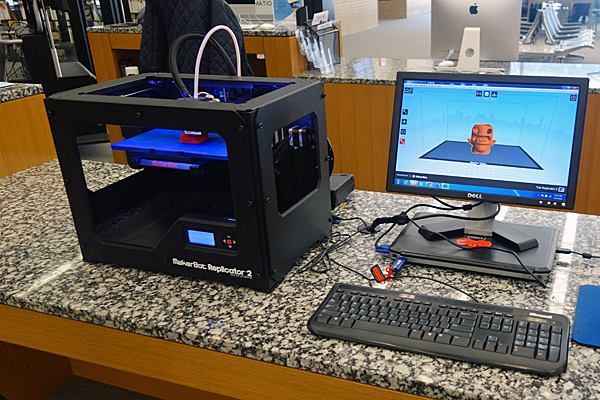
Below are the 10 open source, Linux-compatible models of the 15 products listed on Make Magazine’s reviewed 3D printer page. The other five are all proprietary and except for the newly-proprietary, best-selling Replicator 2, they lack Linux support. Models listed below all support Linux, Mac, and Windows PCs. Unless otherwise noted, all devices support both PLA and ABS plastics, and prices are for assembled models:
Bukobot 8 (Deezmaker)– RepRap-based design, extendable in any axis, supports PVA – $1,385
Lulzbot AO-100 (Aleph Object)– basic RepRap MendalMax design with good accessories – $1,735
M2 (MakerGear)– RepRap Mendel/Pruse design with steel frame, big print volume – $1,499
MendelMaxPro (Trinity Labs)– RepRap Mendel-based with fast-heating 200W glass platform, supports PVA – $1,295
Printrbot LC (Printrbot)– Kickstarter newcomer, extendable in any axis – $799
Printrbot Jr. (Printrbot)– Cheapest, smallest 3D printer around, limited to 4-inch cube, PLA only – $399
Replicator 2 (Makerbot)– Latest version of best seller, higher end, Linux but (newly) not open source, PLA only – $2,199
SeeMeCNC h2.1 (SeeMeCNC)– DIY oriented RepRap Huxley spinoff with injected molded parts, supports PVA – $189 to $594 kit only
Solidoodle 2 (Solidoodle)– Affordable, fully-enclosed original design – $499 – $699
Type A Series 1 (Type A Machines)– Big 9-cubic-inch volume, high accuracy, supports PVA – $1,400
Ultimaker (Ultimaker) – Fast, 150mm/sec. speed, 8.3-cubic-inch volume – ($1,661 kit, incl. controller)
226 » Linux Magazine
Home » Issues » 2019 » 226
Login
Cover Theme: Spotlight on Small Distros
DVD: Manjaro Gnome and MX LInux
Download: Linux_226_DVD_inlay.
 pdf (242 KByte).
 Article Code
US / Canada
UK / Australia
Download this issue as a PDF:
100 pages
Price $12.99
SERVICE: Welcome free
IBM finally closed the deal to purchase Red Hat this month, writing a $34 billion check for the leading Linux company in hopes of restarting its cloud and network service endeavors. Red Hat was a really big fish in the open source scene, but they are tiny compared to IBM, and many observers are wondering how this story will unfold.
more...
SERVICE: On the DVD free
MX Linux 18 and Manjaro Gnome 18.0
more...
NEWS: NEWS free
Debian Buster Arrives; IBM Acquires Red Hat; Raspberry Pi 4 Is Here; Ubuntu Takes a U-Turn with 32-Bit Support: OpenSSH Fixes Side Channel Attacks; Firefox Fixes Error that Crashed HTTPS Pages; and Altair Releases HyperWorks 2019
more. ..
..
NEWS: Zack's Kernel News free
Adding git Documentation; Untangling the System Call Situation; and Bit or Bitmap?
more...
Small Is Beautiful free
Beyond the realm of mainstream, enterprise-ready desktop giants lie a handful of miniscule Linux distributions that barely leave a noticeable footprint on a computer's resources. Here's a look at some of the leading small distros.
more...
IN-DEPTH: Traffic Rules free
The nftables firewall utility offers a simpler and more consistent approach for managing firewalls in Linux.
Firewall , Security
more...
IN-DEPTH: Programming Snapshot – Go Testing free
Developers cannot avoid unit testing if they want their Go code to run reliably. Mike Schilli shows how to test even without an Internet or database connection, by mocking and injecting dependencies.
more...
IN-DEPTH: Time Jumping free
Timeshift lets users easily create, manage, and restore system snapshots.
Administration , Backup
more...
IN-DEPTH: Command Line – QPDF free
Use QPDF to easily make structural changes to your PDFs, including reorganizing pages, creating watermarks, setting encryption options, and changing permissions.
more...
IN-DEPTH: LO Writer – PDF Security free
Depending on your needs, LibreOffice Writer offers varying degrees of security for PDFs.
more...
1 2 3 Next »
Buy this issue
Visit our shop
TABLET & SMARTPHONE APPS
US / Canada
UK / Australia
Express-Checkout as PDF
Pages: 100
Price $12. 99
99
(incl. VAT)
Buy this issue
SUBSCRIPTIONS
Print Subs
Digisubs
TABLET & SMARTPHONE APPS
US / Canada
All other countries *
Express-Checkout as PDF
Pages: 100
Price $12.99
(incl. VAT)
* Google Play Magazines available in AUS, CA, FR, DE, IT, UK, USA
Visit Our Shop
Order Single Issue
Trial Subscription
Digital Subscription
Subscribe
Direct Download
Buy this issue as a PDF
Digital Issue: Price $12.99
(incl. VAT)
Subscribe to our Linux Newsletters
Find Linux and Open Source Jobs
Subscribe to our ADMIN Newsletters
Find SysAdmin Jobs
News
-
Initial Support for Rust in the Linux Kernel is Finally Released
The 6.
 1 LTS version of the Linux kernel, which includes initial support for Rust, has been made available for general usage.
 -
Linux Mint 21.1 Enters Beta Status
With a new version of the Cinnamon Desktop, Linux Mint 21.1 has plenty to offer.
-
4MLinux 41.0 Now Stable and Ready for Use
The developers behind 4MLinux have changed the status of 41.0 to STABLE, which means it's ready for prime time.
-
Xfce 4.18 Coming Soon and Offers Subtle Improvements
The Xfce team has announced the release date of the next iteration of the desktop, which includes a good number of features to polish the fan-favorite Linux UI.
-
Orange Pi Board Has Arch-Based Linux Distribution in the Works
The developers of the Orange Pi board are planning to release an Arch-based Linux distribution available for its hardware as an alternative to Orange Pi OS.
-
Alpine Linux 3.17 Now Available to the General Public
The developers of Alpine Linux have officially announced the release of the latest version of the security-focused Linux distribution.
-
The New StarFighter Linux Laptop Now Available for Preorder
A new, completely customizable Linux laptop is now available to preorder from Star Labs.
-
Critical Escalation Vulnerability Found in the Linux Kernel
A new local privilege escalation vulnerability has been discovered in the Linux kernel and users are encouraged to upgrade/patch immediately.
-
AlmaLinux 8.7 Now Available
The developers of AlmaLinux have released the latest version of the OS, named Stone Smilodon, to the general public.
-
New Arch-Based Linux Distribution Aims to be Beginner-Friendly
CachyOS has been created to serve as a Linux distribution for everyone, even while being based on the more complex Arch Linux.
Tag Cloud
Administration Community Desktop Events Hardware Linux Linux Pro Magazine Mobile Programming Software Ubuntu Web Development Windows free software open source
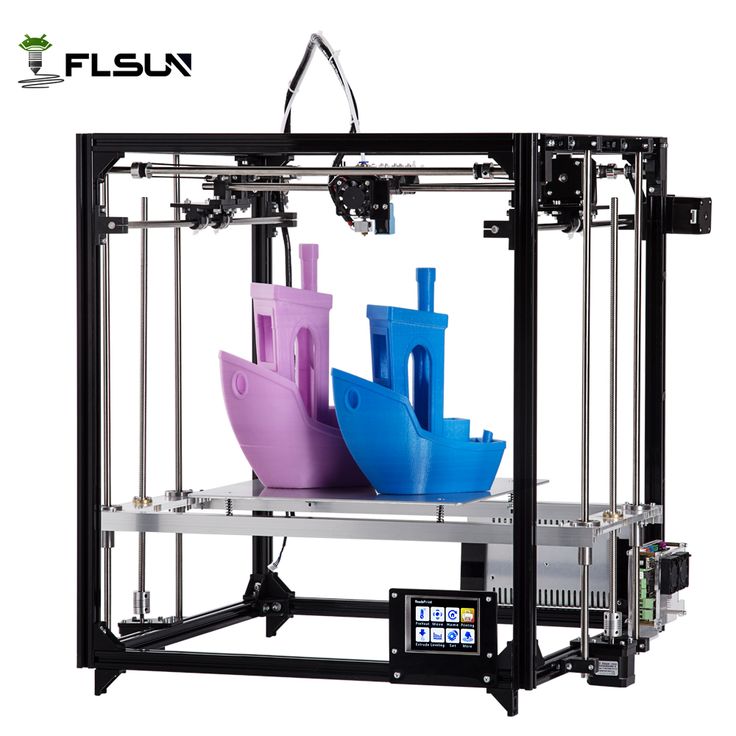
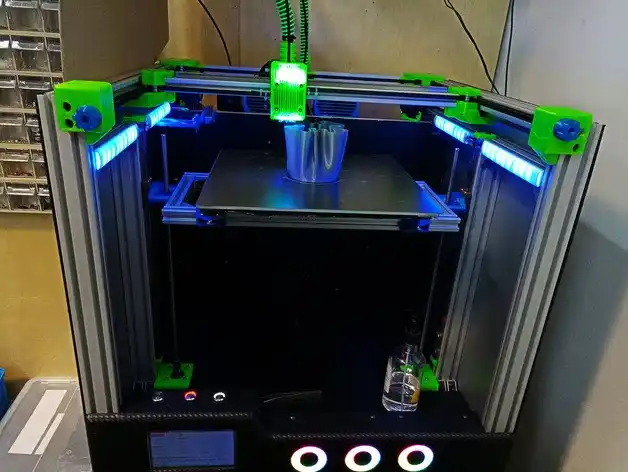
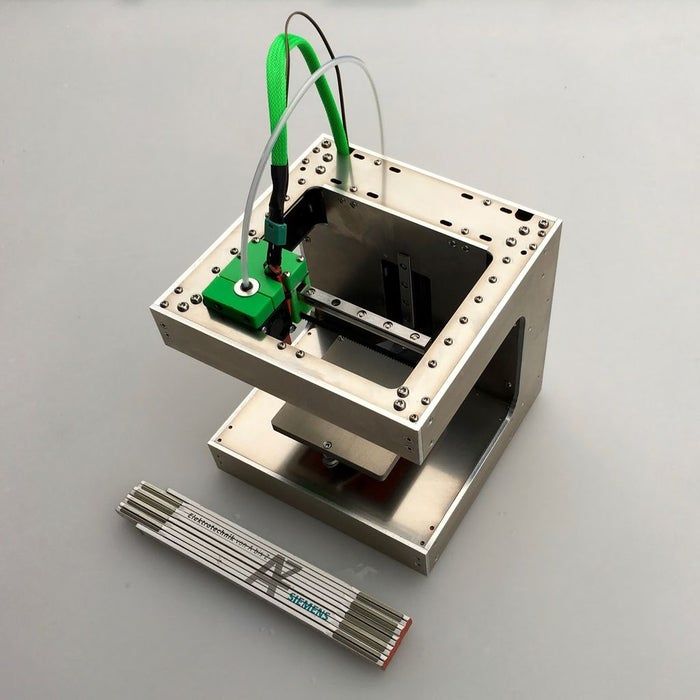
Faberant Cube 3D printer from V1.15
We noticed that you have JavaScript turned off.
It must be enabled for the site to work correctly.
Contents
- Driver installation
- 3D printer connection
- Cura Slicing Program
- Print profiles for slicing
- Repetier-Host Printing and Management Software
- Preparing for 3D Printer
- Print Bed Calibration
- Filling, plastic removal
- Starting 3D printing from a computer
- Offline printing from SD card
- Extruder assembly
- Nozzle replacement
- Removing and installing doors
- Maximum print speed
- Maintenance
- Versioning, firmware
- Safety measures
Driver installation
Before connecting printers for the first time, starting from version 1. 15, install the electronics driver "lpc176x_usb_driver.inf", which can also be found on the SD card that came with the printer. To install, right-click on the file and select "Install" (for Windows).
Turning on the 3D printer and connecting to a computer
Connect the 3D printer to the computer via a USB cable, the connector is located on the back of the printer at the bottom.
Connect the power cable to the 3D printer, the connector is located on the back of the 3D printer at the bottom. Plug the power cable into a 220V socket.
Move the power switch to the up position. The switch is located on the back of the printer at the bottom, just above the power connector.
For printers from version 1.20: turn on the printer by briefly pressing the power button. The button is located on the back of the printer, above the power switch.
Cura Slicing Program
Install Cura Slicing Program
Download version 4. 7.1, 64 bit: Cura (Win), Cura (MacOS X), Cura (Linux)
Attention! Cura is designed for 64 bit operating systems.
If you want Cura to work on a 32-bit operating system, then use the old version.
Installing print profiles
Copy the "profiles.exe" file from the SD card provided with the printer to the folder where Cura is installed.
Double click on the "profiles.exe" file to start unpacking the files.
Restart Cura.
Printer setup in Cura
Start Cura.
In the "Preferences" select the Russian language.
Restart Cura.
From the Options menu, select Printer -> Add Printer.
In the menu that appears, find Faberant , click, select Faberant Cube.
If the printer is not visible, click on neighboring printers and then again on Faberant . The printer should appear.
Click Add.
When you add a printer, its name appears in Cura and you can select nozzles and materials.
Each of the nozzle options has its own preset settings. The user only needs to select from the drop-down menu which nozzle will be installed.
Available nozzles:
D0.1 small
D0.2 small
D0.3 standard
D0.4 standard
D0.4 steel small
D0.5 standard
D0.6 steel small
For nozzles of all diameters, profiles with different layer heights are selected, they can be viewed and selected by opening advanced settings in the "Custom" mode, section "Print Options" -> "Profile".
The height of the print layer for the Faberant Cube 3D printer with different nozzles is from 0.04 mm to 0.4 mm
By default, the nozzle diameter of 0.5 mm (D0.5 standard) is set on the printer. For this nozzle, the optimal layer height for printing any 3D models is automatically selected - this is a layer with a height of 0. 3 mm. If desired, the user can select a profile with a lower layer height.
A 0.3 mm nozzle (D0.3 standard) is supplied with the printer as a spare.
The Faberant Cube 3D printer can print a wide range of materials. The user can select print profiles for materials with optimal print temperature, and other important parameters in the drop-down menu "Material" -> "Universal".
The list contains the following materials from the following domestic manufacturers:
REC (PLA)
PrintProduct (ABS GEO, ABS M8, PET-GUN, PLA GEO, TiTi FLEX Hard, TiTi FLEX Spring, Nylon, Polycarbonate, Polypropylene)
Strimplast (ABS+, FLEX39, PETG, PLA, UltraPET, Polycarbonate)
U3Print - Nylon Super Carbon 2
Best filament (PLA)
Filamentary - Wax (Wax3D)
all settings are ready.
If the material is not listed, you can choose a similar one from the list or just "Standard Plastic". But the temperature of the nozzle and table, blowing will have to be specified independently in the advanced settings, guided by the data indicated on the coil with plastic.
After the user selects the nozzle diameter, layer height and material, you need to click on the "Slicing into layers" button, thereby starting the slicing process.
When the process is completed, the result can be saved to a file in Gcode format
To print from a computer, this file can be opened in the "Repetier-Host" printer management program and printing can be started.
For offline printing without a computer, the finished file must be saved to an SD card, inserted into the printer, and printing started from the printer's display menu.
Repetier-Host Printing and Management Software
Download and install "Repetier-Host" printing and management software ), Repetier-Host (Linux)
Next, in the "Repetier-Host" program menu, you need to switch the "Easy Mode" button to an inactive state to enable all the features of the program.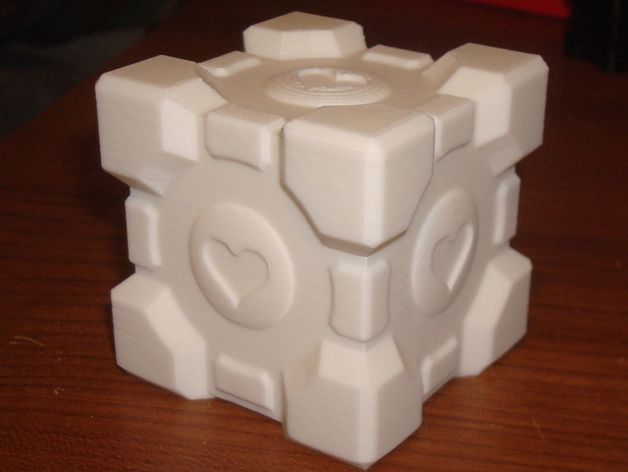
In the "Printer Settings" -> "Connection" you need:
1) enter the printer - "Faberant Cube"
2) select the last Com-port in the list
connection speed 3) 15
In "Printer Settings" -> "Printer" you need:
1) enter all the values, as in the picture
2) check all the boxes, as in the picture.
In "Printer Settings" -> "Extruder" you need:
- enter all values, as in the figure
In "Printer Settings" -> "Dimensions" you need:
1) enter all the values as in the picture.
2) save the changes by clicking on "OK"
Then click the "Connect" button (The USB cable must already be connected to the printer and the printer turned on).
If the printer is connected correctly, the table and nozzle temperatures will appear at the bottom of the program window.
Faberant Cube 3D Printer Preparation
Make sure there is at least 1 mm gap between the heating table and the nozzle.
If the table is raised higher, then lower it 1 mm down with a command from the Repetier-Host control program.
Check that all 3 limit switches are working.
Send Home X, Home Y, Home Z commands in turn.
Pressing the end sensor should stop the printer and reciprocate in one place. If so, then you can continue to work.
Heat up the 3D printer bed and nozzle from the Repetier-Host control program.
For ABS - table 100-120°C, nozzle - 230-245°C (see packaging with plastic)
For PLA - table 25-60°C, nozzle - 190-235°C (cm) . on packaging with plastic)
The table and nozzle can also be heated from the 3D printer display menu under "Temperature".
If necessary, the temperature of the table and nozzle can be changed during printing, both from the Repetier-Host control program and from the printer's display menu.
Print Bed Calibration
Semi-automatic 3-Point Table Calibration
Allows you to calibrate the print platform by 3 points on the plane.
All points are above the three screws with springs holding the top of the table to the bottom.
To start calibration in the printer display menu, select:
"Movement" -> "Table calibration" -> "Manual 3 points"
*Nozzle and table must already be at operating temperature. The table must be cleaned of plastic residues.
This will start a sequence of automatic commands and the printer will send the nozzle to the first point above the table, where it will descend and wait for the user's command.
At this time, the user must, having placed a sheet of A4 size paper in advance, twist the appropriate handle under the table in the right direction.
It is necessary to ensure that a sheet of paper sandwiched between the table glass and the nozzle is slightly pressed down, but can be removed without tearing.
If a sheet of paper is jammed or passes freely, tighten the appropriate knob.
When the gap is set, "Next Point" must be selected from the printer's display menu.
The printer will automatically continue moving to the next points, where the gap between the nozzle and the table also needs to be corrected.
When the gap is set at all three points, "Back" must be selected from the printer's display menu to end the calibration.
*Experienced user can set the gap without using a sheet of paper, "by eye". In this case, when calibrating, the nozzle must touch the table at each point. The gap between them should be equal to zero.
Semi-automatic 9-point table calibration
Allows you to accurately calibrate the printing platform by nine points on the plane. Possible unevenness of the table will be compensated by the printer software during the printing process.
Two steps are required for the table geometry compensation function to work:
1) Calibrate the table by 9 points
2) Enable the table geometry compensation function in G-code printing.
9-point table calibration:
To start the calibration in the printer display menu, select:
"Move" -> "Calibrate table" -> "Calibrate table"
*Nozzle and table must already be at operating temperature. The table must be cleaned of plastic residues.
This will start a sequence of automatic commands and the printer will send the nozzle to the first of nine points above the table, where it will descend and wait for the user's command.
At this time, the user must, having previously placed a sheet of A4 size paper, , use the display handle to twist it in the desired direction. The table itself will move up or down in increments of 0.020 mm.
It is necessary to ensure that a sheet of paper sandwiched between the table glass and the nozzle is slightly pressed down, but can be removed without tearing.
If the sheet of paper is jammed or passes freely, turn the display knob .
When the gap is set, "Next point" must be selected from the printer's display menu.
The printer will automatically continue moving to the next points, where the gap between the nozzle and the table also needs to be corrected.
When the gap is set in all nine points, the calibration is finished.
After that, select "Save settings" in the printer menu.
If necessary, it is possible to manually edit the values of the grid points of the table through the printer menu "Edit Grid".
*Experienced user can set the gap without using a sheet of paper, "by eye". In this case, when calibrating, the nozzle must touch the table at each point. The gap between them should be equal to zero.
Table Geometry Compensation Function
To enable the table geometry compensation function during printing, there must be an "M420 S" command in the print G-code after the "G28" command.
The "M420 S0" command can be used to disable the function.
When using ready-made print profiles from the printer manufacturer, the necessary commands are already registered automatically.
Filling, removing plastic
To start the procedure for changing plastic, you need to heat the nozzle to the operating temperature, select in the printer display menu: "Change filament"
The 3D printer extruder will automatically move aside, the printer will wait until the nozzle temperature stabilizes, then the extruder will start to rotate in the opposite direction to unload the filament.
At the same time, the message "Wait for filament unloading" will appear on the display of the 3D printer.
At this time, it is necessary to pull on the plastic thread coming out near the spool so that it does not remain in the extruder.
After removing the filament, prepare a new spool, thread the new filament into the feed tube of the extruder near the spool.
This will cause the 3D printer to display the message "Insert the bar and press the button to continue".
Press the display knob, the extruder will rotate, dragging the filament with it. Push the filament from the side of the spool into the tube so that the feed mechanism of the extruder can hook it.
If done correctly, plastic should flow from the extruder nozzle. In this case, select "Resume Printing" from the display menu. This completes the filament change.
If the plastic does not flow out of the extruder, select "Squeeze More", slightly loosen the front pressure knob of the extruder, push the rod further into the tube, tighten the front pressure knob of the extruder. Repeat this until the plastic flows out of the extruder.
Attention! For all hard plastics, it is necessary to clamp the front pressure knob of the extruder until it begins to turn tight.
Do not overtighten the front knob, this will flatten the bar and put more stress on the extruder feed mechanism, which can lead to increased wear.
Do not loosen the front knob when printing with hard plastics, as this will cause plastic misfeeds and poor print quality.
Start 3D printing from computer
Load into the "Repetier-Host" control program the previously prepared in the "Cura" program for printing in Gcode format.
Start printing with the Start button.
Stopping the printing process is done by the "Stop" button
During printing, it is possible to change the print speed from 25% to 300% of the values specified in the Gcode.
It is also possible to change the amount of plastic supplied from 50% to 150% (default 100%)
Be careful when increasing these parameters, because. significantly exceeding 100% can damage the printer.
Offline operation, start 3D printing from SD card
For offline 3D printing without a computer, prepare the Gcode for 3D printing in advance and save it to an external SD card.
Turn on the printer, insert the SD card on the left side of the printer near the display into the dedicated slot.
At the same time, a message will appear at the bottom of the display that "Card inserted".
If during slicing the table and extruder temperatures were set in the code, then printing can be started immediately.
If the code does not indicate heating, then it is necessary to turn on the heating of the table and nozzle to the desired temperature from the printer display menu.
After the printer has warmed up, select "Print from SD card" from the menu.
In the list of files that appears, select the desired one, click on it, printing will start.
* Cyrillic filenames cannot be displayed correctly, so name files in the Latin alphabet.
During printing, it is possible to change parameters such as:
During printing, it is possible to "pause" the print, as well as change the filament.
Extruder assembly
Front View
Side View
Nozzle Replacement Procedure
Correct nozzle setting
Standard nozzles
- brass D0.3, D0.5
shortened nozzles
- brass d0. 1, d0.2
- steel D0.4, D0.6
* All work is performed in heat -protection
* Be careful with the white wires on the heater - they are thin!
1. lower the table along the Z-axis down 15 cm
2. Heat the extruder to the printing temperature of the plastic that was last used in printing.
3. carry out the procedure for extracting plastic from the extruder
4. Disconnect extruder heating wire
5. Loosen the nozzle together with the heating block on the thermal barrier (on a heated extruder) with the hexagon head from the printer kit
6. Unscrew the countersunk screw on the lower right in the radiator with a thin hexagon wrench and release the thermal barrier downwards
7. pull out the thermal barrier together with the heating block and nozzle down
8. holding the heating block, unscrew the nozzle from block 9 with a hex head0061 9. if necessary, remove plastic residue from all parts while they are hot
10. installation of the nozzle and assembly is carried out in reverse order on a heater heated to 240C
The maximum production speed of the 3D printer is up to 40 cm3/hour. (With a plastic weight of 1 g/cm3 - 40 grams/hour)
To achieve maximum production speed, all the following conditions:
1. The speed of movement and printing of all perimeters and filling is not lower than 100mm/sec.
2. The use of plastic that can be soldered well in layers at high speed printing (for example, PLA plastic).
3. Using plastic that can heat up enough to melt through the entire extruder at high speed (eg PLA).
4. Use the extruder temperature to melt the plastic closer to the maximum for that plastic.
5. Use a nozzle with a diameter of 0.5 mm and a layer height of 0.3 mm.
6. Simple product geometry.
If you deviate from the above conditions, the production speed of products will be less than the maximum.
If you need to increase the speed of manufacturing a product without changing the above conditions, then you can take advantage of one of the advantages of 3D printing that distinguishes it from other production methods - this is a change in the density of the internal filling (filling, infill).
Reducing infill density from 100% to 0 allows you to print the same product much faster.
Example: fill 0% - only side walls, bottom and top are printed on the product, it is empty inside. High manufacturing speed, but low strength.
Example: 20% fill - internal fill sufficient to support the walls of a product with complex geometry. High manufacturing speed, acceptable strength.
Example: 50% fill - dense inner fill. Good manufacturing speed, high strength.
Example: 100% fill - full internal fill. Low manufacturing speed, maximum strength.
Examples of simple products, 40 cm3, weight 40 g, for printing at maximum speed in 1 hour.
Example with 100% fill
size 4 *4*2.5 cm
material volume 40 cm3
print time 1 hour.
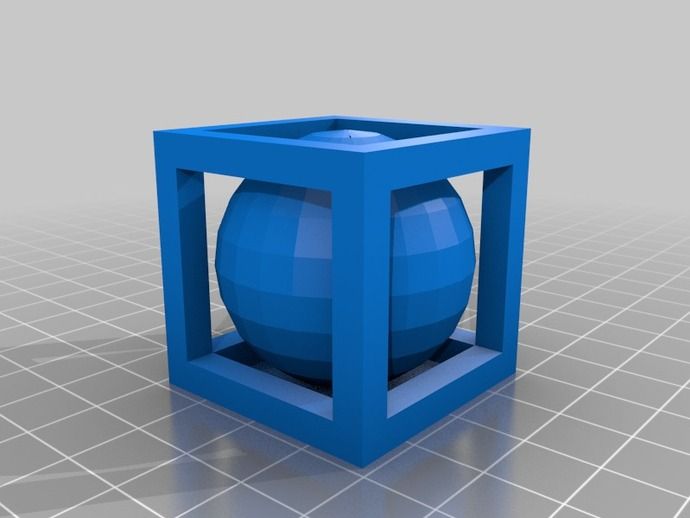
Download 3D-model file "Cube", size 4*4*2.5 cm, volume 40 cm3, with 100% fill.
Example with 20% fill
size 12 *4*2.5 cm
material volume 40 cm3
print time 1 hour.
Download 3D model file "Cube", size 12*4*2.5 cm, volume 40 cm3, with 20% fill.
In this example, an item 3 times as long, but with a sparse fill of 20%, is printed in the same time as an item 3 times smaller in length, but with a solid fill of 100%. This is because the volume of extruded plastic and the weight of both products is the same.
Maintenance
When using the 3D printer, keep the inside of the case clean.
Fine particles can be picked up by the airflow from the fan and then deposited on the pins, lead screw and belts, which can result in poor print quality and accelerated wear on the moving parts.
Periodically wipe down the inside of the case with a dry cloth and remove all small and large debris left after 3D printing from the build chamber. Alcohol-based wipes are allowed.
If there is dust or debris on the guide axles, lead screw, remove them with a dry paper towel.
XYZ axles are lubricated with Litol-24 grease. Frequency - 1 time in 6 months.
Z axis vertical lead screw - lubricated with PMS-100 liquid silicone grease. Application - from top to bottom around the circumference of the screw. Excess is removed with a dry cloth. Frequency - 1 time in 6 months.
Cleaning the Platen
After several print cycles, a patchy layer of dried adhesive may form on the platen, which is necessary to secure the part to the platen. An inhomogeneous layer of adhesive may impair the print quality of the first layer, so it must be scraped off with a clerical knife, and then carefully remove the scraped material with a dry cloth. After that, it is necessary to apply a new, even layer of glue.
It is also possible to smooth out uneven layers of dried glue with a damp cloth, but this must be done carefully so that moisture does not get on the edges of the table under the glass, where it can adversely affect the heating surface of the table.
All manipulations must be carried out with the extruder and table cooled down!
Faberant Cube 3D printer version, firmware
| Printer version | Improvements | Firmware | Changes |
| V1.20 | Remote shutdown function from the control program, from the print code, from the display menu. Automatic shutdown in case of malfunction. Automatic shutdown in case of malfunction. New reinforced extruder connector. Increased the brightness of the interior lighting. | firmware_v1.20_03.bin Download Firmware compatible with printers V1.18, V1.19 | Improved filament change algorithm via display menu. Improved algorithm for semi-automatic table calibration by 9 points. |
| V1.19 | Design improvements to improve printer build quality. | firmware_v1.20_03.bin Download | Firmware update |
| V1.18 | Improved accuracy of extruder temperature determination in the working temperature range. | firmware_v1.20_03.bin Download Firmware is not compatible with previous printer versions! | Firmware update |
| V1.17 | Optimization of metal part shapes, printer shell shape.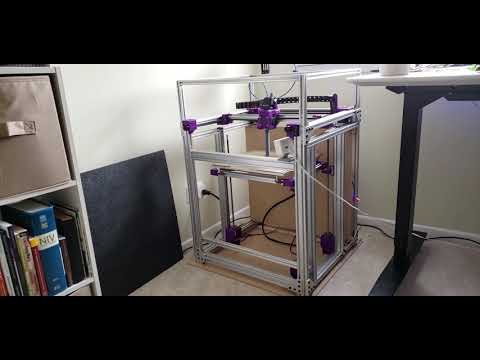 Hole for adjusting the brightness of the display in the outer frame. | firmware_v1.17_04.bin Download Firmware compatible with printers V1.16 | Firmware update |
| V1.16 | New version of electronics - SKR 1.3 | firmware_v1.17_04.bin Download | Firmware update |
| V1.15 | New electronics 32 bit SKR 1.1 instead of Arduino DUE. Possibility to install standard and short nozzles - steel and small diameter 0.2 and 0.1 mm. | firmware_v1.15_47.bin Download | Firmware update |
Firmware installation procedure:
1) Connect the 3D printer to the computer via USB cable
2) Run the "Repetier-Host" printer management program, connect to the 3D printer
3) Enter the menu 3) Enter the menu Configuration -> EEPROM Configuration
4) Select "Export EEPROM Data", save the *. mepr file to a convenient location
5) Download the new firmware from the website
6) To download the firmware to the 3D printer, rename the firmware file to firmware.bin
7) Copy the firmware.bin file to the internal memory of the 3D printer (defined as a disk in Windows)
8) Reboot the 3D printer with the button under the monitor. This will automatically overwrite the new firmware in the printer's memory
9) After the printer becomes active, turn it off. If this is not done, the firmware may not work correctly the first time. *.mepr 9 file0010
11) 3D Printer Ready
Safety Precautions
1) Do not leave the printer unattended while it is running.
2) do not touch the heating element, nozzle or table with your hands. they heat up to a high temperature.
3) if it is necessary to maintain the heated parts of the printer, use heat-resistant gloves
4) do not touch the resulting part with your hands during printing.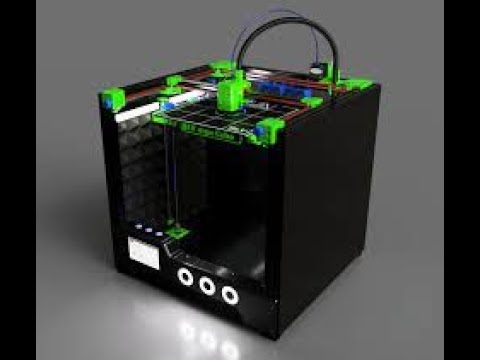
5) turn off the 3D printer from the 220V network after finishing work.
6) Do not lift, move, or lay on its side the 3D printer that is plugged in.
7) When printing with plastics other than PLA, ventilate the room.
8) Do not cover the operating printer with anything, as this may cause the electronics to overheat.
Cura 2.5 3D printing software from Ubuntu 16.04
In this article, we will review the recommended software if you are a 9 user0005 3D printers . In order to get the most out of your 3D printer, in addition to setting up the printer well and setting its firmware properly, you need to tweak the settings of the program you are using as your laminator. Depending on the specifications of your printer, these options may vary greatly.
We are interested in the software Care . This is an "Open Source" program developed by Ultimaker which will take care of the communication with the printer and the lamination of 3D objects. This means that with this program we can perform all the necessary steps to go from a 3D model to a real object.0010
Cura prepares your model for 3D printing. In general terms, we can say that Cura is a cutting program that prepares your 3D drawings for printing. For those new to 3D design (myself included), this program makes it easy to get attractive results. For more advanced users, there are over 200 settings available that can be tailored to the needs of each model. Since the program is open source, it has a community that can always help in case of doubt.
Cura software prepares your files by intelligently assessing the areas that need your attention. Has virtual 3D previews that will let you spin around the design. This way we can guarantee that everything will be where we want it to be.
Cura provides a good integration of our hardware, software and materials (which in my experience doesn't always have to be the cheapest) to achieve a enjoyable 3D printing experience .
Cura was developed for Ultimaker 3D printers and Ultimaker materials. But the program will offer us the opportunity to use it with a large list of printers. This list will be provided by the program, since we will need to select our printer when we first launch the program.
This software gives us the possibility to use it in different operating systems . There are versions of CURA compatible with Linux, MAC and Windows. Installing the program on different platforms is very similar, in general it is relatively simple.
Index
- 1 Install from
- 2 Repository
Install from
repository storage.
Before proceeding with installation because Cura depends on python 3.x. We're going to satisfy the dependencies first so that everything goes right. To do this, open the terminal (Ctrl + Alt + T) and write:
sudo apt-get install python3 python3-dev python3-sip
Next, it's time to add a repository that will provide us with a package to install.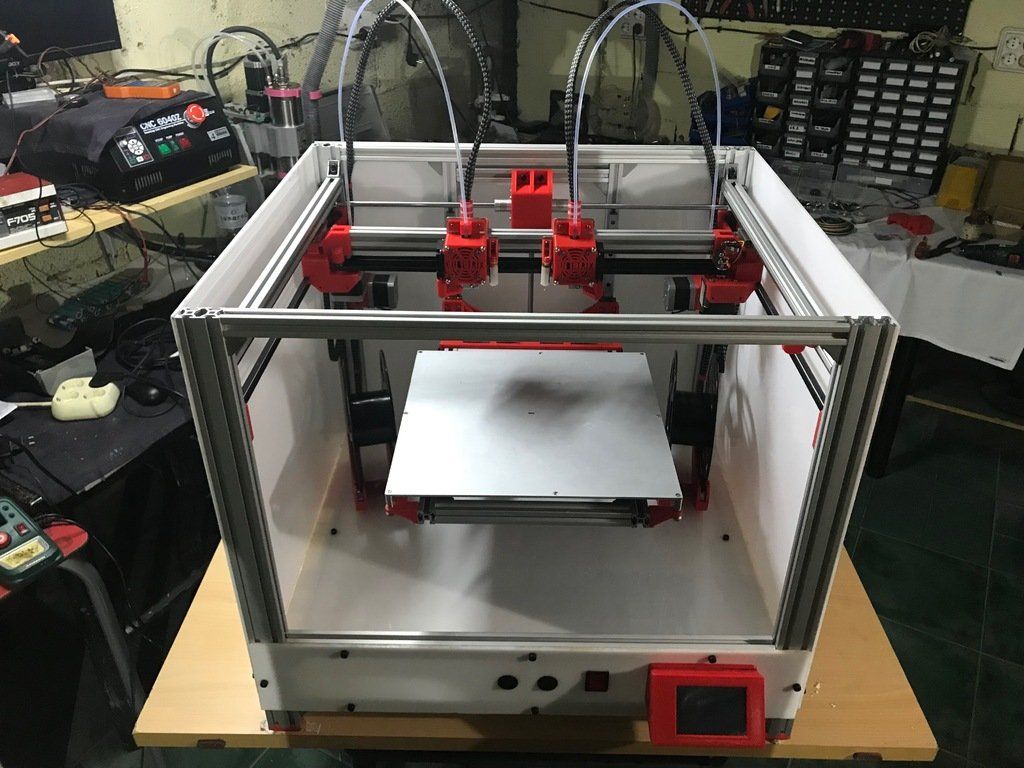 To do this, write in the terminal:
sudo add-apt-repository ppa:thopiekar/cura
To finish, we only need to update the package list and install the cure. In the terminal, we will need to write the following:
sudo apt-get update && sudo apt-get install cura
After that, we can carry out the treatment. Either by the "cure" command from the terminal, or by searching for a launcher in our operating system's Dash.
Launching Cura for the first time
Once installed, there are a few things you need to do to set up the first time you launch Cura. We will simply open Cura from the applications folder (or wherever you have installed). The program will ask us for let's select the printer we have . You can give the printer a unique name if you wish.
To download the model, you just need to click the "Open File" button. It is located in the upper left corner of the screen. In the window that opens, we can find the model we want to prepare for printing and open it in the program.