Cheap 3d printer under 500
The Best 3D Printers Under $500 in 2022
Just a few years ago, finding a 3D printer under $500 would have been almost impossible. Now there are dozens to choose from. This brings 3D printing within the reach of modelers, hobbyists, and small businesses. Of course not every cheap 3D printer has the same capabilities. They produce different-sized models with varying levels of detail. Many are filament models, but several resin printers also come within this price bracket. Getting the right balance between cost and performance can be difficult, and the technology can be confusing. This article demystifies the jargon, and finds the best 3D printers under $500 for whatever kind of model making appeals to you.
— Best Overall: Anycubic Photon Mono X 4K Resin 3D Printer
— Best Budget: ELEGOO Neptune 2 FDM 3D Printer
— Best for Beginners: Creality Ender 3 3D Printer
— Best Large Volume: Artillery Sidewinder SW-X2 3D Printer
We imposed a price ceiling of $500 to ensure each of our picks fell within what could be expected as a reasonable price for those buying their first 3D printer. The result is some of the best budget 3D printers currently available. However, price was far from the only consideration.
Build Volume: Many 3D modelers focus on small projects, or create complex assemblies from a number of small components. Others want to go big as soon as possible. Fortunately, buying a low cost 3D printer doesn’t necessarily limit the scale of your ambitions. We sought a range of alternatives to cover all potential users.
Set Up and Ease of Use: The best resin 3D printers within our price bracket come ready to use, but many filament models require some assembly. How easy they are to operate also varies. Our picks illustrate this variety, allowing buyers to choose a model that is appropriate to their experience level.
Value: Price doesn’t always equate to value. Despite the relatively low cost of our top picks, these are not always the cheapest 3D printers on the market. However, one we selected comes from a brand recognized for their expertise and quality. As a result they should offer long-term reliability.
Why It Made The Cut: By any standards, the Anycubic Photon Mono X 4K is a high quality 3D printer. To find it priced below $500 makes it terrific value.
Specs:
— Type: Resin
— Built Volume: 7.55 inches L x 4.72 inches W x 9.84 inches H
— Speed: 1.97 inches per hour
Pros:
— Highly detailed prints
— Durable, stable all-metal chassis
— Easy setup and use
Cons:
— No direct computer connection
— Gimmicky WiFi
Anycubic has long been one of the leading names in 3D printers with a wide range of innovative, high-quality machines. The Anycubic Photon Mono X 4K set new standards for speed and detail when introduced, and while larger, faster models are now available, few can challenge this model in the under $500 bracket.
With resin printers like this, screen resolution has a big impact on the detail provided. This one has an 8.9-inch 4K LCD, resulting in 3,840 x 2,400 pixels per inch. It‘s capable of printing layers at just 50 microns (0.0019 inches) thick, and at almost 2 inches per hour, it is also one of the fastest resin printers in its class.
The general structure of this 3D printer has the solidity necessary for consistent results and its built-in fans keep things at a constant temperature. The setup is somewhat time consuming, though more straightforward than most filament models. A 2.8-inch touch screen accesses many functions, but files have to be input via a USB stick. There is a WiFi app but its functions are limited and setting it up can be frustrating, so many independent testers consider it not worth the effort. The Photon Workshop software also has its critics, though popular alternatives are available from ChiTuBox and Lychee.
When introduced, the Anycubic Photon Mono X 4K was around 30 percent more expensive than it is today. It has dropped into our price range mostly because 6K and 8K versions now exist. At the moment, we think the Anycubic Photon Mono X 4K is the best 3D printer under $500 on the market.
Why It Made The Cut: There are plenty of cheap 3D printers on the market, but none come with the clear instructions and high print quality of the Elegoo Neptune 2.
Specs:
— Type: Filament
— Built Volume: 8.66 inches L x 8.66 inches W x 9.84 inches H
— Speed: 1.97 inches per second
Pros:
— Clear assembly instructions
— Good print quality
— Low cost
Cons:
— Manual leveling
— Poor interface
The entry-level Elegoo Neptune 2 comes in at well under half our $500 price limit, making it the best budget 3D printer in purely monetary terms. That alone would make it attractive to those thinking of trying 3D printing for the first time, however, the Elegoo Neptune 2 has more to offer than just low cost.
The majority of 3D filament printers come as self-assembly kits. Care is necessary because errors can impact performance later on. Fortunately, the Elegoo Neptune 2 comes with clear instructions, and obvious components, so setup is comparatively simple. It’s not quite all plain sailing though, as bed leveling is a key feature for accurate prints, and this needs to be done manually. Getting it right can be time consuming which may be frustrating for complete beginners. Also, while the touch screen display provides a lot of information, much of it can be unclear and confusing. Fortunately, the provided Cura software is very good, and helps enormously.
Mechanically and functionally the Elegoo Neptune 2 is a very good 3D printer for the money, though sadly the interface lets it down. There are plenty of online sources that can help resolve problems, and results will be worth it, but getting the best from the machine will require patience.
Best for Beginners: Creality Ender 3 3D PrinterAn Excellent Learning Resource. Comgrow
Why It Made The Cut: Creality was one of the first to produce high-quality, budget-friendly 3D printers. The Ender 3 has become hugely popular and has outstanding learning resources.
Specs:
— Type: Filament
— Built Volume: 8.66 inches L x 8.66 inches W x 9.84 inches H
— Speed: 7.9 inches per second
Pros:
— Excellent component quality
— High-quality output
— Outstanding customer support
Cons:
— Manual bed leveling
— Assembly instructions could be improved
At first glance the Creality Ender 3 looks a lot like a whole bunch of other low-cost 3D printers. In fact, Creality is renowned for 3D filament printers that combine quality components with competitive pricing, and as a result, there are many copies.
The Creality Ender 3 can produce layers at 100 microns (0.0038 inches) thick, which, while not as high as resin printers, is good for a budget 3D printer and results in smooth models. Unlike many cheap rivals that only use PLA filament, the Creality Ender 3 can use ABS, PETG, and TPU. The machine is very quiet, heats up quickly, and the user interface is clear and informative.
It isn’t a particularly easy machine to assemble. Creality says it takes two hours, but we feel that’s optimistic and the instructions could certainly be improved. So if that’s the case, why do we recommend this as one of the best 3d printers for beginners?
The main reason is the incredible support network, and the potential for multiple machine upgrades. Not only is Creality’s own customer support very responsive, but the popularity of the Creality Ender 3 means there are dozens of videos and other resources available online. After mastering the basics of 3D printing, add-ons are available so that those who want to improve their knowledge don’t need to buy a whole new machine. It is an excellent introduction to 3D printing, and for the money, there is no better learning platform.
Best Large Volume: Artillery Sidewinder SW-X2 3D PrinterImpressive Build Volume.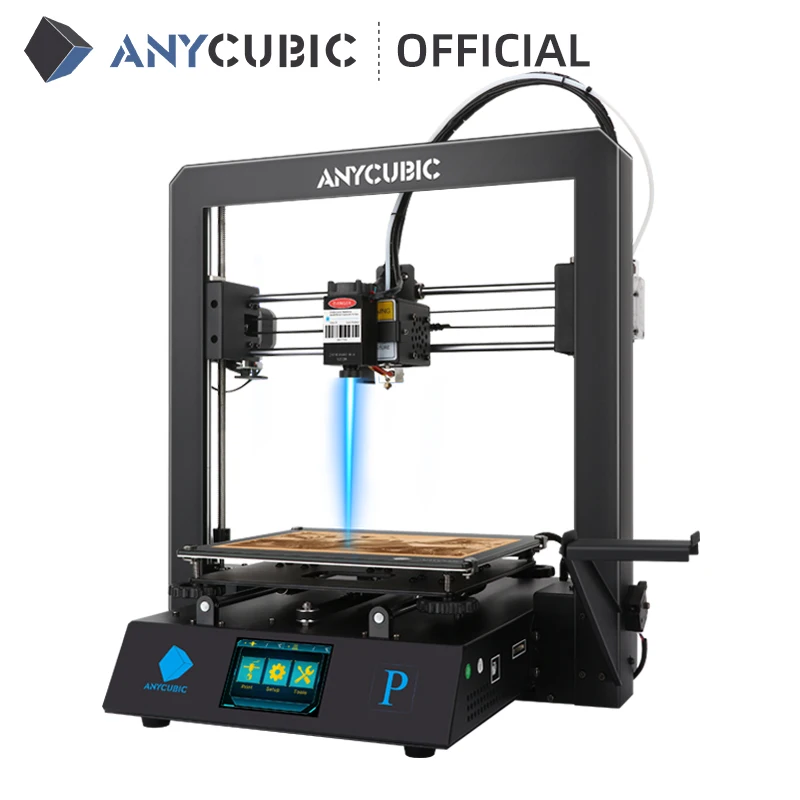 Artillery
Why It Made The Cut: The Artillery Sidewinder offers an impressive build volume for a printer at this price, and doesn’t compromise on quality or user-friendly features.
Specs:
— Type: Filament
— Built Volume: 11.8 inches L x 11.8 inches W x 15.75 inches H
— Speed: 5.9 inches per second
Pros:
— Large build volume
— Arrives 95 percent assembled
— Auto bed-leveling
Cons:
— Filament holder could be improved
— Poor customer support
With its impressive print volume, the Artillery Sidewinder is definitely the best affordable 3D printer for creating large models. It would be no surprise if the company had cut corners elsewhere in order to offer a machine of this capability for the money, but that doesn’t seem to be the case. While there are a couple of areas that could be improved, issues are minor.
The Artillery Sidewinder is not particularly fast, but can create layers of 100 microns (0. 0038 inches) each, so quality is comparable with many smaller devices. It comes almost complete, just needing ribbon cable and the spool holder assembled. The quality of the latter isn’t the best, resulting in occasional feed errors, but the printer will restart from the same point if interrupted. The touch screen controls are also very easy to use.
Unusually for a cheap 3D printer, the Artillery Sidewinder has auto-leveling, which saves time and frustration. The glass bed heats up in around two minutes, so it’s ready to print quickly, and very quietly. It can take a while to get the Artillery Sidewinder working at its best, but that’s not unusual with budget 3D printers. In general, the machine is very reliable, though owners have been critical of customer support when problems have occurred.
Things To Consider Before Buying A 3D Printer Under $500There are so many good machines available today that choosing a 3D printer under $500 presents few restrictions. However, there are a few key points that need some thought.
The size of the projects a 3D printer can create will have a big impact on most people’s choice, but this is just one aspect. It’s a good idea not to be focused on size alone, as this can result in weaknesses in other areas.
Resin or FilamentResin 3D printers tend to be more expensive than their filament counterparts, but often create more detailed models. On the other hand, filament tends to produce a stronger model. The type of filament can make a big difference and is worth looking into further if you are unaware of how each performs. Bear in mind while the best 3D printers can use a wide variety of materials, sub-$500 models may have more limited choices.
SpeedMost people are understandably impatient to see their 3D object finished, and print speed can vary considerably. Filament printers are usually much faster than resin. However, figures can be confusing because resin 3D printer speeds are given as the height of model created per hour, whereas filament 3D printer speeds are how fast the nozzle travels. Neither give a very accurate indication of how long a particular model will take, but they can be used for comparisons.
Also bear in mind with filament printers the maximum speed may seldom be used. For instance, our best budget 3D printer can run as fast as 7 inches per second, but for common filaments like PLA, the optimum speed is only around 2 inches per second.
FAQsQ: Are 3D printers illegal?3D printers are completely legal. What is illegal is the copying and sale of patented or copyrighted objects. Making popular games figures for your own use, for example, is okay, but. trying to sell them is not, and may bring a lawsuit from the rights owner.
Q: Are cheap 3D printers worth buying?Absolutely. In the last few years prices have dropped considerably, so today’s best 3D printers under $500 are very capable, great fun, and can also be very educational.
Q: What can I create with low cost 3D printers?What you can print with low cost 3D printers largely depends on print volume.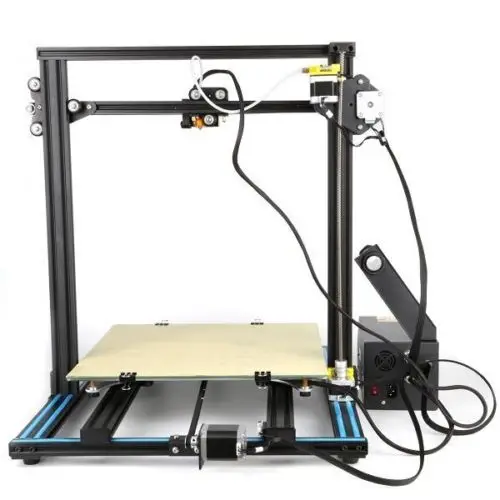 Toys, models, figurines, and jewelry are popular. Credit card holders and phone cases are possible, as are plant pots and other containers. There are hundreds of free-to-download files available, or you can create your own.
Not all cheap 3D printers use PLA, although many do. Some can also use ABS or TPU (thermoplastic polyurethane). Our pick for best 3D printer under $500 is a resin model, which is liquid plastic rather than PLA, which is a filament.
Q: Can 3D printers under $500 work with any software?A great deal of software works with 3D printers under $500, but there are some restrictions. It’s important to check before purchasing, particularly if you have a particular package in mind.
Q: Do I need a good computer for a cheap 3D printer?Whether you need a good computer depends on the 3D models you intend to produce. Most of the standard SLA files that are available online are quite small, and don’t need a lot of computing power to process.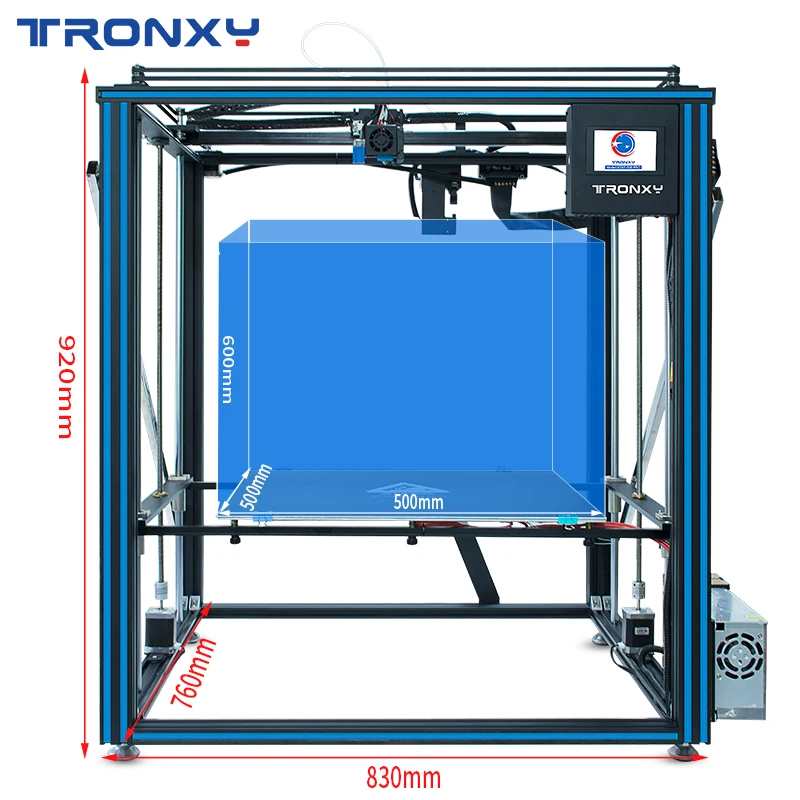 However, if you intend to create your own unique models, the software required can be memory- and processor-intensive. In that case, using a budget computer might prove limiting.
The ANYCUBIC Photon Mono X is an excellent 3D printer, and no other machine currently available under $500 can match the output quality. Unfortunately, resin printers produce toxic fumes so it’s very much a tool for a well-ventilated garage or workshop.
The Elegoo Neptune 2 is great value. It takes a while to set up but instructions are excellent, and many 3D printing enthusiasts feel it’s optimal to know the ins and outs of their machine. Unfortunately, the horrible interface detracts from what is otherwise a good entry-level device. Solutions are readily available, though.
This post was created by a non-news editorial team at Recurrent Media, Futurism’s owner. Futurism may receive a portion of sales on products linked within this post.
Share This Article
Best cheap 3D printer 2022: Beginner picks under $500
So, you want to get started with a 3D printer? Congratulations. It's not an overstatement to say that 3D printing changed my life. It opened up the possibility of making custom physical objects to meet my own specific needs. It got me comfortable building in the workshop and helped me create solutions I use every day.
But getting started can be daunting. What printer should you get? How much should you spend? Should you get SLA (resin) or FDM (filament)? This article is designed to break through those questions.
Let's start with the resin vs. filament discussion. I recommend resin printers to people who want to produce small items of fine detail. Miniature gamers are a massive market for these, as are model railroaders and modelers of all kinds. Print quality can be exceptional, but they create more mess, smell a bit more, and require careful post-processing and management of somewhat toxic liquids.
By contrast, I recommend filament printers to those who want to build objects that meet specific functional needs (rather than display needs). I use 3D printers for brackets, mountings, practical projects, and more. You can also make much larger objects with filament printers, so they're a staple in the cosplay world for making masks and greeblies.
As for price, there are budget considerations. All the printers in this list are lower-cost printers. I have another list of pro-level printers you can check out if you're able to spend more. Pro-level printers are more robust and -- unfortunate for beginners on a budget -- often have conveniences like automatic bed leveling that makes the printing process easier. That said, you can go very far with most of the best budget 3D printers listed here.
One final note before we kick off this list. I've added "Top Pick" indicators to the first few printers. These are the printers I'd feel immediately comfortable recommending to friends who ask about what printer to buy. They're the "can't go wrong" choices. That said, the rest of the list offers better prices or different options, so all on this best-of list are great contenders for newbie 3D printing practitioners.
Also: Practical 3D prints: A first TinkerCAD project for your 3D printer
Also: Everything you need to know about 3D printing and its impact on your business
Also: Practical 3D prints: Increasing workshop storage with bolt-in brackets
Also: Best 3D printer: FDM, resin, and more compared
Also: Anycubic Vyper: An under $500 filament printer with all the best features
Also: Biqu B1 3D printer review: Less than $300, some helpful features, but not perfect
Good luck, and let us know what you're working on in the comments below.
You can follow my day-to-day project updates on social media.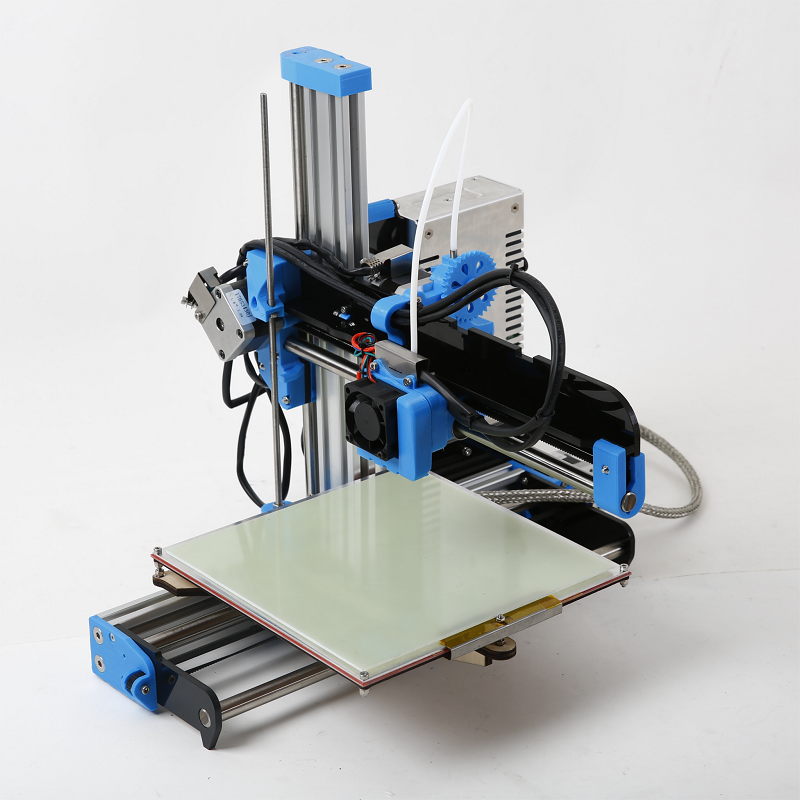 Be sure to follow me on Twitter at @DavidGewirtz, on Facebook at Facebook.com/DavidGewirtz, on Instagram at Instagram.com/DavidGewirtz, and on YouTube at YouTube.com/DavidGewirtzTV.
quick start in 3D printing / 3D printers, machines and accessories / iXBT Live
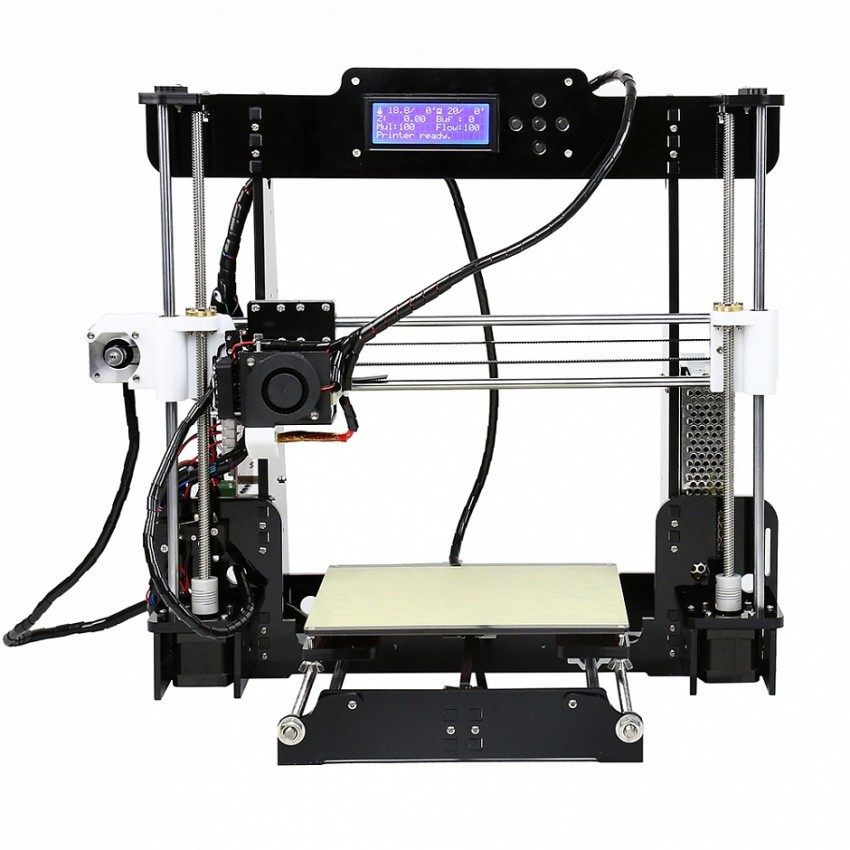
Hello everyone! A small review of the Magic entry-level 3D printer from JGMaker. This is an inexpensive and simple model that does not require any serious skills to assemble and set up and is ready to print in just an hour after receiving it. The JGMaker Magic printer is equipped with a filament end sensor, there are pause and automatic bar change functions. The printer is able to remember the stop point in the event of a power failure and continue printing further (checked!). nine0003
Buy JGMaker Magic 3D Printer
So, JGMaker has released an inexpensive entry-level model that can be useful for those who are taking their first steps in 3D printing. This is a simple Magic printer, with quite good characteristics: in the basic configuration it already has an adhesive sticker, a filament sensor. The structure is rigid, all moving and loaded parts are metal.
Other models of 3D printers (FDM) can be found in the article on choice for beginners. But for high-quality plastic, I ask for this selection (there are exotic: silk, marble, wood, etc.). For lovers of photopolymer printing, I can recommend inexpensive SLA UV printers that will be affordable for everyone. nine0003
The specifications of this model are shown below.
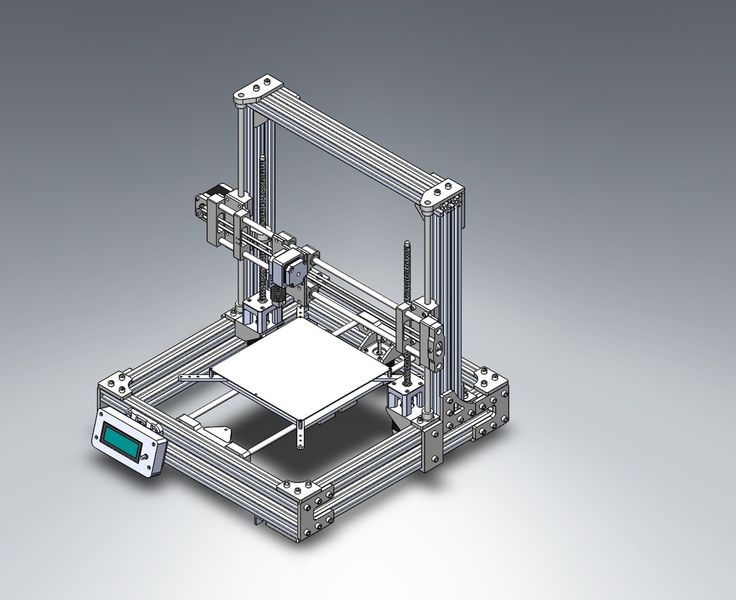
I will highlight the main thing: this is a pre-assembled printer kit with a print area of 220x200x250 mm, with a short bowden as an extruder. The kit has everything you need to start, as a “bells and whistles” a filament presence sensor is used (accordingly, automation of a bar change and a print pause are provided in the firmware). The printer remembers where it stopped when the power is reset.
As I said, the JGMaker Magic comes pre-assembled and pre-configured. The user is required to assemble the upper part of the frame (two posts and a crossbar), assemble the X axis, and the printed circuit assembly is already assembled. The lower part of the printer is a table with a Y axis, a control unit, they are delivered assembled, with connected harnesses. nine0003
The picture shows the JGMaker Magic 3D Printer Assembly Kit. Compared to the inexpensive Tronxy XY-2 Pro 3D printer, the latter has the X axis already assembled. and printer settings. The kit comes with a card reader and a memory card that stores information for the user. nine0003
The basis of the printer is already assembled and prepared - this is a movable table, display, electronics with a power supply. The layout is in the form of a single module, the body of which is made of steel 2 mm thick.
The print block is a ready-made modular assembly that includes a carriage with rollers, a heatsink with a thermal barrier, an active cooling system and an airflow system for the model.
X-axis carriage, motor mounted and T8 nut for height travel. As you can see, everything is already assembled, including cage nuts for fastening to the profile.
Separately, there is an assembly of motors designed to be installed in the bar feed mechanism, as well as to move along the Z axis (with clutch). By the way, if you are interested in self-assembly structures, I recommend looking at the B&R assembly kit, as well as the list of components for CNC and 3D. nine0003
Carriages with rollers and idler for the belt. All components are made of metal (no plastic!), and are factory painted.
And this is the highlight of this configuration. Not all budget 3D printers can afford to boast the presence of a filament end (break) sensor in the stock configuration. But JGMaker Magic can. A small sensor is mounted on a metal plate and attached to the profile in front of the feed mechanism. If the bar breaks (or the spool runs out), then printing will have time to pause before the tip approaches the extruder feed gear. Further, it will be possible to call the operation of changing the filament from the display using standard functions. You can continue printing after replacement. nine0003
Several photos of the printer bed. This is a massive one-piece sheet metal structure, with rounded sides. Rigidity is high and is achieved by using stiffeners. The table belt is already tensioned (fixed with a tie - it must be removed). Cylindrical shafts 8 mm are used as guides. Not the most expensive solution, but quite simple.
The basement houses the control board, power supply and display module. The power supply terminals are covered with a casing. nine0003
Driver type HR4988, non-replaceable. Management using MK Atmel ATmega2560. A simple and reliable solution, for which there are many custom firmware.
There is a sticker on the case with information about the model, manufacturer, and serial number (for manufacturer support).
Before printing for the first time, the printer must be assembled. Prepare the workplace and tools. We remove the film from the profile. nine0003
First, you need to assemble the X axis along which the print head moves.
Consisting of an axle with a short profile section and two carriages with rollers. Installation takes place in prepared grooves, in order not to confuse the installation side, read the instructions.
Carriage units are fixed in the profile with T-nuts. We loosen them, thread them into the groove, combine the countersink holes, fasten them.
Next, until the X-axis is fully assembled, you need to install the printing block on the profile. The rollers go into the grooves of the profile, if necessary, the rollers can be tightened with a complete key. nine0003
We collect everything together, install the last carriage. When installing, do not confuse the side of the print head, try to refer to the instructions and available photos of finished printers.
The second carriage is installed - now you need to pass the belt through the profile and under the rollers, and then fasten it to the printhead. The belt should be tight and the teeth should wrap around the drive gear. nine0003
The manufacturer has already cut the desired piece of belt to size and installed a loop with ties there.
Don't forget about the bypass roller.
We put the loops on the head brackets, check the belt tension.
After assembling the X-axis, it is necessary to proceed to the assembly of the vertical parts, in particular, to the installation of the Z-axis motor and the limit switch on the profile.
We fix the engine assembly in Z on the profile. We install the second vertical crossbar on the printer.
Next, carefully install the pre-assembled X-axis onto the vertical profiles of the printer.
The rollers must slide freely into the grooves, without wedging.
Next, install the T8 lead screw through the nut on the carriage, into the motor coupling.
We tighten the coupling, clamping both the lead screw itself and the motor shaft.
The upper end of the screw is loose.
There is very little left - we fix the upper bar, completing the assembly of the supporting structure. Install the filament sensor and extruder. nine0003
Don't forget about the decorative overlay on the upper profile - U-shaped profile with the inscription JGMaker.
We check the movement of the axles with our hands, check the laying of the wires, and also install clothespins on the adhesive sticker.
Complete extruder. We connect the Bowden tube (feeder).
It remains to connect the harnesses with electronics. Each connector is signed - you can't go wrong here. Z-axis.
Sensor and extruder E.
External view of the assembled JGMaker printer.
Everything has been checked, the printer has been assembled, now let's move on to connecting and configuring.
Preparing for printing is outrageously simple. Download Cura, select a standard printer in the profile, specify the print area 220x220x250mm and give a name.
We fill the plastic in the printer, slice the model in Cura, dump the G-code on the memory card. nine0003
Connect the memory card to the printer.
Starting the printer to print.
Marlin firmware menu, typical menu. There is a check and settings submenu, there is a print settings adjustment in the process. A pause in the printing process is provided (for changing the filament, etc. ). After an emergency reset, the printer offers to start printing from the old place (it turns out well).
Examples of printing models.
One of the simple test models.
Handy mask holder. nine0003
It turned out fine, considering that I didn’t have time to choose the printer with the settings “out of the box” and the temperature for the plastic.
You can try to print something bigger.
Various adapters for telescope and camera.
With these adapters you can connect standard eyepieces, cameras to old telescopes and lenses.
The design works, the plastic practically did not shrink - the parts are inserted into each other with little effort. nine0003
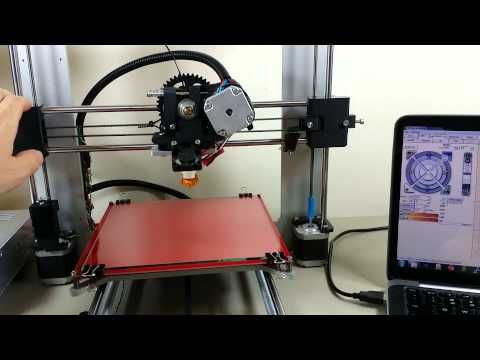
A short video demonstrating the operation of the JGMaker Magic printer.
Here is an example of models after adjusting and selecting print modes for plastic.
Of course, print quality is highly dependent on plastic. More expensive plastic gives better results - a smoother surface, better adhesion of layers and adhesion. And cheaper plastic, as a rule, requires post-processing (sanding, smoothing, etc.). Just for example, a photo of one of the models printed on the JGMaker Magic 3D printer. nine0003
Take it or not - it's up to you. As a first printer for little money, it will fit. Of the minuses, I note the presence of cylindrical shafts. If you plan to change something, then you can try to install the rails on the table, as well as the second drive in Z. If the harnesses of the moving parts are not very well fixed, an error in E1 may occur (the thermistor connector comes off the tightness).
In any case, you will need a link to the official JGMaker website, as well as a link to the contents of the SD card (instructions and firmware). Reviews of other models of 3D printers, see my profile. nine0003
Wanhao Desktop 3D Printer Repair
Our addressesCall courier
Professional appliance repair
+7 (495) 926-72-26 call +7 (901) 519-36-15 call
Check order status
nine0270 More recently, it was hard to even imagine that there would be a device capable of recreating 3D models in a three-dimensional format, but now the electronics market offers many different options for such devices, for example, Wanhao desktop 3D printers (Wanhao), these devices do an excellent job with their main tasks and are quite reliable as well.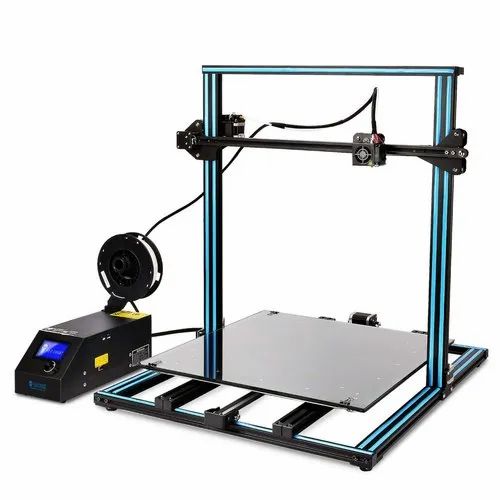 However, do not forget that any equipment can break down over time for various reasons, not always the fault of the owner, and the solution to the problem can be the repair of Wanhao desktop 3D printers (Wanhao). If the repair of the Wanhao desktop 3D printer (Wanhao) in Moscow and its districts has become relevant for you, then rather call Nicom Service by phone: +7 (495) 926-72-26. During our work, we have made more than 30 thousand successful repairs, because of which we can safely talk about the qualifications of our employees. We use only branded spare parts. parts, and at the same time we pleasantly delight our customers with low prices, quick repairs and a mandatory guarantee for our work!
 Typical problems faced by owners of Wanhao desktop 3D printers (Wanhao) are: the printer does not print, the printer prints with defects, cobwebs or hairs on the printout, plastic overheats, layers shift, the printer gives an error, holes are visible on the product and much more! Don't put off fixing your Wanhao desktop 3D printer until tomorrow if you can fix it today! Call: +7 (495) 926-72-26 or fill out an application on our website.