Build tak 3d printer
BuildTak 3D Print Surface - 254 x 165 (10" x 6,5") | 3D Prima
Buildtak
0 Reviews
read more
-20%
€ 11,90
Incl. VAT excl. Shipping
Wish list
Questions about the product
Questions about the product?
Shipping charges are based on the product's total weight and shipping method chosen.
Exact shipping charge is presented at checkout when you select shipping methods and your country. No other hidden costs.
Free shipping for all EU orders above EUR 100!
Fast delivery
Our goal is that all orders placed before 12:00 are shipped out from us the same day if the products are in stock.
All items shown with “in stock” status are in stock in our own warehouse for immediate delivery.
Delivery within EU will be shipped by FedEx, UPS, International tracked mail. You choose method in the checkout.
Delivery time will be around 2 - 6 days to most European countries.
Worldwide delivery around 4 - 7 days.
You will receive and mail from us with the tracking nr of the parcel as soon as we have shipped your order.
Free shipping for all EU orders above EUR 100!
Below you can see delivery time for European countries.
| Country | Delivery Time in Days | Free Freight over EUR 100 order |
| Albania | 4 | No |
| Andorra | 3 - 5 | No |
| Armenia | 4 - 6 | No |
| Austria | 2 - 3 | Yes |
| Azerbaijan | 4 - 6 | No |
| Belarus | 4 - 6 | No |
| Belgium | 2 - 3 | Yes |
| Bosnia & Herzegovina | 3 - 4 | No |
| Bulgaria | 3 - 5 | Yes |
| Croatia | 4 - 5 | Yes |
| Cyprus | 4 - 5 | Yes |
| Czech Republic | 3 | Yes |
| Denmark | 2 | Yes |
| Estonia | 3 | Yes |
| Finland | 2 | Yes |
| France | 2 - 4 | Yes |
| Georgia | 4 - 6 | No |
| Germany | 2 | Yes |
| Greece | 3 - 4 | Yes |
| Hungary | 3 - 4 | Yes |
| Ireland | 3 - 4 | Yes |
| Italy | 2 - 4 | Yes |
| Kosovo | 3 - 4 | Yes |
| Latvia | 3 - 4 | Yes |
| Liechtenstein | 2 - 4 | Yes |
| Lithuania | 3 - 4 | Yes |
| Luxembourg | 2 - 3 | Yes |
| Macedonia | 3 - 4 | Yes |
| Malta | 4 - 5 | Yes |
| Moldova | 4 - 6 | No |
| Monaco | 3 - 4 | Yes |
| Montenegro | 4 - 5 | Yes |
| Netherlands | 2 | Yes |
| Norway | 2 | Yes |
| Poland | 3 - 4 | Yes |
| Portugal | 5 - 6 | Yes |
| Romania | 3 | Yes |
| Russia | 4 - 6 | Yes |
| San Marino | 4 | Yes |
| Serbia | 3 - 5 | Yes |
| Slovakia | 3 | Yes |
| Slovenia | 3 | Yes |
| Spain | 3 - 5 | Yes |
| Sweden | 1 | Yes |
| Switzerland | 4 | Yes |
| Turkey | 4 - 6 | No |
| Ukraine | 4 - 6 | No |
| United Kingdom | 3-6 | No |
Shipping charges are based on the product's total weight and shipping method chosen.
Exact shipping charge is presented at checkout when you select shipping methods and your country. No other hidden costs.
Free shipping for all EU orders above EUR 100!
Fast delivery
All orders placed before 12:00 are shipped out from us the same day if the products are in stock.
All items shown with “in stock” status are in stock in our own warehouse for immediate delivery.
Delivery within EU will be shipped by FedEx International Economy.
Delivery time will be around 2 - 6 days to most European countries.
Worldwide delivery around 4 - 7 days.
You will receive and mail from us with the tracking nr of the parcel as soon as we have shipped your order.
Free shipping for all EU orders above EUR 100!
Below you can see delivery time for European countries.
| Country | Delivery Time in Days | Free Freight over EUR 100 order |
| Albania | 4 | No |
| Andorra | 3 - 5 | No |
| Armenia | 4 - 6 | No |
| Austria | 2 - 3 | Yes |
| Azerbaijan | 4 - 6 | No |
| Belarus | 4 - 6 | No |
| Belgium | 2 - 3 | Yes |
| Bosnia & Herzegovina | 3 - 4 | Yes |
| Bulgaria | 3 - 5 | Yes |
| Croatia | 4 - 5 | Yes |
| Cyprus | 4 - 5 | Yes |
| Czech Republic | 3 | Yes |
| Denmark | 2 | Yes |
| Estonia | 3 | Yes |
| Finland | 2 | Yes |
| France | 2 - 4 | Yes |
| Georgia | 4 - 6 | No |
| Germany | 2 | Yes |
| Greece | 3 - 4 | Yes |
| Hungary | 3 - 4 | Yes |
| Ireland | 3 - 4 | Yes |
| Italy | 2 - 4 | Yes |
| Kosovo | 3 - 4 | Yes |
| Latvia | 3 - 4 | Yes |
| Liechtenstein | 2 - 4 | Yes |
| Lithuania | 3 - 4 | Yes |
| Luxembourg | 2 - 3 | Yes |
| Macedonia | 3 - 4 | Yes |
| Malta | 4 - 5 | Yes |
| Moldova | 4 - 6 | No |
| Monaco | 3 - 4 | Yes |
| Montenegro | 4 - 5 | Yes |
| Netherlands | 2 | Yes |
| Norway | 2 | Yes |
| Poland | 3 - 4 | Yes |
| Portugal | 5 - 6 | Yes |
| Romania | 3 | Yes |
| Russia | 4 - 6 | Yes |
| San Marino | 4 | Yes |
| Serbia | 3 - 5 | Yes |
| Slovakia | 3 | Yes |
| Slovenia | 3 | Yes |
| Spain | 3 - 5 | Yes |
| Sweden | 1 | Yes |
| Switzerland | 4 | Yes |
| Turkey | 4 - 6 | No |
| Ukraine | 4 - 6 | No |
| United Kingdom | 3-6 | No |
This item cant be delivered in the selected country. Please change the country.
Aland Islands Albania Algeria Andorra Argentina Australia Austria Bahrain Bangladesh Belgium Bermuda Bhutan Bolivia Bosnia and Herzegovina Brazil Bulgaria Canada Canary Islands Cayman Islands Chile China Croatia Cyprus Czech Republic Denmark Egypt Estonia Faroe Islands Finland France Georgia Germany Gibraltar Greece Greece, Islands Greenland Guernsey Heligoland, Germany Hong Kong Hungary Iceland India Indonesia Iran Iraq Ireland Isle Of Man Israel Italy Ivory coast (Côte d'Ivoire) Japan Jersey Jordan Kosovo Kuwait Latvia Lebanon Libya Liechtenstein Lithuania Luxembourg Macedonia Malaysia Maldives Malta Martinique Mexico Moldova Monaco Montenegro Netherlands New Zealand Northern Ireland Norway Peru Poland Portugal Puerto Rico Romania San Marino Saudi Arabia Serbia Singapore Slovakia Slovenia South Africa Spain Spain, Balearic Islands Sweden Switzerland Taiwan Thailand Turkey USA United Arab Emirates United Kingdom Uruguay
BuildTak 3D Print Surface – 254 x 254 mm (10″ x 10″) – 3D Kongen
Product Detail and Information
BuildTak is a thin, durable plastic sheet that adheres to the print bed of FDM (fused deposition modeling) 3D printers to provide an ideal surface for 3D printing. It replaces the need for blue masking tape and/or polyimide films such as Kapton. Composed of high quality, heat-resistant raw materials, BuildTak provides a stable build platform for 3D printed objects to adhere to while allowing for a clean, easy removal of completed builds.
BuildTak Offers The Following Benefits
- Works great with ABS, PLA and more without the need to change the surface. And no more pretreatments such as hairspray or acetone slurry!
- Easy installation to the bare print bed and clean removal without adhesive residue.
- Durable and with optimal care can last for many hours of use while providing extended protection to the original print bed surface.
- Creates an optimal bond between the 3D printed object and the build surface for the duration of the print while preventing curling. When builds are complete, the 3D printed object can be cleanly removed with minimal prying or scraping.
- Patent-pending heat resistant composition, developed to withstand the typical temperatures used on heated print beds (i.
 e. 110-125C). With safety in mind, BuildTak is composed of raw materials that are UL flame rated.
 - BuildTak Just Works!
Key Features:
- Works with ABS, PLA, HIPS, PET+, Brick, Wood & Flexible (TPE) filaments; additionally we have had success with getting nylon and t-glase (PETT) to adhere when used with a thin layer of washable glue stick on the BuildTak surface
- Installs much easier than masking tape or films typically used and with fewer chances of air bubbles
- Protects build plate
- Heat resistant and durable, can be reused for many consecutive builds and you can use different filament materials without the need to change the printing surface
- Creates an optimal bond between the 3D printed object and build surface that maximizes the chances your object will be held in place for the duration of the print and then allow for clean and easy removal of the object from the build surface.
FAQ –
Frequently Asked Questions
What is BuildTak?
BuildTak is an ideal 3D printing surface for FFF 3D printers.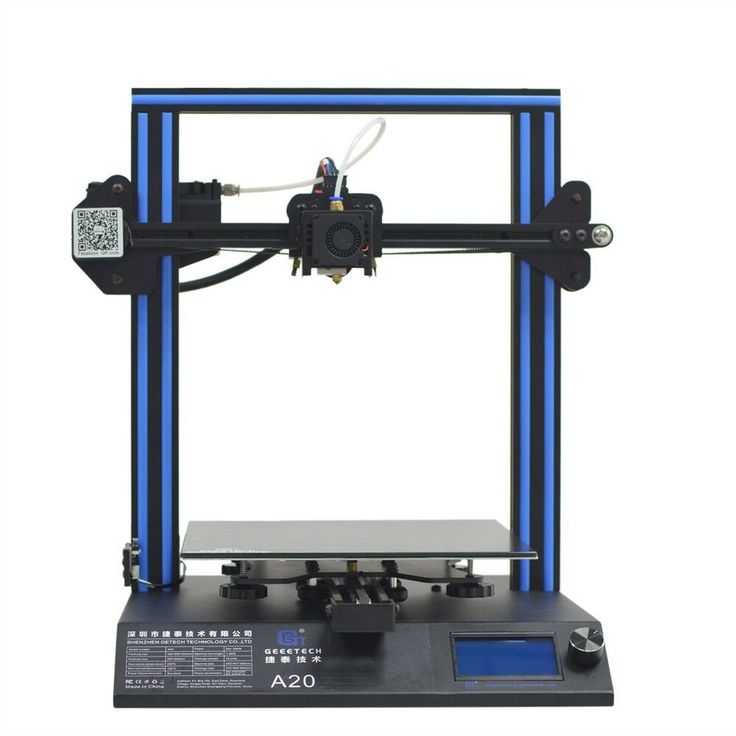 We believe it offers a superior alternative to using masking tape or heat resistant films (such as kapton) on your FFF 3D printers build plate. BuildTak is a proprietary, patent-pending composition that comes in pre-cut, specially textured plastic sheets that adhere to your build platform with its heat-resistant adhesive backing.
Why we think BuildTak is superior over masking tape and heat-resistant films?
if you have ever dealt with either masking tape or kapton, one of the more common features you will notice is that the BuildTak sheets are more rigid and therefore much easier to install or apply to the bare build plate and much less susceptible to air bubbles getting trapped beneath the surface.
BuildTak is found to be more durable in nature so it can be more effective in protecting the build plate and with proper use can significantly outlast the typical cycle time of either kapton or masking tape.
Generally does not require any special treatment or finessing (ie. the use of hair spray, acetone slurry, printing rafts, etc). Once you have the crucial step of setting nozzle height just right, BuildTak just works. Through our experience we find that 3D printed objects stay put on the build surface for the duration of your build with fewer chances of curling. When the builds are complete, we find that builds pop right off with significantly less prying than what you are probably used to using these other alternatives.
BuildTak works for both ABS and PLA, which means if you are using a printer that can print in either of these materials it is not necessary to change the surface between builds. Heated print beds are not a problem, BuildTak is composed of high quality raw materials and is designed to withstand the high temperatures of a typical FFF 3D printer (i.e. 110-125C heated print bed)
If/when you are ready to replace the BuildTak sheet, it comes off clean and easy in one piece, leaving no residue behind from the adhesive.
How do I use BuildTak?
1. Wipe down your bare build platform making sure it is clean and free of debris
2. Trim the BuildTak sheet down to the size of your build plate (if not already)
3. Remove the white adhesive liner and apply the BuildTak sheet to your bare build plate. Start from one edge of the build plate and work your way to the other edge, smoothing the BuildTak sheet with a credit card or decal applicator as you go
4. Re-level your surface, making sure the nozzle heights are properly set to the approximate thickness of a standard piece of office paper. The key to a successful BuildTak experience is a level print bed and finding that nozzle height sweet spot!
What are the best practices to ensure the longevtiy of the BuildTak?
We recommend using a spatula or putty knife with smooth/rounded corners. Avoid using objects with sharp edges or corners that will accelerate the wear and tear of your BuildTak sheet and DO NOT use heavy duty solvents, such as acetone, to clean it, nothing stronger than rubbing alcohol.
Make sure the extruder nozzle for your FFF 3D printer is leveled and is NOT in direct contact with the BuildTak sheet. It is recommended to set your nozzle height to no less than the thickness of a standard sheet of office paper. When trying to achieve an optimal nozzle height, it is better to start with a looser nozzle height, run a test/leveling print and simply decrease the nozzle height in smaller increments until the test prints stick.
What are the best settings for nozzle height and bed leveling?
When it comes to nozzle height, we have found that there is a sweet spot that allows for optimal adhesion/removal of printed parts. When trying to find that sweet spot it is better to start with the nozzle height on the high side and run a test print where you pay close attention to the first layer of the print. You will know right away if the nozzle is too far because the extruded filament will not stick and in that case, no harm done to the sheet. Just reduce the nozzle height slightly and try again until it sticks. For setting the nozzle height (i.e. the distance between your nozzle and the BuildTak sheet) we recommend using the thickness of a standard piece of office paper (or about .1mm) for ABS and a piece of card stock (or about .2mm) for PLA. with just a little bit of friction. Proper leveling should also increase the longevity of the sheet because it will more than likely mean you will not be subjecting it to as much wear and tear in the removal of the object.
Why are my prints not sticking to the BuildTak?
This is generally caused when the extruder nozzle is too far away from the BuildTak sheet, try decreasing nozzle height slightly. Run a test print after each adjustment to confirm.
Why are my prints sticking too well to the BuildTak, making it difficult to remove the builds afterwards?
This can happen when the extruder nozzle is too close to the BuildTak sheet. Try increasing the nozzle height slightly and make sure the print bed is level. Make sure you run a test print. When printing with ABS, try to remove the builds immediately after completion, reheating the heated print bed (for ABS) will also help to release larger builds that are sticking too well. Please note, a heated bed is not required for printing with PLA or removing parts printed with PLA.
What Materials work with BuildTak?
Works with ABS, PLA, HIPS, PET+, Brick, Wood & Flexible (TPE) filaments; additionally we have had success with getting nylon and t-glase (PETT) to adhere when used with a thin layer of washable glue stick on the BuildTak surface.
13 BEST CONSTRUCTION 3D PRINTERS OF 2019
A 3D construction printer is a machine that can build houses by applying material (concrete) layer by layer. The paste type material used, in this case concrete or earth, is forced through the nozzle in layers to print buildings.
Concrete 3D printing in the construction industry saves time, effort and material when compared to traditional methods. However, it is important to note that 3D printers are not yet capable of creating a fully functional home, only the frame and walls can be created, other elements such as windows, electricity or plumbing must be installed separately. Concrete 3D printers can also be used to print bridges, benches, or simply outdoor decorations.
To provide a complete overview of the construction 3D printer market, we have listed the top 12 construction 3D printing solutions. Some of them are 3D printers already available for sale, while others are still in the prototype stage or provide 3D printing services for external structures.
HOW TO BUILD A 3D PRINTED HOUSE?
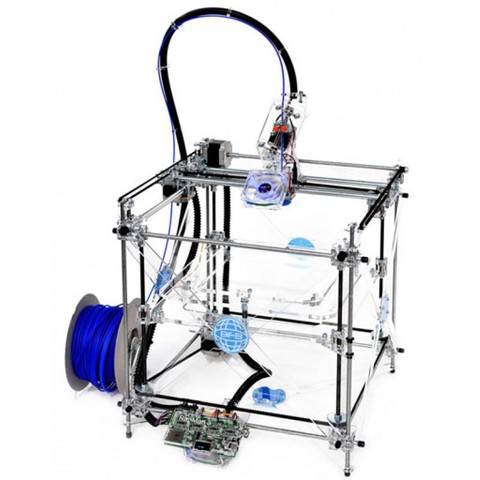
Construction 3D printers use extrusion technology. Some construction 3D printers are similar to FFF/FDM desktop 3D printers, only larger (gantry style), while others consist of a rotating mechanical arm.
In both cases, paste-type components such as concrete are used as the filament. The material is ejected from a special nozzle to form layers. In simpler (very) extrusion of pasta is like using a bag to dispense frosting on a cake.
The printer builds foundations and walls layer by layer. The base is literally the printer's build plate. However, some concrete 3D printers are used to 3D print brick molds. Once molded, the bricks are stacked on top of each other manually (or with a robotic arm).
Benefits of building 3D printing
• Eco-friendly : 3D printed houses can be built with sustainable materials. What's more, some construction 3D printers use solar energy and emit little CO2.
• Affordable: 3D construction printers can build affordable housing, providing great relief to people in poor areas or after natural disasters.
• Scalability: 3D construction printing reduces certain construction costs. For example, the cost of 1 square meter of wall using traditional construction methods is approximately $75, while for an Apis Cor house 3D printer it is only $27.
• Efficient: Because materials are 3D printed on demand, machines produce less waste. In addition, 3D construction printers can complete the foundation of a house in less than a few days, while traditional construction methods take weeks or even months.
• Design flexibility: Curved walls and unique facades can be easily created with a 3D printer
Disadvantages of 3D construction
• Expensive initial investment: These 3D printers can sometimes cost up to a million dollars.
• Partially Built Houses : Only house frames are built. The 3D printing process is usually paused to manually install plumbing, wiring, and fittings.
• Rough Appearance : The exterior of most 3D printed houses is not as smooth as traditional houses.
• Lack of Certification: Construction sites are regulated by law and there are important safety standards that must be met, which can be difficult with 3D printing methods (different repeatability, dimensional stability, etc.).
CONSTRUCTION 3D PRINTERS: OVERVIEW
We divide construction 3D printers into three categories: house building 3D printers that you can buy, prototype concrete printers, and concrete 3D printing services.
Home 3D printers available
AMT printers
Pictured: AMT S-6044 Long and AMT S-300
), 11 x 31 x 80 (maximum)
• Material: Concrete / Clay / Gypsum
• Country: Russia
Equipment manufactured by AMT-SPETSAVIA - workshop and field portal construction 3D printers (COP-printers, Construction Objects Printing): and from small-format (for printing small architectural forms ) to large (for printing buildings up to 30 floors high). Productivity from 0.5 to 2.5 cubic meters per hour, management by 2 people. AMT printers are capable of printing with any kind of concrete, clay and gypsum.
BetAbram P1
• Assembly size : 1.6 x 8.2 x 2.5 m
• Material : Concrete
• Country : Slovenia
BetAbram is a small Slovenian team that has been working on building 3D printing equipment since 2012. Their flagship home 3D printer, the BetAbram P1, is currently in its second iteration and is available with additional printheads: basic, "Orto" for smoother layers, and rotatable for more design options.
COBOD BOD2
• Build size : 11.98 x 45.07 x 1.53 m
• Material : Concrete
• Country : Denmark
This construction 3D printer is fast, with a speed of up to 18 meters per minute. BOD2 is modular and can be adapted to various sizes. COBOD is a 3D Printhuset company.
Constructions-3D 3D Constructor
• Assembly size : 13 x 13 x 3. 8 m
8 m
• Material : Concrete
• Country : France Their 3D Constructor machine is mobile thanks to its rubber tracks and fits in a 20ft shipping container for easy transportation from one construction site to another.
CyBe Construction CyBe RC 3Dp
• Assembly size: 2.75 x 2.75 x 2.75 m
• Material: Concrete
• Country: Netherlands This easy-to-use 3D printer is capable of reaching heights of up to 2.75 meters and only requires two people to operate.
ICON Vulcan II
• Build Size : 2.6 x 8.5 x ∞ m
• Material : Concrete
• Country : United States
ICON wants to revolutionize the construction industry with its Vulcan II printer. The whole process is designed to be user friendly with a tablet-based interface, and the ICON Lavacrete concrete mix is optimized for easy printing.
MudBots Concrete 3D Printer
• Build Size : 1.83 x 1.83 x 1.22 m (minimum)
• Material : Concrete
• Country : United States of Mudts003 Concrete 3D Printers USA. Their smallest model (approximately 1830 x 1830 x 1220 mm) is available for $35,000. Large build sizes are also available, reaching up to 30 meters in length.
According to MudBots, their 3D printers can print a small house in just 12 hours and cut costs by 70% compared to traditional building methods.
Stroybot2
Build Size : 10m x 15m x 6m
Material : Concrete
Country : United States
StroyBot, also known as the Rudenko 3D Printer, is a versatile mobile design printing system supplied as a build kit user. On average, he can print a 100 square meter house in 48 hours (walls only).
WASP Crane WASP “Infinity 3D Printer”
• Build Size : Ø 6.3 x 3 m
• Material : Concrete / Earth materials
• Country : Italy
WASP Crane is an evolution of the previous WASP construction printer 12MT. This open source builder is modular and multiple Crane printers can work together on the same project, giving theoretically endless 3D printing possibilities.
Concrete printers work projects
Apis Cor 3D printer
• Assembly size : 8.5 x 1.6 x 1.5 m
• Material : Concrete
• Country : United States
Apis Cor, a 3D based construction company Francisco and claims to be able to 3D print a house in less than 24 hours. Their Apis Cor printer is similar to a robotic arm and won first place in NASA's 3-stage 3D printing competition.
Batiprint3D 3D Printer
• Build Size : -
• Material : Concrete / Other
• Country : France
Batiprint 3D made headlines internationally when it completed the Yhnova 3D print shop in Nantes, France. Their 3D printer not only prints cement but also insulating foam, making it one of the most complete 3D building solutions.
S-Squared ARCS VVS NEPTUNE
• Build Size : 9.1 x 4.4 x ∞
• Material : Concrete
• Country : United States
S-Squared, also known as Square3D "4D printing", which aims to provide fast, reliable, environmentally friendly and affordable housing for poor areas. ARCS VVS NEPTUNE is one of the company's working models, but it will not be available for commercial sale.
Construction printing services
Contour Crafting 3D Printing System
• Material: Material: Concrees
• Country: United States
This automatic construction system is capable of 3D -printing large buildings and high -high infrastings. Contour Crafting (also known as CC Corp) aims to improve the effectiveness of disaster relief through concrete admixture technology.
XtreeE 3D Printer
• Build Size : -
• Material : Concrete
• Country : France
XtreeE develops custom 3D printing solutions for construction, engineering and architectural design. This startup is located in France and has already completed a number of 3D construction projects.
3D printer for construction - the future or hype?
3D printing is one of the hottest technologies of the beginning of the century. Although the first primitive 3D printers appeared in the late 80s of the last century, only in the last 10-15 years have they become advanced (and cheap) enough to become widespread.
Everything from plastic toys and mock-ups to intricate parts of rockets and organs is now printed with this technology. The construction sector has not been ignored either: now dozens of companies are actively developing 3D printers for construction, some of which have already achieved considerable success and are using them in practice. And not only for creating benches and other street decor, but also for building houses.
Understanding what a construction 3D printer is - the future that has come, or a hype technology that will remain only in niche projects when interest subsides.
A 3D printer for construction is not much different from home devices on which children print plastic toys. But there are three significant differences: dimensions, consumables and, of course, price.
In fact, an industrial 3D printer for building houses is a CNC machine. Only instead of drilling holes or cutting metal with a laser, it applies a thin layer of consumable material along a given trajectory. Then another one is added on top of the first layer, and another, and another - and so on until the printer “prints” the three-dimensional model loaded into its memory layer by layer.
To do this, a 3D model, for example of a garden bench, is created in a CAD program. Then it is "cut" into thin layers, which in turn - from the bottom to the top - are sent to the "print".
The result is a design that is somewhat reminiscent of a layer cake. Only with large voids inside.
The principle of operation of a 3D printer for building a house is always the same:
- applied a thin layer;
- let it dry or gain the necessary strength;
- applied the next coat;
- and so on in a circle.
But the method of applying this layer and its composition are different. As well as the design of the printer itself, but more on that separately and a little lower.
So, when building with a 3D printer, consumables are usually applied in one of three ways: extrusion, powder method, or multi-jet modeling.
Extrusion
In this case, the finished mortar is extruded from the hopper through a special printhead that can move in three planes. The most common "printing" method for construction 3D printers.
Powder method
Two-stage 3D printing technology: powder mortar is applied first, and then special glue is applied. This allows you to get walls with a more even surface. In addition, the powder method is better adapted to field conditions - in particular, there is no risk of the building mixture solidifying in the nozzle in the event of a malfunction.
The technology is rather rare, since 3D construction printers for construction based on it are more complicated than extrusion devices.
Multi-Jet Modeling
A very rare 3D printing method that is used in only a few devices. This method is very similar to conventional inkjet printing: there are several hundred nozzles through which the mortar is squeezed out. The carriage, on which the nozzles are fixed, moves slowly and creates the desired pattern.
The main advantage of such a device is the speed of operation, which is several times or tens of times higher than that of an extruder printer.
There are actually more ways to print on construction 3D printers. After all, they are used not only for the construction of houses and the creation of decor, but also for the construction of complex metal structures, for example, bridges. But such machines are not the topic of this article - we are interested in private houses.
Most commonly used in construction 3D printers is modified concrete . But not ordinary, but special: with special additives, plasticizers, often with reinforcing elements. The result is a plastic mixture with a high degree of uniformity, which at the same time quickly hardens and gains strength.
Moreover, 3D concrete printers from different manufacturers use different mixtures for building a house. This is due to the fact that equipment developers select the composition of the building mixture so that it does not clog the nozzle, does not stick to it and comes out as a neat homogeneous mass without the formation of bubbles and other defects. And since extruders in general, and nozzles in particular, are unique for manufacturers, this also affects mixtures.
The second most popular type of building composition is various clay mixtures . They are used for two reasons: firstly, they are considered more environmentally friendly, and secondly, they are more affordable.
It does not really matter if the house is being built within the city limits or not far from the city. But the use of concrete mix severely limits the use of 3D printers in the construction of buildings located far from large cities, since many tons of consumables will then have to be transported along with the equipment. This is at least inconvenient and leads to additional costs. Not to mention the fact that mixing concrete for most construction 3D printers is possible only in factory or laboratory conditions, but not in the field.
Clay "seal" solves this problem for the most part - in this case, you only need to bring modifiers with you. This makes it possible, for example, to build houses with a 3D printer in remote areas of Russia.
In addition to clay, mixtures with earth, ash, and straw are used for printing - this allows you to build houses actually from garbage and what you get on the site.
The least common 3D construction printers are inverted and use polyurethane foam insulating foam to build houses. That is, a 3D printer does not print walls, but a layer of insulation on them. At the same time, the operation of the device is stopped every 1-1.5 m of height and a concrete mixture is poured into the walls, using thermal insulation as a permanent formwork.
Such 3D construction printers are especially relevant in Russia, as they allow you to immediately solve the problem of home insulation. Moreover, among the heat-insulating materials used in private construction, polyurethane foam is the most effective.
There are four main types of construction 3D printers:
- Portal . Such 3D printers consist of at least two vertical stands and two horizontal rails between them. A carriage with an extruder attached to it moves along the resulting frame. This is a very robust design, but only objects that fit inside the frame can be "printed" with it.
- Compasses . Such a construction 3D printer is designed for the construction of large houses and structures at a distance from cities. It is a carriage that is put on a base that can rotate 360 °.
- With arms. It's just a robotic "arm" that has been adapted for 3D printing. The most difficult to manage, but also the most flexible models.
- Delta . In this case, the extruder is suspended on three levers, which are fixed on racks.
 As a result, its position is determined by the position of the levers.
When building small houses using a 3D printer, portal models are usually used, less often circular ones. Delta devices are good for large or tall houses, and manipulators are good for creating small parts, for which positioning accuracy of the extruder is important.
The use of a 3D printer in construction is a new, but very promising technology. "Printed" houses:
- Cheap - "box" costs several thousand dollars.
- Can be built quickly - small houses can be completed in less than a day.
- Robust as they are virtually monolithic.
- They can be of almost any shape - the architect's imagination is limited only by the strength of the structure.
- As shown in the picture - any CNC works with high precision, so the door and window openings will be exactly the same width as the project.
However, 3D printing is far from a magic wand. This technology has many disadvantages, and one of them makes it impossible to build with a 3D printer in Russia. Yes, and not only in it.
This disadvantage is standardization. In many countries of the world, technologies and requirements for building structures are strictly standardized. And Russia is one of the champions in this. At one time, the great Zaha Hadid was forced to change her Dominion Tower project in Moscow, because the concrete slab projections did not meet the standards. Whether it will be possible in Russia to put into operation a house that has not even been built, but printed on a construction 3D printer, is a rhetorical question.
Other minuses are also significant:
- extremely expensive equipment;
- finishing and other internal work, including the installation of engineering networks, still need to be done using traditional technologies;
- need very skilled workers for quality control;
- specific look that not everyone will like.
3D printing technology in construction is innovative and trendy, but so far has little to do with practice.