3D printer 2 colors
How To: Print Two Colors With One Nozzle
Learn how to 3D print one part with two different colors with a single-extrusion 3D printer!
Posted on July 2, 2019
by
Alec Richter
Dual extrusion is a lot more commonplace than it used to be, but the different methods possible are as varied as ever. Some use articulating within the print head to change from nozzle to the other, some have multiple toolheads they switch back and forth from, some use one nozzle and purge out the old material, and some have two nozzles mounted to the same printhead. Each of these has their own set of advantages and disadvantages, but the biggest thing is that if your 3D printer doesn’t already utilize one of these, there’s some external cost involved in upgrading your printer to do more than one color or material in a print, unless you fake it.
There’s a couple different ways you can go about “dual extruding” your 3D prints: Separate Parts, Layer Swapping, First Layer Inlay, and Top Inlay.
Separate Parts
Separate Parts is exactly what it sounds like, design the base piece you want and have the secondary color be a set of pieces that slot into the first 3D print. This is specific to models where you can get straight insertions and don’t have odd angles to work around. Take for example, this Optimus Prime figure. This was originally modeled by ChaosCoreTech, but I have seriously modified the STLs for it. It was designed to work around a filament splicing system to use multiple colors in the same part, instead what I did was make each other color a separate piece that would easily slot over each other.
ChaosCoreTech's Optimus Prime has been modified to work with single extrusion printers without a filament splicer.
To demonstrate, let me show you how I designed the shift knob for my car: First I have the base piece here which I reverse engineered from the shift knob designed by Dingoboy71 on Thingiverse. The top and bottom sections are essentially the same, with some modification made for my car, which has an M8 threading for the shift knob instead of the M12 that the original was made for.
Dingoboy71's Shift Knob reverse engineered in Fusion360 for more precise modification.
Once I had the base remodeled, I started by creating a reference plane above the surface, and sketching out the shape I wanted using the various sketch tools, then I extruded it into the body of the knob the depth I wanted and kept it as a “New body” instead of joining or cutting it out like you might initially think.
The inlay before it has been cut out to match the contour of the knob.
Then I could use the modify>combine tool to find the intersection between the design and knob, keep that, and take this new body and subtract it from the knob.
The inlay has been cut out from the knob, but will fit it exactly, without any wiggle room.
This will give a perfect puzzle piece for the knob, but 3D printers just aren’t that precise, for zero clearance tolerancing, so instead what we can do is hide all the parts except the inlay, and use the push-pull tool to offset all the side faces inward. This value is going to be fairly specific for your 3D printer’s capabilities; for mine, 0.2 provides for a tough but solid fit.
Using the Push/Pull modifier is an easy way to add clearance tolerancing for 3D prints
Layer Swapping
Layer swapping is one of the most commonly used methods, especially in the MatterHackers office. The design considerations are a lot simpler, but so are the final results. Design your model, pause your print (either manually through your LCD, inserting the pause Mcode into the Gcode you are printing (usually just M600, depending on your firmware), or pausing in your slicer you’re running from), change filament, and continue. We heavily use this method for the MatterHackers Hextile wall since it’s so easy to take a favorite logo or text and make it stand out against the background, and as long as you have different geometry per layer, then the color will come across.
This hextile was paused four different times to get all the colors to come through in the right thickness.
First Layer Inlay
First layer inlay is something that I first heard of from Devin from MakeAnything a little over six months ago. He developed a process of creating 3D models that have a lot of colorful detail on only the first layer, and then swaps filament for the rest. The set up is very similar to the separate piece strategy, except you can’t do complex tops; the inlay will be completely flat.
MakeAnything's Starry Night phone case utilized ten different colors in the first layer.
At home I am building a 3D printer that has a little drawer in the front, and I wanted a custom knob for it. To do so, I designed the basic knob shape in Fusion360, and created a pattern on the front I wanted to have in a different color, and did the same intersection and subtraction technique as before, except this time didn’t do any offsetting to the secondary colored parts, and made sure they were only 0.4mm tall.
The knob in Fusion360 has no clearance, unlike the shift knob.
Once you’re in the slicer, you’re going to import all the parts together, and they should come in aligned to each other. Set the part in the center of the build plate and make sure that you don’t have a brim and your skirt is far enough away to not interfere with the primary colored part. Remove the primary colored part, slice, and start your print (or export to the SD).
The secondary color sliced on its own, ready for printing.
When the print finishes, remove any boogers that could get caught by the primary part, change filament and purge until clean, the Undo the removal of the primary part, and delete the secondary part, slice, and print.
The primary color sliced on its own, without supports so it can melt with the previously printed inlay.
The print should go right over the top of the inlay and melt together cleanly, giving you a super cool two-tone print. Keep in mind that if your printing uses a probing method that requires touching the bed, you may have to either disable it, or instead start these prints in a position that will be clear of the probing routine.
Two layers of red make it just opaque enough to see the shape on the knob
Top Inlay
Top inlay is something I hadn’t considered until a coworker, Mike, showed me it, to which I’ve expanded and created a set of guidelines. Using both first layer inlay and top inlay, you can have a double-sided and flush design - like a double sided keychain. Create a first layer inlay like normal, then on the top surface, instead of extruding into the keychain and calling it finished, add a chamfer or draft angle to the extrusion. This will allow you to print multiple layers of the top inlay, so you can’t see through it (which is possible with one-layer only inlays). The taper is chosen specifically to leave enough room for the taper of the nozzle, making sure it doesn’t crash into previously printed layers. For this method, your procedure will be: first layer inlay, end print, main body, end print, top inlay, end print. Three prints in total to get this effect.
The slight taper to the walls of the letters allow for the nozzle to print in these cavities without fully smearing into the sides.
Each one of these has their place and utility, so don’t be afraid to try one out, find out it doesn’t work for your design, and think about how to incorporate a different method. There may be a point where you need to check out a new dual extrusion printer or a filament splicing method for the more ornate designs, and for that, you can check out MatterHackers.com. I’m Alec from MatterHackers, thanks for reading.
Happy Printing!
Article Tags
- 3D Printing
- Firmware
- 3D Design
- MatterControl
- Press Releases
- Small Business
- Automotive
- E3D
- Jewelry Making
- Engineering
- Entertainment Industry
- MatterControl Touch
- ESD Materials
- NylonX
- BCN3D
- Open Source
- Crafty Pen
- Digital Fabrication Anatomy
- How To
- Hardware and Upgrades
- Tips and Tricks
- Weekend Builds
- Top Ten
- Education
- Tech Breakdown
- Women in 3D Printing
- Project Ideas
- Advanced Materials
- Reference
- Pulse Dual Extrusion
- Product Spotlight
- Aerospace
- Jobs
- Military & Government
- Multi-Tool Machines
- Getting Started
- Healthcare
- How To Succeed With Any 3D Printing Material
- Creality3D
- Architecture
- 3D Printer Reviews
- Hacker of the Month
Related Products
View all related products9 Best Multicolor 3D Printers In 2022
- Last Updated: November 28, 2022
- Pat Nathaniel
Looking for the very best Multi-Color 3D Printer on the market for 2022?
Then you’re in the right place.
Today we’re going to be:
- Looking at multicolor 3D printing;
- Seeing how viable it is for interested creators;
- Finding out which color 3D printer is the best choice for home users;
- Loads more…
Though 3D printing is still in its infancy – and I believe there’s still plenty of wild and wonderful things to look forward to in the coming years – we’ve already made so much progress in the last decade.
One area of continuous innovation is the ability to print in multiple different colors.
As with most 3D printing innovations, multi-color printing was first seen on industrial machines but has been making its way over to desktop 3D printers lately.
Let’s get started!
Geeetech A20M
Build Volume: 255 x 255 x 255 mm
Check Latest Price
Tenlog TL-D3 Pro
Build Volume: 300 x 300 x 350 mm
Check Latest Price
LOTMAXX Shark V3
Build Volume: 235 x 235 x 265 mm
Check Latest Price
Table of Contents
- Top 9 Multicolor 3D Printers At a Glance
- 1.
 Geeetech A20M (Best Value)
 - 2. LOTMAXX Shark V3 (Premium Choice)
- 3. Tenlog TL-D3 Pro (Best Choice)
- 4. XYZPrinting Da Vinci Color (Best Full Color 3D Printing for its Price)
- 5. FlashForge Creator Pro (Most Reliable)
- 6. XRize Rize (A Look-See at an Industrial Full Color 3D Printer)
- 7. Qidi Tech iFast
- 8. FlashForge Creator Pro 2
- 1.
- Add-Ons
- 9. Mosaic Palette 3 Pro (Best Color 3D Printing Add-On)
- Multicolor VS Full Color 3D Printers
- Can 3D Printers Do Multiple Colors?
- What is a Multi-Color 3D Printer?
- Advantages and Disadvantages of Multi-Color 3D Printer
- How Do You Print Two Colors?
- Can You Paint 3D Printed Objects?
- A Few Final Thoughts…
- Winner: Lotmaxx Shark V3
Top 9 Multicolor 3D Printers At a Glance
1. Geeetech A20M (Best Value)
2. LOTMAXX Shark V3 (Premium Choice)
3.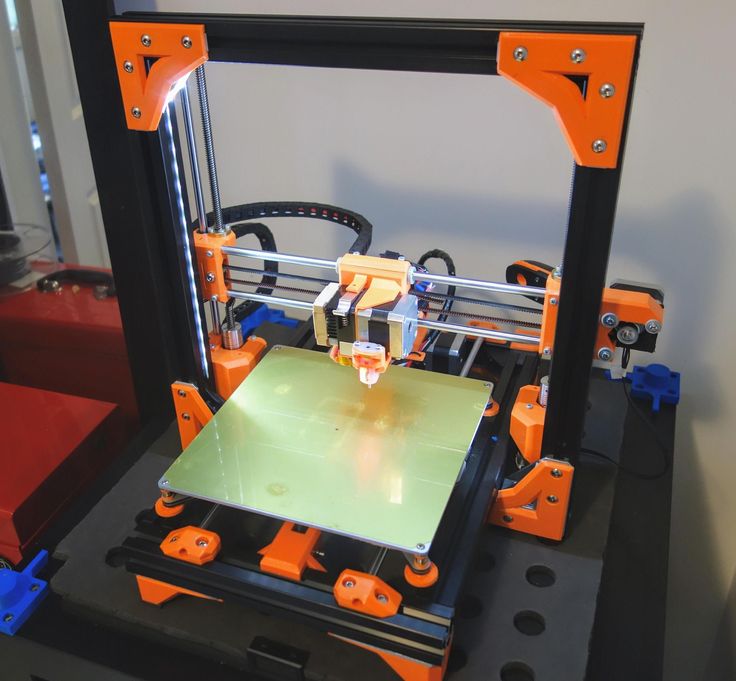 Tenlog TL-D3 Pro (Best Choice)
4. XYZPrinting Da Vinci Color (Best Full Color 3D Printing for its Price)
5. FlashForge Creator Pro (Most Reliable)
6. XRize Rize (Best Industrial)
7. Qidi Tech iFast
8. FlashForge Creator Pro 2
9. Mosaic Palette 3 Pro (Best Add-On)
1. Geeetech A20M (Best Value)
3D Printer Type: FDM | Materials: ABS, PLA & PETG | Build Volume: 255 x 255 x 255 mm | Print Speed: 180 mm/s | Color Mixing (Y/N): Y | Extruder: Dual
Geeetech has a couple of different 3D printers on the market, and I found the A20M to be its best option for multi-color 3D printing.
Given that the field is still highly experimental, the A20M doesn’t cost much, which is an immediate bonus.
In fact…
… for any reliable dual-extruder, the A20M is still a great price. It’s also blessedly easy to set up, and the dual-extrusion 3D printing technology tends to work well.
But the real reason I loved this 3D printer was its ability to push the envelope on color mixing.
You really don’t see this very much in personal 3D printers, and it’s completely unheard of at this price point.
With the Geeetech, you can expect to print in two distinct colors (striping or the like) or even mix and/ or grade your colors, allowing for a full spectrum of shades and hues.
- Excellent price point
- Great color-mixing technology
- Solid customer service
- Persistent clogging issues
- Poor plate cover
Check Latest Price
2.
 LOTMAXX Shark V3 (Premium Choice)
 3D Printer Type: FDM | Materials: PLA, PLA+, ABS, TPU & Wood | Build Volume: 235 x 235 x 265 mm |Print Speed: 45-90 mm/s | Color Mixing (Y/N): Y | Extruder: Dual
The upgraded version of the LotMaxx Shark V2 brings new features to the table — and they’re good!
It has improved laser engraving capabilities — yielding finely-detailed engravings — and an overall sturdier frame and design with improved cable management. It’s also much quieter than its predecessor, which will save you some hearing damage as a long-suffering 3D printer user. (Oh those stepper motors…)
The V3 comes with smart G-sensor auto-leveling — the G stands for gravity. This helps you get accurate and super precise leveling that will stay in place for a long time. Nice!
It also has a Resume Print function in case of electricity outages or other interruptions, as well as a filament detection sensor to alert you when the filament has run out.
This printer is compatible with PLA, PLA+, and ABS filaments. For laser engraving, it’s compatible with bamboo, leather, wood, ceramic tile, and craft paper.
It has a build volume of 235 x 235 x 265 mm and is equipped with ultra silent TMC2208 stepper drivers.
This printer comes with dual-color switching extruders and yields beautifully-colored prints. We loved our test prints — they came out very clean and the colors were perfect.
This printer can be used with the default LotMaxx slicer, as well as Cura and Simplify3D. It supports microSD and USB connection
- High-quality dual-color printing and laser engraving
- Silent printing
- Filament detection sensor
- Auto bed leveling
- No Wifi capabilities
Check Latest Price
3.
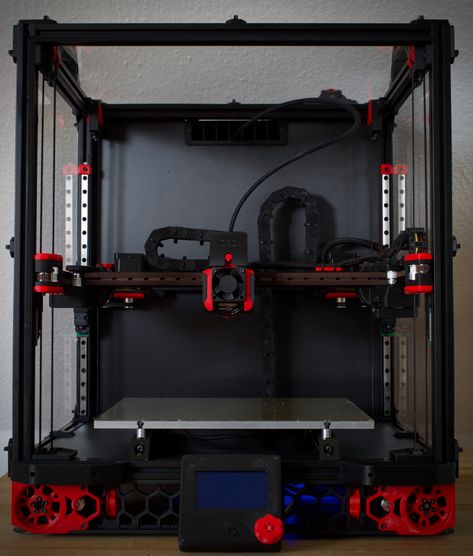 Tenlog TL-D3 Pro (Best Choice)
 3D Printer Type: FDM | Materials: TPU, PVA, PLA, ABS, HIPS, WOOD, PETG & Flexible | Build Volume: 300 x 300 x 350 mm | Print Speed: 10-150 mm/s | Color Mixing (Y/N): Y | Extruder: Dual
Unlike the printers before, the Tenlog TL-D3 Pro’s has two extruders and two nozzles.
It means that you can print two identical items simultaneously, in two distinct colors. You can also print in mirror mode and print in two different materials.
It seems like a pretty simple adaptation of the popular (and increasingly affordable) dual-extruder design.
Without delving too far into the enormous potential of this function (try out different colors, double-up on your creation rate, etc.), this is something I expect a lot of other 3D printers to be adopting soon.
But just as easily, these two nozzles can be used on the same product, either filling in a support filament or going for the multi-color approach.
It almost feels unfair constraining this 3D printer to a list like this… all thanks to its Swiss-Army Knife-Like variety of functions and capabilities.
How long does it take to assemble?
The D3 Pro comes half assembled and it took me 30 minutes to put it together with the help of videos online. What I didn’t like was the printer didn’t come with a lot of instructions.
The printer is not dead silent and there’s a low humming noise from the fans. However, it’s noticeably quieter than my Ender 3 Pro.
The prints so far are very good and I have better results with custom stl files than the test files from Tenlog.
There are cheaper dual color/extruder 3D printers out there but this is the most affordable INDEPENDENT dual extruder (IDEX) 3D printer today.
All in all, this is the best multicolor 3D printer.
- Image-mirroring capabilities
- Easy setup and assembly
- Included warranty
- Runs quietly
- Poor customer service
- Requires filament in both extruders
Check Latest Price
4.
 XYZPrinting Da Vinci Color (Best Full Color 3D Printing for its Price)
 3D Printer Type: FFF | Materials: 3D Color-inkjet PLA , PLA , Tough PLA , PETG, Carbon Fiber & Metallic PLA | Build Volume: 200 x 200 x 150 mm | Print Speed: 180mm/sec | Color Mixing (Y/N): Y | Extruder: Single
This super-popular 3D printer is probably the first one you’ll see when you search for a personal-use full-color 3D printer.
And there’s a good reason for that.
The da Vinci Color is one of the first (if not the first) personal printers to offer full color printing.
While this 3D printer still has its bugs, it can offer a 3D printing design experience that’s miles ahead of almost any other 3D printer on the list.
The Da Vinci’s full color capabilities mean creators have almost total control over every aspect of their design, including the exterior color design.
Gone are the days of painting by hand; with the right schematics, you can print just about any design imaginable.
The 3D printer also comes with hands-free calibration, which can significantly reduce the amount of time you spend fiddling with the da Vinci Color.
And while I didn’t have enough time to experiment with this feature as extensively as I might have liked, it seemed to work very well for the few prints I tested.
To note: this printer comes in the regular size – which I looked at here – and a miniature version that is basically a scaled-down version of the original da Vinci Color.
- Full color 3D printer capabilities
- Hands-free calibration features
- Excellent color palette
- Very pricey
- Some issues with ink cartridge technology
Check Latest Price
5.
 FlashForge Creator Pro (Most Reliable)
 3D Printer Type: FDM | Materials: PLA, ABS, PETG & TPU95A | Build Volume: 227 x 148 x 150 mm | Print Speed: 100 mm/s | Color Mixing (Y/N): Y | Extruder: Dual
Yet another excellent dual extruder 3D printer, the FlashForge Pro, takes the shape of the enclosed-box design, whereas the other dual extruders on the list have all been open-air.
Aesthetically, this has always been my favorite design, though it has its positives and negatives in more objective terms.
Like the previous 3D printer, the FlashForge Creator is a dual-nozzle design, though it doesn’t have the independent-nozzle functionality (and the image mirroring).
However, it does have a substantial metal frame and faster printing on single objects than the two independent heads.
On top of that, the enclosed design allows for better temperature control, and less potential warping as a result.
However…
… FlashForge went the distance with its design, also allowing for increased ventilation options if you’re printing with PLA.
Finally, the reliability of the Creator Pro’s build plate shouldn’t be overlooked.
By and large, issues with build plates, leveling, and covers have been the most prevalent issue I’ve had with printing.
Having a solid, completely level plate was a wonderful change for me.
- Enclosed environment
- Excellent built plate
- Great filament variety
- Some nozzle clogging
- No automatic bed-leveling
Get Discount (Official Store)
Check Latest Price
6.
 XRize Rize (A Look-See at an Industrial Full Color 3D Printer)
 3D Printer Type: FFF with AMD | Materials: Rizium Carbon, GF (Glass Filled), ST (Semi-Translucent), Rizium One White & Black, CMYK Inks & Release Ink | Build Volume: 310 x 200 x 200 mm | Color Mixing (Y/N): Y
This one’s just on the list for fun (unless you’re a large-scale industrial manufacturer, of course).
That said, it’s interesting to look at the difference in the price points of desktop-style multicolor 3D printers and an industrial-grade model full color 3D printer like the Rize.
So how much does the Rize cost?
Well, as you can see from its listing, you’ll need to request a quote to find the exact cost.
However…
… what I can tell you is that based on some of the other sites I looked at while conducting preliminary research, the price should fall somewhere around $55,000 – brand spanking new.
And believe me, that isn’t even close to being the most expensive full color 3D printer on the market.
A full color 3D printer can set you back a dime or two.
So what do you get out of one of these color 3D printers that you’ll miss in one of these other, comparatively affordable versions?
For a start off, this full color 3D printer has a precision and control over their 3D print products that nothing else on my list can come close to.
Like the da Vinci Color (one of our most expensive desktop 3D printers besides the Rize), this printer uses Inkjet toner (the same as a traditional 2D printer) to externally bind colors to the filament as it prints.
However…
… with a full color 3D printer of this price, you can expect much, much better color control than anything you’ll get from the DaVinci.
This color 3D printer can also print logos, QR codes… literally anything you can imagine slapping on the side of a 3D printing; this Rize can make it happen.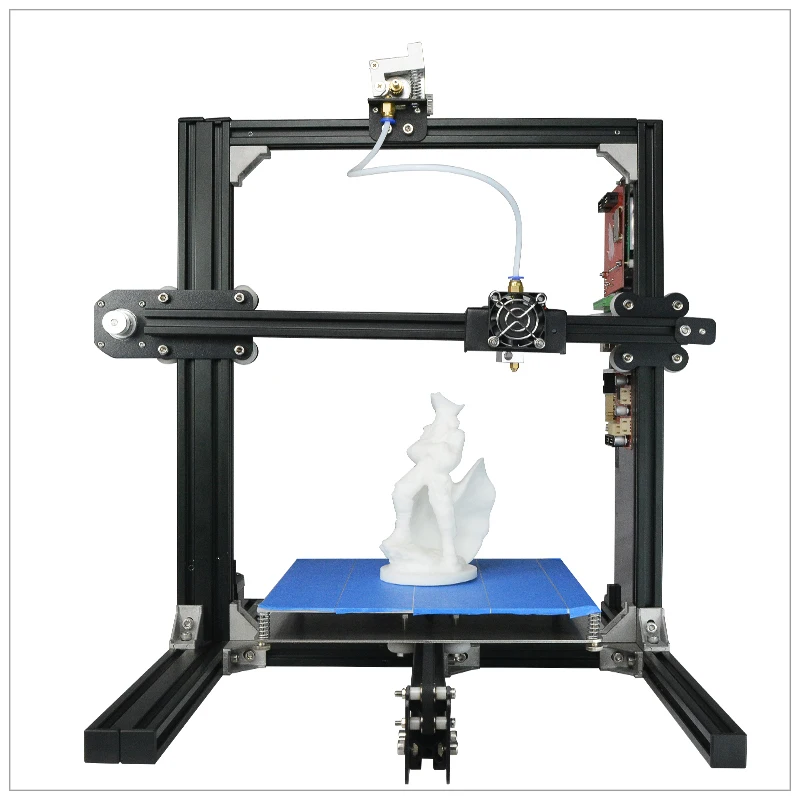
It’s awesome.
This full color 3D printer also comes loaded with all sorts of extra features that make it suitable for industrial production: a heated build chamber, automatic filament swapping and digitally-encoded ink cartridges, to name a few.
More than anything, the XRize is interesting because it provides us with a potential roadmap of what a future desktop 3D printer will be trying to emulate.
After all…
… the evolution of desktop 3D printer technology usually aims to copy the best capabilities of industrial best 3D printers, but on a smaller, less-expensive scale, of course.
Request A Quote
7. Qidi Tech iFast
3D Printer Type: FDM | Materials: PLA, ABS, PETG, TPU, PVA, Carbon Fiber, Nylon & PC | Build Volume: 330 x 250 x 320 mm | Print Speed: 60-120 mm/s | Color Mixing (Y/N): Y | Extruder: Dual
Yet another awesomely robust dual-extrusion 3D printer?!
The Qidi Tech iFast is an industrial and engineering-grade that’s much more affordable than other printers of its caliber.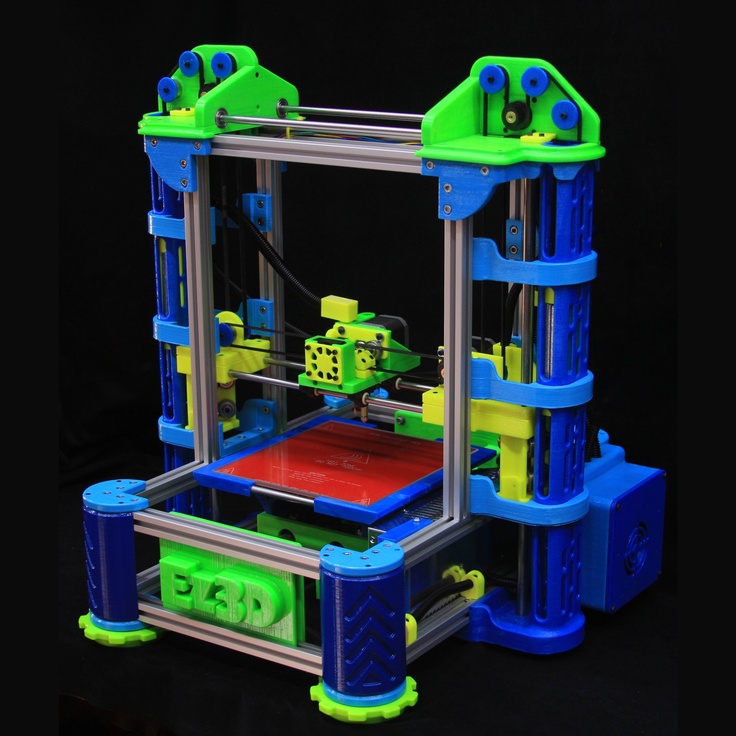
With a super spacious build volume of 330 x 250 x 320 mm, you can make a whole lot of medium to large-sized objects.
It has in-built air filters providing thorough ventilation, which makes it ideal for indoor use.
This printer can print PLA, ABS, TPU, PETG, Nylon, carbon fiber, and water-soluble PVA for supports.
It also has a double Z-axis for double the precision! Okay, that sounded right out of an infomercial. Anyway. (It’s still true!)
The Qidi Tech iFast comes with a whopping 4 direct extruders! That’s 2 extruders for normal-temperature filaments like PLA and 2 high-temp extruders for nylon and other toasty materials.
This printer also comes with a removable build plate for easy part removal. It has a filament run-out sensor to detect when filament… well… runs out, and it’s also got a camera for remote viewing of your print!
We loved the large touchscreen — it helped us easily navigate controls and get set up quickly.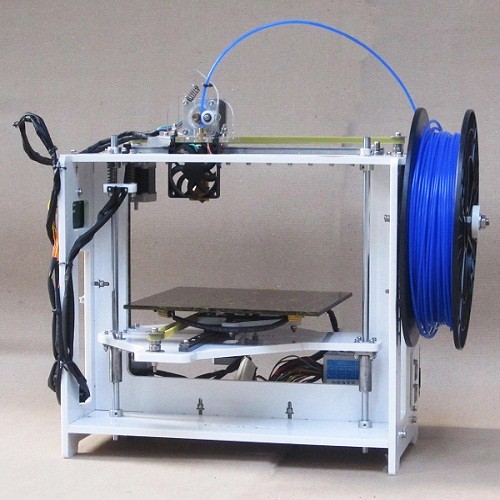 The printer also has WiFi capabilities so you can easily send your print file.
It also comes with a heated enclosure which is perfect for higher temp filaments like ASA, nylon, and PBS.
We found that the stepper drivers were a bit noisy when using this printer. Also, this printer is only compatible with Qidi’s own software, which isn’t as robust as say, Cura or Simplify3D. Also, it doesn’t come with auto bed leveling but with a sturdy printer of this type, it’s not that necessary.
This printer also comes with a 2 year guarantee and round-the-clock tech support. If you’re a pro who wants a mid-range printer with high-end capabilities, go for the Qidi Tech iFast.
- Very robust and professional quality printer
- 4 extruders
- Air filters
- Large build volume
- Noisy printing
- Would be better with standard 3D printing software
Check Latest Price
8.
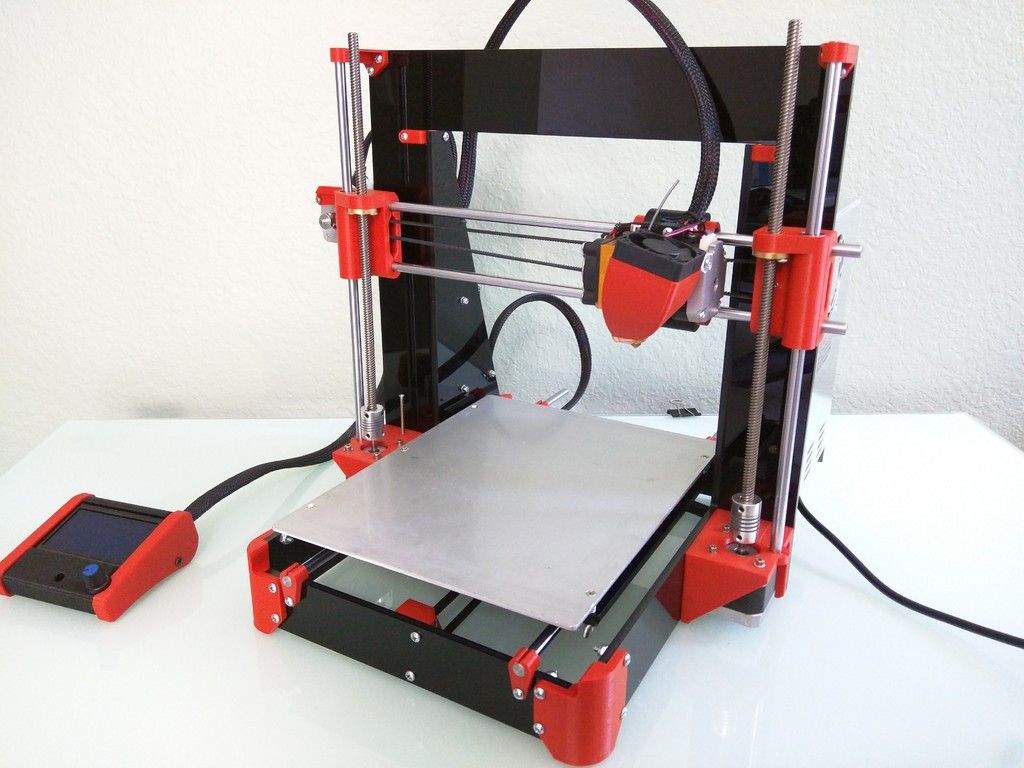 FlashForge Creator Pro 2
 3D Printer Type: FDM | Materials: PLA, Pearl PLA, ABS, ABS Pro, PVA & HIPS | Build Volume: 200 x 148 x 150 mm | Print Speed: 30-100 mm/s | Color Mixing (Y/N): Y | Extruder: Dual
The Pro 2 offers cool new features — namely, a mirror mode where you can print two of the same object at once! Crazy.
It also has an improved dual-extrusion system with only one nozzle. This grants it more flexibility and ease of use than the original Pro design. And it’s got a dandy 3.5″ touchscreen which the Pro doesn’t have!
The Pro, however, has a larger build volume at 227 x 148 x 150 mm and is cheaper than the Pro 2.
The Pro 2 has a slower build speed at 10-100mm/s unlike the Pro’s 30-200mm/s. They both come with 0.4 mm nozzles and have a maximum temperature of 240°C.
If you’re on a budget and/or want a slightly larger printer, go for the Pro. If you want a better dual-color printer, the Pro 2 is definitely it.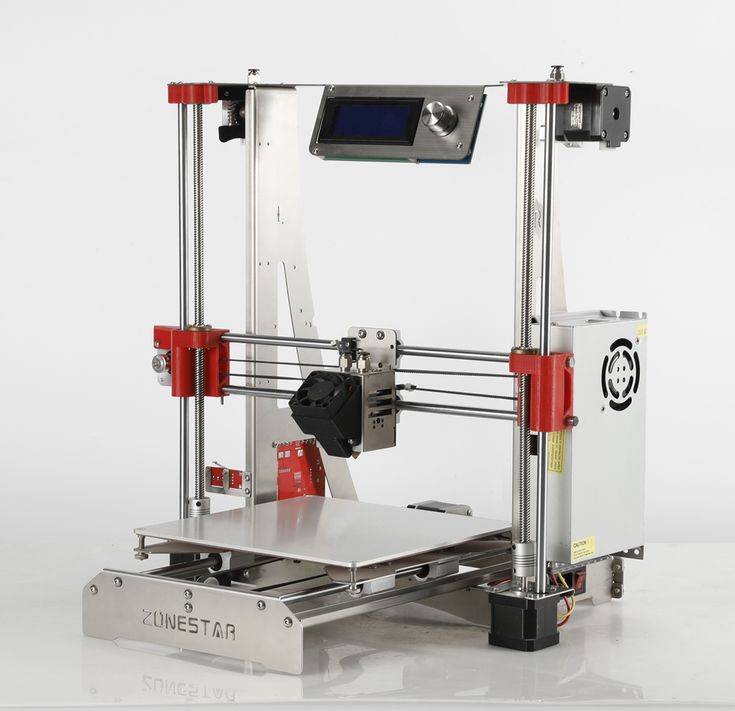
The Pro 2 has a build volume of 200 x 148 x 150 mm and offers 4 printing modes: mirror, duplicate, dual filament and dual color.
And with a 1 year warranty and lifetime technical assistance, the FlashForge team really have got your back!
- Improved dual-color printing
- 4 printing modes
- Amazing customer service
- Smaller build volume and more expensive than predecessor
Get Discount (Official Store)
Check Latest Price
Add-Ons
While there are plenty of color 3D printers that can handle multi-color print jobs within their basic design, others need some help.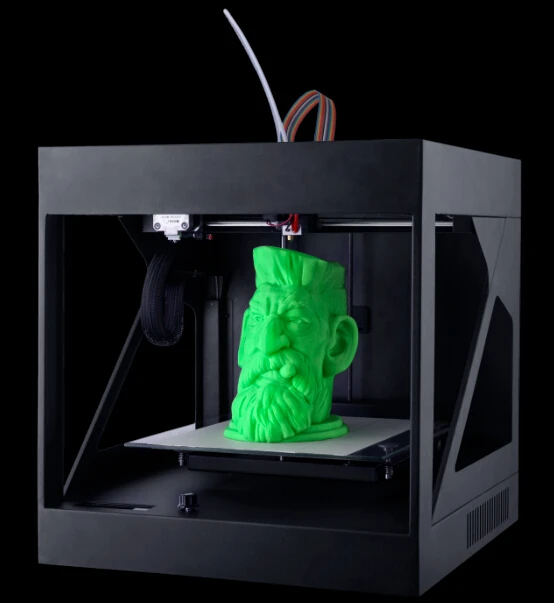
Nowadays, one of the best ways of getting excellent and low-cost multi-color creations is using a multi-color add-on for color 3D printers. These tend to cost less than getting a new printer altogether and are compatible with plenty of models (though you should always research the cross-compatibility before you order one).
9. Mosaic Palette 3 Pro (Best Color 3D Printing Add-On)
3D Printer Compatibility: Accepts Non-Proprietary Filament Which is 1.75 mm in Diameter & Recognizes Files Sliced in Slic3r/PrusaSlicer or CANVAS, and Has Open Access to Filament Feed | Materials: PLA, ABS, PETG, TPU, PVA & HIPS | Extruder: On
Want to make a glorious color explosion with your 3D printer? Or have you been dreaming of multi-color capabilities but don’t want to get another 3D printer?
Introducing the Mosaic Palette 3 Pro!
This awesome doo-dad isn’t a printer in itself but rather a device that you hook up to your existing printer to give it multi-color capabilities.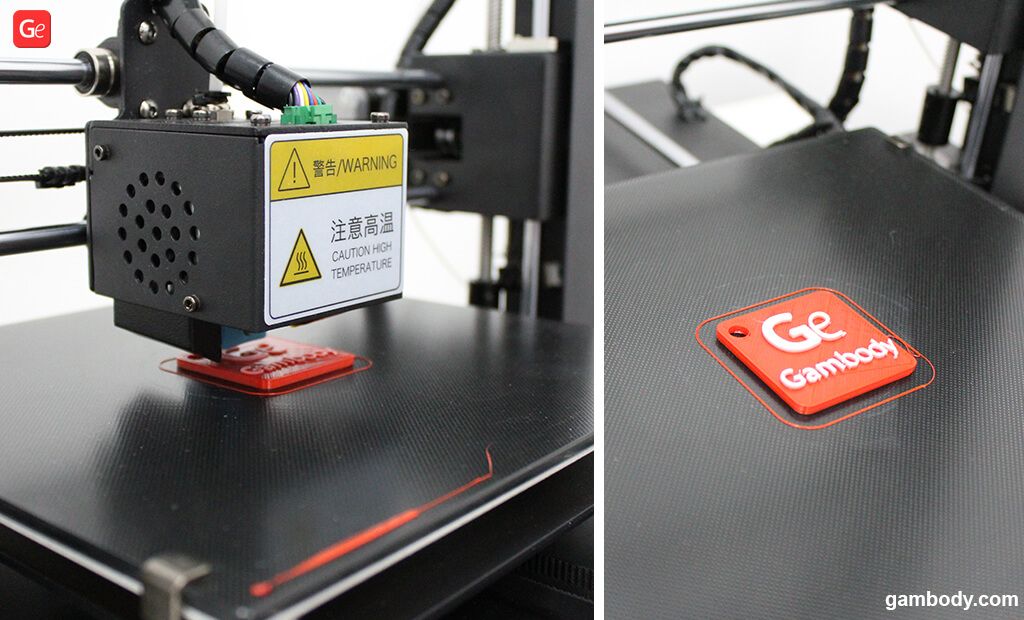 With the Mosaic Palette 3 Pro, you can print up to 8 different colors and materials at once — kind of like a multi-colored filament octopus.
With the Palette 3, you can print breakaway or soluble supports using different materials, allowing you to easily tackle difficult overhangs.
To get started printing, place spools on the filament stand and feed them individually into the material inputs on the device. It kinda sounds like something out of Star Trek, but it’s simple enough when you get the hang of it!
What the Palette 3 Pro then does is it heats and splices filaments together into a single multi-filament strand.
It comes with Canvas Hub software for remote monitoring of your print. So even when you’re not nearby, you can see how things are going!
The Palette 3 also has a high-resolution touchscreen where you can execute commands and change settings. Nice!
This device has three color printing modes: Gradient Mode (for an awesome gradient/ombré effect), Pattern Mode which enables you to print patterns, and our personal favorite, Random Mode! Which is a bit like throwing paint at the wall blindfolded. (Our favorite pastime outside of 3D printers.)
- Can print up to 8 different colors and materials
- Versatile color and material printing for creative designs and supports
- Remote monitoring
- Expensive
Check MatterHackers
Check Latest Price
Multicolor VS Full Color 3D Printers
Source: Youtube XYZprintingI want to start with a pretty important distinction when talking about 3D printers that can print in multiple colors.
Sometimes “full color” is a term used to describe these printers.
And while this is technically true, “full color” more often describes industrial-grade printers that are able to produce intricate color scaling and manipulation (I included one of these on the list – the XRize Rize – for comparison’s sake).
On the other hand…
… we’re going to be mostly looking at multicolor 3D printers, which can usually handle only a small number of different colors, but which tend to fall under the “personal 3D printer” umbrella.
They’re smaller and much, much less expensive.
All that said, multicolor printing is still a very experimental field – much less established than its industrial counterparts.
Given the scarcity of personal 3D printers that can handle multiple colors, I’m going to be looking at every option on the market today, including dual-extruder printers where each extruder can print a separate color and multi-color printer upgrades.
So let’s take a look at the best multicolor 3D printers!
Can 3D Printers Do Multiple Colors?
Source: Youtube 3D Printing Nerd3D printers can do multiple colors! However, the method varies between printers.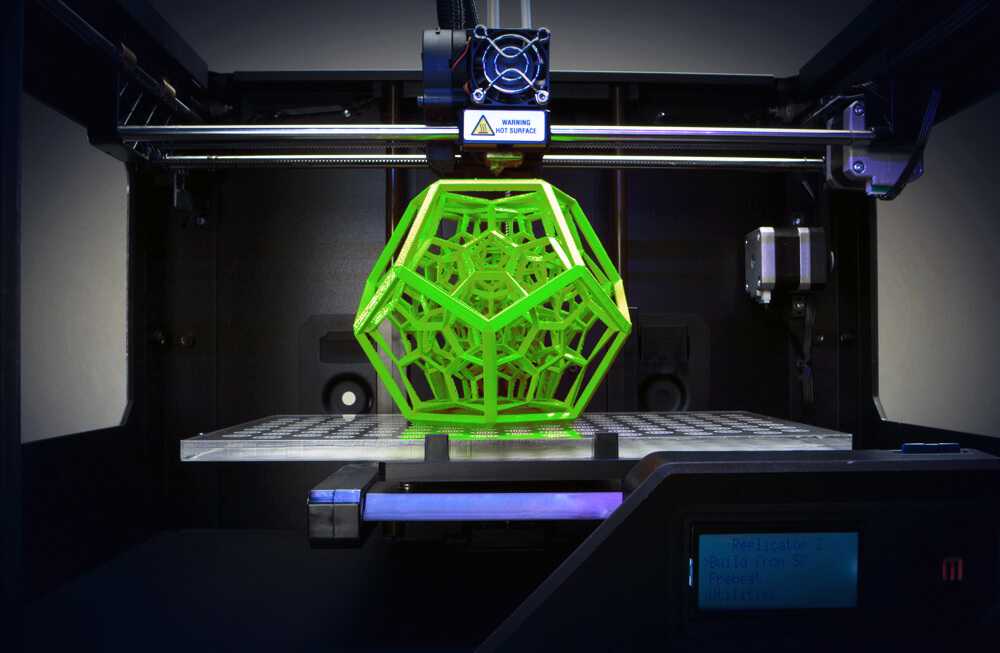 Single-extruder printers rely on a method of manually switching out spools of filament, while multi-color printers do this process for you.
What is a Multi-Color 3D Printer?
A multi-color 3D printer is a device that 3D prints different filaments using multiple extruders and nozzles.
Advantages and Disadvantages of Multi-Color 3D Printer
The obvious advantages of a multi-color 3D printer: you get awesome multi-colored prints without having to manually swap filaments. Also, such printers are compatible with water-soluble filaments for easy support removal.
The disadvantages: twice the extruders, twice the maintenance. Hot end assemblies can run into any number of issues — and dealing with two of them can be a hassle. Also, it’s much more expensive than a single-extruder printer.
How Do You Print Two Colors?
If you have a single-extruder printer, you can pause and swap.
What does this mean?
Well, whenever you want to change colors in a print, you just stop the print and swap the filament. This can be a major chore, however, and with multi-color printers the process is much easier.
First, you load your two spools onto the spool holder, and then you feed the filament into the printer. Then you just let it do its multi-colored magic!
Can You Paint 3D Printed Objects?
Yes, you definitely can!
Acrylic and enamel paints are best for 3D printed surfaces. However, you’ll have to sand your 3D printed part first. This gets rid of visible layer lines and helps the paint stick better to the surface.
A Few Final Thoughts…
So there you have it – a fairly comprehensive guide to multi-color 3D printing, the best (affordable) multicolor 3D printers out there, one crazy-expensive one, and an alternative option altogether!
When it comes to choosing your best color 3D printer, there are plenty of factors to keep in mind.
When making your decision, you should always consider what specific projects you have in mind and tailor your choice to fit.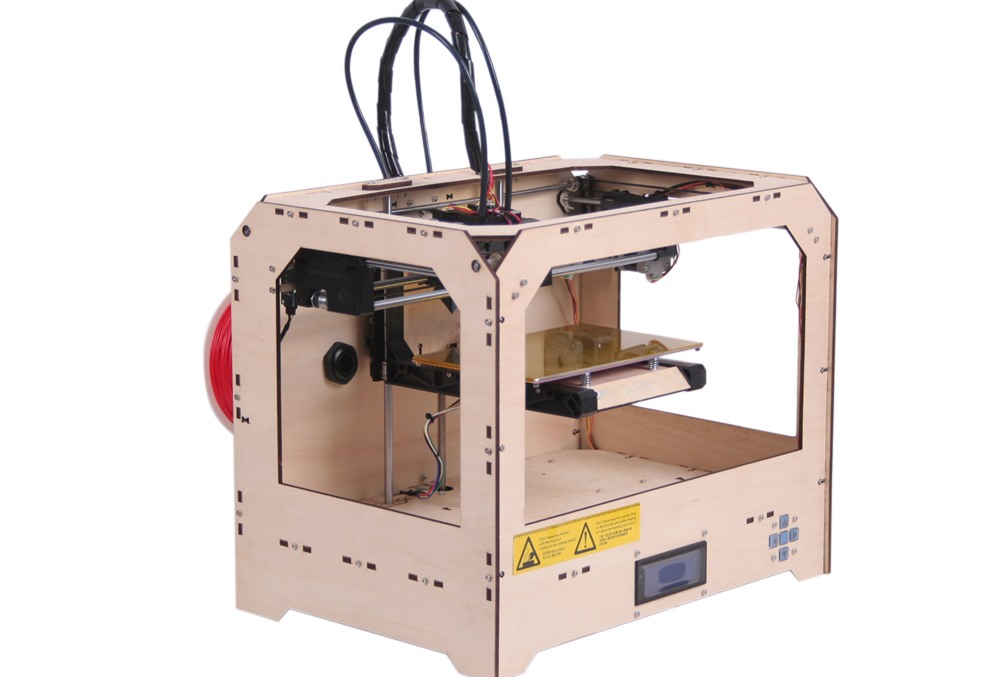 After all, if you’re looking to upgrade towards multicolor 3D printing, you probably have a couple of exciting ideas in the bag already.
Some of these 3D printers excel at color combining.
For color control, the Da Vinci provides an entirely different system from anything else on the list (besides the XRize) but does so at a higher price point and with a few concerning bugs.
Some color 3D printers come packed with excellent side features, like the Lotmaax Shark V3.
And others have an ingenious design that comes with other exciting applications, like the dual-nozzle design of the TenLog.
Anyway, your preferences will determine your best color 3D printer, so I’ll hand over the baton to you to make your choice.
You’ll be churning out those colorful 3D prints before you know it.
Our pick
LOTMAXX Shark V3
Great 3D printer for beginners
This printer cranked out quality prints right out of the box in our test. Comes with excellent, all-metal nozzle and extruder and many more features makes this the best value.
Check Price from Amazon
Source: Youtube Dylan HongSo this was kind of an underdog story for me. When I first started looking for the best color 3D printer, the Lotmaxx wasn’t even on my radar.
Yet the more I learned about this 3D printer, the more I was impressed – both by its original design and by its execution. Not to mention that it’s a Kickstarter success and really demonstrates the best aspects of grassroots ingenuity coming out of the color 3D printing field.
Not only is the Lotmaxx an excellent base 3D printer capable of color 3D printing, but it also comes with some innovative features that I haven’t seen in a single other color 3D printer.
The laser engraving upgrade opens up new doors in creative design. The auto bed-leveling works pretty well, and the handheld removable touch-screen is something I haven’t seen in any other 3D printers, no matter what price point.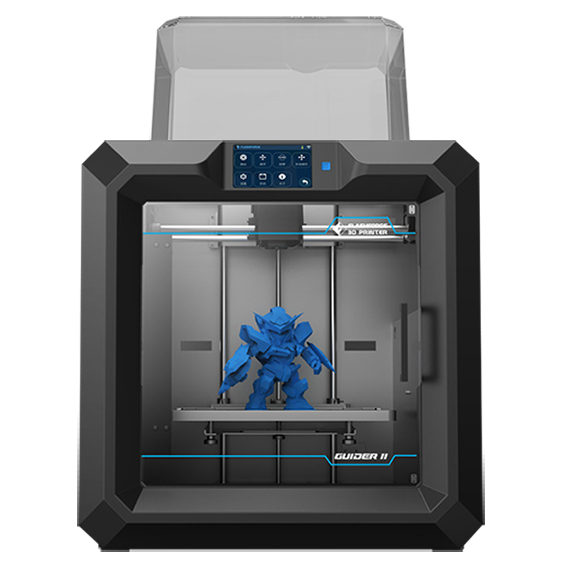
And to speak on the price… all of this costs less than $500.
Typically, when I review 3D printers by newly-launched companies or Kickstarter campaigns, I’m overwhelmed by a sea of mechanical, software, and assembly issues. I had none of these with the Lotmaxx.
In fact, the only persistent issue I had with this color 3D printer came from the build plate adhesion.
In some cases, my recent prints would require a lot of elbow grease and some light chiseling to remove the prints from the plate. This is one of the most straightforward issues to remedy, though, so it’s not even something worth criticizing.
So there you have it!
Whether you choose the Shark or some other color 3D printer on the list (XRize, anyone?), multicolor 3D printing opens up many new avenues for you and your creations.
In a field where companies and creators are innovating every day, I can’t wait to see what new color 3D printer awaits us! Until then, thanks for reading, and happy printing!
How to choose a 3D printer for printing with 2 materials?
Good afternoon everyone!
In this article, we would like to talk about the issue that torments many customers when choosing a 3D printer with 2 extruders. Namely, which is better? What is more stable? Which 3D printer to choose? Why do dual extruder 3D printers alone cost significantly less, and what is the difference between them?
First of all, let's start with the fact that by printing with 2 extruders (or 2-component printing), we mean the ability to print with 2 materials, for example, PLA (base material) and PVA (temporary support material removed chemically, using water in this case ).
It is possible to print in two different colors. But in practice this has not received any great distribution. Printing of complex models with dissolvable supports is in demand.
Therefore, you need to decide for yourself why you need a 3D printer with two extruders? For most tasks, it is enough to use a 3D printer with 1 extruder.
The use of a dual extruder 3D printer is a must when printing complex 3D models with dissolvable supports. Usually such 3D printers are chosen by manufacturing companies for printing geometrically complex prototypes or owners of 3D printers with 1 extruder who understand that they cannot realize with a 3D printer with 1 extruder.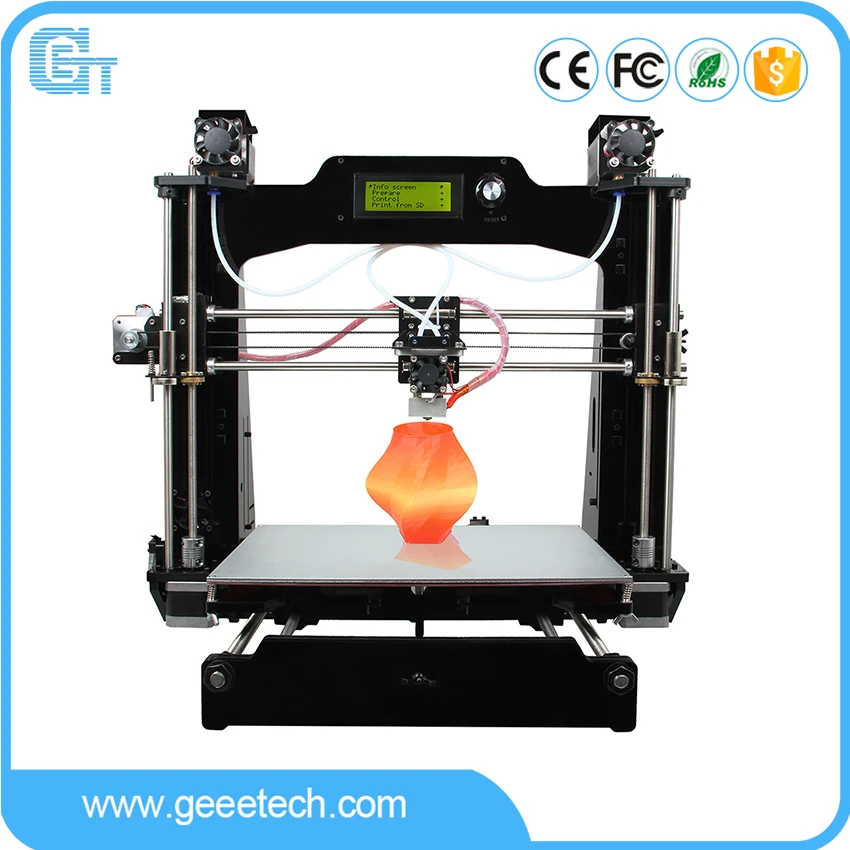
But do all 3D printers with 2 extruders have the same capabilities? Or is it that the differences in design, and, accordingly, in price, are of decisive importance?
Let's consider various solutions for 3D printing with 2 materials on the 3D equipment market.
To implement this function, manufacturers use the following solutions:
Decision No. 1
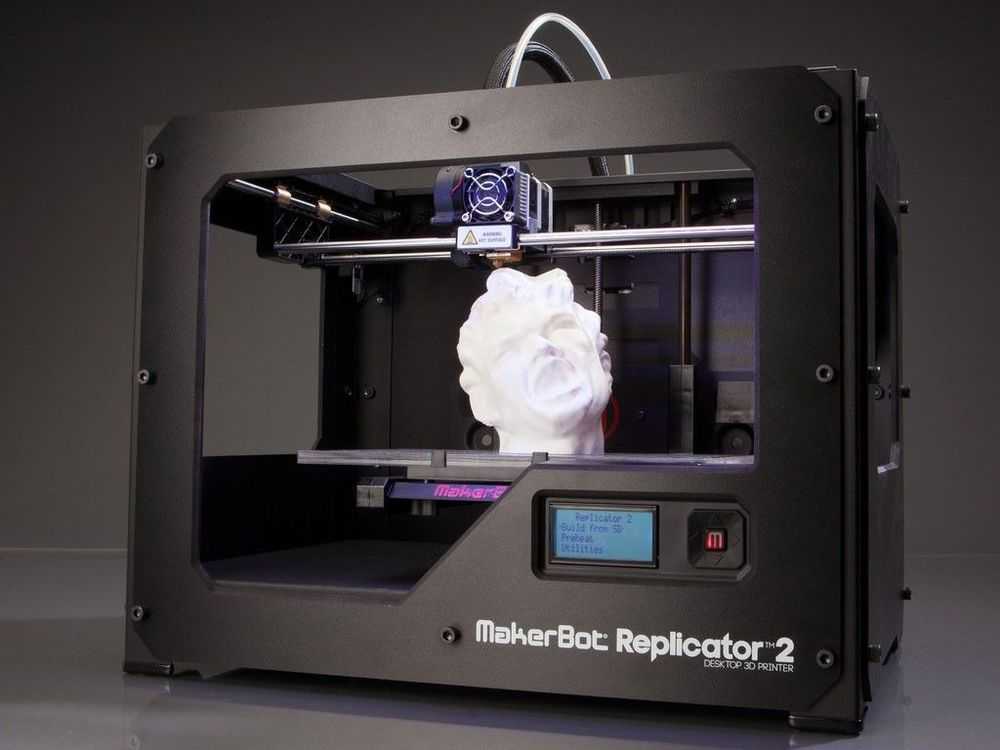
Use of 2 static extruders. As a rule, these are 2 hot-ends with two independent material feed motors. There are many options. But all of them, to one degree or another, repeat the solutions on the Makerbot Replicator 2, released in 2012.
There are several technical solutions, but they all have a common list of disadvantages and features.
Weaknesses :
1) Be sure to align both nozzles horizontally with respect to the desktop of the 3D printer. In other words, the nozzles of each hotend should be at the same height, ideally with an error of no more than 0. 1 mm.
1 mm.
2) Using a utility tower (or analogues) to clean the inactive nozzle from plastic drips (drop formation) before switching to the active mode for printing. Let's consider an example: if nozzle No. 1 prints a model with blue plastic, then in order for nozzle No. 2 to start printing white, the printer must first print the 1st layer of the tower with nozzle No. 2 to remove plastic residue, and only then move it to print the base model ( see picture). And so every switch. This greatly (at times) slows down the print speed, relative to the same model but when printing in 1 color. Moreover, there is a possibility of the collapse of the utilitarian tower (the layer did not fit well, or peeled off from the desktop) and, as a result, the marriage of the entire project.
3) There is no guaranteed result. Due to the complexity and imperfection of the extruder architecture. Large marriage rate. A nozzle that is currently inactive can leak plastic and ruin the part.
Advantages:
1) Low cost solution
2) Simplicity of design, as a result - high maintainability.
This option has the lowest price and the lowest overall performance. The complexity of the settings, to obtain a high-quality result, makes this implementation option a testing ground for experiments at home. In a more or less intensive implementation of projects, this option is quite problematic.
Solution #2
Using a Diamond type extruder. These types of extruders use a single feed motor and a radiator(s) (or cooling module) with multiple internal plastic passages.
Basically, such an extruder is used to print different colors. But this, as we already know, has not received much distribution in reality. Printing with solvent material will be somewhat difficult. Firstly, the base material and support material have different operating temperatures. This will cause some difficulties for quality printing.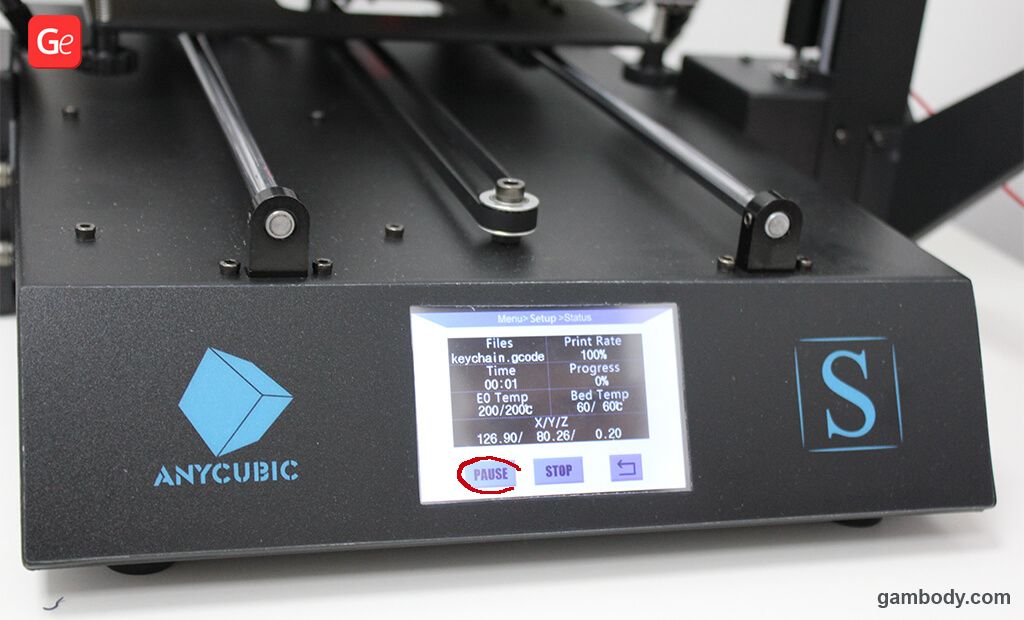
And in any case, this design has almost the entire list of disadvantages, like the first option.
Only there is no point about the alignment of the nozzles - here it is one.
Weaknesses :
1) There remains the need to use a utility tower (or analogues) to clean the nozzle from plastic streaks (drop formation) before switching to another material. This "tower" is visible in the photo. This greatly (at times) slows down the print speed, relative to the same model, but when printing in 1 color. Here it will still probably take time to change the temperature of the nozzle, when changing the base material to supports. Or the possibility of poor-quality printing will greatly increase.
2) There is no guaranteed result. Due to the complexity and imperfection of the extruder architecture. Large marriage rate.
3) This type of extruder is equipped with Bowden-scheme plastic feeding. This entails difficulties (more often, even the impossibility of printing with flexible plastics)
The benefits are gone too.
Such a solution is quite expensive. And it has a complex structure.
Advantages:
1) Better print quality than option #1.
As a result, in the option of printing with two materials with dissolvable supports, there are no special advantages over the first solution. But this option has a higher price.
Resolution #3
Extruder designs where the currently inactive nozzle rises to avoid problems. Today's most famous commercial printer is the JetSwitch™ circuit.
Rotary nozzle system from PICASO 3D.
There is one plastic feed motor, which facilitates the design.
The main feature is that with the help of a rotary mechanism, one of the nozzles, which is active at the moment, is lowered to the working level. The second is closed at this time, and no molten plastic flows out of it.
Advantages:
1) High quality printing
2) There is no need to build a utilitarian "tower". Therefore, the switching time between extruders is short. Printing speed with two materials is MUCH faster than options 1.2. Below is a comparison table from PICASO 3D.
Weaknesses :
1) Relatively complex design, and as a result - a high price.
There are several more options for extruders with lifting nozzles. All of them are united by one thing - a much higher print quality with two materials than the "classic" option No. 1. Yes, they all have a higher price, but the print quality is drastically different.
The conclusions are as follows - by purchasing an inexpensive design, you save money, but spend many times more time on setup and printing itself. With the remaining risk of marriage, which reduces all efforts to zero. At the same time, the print result will still be worse than that of designs with lifting nozzles.
If you need a high-quality result and the printing time of complex models is critical, then it makes sense to choose a model with lifting nozzles:
1) PICASO 3D Designer X PRO - https://3dtool. ru/product/3d-printer-picaso-3d-designer-x-pro-2/
2) Raise3D Pro2 - https://3dtool.ru/product/3d_printer_raise3d_pro2/
3) Ultimaker 3 - https://3dtool.ru/product/3d-printer-ultimaker-3/
Best Dual Extruder 3D Printers & Updates 2022
Dual extruder 3D printers save you from single color slumber. 3D printing using multiple colors, multiple materials to reinforce specific areas, or using dissolvable filaments such as PVA or HIPS to achieve a smooth finish.
We've been lucky enough to try a few dual extruder 3D printers firsthand and have come up with our recommendations for the best dual extruder printers available in 2022. We also explain the differences between different types of dual extruders (IDEX, mixed color 3D printing, dual extruder upgrade) and whether you should upgrade your printer.
Contents
- What are the advantages of a dual extruder 3D printer?
- What is the best dual extruder 3D printer?
- Budget Dual Extruder 3D Printers (under $1,000)
- 1.
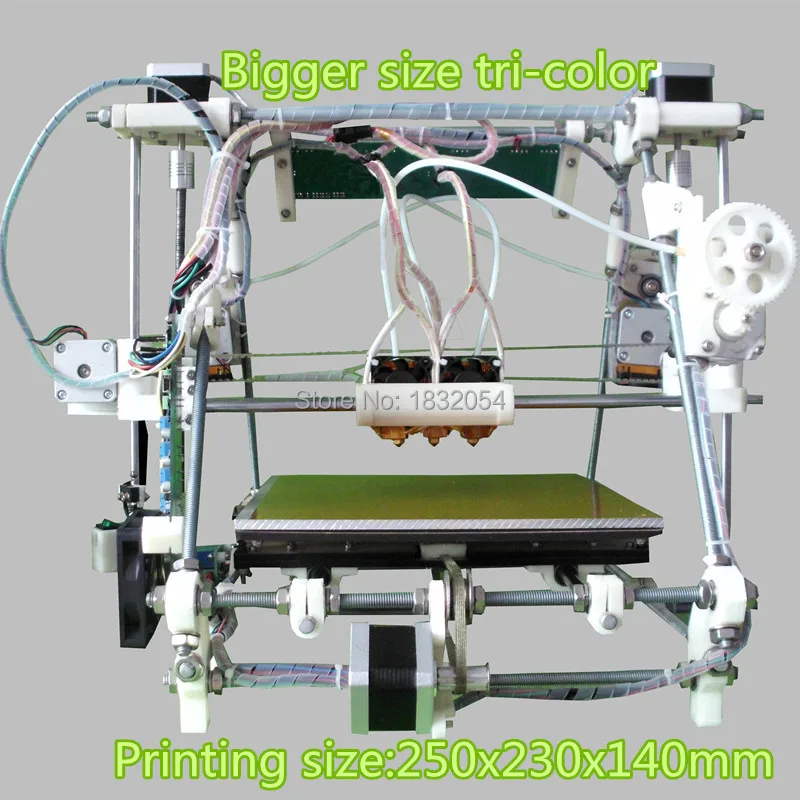 Geeetech A20M / A10M - Best Budget Dual Extruder 3D Printers
 - 2. BIBO 3D Printer (Touch Laser if purchased with laser engraver) 3. Flashforge Creator Pro 2 - Affordable IDEX
- 3D Printer 4. BCN3D Sigma D25 - IDEX 9 3D Printer0178
- 5. Ultimaker S3 - Highly Accurate Dual Extruder 3D Printer
- 6. Raise3D Pro2 / Pro2 Plus
- 7. Ultimaker S5
- Best Dual Extruder Upgrades
- 8. Mosaic Palette 2S / 2S Pro - Best Upgrades dual extrusion filament splicer
- 9. Prusa Multi Material Upgrade 2S - Prusa Upgrade Kit
- Dual extruder 3D printer FAQ
What are the advantages of dual extruder 3D printer?
The main advantages of a dual extruder 3D printer include:
Better for supports: one extruder prints your material of choice, such as ABS or PLA, while the second extruder prints water-soluble supports, such as PVA filament. These supports dissolve easily in water and produce smoother prints without having to manually remove them.
Multiple Colors: Dual filament 3D printers can print multiple colors of the same filament type such as PLA for stunning multi-color details.
Multiple parts at the same time (IDEX): IDEX 3D printers such as the BCN3D Sigma D25 have two extruders that work completely separately and can print different parts at the same time.
What is the best dual extruder 3D printer?
That's why we've ranked the best dual extruder 3D printers on the market. We rated these printers for value for money, reliability, build volume, ease of use, and various other features.
Budget Dual Extruder 3D Printers (under $1,000)
These amazing 3D printers break the rules of the definition of "dual extruder 3D printing". To be clear, they can be loaded with two separate filaments, such as red and yellow PLA, but they will come out of the same nozzle, mixing the two colors during the printing process. Some call it dual nozzle 3D printing.
The results are amazing. Connect red, orange and yellow threads and watch your printed vase look like an exotic cocktail. The printers offer four dual 3D printing modes: single color, dual color, gradient and mixed. This provides a huge selection of print designs for such an inexpensive dual extruder 3D printer.
In terms of specifications, the A20M has a good working volume of 255 x 255 x 255 mm, while the A10M is only slightly smaller. The A20M also boasts improved stability as it is better anchored. Overall, this is an accurate (layer resolution down to 0.1 mm), interesting and inexpensive two-color 3D printer that combines colors and filaments through a single nozzle.
single nozzle geeetech a20m filament mixer.
2. BIBO 3D printer (touch laser if purchased with laser engraver)
- Dual extruder 3D printer cost: $599
- Assembly volume: 214 x 180 x 160
How do we get started with the BIBO eccentric printer? Well, the most important thing is that it also performs another function. It can be used as a laser engraver! The engraver can permanently carve your favorite designs on wood, as well as cut paper or felt materials - and print in 3D!
You can purchase BIBO as a 3D printer kit or pre-assembled, with or without a laser engraver. And if he performs another function, this does not mean that he cannot succeed in both. In fact, this is a very efficient multi-extruder 3D printer with a minimum layer height of 0.05 mm and stable printing in a closed working chamber.
This is a great printer, crazy and ambitious. Even the product images on Amazon showcase the machine's character and personality. We love it.
3. Flashforge Creator Pro 2 - Affordable IDEX 3D Printer
- Creator Pro 2 price: $649
- Assembly volume: 200 x 148 x 150 mm
The popular and beloved Flashforge Creator Pro has started to show its age since it was released in 2016, so Flashforge followed it up with the vastly improved Creator Pro 2.-kupit-v-soin-store.ru-2.png) assembly volume on the x-axis. It retained a minimum resolution of 100 microns and a Teflon tube extruder for 3D printing of PLA, ABS and nylon in a closed working chamber.
assembly volume on the x-axis. It retained a minimum resolution of 100 microns and a Teflon tube extruder for 3D printing of PLA, ABS and nylon in a closed working chamber.
However, the main change that makes this printer so profitable is undoubtedly the IDEX upgrade. In the IDEX 3D printer, the nozzles work independently, unlike the dependent, attached nozzles on the original Creator Pro, with different modes such as Mirror Mode for 3D printing multiple identical models at the same time - a big time saver, trust me.
Other quality-of-life improvements include an improved touch screen interface, as well as important nozzle updates that prevent unused nozzles from oozing out and messing up the print bed or even causing errors. You won't find a more affordable IDEX printer.
4. BCN3D Sigma D25 — IDEX 3D printer
- Manufacturer: Spain
- Price: $3,995
- Assembly volume: 210 x 297 x 210 mm
Spanish 3D printer manufacturer BCN3D has made a name for itself with reliable dual extruder 3D printers. All of their printers, including the Sigma and Epsilon series, use BCN3D's IDEX (Independent Dual Extruder System) 3D printing technology, a unique and key advantage.
IDEX 3D printing allows each extruder to move completely independently, not limited to working on the same model at the same time as in other 3D printers. Two different parts can be created at the same time, cutting the time required to create several small parts in half. The Sigma D25 also features high quality E3D hot ends for quality printing on a variety of materials, including stiffer filaments, and a filament low sensor informs you when the filament has run out.
For those who need a 3D printer for rapid prototyping, being able to print multiple parts for testing at the same time is a huge advantage. The BCN3D Sigma D25 uses 2.85mm filaments instead of the standard 1.75mm so be aware of this, but is compatible with any 2.85mm filament. You can use a variety of 3D printer nozzle sizes, from 0.3mm to 1. 0mm, and a clear and easy-to-navigate touch screen interface.
Interestingly, Sigma D25 is also an open source 3D printer: printer firmware, workflow, software and other files are available on BCN3D GitHub. It works seamlessly with the Cura 3D slicer and is easy to set up and use right from the start. Overall this is a great, reliable and efficient dual extruder 3D printer. With a resolution of 50 microns, this is a high quality, high resolution 3D printer for accurate rapid prototyping.
5. Ultimaker S3 - very precise dual extruder 3D printer
- Manufacturer company Holland
- Ultimaker S3 price: $3,850
- Assembly volume: 230 x 190 x 200 mm
Ultimaker is another behemoth of desktop 3D printing that has won numerous award-winning deposition modeling printers. With a dual extruder and incredible precision down to 20 microns, the Ultimaker S3 is a fantastic option for small businesses, manufacturers and prosumers.
For precision multi-material 3D printing, nothing beats the Ultimaker S3. It is widely used to create accurate architectural models as building design prototypes, to create accurate industrial and engineering prototypes, and in many other industries. Upon release, it won dozens of awards and is still one of the best dual extruder 3D printers.
With a print volume of 230 x 190 x 200 mm, the Ultimaker S3 can handle most printing needs. It also has a built-in camera that allows you to monitor the printing process remotely.
Connected via WiFi, Ethernet or USB stick, the Ultimaker S3 is designed to be easy to use. While the Ultimaker 3 doesn't come cheap at $3,850, it's accurate, fast, reliable, and easy to use. This makes it overall one of the best dual extruder 3D printers on the market today.
6. Raise3D Pro2 / Pro2 Plus
- Price: $3,999
- Assembly volume: 305 x 305 x 300 mm
Also featured in our overall ranking of the best 3D printers, the Raise3D Pro2 series impresses with its reliability, size and range of printable materials. In addition to standard PLA, ABS, and PETG printing, the Pro2 and Pro2 Plus 3D print with nylon, polycarbonate, carbon fiber, ASA, and metal-filled filaments on either of the two extruders.
Its big brother, the Raise3D Pro2 Plus, costs $5,999
The Raise3D Pro2 also boasts a fantastic build volume of 305 x 305 x 300mm, enough for everyday and industrial printing. The printer is also very accurate, with a minimum layer height of 0.01mm, and is equipped with a 7-inch touch screen for easy printer control. The Raise3D Pro2 costs just under $4,000 and overall is a fantastic dual-extruder printer for the price.
7. Ultimaker S5
- Price: $5,995 - Available at Dynamism Store
- Assembly volume: 330 x 240 x 300 mm
Ultimaker is highly regarded, and for good reason - the company can't go wrong. After the Ultimaker 3, the Ultimaker S5 is an updated, improved and slightly more expensive dual extruder 3D printer that will compete with the Makerbot Method.
A 330 x 250 x 300mm large-format 3D printer built for more scalable production, the Ultimaker S5 already has satisfied customers at Volkswagen, Decathlon and many more. It features a very advanced print leveling system, an improved touch screen, and can be connected to a phone via the Ultimaker app, which notifies you when a print is complete. The Ultimaker S5 is undoubtedly a great dual extruder 3D printer.
Best Dual Extruder Upgrades
8. Mosaic Palette 2S / 2S Pro - Best Upgrades for Dual Extrusion Filament Splicer
- Palette 2S Price: $599
- Palette 2S Pro Price: $799
If you want to print multiple colors without a dual extruder, consider Palette as well. Instead of 3D printing with two multi-colored filaments from separate extruders, the Palette 2S and 2S Pro fuse up to four multi-colored filaments - or different materials - together during printing to create multi-color or multi-material parts.
They work by running your model through specially designed software - CANVAS for Palette - to assign different colors to different areas of your model before printing. When a particular area needs to be printed, the Palette software splices the colored filaments to print that particular area in the material or color you choose.
This makes Palette ideal for creating architectural models for construction projects, colorful desktop models of your favorite designs or D&D models, and multicolor prototyping businesses. The standard Palette 2S model includes all of these features, while the Palette 2S Pro can also splice up to 20% faster and comes with an extended 2-year warranty and replacement parts.
Palette is compatible with hundreds of 3D printers, including almost all of the most popular options. For more information, you can check your printer's compatibility here, and as for choosing between the Palette 2S and 2S Pro: The 2S Pro cuts filament 20% faster and comes with a longer warranty - so if that's important to you, spend the extra money on 2S Pro.
9. Prusa Multi Material Upgrade 2S - Prusa Upgrade Kit
- Price: $299
While you can upgrade the palette for most 3D printers, Prusa printer owners can purchase a similar Multi Material Upgrade kit that allows you to print up to 5 different materials at the same time.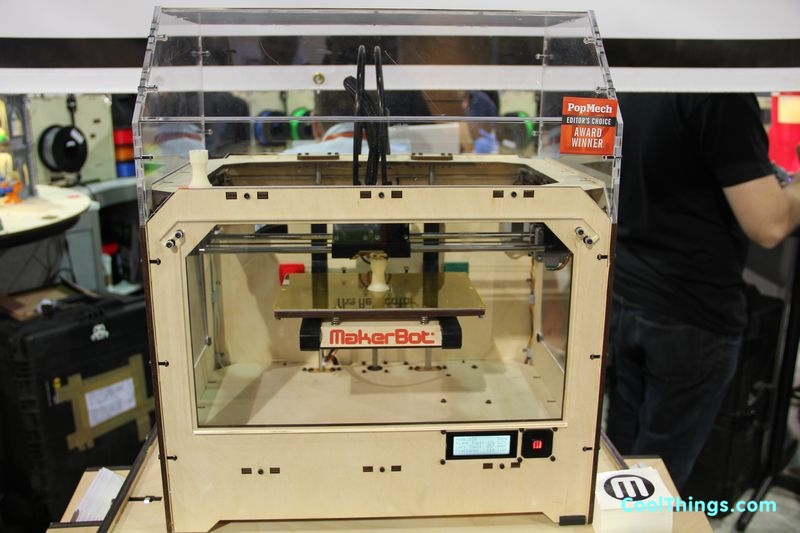 Prusa printers are some of the best 3D printers under $1,000 and this upgrade turns your Prusa into a multi-color or multi-material 3D printer.
MMU2S is an improvement over the previous version of the Multi Material Upgrade Kit 2.0, key changes include a material feed sensor, buffer and a much improved overall calibration process.
The Filament Sensor goes further, checking not only for the presence of filament, but also to see if it has reached the Bondtech gears for printing. This provides much more reliable extrusion and makes filament calibration and loading easier.
The filament buffer also saves you the hassle because each of your filaments (especially if you're using all 5!) won't get tangled or tangled. Organizing and separating each filament also saves space on your desk or 3D printer table.
Dual extruder 3D printer FAQ
What is a dual extruder 3D printer?
Dual extruder 3D printers have two print heads or nozzles instead of one print head like standard FDM 3D printers.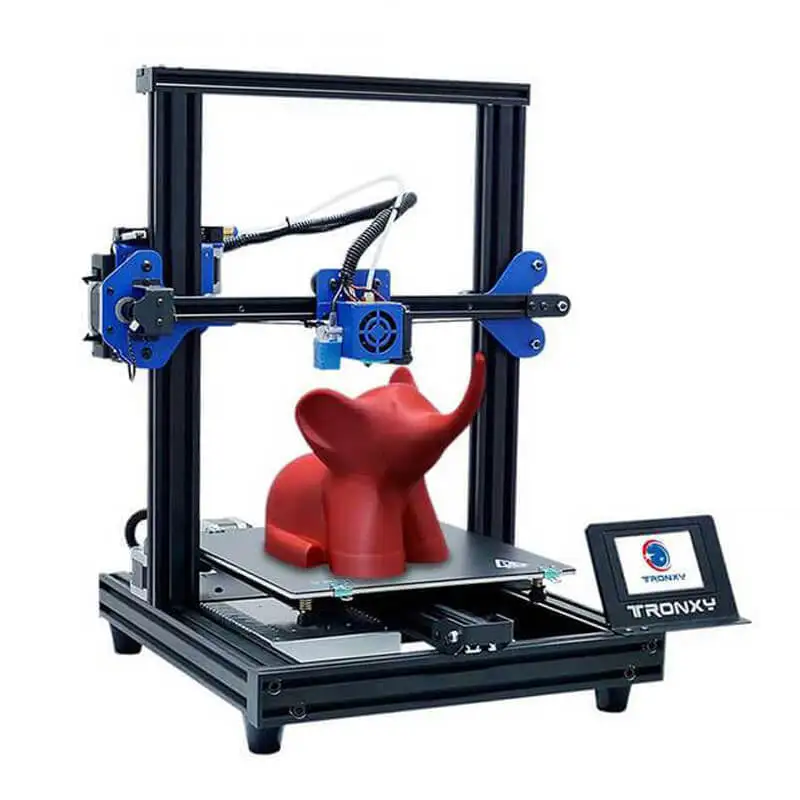 Dual printing frees you from the limitations of using only one type of 3D printer filament and allows you to create multicolored parts with ease.
Dual Head 3D printing improves printing with soluble supports such as HIPS and PVA and also allows multi-color parts to be printed.
Most budget dual extruder 3D printers are dual nozzle printers, meaning they have two nozzles but extrude from a single head, but we also include more advanced printers. These advanced options include IDEX 3D printers with two printheads that move completely independently for efficient and versatile printing.
What are the main types of dual extruder 3D printers?
The main types are:
1. Dependent Dual Extruder 3D Printers - Most low-cost multi-extrusion 3D printers are dependent, that is, two nozzles that extrude separate filaments are attached to one print head. They follow the same path, filling areas (such as a support or main part) in turn.
2. Dual Extruder Independent 3D Printers (IDEX 3D Printers) - IDEX extruders use two printheads independently of each other, doubling productivity when printing multiple parts at the same time.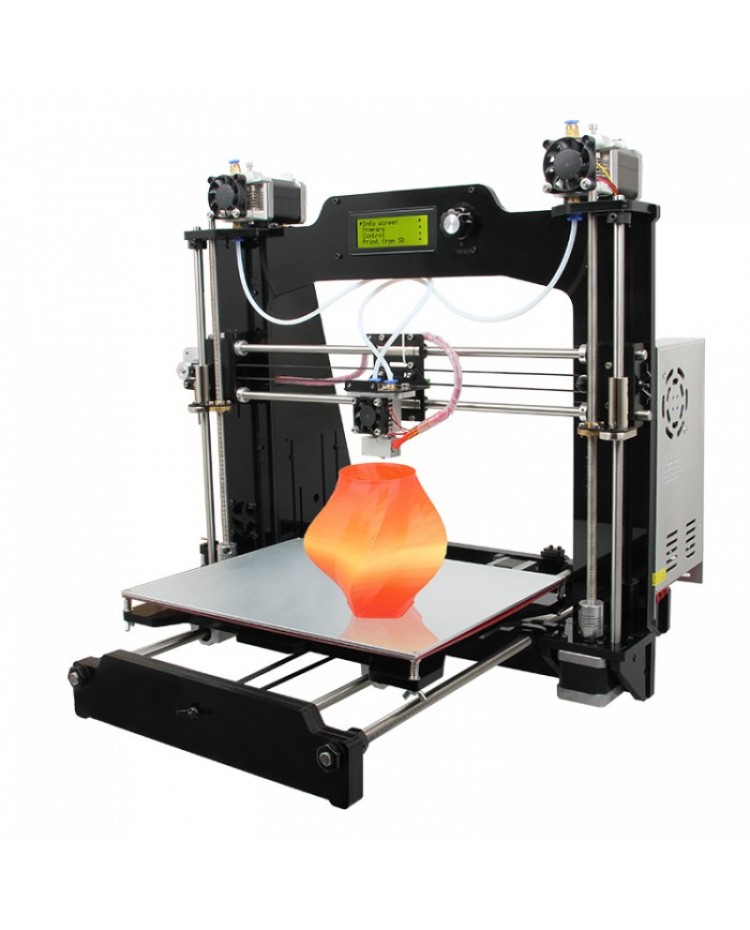
3. Dual Extruder Printer Upgrades - These upgrade kits, such as the Palette 2S series and Prusa Multi Material Upgrade 2.0, transform a single extruder 3D printer into a printer that can print up to 5 colors simultaneously using splicing systems and dedicated software and plans for filling 3D models.
4. Mixed color 3D printers are some of the cheapest dual extruder 3D printers, and maybe not even dual extruders. They use one printhead and one nozzle, but two filaments to mix the colors while melting. You can print models in half color, or mix colors like red and blue to create a purple hue.
Can the 3D printer be upgraded with a dual extruder?
Yes, you can. Dual extruder upgrades such as Palette 2S (compatible with most popular 3D printers) and Prusa Multi Material Upgrade 2.0 (for Prusa 3D printers) will turn your standard FDM printer into a multi-color 3D printer.
However, manually modifying a 3D printer and adding a second extruder is more difficult.


