Best settings for 3d printer
Tips and Settings for the Best 3D Prints – Clever Creations
Image: Polymaker
Our site is reader-supported. When you buy via the affiliate links on this site, we will receive a commission at no cost to you. All opinions remain our own. Learn more
Are you thinking of trying to 3D print with PLA filament? PLA is one of the most popular materials for 3D printing and an excellent choice for beginners because it’s easy to use and more economical than other filament options. Even so, there are some things you need to know before buying your first spool.
We’ll tell you all about what PLA is, why it’s a great option for 3D printing, and what settings and temperatures you should use for the best results.
What is PLA?
PLA (Polylactic acid) is a thermoplastic made from organic materials instead of petroleum. Short for polylactic acid, PLA is a compostable bioplastic derived from corn starch, sugarcane, and other types of renewable resources.
PLA has a wide variety of applications and is used in plastic bottles, plastic wrap, and some medical devices. While it is an efficient green alternative for product packaging and biodegradable components, PLA has a low heat tolerance which makes it unsuitable for any uses requiring direct contact with warm environments.
Why 3D Print With PLA?
PLA filament is one of the most popular materials for 3D printing because its material properties like low printing temperature makes it easy to print with. It is economical to produce, which leads to lower costs on filament. It is also easy to work with, mostly odorless, and biodegradable.
PLA filament is ideal for beginners and makers with budget 3D printers who don’t have advanced printing features. Unlike other filaments, like ABS, PETG and Nylon, PLA can be 3D printed without a heated build plate or 3D printer enclosure.
Image: Ajrocket1 via Wikimedia, CC BY-SA 4.0
PLA filament spools are typically made of either plastic or cartonDownsides of PLA
While there are several benefits to using PLA filament for 3D printing, there are also some downsides.
The biggest drawback of polylactic acid is its low melting point and low glass transition temperature. These make it easy to print with but limit the durability of the finished products. 3D prints made with PLA filament are unable to withstand high temperatures and will start to soften and warp from being left in a hot car, or in direct sunlight on a hot day.
Using specialty PLA filament blends (also known as PLA+ / Pro PLA filament) can make your finished 3D prints more resistant to high temperatures without affecting the printing temperature. However, these do come at a higher cost.
Another issue with PLA is that it is not as easy to post-process as other filament options like ABS. While 3D prints made from ABS can be smoothed by placing them in a closed container with acetone, PLA is resistant to most chemical smoothers. Instead, smoothing PLA 3D prints is done by sanding and/or covering with an epoxy resin.
To learn more about the differences between PLA vs ABS, check out our guide on the two materials. We also have a great article comparing PETG vs PLA if you want an alternate option to PLA without the downsides and strong 3D printing fumes of ABS.
What Do You Need to 3D Print With PLA?
As mentioned above, it is quite easy to print with PLA filament. That means even the most basic 3D printers can usually handle it with little difficulty.
Hot End
PLA filaments usually work well with nearly every hot end. If your hot end is capable of reaching a temperature of around 200 degrees Celsius, you can 3D print PLA with it. Most hotends for 3D printing are more than capable of reaching that nozzle temperature with little issue.
Similarly, to 3D print with PLA, your hot end does not need a fully constrained filament path. This is different from when working with flexible filament, for example.
You also don’t need an all-metal hot end for PLA either, since its low printing temperature means you won’t melt the non-metal components near your nozzle. When 3D printing high-temperature filaments, like Nylon or PEEK, you risk melting PTFE tubing and other non-metal components inside the hot end.
Image: syvwlch via Wikimedia, CC BY 2.0
Not all extruders are compatible with high-temperature filamentsHeated Bed
PLA also does not warp or deform that much as it cools, so it does not strictly require a heated bed to 3D print. This is different from when printing with ABS, where it is beneficial for the entire print to stay consistent and limit big differences in temperature.
The unnecessity of a heated bed makes PLA filament a great choice for 3D printing enthusiasts on a budget, as a heated bed adds additional costs (both in hardware and electricity usage) to the 3D printer.
That said, a heated bed is still an advantage when it comes to 3D printing PLA, as higher temperatures can increase bed adhesion of the first layer.
You can print PLA on most types of build plate surfaces, including metal, glass, and BuildTak. It does occasionally need an adhesive added to the surface of the bed if it is not sticking well on its own.
This can be as simple as a basic glue stick or as complex as a 3D print-specific adhesive. Painters’ tape on the bed is another popular way to make your PLA 3D prints stick.
Tips for PLA 3D Printing
It’s easy to get great results with PLA filament. If you are new to 3D printing, it is your best chance for getting good prints right away without too much fuss. It is just as easy to work with on a 3D printer under $300 as it is on a $1000 3D printer.
Even so, there are a few things to be aware of when starting to 3D print with PLA material.
How to Get the First Layer Right
It’s important to get the first layers just right with any 3D print, and PLA prints are no exception. The first layers are the building blocks for the whole print, so if they are off, the rest of the print will be as well.
Bed Leveling
The easiest way to get great-looking PLA prints is to have a level print bed. If your bed is uneven, certain areas of your first layers will be very close to the build plate while others are too far away. Not only does this make it difficult for the first layer to adhere to the build plate, it causes poor layer adhesion overall and makes the rest of the print unstable.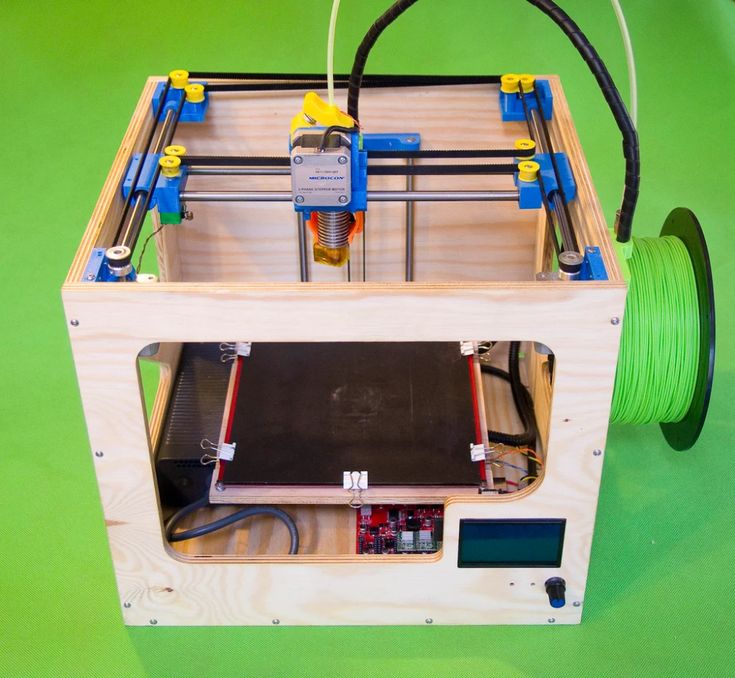
If your 3D printer does not offer automatic bed leveling, you might want to consider upgrading it with a BLTouch sensor to remove the need for manual leveling.
Nozzle Height
Your nozzle height is important to keep your first PLA print layers clean and well-adhered to the print bed. If the nozzle is too close to the bed, the melted filament will have difficulty extruding from the nozzle. If the nozzle is too far away from the print bed, the filament extrudes out in loose layers and doesn’t adhere well to the print bed or the previous layers.
Recommended PLA Print Settings
PLA is one of the easier 3D printing materials to get good print quality with even with a basic 3D printer. That being said, you need to know which PLA print settings to use in your slicing software to get the best results.
- Nozzle Temperature: 195-220C
- Bed Temperature: 60-70C (optional for better adhesion to the printer bed)
- Layer Height: 0.
 2mm for standard speed and quality
 - Print Speed: 30-90mm / second
- Bed Material: Glass, aluminum, BuildTak.
Other settings like infill percentage, wall thickness, retraction speed, etc. are dependent on the individual project. For example, more infill is better for strength while a lower percentage is better to save filament. The download pages of most 3D models will give you the optimal settings for these settings.
Other Tips
Get the Temperature Right
Most PLA filaments work within a set range of printing temperatures. What exact temperature you should use depends on your 3D printer and the brand of PLA filament. Sometimes temperature settings can even vary between different colors of the same brand of filament since the pigments used to color them can affect the way filament behaves.
When trying a new type of PLA filament, you’ll need to experiment to find the best settings for your 3D printer. Check the specifications of your filament to find the ideal printing temperature range and run test prints starting at the lowest temperature. Work your way up by increasing the extruder temperature 5-10 degrees on each additional test print until you find the temperature that works best with your machine.
You can also print a temperature tower to do this within one print. Just be sure to track the specific PLA filament, 3D printer and settings you used so you remember what you tested for later.
Use a Good Quality Filament
It can be tempting to cut corners by using the cheapest PLA spool possible, but you almost always trade quality for those cheap prices. Inconsistent filament diameters, breakage from moisture, inconsistent tension on the spool, and other quality issues will make printing harder and result in a lot of waste.
You are better off buying a decent-quality PLA filament for a slightly higher cost per spool for easy printing and good results. There are many things that can go wrong during a 3D print, so controlling the obvious ones with good materials and parts makes the whole process much easier.
If you aren’t sure what brand to choose, head over to our guide on the best PLA filament brands to see our top picks.
Troubleshooting
My PLA Keeps Breaking Mid-print
Breaking PLA during 3D printing is most often caused by old or improperly stored filament. PLA can absorb moisture from the air, which causes it to turn brittle. If you bend your filament and it easily snaps in half, it’s probably been exposed to too much moisture.
A good way to fix and prevent this is by using a filament dry box for your 3D printing material. These keep filament dry for when you need it. Some even have the ability to dry out filament that has absorbed too much moisture, offering you the opportunity to restore brittle PLA.
Recommended:
The 10 Best Filament Storage Containers and Dry Boxes
If your PLA bends like it’s supposed to, the problem could be due to improper tension. Either the filament wasn’t wound on the spool consistently during production (a common problem with cheap filaments) or it is getting too much resistance at your spool holder.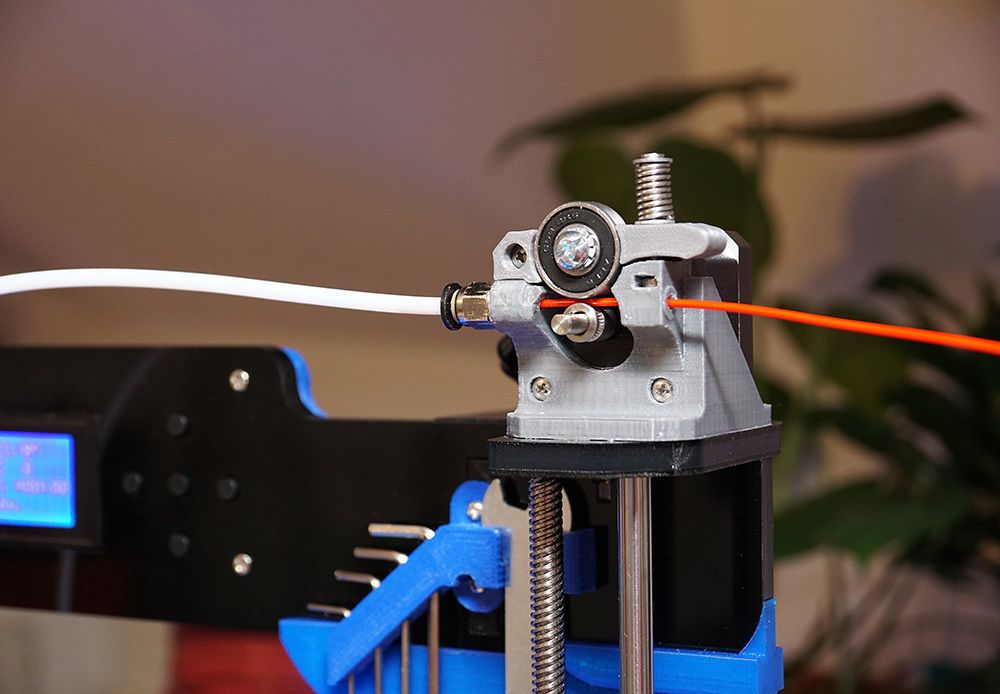
My PLA Keeps Jamming My Extruder
A jamming 3D printer extruder is common with cheaper PLA filaments. It is usually because the filament’s diameter is not consistent. It can also be caused by the filament not being perfectly round, which is yet another sign of poor filament quality.
The best way to ensure that your filament is the size and shape it is supposed to be is to buy a quality filament that has been manufactured with precise tolerances. This will prevent PLA filament getting stuck in the PTFE tube.
Extruder jamming can also occur when the extruder temperature is set too low. However, this is harder to do with PLA than other materials like ABS, since PLA plastic has a pretty wide range of tolerances for extrusion temperature.
Many PLA+ filaments are formulated to avoid extruder jams and clogs. You can learn more about the differences between standard PLA vs PLA+ in our dedicated article.
Conclusion
PLA 3D printing is a great option for getting good print quality without the hassle of complicated print settings you sometimes have with other materials. You can 3D print PLA with a low extruder temperature and no heated bed or enclosure. While PLA does have some downsides, it is still one of the best materials for 3D printing beginners.
If you have any questions, for example if you are wondering if PLA is food safe, don’t hesitate to ask us in the comments!
10 Most Important 3D Printing Slicer Settings
A 3D printing slicer is a software package that converts a 3D model into a set of machine-readable instructions to print the part. The success of the 3D printed part depends heavily on selecting the correct 3D printing slicer settings. These settings can mean the difference between a high-quality part or a difficult-to-clean tangled mess of plastic. The most important settings for an optimal 3D print are temperature, location and number of supports, and bed adhesion. Getting these settings wrong will most likely result in a failed print. This article will explore the ten most important settings of FDM (Fused Deposition Modeling) printers to keep track of to ensure a successful 3D printed part.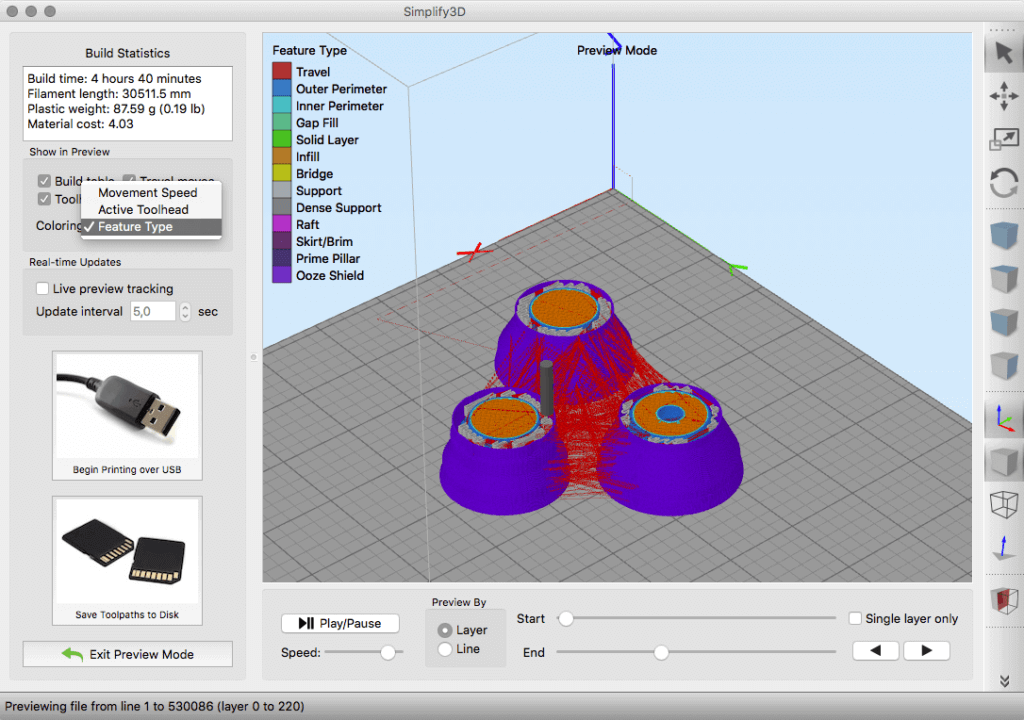
1. Temperature
The temperature settings in 3D printer slicer software refer to the temperatures of the build platform and the extruder. The optimal build platform temperature helps keep the first printed layer attached to the build platform while also limiting the potential for warping. The extruder temperature, on the other hand, is the temperature that the plastic is heated to as it is extruded from the print nozzle. Both of these temperatures are selected based on the material being extruded. For example, PLA (Polylactic acid) requires a bed temperature of 50°C and an extruder temperature of 95°C, whereas ABS (Acrylonitrile butadiene styrene) requires a bed temperature of 70°C and an extruder temperature of 210°C. Many slicers will have predefined temperature settings for specific material classes. These values generally work well without too much tweaking.
2. Speed
Printing speed can be set to a global value in a slicer program. However, it is possible to set specific speeds for specific parts of the print.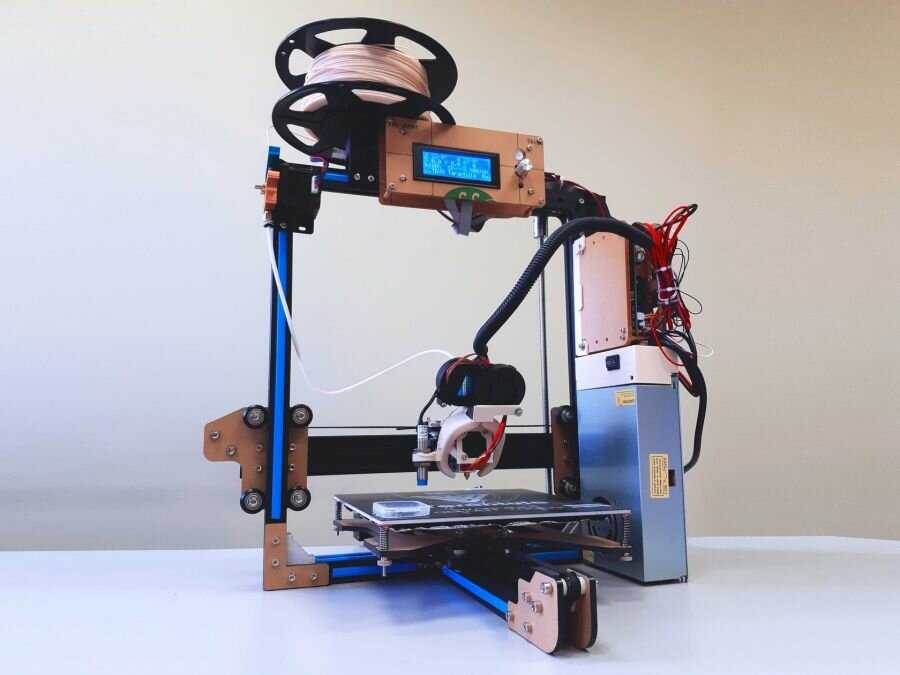 For example, speeding up the printing of the infill can save significant time as these areas will not be seen, while printing the walls at a slower speed will result in improved print quality. In general, increasing the speed will result in faster prints but this will be at the expense of print quality. The more rigid a 3D printer, the higher the speed it can print at while maintaining good quality.
3. Flow
The flow rate of the 3D printer refers to the rate at which material exits the nozzle. Normally the flow rate is set at a default value depending on the printer. An incorrect flow rate will result in wall thicknesses that are either too thin or too thick. A high flow rate will result in excessive filament usage, whereas a low flow rate may result in structurally weak prints. The flow rate rarely needs to be changed. The flow rate is usually not changed directly but is modified by entering a factor that is multiplied by the default flow rate.
4. Retraction
Whenever the printer is not actively printing, i.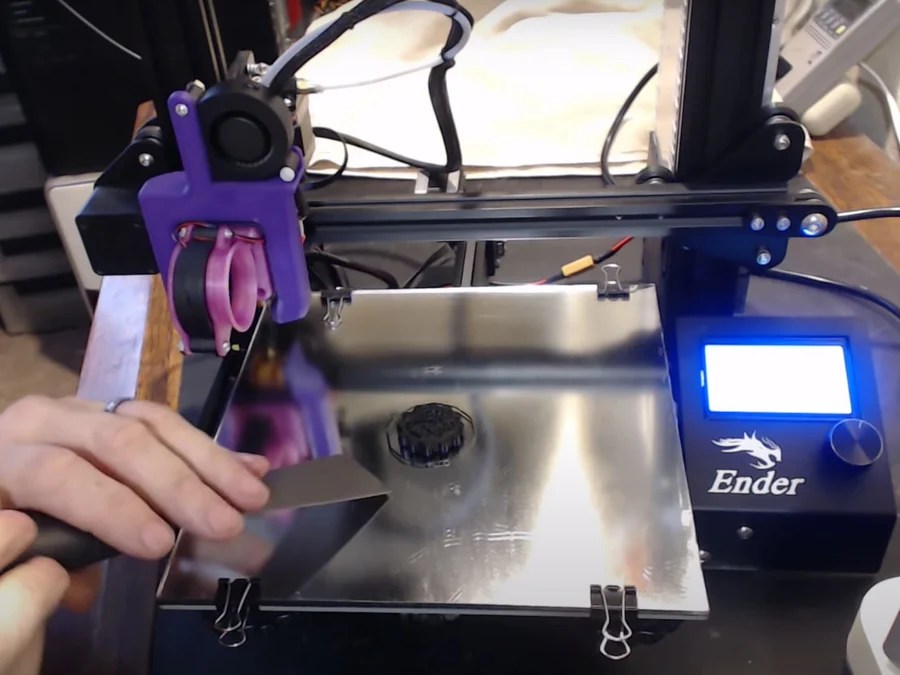 e., when it is moving from one location to the next, it will slowly ooze plastic from the nozzle. This phenomenon can result in thin strings of plastic draped all over the print. Retraction addresses this issue by reversing the extruder to pull the material back into the nozzle when it is not actively being dispensed, thus preventing oozing. Retraction settings can be further customized by setting the amount of material that is retracted as well as the speed of retraction.
5. Cooling
3D printer settings for cooling are primarily linked to the speed of the fan located on the extruder assembly. This fan speed is set on a scale of 0 to 100%. The cooling fan speed is especially important if large unsupported overhangs or bridges are to be printed. This is because the plastic will sag between unsupported areas if not cooled quickly enough. The fan is typically turned off during the printing of the first layer, as this helps produce a better bottom surface and improves the bed adhesion.
6. Infill
Many slicers will have a large number of different infill settings. The most important of these are the infill density and the infill pattern. The higher the infill density, the denser the part, with 0% referring to a part with no infill and 100% referring to a completely solid part. A typical infill density is 20%. The term “infill pattern” refers to the geometric shape of the infill. There are many different infill patterns. The most common is the grid infill. Some patterns optimize print time at the expense of part strength. Others prioritize parts strength at the expense of longer cycle time.
7. Supports
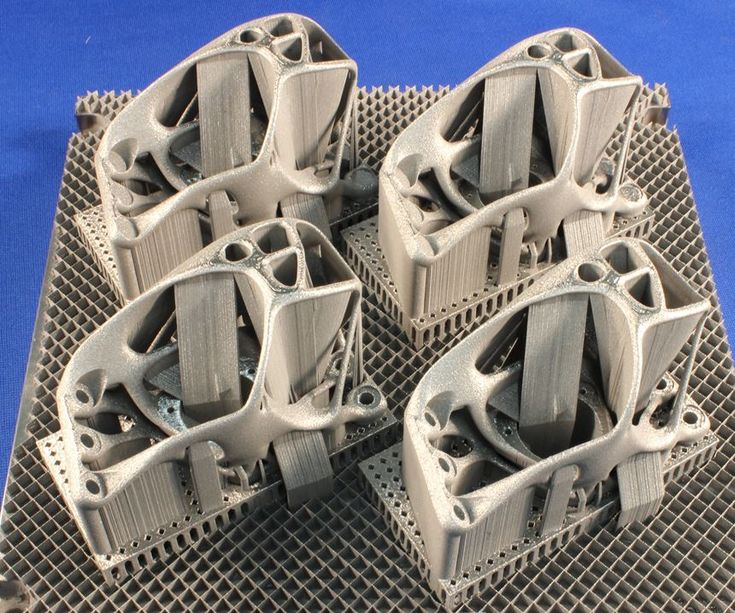
Determining the optimal 3D printing slicer settings for supports is critical to effectively printing parts with overhangs or bridges. Optimizing the cooling rate can assist with printing overhangs without supports, although this is generally not recommended. A 3D printer cannot simply dispense material into thin air. Every layer needs some kind of support beneath it - either the previous layer's print or a designed-in support member that is not a part of the finished product.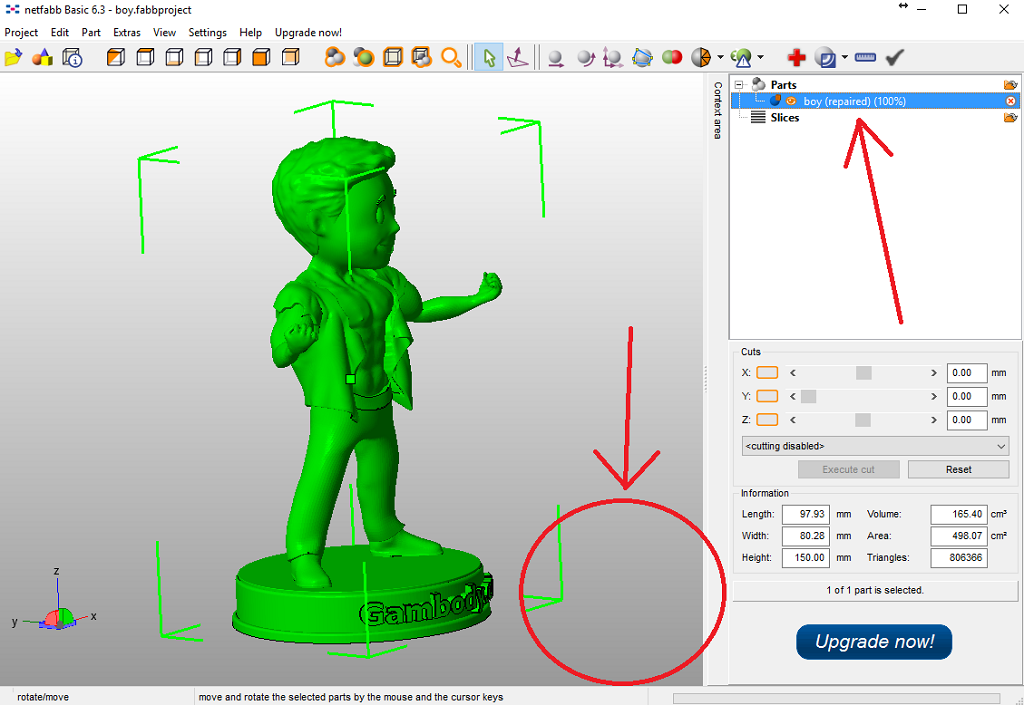 Figure 1 below is an example of a 3D printed part with support:
In the case of overhung features, the support material must be built up from the build plate to where the overhang begins. As with infill, the support density and pattern can also be adjusted. The minimum overhang angle can be set to control where supports are placed. This value is typically between 45 and 60% (0% means no supports are placed anywhere, and 90% means that even the slightest overhang is supported).
8. Layer Height
The slicer software will divide a part into multiple slices along its z-axis (vertical direction). The height of these slices is known as the layer height. A large layer height will result in faster prints since the machine does not have to print as many layers. However, this will be at the expense of dimensional resolution. Small layer heights will take longer but the part will have higher resolution.
9. Shell Thickness
The shell thickness of 3D printing slicer settings refer to the characteristics of the outer plastic shell that forms the wall of the 3D printed part. The shell thickness must be a multiple of the nozzle print width, i.e. a shell thickness of 0.8 mm with a 0.4 mm nozzle will mean the nozzle will extrude two lines. The number of layers in the wall can be set to increase the part strength with only a slight increase in print time.
10. Adhesion Resistant
A common challenge with 3D printing is bed adhesion. Parts will sometimes come loose from the print bed. This can cause the printer to extrude the material into empty air, since the part it was supposed to build on is no longer in the correct location, creating a tangled mess of plastic. Alternatively, if the part adheres to the nozzle, plastic will slowly accumulate around the nozzle and ultimately encase the entire extruder. Poor bed adhesion can also cause the first layer to warp, resulting in print failure. Bed adhesion can be improved in the slicer 3D printer settings by printing a “brim.” A brim is a single layer that effectively expands the surface area of the first printed layer, creating a larger bonding area on the bed plate.
What is a 3D Printer Slicer?
A 3D printer slicer is a software package used to prepare a 3D model for 3D printing. It converts the model, typically in STL format, into a set of printer instructions in a machine-control language called G-code. For more information, see our article on Slicers in 3D Printing.
Why Are 3D Printer Slicer Settings Important?
3D printer slicer settings are important because they ensure that a part is printed with the correct set of instructions for a specific material and part design. The settings also help ensure that every unique part is printed with the correct supports, infill, temperature, etc. Using the incorrect slicer settings will result in a failed print.
How Can I Change the Settings on my Slicer?
The exact method of changing a slicer’s settings depends on the software being used. However, most slicers will have a set of standard 3D printing settings for new users, as well as more advanced 3D printing slicer settings that can be modified by more experienced users.
How to Use a 3D Slicer
Slicer software can be used by downloading it from the supplier's website. Some slicers are free, while others need to be purchased. Once it is downloaded and installed, open the software and import the desired 3D model. The acceptable file formats will depend on the software you are using, but the most common format is STL (standard file format). Most CAD and design packages can export models as STLs.
How Does a 3D Printer Slicer Work?
A 3D printer slicer works by converting a 3D model into multiple 2D slices. The number of slices depends on the chosen layer height. These individual 2D slices are then converted into a set of instructions that can be understood by the 3D printer. These instructions are called G-code. They tell the machine where and how fast to move, and what temperatures are required, and give it information about other features to be printed, such as brims, supports, and outer shell thickness.
What Are the Best Slicers for 3D Printing?
There are many different slicer software packages available. The best of these are:
- Cura: This software was developed by Ultimaker, which has its own range of top-tier 3D printers. Cura is free and can be used with almost any FDM (Fused Deposition Modeling) 3D printer.
- Simplify 3D: Simplify 3D is a paid software that comes with a range of powerful printer settings.
- Prusa Slicer: This software was developed by Prusa, which supplies medium-cost, high-quality 3D printers.
- Netfabb: Netfabb is a professional software package developed by Autodesk. It is best suited for industrial 3D printing applications. Netfabb can be used for preparing files for almost any type of 3D printer technology.
- Dremel Slicer: Dremel Slicer, also known as Dremel Digilab 3D Slicer, is a Cura-based slicer software program developed for Dremel 3D printers. It can also be used with Cura-integrated 3D printers.
For more information, see our article on the Best Slicer Software for 3D Printing.
Does the Slicer Affect Print Quality?
No, the brand of slicer software used will not affect the print quality. However, using the correct 3D printing slicer settings can be the difference between a failed print and a successful one. Most slicers will provide good baseline settings but these must often be tweaked to get optimal results.
Summary
This article presented ten 3D printing slicer settings, explained what they are, and discussed how each one is important for 3D printing. To learn more about 3D printing slicer settings, contact a Xometry representative.
Xometry provides a wide range of manufacturing capabilities, including 3D printing and other value-added services for all of your prototyping and production needs. Visit our website to learn more or to request a free, no-obligation quote.
Disclaimer
The content appearing on this webpage is for informational purposes only. Xometry makes no representation or warranty of any kind, be it expressed or implied, as to the accuracy, completeness, or validity of the information. Any performance parameters, geometric tolerances, specific design features, quality and types of materials, or processes should not be inferred to represent what will be delivered by third-party suppliers or manufacturers through Xometry’s network. Buyers seeking quotes for parts are responsible for defining the specific requirements for those parts. Please refer to our terms and conditions for more information.
Team Xometry
This article was written by various Xometry contributors. Xometry is a leading resource on manufacturing with CNC machining, sheet metal fabrication, 3D printing, injection molding, urethane casting, and more.
best Cura profile for Ender 3
3DPrintStory 3D printing process Ender 3 Cura Settings: Best Ender 3 Cura Profile
Creality's Ender 3 is one of the most popular 3D printers and has become the starting point for many to enter the world of 3D printing. Competing with some of the more expensive printers in terms of speed, quality and 3D printing space, this model surprises with its price-performance ratio.
Naturally, for a 3D printer of this price, manual calibration and possibly a few modifications are required, but even with this, the price and quality are still excellent.
The standard Ender 3 Cura profile will work for you as a start, so definitely download that as a base.
- Click Settings > Printer > Manage Printers”
- In the settings window, select Add > Add a non-networked printer.
- Scroll to Creality3D, expand the section and select Ender 3.
Here you will have default settings from which you can create your ideal profile. Naturally, you will have to adapt to individual materials and 3D print resolutions. By default we will modify this profile for PLA, but we will also mention settings for ABS and PETG.
Below is a summary of the profile we recommend, and the rest of the article provides a more detailed explanation of each setting.
Optimum Ender 3 profile for PLA:
- 3D printing temperature: 200° C
- Table temperature: 60° C
- Speed: 50 mm/s
- Layer height: 0.12 mm
- Retract: 6 mm at 25 mm/s
- Infill: 20%
- Start Layer Print Speed: 20mm/s
- Initial Fan Speed: 0%
3D Print Temperature
One of the most important settings is temperature. Incorrect temperature setting can result in over or under extrusion of the material, curling, or cavities. Most grades of PLA require at least 180°C for good extrusion. This temperature range can be extended up to 220°C.
Ideal temperatures vary for different materials (ABS: 220-250° C, PETG: 220-245° C), but the material grade can also be important. When trying out a new material, it's worth starting to print at different pitches. In general, 200°C is considered a great start for PLA plastics.
Remember: when calibrating the 3D printer, change only one setting at a time.
Summary:
- PLA: 200°C
- ABS: 230°C
- PETG: 240°C
3D printer bed temperature
The bed temperature also depends a lot on your material. PLA doesn't really require the table to be heated (although heated is better). You can easily get by with glue, hairspray, or blue tape. But ideally, the temperature of the table should of course be just a little higher than the ambient temperature.
The table temperature for ABS should be significantly higher than for PLA - around 110°C. If you are going to use Ender 3 in conjunction with ABS plastic, you will also probably need to add a 3D printer case to eliminate excess cooling and prevent deformation and delamination of layers.
Summary:
- PLA: 50° C
- ABS: 110° C
- PETG: 70° C
3D print speed
quality. Unfortunately, as the print speed increases, the quality drops. On the other hand, no one wants to wait two weeks to print one 3D model.
On average, most users print PLA at 45 to 65 mm/s. You can increase this speed by using OctoPrint and alternative firmware like Klipper or Marlin. We recommend a starting speed of 60mm/s and reduce the value for 3D models that require a higher level of detail.
When 3D printing with flexible materials, the speed must be significantly reduced. We recommend 3D printing speed from 20mm/s to 40mm/s.
PETG is slightly more fibrous than PLA and to combat this you can reduce the print speed to 20mm/s or so. From 30 to 55 mm / s, you can also try. It is better to start with the lower bar and gradually increase it.
ABS requires about the same print speed as PLA. Ideally from 45 mm/s to 65 mm/s.
For larger 3D models that require less detail, you can increase the print speed on the Ender 3 to 120mm/s.
In general, the travel speed can be increased up to 150 mm/s.
Summary:
- PLA: 60 mm/s
- Flexible materials (e.g. TPU): 30 mm/s
- PETG: 40 mm/s
- ABS: 60 mm/s
- Travel speed /s
Layer height
Decreasing layer height increases 3D print resolution. That is, by halving the layer height, you fit twice as many layers in one 3D model.
The negative side of high resolution is again the increase in long-term 3D printing. Finding the perfect combination of print speed and layer height is essential to getting high quality prints in the shortest possible time. Layer height can be broken down into "magic numbers". The magic numbers are essentially the height of the layer, which works best on Ender 3:
- 0.24 mm
- 0.20 mm
- 0.16 mm
- 0.12 mm
- 0.08 mm
You may notice that all magic numbers are multiples of 0.04 mm. The reason is that the Z-axis stepper motor on the Ender 3 raises the printhead by 0.04mm per step.
Summary:
- Fine Detail, Slow: 0.12mm
- Coarse Detail, Fast: 0.20mm
Retract
Retract is your best weapon for fighting 3D problems print. The retract can be divided into two main parameters:
- Retraction distance
- Retraction speed
Essentially, the retraction reverses the motor shaft to reduce material pressure in the nozzle during idle strokes. In this case, without pressure on the nozzle, excess material will not be squeezed out.
After the release of the Ender 3 model, he quickly became known precisely for his problems with plastic residues (cobwebs) between the parts of the model. But this is already a long time in the past, and the optimal retract settings have been found. For PLA, this is a distance of 6 mm at a speed of 25 mm per second. PETG should be set to a shorter retract distance, ideally around 4mm. ABS should be set to retract distance of 6mm, but at a higher speed of 40mm per second. However, we still recommend playing around with these settings to find the most suitable for you. To set up the retract, you can use the 3D model from Thingiverse.
Summary:
- PLA: 6 mm at 25 mm/s
- PETG: 4 mm at 25 mm/s
- ABS: 6 mm at 40 mm/s
Filling affects how 9002 9002
filling affects 9002 strength and weight of your finished 3D model. There is no "ideal" infill setting as it depends entirely on the purpose of 3D printing. For light decorative 3D prints, you can reduce the infill to 5% or 10%. This will reduce print time and make the model much lighter.
For functional 3D models you will need a higher infill to increase strength and durability. Ideally between 20% and 60%. Some models or even certain parts of the model may require 100% infill.
Resume:
- Decorative 3D models: 10%
- Standard 3D models: 20%
- Functional 3D models: 40%
The initial layer
good quality 3D printing. Poor first layer adhesion will almost always cause 3D printing to fail.
The thickness of the initial layer can be increased to 0.20 mm or 0.24 mm to obtain a thicker first layer and improve substrate adhesion.
The 3D print speed of the initial layer should be slightly slower than the normal print speed. A lower speed gives the first layers more time to stick to the table. Decreasing the initial layer speed should not greatly affect the overall print time, since there are not many base layers. We believe that 30 mm per second is the optimal speed for printing the initial layer. If you have problems with the adhesion of the first layer, you can reduce this value.
The first 5 layers are usually sufficient and will print at a slower speed. The initial fan speed should be set to 0%. Excessive cooling of the earlier layers may cause the model to shrink or warp slightly, causing it to slide off the table.
We hope that the material was useful to you and it will help you for high-quality 3D printing on Ender 3.
Instructions for setting up all the mechanics of a 3D printer: from belts to speeds
The quality of the printed models directly depends on the mechanics of the printer, namely on its correct settings. Any elements of the printer wear out over time, so the printer must be set up at least once every 5-6 kg of printed filament. With the help of the short instructions described in this guide, you can quickly and easily set up the mechanics of your printer: belt tension, motor current, motor steps, acceleration, jerk and speed.
Mechanics includes
3D printers of any design always contain the same things: Axes and rails along which the elements of the printer move and motors with belts that set these elements in motion. In a classic printer design, there are at least 3 motors (one for each axis), 3 rails (one for each axis) and an electronics board that controls the motors. The latter can hardly be called part of the mechanics, but since it controls the engines, it also indirectly affects the quality of the model.
Printing defects due to mechanical problems
Before changing anything in the printer, you need to decide what exactly needs to be configured. Often defects are visible visually. Our blog has an article about most printing defects, which details the reasons for their occurrence. The following is a list of defects and what element of mechanics they are associated with:
-
Layer shifting - Belts, Motor current, Guides
-
Ringing - Guides, Speed
-
Incorrect model geometry - Guides, Motor steps, belts
As you can see, all the above problems do not interfere with the printing process itself, but the result leaves much to be desired. Sometimes mechanical errors can completely stop the printer from working. Therefore, it is better not to take the situation to extremes and, if any problems arise, immediately start checking and configuring the 3D printer.
How to save settings
To fix some defects, you need to change the printer software settings. Therefore, before adjusting the mechanics, it is necessary to understand how to properly store the settings inside the printer. There are 3 ways to do this:
All settings are located in the corresponding menu of the printer
Depending on your firmware, this manual will indicate code sections for MARLIN firmware in the configuration.h file
We first enter the parameters into the printer and then store them in EEPROM - the internal memory of the microcontroller. Or paste all the necessary settings at the beginning of GCODE. To learn how to do this, read our article on working with GCODE and creating macros.
To save to EEPROM, you need to send the printer a command to change some value (which can also be inserted into the initial GCODE), and then send the M500 command (save the current settings to permanent memory). The EEPROM function must be enabled in the firmware, for this you need to remove two slashes in the line:
//#define EEPROM_SETTINGS
Whichever option you choose, you should be careful when using any commands. You will not be able to harm the printer in any way when changing the settings, but if you make a mistake, you will have to look for the cause of possible further problems for a long time.
Setting Instructions
Now you can start setting up the printer itself. If you decide to set several parameters at once, then it is better to use the order of adjustments as in the article, since some of the settings are related to each other and if you use the wrong order, adjusting one element of the mechanics will override the settings of another element. For example, you should not adjust the motor steps before tightening the belts, as changing the length of the belts will change the "true" steps per millimeter of the motors. Also, before setting up, you must make sure that there are no backlashes in the printer frame, tighten all belts.
Belts
The first thing to start setting up the printer is the belts. They directly affect the geometry of the model and, when pulled too much, they cause a lot of problems: displacement of layers, changes in geometry, ripples. First you need to make sure the belt is intact. To do this, look at the entire belt, especially the areas where the belts bend. If the belt has outlived its usefulness, then you can see a section of the belt where the distance between the teeth has greatly increased and a metal wire (cord) is visible between them. This means that it's time to completely change the belt.
Broken belt with broken cords
If the belt is intact or you have already replaced it, then you can proceed to the next step. Depending on the design of your printer, you need to move the roller through which the belt passes. The tension should be such that the carriage or table moves effortlessly, but at the same time, when moving quickly, the belt should not slip the teeth on the motor gear. Adjust the tension of the belts on each axis of the printer using this method.
Tip: if your printer came with a belt tensioner in the form of a spring attached to the belt itself, remove it. Due to the flexibility of this tensioner, printing defects will occur, such as protruding corners on the model. It is better to adjust the belt without using this tensioner.
Belt tensioner
Current motors
As we know from the school physics course, the power of the engine depends on the voltage and current strength. Since the voltage on all printer electronics is the same everywhere, the only thing that can be changed is the current on the motor. More precisely, it should be said the maximum current that the driver will supply to the motors. To change this limit, you need to climb inside the case and find the printer board. On it you will see the printer driver. We are interested in a small potentiometer on the driver itself (in the picture below it is indicated as a tuning resistor).
Example of potentiometer location on driver
For adjustment, you will need a voltmeter and a small Phillips or flathead screwdriver. Before proceeding further, it is necessary to calculate the maximum current supplied to the motors. Different formulas are used for different drivers, the most popular ones will be listed in the table below:
| Driver name | Formula | Explanations |
| A4988 | Vref = Imax * 1.25 for R100 | To understand which formula to use, you need to find a resistor with the signature R100 or R050 on the driver. They are located next to the driver chip. |
| DRV8825 | Vref = Imax / 2 | |
| LV8729 | Vref = Imax / 2 | |
| TMC2208 TMC2100 TMC2130 | Vref = Imax * 1. | One formula for all drivers |
The value of the maximum current (Imax) depends on the motor controlled by the driver. This can be found in the engine specification or on the sticker on it. The following are the currents for the most popular motor models:
17HS4401 - current 1.7 A
17HS8401 - current 1.8 A
17HS4402 - current 1.3 A
Substituting the value into the formula, we get the Vref value for the maximum current supplied to the motor. But at this value, the engine will get very hot, so the resulting Vref value must be multiplied by 0.7. For example, for a motor with a maximum current of 1.5 A and a TMC 2208 driver:
Vref=1.5*1.41*0.7=1.48V
Now the resulting value can be used when configuring on the printer itself. To do this, disconnect the wires going to the motors, turn on the printer and place one voltmeter probe in the center of the trimmer, and the second probe to the negative terminal on the power supply (you can also use the negative terminal on the printer board and the contact on the driver, labeled as GND). You will see some value on the voltmeter screen. Turn the trimmer clockwise to decrease the Vref value and counterclockwise to increase it.
Attention: you should not specify a Vref value higher than the maximum calculated for your engine! Otherwise, the engine will soon break down!
Once you have adjusted the value on the drivers, you can turn off the power to the printer, connect the motor wires, and put the case back together. This completes the driver setup.
Motor steps
When setting up motor steps, you will need a ruler. For convenience, you can use the program Repetier-Host. The adjustment for each of the three axes occurs according to the same algorithm:
-
Set the caret to zero coordinates (Autohome or G28)
-
Move the carriage some distance
-
We measure how far the carriage has traveled
-
We calculate the correct number of steps per millimeter using the formula:
True steps per millimeter = current steps per millimeter * reported distance / distance traveled
For example, if the printer was set to 100 steps/mm, we tell the printer to move 80mm and the printer travels 87. 5mm. Then the correct steps per millimeter would be 100 * 80 / 87.5 = 91.42 steps/mm. For the convenience of measurements, you can fix a ruler on the table, and a thin object, such as a needle or pin, on the carriage. Then it will be possible to accurately measure the distance traveled. The extruder uses a partially different algorithm to measure distance:
-
Inserting plastic into the extruder
-
Cut it right at the outlet
-
We give the printer a command to stretch the plastic a certain distance (at least 100 millimeters)
-
Cutting plastic again
-
We measure the length of the resulting piece of plastic
-
We use the formula from the previous algorithm
Next, the settings data must be inserted into the firmware in the line:
#define DEFAULT_AXIS_STEPS_PER_UNIT {X,Y,Z,E0}
X,Y,Z and E0 should be replaced by the steps per millimeter for each of the axes, respectively. Otherwise, you need to insert this line into the initial GCODE:
M92 Ennn Xnnn Ynnn Znnn
Instead of nnn in each of the parameters, you must substitute the steps per millimeter for each axis. If you want to adjust the steps only for not all axes, then you can remove unnecessary parameters.
Acceleration
This parameter is responsible for the rate of change of speed. That is, how fast the printer will change its speed. This affects the nature of the movement of the hot end relative to the table. If the acceleration is too small, then the printer will print slowly, if it is too large, then the outer surface of the model will have visual defects: fading waves will be visible near each of the corners, as in the picture below.
To set up acceleration, you need to follow simple steps:
-
Cut a model of a standard test cube with a wall thickness equal to one nozzle diameter, without filling and top layers, bottom 2-3 layers;
-
Open GCODE file in notepad;
-
Find the G28 command at the very beginning and insert the line data after it:
M201 X5000 Y5000
M204 P500 T500
-
Save the changes, print the model according to the received GCODE and note at what parameters P and T it was printed;
-
Open the same GCODE file and change the P and T values on the second line, adding 500 to each;
-
Repeat steps 4-5 at least 3 times;
As a result, you will get several test cubes, some of which will show waves at the corners. Choose the cube that is printed with the highest P and T parameters, but that no waves can be seen on it. The number in parameter P will be the desired acceleration value. To save this value, you need to find 2 lines in the firmware:
#define DEFAULT_MAX_ACCELERATION {X,Y,Z,E0}
#define DEFAULT_ACCELERATION {nnn}
Instead of X and Y, you should put an acceleration twice as high as found earlier. And instead of nnn, you need to put the acceleration value found earlier. Otherwise, you need to insert a line in the initial GCODE:
M204 Pnnn Tnnn
In the parameters P and T, you need to put the value of the found acceleration. After that, the acceleration setting can be considered complete.
Jerk
A jerk indicates the speed with which to start accelerating. It affects the model in a similar way as acceleration: it creates ripples around the corners of the model. But it also increases the protrusion of the corners if the jerk is too small. The jerk setting is also similar to the acceleration setting:
-
Cut a model of a standard test cube with a wall thickness equal to one nozzle diameter, without filling and top layers, bottom 2-3 layers.
-
Open GCODE file in notepad
-
Find the G28 command at the very beginning and insert the line data after it:
M205 X5 Y5
-
Save the changes, print the model according to the received GCODE and note at what X and Y parameters it was printed
-
Open the same GCODE file and change the X and Y values on the second line, adding 2 to each
-
Repeat steps 4-5 at least 3 times
As a result, you will get several cubes. Find a non-rippled cube printed at the highest X and Y settings. This will be the jerk value for your printer. To save them, you need to find the line in the firmware:
#define DEFAULT_XJERKnnn
#define DEFAULT_YJERKnnn
It is necessary to substitute the jerk values for the X and Y axes, respectively. Otherwise, you need to substitute the command in the starting GCODE:
M205
Instead of nnn, you need to substitute the jerk value found earlier. This completes the jerk setting.
Speed
In fact, there are many different speed parameters, the values \u200b\u200bof which vary greatly. Let's take a look at the main ones:
This parameter is responsible for moving the nozzle without extruding plastic. The value is in the range from 80 to 120 mm/s. Limited only by the maximum speed at which the motors can rotate. Does not affect the model
This speed is important because it indirectly affects the adhesion of the model to the table. Usually lies between 15 and 30 mm/s
-Print speed of inner walls
Usually set to about 60 mm/s, it only affects the strength of the model. Depends on the maximum amount of plastic that the extruder can push through the nozzle
-Speed of printing outer walls
Usually about half the printing speed of the inner walls (30 mm / s).