Best 3d printer fan
Reddit - Dive into anything
Motivation
I melted my DiiiCooler again. I was printing ABS, which most would say requires little to no cooling. My DiiiCooler was PETG, but after a few hours it started to sag and caught on the print. I should have taken it off or replaced it with something more resilient before I started, but such is life.
I started researching alternatives and found this great study on the effectiveness of various fans and shrouds. (I will use 'shroud' and 'duct' interchangeably here, although I'm sure they have different meanings.) It looked like maybe the type of shroud didn't matter too much as long as you had a powerful fan. I was looking forward to using a shroud that would finally give me a clear view of the build plate.
I began experimenting and things snowballed. I ended up doing this "comprehensive" study on the most popular fans and ducts. The results were predictable (you jumped to the end already anyway, so you know), but there were some surprises. I'm not the first to do this type of experiment, but maybe I can add to the knowledge base.
Theory
[Feel free to skip this part. You probably already know why fans are important. I just go on and on about how cooling works.]
Filament is hot when extruded. That's sort of the whole idea. But, when you lay down a layer of extrudate (it's a word) you want it to be solid before you lay down another layer on top of it. If not, the layers start getting squished and you lose the integrity of your design. Not only that, but when you try to bridge or do an overhang, there's very little or even nothing under your current layer. The more quickly you can cool your filament below the glass transition temperature, the less your layer will sag. This is why we use fans.
I started thinking about how a fan cools a surface. There are a few important variables, but mainly there are two big aspects: air velocity and time. Air velocity contributes to the rate of cooling, while time is how long that moving air is in contact with the hot filament. Let's start with air velocity.
A cooling fan is capable of producing a certain pressure which, given a flow configuration, translates into an air velocity. Axial fans typically produce a lower pressure than a blower (also called a centrifugal fan). The type of duct also determines velocity due to the flow area and internal resistances. You can create a narrow duct opening and you'll get a higher velocity (but lower total air flow). Increase the size of the opening, and the velocity decreases but you get a larger amount of air. It is always a trade-off.
What about time? That one is more difficult. You only have so much time after you extrude to cool the filament before it starts to deform. You need to use that time as effectively as possible. Your fan is moving with your hot end, so you need to consider its zone of influence (ZOI), which is the characteristic length of the zone of high air velocity. For example, let's say you have a duct that points at your hot end from one direction and gives you a beam of cool air with a width of 20 mm. Your hot end is moving at, let's say, 50 mm/s. The hot filament will only be in the ZOI for 0.2 seconds. (The filament is extruded in the middle of the ZOI and 'moves' to the outer edge.) That's not a lot of time. So, naturally, you think it's time to get a wider duct and increase the width of your air beam. Well, you'll be lowering the air velocity in the process. Okay then, use a duct with a smaller nozzle to get a laser-focused beam of high-speed air. Well, you'll lower your total air flow and decrease the size of your ZOI (which, in turn, lowers the amount of time).
What does this all mean? I have no idea. Well, for one, I guess it means you should probably be using a blower if you care about cooling. But as far as choosing a duct... That's why you've got to do the tests.
Procedure
The plan was simple. Choose a selection of popular and different fan/duct combinations and print an overhang test. The overhang has angles of 30, 45, 60, 70, and 80 degree. I'd then compare the results and assign a purely arbitrary but relative score.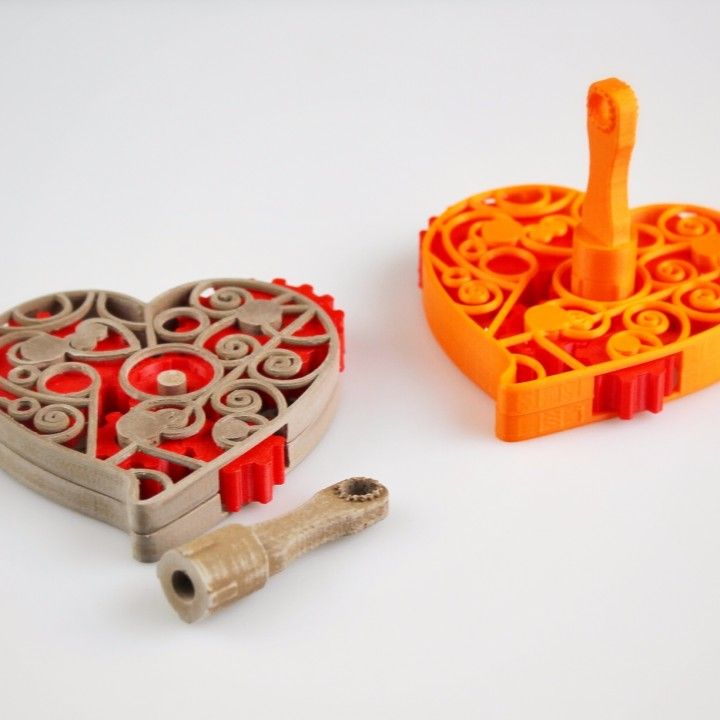 The tests would use the same filament, the same gcode, and the same conditions. Only the fan and duct would change. 100% fan after the first layer.
Equipment
I've got a Monoprice Maker Select V2.1 with a Micro Swiss all-metal hot end, but the results should be applicable to most printers. I chose Hatchbox PLA as my filament. The axial fan is the stock 40mm fan. The blower is a 50mm 0.15A fan from amazon.
The Ducts/Shrouds Tested
No Fan At All
I don't expect this to work, but I needed a control. Who knows? Maybe this fan thing is a myth.
Stock Fan and Metal Duct
This comes with the printer, so you'd think it wouldn't be too bad. It has the advantage of being free and simple. I did the adjustment to get it pointed more squarely at the nozzle, but otherwise no changes.
Stock Metal Duct, but with a blower (via adapter made by me)
If the stock fan is okay, then this should be even better, right? It involves removing the stock axial fan and replacing it with the fan adapter and blower. It sticks out a bit, but blasts plenty of air. It's advantage is that it's an easy mod and the duct won't melt.
DiiiCooler by Pawpawpaw85 with blower
This is the de-facto standard that everyone says is the duct to use. I've had good luck with it, but I had to see how it compared. The advantage is omni-directional cooling. The disadvantage is that it can be a pain to print and can be a headache attaching and removing (which is why they keep melting). Also, it blocks your view so you can't see that sweet, sweet hot-end-on-build-plate action.
DiiiCooler with axial fan (via 40mm fan adapter)
The DiiiCooler is great, but is it the fan or the duct (or both)? This test changes the blower for a 40mm axial fan using the adapter that the designer provides. It's definitely less air flow, but maybe that doesn't matter. (Spoiler: it matters.)
Simple 50mm part cooling fan for wanhao i3/ alike by DevilZMods
If I were a betting man, I would have said this design would win the day. After reading the fan/shroud study, I thought the best plan would be to point your blower at the nozzle and pat yourself on the back for being so clever. The advantage of this design is the high air flow, since there is very little between the fan and nozzle to slow it down. The only disadvantage is that this particular design wants you to glue a little nozzle on the fan. I taped mine and it stayed on fine for one print.
WANHAO i3 Fan duct by Thorped
This is another very popular fan duct that blasts air from three sides. So, it should be 75% as good as the DiiiCooler? That math checks out, but I've got to run the test anyway. It has the advantage of giving you a nearly unobstructed view of the hot end. The big disadvantage is the method of mounting, which is on the back of the extruder carriage and, depending on your printer model, might require tapping a mount hole. Also, it isn't designed for my printer, so I had to use an adapter.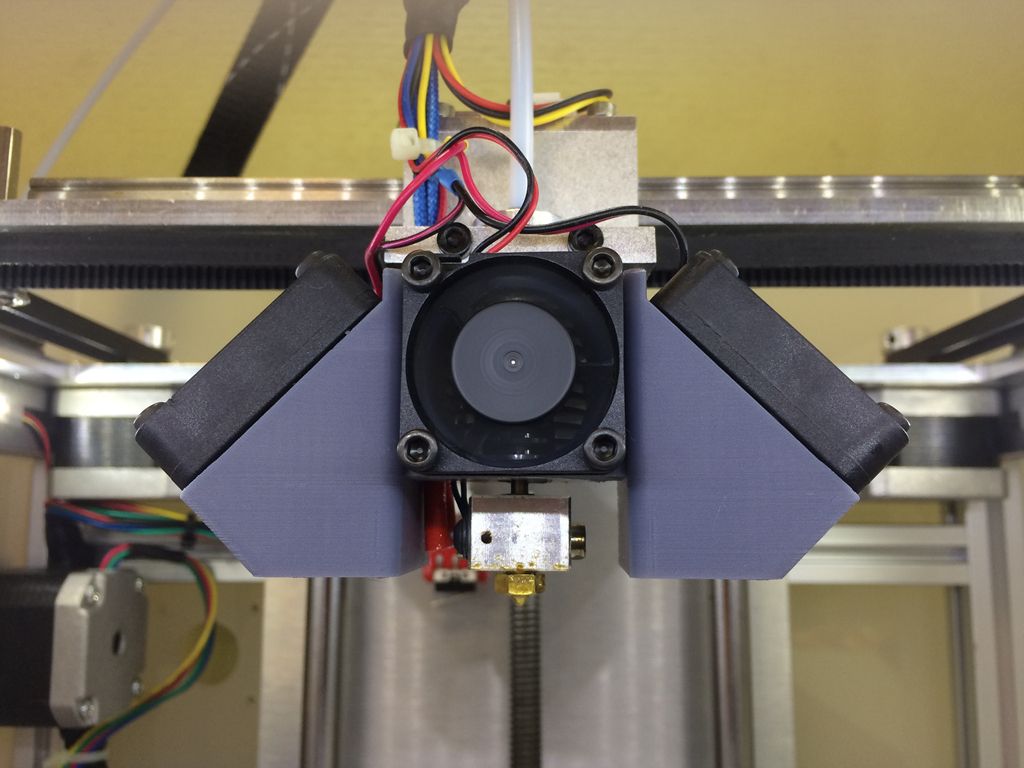
CiiiCooler for Wanhao Duplicator i3 / Maker Select also by Pawpawpaw85
Added by popular demand and because it just makes sense. From the same designer of the DiiiCooler, this model gives a clear view of the hot end, but is supposed to also provide great cooling. Should be an interesting comparison. Like Thorped's design, it attaches to the back of the extruder carriage, so I had to use the provided adapter on my Monoprice Maker Select V2.1. Indecently, the adapter, like the duct itself, is really elegantly designed. Somehow, this duct was even more challenging to print than the DiiiCooler, but that may have been just me.
Results
Check my photos for a visual guide to the notes and scores below. Score is from 0 to 10; 0 being a total disaster and 10 being the perfect print.
| Fan/Duct Type | Notes | Score |
|---|---|---|
| None (control) | Not so great. I guess a fan is a good idea after all. Still, not to total failure. 30 and 40 degree overhangs had only minor defects. 60 degrees got tore up real good. I guess a fan is a good idea after all. Still, not to total failure. 30 and 40 degree overhangs had only minor defects. 60 degrees got tore up real good. | 2 |
| Stock Fan and Metal Duct | Better than nothing, but honestly not that much. The 60 degree angle fared much better, but otherwise only a very moderate improvement. | 3 |
| Blower w/ Stock Duct | This was a huge surprise. 30 and 45 degree overhangs are excellent. 60 and 70 are both pretty good. In fact, 80 isn't even that bad. | 8 |
| DiiiCooler w/ Blower | Time to shine. This should be the best - and it is... but not by that much. It is only very slightly better than the stock duct with a blower. Everything up to and including 60 degrees is about perfect. There's a little stutter at 70 and 80 is about as good as you can hope for. | 9 |
| DiiiCooler w/ Axial Fan | This was a little shocking also. No better than stock. Also, it's an abomination. | 3 |
| DevilZMods simple 50mm | I had such high hopes, but alas... It was about in the middle of the pack. 30 is great, 45 had a little issue, really started to flop on 60 and up. Bummer. | 6.5 |
| Thorped's Wanhao i3 Fan duct | Again, I really wanted this one to work out. It's okay and scored in the top half of the group (such as it is). Nearly the same results as DevilZMods simple 50mm. Hiccup on 45, 60 and 70 are okay, 80 is not that terrible. | 7 |
| CiiiCooler | This late addition turned out to be right about where you'd expect it. Not quite as good as DiiiCooler, this design still did very well. I have to call this better than Thorped's duct or DevilZMods', just due to the performance on the 45 degree slope, which was about flawless. Up from there, 60 was decent, between 70 and 80 was a problem, but otherwise pretty clean. | 7.5 |
Summary of all results
Conclusion
First, throw out your axial fan and get a blower if you haven't already.
Second, the opinion of the masses seems to be true here. The DiiiCooler is the reigning champion, and for good reason.
But, there were some surprises. The runner-up was the stock duct with a blower jammed onto it. And it was really close! Why is this? Maybe, since there is so little flow resistance in the stock duct, the air flow is high and spread over a larger zone of influence. Maybe you don't need omni-directional cooling after all.
Between the DiiiCooler and CiiiCooler, the results are pretty clear. DiiiCooler just kills it, while the CiiiCooler is very strong, but just not on that level. It's easy to guess that the difference is due to the gap in the shroud, but I'm not willing to make that leap just yet.
Also, why didn't DevilZMods simple 50mm or Thorped's Wanhao i3 fan duct perform better? I really wanted one of these to come out on top, since they provide an unobstructed view of the hot end. Maybe, in the case of DevilZMods design, the air is too laser-focused and has too small of a zone of influence.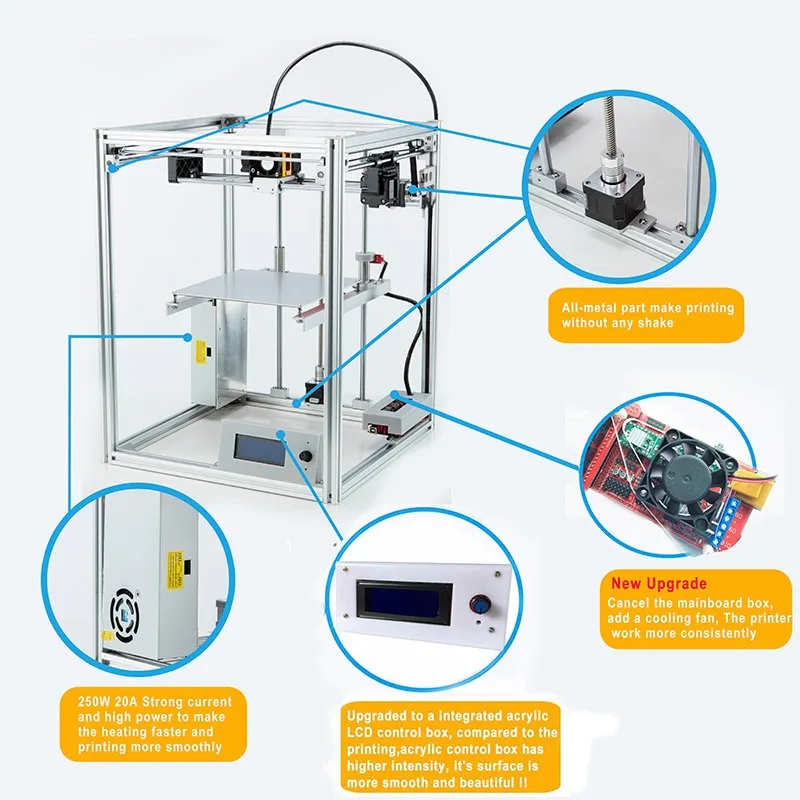 Maybe Thorped's design has too much flow resistance, since the air has to flow around a corner. Both designs seem to direct flow down toward the build plate, rather than in toward the hot end. I just don't know.
Anyway, my plan from now on will be to use the DiiiCooler for PLA and swap in the stock duct with a blower for materials that don't need much fan (e.g. ABS and PETG). That way, there's nothing to melt.
This was a tough test. You probably shouldn't be printing overhangs this extreme without supports anyway. I mean, I was printing a 0.4mm width and 0.2mm thickness, so any overhang greater than about 63 degrees means there is NO support from the previous layer. Even 60 degrees is basically trying to print without any support. The fact that some of these ducts worked so well for 70 and 80 degrees is nothing short of amazing.
And one final thought. As I went through this process, I came to realize that these designs are more than clever technical components - they are also functional pieces of art.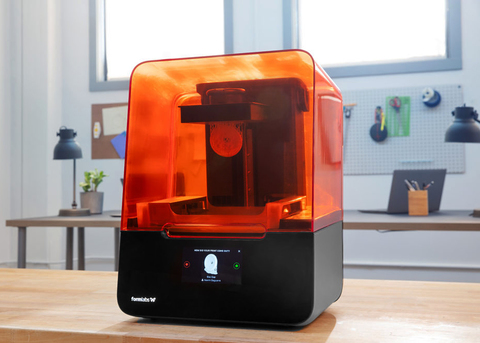 An incredible amount of work went into their creation, so take a moment to thank the designer of your favorite duct (or any other model). Show your appreciation by tipping them on Thingiverse or leaving an encouraging comment.
What Next?
I'm done for now. You do what you want. But, there are plenty of unanswered questions.
"What about MY favorite duct/fan/mod?!" You test it. (Although I kinda want to try the Cobra).
What about bridging?
How does the cooling rate affect inter-layer adhesion and strength?
What about other filament materials?
What about different orientations, print directions, speed, repeatability, etc?
Don't like my results? Cool, cool. I've got no dog in this fight. Use what works for you.
UPDATE: /u/cyborgcanuck did a study on the effect of orientation on the blower performance. The results may surprise you.
Fans for 3D Printers - 3DJake International
Sort byRelevanceBestsellersCustomer ReviewsPrice, Low to HighPrice, High to LowNew arrivalsHighest Discount
-
Noctua NF-A4x10 Fan 2 Model types- Ultra-quiet
- Premium quality
- Excellent long-term stability
-
Anycubic Mainboard Fan 9 Model types- Original spare part
- From Anycubic
-
Noctua NF-A4x20 Fan 2 Model types- Ultra-quiet!
- Premium quality
- Excellent long-term stability
-
Creality Radial Fan Kit 3 Model types- Easy exchange
- Efficient heat dissipation
- Quiet operation
-
Noctua NF-A6x25 Fan 2 Model types- Ultra-quiet!
- Premium quality
- Excellent long-term stability
-
Artillery Material Fan- Original spare part
- From Artillery
-
Anycubic Hotend Fan 8 Model types- Original spare part
- By Anycubic
-
Creality Axial Fan Kit 3 Model types- Easy exchange
- Efficient heat dissipation
- Quiet operation
-
Anycubic Material fan 8 Model types- Original spare part
- By Anycubic
-
FLSUN Part Cooling Fan 3 Model types- Original spare part
- Original material fan
-
Zortrax Radial Fan- Original spare part
- Zortrax M200 Plus
- Zortrax M300 Plus
-
E3D DC Fan 24V - Black 2 Model types- 3D printer spare parts
-
Noctua NF-A9x14 Fan- Ultra Quiet
- Premium quality
- Superior efficiency
-
Noctua NF-A12x25 Fan 2 Model types- Ultra-quiet!
- Premium quality
- Superior efficiency
-
Noctua NF-A9 Fan 2 Model types- Ultra Quiet
- Premium quality
- Superior efficiency
-
Noctua NF-A14 Fan 2 Model types- Ultra-quiet!
- Premium quality
- Excellent cooling performance
-
FLSUN Hotend Fan 3 Model types- Original spare part
-
Creality LD-002R Case Fan- Original spare part
- By Creality
- For LD-002R
-
E3D Hemera Fan 2 Model types- Original spare part
- For E3D Hemera
-
BIQU Housing Fan 3 Model types- Original spare part
-
Artillery Hotend Fan- Original spare part
- From Artillery
-
Slice engineering Mosquito Fan 2 Model types- Perfect cooling
- Fits the Mosquito Hot-End
-
E3D Revo Micro Fan- Maximum controller input: 24V
- Low volume
- Good fan performance
-
Creality LD-002R Air Filter Fan- Original spare part
- By Creality
- For LD-002R
All prices incl. VAT.
VAT.
Which 3D printer to choose for home and hobby use
A few years ago, 3D printers were bulky industrial machines, but now 3D printing is becoming more accessible for home use. When buying their first printer, many are disappointed. This may be due to the unsatisfactory quality of the resulting models or the complex setup and maintenance of the 3D printer.
In the reviews that are found on the Internet, printers are often shown after a lot of upgrades or a long selection of settings for printing. This is not at all the result that a beginner who first got acquainted with 3D printing will get.
In order not to be disappointed, before buying, you need to understand which model is suitable for your tasks. First of all, it is worth deciding what the printer will be used for. What is the main property that finished products should have? What is more important, the physical properties of the model or the ideal surface and detail? Not only the model depends on this, but also the technology by which the 3D printer will work.
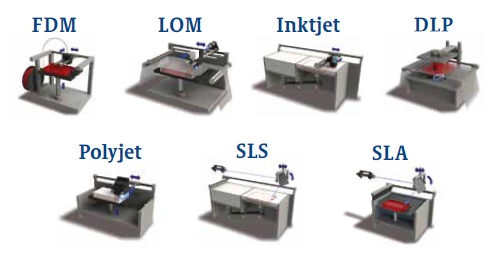
Which technology to choose? FDM or LCD?
If you need to make a small detailed figurine with a perfectly smooth surface, you should pay attention to models that work on LCD technology (LCD works on a principle similar to DLP - Digital Light Processing or “digital light processing”).
LCD prints using a photopolymer resin that cures under UV light. This makes it possible to produce without deformation, even small and thin products that cannot be manufactured using FDM technology.
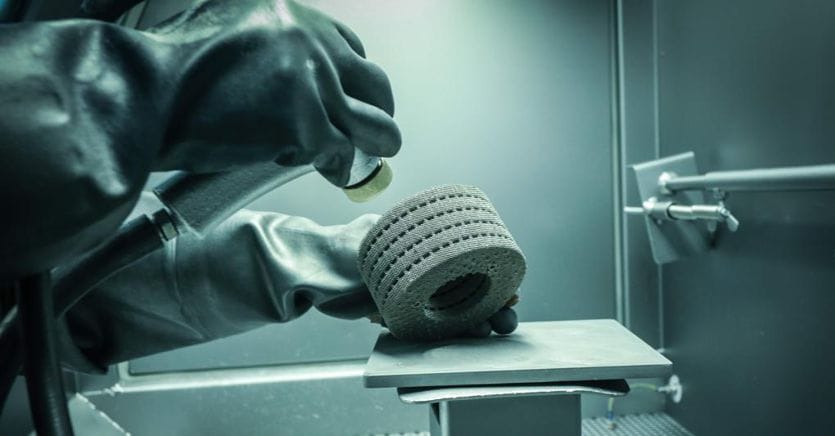
Resin model
Now on sale there are many photopolymer resins with different properties. A few years ago the choice was not great. Basically, finished products were not strong enough for use in functional models. Now engineering resins have begun to appear on sale. Products from them are not inferior in strength to models made using FDM technology from ABS or even nylon.
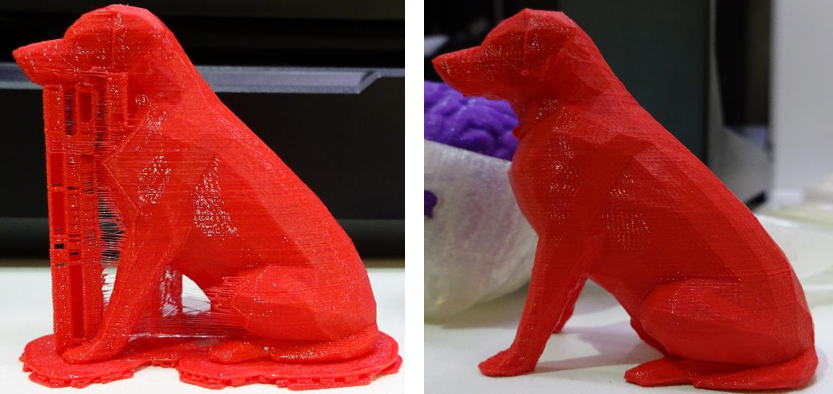
If it is necessary to produce large products with different properties, or the tasks will be very diverse, then the choice is with FDM technology. But it is important to understand that finished products will not have a perfectly smooth surface. Of course, you can polish the model, but this is additional time and labor costs.
FDM technology builds a model using molten plastic filament, which is fed from the print head. The print head (extruder) “grows” the model layer by layer on the printing table.
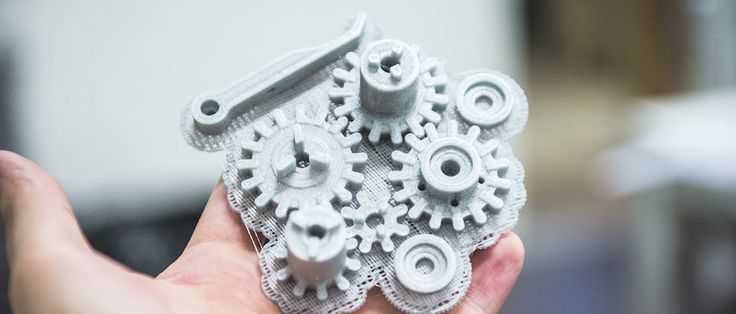
FDM Models
FDM technology became widespread much earlier than DLP. Thanks to this, a wide variety of 3D printers and consumables for them has appeared. You can find many decorative plastics that mimic various materials, or engineering plastics for making functional models or mock-ups.
Choosing an LCD printer
Photopolymer printers work on one of 3 technologies - DLP, LCD or SLA.
As home printers, devices based on LCD technology are usually used due to their availability and low price.
Printer design
SLA technology appeared the very first among photopolymer printers.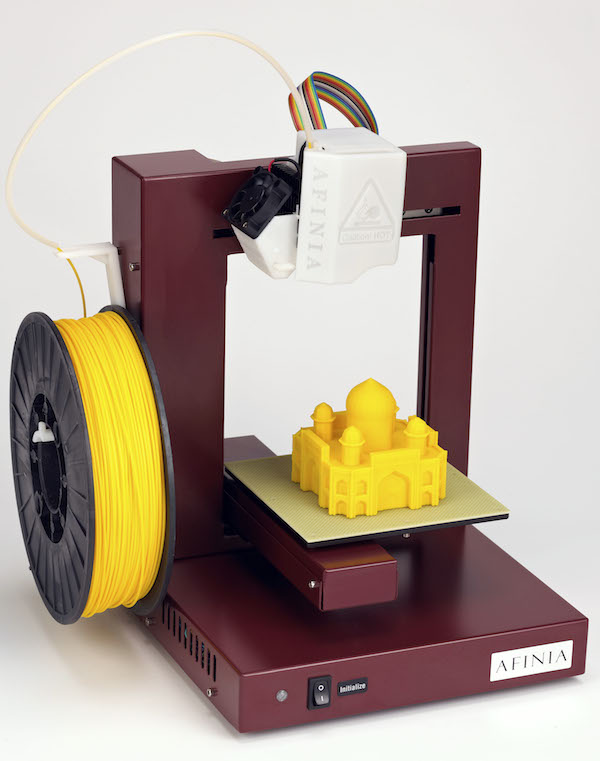 With the help of a point-focused beam, the desired areas of the resin are gradually illuminated. This is repeated layer by layer.
How SLA 9 works0018
Since the surface of the model is perfectly smooth, SLA has become used in the jewelry and dental industries.
Pros:
Cons:
DLP technology appeared later than SLA, but it is very similar to it. The main difference is that the light source is not a focused beam, but a projector. This made it possible to illuminate the entire layer at once, which significantly accelerated the production of models. The quality of the surface was slightly inferior to SLA, but modern DLP printers, in terms of the quality of models, are almost as good as SLA technology.
How DLP works
Pros:
-
Faster production of models due to the illumination of the entire layer
-
Consumables are slightly cheaper than SLA
-
High surface quality (although may be inferior to SLA)
Cons:
LCD technology is the youngest of all. The DLP principle is taken as a basis, but an LCD display is used as a matrix or illumination pattern. LEDs are used as a source of UV light in LCD technology. Thanks to inexpensive components, we managed to get a simple, but high-quality and affordable photopolymer printer.
How the LCD printer works
Pros:
-
small cost
-
Cheap parts
Cons:
-
Low accuracy compared to SLA and DLP (for jewelers and dentists, the quality of LSD prints may not be enough, although more and more accurate models appear with the development of technology)
-
Possible stray light
-
The quality of models may decrease at the edges of the printable area (this can be corrected programmatically)
Resins that are used as a consumable for photopolymer printing can smell strongly and unpleasantly during operation.
Try to use the printer in a well-ventilated area, or choose a printer with a sealed cabinet and filter.
When choosing an LCD printer, pay special attention to the rigidity and positioning accuracy of the platform along the Z axis. If there are poor quality guides along the Z axis or even a slight play, then the surface quality of the finished model may turn out to be sloppy or the model will turn out to be unevenly striped.
Rating of the best LCD 3D printers for home
Anycubic Photon Mono
This is an LCD printer with a matrix that allows you to increase the speed and accuracy of printing. Anycubic Photon Mono will be a good helper for hobbyists and modellers.
Anycubic Photon Mono SE
Anycubic Photon Mono SE has an unusual parallel light source. This minimizes distortion at the edges of the printable area. You can effectively use the entire working area of the machine and produce many small models at a time.
Phrozen Sonic Mini 4K
Model with high resolution LCD display and large print area. The monochrome display transmits UV rays better and allows you to print much faster than similar devices with a conventional display. The manufacturer claims a screen life of more than 2000 hours. Phrozen Sonic mini 4k is suitable for almost any task.
Wanhao GR1
Wanhao GR1 has high precision and large print area (140x78x200mm). The manufacturer tried to reduce distortion at the edges of the display, this allows you to make the most of the entire work area. High precision and large print area make Wanhao GR1 not only for hobby use, but also for production.
Anycubic Photon Zero
Small and very budgetary LCD device. Its resolution and small working area (total 97x54x150 mm) is enough for printing small miniatures, figurines or small engineering models. Anycubic Photon Zero is a good choice for beginners who want to get into photopolymer printing without spending a lot of money.
Choosing an FDM printer
If you plan to produce large and diverse functional models or experiment, a 3D printer that prints using FDM technology is an excellent choice.
First, decide on the size of the printable area and the properties that the finished model should have. After all, some materials require a closed chamber or good airflow to work.
Some printer models can be “upgraded” in the future. For example, if necessary, purchase spare parts for a closed case, put a nozzle of a different diameter, or change the thermal barrier to an all-metal one. But not all manufacturers provide for the possibility of such upgrades.
Printer design
Despite the same principle of operation, there are several different mechanics, which have their pros and cons.
Kinematics “Prusa” (Prusa)
Perhaps the most popular kinematics among home FDM devices. Mainly due to its simplicity and low cost. The main feature is the table that moves along the Y axis, while the extruder moves along the rest of the axes. Because of this, such kinematics was nicknamed “dragstol”.
Prusa kinematics
Pros:
Cons:
-
Slow print speeds. A massive table with a model is forced to constantly move along the Y axis, because of this, print quality will be worse at high speeds.
-
Some models have design flaws (for example, insufficient frame rigidity), they can be fixed, but for this you have to be a little inventor. Or find a ready-made solution on the Internet.
This category also includes 3D printers with console kinematics. The same prusa, only halved. Because of this, the frame is less rigid, but the printer itself is more compact.
Kinematics Ultimaker
The extruder moves along the X-Y axes, and the table only along the Z axis. All motors are trying to be fixed on the body to lighten the weight of the moving mechanisms, thanks to which it is possible to achieve high print quality at high speeds.
Ultimaker kinematic diagram
Pros:
Cons:
H-BOT or Core-XY
These are 2 similar but more complex kinematics - the table moves only along the Z axis, and the extruder along the X-Y. But to move the extruder, 1 or 2 long belts and 2 stepper motors work in concert.
Example Core-XY kinematics
Pros:
-
High print quality
-
High print speeds without loss of quality.
-
Can be easily closed completely
Cons:
MakerBot Kinematics
Similar to Ultimaker kinematics, but one of the motors is located on the Y or X axis carriage.
Pros:
Cons:
Delta
Deltas do not have the usual XYZ axes. There are 3 columns in the deltas, along which the carriages move, and the position of the extruder in space is calculated using a complex formula. The table is usually statically fixed to the body.
Delta printer example
Pros:
Cons:
Nuances of choosing an FDM 3D printer
In addition to kinematics, when choosing a printer, it is important to take into account some design features.
One or two extruders?
Two extruders can be used for dual color printing, but most commonly the second extruder is used for solvent support printing. If you need to print complex parts with internal cavities, then you should choose a dual extruder printer.
Closed or open printer?
Printing of functional models and parts uses plastic, which usually requires a closed chamber. If you plan to print functional prototypes or various models, you should look at printers with a closed chamber.
Bowden or direct?
There are 2 types of material supply to the print head of the printer - bowden and direct.
In a bowden, the feed mechanism motor is located on the printer body. This allows you to reduce the weight of the extruder and print at higher speeds without losing quality. But because of the long tube, printing with very soft plastics can be problematic.
Bowden feed pattern
In direct feeding, the motor and feed mechanism are located on the extruder. This increases the weight of the print head, but allows you to print with any kind of plastics.
Direct feeding scheme
Heated table or not?
The heating of the table improves the adhesion of the first layer of the model. And engineering plastics cannot be printed without a heated table.
Many manufacturers add useful additional features. They do not affect the quality of the print, but save time and nerves. The most useful additional functions are the filament presence sensor and remembering the print location after a power outage.
Filament sensor.
It will automatically pause printing if the plastic runs out. When there is a little plastic left on the spool, this feature will allow you not to stand over the guard printer until the old spool runs out in order to have time to push in a new bar “on the go”.
Power outage protection.
Remembering where to print when the power goes out can save you a lot of nerves when printing large models. You won't have to worry that after a power outage, you will have to run the model again for many hours or cut and reprint a piece of the model. It is especially disappointing to throw away a complex underprinted model with supports due to a one-minute outage.
There are also many extras. features that make using the printer more comfortable. For example, automatic calibration, touch screen, Wi-Fi and others.
Rating of the best FDM 3D printers for home
Anycubic Mega Zero 2.0
Inexpensive model with Pryusha kinematics. Good for getting started with 3D printing without a big investment. Despite the low cost, Anycubic Mega Zero 2.0 has a heated table and a resume function after a power outage. Thanks to direct feed, printing with soft materials should not be difficult.
Creality3D Ender 3 Pro
A very popular device due to its low price. But despite this, the Ender 3 Pro has a heated table and a decent print area. Can be sold assembled or as a DIY kit.
Flash Forge Finder
Small home appliance intended for children or educational institutions. The Finder doesn't have a heated table, but it does have a calibration assistant, a Wi-Fi module, and other extras that make getting to know it a lot easier. All moving and heated elements are hidden as much as possible in the case so that the child cannot get burned.
Wanhao Duplicator 6 Plus
Wanhao Duplicator 6 Plus was based on Ultimaker kinematics, but instead of bowden feed, they made direct. Because of this, it will not be possible to print super fast, without quality loss, but there will be no problems with printing with soft types of plastics. There are 2 trim levels - with a closed case and without.
Flashforge Dreamer
The Dreamer is a closed body dual extruder printer with MakerBot kinematics. Thanks to this, he can cope with printing models of any complexity. Using a second extruder for soluble support, models with complex geometries can be produced. A good choice for engineers and those who like to experiment with different materials.
FlyingBear Ghost 5
Most commonly sold as a kit (assembly kit). Assembly usually does not cause any great difficulties, even for people far from electronics or mechanics. Flying Bear is equipped with a filament sensor, a function to resume printing after a power outage and Wi-Fi connectivity.
The Flying Bear makes a great first printer for the novice user who is ready to build their own printer.
Totals
In order for the printer not to become a useless toy, you should clearly understand what it is for.
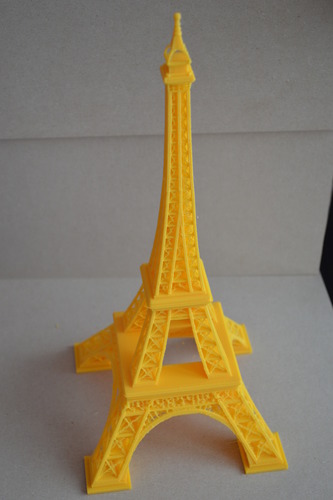
For a fan of miniatures or detailed figurines, a photopolymer printer is a good choice. A small work area is more than offset by the detail that cannot be obtained using other technologies.
For an engineer or a fan of experiments, an FDM machine with a closed chamber and two extruders is well suited. This will allow you not to limit yourself in the choice of plastics and comfortably experiment with any materials.
For a beginner who has not yet decided whether he needs 3D printing, you can opt for inexpensive machines with slick kinematics. Due to their great popularity, you can find a lot of upgrades and reviews on them. In the future, it will be possible to modify the printer for specific tasks or change it to a more suitable model.
For a child, safety is paramount. As the first children's printer, models without a heated bed are suitable, in which the main emphasis is on printing with safe PLA plastic. Or models in which all moving and heating mechanisms are hidden in the case.
A 3D printer is a handy tool, and whether it brings joy or frustration depends on the user.
Top 10 Resin 3D Printers of 2022 (each price range)
Resin 3D printers use SLA, DLP, or LCD technology to cure liquid resin, producing crisp, high-resolution prints at high speed. You'd be surprised how many industries use these machines, from jewelry to dentistry.
That's why we've ranked the best resin printers in every price range, from $150 to $5,000+, so you can find the perfect machine for your hobby projects or business.
Contents
- Best Cheap Resin 3D Printers (Under a Thousand Dollars)
- Anycubic Photon Mono - Great Cheap Resin 3D Printer
- ELEGOO Mars Pro / Mars 2 Pro - Best Cheap Resin 3D Printer 9007 Anycubic Photon Photon 4K
- Phrozen Sonic Mini 4K
- Elegoo Mars 3
- Elegoo Saturn
- Phrozen Sonic Mighty 4K
- Anycubic Mono X - great budget photopolymer 3D printer
- Elegoo Mercury Plus
- Prusa SL1S Speed
- Peopoly Phenom mSLA Printer - large photoresin 3D printer with huge build volume
- Professional photoresin 3D printers (,000+)
- Formlabs Form 3 - Best Resin 3D Printer
- Buyer's Guide - What to Consider When Buying a Resin 3D Printer
- RGB vs.
LCD Screens - Differences, Benefits/Cons
- Post Processing Equipment
- How Resin 3D Printer?
- Resin 3D printing technologies
- SLA
- DLP
- MSLA/LCD
- LFS
- DLS
- How much does a resin 3D printer cost?
- Resin 3D Printer Applications
- Resin 3D Printing vs. Filament (FDM)
- Resin 3D Printing vs Selective Laser Sintering (SLS)
- FAQs
dollars)
Anycubic Photon Mono is a great inexpensive photopolymer 3D printer
- Price: $249
- Assembly volume: 120 x 80 x 165 mm
- Screen resolution: 2560 x 1620 pixels
- Screen size: 6″ 2K monochrome LCD
- XY resolution: 51 microns
- Speed: 50 mm/h
- Cleaning/Cure: Anycubic Washing and Curing Station
The new Anycubic Photon Mono printer adds to Anycubic's reputation as a first-class manufacturer of affordable LCD 3D printers. Where you used to pay thousands for an entry-level SLA printer, now printers like the Mono offer great resolution at lower than ever prices. The Photon Mono is a new upgrade from previous models, including greatly increased resin printing speed and other accuracy improvements.
It is equipped with a high quality 2K LCD screen, which is more than enough for most resin projects. But for higher resolution and better quality for really complex figurines or miniatures, we recommend getting the Anycubic Mono X with its 4K LCD screen, which we'll cover in more detail later in this article.
Perhaps the most notable upgrade is speed - up to a maximum of 50mm/h compared to previous levels of around 20mm/h on older Photon models. Anycubic has also upgraded the Z axis for more stable printing and better surface finish with a new dual linear motion system.
Overall, we rate the Anycubic Photon Mono, as well as its competitors in the Sonic Mini and Elegoo Mars lineups, as the best cheap photopolymer 3D printers. But if you have a few hundred dollars to spare and need better resolution, go for the Mono X.
anycubic photon mono is a cheap photopolymer 3d printer.
ELEGOO Mars Pro / Mars 2 Pro - Best Cheap Resin 3D Printer
- Price: $250 / $280 - Available on Amazon here
- Print volume: 129x 80 x 160 mm
- Screen resolution: 2560 x 1620 pixels
- Screen size: 6.08″ 2K monochrome LCD
- XY resolution: 50 microns
- Speed: 30-50 mm/h
- Cleaning/Cure: Elegoo Mercury Plus/X Wash and Curing Station The
Elegoo Mars is another cheap resin 3D printer, like the Anycubic Photon, which shocked manufacturers with how good it really is. As LCD 3D printing becomes more affordable, accurate and fast, Elegoo is taking advantage of this advantage to create a low cost resin printer that delivers quality and consistency.
An upgraded version of the Mars Pro printer is more accurate with an updated Z-axis linear guide system that smooths layers and makes each individual layer line less obvious, improving surface quality. There are also a number of safety improvements, such as a silicone seal that prevents resin from leaking on the 3D printer cover.
The printer is equipped with a 2K LCD projector and the minimum layer height is only 0.01mm. Elegoo Mars Pro comes with its own 3D resin slicer called CHITUBOX and has a nice max build volume of 115 x 65 x 150mm. It's also fast enough for a budget photopolymer 3D printer.
Elegoo also sells some of the cheapest resins on the market. You can buy them here.
Anycubic Photon Mono 4K
- Price: $289
- Print volume: 165 x 132 x 80 mm
- Screen resolution: 3840 x 2400
- Screen size: 6.23" 4K monochrome LCD
- XY resolution: 35 microns
- Speed: 50 mm/h
- Cleaning/Cure: Anycubic Washing and Curing Station
The Anycubic Photon Mono 4K, equipped with a 6.23″ 4K high-resolution monochrome LCD, is an affordable, performance-oriented 3D printer for the discerning but budget-friendly resin maker.
The construction volume of 165 x 132 x 80 mm is small by FDM standards. Although, as befits resin 3D printers, its volume is slightly larger than most, and it certainly makes up for it with exceptional precision and detail thanks to its 35 micron XY resolution.
In testing, Anycubic Photon Mono 4K proved to be ready to work with any highly detailed models and decorative elements, even quite large ones. Articulated parts, board game figures and even articulated miniatures, the Mono 4K does it all.
Cast on a few copies of a small part and the Anycubic Photon Mono 4K is ready, making it equally suitable for small businesses and hobbyists alike. The print speed is up to 50mm/h and the printer easily prints layers in less than 2 seconds.
In terms of usability, we'd like to see desirable features such as resume printing and Wi-Fi connectivity. Anycubic's Photon Workshop slicing software is a functional, if unremarkable, slicer. Luckily, the Anycubic Photon Mono 4K's compatibility with third-party software such as Lychee and ChiTuBox means you don't have to be tied to Anycubic's slicing software.
If you're after impressive 4K screen fidelity, the Anycubic Photon Mono 4K's delivers hassle-free, high-resolution printing at a great price.
Phrozen Sonic Mini 4K
- Price: $349 - Available at Phrozen official store here / Available on Amazon here
- Print volume: 134 x 75 x 130 mm
- Screen resolution: 3840 x 2160 pixels
- Screen size: 6.1″ 4K monochrome LCD
- XY resolution: 35 microns
- Speed: 80 mm/h
- Cleaning/Cure: Phrozen Cure and Phrozen Ultra-Sonic Cleaner
At an affordable price, the Phrozen Sonic Mini features a powerful 4K 6.1-inch LCD screen that delivers 35µm quality and two-second layering speed.
This is a powerful, inexpensive photoresin 3D printer with everything you need to print, and while if you need more print you can go for the Sonic Mighty 4K (more on that later!), if size isn't a big deal, the Sonic Mini 4K is more than fit.
Phrozen claims the Sonic Mini 4K is ideal for resin mold printers, as well as miniature and desktop model printing.
Elegoo Mars 3
- Price: $349
- Print volume: 143 x 90 x 165 mm
- Screen resolution: 4098 x 2560 pixels
- Screen size: 6.6″ 4K monochrome LCD
- XY resolution: 35 microns
- Speed: 1.5-3 seconds per layer
- Cleaning/Cure: Elegoo Mercury Plus/X Wash and Curing Station
Featuring an Ultra 4K resolution LCD screen and Elegoo's latest mSLA technology, Elegoo Mars now has 30% more accurate XY (35µm) resolution than Mars 2, as well as a 37% larger build volume. For an extra $100, this is a very attractive deal for those looking to get higher-end resin 3D printing.
Other features include an improved light source for more uniform resin curing - even over a larger build area. Built-in 36 high-power LED lamps and a new lens provide higher accuracy, as well as an improved heat sink and cooling fan, which extends the life of the printer and enhances its durability.
Elegoo Saturn
- Price: $499
- Print volume: 192 x 120 x 200 mm
- Screen resolution: 3840 x 2400 pixels
- Screen size: 8.
9″ 4K monochrome LCD
- XY resolution: 50 microns
- Speed: 30-40 mm/h
- Cleaning/Cure: Elegoo Mercury Plus/X Cleaning and Curing Station
Featuring an 8.9" 4K monochrome LCD screen for fast layer curing, the Elegoo Saturn greatly outperforms the standard models by printing 60% faster than the Elegoo Mars Pro, printing a layer every 2-3 seconds.
You get a number of other key improvements for your money, the most notable of which is a larger build area that turns the Elegoo Saturn into a 3D printer for printing large hard resin models, as well as the ability to print multiple small models at the same time in one batch.
Improved accuracy with the Saturn's double linear Z-axis guide makes the Saturn printer more stable than ever, ensuring accurate and uniform printing. And in case you're a fan, the Elegoo Saturn also has an Ethernet port on the back to keep things fast and efficient.
Phrozen Sonic Mighty 4K
- Price: $549
- Print area: 200 x 125 x 220 mm
- Screen resolution: 3840 x 2400 pixels
- Screen size: 9.
3″ 4K monochrome LCD
- XY resolution: 52 microns
- Print speed: 80 mm/h
- Cleaning/Cure: Phrozen Cure and Phrozen Ultra-Sonic Cleaner
If you're looking for a low-cost photoresin 3D printer with a large enough footprint for mass production of models or large photoresin prototypes, the Phrozen Sonic Mighty 4K is even bigger than the Elegoo Saturn.
With a strong and reliable Z-axis that delivers print accuracy up to a maximum print height of 22 cm, it offers good print quality, especially with the 4K resolution LCD screen. It also prints fast, with two-second layer printing.
While Phrozen recommends using proprietary 3D printer resins, the Sonic Mighty 4K is compatible with most third-party resins (check first). So if you have spare resins left over from a previous 3D printer, you should be fine.
Anycubic Mono X is a great budget photopolymer 3D printer
- Price: $599
- Printable area: 192 x 120 x 245 mm
- Screen resolution: 3840 x 2400 pixels
- Screen size: 8.
9″ 4K monochrome LCD
- XY resolution: 50 microns
- Speed: 60 mm/h
- Cleaning/Cure: Anycubic Wash & Cure Statio
Anycubic's original budget Photon 3D resin 3D printer is still one of the most popular 3D printers in the world, and now the Mono X proves that the company can compete with higher-end machines. Mono X can print 3 times faster than standard photopolymer printers at speeds up to 60mm/h, and thanks to the 4K LCD screen, it can create very precise and sharp details.
In addition, the upgraded Mono X Z-axis improves stability and makes the surface smooth, unaffected by external factors such as vibrations. The result is jewelry models and miniatures where the layer lines are barely visible.
Another big benefit is WiFi printing, so you don't have to keep unplugging your SD or USB card when printing multiple designs throughout the day. The large 3.5" touch screen makes it easy to navigate, and with a larger build volume, you can print multiple jewelry models or desktop miniatures at the same time. Overall, this is one of the best budget photopolymer 3D printers out there.
Curing & Cleaning Stations
Since washing and curing are an inevitable part of resin 3D printing, we've rounded up some of the best washing & curing stations to include in your printing system to save you the hassle and mess of subsequent printing. processing.
Anycubic Wash & Cure.
Anycubic Wash & Cure is a versatile station compatible with the vast majority of photopolymer printers. Thanks to Anycubic's recent price cut, Wash & Cure is under $100.
The flush mode has adjustable flush cycles including 2, 4 and 6 minutes. Curing mode uses a broad spectrum UV light of 356 nm and 405 nm mounted on a 360° rotating platform to ensure uniform curing of any and all prints 115 x 65 x 165 mm or smaller.
Anycubic has simplified the entire rinsing and curing process with a “set it and forget it” design—select rinsing or curing on the touch button interface and you're done. Station blocks 99.95% UV radiation and has an auto-pause feature if the cap is accidentally knocked off. The station has an adjustable bracket that can be fixed on the Anycubic platform if you are working with a Photon Mono series printer.
Elegoo Mercury Plus
Another all-in-one station, but this time from Elegeoo, the Elegoo Mercury Plus is an easy-to-use option for hands-free finishing.
The allowed maximum print size is 125 x 85 x 160 mm for washing and 140 x 165 mm for curing. You can either use the included cleaning basket or install the Elegoo build plate with models still attached, making it compatible with most if not all photopolymer 3D printers, not just Elegoo machines.
385nm and 405nm UV lamps and a 360-degree rotatable curing turntable do all the curing work with the ability to enter and control cure times up to 30 minutes on a TFT touch screen. Safety is provided by an anti-UV cap that blocks 99.95% of UV rays and a pause function if the cap comes off during curing.
Anycubic station will cost more, but at around $120 you will complete your 3D printing rig with a quality resin 3D printing station with no mess.
Best desktop resin 3D printers ($1,000 to $3,000)
Prusa SL1S Speed
- Price: $1,999 - available at Prusa store here
- Print volume: 120 x 68 x 150 mm
- Screen resolution: 2560 x 1620 pixels
- Screen size: 5.96″ 2K monochrome LCD
- XY resolution: 47 microns
- Print speed: 50 mm/h
- Cleaning/curing: Original Prusa CW1S
Prusa printers are known for being the best RepRap 3D printers. They are so good that over 150,000 printers have been sold, and company founder Josef Prusa has opened his own printer factories to print parts for more printers! Prusa reception.
Prusa has now moved into the SLA 3D printing sector with the launch of the Prusa SL1 printer based on mSLA technology: using LCD and LED panels to cure photosensitive resin layers. As mentioned earlier, this has the advantage of scalability—multiple parts can be created at the same time without additional time—as well as high accuracy.
In addition to the printer, Prusa sells a wash and cure machine that helps wash and cure prints, maximizing the surface finish. The Prusa SL1 has a heavy aluminum chassis designed to anchor the printer to the ground and make it more stable for more accurate printing. It seems to me that the phrase “of course, this is good, this is Prusa” is appropriate here.
Peopoly Phenom mSLA Printer - large photopolymer 3D printer with huge build volume
- Price: $1,999 - Available from Matterhackers here
- Print volume: 276 x 155 x 400 mm
- Screen resolution: 3840 x 2160 pixels
- Screen size: 12.5″ 4K LCD
- XY resolution: 72 microns
- Print speed: 75 mm/h
- Cleaning/Cure: Peopoly Curing Box
We already included the Peopoly Moai 130 in our list, a fantastic DIY SLA 3D printer kit. Now Peopoly is back with the Phenom, a large photopolymer 3D printer that combines LCD and LED technology.
Peopoly Moai has a huge print volume for a photopolymer 3D printer - 276 x 155 x 400 mm, as well as 72-micron resolution. This is practically unheard of as photopolymer printers typically have a much lower build volume than FDM 3D printers. Peopoly recommends using their own resins for 3D printing, which they sell for about $70 per litre.
Overall, this is an impressive and accurate large format resin 3D printer.
Professional Resin 3D Printers ($3,000+)
Formlabs Form 3 - Best Resin 3D Printer
- Price: $3,499
- Assembly volume: 145 x 145 x 185 mm
- XY resolution: 25 microns
- Print speed: 70 mm/h
- Clean/Cure: Formlabs Form Wash & Cure
Formlabs has made a name for itself in the 3D printing industry since its initial Kickstarter campaign in 2012. An American 3D printer company was selling a Form 3 SLA 3D printer for 3 49$9 and has since become very popular in the dental and jewelry industries.
Formlabs resins available here.
TheForm 3 comes with a ton of new features. It features the new benefits of LFS technology as well as a new Light Processing Unit (LPU) to improve the surface finish of resin parts as well as better layer registration. The Form 2 was already fantastic, and these additional features take the Form 3 to a whole new level in desktop SLA printers.
In addition, the Formlabs Form 3 has an automated resin supply system and uses smart cartridges that automatically fill the resin reservoir, along with many other advanced features. In addition, it is equipped with a resin tray scanning system after each layer and automatically adjusts according to the type of resin used. In addition, the printer has a fantastic touch screen and can be controlled remotely via a WiFi connection.
This UV resin 3D printer has a very good print volume of 145 x 145 x 185mm and is extremely accurate with 25 micron XY resolution. The Formlabs Form 3 is compatible with a wide range of resins, from ceramics, flexible resins, to cast resins, although Formlabs also sells its own high quality resins.
For those looking for 3rd party resins compatible with Formlabs printers, here's a great place to start.
Formlabs has established itself as a leader in stereolithography with the Form 3 printer. It has received rave reviews and is widely used in dentistry. Formlabs also sells a 3D printer for SLS, the Fuse 1.
Buyer's Guide - What to Consider When Buying a Resin 3D Printer
RGB vs. LCD Screens - Differences, Advantages/Disadvantages
earlier models.
This change is only to the benefit of manufacturers, since monochrome screens have many advantages over RGB. Although they are more expensive, they are more efficient, less energy intensive, and print faster due to shorter polymerization times.
Unless you choose an old used model, you will most likely buy a printer with a default monochrome LCD screen.
LCD Resolution - 2K, 4K, 6K
Like computer monitors and TVs, LCD resolution determines the level of pixels and detail.
Higher resolution translates into better XY resolution and lower layer height, which is a critical factor for the fine detail and precision we expect from resin printers.
You'll find 2K, 4K and even 8K resolution printers for those who want the ultimate level of detail and intricate detail in their prints.
However, the print quality of the 2K LCD is far superior to that of FDM printers, so it is more than adequate for most applications.
Build Volume
Photopolymer printers typically have a smaller build volume than more common FDM machines, so manufacturers and professionals use them to create small, intricate parts with high precision.
If you need extra space to print duplicate parts or large figures and models, look to larger format resin printers such as the Peopoly Phenom and Phrozen Sonic Mighty 4K.
Post-Processing Equipment
Resin 3D printing is a messy business and post-processing is a major part of the printing process. Post-processing consists of two parts - washing and polymerization.
Flushing involves removing uncured resin residue from the print with isopropanol.
Polymerization uses additional UV light to complete the polymerization process to improve the finish and overall rigidity of the part.
Do-it-yourself, hands-on processing is one option, but manufacturers now offer versatile wash and curing stations that eliminate many of the hassles associated with this process.
How does a photopolymer 3D printer work?
Each type of resin 3D printing technology cures UV resin, they just differ in how they do it.
Stereolithography (SLA) was the first additive manufacturing technology invented, with patents granted to 3D Systems back in 1986. SLA printing works by using an ultraviolet laser and mirrors (called galvanometers) to selectively cure the resin.
DLP 3D printing was pioneered by EnvisionTEC and uses a projector similar to a movie theater projector. LCD printing uses an LCD screen with individual LEDs that turn on and off to selectively cure specific areas of the resin to form the final object. LCDs are sometimes referred to as MSLA (masked SLA), as in Prusa and Peopoly resin printers.
Resin 3D Printing Technologies
SLA
Using mirrors, also called galvanometers, an SLA or stereolithography printer directs a UV laser beam onto photopolymer liquid resin in cross sections to cure or print layer by layer.
DLP
DLP, or digital light processing, is very similar to the SLA machine and involves emitting digital light (LED in most printers) through an array of micromirrors onto a light-sensitive liquid resin for flash, or in other words, curing the entire image layer at a time in so-called voxels - rectangles that look like pixels.
MSLA/LCD
Like DLP machines, MSLA or stereolithography (often also referred to as LCD) printers use a digital light source (usually hundreds of LEDs) to flash an entire layer at once. Unlike DLP, the MSLA printer uses the LCD as a "mask", directing and illuminating a photosensitive liquid resin rather than mirrors. The mask allows the printer to expose only those areas that need to be cured to the light source.
LFS
LFS or Low Force Stereolithography is Formlabs patented pot polymerization technology. LFS overhauls the standard SLA process using a custom-designed Closed Light Processing Unit (LPU) that passes a UV laser beam through a spatial filter and an array of mirrors to polymerize the photosensitive liquid resin cross-section layer by layer.
DLS
Another patented technology from Carbon 3D, DLS, or Digital Light Synthesis, uses an oxygen permeable window to cure a photosensitive liquid resin in what is known as Continuous Liquid Interface Production (CLIP). Light from a special LED engine illuminates ultraviolet rays to match the shape and details of the part's cross-section onto an ultra-thin resin layer supported by an oxygen window known as the "dead zone". The resin in the "dead zone" is then cured to create precise, detail-rich layers.
How much does a photopolymer 3D printer cost?
Good cheap photopolymer 3D printers start around $200. Even ten years ago, resin printers cost thousands of dollars, but with great advancement - mainly in the field of LCD printing - the prices have come down!
However, these budget photoresin 3D printers can't compete with more professional high resolution printers like the Form 3 ($3,499) or the Peopoly Phenom (1 9$99). They can still produce accurate models, for example for miniatures and other fun projects, but as a photopolymer 3D printer for business, they may not be effective.
Resin 3D Printer Applications
Budget Resin 3D printers are commonly used by hobbyists to produce precise figurines and miniatures in detail that FDM printers simply cannot match. They are commonly used for 28mm miniatures, D&D figurines and other similar desktop model projects.
However, these inexpensive options can sometimes be used to create wax molds for casting jewelry. However, for higher quality precious metal casting, it is recommended to use a more professional resin 3D printer capable of better resolution and accuracy.
photopolymer printers are widely used in dentistry, audiology, jewelry and medical industries. For example, in dentistry, photopolymer 3D printers can print orthodontic models and implants, and in audiology, almost 100% of custom-made hearing aids are now 3D printed.
3D resin versus filament (FDM)
Hobbyists usually turn to resin 3D printing when they want higher precision, smoother surfaces and sharper details on small prints such as figurines or miniatures. While FDM is simpler, it cannot achieve these levels of precision and smoothness.
However, the trade-off between FDM and resin is that in terms of filament to resin ratio, filaments are cheaper, easier to use and reuse, come in more materials, colors and types, and tend to be stiffer.
Resins tend to be more expensive (although LCD resins are much cheaper now) and harder to use. They require thorough rinsing and post-processing, and extra care must be taken when printing and during post-processing with a resin 3D printer, including wearing protective gear, as the materials can be corrosive.
Thus, resin and thread are used for different purposes, and are not in direct competition for the same use. For the unrivaled precision of cheap 3D printers, as well as the rapid production of dental, jewelry and medical models, resin 3D printers are the way to go. But for more complex - perhaps with multiple colors - basic prototypes, deposition modeling is best suited.
3D printing with resin against selective laser sintering (SLS)
The trade-off between SLA and selective laser sintering is similar: SLS-printed parts are more rigid, with excellent mechanical properties (and make excellent functional prototypes), although parts printed SLA are characterized by a smoother surface and faster printing.
SLS is also great if you're not a fan of additional support structures and don't like post-processing, because the parts printed in the resin powder chamber don't move or deform during printing. SLS offers better material properties than SLA - for example, it is not as susceptible to UV or sun damage. But they are less affordable—even the cheapest printers start at $5,000.
FAQ
Is resin more durable than PLA?
In general, conventional resin produces brittle, brittle parts that are less resistant to stress and weather than traditional 3D printing materials such as PLA. Therefore, we cannot recommend the resin for making load-bearing, functional, impact-resistant or exterior parts where PLA and ABS work much better, so manufacturers prefer the resin for fragile decorative parts filled with precise detail and a smooth finish.
Increasingly, however, 3D printing media manufacturers are offering "tough" resins such as Formlabs Tough 2000 Resin, which offer superior tear strength and even outperform ABS in some cases. Real world applications in orthopedics (such as splints and braces) and dentistry (aligners and crowns) demonstrate how people are increasingly turning to tough resins to make strong, wear-resistant parts.
Is 3D printer resin expensive?
When viewed in the context of 3D printing and compared to other popular materials and filament types, resin is not particularly expensive. A 1 liter bottle of standard resin costs between $20 and $50 depending on the brand, which is more or less the price of ABS and PLA raw materials.
The number and size of prints you can make from a standard 1 liter bottle can vary, with costs skyrocketing for the most prolific producers.
Is the resin print dirty?
While the resin printing process itself isn't messy, post-processing of the finished print invariably turns into an annoying, messy mess, not to mention a potentially dangerous mess of dripping resin and harsh isopropanol. This is not for the faint of heart and not for those who are afraid to get involved in this matter.
Luckily, curing and cleaning stations help keep resin processing messy, so you don't get your hands dirty by smearing prints in a vat of isopropanol.