Beginner resin 3d printer
7 Best Resin 3D Printers for Beginners in 2022 – High Quality – 3D Printerly
3D printing is steadily growing as time goes on as a way to create high quality models, whether they are items related to one of your hobbies or for some cool miniatures, figurines and plenty more.
Resin 3D printers are getting a lot easier to use for beginners and novices, so I decided to put together a simple article that gives you some great options that you can get for yourself or as a gift for someone else.
These resin (SLA) printers are different from filament (FDM) 3D printers as they use a photopolymer liquid resin as the main building material rather than spools of plastic such as PLA or ABS.
You have multiple types of resin that have different properties like water washable resin, flexible resin and tough resin which can reach layer heights of just 0.01-0.05mm.
The quality difference between resin and filament is very noticeable, as filament usually has layer heights of 0. 1-0.2mm.
So now that we have the basics out of way, let’s get into the 7 of the best resin 3D printers for beginners.
Anycubic is a very popular resin 3D printer manufacturer that several people love, so the release of the Anycubic Photon Mono was a great experience. I think it was Anycubic’s first Mono resin printer, allowing for an LCD screen that lasts around 2,000 hours of printing rather than 600 hours.
The Photon Mono is packed with features such as a fast printing speed and a great light source.
Features of the Anycubic Photon Mono
- 6” 2K Monochrome LCD
- Large Build Volume
- New Matrix Parallel 405nm Light Source
- Fast Printing Speed
- Easy to Replace FEP
- Own Slicer Software – Anycubic Photon Workshop
- High Quality Z-Axis Rail
- Reliable Power Supply
- Top Cover Detection Safety
Specifications of the Anycubic Photon Mono
- Display Screen: 6.0-Inch Screen
- Technology: LCD-Based SLA (Stereolithography)
- Light Source: 405nm LED Array
- Operating System: Windows, Mac OS X
- Minimum Layer Height: 0.
 01mm
01mm - Build Volume: 130 x 80 x 165mm
- Max Printing Speed: 50mm/h
- Compatible Materials: 405nm UV Resin
- XY Resolution: 0.051mm 2560 x 1680 Pixels (2K)
- Bed Leveling: Assisted
- Power: 45W
- Assembly: Fully Assembled
- Connectivity: USB
- Printer Frame Dimensions: 227 x 222 x 383mm
- Third-Party Materials: Yes
- Slicer Software: Anycubic Photon Workshop
- Weight: 4.5 KG (9.9 Pounds)
User Experience of the Anycubic Photon Mono
The Anycubic Photon Mono is a great entry for beginners to start resin printing for many reasons. The first is its affordable price, being around $250 which is competitive for the features it has.
Another reason is how fast you can cure each layer, with Anycubic stating that you can cure layers in just 1.5 seconds.
Users have rated the Anycubic Photon Mono very highly on Amazon, currently having a rating of 4.5/5.0 with over 600 reviews at time of writing.
The packaging and delivery comes securely packaged to a high standard to ensure safe delivery. The instructions and assembly process are really simple to follow, so you don’t have to take hours to put things together.
It comes with all the things you need to get started such as gloves, filters, a mask, and so on, but you’ll need to purchase your own resin.
Once you get things up and running, the print quality of the models are excellent, as many users have mentioned in their reviews of the Anycubic Photon Mono.
Many beginners chose this 3D printer as their first and didn’t regret it one bit. One review even says it’s a “perfect first time user’s machine” and he had it printing within 30 minutes of it arriving to his house.
Pros of the Anycubic Photon Mono
- Comes with an efficient and convenient acrylic lid/cover
- With a resolution of 0.05mm, it produces an excellent build quality
- Build volume is a bit larger than its advanced version Anycubic Photon Mono SE.
- Offers a very fast printing speed which is normally 2 to 3 times faster than other traditional resin 3D printers.
- It has a high 2K, XY resolution of 2560 x 1680 pixels
- Has quiet printing, so it doesn’t disturb work or sleep
- Once you get to know the printer, it is quite easy to operate and manage
- An efficient and extremely easy bed leveling system
- Focusing on its print quality, printing speed, and build volume, its price is quite reasonable as compared to other 3D printers.
Cons of the Anycubic Photon Mono
- It only supports a single file type which can be inconvenient sometimes.
- Anycubic Photon Workshop is not the best software, but you have the options to use Lychee Slicer which can save in the required extension for the Photon Mono.
- It’s hard to tell what’s going on until the base comes above the resin
- The odors aren’t ideal, but this is normal for many resin 3D printers. Get some low-odor resin to combat this downside.
- There is a lack of Wi-Fi connectivity and air filters.
- The display screen is sensitive and prone to scratches.
- Easy replace FEP means you have to buy the whole FEP film set rather than individual sheets which costs more, but you can get the Sovol Metal Frame Vat from Amazon to replace FEP film.
Get yourself the Anycubic Photon Mono from Amazon as your first resin 3D printer today.
Elegoo is another reputable resin 3D printer manufacturer with plenty of experience making popular resin printers. The Mars 2 Pro also has a Mono screen like the Photon Mono. It is a mostly aluminum printer, with an aluminum body and aluminum sanded build plate.
There is also a built-in carbon filtration to help reduce odors.
Features of the Elegoo Mars 2 Pro
- 6.08″ 2K Monochrome LCD
- CNC-Machined Aluminum Body
- Sanded Aluminum Build Plate
- Light & Compact Resin Vat
- Built-In Active Carbon
- COB UV LED Light Source
- ChiTuBox Slicer
- Multi-Language Interface
Specifications of the Elegoo Mars 2 Pro
- System: EL3D-3.
 0.2
0.2 - Slicer Software: ChiTuBox
- Technology: UV Photo Curing
- Layer Thickness: 0.01-0.2mm
- Printing Speed: 30-50mm/h
- Z Axis Accuracy: 0.00125mm
- XY Resolution: 0.05mm (1620 x 2560)
- Build Volume: 129 x 80 x 160mm
- Light Source: UV Integrated Light (wavelength 405nm)
- Connectivity: USB
- Weight: 13.67lbs (6.2kg)
- Operation: 3.5-Inch Touch Screen
- Power Requirements: 100-240V 50/60Hz
- Printer Dimensions: 200 x 200 x 410mm
User Experience of the Elegoo Mars 2 Pro
Resin printing on the Elegoo Mars 2 Pro is a great experience that many users have enjoyed.
The quality is described by current users as stunning. One user described the experience of creating the first resin 3D print as “incredible”. This is a great competitively-priced resin 3D printer that is practically ready out of the box, requiring little assembly.
When it comes to resin 3D printing though, it’s important to learn the ropes on how to get things working to a good standard. One of the key things is learning how to support resin models, which does take some time and practice.
Once you learn this skill, you can take a variety of cool STL files from a website like Thingiverse and start processing some models to 3D print.
Some models do come pre-supported which is pretty useful, but learning how to do it yourself is ideal.
Admittedly, resin can be troublesome to deal with, especially if you don’t have a low-odor resin that doesn’t smell as bad as others. You should operate the Elegoo Mars 2 Pro in a ventilated room at minimum, and ensure you have a proper workspace.
After some research, one user who is a full-time woodwind maker, and famous for Irish Flutes decided to purchase the Elegoo Mars 2 Pro. Filament printing couldn’t achieve the quality he wanted, but resin printing definitely could.
The 0.05mm resolution was more than enough to fulfill he needs, but he did run into a small issue with the Z-axis height. He needed a larger height so he actually ended up changing the leadscrew to allow for 350mm Z-axis capabilities, which worked out well.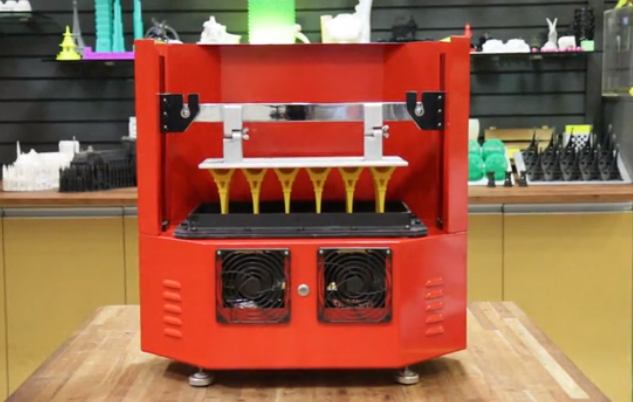
He praised the final output and quality of this 3D printer, so I’m sure you’ll love it too.
Another user who was experienced at 3D printing D&D miniatures for tabletop gaming with filament decided to give resin 3D printing a try. After getting this machine, he considered selling his Ender 3 because the quality was so much better.
He said he had nothing but a positive experience using the Elegoo Mars 2 Pro. Setting it up was easy along with leveling the build plate and printing the first test print.
Pros of the Elegoo Mars 2 Pro
- Outstanding printing quality
- Fast layer curing time
- Inclusion of an angled plate holder
- Rapid printing process
- Large build volume
- Less to no maintenance
- High accuracy and precision
- Robust build and sturdy mechanism
- Supports multiple languages
- Long lifespan and high reliability
- Stable performance during long-term printing
Cons of the Elegoo Mars 2 Pro
- LCD screen lacks a protective glass
- Loud, noisy cooling fans
- Z-axis does not have a limiter switch
- A slight decrease in pixel-density
- No top-down removable vat
The Anycubic Photon Mono X was a significant entry into larger resin printers for Anycubic. There were other larger resin printers, but at quite premium prices. This machine had a large influence on other resin printer today that come at competitive prices.
It has a large build volume for a resin printer at 192 x 120 x 245mm, plenty of room for a high detailed statue or bust, as well as for a gang of miniatures for tabletop gaming. Your creativity is your limit.
Features of the Anycubic Photon Mono X
- 8.9″ 4K Monochrome LCD
- New Upgraded LED Array
- UV Cooling System
- Dual Linear Z-Axis
- Wi-Fi Functionality – App Remote Control
- Large Build Size
- High Quality Power Supply
- Sanded Aluminum Build Plate
- Fast Printing Speed
- 8x Anti-Aliasing
- 3.5″ HD Full Color Touch Screen
- Sturdy Resin Vat
Specifications of the Anycubic Photon Mono X
- Build Volume: 192 x 120 x 245mm
- Layer Resolution: 0.01-0.15mm
- Operation: 3.5″ Touch Screen
- Software: Anycubic Photon Workshop
- Connectivity: USB, Wi-Fi
- Technology: LCD-Based SLA
- Light Source: 405nm Wavelength
- XY Resolution: 0.
 05mm, 3840 x 2400 (4K)
 - Z Axis Resolution: 0.01mm
- Maximum Printing Speed: 60mm/h
- Rated Power: 120W
- Printer Size: 270 x 290 x 475mm
- Net Weight: 10.75kg
User Experience of the Anycubic Photon Mono X
I’ve got the Anycubic Photon Mono X myself and it was actually my first resin 3D printer. As someone who was a beginner, this was a great choice to get started because it was very easy to assemble and operate afterwards.
The larger build size is a significant feature, especially with a resin printer which tend to be smaller. Assembly probably took 5 minutes, while calibration took 5-10 minutes to get it right. Once you have done both of those things, you can get started pouring the resin in and starting your first print.
In terms of the quality of the models that come off the build plate, the 4K resolution is really seen in the resulting 3D prints, especially for miniatures that have finer details.
It’s quite a heavy machine but once you set it in place, you shouldn’t have to move it very often.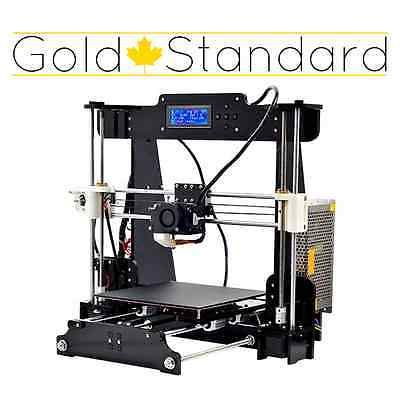 The design looks very professional and the yellow acrylic lid allows you to still view your prints while it is printing.
One of my favorite features is the ability to adjust settings during the print such as exposure times, lift heights and speeds. This gives you more control over your prints if you notice you put in any incorrect settings beforehand or for any other reason.
The resin vat has a small lip in the corner that allows you to pour resin out a little easier. One thing that I’d like to see though is the acrylic lid to have a better airtight connection with the printer, since it doesn’t sit in place so well.
Pros of the Anycubic Photon Mono X
- You can get printing really quickly, all within 5 minutes since it’s mostly pre-assembled
- It’s really easy to operate, with simple touchscreen settings to get through
- The Wi-Fi monitoring app is great for checking on the progress and even changing settings if desired
- Has a very large build volume for a resin 3D printer
- Cures full layers at once, resulting in quicker printing
- Professional looking and has a sleak design
- Simple leveling system which stays sturdy
- Amazing stability and precise movements that lead to almost invisible layer lines in 3D prints
- Ergonomic vat design has a dented edge for easier pouring
- Build plate adhesion works well
- Produces amazing resin 3D prints consistently
- Growing Facebook Community with plenty of helpful tips, advice, and troubleshooting
Cons of the Anycubic Photon Mono X
- Only recognizes .
 pwmx files so you may be limited in your slicer choice
 - The acrylic cover doesn’t sit in place too well and can move easily
- Touchscreen is a little flimsy
- Fairly pricey compared to other resin 3D printers
- Anycubic doesn’t have the best customer service track record
You can get the Anycubic Photon Mono X from Amazon for a competitive price. You may be eligible for a coupon depending on when you buy it, so click the link to see if it’s available.
Phrozen have been creating some great resin 3D printers lately, so with the addition of the Phrozen Sonic Mighty 4K, they have been putting in some great work. This printer has a large 9.3-Inch 4K monochrome LCD, along with very fast printing speeds of up to 80mm per hour.
It has most things you’d want as a beginner for resin printing, especially if you want one with good size to it.
Features of the Phrozen Sonic Mighty 4K
- Large Build Size
- 4K 9.3 Inch Monochrome LCD
- ParaLED Module
- Compatible with 3rd Party Resins
- Easy Assembly
- User Friendly
- Fast Curing at 1-2 Seconds Per Layer
- Speeds Up to 80mm Per Hour
- 52 Micron Precision & Resolution
Specifications of the Phrozen Sonic Mighty 4K
- System: Phrozen OS
- Operation: 2.
 8in Touch Panel
 - Slicer Software: ChiTuBox
- Connectivity: USB
- Technology: Resin 3D Printer – LCD Type
- LCD Specification: 9.3″ 4K Mono LCD
- Light Source: 405nm ParaLED Matrix 2.0
- XY Resolution: 52µm
- Layer Thickness: 0.01-0.30mm
- Printing Speed: 80mm/ hour
- Power Requirement: AC100-240V~50/60Hz
- Printer Size: 280 x 280 x 440mm
- Print Volume: 200 x 125 x 220mm
- Printer Weight: 8kg
- VAT Material: Plastic
User Experience of the Phrozen Sonic Mighty 4K
The Phrozen Sonic Mighty 4K is a well-respected resin 3D printer that has created plenty of high quality models for many users, including beginners. It has a fantastic rating on Amazon of 4.5/5.0 at time of writing.
Plenty of people who are using this machine are beginners, and they mention how it wasn’t too hard to get the hang of.
There is some troubleshooting and learning involved, but once you learn some tips such as warming and shaking up your resin between uses, you can get many successful prints.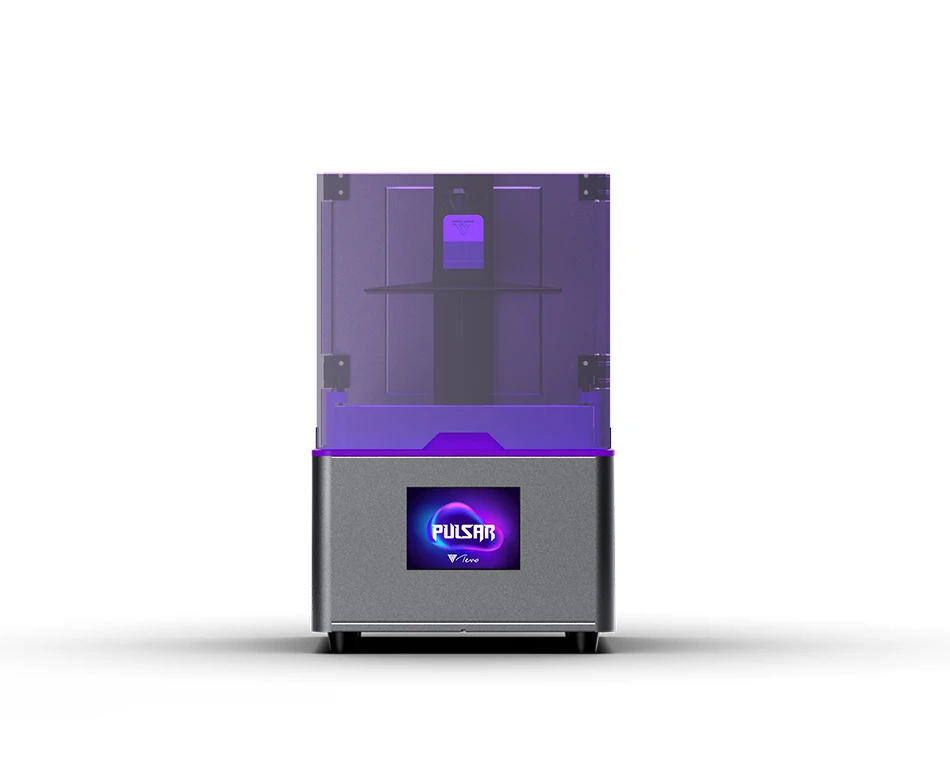 The quality, as well as the large build plate are the main reasons why users love this printer.
One user who is very familiar with Phrozen products said the quality of the Sonic Might 4K is excellent. It works faster than standard resin 3D printers by far, even taking half the time to print as the Sonic Mini in some cases.
This same user mentioned that after just 4 days of printing, they managed to create over 400 vehicles without even one failed print. He says the support from Phrozen is top class, so you can rely on their customer service if needed.
Some users have unfortunately had quality control issues in the past, but it seems as though they have fixed these issue since the recent reviews are looking great. Other than the resin smells, people absolutely love the Phrozen Sonic Mighty 4K.
Pros of the Phrozen Sonic Mighty 4K
- Amazing print quality
- Easy handling and operation
- Printer comes well packaged up
- You can print larger models than regular resin printers that tend to be smaller
- Great company reputation with many trusted products
- Works great out of the box
- Set up is really easy
- Has a large build plate, where you can fill the plate with plenty of models
Cons of the Phrozen Sonic Mighty 4K
- Known to be some quality control issues such as loose screws and LED scratches in some cases based on reviews
- Z-axis design is a little troublesome since you have to screw the thumbscrew in a decent amount to hold it in place.
- The LCD screen doesn’t come with a screen protector so it can be prone to scratches
You can find the Phrozen Sonic Mighty 4K from Amazon for a respectable price.
Creality are probably the most popular 3D printing manufacturer in the world, but with most experience on filament printers. They decided to try their hand at resin printing and it has been going very well so far, with the release of the Creality Halot One.
This is perfect for a beginner, being a budget 3D printer with good features and a decent build volume. It’s a 2K screen 3D printer with enough resolution to provide you with great resin models.
Features of the Creality Halot One
- High Precision Integral Light Source
- Powerful Motherboard Performance
- 6-Inch 2K Monochrome Screen LCD
- Dual Cooling Systems
- Creality Slicing Software
- Supports Wi-Fi Control
- Simple Elegant Design
Specifications of the Creality Halot One
- Printing Size: 127 x 80 x 160mm
- Machine Size: 221 x 221 x 404mm
- Machine Weight: 7.
 1kg
1kg - UV Light Source: Integral Light Source
- LCD Pixels: 1620 x 2560 (2K)
- Printing Speed: 1-4s per layer
- Leveling: Manual
- Printing Material: Photosensitive Resin (405nm)
- XY-Axis Resolution: 0.051mm
- Input Voltage: 100-240V
- Power Output: 24V, 1.3A
- Power Supply: 100W
- Control: 5-Inch Capacitive Touchscreen
- Engine Noise: < 60dB
- Operating System: Windows 7 & Above
User Experience of the Creality Halot One
The Creality Halot One is a lesser known resin printer, but since it’s made by Creality, it is choice that is easy to make for beginners. It currently is rated 4.9/5.0 on Amazon, but with only around 30 reviews.
People’s experiences with the Halot One are mostly positive. They love the ease of setup and assembly, as well as the overall print quality that they can get with models. Several reviews come from beginners who really appreciate how simple the printing process was.
Even though this is a great device for beginners, resin printing still has its learning curve, but it is made simpler with this machine.
Most printers are shipped successfully, but one printer that came with a defective lid to one user promptly had it replaced after contacting customer service. This shows that Creality are happy to work with users if any issues arise.
The Halot One barely requires any assembly, just inserting the USB stick, peeling off the films, leveling the print bed, then you should be able to start printing successfully.
One user said he was printing within just 10 minutes of unboxing this printer. He recommends it to anyone who is looking for their first resin 3D printer.
Pros of the Creality Halot One
- Great print quality
- Very little assembly required
- Easy to get started from unboxing to printing
- Bed leveling is very simple compared to filament printers
- Creality slicer works well and is simple to operate
- File transfer is easy since it is natively wireless
- Has carbon filters to help reduce odors in the environment
- The touchscreen works well and is easy to clean
- Navigation and the user interface is simple
Cons of the Creality Halot One
- Some users don’t really like the slicer that comes with the printer – constant crashes, can’t set up profiles, exposure has to be set on the printer rather than the slicer.
 You can use Lychee Slicer which has a profile for the Halot One.
 - Trouble with setting up the Wi-Fi and getting a proper connection
- Not supported by ChiTuBox at time of writing
- Some people had issues getting the first prints, then got there with some basic troubleshooting
Treat yourself with a great first resin printer with the Creality Halot One from Amazon.
Elegoo outdid themselves with the release of the Elegoo Saturn, a direct competitor to the Anycubic Photon Mono X. They do have very similar features such as the double linear Z-axis rails and 4K monochrome LCD, but there are a few differences such as the look and file transfer feature.
Features of the Elegoo Saturn
- 8.9″ 4K Monochrome LCD
- 54 UV LED Matrix Light Source
- HD Print Resolution
- Double Linear Z-Axis Rails
- Large Build Volume
- Color Touch Screen
- Ethernet Port File Transfer
- Long-Lasting Leveling
- Sanded Aluminum Build Plate
Specifications of the Elegoo Saturn
- Build Volume: 192 x 120 x 200mm
- Operation: 3.
 5-Inch Touch Screen
 - 2Slicer Software: ChiTu DLP Slicer
- Connectivity: USB
- Technology: LCD UV Photo curing
- Light source: UV Integrated LED lights (wavelength 405nm)
- XY Resolution: 0.05mm (3840 x 2400)
- Z Axis Accuracy: 0.00125mm
- Layer Thickness: 0.01 – 0.15mm
- Printing Speed: 30-40mm/h
- Printer Dimensions: 280 x 240 x 446mm
- Power Requirements: 110-240V 50/60Hz 24V4A 96W
- Weight: 22 Lbs (10 Kg)
User Experience of the Elegoo Saturn
The Elegoo Saturn is probably one of the most top-rated resin 3D printers out there, having an excellent rating of 4.8/5.0 with over 400 reviews at time of writing. Elegoo have a really great reputation as a company and even more for the Saturn itself.
Initially, it was so popular that it constantly ran out of stock since so many people were trying to get one for themselves. Now they have kept up with the demand, so you can get your hands on one a lot easier than before.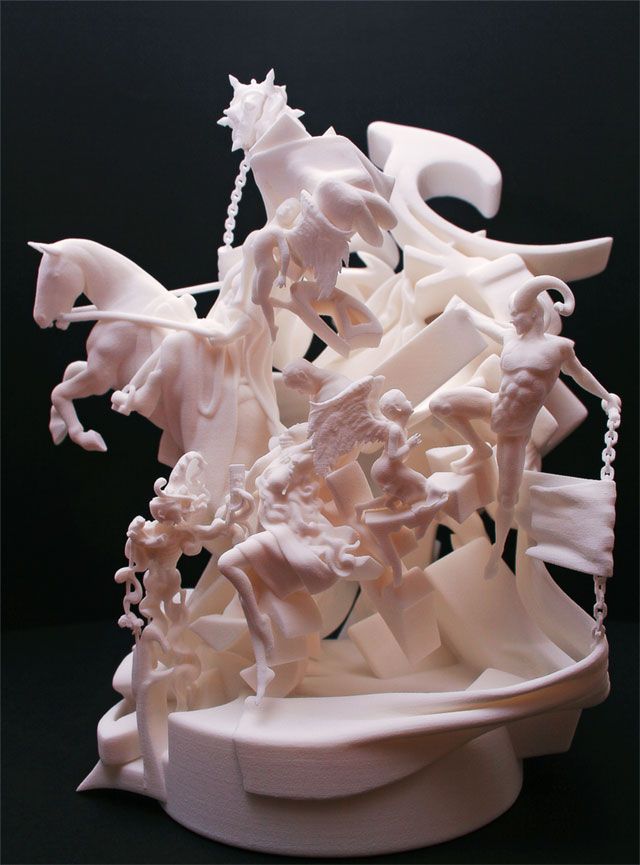
The packaging is the first thing you’ll notice when unboxing this machine, and it is very well-packaged, with layers of protection and precision foam inserts that hold all the items in place properly. It’s an all-metal machine other than the orange acrylic lid, giving you top quality parts.
Setting up the Elegoo Saturn is a very simple process just like the other resin printers. You simply have to install the build plate, loosen the two screws on there, level the plate with the leveling paper and clear instructions, then pour resin in and start printing.
From this point, you can insert the USB and begin your first test print.
One user mentioned that he’s getting great printing results after learning how to properly support models, and is practically creating perfect prints every time.
I’d recommend watching some YouTube videos of other users who have experience so you can learn some of the basics and techniques to get some great models. One user made the mistake of overfilling their resin vat, as well as not using the recommended settings.
Pros of the Elegoo Saturn
- Outstanding print quality
- Accelerated printing speed
- Large build volume and resin vat
- High accuracy and precision
- Rapid layer-curing time and faster overall printing times
- Ideal for large prints
- Overall metal build
- USB, Ethernet connectivity for remote printing
- User-friendly interface
- Fuss-free, seamless printing experience
Cons of the Elegoo Saturn
- Cooling fans can be slightly noisy
- No built-in carbon filter
- Possibility of layer shifts on prints
- Build plate adhesion can be a little difficult
The Elegoo Saturn is a great choice of resin 3D printer for beginners, so get your own from Amazon today.
The Voxelab Proxima 6.0 is a well put together resin 3D printer that beginners are sure to love as an entry into resin printing. It covers all the basic necessities and adds a few ideal features that users find easy to operate.
You can get printing very quick after unboxing this machine.
Features of the Voxelab Proxima 6.0
- 6-Inch 2K Monochrome Screen
- Single Linear Rail
- Stable & Efficient Light Source
- Simple Leveling System
- Full Gray-Scale Anti-Aliasing
- Integrated FEP Film Design
- Supports Multiple Slicers
- Sturdy Aluminum Vat with Max. Level
Specifications of the Voxelab Proxima 6.0
- Build Volume: 125 x 68 x 155mm
- Product Dimensions: 230 x 200 x 410mm
- Operating Screen: 3.5-Inch Touch Screen
- Max. Layer Height: 0.025 – 0.1mm (25 – 100 microns)
- XY Axis Resolution: 2560 x 1620
- Printer Screen: 6.08-Inch 2K Monochrome LCD Screen
- Light Source: 405nm LED
- Power : 60W
- AC Input: 12V, 5A
- File Format: .fdg (exported from .stl files in slicer)
- Connectivity: USB Memory Stick
- Supported Software: ChiTuBox, VoxelPrint, Lychee Slicer
- Net Weight: 6.
 8 KG
8 KG
User Experience of the Voxelab Proxima 6.0
I actually have the Voxelab Proxima 6.0 myself and it was definitely a positive experience. I’d recommend it for beginners because it focuses on simplicity. Many users who got this resin printer were beginners, showing it plenty of praise.
It has a rating of 4.3/5.0 on Amazon at time of writing, with 80% of reviews being 4 stars or above.
The most significant things here is the price, mixed with how many features it has. You can get the Proxima 6.0 for around $170 from Amazon, which still provides amazing quality prints.
Below are three prints from this machine that came out really well.
It has a respectable build volume of 125 x 68 x 155mm, along with a 2K monochrome screen that can create excellent models.
Voxelab isn’t as popular as other brands, but they are linked to Flashforge’s manufacturers so they have experience with creating 3D printers.
A few reviews have commented on how they reached out to customer service for issues of warranty on things like the screen and couldn’t get a replacement. I’m not sure of the details behind it, but they weren’t happy with the customer service they received.
Most reviews are positive but it’s important to note these types of things..
Pros of the Voxelab Proxima 6.0
- It’s packaged up very securely and snug so it comes to you in one piece.
- Decent instructions that provide the simple steps to set the machine up – though some parts aren’t written too well
- Overall setting up and operation of the machine is very easy to do and can be done quickly
- The quality of the prints are top of the line and allows you to print at a 0.025mm layer height
- Frame and sturdiness of the Proxima 6.0 is amazing compared to other printers out there
- The touchscreen is great in terms of user experience
- Good tight fit around the acrylic lid, so fumes don’t spill out so easily
- High quality USB to connect and print with
- Really competitive price point for the quality and features you are getting
- Leveling is very easy to get the hang of and doesn’t need to be done so often
- The plastic and metal scrapers that come with the printer are great quality
- It’s a perfect 3D printer for beginners who have never printed with a resin machine
Cons of the Voxelab Proxima 6.
 0
0- You can’t change the settings and exposure time during the printing process
- It is pretty loud compared to other resin 3D printers – mainly the up and down movements of the build plate.
- The USB stick comes with STL files rather than a pre-sliced model so you have to slice the model yourself to test the printer.
- Some users have mentioned that the VoxelPrint software could use some improvement
- A few users couldn’t follow the instructions too well so I’d recommend using a video tutorial
- The package came with one set of gloves that were a different size unfortunately!
You can find the Voxelab Proxima 6.0 on Amazon for your first resin 3D printer.
Creality Halot-One Plus 3D Printer Review: 4K Resolution, Sub-$400 Price
Tom's Hardware Verdict
Offering high resolution and an above-average build volume, the Creality Halot-One Plus is an impressive machine with a set of hardware features not typically seen at this price.
Pros
- +
4K+ resolution provides sharp detail and consistent surfaces
- +
Large 5-inch LCD interface is bright, fast, and responsive
- +
Halot Box slicer software is simple and easy to use
- +
Built-in Wi-Fi connectivity and remote print monitoring
- +
Integrated air filtration unit
Cons
- -
Z endstop placement at the top of the Z axis is a strange choice
- -
Creality Cloud platform appears to host many unauthorized models
- -
Four bolt build platform leveling can be messy
Why you can trust Tom's Hardware Our expert reviewers spend hours testing and comparing products and services so you can choose the best for you. Find out more about how we test.
Today's best Creality Halot-One Plus deals
$399.99
View
No price information
Check Amazon
The Creality Halot-One Plus is the flagship printer in the Halot line of MSLA printers, offering 4K resolution, a 7.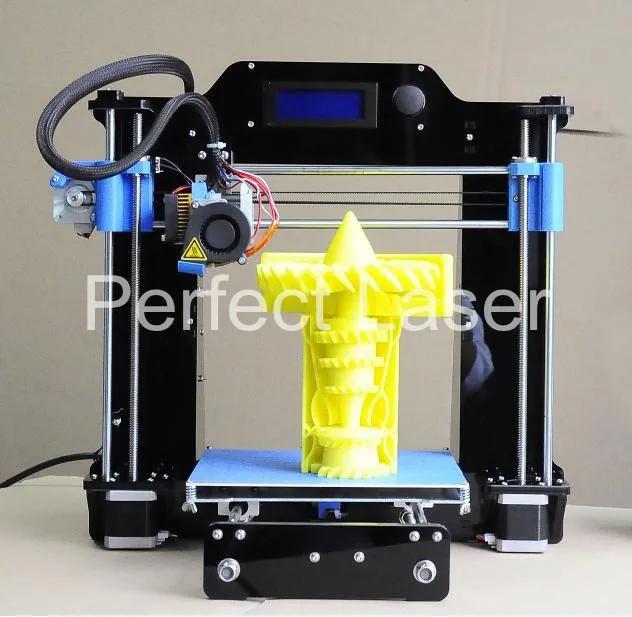 9-inch mono LCD with a 3 second exposure time, and other high-end features in a package that retails for just under $400. The Halot-One Plus appears to have been designed for the prosumer market, with features like Wi-Fi connectivity, air filtration, and other features that don’t typically appear in printers in this price range.
During testing, this printer proved to be a logical next-step in resin 3D printing, showing how these features can be successfully implemented at a lower price point while still maintaining functionality. We had issues with the Creality Cloud platform and the lack of attribution on published models, but the printer hardware itself places this among the best resin 3D printers.
Creality Halot-One Plus Specifications
Swipe to scroll horizontally
| Machine Footprint | 9.29" x 9.57" x 16.46" (23.6cm x 24.3cm x 41.8cm) |
| Build Volume | 6. |
| Resin | MSLA Photopolymer Resin |
| UV Light | 4,500 uw/m2 Integral Light Source |
| Masking LCD Resolution | 4320 x 2560 |
| Masking LCD Size | 7.9-inch |
| XY Axis Resolution | .04mm |
| Interface | 5-inch LCD Touchscreen |
Included in the Box of Creality Halot-One Plus
(Image credit: Tom's Hardware)The Creality Halot-One Plus ships with everything you need to get started printing, including a set of Allen keys, plastic and metal scrapers to remove parts from the printer, a printed user guide, and a power cable, and some paper funnels for pouring resin back into the bottle from the vat. The printer itself is well-packed and protected, with a protective plastic covering over the UV-resistant lid.
- Creality Halot-One Plus (Blue) at Walmart for $399.99
Unlike with many other resin printers, including the Elegoo Mars 3, the Halot-One Plus does not include any consumables such as gloves, masks, or other cleaning supplies. This isn’t a large omission, but it means first time users will want to make sure they have all the proper supplies before they start printing.
One of the first features I noticed on the Creality Halot-One Plus was the large LCD screen. The 5-inch screen is bright, responsive, and feels like the type of capacitive screen you’d expect to see on a tablet or mobile phone. This screen is easy to read and use, and immediately sets the Halot-One Plus apart from similarly priced machines that use smaller screens. The Halot-One Plus also includes an onboard ARM Cortex-M4 quad-core 64 bit processor, which gives it more processing power than other similarly priced machines.
Image 1 of 2
(Image credit: Tom's Hardware)(Image credit: Tom's Hardware)The Halot-One Plus has a dark blue UV-resistant lid, something that stands out from the typical red, orange, or yellow used on similar printers. This lid is close to opaque, and I can’t easily see through it during printing. The QR code printed on the top of the lid leads to the Creality Cloud site where users can purchase models, 3D printers, consumables, as well as a social platform for sharing prints.
The Halot-One Plus features an integrated 100W power supply, so there’s no need for an external power brick. The build size, printer size, and other information is printed on a sticker on the back of the printer, as well as a QR code that appears to contain information specific to the printer. The base of the Halot-One Plus is heavy and dense, and feels very sturdy despite the plastic shell.
(Image credit: Tom's Hardware)The integrated air filtration system on the Halot-One Plus is a welcome addition and worked very well throughout our testing. The resin used in the MSLA printing process can have an odor during printing, and the integrated air filtration system significantly reduces the amount of odor from the Halot-One Plus.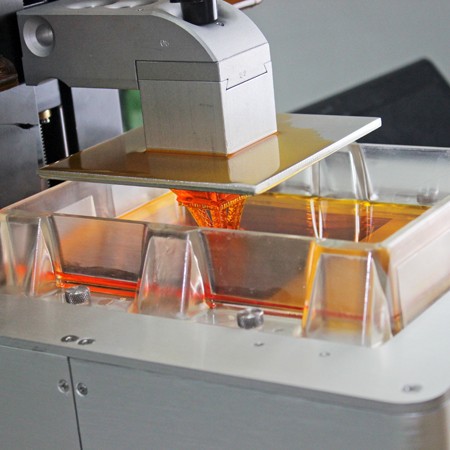 The air intake is located directly behind the resin vat, and runs automatically throughout the duration of printing.
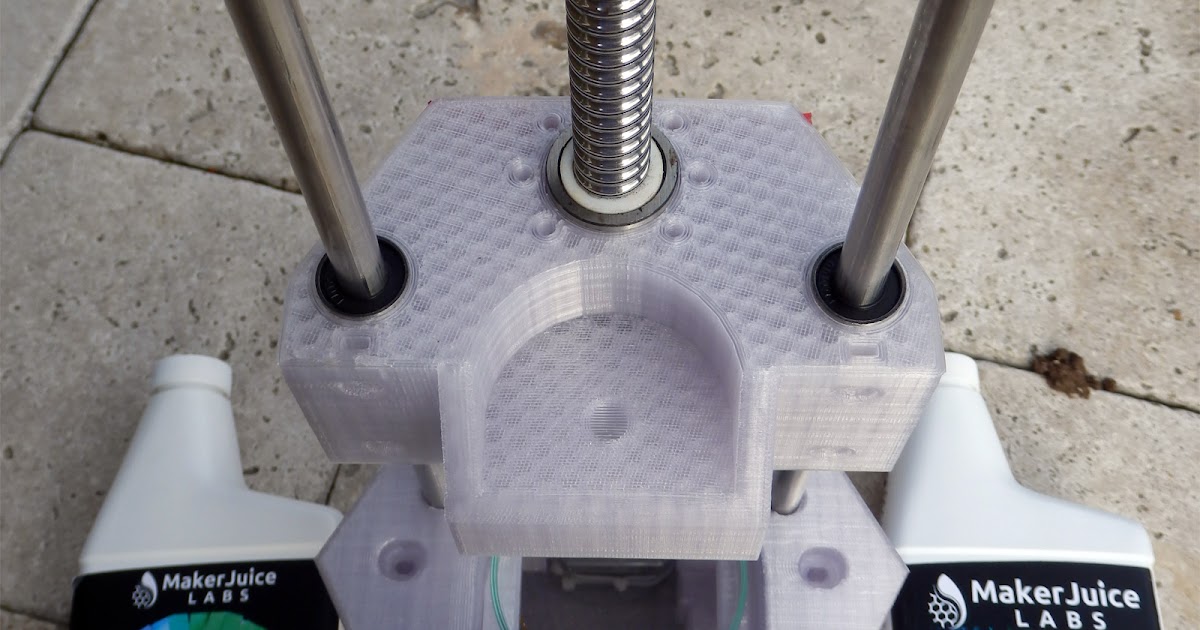
The Z axis on the Halot-One Plus uses a threaded rod with a captive nut for travel, and the dual linear rails allow for smooth and consistent movement. Most small format MSLA resin 3D printers use a single linear rail for travel, with dual rail systems being more common on larger machines like the Elegoo Saturn or the Anycubic Mono X. The build platform is suspended from a lightweight metal arm and doesn’t deflect, even when printing large and heavy parts.
(Image credit: Tom's Hardware)The Halot-One Plus has the Z endstop located at the top of the Z axis, an unusual design choice for an MSLA resin 3D printer. Typically, the leveling process involves dropping the platform to Z0 (the bottom of the Z axis) and ensuring the platform is planar with the LCD screen. The Halot-One Plus requires the entire platform be brought to the top of the printer to define Z0, and then lowered to the LCD screen and leveled.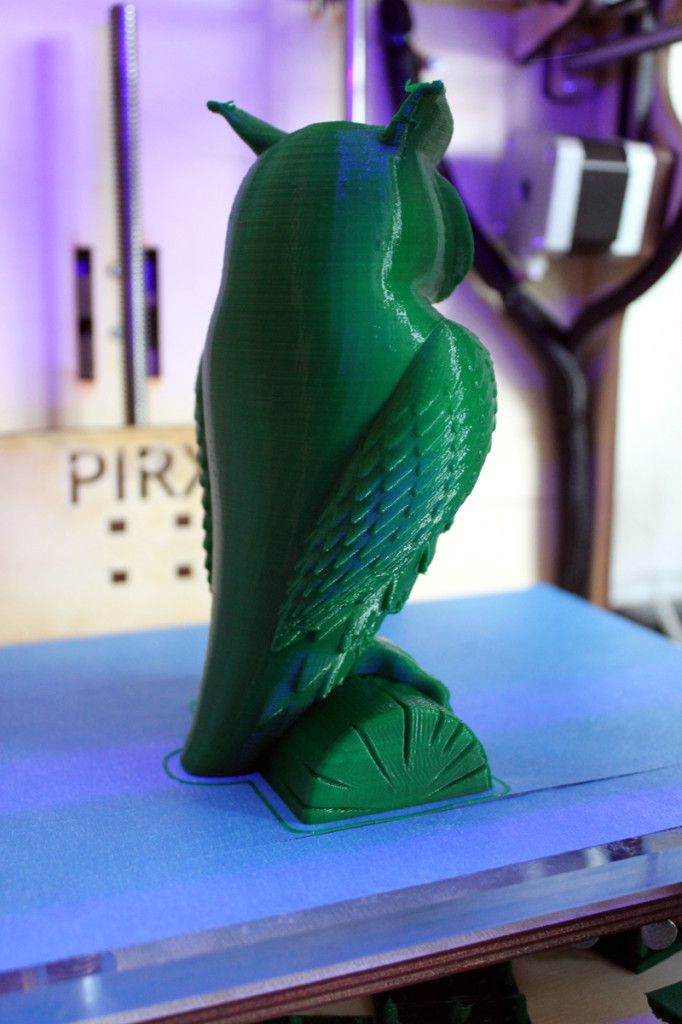 It’s hard to say if this is a less accurate process, but it’s definitely a more time-consuming one.
The resin vat on the Halot-One Plus is smooth and easy to clean, with printed labels that indicate 250mL, 450mL, and 650mL fill levels. The vat also has a spout molded into the front right and back left corners, which makes pouring resin out of the vat and back into the bottle a simple and mess-free process. One of the screws that secures the vat to the frame had some flashing on the molded thumbscrew, and this meant the screw couldn’t actually fit into the mating hole without being trimmed. Not a major issue, but definitely a QC issue that should have been caught before the printer was packed and left the factory.
Image 1 of 3
(Image credit: Tom's Hardware)(Image credit: Tom's Hardware)(Image credit: Tom's Hardware)The light source of the Halot-One Plus is what Creality calls the “Integral Light Source”, which is a high-powered 4,500 uw/cm2 LED array that is projected through the masking LCD via an angled mirror in the base of the printer.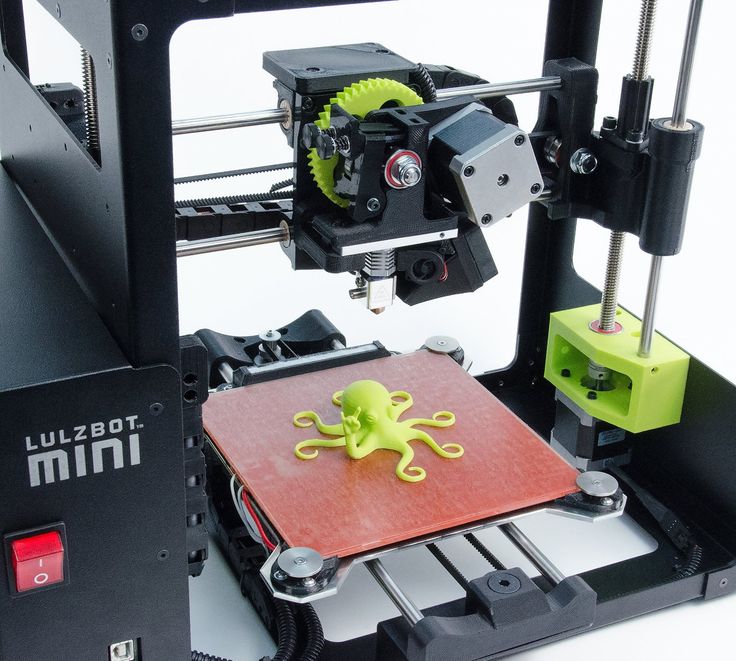 This light source generates a substantial amount of heat during printing, which causes the onboard fan to run continuously during printing.
The 7.9-inch masking LCD has a resolution of 4320 x 2560, a resolution that is slightly above the typical 4K resolution (4098 x 2560) used on similar resin 3D printers like the Elegoo Mars 3. This 4K resolution translates to an XY pixel size of .04mm (40 microns), which is high enough to capture fine details and texture when printing.
Image: Creality
(Image credit: Creality)Build Platform on Creality Halot-One Plus
The Creality Halot-One Plus uses a four bolt leveling system to ensure a planar relationship between the build platform and the masking LCD. Because the Z endstop is located at the very top of the printer, this process involves loosening the build platform connecting bolts, sending the built platform to the top of the printer to trigger the endstop, then reversing direction and sending the platform to the bottom of the Z axis.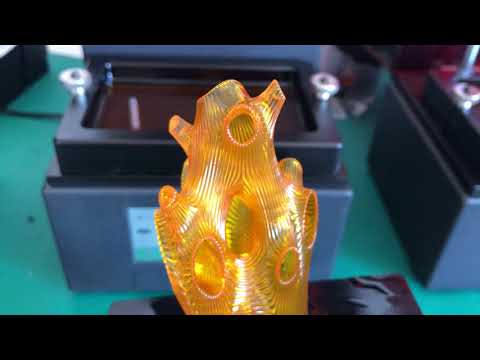 Once the platform is sitting flush on the masking LCD, the four bolts are tightened and the platform is leveled.
The Halot-One Plus has four upward-facing bolts that secure the build platform to the gantry arm, and these bolts tend to fill with resin during printing. This is a poor design choice, as resin tends to pool inside the bolt cap heads, in the knurling, and around the bolts, which is very difficult to clean and remove. Elegoo has solved this on their Mars 2 Pro and Mars 3 printers by using a simple captive ball joint that can be leveled with only two screws. Those platforms are easy to level and clean without additional effort.
(Image credit: Tom's Hardware)Printing Safety with Halot-One Plus
(Image credit: Tom's Hardware)The Creality Halot-One Plus uses 405nm UV resin, a material that you need to handle safely when in an uncured state to avoid injury. The resin can be harmful when making contact with skin, so make sure to wear gloves when pouring, cleaning up, or handling uncured resin. I also make sure I’m wearing gloves when removing the build platform after a print, as the resin tends to pool on top of the platform and can drip off while the platform is being removed.
Make sure you use the Halot-One Plus in a well-ventilated room to minimize the danger from inhaling fumes. Any spills or uncured resin stuck to a surface should be cleaned using 99% isopropyl alcohol and the container for the resin should be kept closed and secured when not actively pouring material.
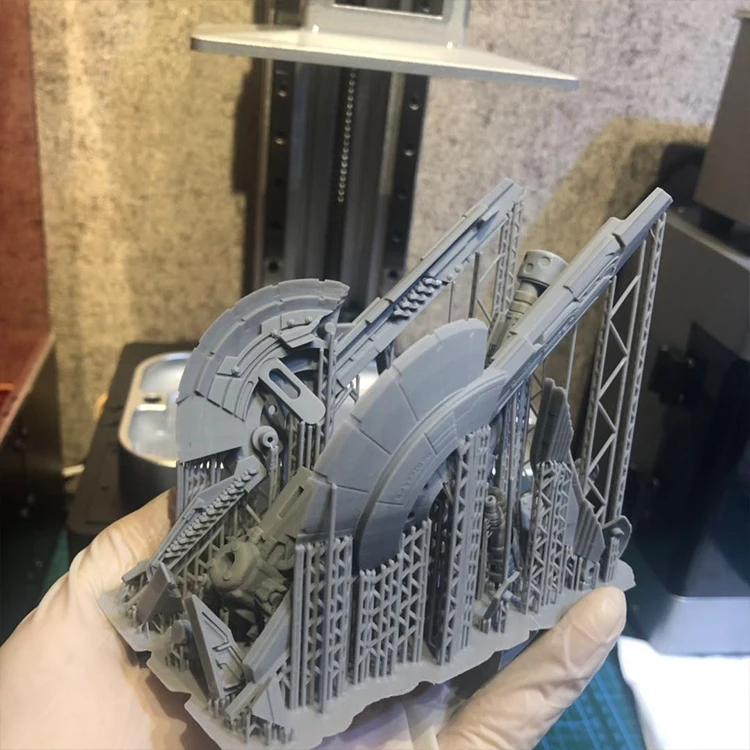
Printing the Included Test Print on the Creality Halot-One Plus
The test print included with the Creality Halot-One Plus is one of the best demonstration prints I have ever seen. The 8 hour print is titled “Kholek Suneater”, and it fills nearly the entire build area of the Halot-One Plus from corner to corner. This model comes pre-sliced using the same settings as in Halot Box (.05mm layer height, 3 second layer exposure time, 40 second base layer exposure time, etc.), and is ready to print directly from the USB thumb drive.
Creality has apparently identified one of the common applications of resin 3D printing (tabletop gaming and miniatures) and has embraced this by including a detailed miniature model with the Halot-One Plus. My previous experience with Creality’s test prints was poor; the Creality LD-002R (a budget MSLA resin 3D printer) included a test model that took over 19 hours to print and was not particularly impressive.
Image 1 of 3
(Image credit: Tom's Hardware)(Image credit: Tom's Hardware)(Image credit: Tom's Hardware)This model has a very dense support structure, which is required to support all the various fine features including a long hammer and tail. The support structure was removed easily and left minimal marks on the printed model. Unfortunately, I broke the hammer during washing, but was able to glue it back on without much effort. The spikes on the armor, the thin tail, and the other details present on this model are sharp and in focus, and I believe that anyone who purchased this printer to make miniatures would be immediately delighted to see such a high-quality model come out of the printer without any additional preparation.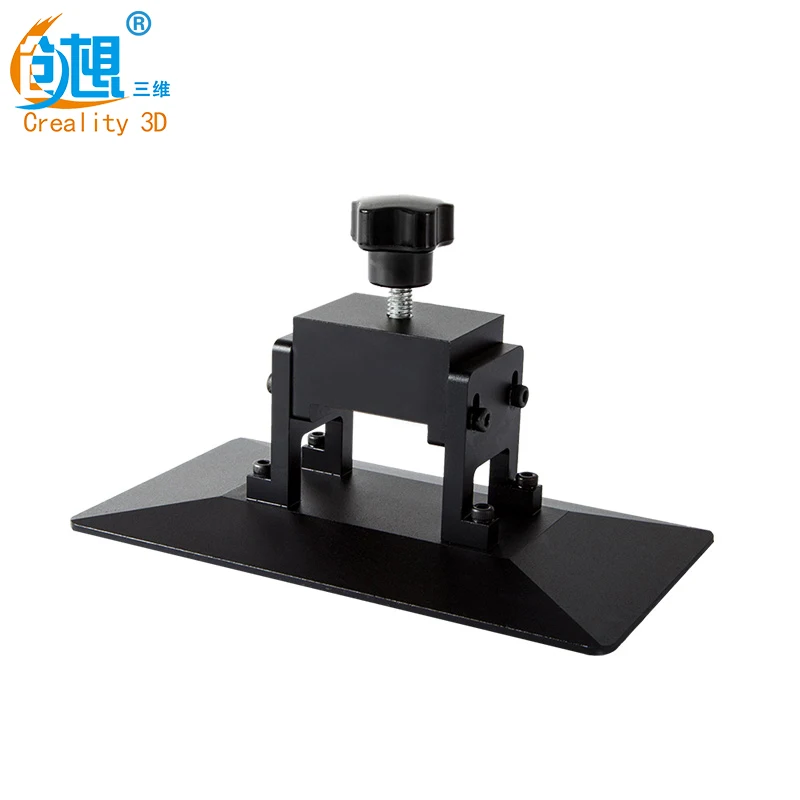
Preparing Files for Printing with Creality Halot Box
(Image credit: Creality)While resin 3D printers tend to be much more mechanically simple than filament FDM 3D printers, the software typically requires more setup work and the part preparation is a very important part of the process. Creality includes a copy of Halot Box with the Creality Halot-One Plus, which is the slicer design for the Halot series of printers.
Halot Box offers two separate menus for slicing parts: Basic Options and Advanced Options. As expected, Basic Options contains parameters like layer thickness, exposure time, build platform raise height, and more which users will likely adjust the most often. These options are pre-populated with parameters that are more focused on success as opposed to speed, with a 3-second layer exposure and a 40 second initial layers exposure. Advanced Options contains more complicated parameters, such as shrinkage compensation for X, Y, and Z axes, anti-aliasing, and other parameters.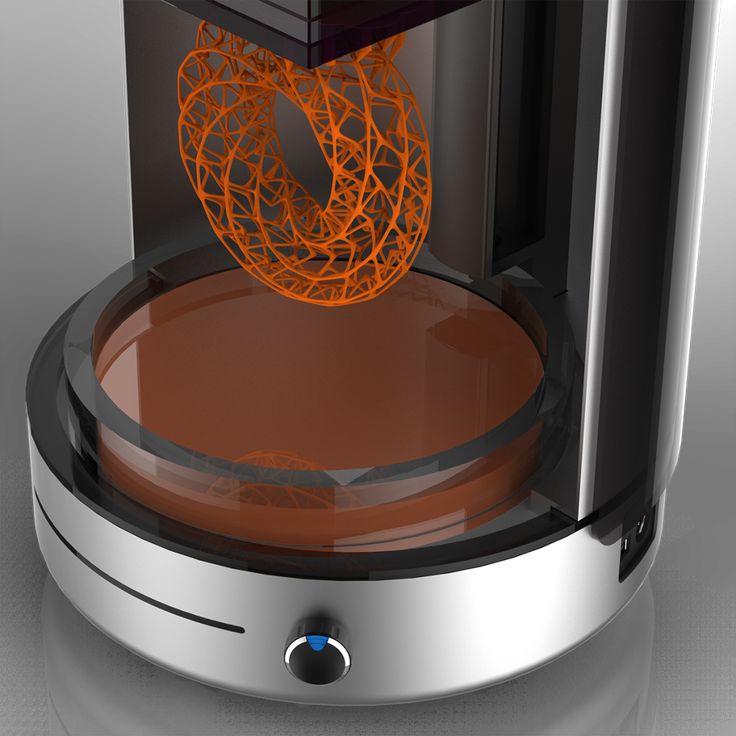
Halot Box is a fully featured slicer and is capable of importing models, hollowing them for resin printing, adding support structures, and even more advanced features like adding text, slicing a model into pieces, and measuring between two points. These features make Halot Box just as feature-rich as ChituBox and Lychee slicer, both of which are also compatible with the Halot-One Plus.
(Image credit: Tom's Hardware)I prepared this model of a dragon using the default Halot Box settings, including a 5mm shell after hollowing, medium support settings, and default slicer settings. Sliced with a .05mm layer height and a 3 second exposure time, this print took just over 12 hours to print out using Anycubic Water Washable Aqua Grey resin. The process of importing a model, hollowing, adding drain holes, adding support, and slicing took about 5 minutes and was intuitive and easy.
Image 1 of 3
(Image credit: Tom's Hardware)(Image credit: Tom's Hardware)(Image credit: Tom's Hardware)Comparison of the Creality Halot-One Plus vs.
 Elegoo Mars 3(Image credit: Tom's Hardware)
The 4K resolution mono LCD on the Creality Halot-One Plus makes it a natural competitor to smaller resin printers like the Elegoo Mars 3, but the larger build volume and Wi-Fi capabilities help it to edge out most competition. Instead of focusing on Z height, the Halot-One Plus has a large surface area on the build platform, providing additional space for printing multiple parts.
Swipe to scroll horizontally
| Creality Halot-One Plus | Elegoo Mars 3 | |
|---|---|---|
| Masking LCD Resolution | 4320 x 2560 | 4098 x 2560 |
| Masking LCD Size | 7.9 inches | 6.7 inches |
| XY Resolution | .04mm | .035mm |
| Build Dimensions | 6.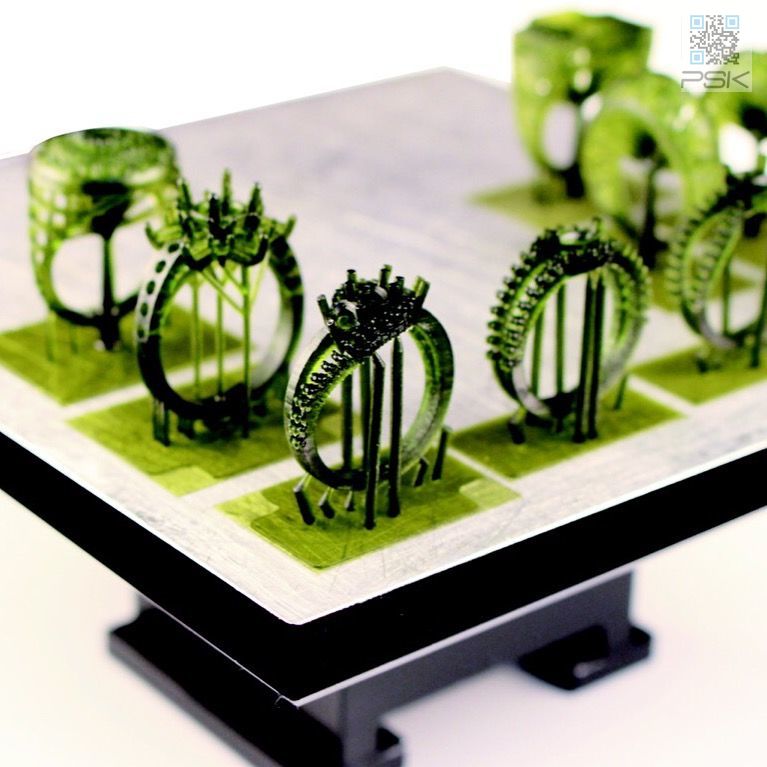 77 x 4.01 x 6.29 inches 77 x 4.01 x 6.29 inches | 5.64 x 3.52 x 6.89 inches |
| (172mm x 102mm x 160mm) | (143mm × 89mm × 175mm) | |
| Build Volume | 170.76 cubic inches | 136.79 cubic inches |
| Printer Dimensions | 9.29 x 9.57 x 16.46 inches | 8.93 x 8.93 x 17.28 inches |
| (23.6cm x 24.3cm x 41.8cm) | (22.7cm x 22.7cm x 43.85cm) | |
| Printer Volume | 1463 cubic inches | 1378 cubic inches |
| Build / Footprint Ratio | 11.70% | 9.90% |
| (higher is better) | ||
| Price | $399 | $299 |
The Halot-One Plus has a somewhat squat appearance in contrast with the taller and narrower Mars 3, and the large LCD screen on the front gives it an appearance that is closer to an appliance than a 3D printer.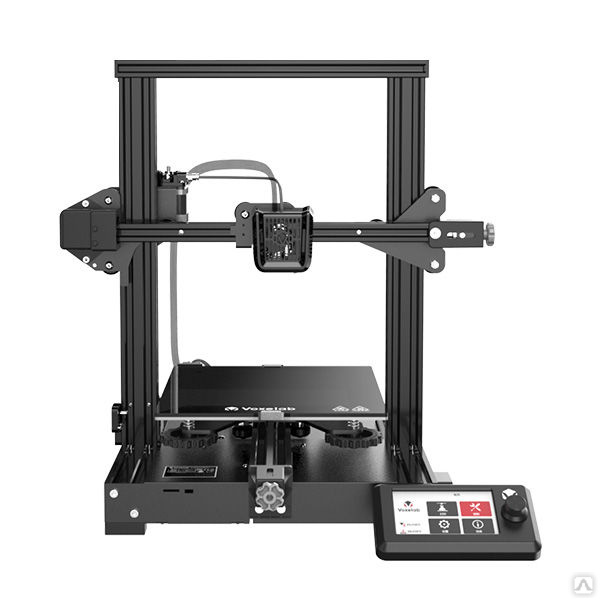 The build volume is somewhere between the Elegoo Mars 3 and the Elegoo Saturn, and the price also sits between the two.
The Halot-One Plus is slightly larger in size than the Mars 3, but the differences in build volume and X/Y area are clear when comparing the two. In addition, the built-in air filtration system, large LCD, and dual Z axis linear rails give the Halot-One Plus a more industrial appearance. The front-facing USB port makes swapping out USB drives easy on both printers, but the power button on the Halot-One Plus is located on the back of the machine as opposed to the front-mounted power button on the Mars 3.
The build platform of the Halot-One Plus has a lightly textured surface, which gives printed parts a more complex surface to bond to during printing. Placing the platform of the Halot-One Plus and the Mars 3 side-by-side highlights the difference in build area, with the Halot-One Plus being a full inch longer in the X axis and just under half an inch wider in the Y axis. The difference in build area is complemented by an increase in pixel resolution, which makes the Halot-One Plus XY pixel size .04mm, a 5 micron difference from the .035mm resolution of the Mars 3.
Printing a Large Model on Creality Halot-One Plus
(Image credit: Creality)The build platform on the Creality Halot-One Plus is large enough to fit busts from Loot Studio, so I printed the bust of Korut The Mechappilian. The model prints in 5 pieces: the bust, left arm, right arm, base, and minigun. I was able to fit the bust and both arms onto a single build platform, and printed the minigun and base separately. Processing these files in Halot Box was easy, and just involved dragging the models into the window, clicking “slice”, and exporting. No additional steps were needed, and I used Anycubic Grey Craftsman Resin and the default exposure settings.
(Image credit: Tom's Hardware)The first filled build platform printed flawlessly, and the level of detail was incredible. The lizard-like texture on the model looked realistic, and the smooth armor components had a consistent and even appearance. The 3-second exposure time seemed like a perfect fit for this resin as the support material snapped off easily and without leaving major pockmarks on the model.
Image 1 of 3
(Image credit: Tom's Hardware)(Image credit: Tom's Hardware)(Image credit: Tom's Hardware)After washing and curing the model, the general surface quality was still very impressive. The smooth surfaces have an even appearance and there are virtually no layer lines present, owing to the .05mm layer height and the .04mm X/Y resolution. The nubs left by the support structure detach easily, and can be removed by simply running a pair of tweezers over them.
(Image credit: Tom's Hardware)The final assembled bust looks more like a resin collectible than a 3D print, and the general quality was as good as any resin 3D printer under $2,500 that I have used. The joints fit together with simple peg and hole locating features, and they were a perfect friction fit. You can clearly make out the lizard skin texture on the model, and the fine detailing on the armor is easy to see without magnification.
Printing Models from Creality Cloud
(Image credit: Creality)Creality has implemented Creality Cloud into its Halot Box software, which allows users to download models directly from the internet into their slicer. This feature has come under scrutiny due to the widespread abuse enabled by the ability to mass upload models, regardless of their copyright or designer intent. YouTuber Bryan Vines made an excellent video discussing this topic, which shows how the platform was intended to be used versus the current usage.
For example, on the front page of the Creality Cloud, I saw the chainmail model by Agustin “Flowalistik” Arroyo. This model is currently available with a Creative Commons Attribution license, which means attribution is required when sharing the model or derivatives. The model on Creality Cloud has been uploaded by “user3265593031”, and features the picture from Printables as well as filenames with “flowalistik” in them, further proving they were uploaded by someone other than the creator.
The chainmail model was easily downloaded, sliced, and sent to the printer without any additional steps required through Halot Box. While this does make searching for and downloading models a simple process, it’s troubling to see that the original creator has no effective recourse for limiting this type of piracy. In this case, I was aware of the original creator but it would be completely understandable that most users may not, and may even think the model was being provided by Creality directly.
(Image credit: Tom's Hardware)The Halot-One Plus is also able to download models from Creality Cloud directly from the printer interface without using Halot Box or any other slicer software. While this is a convenient feature, it is still subject to the same issues as downloading models from Creality Cloud via Halot Box. For instance, I downloaded this Minion file from the printer interface, but have no easy way to determine who the original designer was, what copyright license they used, and their intent for the printed model.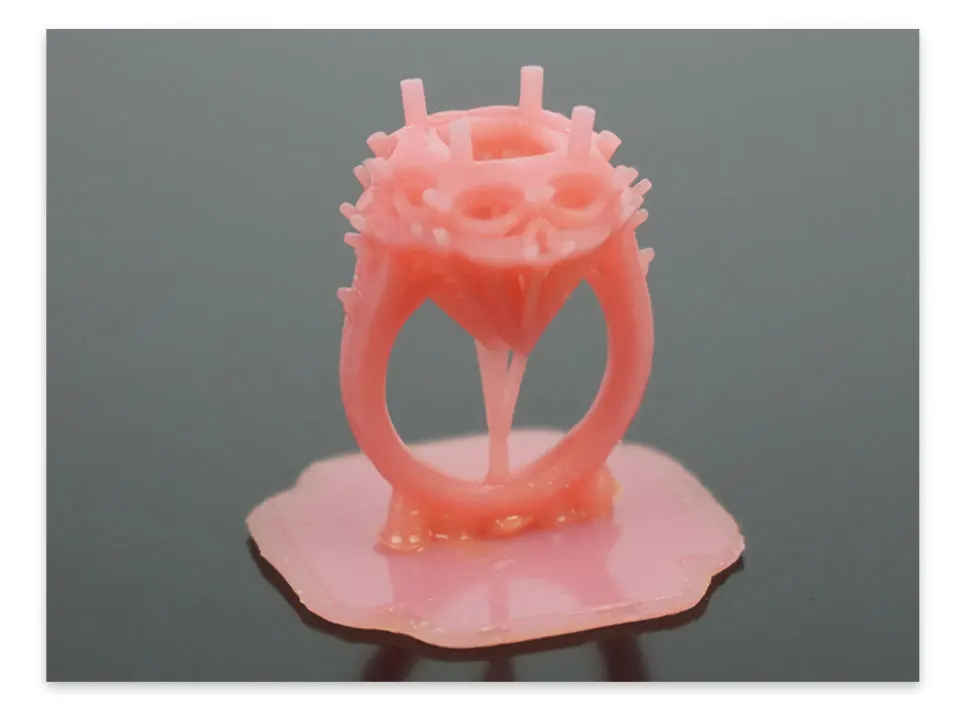 In addition, the model printed completely solid and used significantly more resin than I was expecting for such a small print.
Image 1 of 3
(Image credit: Tom's Hardware)(Image credit: Tom's Hardware)(Image credit: Tom's Hardware)(Image credit: Tom's Hardware)The Creality Halot-One Plus is a sleek, smart, and well-performing printer that worked well during our testing and left me impressed with the quality of prints made with minimal to no adjusting of the default settings when using the Halot Box slicer. The 172mm x 102mm x 160mm build volume is larger than other similarly priced printers, and the 4K resolution of the masking LCD provides sharp detail and fine features.
The Halot-One Plus sits in the awkward spot between small and large format resin 3D printers, and it’s hard to see if there is a place in the market for this machine. The large onboard LCD and built-in Wi-Fi connectivity are something you would expect on a more expensive printer like the Prusa SL1S, but are users currently looking for these features over build volume and print speed? That’s a hard question to answer, and only time will tell if the Halot-One Plus becomes a popular model.
If resolution isn’t your primary concern and you’re looking for the most build volume for your dollar, the Elegoo Saturn (on sale on Amazon for $369) and Elegoo Saturn 2 (available as a pre-order for $550) provide larger build volumes for a similar price tag. If you want to go in the other direction and find a printer with a higher resolution and aren’t worried about the price, the Phrozen Sonic Mini 8K provides an eye-watering .022mm XY resolution at an $899 price tag.
Andrew Sink first used a 3D printer in 2012, and has been enthusiastically involved in the 3D printing industry ever since. Having printed everything from a scan of his own brain to a peanut butter and jelly sandwich, he continues to dive ever more deeply into the endless applications of additive technology. He is always working on new experiments, designs, and reviews and sharing his results on Tom's Hardware, YouTube, and more.
Which 3D printer to choose for home and hobby use
A few years ago, 3D printers were bulky industrial machines, but now 3D printing is becoming more accessible for home use. When buying their first printer, many are disappointed. This may be due to the unsatisfactory quality of the resulting models or the complex setup and maintenance of the 3D printer.
In the reviews that are found on the Internet, printers are often shown after a lot of upgrades or a long selection of settings for printing. This is not at all the result that a beginner who first got acquainted with 3D printing will get.
In order not to be disappointed, before buying, you need to understand which model is suitable for your tasks. First of all, it is worth deciding what the printer will be used for. What is the main property that finished products should have? What is more important, the physical properties of the model or the ideal surface and detail? Not only the model depends on this, but also the technology by which the 3D printer will work.
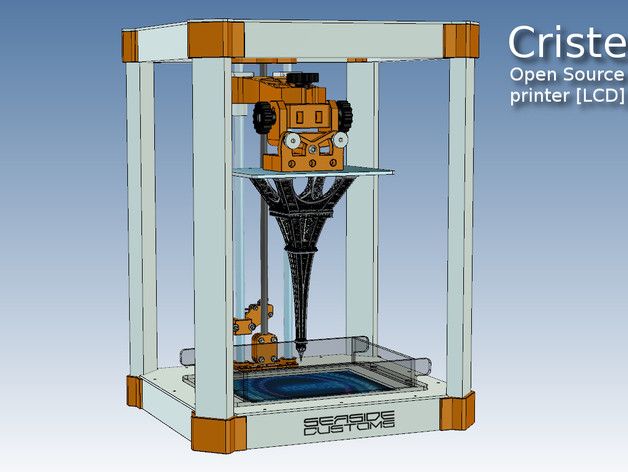
Which technology to choose? FDM or LCD?
If you need to make a small detailed figurine with a perfectly smooth surface, you should pay attention to models that work on LCD technology (LCD works on a principle similar to DLP - Digital Light Processing or “digital light processing”).
LCD prints using a photopolymer resin that cures under UV light. This makes it possible to produce without deformation, even small and thin products that cannot be manufactured using FDM technology.
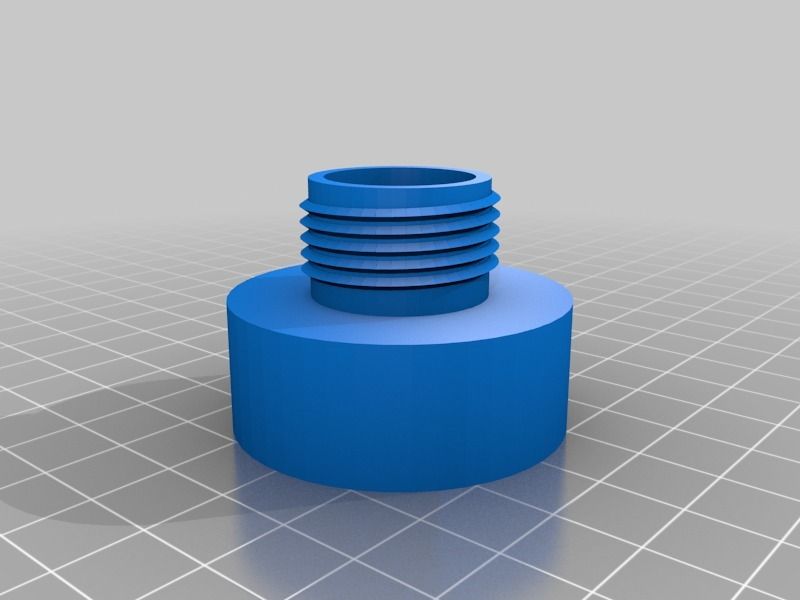
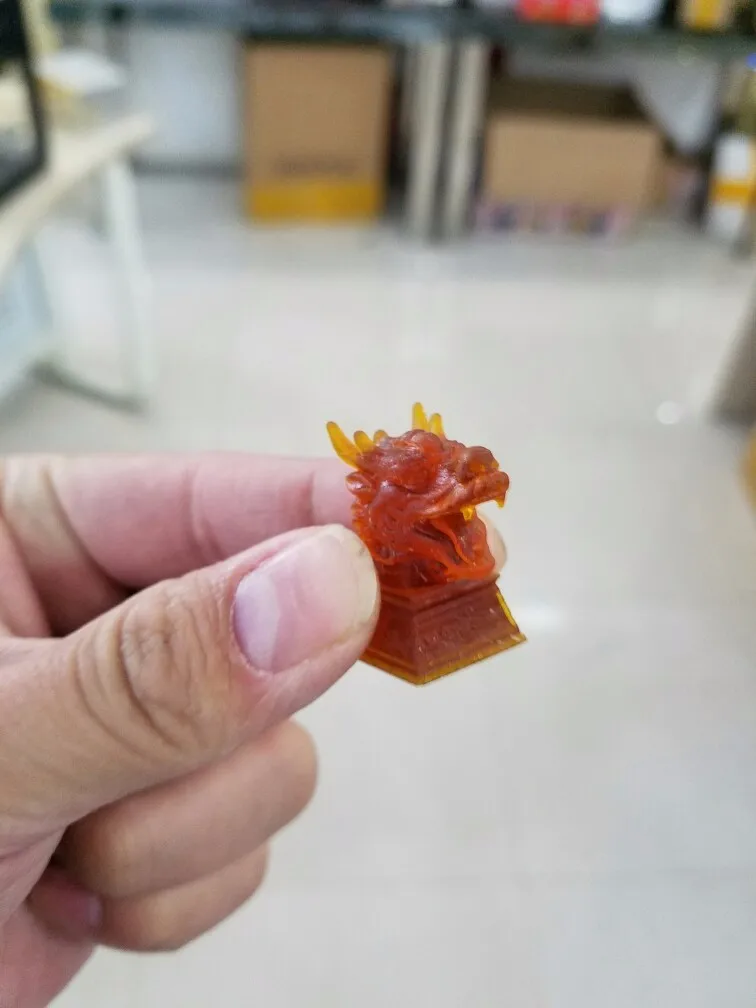
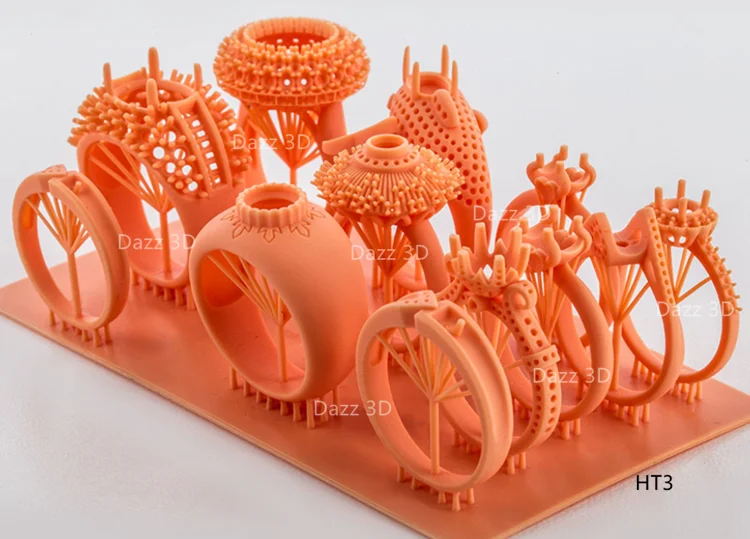
Resin model
Now on sale there are many photopolymer resins with different properties. A few years ago the choice was not great. Basically, finished products were not strong enough for use in functional models. Now engineering resins have begun to appear on sale. Products from them are not inferior in strength to models made using FDM technology from ABS or even nylon.
If it is necessary to produce large products with different properties, or the tasks will be very diverse, then the choice is with FDM technology. But it is important to understand that finished products will not have a perfectly smooth surface. Of course, you can polish the model, but this is additional time and labor costs.
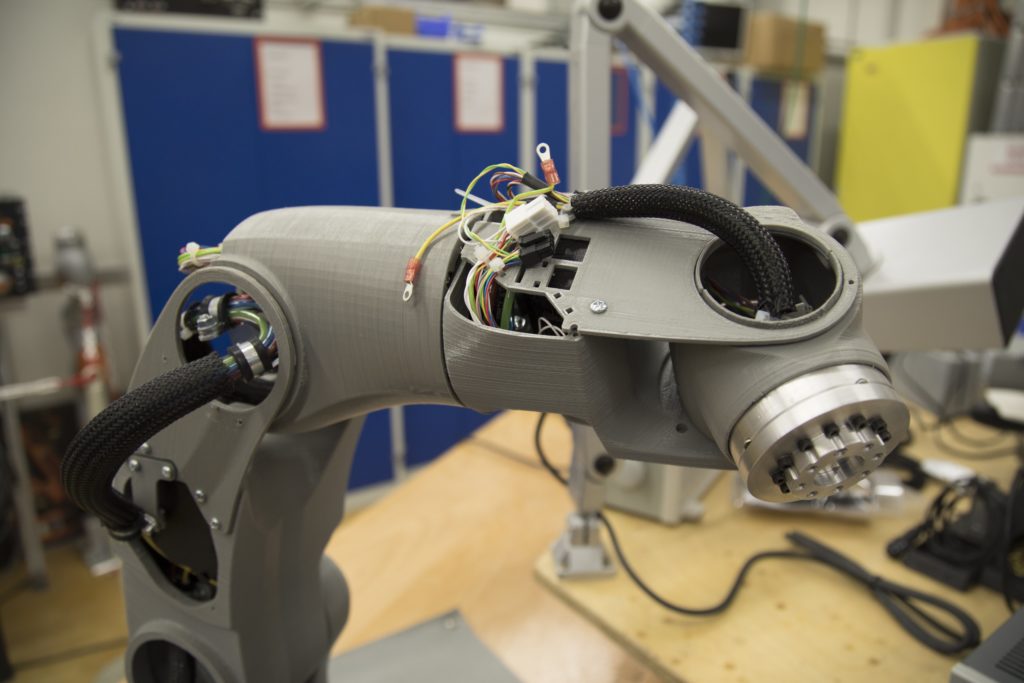
FDM technology builds a model using molten plastic filament, which is fed from the print head.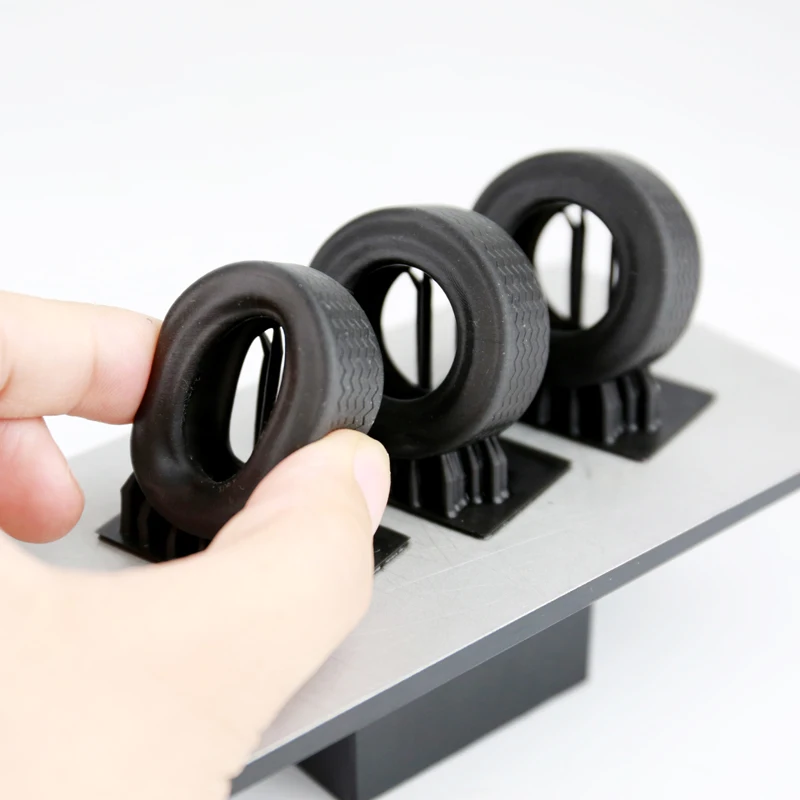 The print head (extruder) “grows” the model layer by layer on the printing table.
FDM Models
FDM technology became widespread much earlier than DLP. Thanks to this, a wide variety of 3D printers and consumables for them has appeared. You can find many decorative plastics that mimic various materials, or engineering plastics for making functional models or mock-ups.
Choosing an LCD printer
Photopolymer printers work on one of 3 technologies - DLP, LCD or SLA.
As home printers, devices based on LCD technology are usually used due to their availability and low price.
Printer design
SLA technology appeared the very first among photopolymer printers. With the help of a point-focused beam, the desired areas of the resin are gradually illuminated. This is repeated layer by layer.
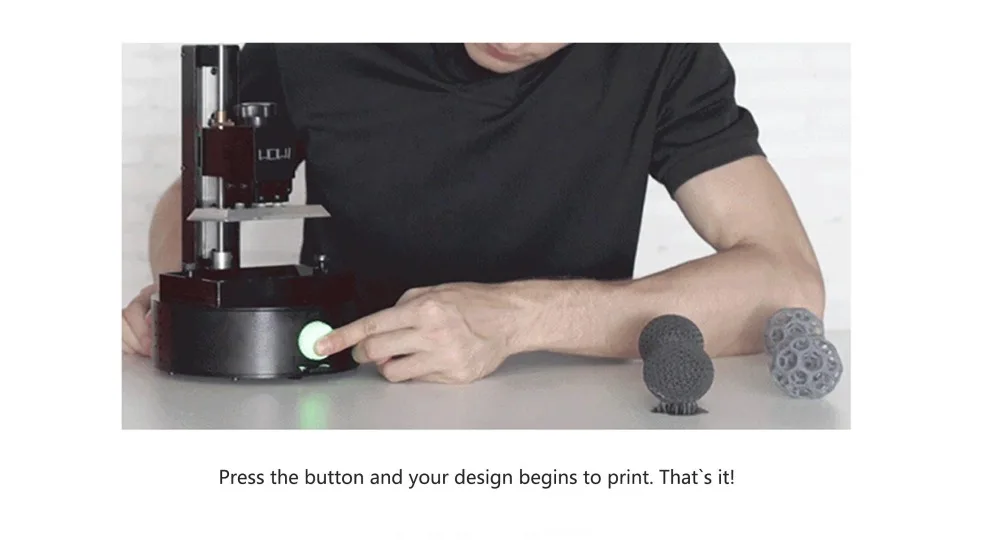
How SLA 9 works0018
Since the surface of the model is perfectly smooth, SLA has become used in the jewelry and dental industries.
Pros:
Cons:
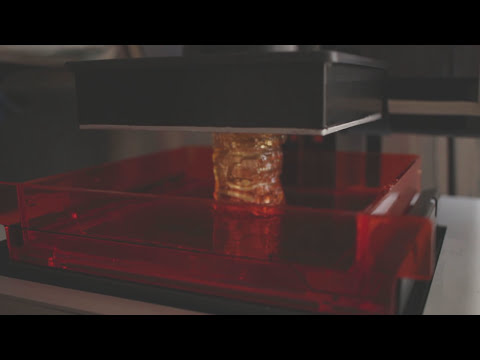
DLP technology appeared later than SLA, but it is very similar to it. The main difference is that the light source is not a focused beam, but a projector. This made it possible to illuminate the entire layer at once, which significantly accelerated the production of models. The quality of the surface was slightly inferior to SLA, but modern DLP printers, in terms of the quality of models, are almost as good as SLA technology.
How DLP works
Pros:
-
Faster production of models due to the illumination of the entire layer
-
Consumables are slightly cheaper than SLA
-
High surface quality (although may be inferior to SLA)
Cons:
LCD technology is the youngest of all. The DLP principle is taken as a basis, but an LCD display is used as a matrix or illumination pattern. LEDs are used as a source of UV light in LCD technology. Thanks to inexpensive components, we managed to get a simple, but high-quality and affordable photopolymer printer.
How the LCD printer works
Pros:
-
small cost
-
Cheap parts
Cons:
-
Low accuracy compared to SLA and DLP (for jewelers and dentists, the quality of LSD prints may not be enough, although more and more accurate models appear with the development of technology)
-
Possible stray light
-
The quality of models may decrease at the edges of the printable area (this can be corrected programmatically)
Resins that are used as a consumable for photopolymer printing can smell strongly and unpleasantly during operation. Try to use the printer in a well-ventilated area, or choose a printer with a sealed cabinet and filter.
When choosing an LCD printer, pay special attention to the rigidity and positioning accuracy of the platform along the Z axis. If there are poor quality guides along the Z axis or even a slight play, then the surface quality of the finished model may turn out to be sloppy or the model will turn out to be unevenly striped.
Rating of the best LCD 3D printers for home
Anycubic Photon Mono
This is an LCD printer with a matrix that allows you to increase the speed and accuracy of printing. Anycubic Photon Mono will be a good helper for hobbyists and modellers.
Anycubic Photon Mono SE
Anycubic Photon Mono SE has an unusual parallel light source. This minimizes distortion at the edges of the printable area. You can effectively use the entire working area of the machine and produce many small models at a time.
Phrozen Sonic Mini 4K
Model with high resolution LCD display and large print area. The monochrome display transmits UV rays better and allows you to print much faster than similar devices with a conventional display. The manufacturer claims a screen life of more than 2000 hours. Phrozen Sonic mini 4k is suitable for almost any task.
Wanhao GR1
Wanhao GR1 has high precision and large print area (140x78x200mm). The manufacturer tried to reduce distortion at the edges of the display, this allows you to make the most of the entire work area. High precision and large print area make Wanhao GR1 not only for hobby use, but also for production.
Anycubic Photon Zero
Small and very budgetary LCD device. Its resolution and small working area (total 97x54x150 mm) is enough for printing small miniatures, figurines or small engineering models. Anycubic Photon Zero is a good choice for beginners who want to get into photopolymer printing without spending a lot of money.
Choosing an FDM printer
If you plan to produce large and diverse functional models or experiment, a 3D printer that prints using FDM technology is an excellent choice.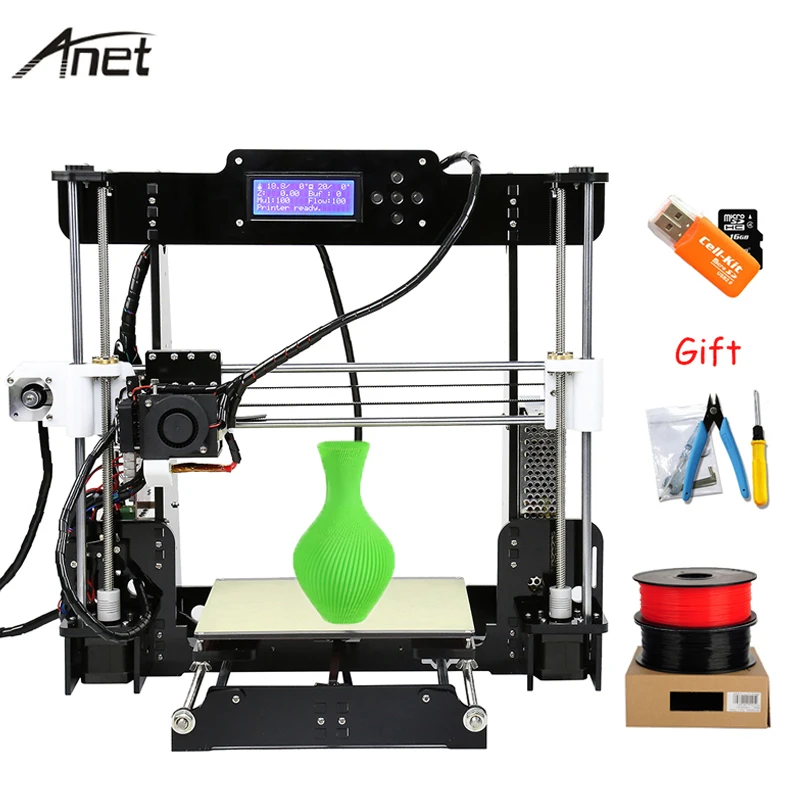
First, decide on the size of the printable area and the properties that the finished model should have. After all, some materials require a closed chamber or good airflow to work.
Some printer models can be “upgraded” in the future. For example, if necessary, purchase spare parts for a closed case, put a nozzle of a different diameter, or change the thermal barrier to an all-metal one. But not all manufacturers provide for the possibility of such upgrades.
Printer design
Despite the same principle of operation, there are several different mechanics, which have their pros and cons.
Kinematics “Prusa” (Prusa)
Perhaps the most popular kinematics among home FDM devices. Mainly due to its simplicity and low cost. The main feature is the table that moves along the Y axis, while the extruder moves along the rest of the axes. Because of this, such kinematics was nicknamed “dragstol”.
Prusa kinematics
Pros:
Cons:
-
Slow print speeds.
 A massive table with a model is forced to constantly move along the Y axis, because of this, print quality will be worse at high speeds.
 -
Some models have design flaws (for example, insufficient frame rigidity), they can be fixed, but for this you have to be a little inventor. Or find a ready-made solution on the Internet.
This category also includes 3D printers with console kinematics. The same prusa, only halved. Because of this, the frame is less rigid, but the printer itself is more compact.
Kinematics Ultimaker
The extruder moves along the X-Y axes, and the table only along the Z axis. All motors are trying to be fixed on the body to lighten the weight of the moving mechanisms, thanks to which it is possible to achieve high print quality at high speeds.
Ultimaker kinematic diagram
Pros:
Cons:
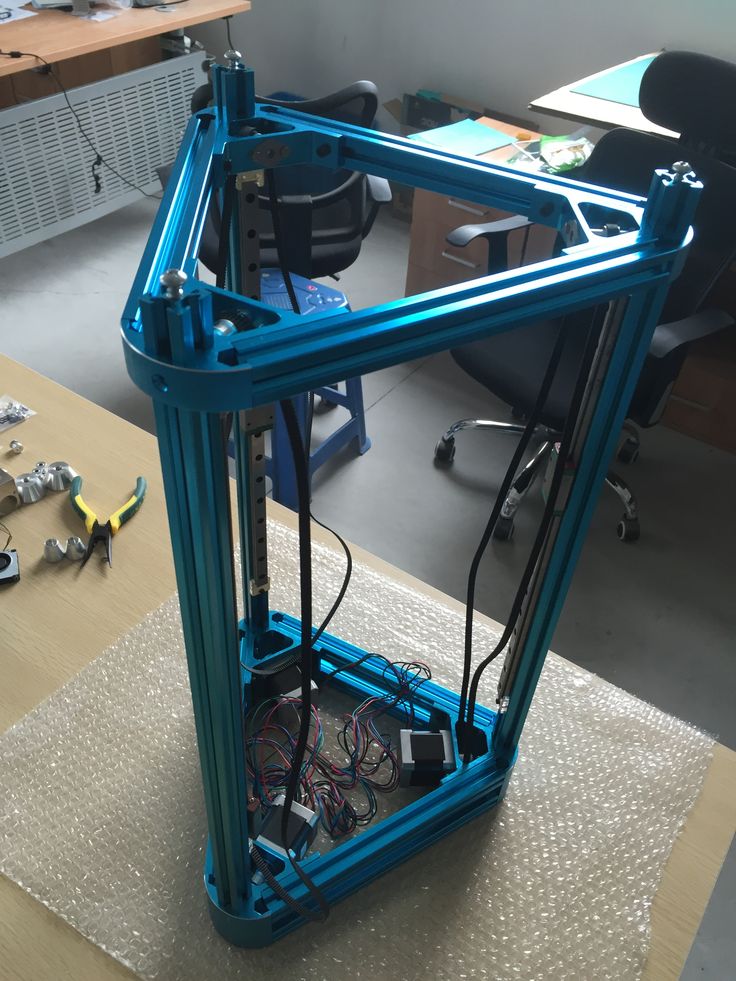
H-BOT or Core-XY
These are 2 similar but more complex kinematics - the table moves only along the Z axis, and the extruder along the X-Y. But to move the extruder, 1 or 2 long belts and 2 stepper motors work in concert.
Example Core-XY kinematics
Pros:
-
High print quality
-
High print speeds without loss of quality.
-
Can be easily closed completely
Cons:
MakerBot Kinematics
Similar to Ultimaker kinematics, but one of the motors is located on the Y or X axis carriage.
Pros:
Cons:
Delta
Deltas do not have the usual XYZ axes. There are 3 columns in the deltas, along which the carriages move, and the position of the extruder in space is calculated using a complex formula. The table is usually statically fixed to the body.
Delta printer example
Pros:
Cons:
Nuances of choosing an FDM 3D printer
In addition to kinematics, when choosing a printer, it is important to take into account some design features.
One or two extruders?
Two extruders can be used for dual color printing, but most commonly the second extruder is used for solvent support printing. If you need to print complex parts with internal cavities, then you should choose a dual extruder printer.
Closed or open printer?
Printing of functional models and parts uses plastic, which usually requires a closed chamber. If you plan to print functional prototypes or various models, you should look at printers with a closed chamber.
Bowden or direct?
There are 2 types of material supply to the print head of the printer - bowden and direct.
In a bowden, the feed mechanism motor is located on the printer body. This allows you to reduce the weight of the extruder and print at higher speeds without losing quality. But because of the long tube, printing with very soft plastics can be problematic.
Bowden feed pattern
In direct feeding, the motor and feed mechanism are located on the extruder. This increases the weight of the print head, but allows you to print with any kind of plastics.
Direct feeding scheme
Heated table or not?
The heating of the table improves the adhesion of the first layer of the model. And engineering plastics cannot be printed without a heated table.
Many manufacturers add useful additional features. They do not affect the quality of the print, but save time and nerves. The most useful additional functions are the filament presence sensor and remembering the print location after a power outage.
Filament sensor.
It will automatically pause printing if the plastic runs out. When there is a little plastic left on the spool, this feature will allow you not to stand over the guard printer until the old spool runs out in order to have time to push in a new bar “on the go”.
Power outage protection.
Remembering where to print when the power goes out can save you a lot of nerves when printing large models.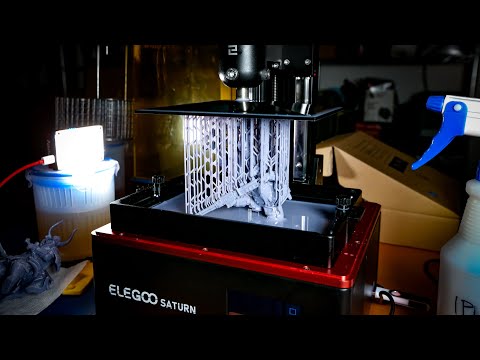 You won't have to worry that after a power outage, you will have to run the model again for many hours or cut and reprint a piece of the model. It is especially disappointing to throw away a complex underprinted model with supports due to a one-minute outage.
There are also many extras. features that make using the printer more comfortable. For example, automatic calibration, touch screen, Wi-Fi and others.
Rating of the best FDM 3D printers for home
Anycubic Mega Zero 2.0
Inexpensive model with Pryusha kinematics. Good for getting started with 3D printing without a big investment. Despite the low cost, Anycubic Mega Zero 2.0 has a heated table and a resume function after a power outage. Thanks to direct feed, printing with soft materials should not be difficult.
Creality3D Ender 3 Pro
A very popular device due to its low price. But despite this, the Ender 3 Pro has a heated table and a decent print area.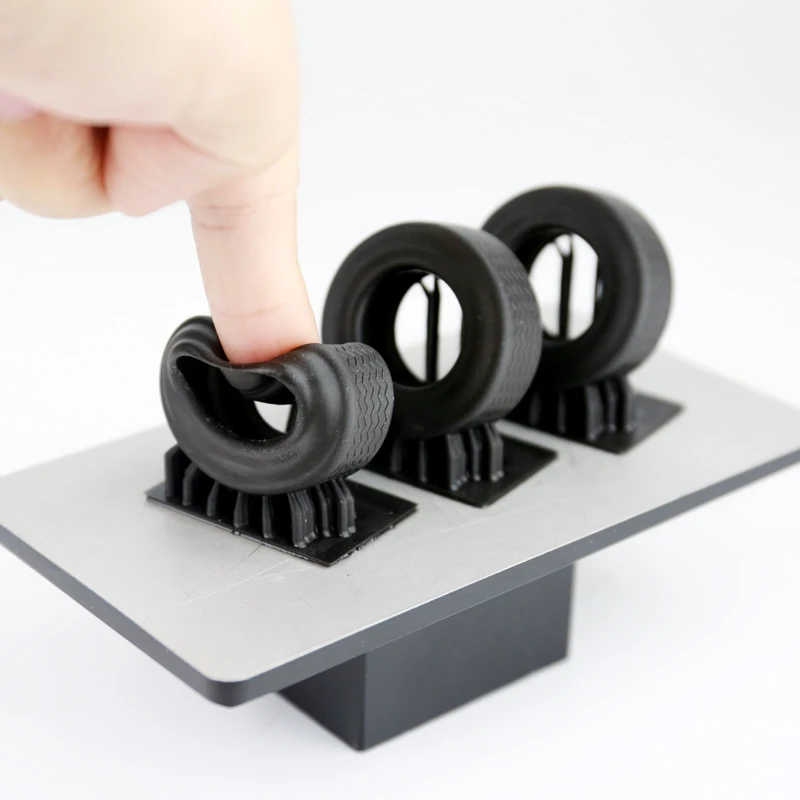 Can be sold assembled or as a DIY kit.
Flash Forge Finder
Small home appliance intended for children or educational institutions. The Finder doesn't have a heated table, but it does have a calibration assistant, a Wi-Fi module, and other extras that make getting to know it a lot easier. All moving and heated elements are hidden as much as possible in the case so that the child cannot get burned.
Wanhao Duplicator 6 Plus
Wanhao Duplicator 6 Plus was based on Ultimaker kinematics, but instead of bowden feed, they made direct. Because of this, it will not be possible to print super fast, without quality loss, but there will be no problems with printing with soft types of plastics. There are 2 trim levels - with a closed case and without.
Flashforge Dreamer
The Dreamer is a closed body dual extruder printer with MakerBot kinematics. Thanks to this, he can cope with printing models of any complexity.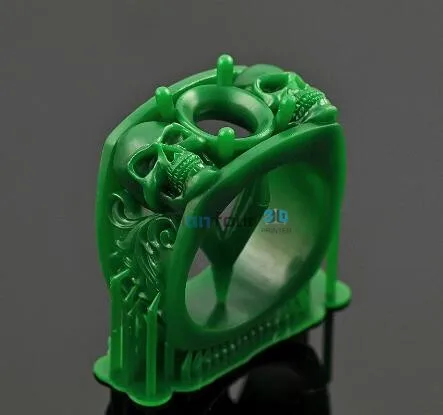 Using a second extruder for soluble support, models with complex geometries can be produced. A good choice for engineers and those who like to experiment with different materials.
FlyingBear Ghost 5
Most commonly sold as a kit (assembly kit). Assembly usually does not cause any great difficulties, even for people far from electronics or mechanics. Flying Bear is equipped with a filament sensor, a function to resume printing after a power outage and Wi-Fi connectivity.
The Flying Bear makes a great first printer for the novice user who is ready to build their own printer.
Totals
In order for the printer not to become a useless toy, you should clearly understand what it is for.
For a fan of miniatures or detailed figurines, a photopolymer printer is a good choice. A small work area is more than offset by the detail that cannot be obtained using other technologies.
For an engineer or a fan of experiments, an FDM machine with a closed chamber and two extruders is well suited. This will allow you not to limit yourself in the choice of plastics and comfortably experiment with any materials.
For a beginner who has not yet decided whether he needs 3D printing, you can opt for inexpensive machines with slick kinematics. Due to their great popularity, you can find a lot of upgrades and reviews on them. In the future, it will be possible to modify the printer for specific tasks or change it to a more suitable model.
For a child, safety is paramount. As the first children's printer, models without a heated bed are suitable, in which the main emphasis is on printing with safe PLA plastic. Or models in which all moving and heating mechanisms are hidden in the case.
A 3D printer is a handy tool, and whether it brings joy or frustration depends on the user.
budget printers for beginners or technology to the masses / Sudo Null IT News
The moment has come that having a small desktop 3D printer at home is not at all expensive, and using it does not require deep knowledge of technology or printing experience.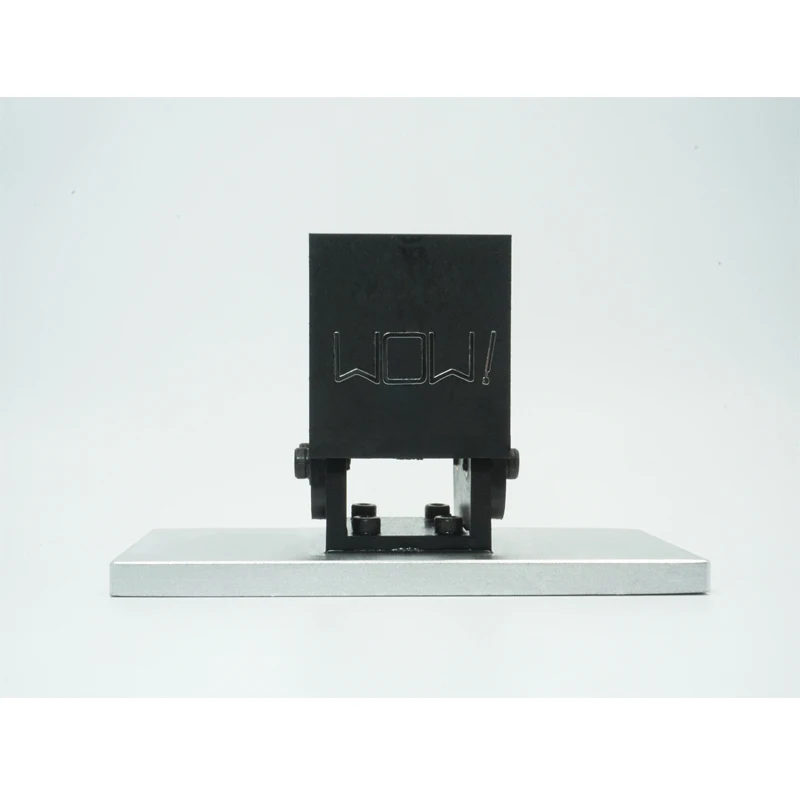 The store has several good models for less than $200 (!), which are suitable for novice users. All 3D printers can print with the popular and safe PLA plastic, which is odorless and the easiest to learn.
Many people have already used 3D printing services or at least heard about additive technologies.
Every year this technology becomes more and more accessible, and Gearbest also contributes to this by making personal 3D printers even more affordable: cheaper and with delivery from stock in the Russian Federation (!).
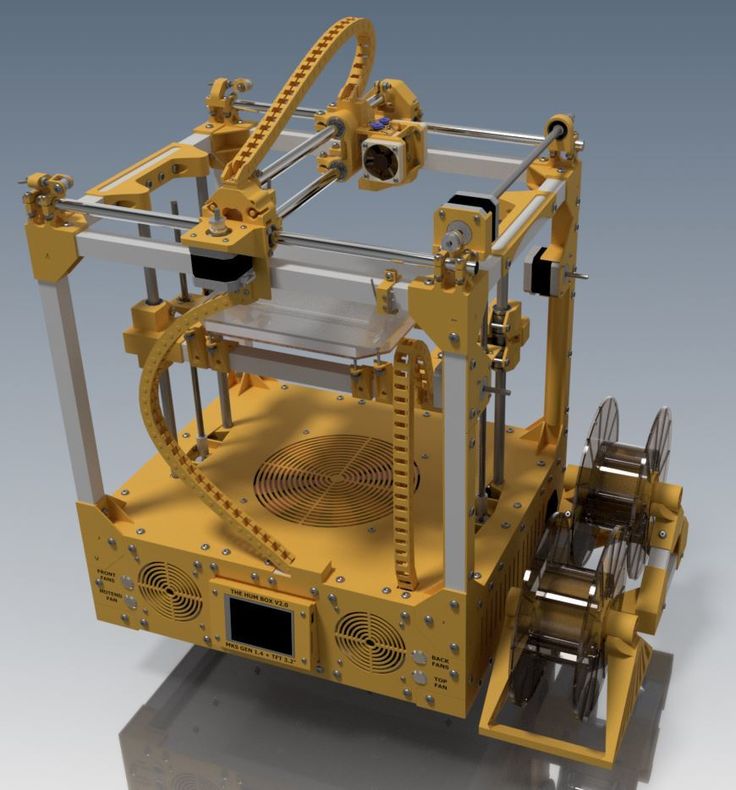
I'll start with a good 3D printer - E180 from Geeetech. Current value $219.
This copy was developed with crowdfunding and was a success in 2018. The 3D printer is equipped with a large touch screen, a Wi-Fi module with access from a smartphone and a special application, as well as a microSD card reader with an offline printing function. The E180 does not require a computer to operate and manage - a smartphone or tablet is enough. The pause of the press with saving of intermediate results is provided. You can change the filament or turn off/on the printer. In the event of a power failure, it is possible to continue from where it stopped.
The printer prints with special nozzles Geeetech 0.4 mm. The print working area is 130x130x130 mm. Positioning accuracy up to 25 microns, minimum print layer: 50 microns. The compact strict design allows you to use it at work or in the office. No protruding wires or exposed hot components!
The next budget contender is the IUM1 Portable 3D printer with a print area of 110 x 110 x 120 mm.
Present value $189. The printer has a compact design with a closed design. All moving parts are inside the case. The table is equipped with a special removable polymer plate to increase the adhesion of parts, the plate itself is on a magnetic base for quick removal after printing. The printer has a microSD card reader for printing without a computer, as well as a print pause (pause) function for changing the filament.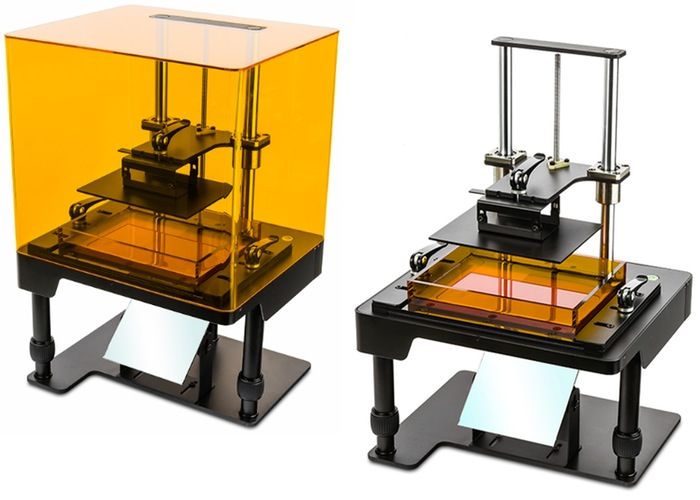 You can print colored parts in layers. Nozzle 0.4 mm, minimum print layer 100 microns. The printer is compact, lightweight, closed - suitable for home use, at school or in the office.
Another interesting and inexpensive option is the NANO 3D printer from Easythreed.
Current value $159.99 with coupon GBACERU0117C . This is a "cube" printer with closed kinematics. The table is completely motionless, the print head “flies” over the model, which has a positive effect on the print quality. The nozzle is set to 0.4 mm, the minimum layer is 0.1 mm. Due to the interesting design, the print area is divided into 2 parts. The main one is 110x110x90 mm.
Pay attention to his "big brother" - EasyThreed ET4000. This is a larger cube printer.
The current price is $237.99 - a little more expensive, but the pluses are greater rigidity of the kinematics due to the increased number of guides, as well as the presence of a large touch screen for control.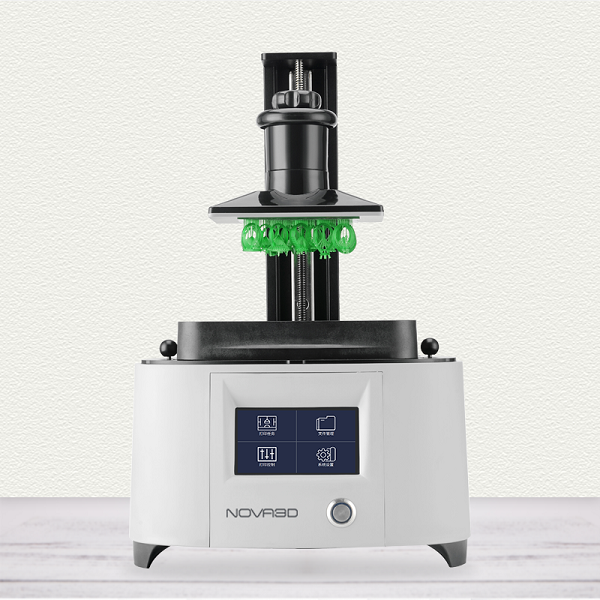 The size of the print area is 120x120x120 mm. The printing accuracy is increased, the available layer size starts from 50 microns. Nozzle too, 0.4 mm. The manufacturer provides protective glazing of the windows, which is very useful if the printer is accessible to children.
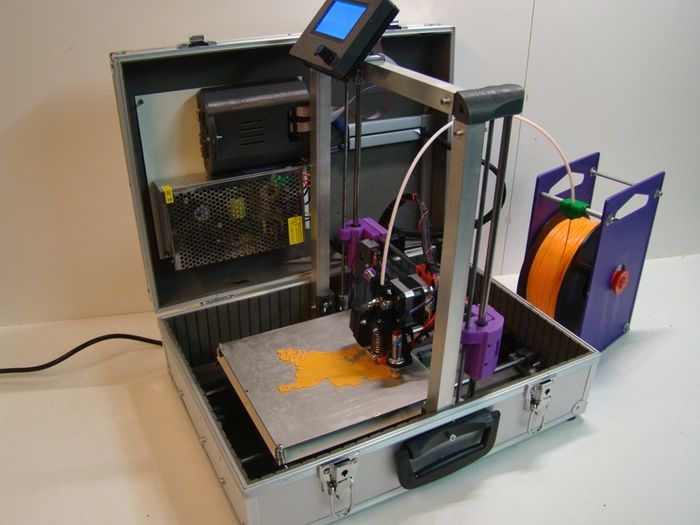
If you have the time and desire, you can assemble a 3D printer from the "constructor". One of the most popular build kits is the Alfawise EX8 3D printer kit. To date, this is the most budget option for home 3D printing.
Current price $145.99 including door-to-door delivery, actual parts price. Alfawise EX8 is made with the latest improvements for printers of this design. Installed two drives along the Z axis. Improved model airflow. The X carriage is reinforced. Alfawise EX8 is equipped with a direct feed extruder drive, which allows you to “feed” the printer any plastic: PLA, ABS, PETG, SBS, Flex, and so on ... The large graphic display makes it easy to control the printer, a print pause is provided, and the An SD card reader allows you to print offline.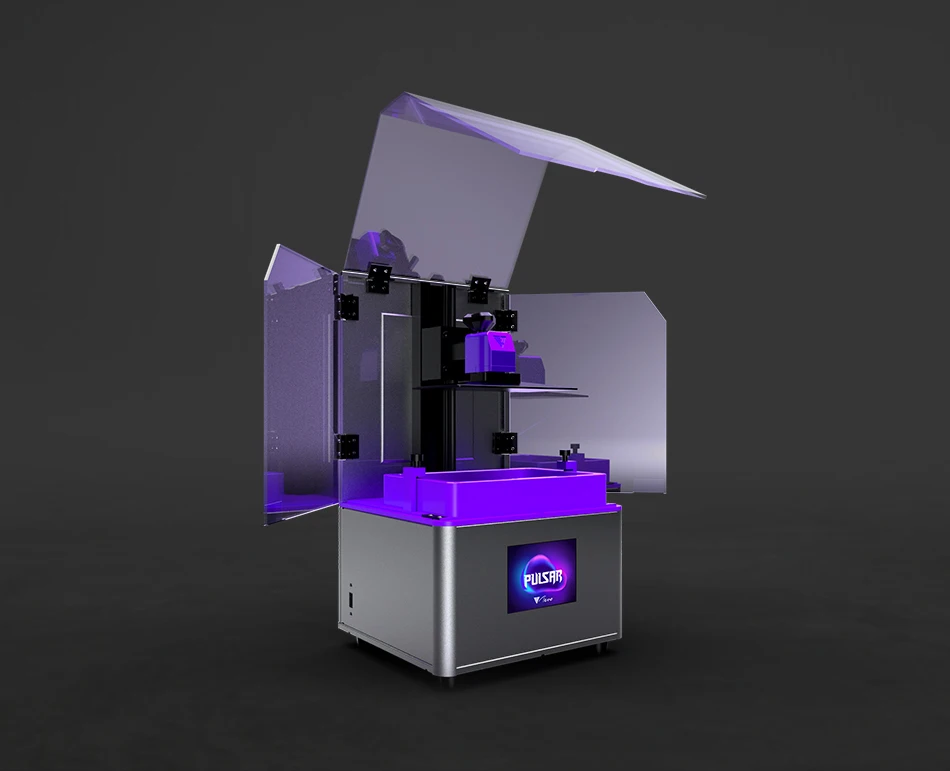 Table heating provided. The printer has the largest printable area of all listed: 220 x 220 x 240 mm. Minimum print layer: 100 microns. The nozzle is set to 0.4 mm, but it is possible to install any nozzle under the MK8 hotend.
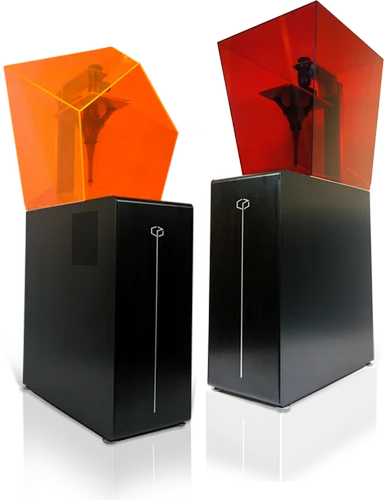
For comparison, I add a fairly expensive branded printer: Tronxy C5.
This is an aluminum die-cut printer in a clean black design. Current value $330.99. The printer also has a direct feed (MK8) and a printable area of 210 x 210 x 210 mm. Available materials: ABS, HIPS, Nylon, PLA, PVC, Wood. Positioning accuracy 12 microns, minimum layer 50 microns. Nozzle 0.4 mm. Airflow of the model is provided. Rigid metal housing provides accurate printing and reduced parasitic vibrations during operation.
Update:
At the request of the comments, I add Creality3D Ender-3 DIY 3D Printer
Inexpensive pre-assembled printer for $199.99, the final assembly takes about half an hour - installing the portal to the base, plus connecting the electronics.