Anycubic chiron fdm 3d printer
I honestly would not recommend it to anyone. : anycubic
TLDR
Please do yourself a favour. DO NOT PURCHASE this printer. It is ancient in design, lacks important and useful modern features, has very little support (official or from the community) and many quality control problems.
Disclaimer and Backstory
Firstly, I want to take the time to say that my printer was not malfunctioning or an especially challenged unit, so this isn't simply a customer with an unlucky bad experience. I think that my experience is fairly representative of what the vast majority of people will face.
Secondly, I want to point out that I bought this printer with my own money as my first printer. I bought it because I was lured in by the huge print volume and didn't quite yet know enough to see the glaring warning signs that I now see. I hope to lend my hindsight vision to future potential buyers so that they do not make the same mistake.
Thirdly, I want to give you an idea of what experience I've gained that has allowed me to come to the conclusions I have now. Essentially my 3d printing story is as follows.
I first bought this printer about 2 years ago as my first printer. At the time, I didn't know the world about 3d printing, but was interested in being able to conjure up mechanical robotics parts without the expense of a typical cnc machine (be it a laser cutter, router or mill) or time and experience necessary to build such things out of wood. In this capacity, the printer did technically print, but what I didnt immediately realize and unfortunately realized out of the return period is that simply doing the primary task does not make a product truly good or worth the money, time or pain (which I will cover in the review). After just being frustrated with this printer and the experience it had to offer over and over again, being alerted to some fancier newer features available in any modern firmware and just wanting an experience that was pain free, I decided to buy a Creality CR6 with a big tree tech drop in replacement motherboard so I could use some fancier features such as linear advance (Which makes corners smooth and straight to give a brief explanation).
After simply crimping the tinned wires the CR6 came with, adding ferrules and plugging in the new board, I was amazed by the difference in experience. So much better has this experience been, I really felt badly for all the other people just like me who didn't know the signs to look for.
All this time, I have been watching youtube videos about 3d printing, looking into the latest developments, planning my fixes to this awful printer, and generally gaining knowledge necessary to really critique it fairly and in detail.
Review
This printer won't be worth the effort and time you'll put in to get it printing well or reliably. It technically prints, and for a lot of people who bought this as their first printer, that alone will make them give it good reviews, but it is far far far from good, or even acceptable.
I think the best way to sum up this printer is that it is ancient. Not in one way, but generally. The word describes the ethos of the system.
It has an ancient hotend design, It has an ancient motherboard, it has ancient hardware (like the belt tensioning system). The firmware that it ships with is ancient and misconfigured (to the point that while it says it has ABL it DOES NOT), the overarching design is ancient and so too is the level of QA.
Let's be more specific though and get into why or how exactly the aged nature of this printer hurts you, the potential buyer of the device.
Hotend
This is a large printer. Its huge. Its no longer the biggest, but for this class of printer its on the high end of the scale alongside competitors such as the Creality CR lineup, Ender 5 Plus, Sidewinder X2, Sovol S series and the line.
This is great for some people, and indeed was great for me. The problem quickly pops up though.... How long will it take to print things? Well, the answer is that, on this printer, it will take too long. This section is about the hotend, so we wont even discuss firmware limitations here, that's for later. Instead let's just talk about the bad ol J head hotend on the Chiron.
This thing is one of the oldest hotends on any printer being sold. Superseded by the far more popular and better supported V6 (which was available for Anycubic to use might I add) and Volcano hotend (which would be a much better fit due to its much higher flow rate, allowing you to use bigger nozzles and truly use the large build space), the J head is just not fit for purpose of a printer on this size.
Its """"fine"""" with the tiny 0.4mm nozzle that this printer comes with, but combined with the firmware build in and the large bed, this printer takes forever to use any reasonable portion of its bed size. Due to the firmware and weight even, it actually prints significantly slower than smaller machines.
This could be overcome if the stock hotend was sufficient to put a reasonable amount of filament through larger nozzle diameters, but it simply isn't.
Oh, and also the hotend fan is so weak and wimpy that even if you upgrade the nozzle, you'll still have a hard time printing like something this size should.
This is just the first way the ancient design hurts this printer and the user using it.
The Motherboard
Something a new buyer won't really know what to look for in is a motherboard. A new user, particularly one who isn't really familiar with the way open software works or what makes an easy to upgrade or future proof part only really looks a printer from the outside. Does it do the main thing I think I want it to do? If so, then as long as no one is saying it completely fails, I'll give it a shot, and look at that price!
One of the ways they achieved that price is almost certainly the motherboard. Ancient for the time it was designed and even worse now, years later, the motherboard contains cheap, noisy stepper drivers (as in audibly noisy), an 8 bit atmega 2560 (which is old and slow meaning that it'll have trouble with some modern features and firmware updates like curves and arcs in prints, leaving zits if not carefully managed) and no easy means for updating easily, especially because there is no pinout for the motherboard (but we'll cover that more in the section about firmware, and oh boy is that section something).
What's worse about this already bad deal of a motherboard, is that it uses a lot of proprietary nonsense that benefits you none at all and makes the printer less reliable.
What do I mean? Its not actually one motherboard, or rather, its one motherboard and 4, count them, 4 separate boards attached to it for no good reason on earth. It has one for the absolutely atrocious, proprietary and unique screen mounted (which makes it more difficult to upgrade), It has one for combining multiple wires into a single wire (yes, the big unreliable one which will be talked about later), it has one for the SD card and it has one for the print bed. Ok, the print bed, thats understandable, sure, it has a massive bed, but the other ones? Why? Why have the added complexity that if shifted can leave mysterious bugs that only crop up sometimes? Why use strange non standard connectors to route your most important cables outside the printer?
Its extra design in the wrong place.
The motherboard somehow manages to have too much focus, yet still come out as an ancient relic of an era where simply printing was a claim to fame.
hardware
As I briefly touched on above, some of the hardware decisions made on this printer are just absolutely baffling. They are so baffling Im not quite sure where to start. I suppose we'll start with the movement system and end where we left off with the strange choice in cable bundling that leads all the way up to the pinnacle of bad design on this printer, the hotend.
The movement system on this printer to someone without a discerning eye looks similar enough to a typical ender3/ender3 v2 that someone could be forgiven if they assumed I simply thought the ender 3 was poor design. I don't actually. It's clearly designed to a price, but its generally ok enough for what it is and will have a lot of support.
This printer on the other hand.... Oh boi, why don't we have a seat.
With V rollers, the way something is held tightly to its axis so that it does not wobble or rattle is with eccentric nuts. This is an ok enough system, and it works.... when the wheels are close enough that it can actually get good pressure. In the case of the X Axis mount, something I noticed that may be applicable to others who have unfortunately not noticed, is that the eccentric nut in the bottom wheel of the 3 for the X axis simply is too far away from the aluminum extrusion to ever get tightened.
At best, it gets to about 2 mm of wiggle room in, for something that is supposed to be in full contact at all times. This results in a poor surface finish that is essentially impossible for the user to fix without simply buying another x carriage (something I ended up doing, replacing it with an ender 3 x carriage as one of many upgrades I have and am making to mine).
This isn't the only problem with the movement system though, because while the y carriage came factory tight, and the wheels mostly make contact, its simply not reasonably feasible to tighten the y carriage due to the intrusion of the power supply and motherboard compartments. .. Yes that's right, if you want to tighten your eccentric nuts, you'll need to remove the power supply or fine an eccentric L key for your eccentric nuts, and frankly, that's just too eccentric for me.
Ok, we are done with the movement system right????
Nope. The X axis doesn't have a good belt tensioning system as it simply requires pulling the belt taught while simultaneously tightening the bolt that holds it in place. If that weren't bad enough, the y axis takes the cake... loosely and slackly because it couldn't be tightened reasonably. That's right, there is literally no mechanism for tightening the y axis, apart from simply rebelting the printer and pulling and you do so... Oh, and also the damper for the Y axis not only would only serve to make artifacts ore obvious if it was installed correctly, but it is installed rigidly eliminating the point of having one) and crooked, which probably causes excess wear on the belt. A solution I've seen to this from Th4d I believe was simply mounting it directly and throwing out the dampener.
It gets even worse, when you consider the lack of reinforcement on such a tall frame, and lack of anti backlash nuts, and cable chain that comes so long it blocks the X carriage on occasion (luckily you can manually shorten it by one or 2 links yourself), but those seem like minor nitpicks at this point so lets move on to the creme de la creme of why this is a bad printer in terms of the hardware.
Those proprietary cables are bad. They really are bad. Go ahead and search for temperature sensor complaints. You'll find many, but you also won't find as many as you should. That's not only because of poor firmware design (in the screen and motherboard) but also because of an inconsistent issue that will likely creep up on you when you least expect it and during a large print.
That is the cable, the red one, sneaking its way out of the hot end during extended prints. Yes, they cable tie it to the hot end when its shipped to you, but believe me, its not enough.
I actually thought my cable was busted due to this issue and only upon seeing the problem return with a replacement cable did I realize it was simply another instance of poor design cropping up its head yet again. It turns out that the awful unsecured connector that I complained about above? Yea, that was the culprit. As the printer prints, slight wiggling in that cable eventually becomes enough, that while it will visibly look plugged in completely, it won't be making proper contact, which may result in you getting temperature sensor error (not thermal runaway mind you... but we'll talk about that in the firmware section) which will ruin your large long running print.
You might be able to fix this with hot glue, but boy o boy.... did they just like... not test the printer at all in factory?
I actually theorize that they did, and so rather than reengineer it properly, or remove the not quite proprietary but as good as cable in place of standard JST XH or SM connectors, they figured a cheap zip tie would probably work well enough... until it didn't.
Ok, at this point, if I haven't convinced you not to get this printer, quite frankly... have you been reading what I've been typing?
Ok, fine, I'll continue, but somehow, believe it or not, it gets worse.
Firmware
At this point, I'm getting tired of typing, and you are probably getting tired of reading (I certainly hope so, because I can't imagine how I haven't convinced you yet), but there is still more.
Its to do with one of the biggest limiting factors in this printer, the firmware. It is so ancient that it does not contain thermal runaway protection, something critical for safety in the event of a thermal mishap (though it does have earlier protections that perform similar things in less safe ways).
How can it get worse than this? Well you cant upgrade the firmware either, at least not officially (there are some community firmware builds but think one guy on the weekend trying to make his printer less bad rather than a devoted group of people working together as you might see for a more popular printer) and not without pain dealing with their proprietary screen firmware (some just opt to disable it to avoid fighting). What this means is that the last version of the firmware on their site (which might give you hope just to shoot it down again) is based on a version of Marlin that is quite literally from as best as I can tell, 4-5 years ago. ... yea.... its definitely a forgotten product.
What that means is its missing many advanced features and fixes and good luck updating it without just redoing the majority of the printer due to their frustrating choices cabling things....
# Auto Bed Levelling
IT DOES NOT HAVE THIS PROMINENTLY ADVERTISED FEATURE IN ANY MEANINGFUL WAY
I wanted to make this bold and obvious because to me, I was just mystified at why anyone liked auto bed leveling when I bought it and saw that their instructions for using auto bed levelling were to manually level... and then adjust the points of the auto bed levelling they included because they knew it didn't actually work.
Yea, that's right. After you wait so long for it to complete, it seems to do absolutely nothing with the data, or maybe the data is just bad. Either way, it doesn't work, and levelling this beast will frustrate you silly.
Bed
The bed is one of the parts that people are sold on with this printer. ULTRA BASE!!! They call it. More like Ultra warp. That would be manageable if the aforementioned Auto Bed Levelling worked out of the box or with any of the firmware that Anycubic provided. It does not though, so good luck levelling something which isn't flat.
Sure, you might get lucky with a flat bed, and end up with low adhesion problems, but if you don't, like many people don't, you'll have an extremely painful time levelling your bed, and likely will be limited to prin ting in the areas you could get flat enough to level. It cant get worse than that right? Oh but it can!
The beds surface. It's a selling point. Print on hoit, pops off cold. What they don't tell you though, is that if you clean it off with isopropyl alcohol like is recommended frequently it cleans off a coating applied to the bed at the factory. I for one was quite sad when I cleaned my bed with ISO for the first time and noticed yellow substance rubbing off onto the paper towel.
After this, it was an absolute nightmare to get anything to stick. With other print surfaces such as spring steel or Creality's similar looking but different and better bed surface, I've had no such problem.
We're done with the bed now, right mister reviewer? Nope!
This part is a somewhat minor nitpick, but the lines on the bed. You might imagine they are under the surface or wouldn't come out on the print like with other surfaces right? wrong. Not only are these lopsided lines matching no reasonable spacing (they are not 10 cm apart, just some random distance), they also totally show up in the bottom of your prints, including the Anycubic logo. Just why add insult to injury...
oh right, and here's a few more things just to bug you more for no good reason....
Odds and ends
The stepper motors on this printer have weird wiring. I had to swap the position of the middle 2 pins to get them to work with the standard cables that work for every other stepper motor I've ever used. Bizzare.
The second power supply (that's right.
 .. it has 2 for some reason despite the bigger one saying it can support more than enough wattage (hmmmmmmmmm)) is not grounded. They say its ok, but that sketches me out.
The second power supply is just sitting in there, clearly a laptop power supply with the cable cut and the sheathing pulled back to get access rather than using a proper connector or power supply.
Whatever they put on the lead screws gets dirty really quickly. With my CR6 for comparison, there was just so much junk that accumulated on the Chiron vs the CR6 over the same time period it was weird. I put some WD PTFE spray (different from WD 40 and actually lube meant for metal on metal) on it and wiped off the old gunk and it seems to be performing better in that aspect.
The Z end points for you might come misaligned, so I'm just telling you incase for some reason you buy it despite everything I just said and wonder why its so hard to level.
When protection trips its not obvious at all.
 The temps stop working, and when you look in the about firmware section on the screen it says killed, but you really have to search to figure it out.
The frame, despite what Is said about the second power supply is actually grounded, and I verified that with a voltmeter... still sketchy though.
There is a lot of unused space in the mother board area for no reason I can discern. At least it leaves you room to expand when you chuck the trash they include in there I guess??? Though its awkwardly positions even still.
Conclusion
I sincerely believe you could not possibly have a use for a conclusion after all this but
This printer is jank, is straight out of 2013, has too small a hot end and nozzle stock to be useful, hard to upgrade firmware, impossible to upgrade screen firmware, accessibility problems for critical parts, is 8bit, has many many many poorly thought out parts and designs, no functional thermal runaway protection simply due to the age of the firmware, the list goes on and on.
Do not buy this printer.
Even at 500 CDN or 400 USD its not worth it. Maybe at 200 dollars it would be worth it just to disassemble for the components.
It will sink in on you too late that it's not worth it, and Anycubic seemingly simply has forgotten about this product's existence in terms of support, especially on the firmware front.
What am i doing with mine?
Personally I decided after getting another printer to throw good money after bad and do a laundry list of upgrades essentially Ship of Theseus-ing this printer to hell and back.
I:
Removed all the old electronics
Motherboard
Daughter boards
Proprietary-esque cables both inside and all the way through the cable chain
endstops
filament runout sensors
literally the whole hotend assembly, including the metal carriage
Added a ton of new stuff
SKR 2 with 2209 UART stepper drivers (for sensorless homing)
New non proprietary ports on the side using tried and tested JST XH connectors
Over built silicone wire the whole way
A BTT Smart filament runout sensor
Klipper (to allow for much much faster good looking prints)
The ender 3 x carriage (the metal part with rollers)
a volcano hotend with a 0.
 8 hardened nozzle.
BMG Wind Extruder from MellowHemeraCopperhead Heartbreak from slice engineeringTriangle labs 3d touch
Spring Steel magnetic bed good up to 130 Celsius
I'm not done yet, but figured it would be of interest in this review.
Thank you for your time, and hopefully this review helped save you time, money and frustration.
Simple Anycubic Chiron Review – Worth Buying or Not? – 3D Printerly
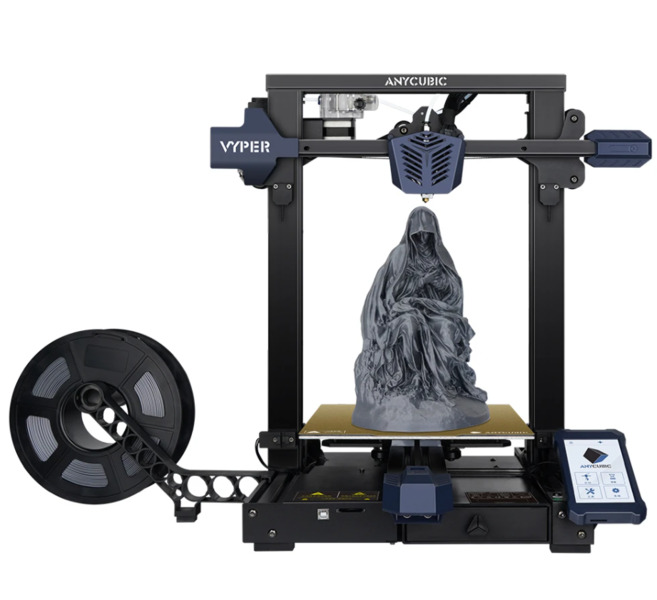
The Anycubic Chiron is a large FDM 3D printer with a huge build area of 400 x 400 x 450 mm. With the Anycubic Chiron it is easy to set it up and start working, which is ideal for any user out there.
I think one of the main points of this 3D printer is its reasonable value, making it a perfect 3D printer for specialists, as well as beginners just setting their feet into the 3D printing world.
The Chiron is furnished with a solitary extruder module portrayed by a limited way, which permits printing with adaptable materials.
The filament run-out sensor monitors material to use while the full-shading TFT contact screen encourages print the executives and activity.
The quick warming Ultrabase Pro bed is the printer executioner highlight. It guarantees ideal print bonds while encouraging print evacuation once cooled off.
Creators, instructors, and hobbyists have been utilizing it to deliver a wide arrangement of 3D models, including toys, end-client apparatuses, and functional parts. read on to discover more about the Anycubic Chiron.
Features of the Anycubic Chiron
- Huge Build Volume
- Semi-Auto Leveling
- High Quality Extruder
- Dual Z Axis Switches
- Filament Run-Out Detection
- Technical Support
Huge Build Volume
It has huge build volume of 15.75” x 15.75” x 17.72”(400 x 400 x 450mm). Everyone wants to get more space for whatever they are working be it, your professional work or your hobby. The more the space for creation, the better you can create for years to come.
Semi-Auto Leveling
This is a feature that many can appreciate. Having a huge 3D printer in the first place has its own challenges, but setting them up for printing shouldn’t be one of them.
Anycubic made sure to work on their convenience, so it has a feature that automatically detects 25 points, while supporting real-time adjustments.
It also adjusts real-time nozzle height. A little thing you have to look for is to make sure auto-leveling mode contacts well with the printer, as they have upgraded the wire too for better connection.
High Quality Extruder
It contains high quality extruder which is compatible with several filaments. It will provide you the better printing experience with flexible filament, which many 3D printers in this price range don’t offer you.
Dual Z Axis Switches
It has dual Z axis switches so its photoelectric limit switch offers you the more stable levelness of the print bed. Your prints will not get messy if your print bed is stable. Print quality and stability are important, so this is a nice feature to add to that.
Filament Run-Out Detection
Sometimes we misjudge how much filament we have left for a print, which is where the filament run-out detection feature comes in. Rather than your print head continuing to move without extruding filament, the Anycubic Chiron detects that no filament is coming out and automatically pauses the 3D printer.
Once you change over your spool of filament, you can easily resume printing and save yourself several hours and a good amount of filament.
Technical Support
Getting a quick response from companies when you run into an issue is ideal in any situation, so the technical support you receive from Anycubic is just that. They run a lifetime technical assistance service along with a 24-hour response.
In terms of the warranty on the printer, this runs for 1 year after sale which is more than enough time to fix any manufacturer defaults, and these are pretty rare for Anycubic.
They also have a growing user community where they are sharing their successes and trials on Facebook, Reddit, and YouTube, which will be kind of handy for beginners even for seasoned users too.
Benefits of the Anycubic Chiron
- It is being offered in quite good and affordable price
- Its semi-leveling feature has made it easier to use
- Its print bed, which is Ultrabase pro, is just spectacular
- It has fast heating bad which gets hot easily
- You’re getting high quality prints
- Very large build surface compared to most 3D printers out there
Downsides of the Anycubic Chiron
Introducing an immediate drive extruder or even only a superior Bowden extruder is one of the principal redesigns clients think about creation to the Chiron. That is on the grounds that the stock extruder is not exactly perfect for delayed use.
It normally experiences difficulty taking care of fiber reliably, battles with withdrawal, and even has some free parts. This is a basic yet generally costly redesign that cuts down the general estimation of the printer.
The semi-automatic leveling approach that the Anycubic Chiron uses doesn’t actually make the leveling process much easier, because it doesn’t take into account the measured levels properly.
It still takes manual effort from you to input values. The good thing though is once you level the 3D printer properly, which can take around an hour, you won’t have to level it again, unless you move the 3D printer.
Specifications
- Technology: FDM (Fused Deposition Modeling)
- Assembly: Semi-assembled
- Print area: 400 x 400 x 450 mm
- Printer size: 651 x 612 x 720 mm
- Extruder type: Single
- Nozzle size: 0.4 mm
- Max. Z-axis resolution: 0.05 / 50 microns
- Max. print speed: 100 mm/s
- Printer weight: 15 kg
- Power input: 24V
- Bed leveling: Fully automatic
- Connectivity: SD card and USB cable
- Display: Touch screen
- Max extruder temperature: 500°F / 260°C
- Max heated bed temperature: 212°F / 100°C
Customer Reviews
Usually the annoying thing about 3D printers is the leveling of bed, but with Anycubic Chiron it is much simpler and easier.
A user bought it to print large nylon parts and has to print them quickly, this Anycubic Chiron 3D printer saved him, as it provides the prints in short time even though they are large.
One of the users who wanted to buy a good quality printer in low price finds it as perfect as it can be. He was surprised at its abilities, as it provides good quality prints in such a low price.
A great sign of a 3D printer’s ability is how long it can run for consistently for one single print. Someone actually managed to run a 120-hour 3D print, which is a straight five days without issues.
Many 3D printers would have had some type of failure, layer skip or malfunction that would ruin several hours of printing time and a lot of filament. Anycubic take pride in their 3D printer quality, so it’s definitely a top-class 3D printer.
Verdict
The Anycubic Chiron goes where scarcely any other buyer printers have gone previously. It is amazingly huge and it is genuinely equipped for most types or large 3D printing projects.
You need large prints, you got them with the Chiron, but you are also getting precision. The extruder could be better, however all mechanics, power supplies, warming and cooling-components all function admirably out of the box.
I think considering the features of this 3D printer, it could be a little cheaper, but overall you’re getting a pretty solid machine.
It’s a perfect 3D printer to go for if you are after a large-scale 3D printer for under $1,000. Get yourself the Anycubic Chiron today from Amazon.
Extruder Flow Calibration Concept for FDM 3D Printers Using Anycubic Chiron
as an Example Authors : Mikhailova Olga Mikhailovna, Kovaleva Victoria Viktorovna, Ponomarenko Denis Alekseevich
Category : Engineering sciences
Posted by in young scientist №27 (369) July 2021
Publication date : 28. 06.2021 2021-06-28
Article viewed: 255 times
Download electronic version
Download Part 1 (pdf)
References:
Mikhailova, O. M. The concept of extruder flow calibration for 3D printers based on FDM technology on the example of the Anycubic Chiron model / O. M. Mikhailova, V. V. Kovaleva, D. A. Ponomarenko. - Text: direct // Young scientist. - 2021. - No. 27 (369). - S. 54-57. — URL: https://moluch.ru/archive/369/82927/ (date of access: 10/17/2022).
The article describes the concept and step-by-step method of flow calibration on Bowden type extruders with a description of commands for working in the terminal and changing the controller firmware configurator.
Keywords: extruder, flow, calibration, 3D printer.
The extruder block is one of the most important elements of a 3D printer. This node performs the function of supplying the required amount of filament to the hot end block, where the material is melted and fed in layers to the working surface of the 3D printer. It should be emphasized that the extruder and the print head, which includes the hot end, are different machine components, although the concepts of these blocks are often substituted for each other.
To illustrate the concept of calibration, an example of the work performed will be shown on the feeder of the Anycubic Chiron 3D printer, one of the most popular large format machines.
At the moment there are two main types of extruders, "Bowden" and direct feed "Direct". Each of these types has its own advantages and disadvantages. [one]
Bowden type extruders do not handle flexible materials satisfactorily, and Direct, in turn, has more weight, which causes slower printing compared to other types. The extruder is driven by a stepper motor that must take a certain number of steps to feed the filament being pushed through the hot end. The number of these steps is determined by the firmware in the control device controller in the printer as steps/mm.
Before proceeding with the flow calibration process at the software level, it is necessary to make sure that there are no splicing programs running in parallel, for example, Сura. [2] Running software may cause the 3D printer to not respond to commands. The device is connected via a USB cable to a computer. To send commands to the machine, the Termite software product is used, the interface of which is shown in Figure 1.
Rice. 1. Termite interface
To send commands to the device, you must specify the connection COM port, mainly ports 5 or 6, the port speed for data transfer is 250000.
If the connection is correct, the program will show all the hardwired device settings. An example of settings is shown in Figure 2.
Rice. 2. Hardwired hardware settings
The next step is to find the number of extruder steps. In most cases, it is at the top of the 3D printer command list. Figure 3 shows the above command.
Machine feedback helps you send commands and get real-time results.
Rice. 3. Start Steps of Extruder
Having received stock values from the terminal, the operator has something to build on for calibration. The example indicates the value of the starting steps of the extruder - 405. To unambiguously understand the amount of material supplied, the specialist must make a mark on the filament for subsequent measurement, an example is shown in Figure 4. The mark is indicated in front of the feeder.
Rice. 4. Marking the starting point of the filament
Using the terminal, it is necessary to warm up the equipment by 200 degrees by sending the command M104 S200 . The next step is to send commands one at a time. Team G 91 sets the absolute extrusion mode, G 92 E 0 sets the current position of the extruder to the zero point, G one E twenty F 200 feeds 20 mm of material at a speed of 200 mm/min, M 104 S 0 turn off the hotend heater. After executing the commands, using a measuring device, you need to measure the feed material as in Figure 5, if the indicator is 20 mm, then the data stored in the controller is correct.
Rice. 5. Amount of extruded filament
In figure 5, the indicator is 18 mm, which means the material is fed with a deviation. 18/20 = 0.9, 0.9*100 = 90%, hence there is a 10% filament shortage. Knowing that the step rate is 405, you can calculate a new value for 100% pitch, 405/0.9 = 450. [3]
Provided that the machine produces more material than necessary, the value of the steps of the extruder will differ in a smaller direction compared to stock.
Using the command terminal, the default value is replaced through the command M 92 E 450 , team M 503 the specialist saves the new parameters and updates the configuration, requesting information to verify the readings.
Literature:
- The extruder is one of the most important parts of a 3D printer. — Text: electronic // TechnPrint3D: [website]. — URL: https://tp3d.ru/index.php?route=information/information&information_id=28 (date of access: 06/18/2021).
- Installation and settings CURA in Russian - a slicer for a 3d printer. — Text: electronic // 3DNetPrint: [website]. — URL: https://3dnetprint.ru/blog/ustanovka-i-nastroyki-cura-na-russkom-programma-dlya-3d-printera/ (date of access: 06/18/2021).
- Marlin extruder pitch calibration. - Text: electronic // 3D Today: [website]. — URL: https://3dtoday.ru/blogs/lis92/kalibrovka-shagov-ekstrudera-marlin-ili-esli-u-vas-problemy-s-podachey-plastika (date of access: 06/26/2021).

Basic terms (automatically generated) : send commands, USB, command, material, feeder, pattern, extruder type.
Keywords
calibration, flow, extruder, 3D printerextruder, flow, calibration, 3D printer
Similar articles
Automation of the technological process of production...
The main technological process for the production of pipes from polymer materials is
The process itself can be divided into several stages ( figure 1), this is the preparation of raw materials, loading into
Then the raw material enters the bunker, after which it is dosed into extruder . ..
..
Algorithm for generating data packets for transmission over...
For clarity, the process is shown in figure 1. \ Pic. 1. Packet data transmission over a communication channel. For different modes of operation (reception and transmission), different data schemes and schemes of algorithms are provided. The main data with which the described algorithm works in ...
Customize Unified Bed Leveling Options and Build...
Keywords: command , grid, work surface, autolevel, calibration, EEPROM, UBL, Bed Leveling, Grid.
After downloading the updated firmware and starting the printer's switching software, send to the console command .
Desktop 3D Printer | Article in the journal "Young scientist"
Submit your article today! The magazine will be released on May 21, printed copy will send on May 25th. Publish an article in a journal.
The shape of the original material -polymer resembles a thread or wire. When printing, it is fed into the so-called extruder , where the polymer...
Improving the Design Efficiency of Single Screw...
Mustyukov, NA Improving the efficiency of designing a single screw extruder by integrating external components of CAD systems / NA Mustyukov, TM Zubkova.
All these objects are described in the COM system and provided by the software package in the form of the library.
About modeling objects for a 3D printer | Article in the collection...
Then apply the command Shell with a shell thickness of 2 mm to the top face of the resulting object. In order to create the open end of the whistle, the Shell operation is also applied with a shell thickness of 2 mm.
Sending SMS messages via GSM modem | Journal article...
Most AT commands (except two) start with the at prefix. The exceptions are the escape sequence +++ and the command repeat /.
Sending messages in Cyrillic is possible via digital mode with prior text conversion to UCS.
Development of
extruder for making plastic filament for...In fact, extruder is mechanism meat grinder, but with an additional
The principle of operation of extruder is as follows: stepper motor type Nema 23 rotates
Fig.4. Schematic diagram of extruder for making plastic filament for 3D printing...
Creating a robot racer on the Arduino platform | young scientist
Today it is difficult to imagine a world without robots. Robotics is an effective method for studying important areas of science, technology, design, and mathematics. Today it is impossible to talk about robots and not touch on such a thing as...
Similar items
Automation of the technological process of production...
The main technological process for the production of pipes from polymeric materials is
The process itself can be divided into several stages ( figure 1), this is the preparation of raw materials, loading into
Then the raw material enters the bunker, after which it is dosed into extruder ...
Algorithm for generating data packets for transmission over...
For clarity, the process is shown in figure 1. \ Pic. 1. Packet data transmission over a communication channel. For different modes of operation (reception and transmission), different data schemes and schemes of algorithms are provided. The main data with which the described algorithm works in ...
Customize Unified Bed Leveling Options and Build...
Keywords: command , grid, work surface, autolevel, calibration, EEPROM, UBL, Bed Leveling, Grid.
After downloading the updated firmware and starting the printer's switching software, send to the console command .
Desktop 3D Printer | Article in the journal "Young scientist"
Submit your article today! The magazine will be published on May 21st, the printed copy will be sent to on May 25th. Publish an article in a journal.
The shape of the original material -polymer resembles a thread or wire. When printing, it is fed into the so-called extruder where polymer...
Improving the Design Efficiency of Single Screw.
 ..
.. Mustyukov, NA Improving the efficiency of designing a single screw extruder by integrating external components of CAD systems / NA Mustyukov, TM Zubkova.
All these objects are described in the COM system and provided by the software package in the form of the library.
About modeling objects for a 3D printer | Article in the collection...
Then apply command Shell with a shell thickness of 2 mm to the top face of the resulting object. In order to create the open end of the whistle, the Shell operation is also applied with a shell thickness of 2 mm.
Sending SMS messages via GSM modem | Journal article...
Most AT commands (except two) start with the at prefix. The exceptions are the escape sequence +++ and command repeat /.
Sending messages in Cyrillic is possible via digital mode with prior text conversion to UCS.
Development of
extruder for making plastic filament for...In fact, extruder is mechanism meat grinder, but with additional
The working principle of extruder is as follows: stepper motor type Nema 23 rotates
Fig.4. Schematic diagram of extruder for making plastic filament for 3D printing...
Creating a robot racer on the Arduino platform | young scientist
Today it is difficult to imagine a world without robots. Robotics is an effective method for studying important areas of science, technology, design, and mathematics. Today it is impossible to talk about robots and not touch on such a thing as...
features, photos and customer reviews
29 018 – 50 609 ₽Item is not available now, look similar
Go to the storeItem is no longer for sale, look similar
Link copied, share it
Or send via social networks 5 5
This product is currently not available, but there are similar ones
0005
72% Seller Reliability
Above average, can be bought, ANYCUBIC 3-D Printer Store
- On the site for more than 4 years
- Poor overall rating (1084)
- Customers are satisfied with the communication
- Goods correspond to the description quickly 903 sends goods
- 3.
 3% of buyers were dissatisfied for the last 3 months
Customer reviews
The item was guaranteed for 2 weeks. A month later, the parcel is not sent. I received the track, after 2 days it was returned to the seller. It was not my track for me, the goods were never sent! I received a refund after a month! And I got $25 less than the total paid! Therefore: no product, no money for a month, less than $25 at the end of everything. Goodbye to ALIEXPRESS. First time for me, and last time! No more! The image tells my refund! See below!
November 18, 2020
The item was guaranteed for 2 weeks. After a month without sending. I received the track, after 2 days it is returned to the seller. For me it was not my track, the item was never shipped! I received a refund after a month! And I got $25 less than the total payment! So: no product, no money for the month, $25 less at the end of everything. Goodbye ALIEXPRESS. First time for me, also the last! No more! Image announces refund! Looks below!
May 22, 2020
Everything is fine, fast delivery, everything is whole, there are no problems.
June 15, 2020
Everything is fine, fast delivery, everything is whole, there are no problems.
December 03, 2020
Prices from other sellers from 19184.65 ₽
19 185 – 28 124 ₽
Anycubic 3d Printer Chiron Plus Size 400*400
Anycubic 3d Printer Chiron Plus Size 400*400
DIY Torad ZDM Dual D printer Auto-leveling 3 axis 3 impres drucker
3rates
11order
Reliability-89 %
Seller Anycubicbrand Store
In the store in the store
found 48 similar goods
-12
%
798-15
9000 3D-printer ANYCUBIC MEGA-SS UPGRADE, fully metal case, TFT touch screen, high accuracy, FDM, 210*210*205 mm4
7
The reliability of the seller is 89 %
-36
%
9000 -20 715 -20 697 ₽anycubic mega pro 3d printer laser engraving touch screen tpu filament dual gear extruder DIY printing
1
1
The reliability of the seller is 89 %
-30
%
17 809 -23 929 ₽
Anycubic photon S DIY 3D printers Dental objects on the provided services of UV 8 × ADMP 3d printers color, decorations impressora 3d impressora
2
5
Reliability of the seller 89%
16 888 – 23 489 ₽
nylon, flex / diy kit anycubic / delivery from Russia
1
1
The reliability of the seller is 100 %
-3
%
26 085 -26 098 ₽
3D printer Tronxy, large colors, FDM, FDM renewal function, thread detection, automatic alignment, ultra quiet motherboard
0
0
Seller Reliability 68%0005
1
3
The reliability of the seller 89 %
-5
%
13 684 -18 497 ₽
3D printer IdeAFORMERER PRO FDM, double axis Z and double axis Y, silent printing 300*300* 350mm full metal magnetic build plate DIY printer
0
0
100% reliable seller
work/thread detection/auto alignment for home use
1
1
The reliability of the seller 100 %
-24
%
20 560 ₽
9000 GeeTECH 3D printer A30Pro Dual Z Axis Sundance Printer Large Printing Printing Automatic Speaking Steam 3D 9000 1 9000 9000 0Reliability of the seller 89%
-24
%
marlin source code, 3d printer
3
1
Reliability of the seller 85% Self -assembly
3
1
Seller's reliability 100 %
-3
%
13 495 -21 680 ₽
3D printer ANET ET4PRO, Silentic Printer with the TMC2208 driver, PRUSA I3 FDM, with the function of auto -equalization. , with printing continued and filament detected
1
1
The reliability of the seller is 89 %
-2
%
25 373 -25 375 ₽
3D printer TRONXY X5SA Pro, guide to the Titan Extruder, core XY, flexible thread, PLA, PLA, PLA, PLA, PLA, PLA, PLA, PLA, PLA, PLA, PLA, PLA, PLA, PLA, PLA, PLA, PLA, PLA TPU, ABS, Petg
0
0
Seller's reliability 68 %
-22
%
9000 8 148 -16 297 ₽3D printer Anycubic Mega S, 3.5 inch, touch screen, set for 3d printing anycubic i3 mega with extruder and hanging photo
0
9,0005
The reliability of the seller is 89 %
-3
%
30 618-43 451 ₽
3D printer Anycubic Chiron, 400x400x450 mm, large printing size, with touch screen, ultrabaza plate , with PLA-thread 500 g
0
0
The reliability of the seller 89 %
-0. 8
8
%
8 766-10 929 ₽
Easythreed Little Wi-Fi Printer Appender PLA FDM mini mini -printer 3d x2 brazil impresora 3d printer with lcd screen
0
0
The reliability of the seller 55 %
-14
%
11 655 -15 059 ₽
AW 3D FDM 3D printer S8 works with various threads of wood/Pla/Petg/tpu/ABS Press size in 310x310x400mm
1
1
The seller’s reliability 100%
34 662-36 300 ₽
3D printer Crealy CR-6 SE, with a 32-bit silent mother, self-leveling self-leveling, with two lords Z, Osilia Z. drucker impresora 9 3d printer kit0005
0
0
The reliability of the seller 72 %
-22
%
17 346 ₽
Creative 3D printer FDM 3D printer Zn Detection and Resetty Press
05
0
0
Reliability of the seller 66%
0005
1
1
The reliability of the seller 72 %
-5
%
Equal data
1351 -19 350 ₽
3D -printer FDM, Large of Plane/PETG/TPU/ABS filament, 2 year warranty
0
0
Seller Reliability 0%
0
1
The reliability of the seller 100 %
-24
%
23 035 ₽
3D printer Tronxy X5SA, Assembly set, 330*330*400 mm, with heating, automatic leveling, Automatic equalization, automatic leveling. resumption of the printing of the press, find ...
0
0
The reliability of the seller 89 %
-8
%
9000 38 38 365 ₽3D printer Tronxy IDEX Gemini S, multi -colored, 2 colors , 2 heads, independent dual extruder, large fdm 3d printer
0
0
Reliability of the seller 89%
0
The reliability of the seller 89%
19 975-28 880 ₽
3D printer SV01PRO with two vertical axes and auto-excess function
4
8
Reliability of 66% 9000% 9000% 9000% 9000%0022 -8
%
11 270-15 271 ₽
Set for 3D printer ANET A8, 220x220x240 mm, print size with LCD, auto-leveling, Impressora 3D Open Source Full DIY 3D Drucker
2 9000 2 9000 2 9000 2 9000 2 9000 2 9000 2 9000 2 9000 2 9000 2 9000 2 9000 2 9000 2 9000 2 9000 2 9000 2 9000 2 9000 2 9000 2 9000 2 9000 2 9000 2 9000 2 9000 2 9000 2 9000 2 9000 2 9000 2 9000 2 9000 2 9000 2 9000 2 9000 2 9000 2 9000 2 9000 2 9000 2 9000 2 9000 2 9000 2 9000 2 9000
Reliability of the seller 89%
14 955 – 16 502 ₽
easythreed fdm mini printer with touch screen, wifi support, stampante app, impressora, drukarka, 3d, brazilian, russian
1
Reliability of the seller 55%
611. 98 – 35 193 ₽
3d printer printer 3d printer artilery swx1, DIY kit, large print size, low noise, filament support, detection, power off
11
0
13 220 – 15 307 ₽
Cheap tronxy c2 3d printer all aluminum sheet mini 3d machine 1 roll 1.75mm pla filament as a gift
1
1
0005
-7
%
11 081 ₽
ANET Classic DIY 3D Printer A8 Impresora 3D PRUSA I3 with thread SD Base for open source Marlin
1
1
The reliability of the seller 85 %
27 485 - 27 491 ₽
X5sa-2e 3d printer dual extruder 330*330*400mm tronxy dual color head 3d drucker diy 2 in 1 external kits print impresora
0
0
Reliability of the seller 25 -
0005
%
25 386 ₽
3D printer Twotrees Bluer PEI BMG TMG TMC2209, updated magnetic mask for printing with a touch screen, resumption of power failure, double axis Z, 2021
0
1
Seller 89 %.