
3D systems scanners
3D Scanners | 3D Systems
Resolution makes a difference
3D scanning opens up a world of possibilities. Imagine being able to capture anything in the physical world and have a digital model of it in minutes.
You don’t have to imagine. Every day, companies use 3D scanners and software to:
- Create and reverse engineer CAD models of real parts to capture lost designs, update existing products, and make new ones.
- Verify product quality by comparing manufactured parts to CAD designs.
- Make mass customized products for healthcare, dentistry, and fashion.
- Scan entire buildings to create accurate 3D models.
- And much more.
3D scanners and accompanying software are now within the reach of many. Scanners are faster, less expensive, and more accurate. 3D scan-processing software is more automated, creates better results, and works faster than ever before.
What Are 3D Scanners?
There are many different devices that are called 3D scanners. Any device that measures the physical world using lasers, lights, or X-rays and generates dense point clouds or polygon meshes can be considered a 3D scanner. They go by many names including 3D digitizers, laser scanners, white light scanners, industrial CT, LIDAR, and others. The common, uniting factor of all these devices is that they capture the geometry of physical objects with hundreds of thousands or millions of measurements.
Why Do You Need 3D Scanning Software?
Because scanners collect immense amounts of data, you need dedicated reverse-engineering software like Geomagic® Design X™, Geomagic for SOLIDWORKS®, and Geomagic Wrap® to process the output into something usable that other software can handle. Depending on what you will use the scan data for, reverse-engineering software can do many different things to the data. The most common applications for 3D scanning are reverse engineering, inspection, and digital archiving or 3D printing.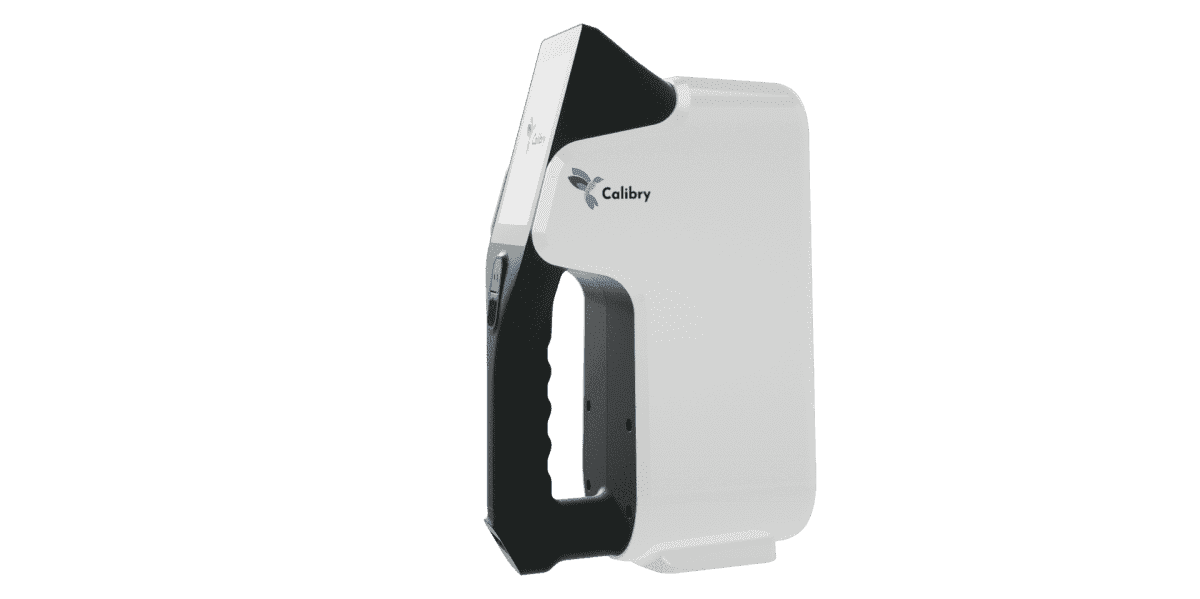 Dedicated software like Geomagic reverse-engineering software and Geomagic Control X™ inspection and metrology software is the fastest, easiest way to unlock the full potential of a 3D scanner.
How Do 3D Scanners Work?
There are many different approaches to 3D scanning, based on different principles of imaging. Some technologies are ideal for short-range scanning, while others are better for mid- or long-range scanning.
Short-Range 3D Scanners
3D scanners with less than one meter of focal distance include laser triangulation and structured light 3D scanners.
Laser Triangulation 3D Scanners
Laser triangulation scanners use either a laser line or single laser point to scan across an object. A sensor picks up the laser light that is reflected off the object and, using trigonometric triangulation, the system calculates the distance from the object to the scanner.
The distance between the laser source and the sensor is known very precisely, as well as the angle between the laser and the sensor. As the laser light reflects off the scanned object, the system can discern what angle it is returning to the sensor at, and therefore the distance from the laser source to the object’s surface.
Structured Light (White or Blue Light) 3D Scanners
Structured light scanners also use trigonometric triangulation, but instead of looking at laser light, these systems project a series of linear patterns onto an object. Then, by examining the edges of each line in the pattern, they calculate the distance from the scanner to the object’s surface. Essentially, instead of the camera seeing a laser line, it sees the edge of the projected pattern, and calculates the distance similarly.
| Short-Range 3D Scanners | Pros | Cons |
| Laser Triangulation |
|
|
| Structured Light |
|
|
Mid- and Long-Range 3D Scanners
3D scanners with with one or more meters of focal distance include laser pulse-based and laser phase-shift 3D scanners.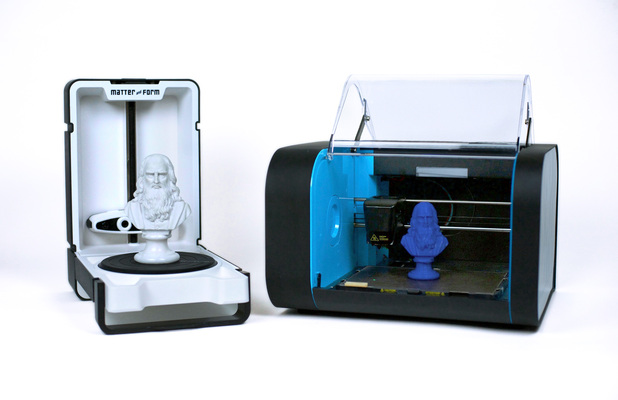
Laser Pulse-Based 3D Scanners
Laser pulse-based scanners, also known as time-of-flight scanners, are based on a very simple concept: the speed of light is known very precisely, so if we know how long a laser takes to reach an object and reflect back to a sensor, we know how far away that object is. These systems use circuitry that is accurate to picoseconds to measure the time it takes for millions of laser pulses to return to the sensor and calculates a distance. By rotating the laser and sensor (usually via a mirror), the scanner can scan up to a full 360 degrees around itself.
Laser Phase-Shift 3D Scanners
Laser phase-shift scanners are another type of time-of-flight 3D scanner technology and conceptually work similarly to pulse-based systems. In addition to pulsing the laser, these scanners also modulate the power of the laser beam, and the scanner compares the phase of the laser being sent out and then returned to the sensor. Phase shift measurement is more precise.
| Mid- and Long-Range 3D Scanners | Pros | Cons |
| Laser Pulse-Based | Medium- and long-range (2m–1,000m) |
|
| Laser Phase-Shift |
| Medium-range only |
How to Choose the Best 3D Scanner to Use With Your 3D Printer
3D scanning has an important place at the beginning and end of 3D fabrication workflows. Engineers, product designers, and researchers use 3D scanners as a faster and more efficient way to start constructing digital models, whether by incorporating existing designs via reverse engineering, digitizing hand-sculpted clay designs, or referencing the exact shape of the human body.
After fabrication, 3D scanning can support quality control and help to verify the accuracy of a 3D printed part, or, after the part has been used, a scanner can reveal how it’s performed—a scan of a deformed part can show you where to reinforce the design in the next revision.
With such a wide range of product options from handheld 3D scanners to desktop 3D scanners, it can be difficult to choose the best 3D scanning system that’s right for your application and budget. In this post, we explore the most important factors to consider when purchasing a 3D scanner and showcase some of the key applications that are empowered by combining 3D scanning and 3D printing.
White Paper
3D scanning and 3D printing workflows can be applied to replication and restoration, reverse engineering, metrology, and more. Download our white paper to explore these applications and learn how to get started.
Download the White Paper
There are multiple scanning technologies currently on the market, all offering their own advantages and weaknesses.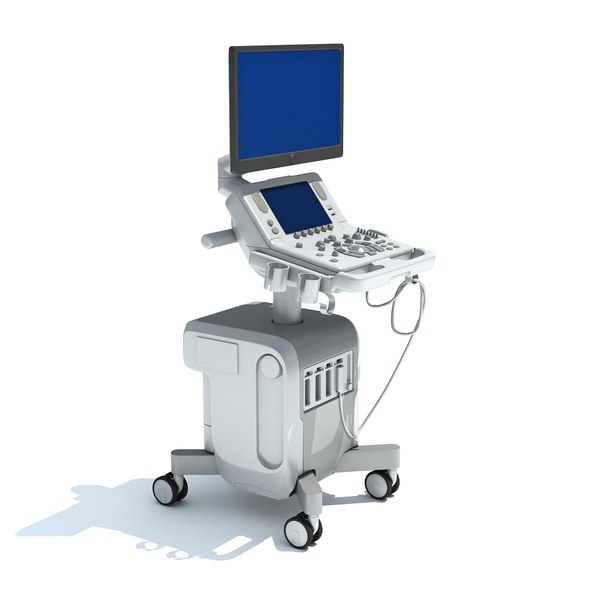
Laser triangulation uses light projected onto the object to take up to millions of measurements (dots) per second. The light reflected from the dots back into the scanner’s sensor to help it capture the geometry of the object. These types of scanners are often the most accurate, and are great for highly detailed parts that have opaque surfaces.
Laser triangulation scanners do have limitations. For example, this technology is not used in most portable scanners because the laser dots need to project from a stable source, and the source has to be kept a close distance from the scanned object. Laser triangulation scanners don’t always work on transparent or shiny surfaces either. Typically, they require reflective markers to be applied onto the object, which need to be removed after use and can be an obstacle depending on the object being scanned.
Finally, the laser dots can be harmful to human eyes, so it is important to use extra safety precautions when scanning body parts with a laser triangulation system, or to check with your scanner manufacturer to make sure the device is eye-safe.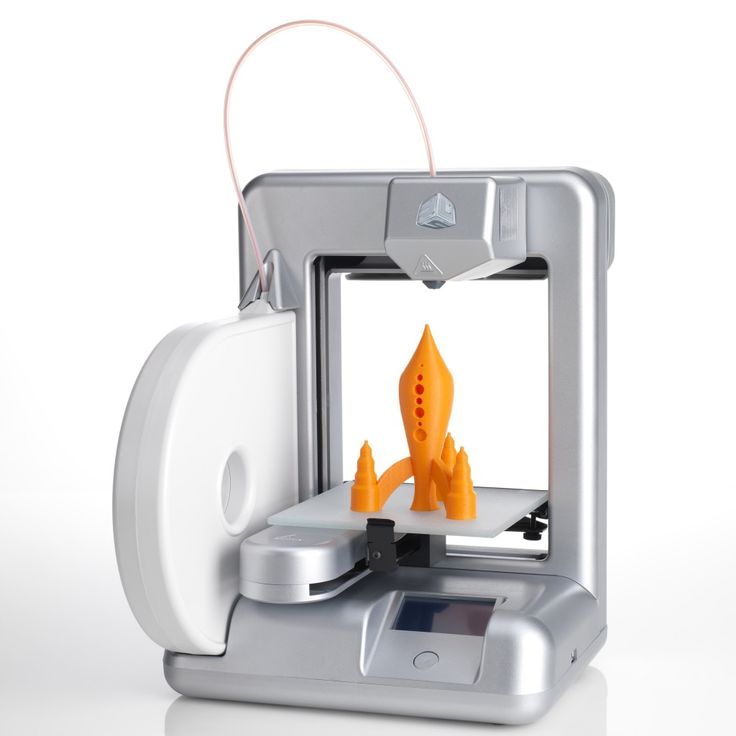
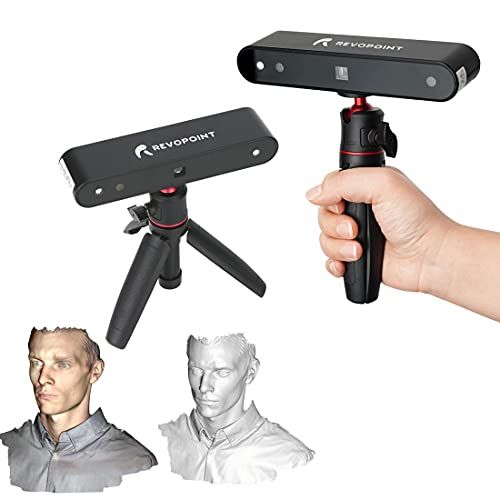
Structured light scanners (also known as white light scanners or blue light scanners) generally use a projector with two cameras at angles on either side. A pattern of light is projected and laid over the component being scanned, the cameras capture the ways in which the object deforms the light pattern, and then multiple images are integrated into a single 3D snapshot.
Structured light scanners are available in both stationary and portable format—the technology is the most commonly used process for handheld 3D scanners. Structured light scanners are far more common in medical applications, since it is safe to use on both humans and animals and excels when an object is not perfectly still. Traditional white light scanners have been slower to scan than laser triangulation scanners.
Structured light scanning is the most commonly used technology in handheld 3D scanners.
Depth-sensing cameras project a field of dots in infrared (IR) to sample a 3D scene. Depth-sensing cameras are simple to use and are the least expensive scanning option, but their accuracy and resolution are low, and fine details are sometimes lost. Large objects may be captured with depth-sensing cameras, but accuracy declines with increased distance from the subject and at steeper angles to the camera.
Photogrammetry means the act of deriving precise measurements from photographs. It involves taking a set of overlapping photos of an object, building, person, or environment, and converting them into a 3D model using a number of computer algorithms. This is the most commonly used method when creating a 3D scan with a smartphone, since modern phone cameras are capable of capturing and combining a large numbers of photos. Photogrammetry should be considered the least expensive and least accurate method for creating 3D prints, and is not suitable for serious business applications.
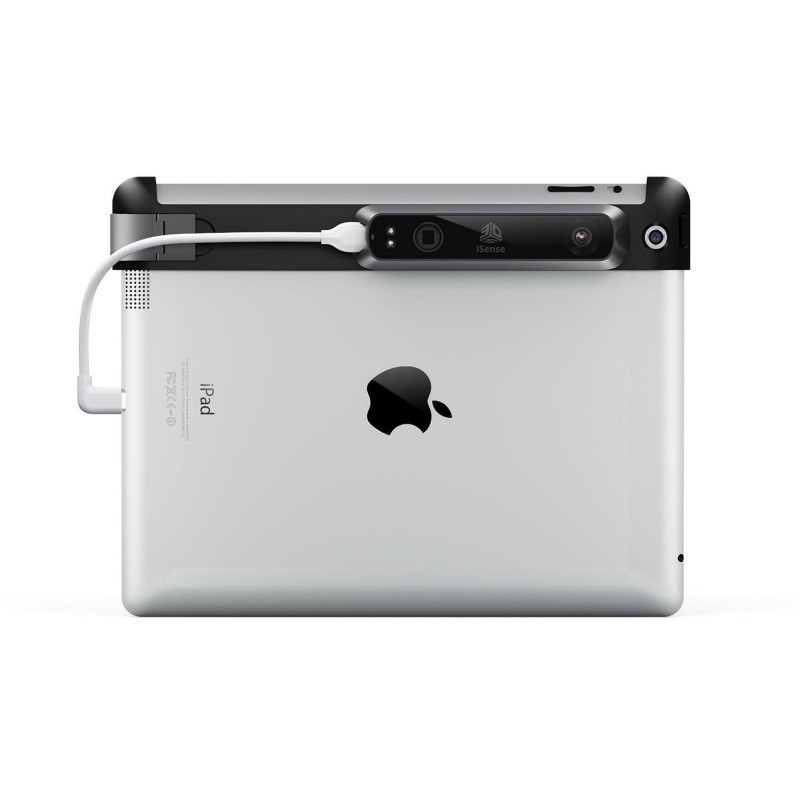
LiDAR (light detection and ranging) sensors can be found on some higher-end smartphones and tablets, such as the latest versions of the iPhone Pro and the iPad Pro.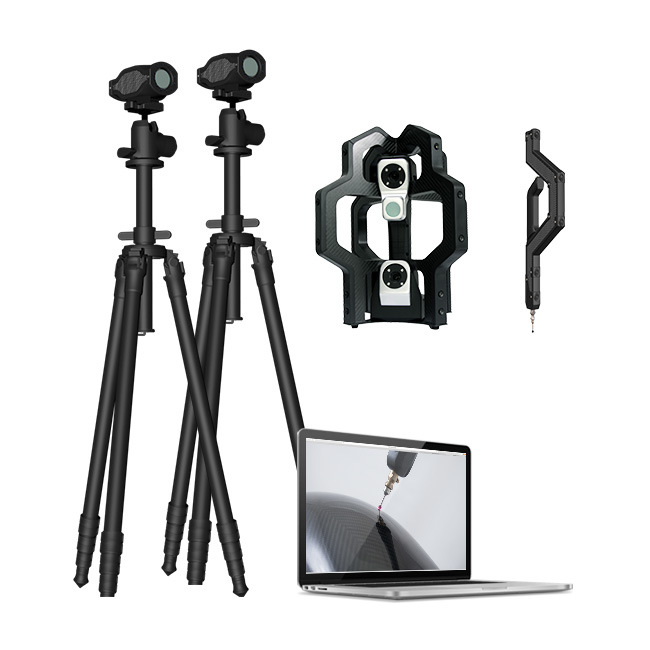 This has made the iPhone and iPad viable scanners for those with only occasional scanning needs, offering performance a step above devices that only have access to photogrammetry. Applications that generate 3D mesh files via your smartphone’s or tablet's camera should be seen as the floor for entry-level scanning; users should expect additional work in their CAD software to remove gaps in meshes and improve the 3D model for applications like sending it to a 3D printer. Smartphones use fewer light points when scanning objects, resulting in less detail than a true, stand-alone scanner. iPhones are good substitutes for scanners if you have significant CAD design ability or need to transfer basic models into a digital space.
WEBINAR
Watch this webinar with Peel 3D to explore how to integrate 3D scanners into your 3D printing workflow to elevate your product development process.
Watch the Webinar Now
Scan accuracy varies considerably between scanner technologies, and higher accuracy generally comes at a higher cost.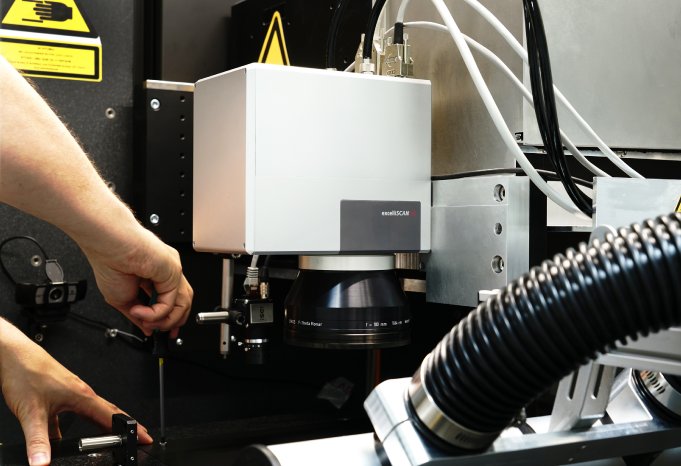 The required tolerances of your final part can be a helpful guide for determining your accuracy requirements for a 3D scanner.
| High Price, Highest Accuracy ($15,000 and more) | More Affordable, High Accuracy ($12,000 and under) | Low price, Low Accuracy |
|---|---|---|
| Zeiss T-Scan Hawk Scantech Simscan EviXscan Optima+ M Creaform HandyScan 307 Silver Series | peel 3d peel 1, peel 2 & peel 2-S FARO Freestyle 2 Polyga Compact S1 | iPhone Pro and iPad Pro Structure Sensor Matter and Form 3D Scanner V2 Revopoint POP |
With accuracy in the range of 0.1 mm or better, laser and structured light scanners are a good fit for professional applications and alongside high-resolution 3D printers. Formlabs stereolithography (SLA) 3D printers (such as the Form 3+) produce parts at a similar accuracy, and with a similar printable area, to the scan volume of many desktop 3D scanners.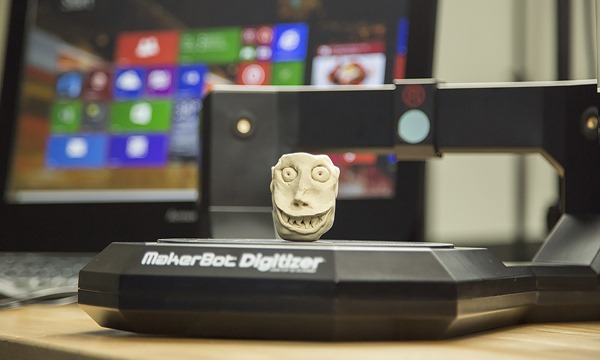
Besides the accuracy between measured points and their actual location, scanners also vary in terms of resolution, which is the distance between captured points at a given scan distance. This means that details on the scanned object that are smaller than the scanner’s resolution won’t be captured. For example, a highly accurate 3D scanner with a lower resolution might detect the general shape of jewelry on a statue, but not clearly show individual details on a ring or necklace. Depending on your project requirements, this may or may not be a dealbreaker.
An easy way to remember these metrics is: accuracy is the measurement error between the part and digital value. Resolution refers to the density of measurements.
Accuracy can mean slightly different things depending on the manufacturer and 3D scanning technology. For example, the accuracy of handheld scanners depends on the distance to the subject and the quality of scan reconstruction, while desktop scanners have consistent accuracy within the constrained scan volume.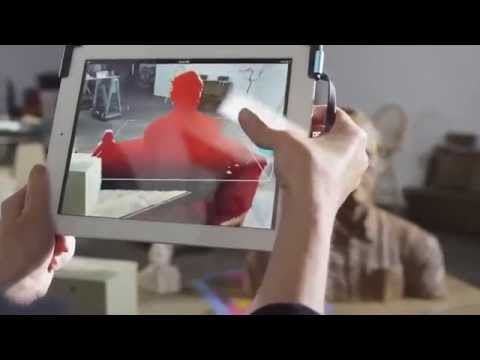 If you are considering buying a 3D scanner for precise measurement, make sure to compare like to like.
In general, structured light scanning provides the best resolution and accuracy when compared to laser scanning. For some artistic use-cases for 3D scanning you may need a lot of detail, while overall accuracy is less important—especially if you don’t require your part to fit precisely with other parts in an assembly. In these cases, photogrammetry is an excellent low-cost option to explore.
Both depth-sensing cameras and photogrammetry are a good solution for scanning large objects in order to create 3D printed scale models and also offer enough accuracy for capturing the shape of the human body.
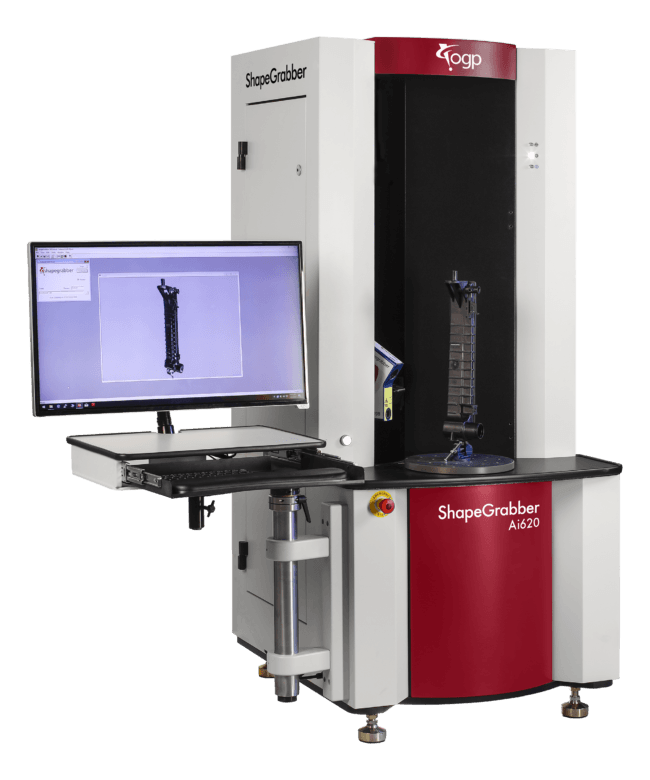
Several entry-level laser scanners are available using technology similar to higher-end systems. These scanners are a great way to start replicating small objects at 1:1 scale. As one would expect, the accuracy of entry-level laser 3D scanners is lower than a high-end scanner, but they can easily provide enough detail to replicate small decorative objects and figures where accuracy is not critical.
If you only have occasional 3D scanning needs, digitization services can scan your object, as well as perform CAD translation and accuracy inspection.
The area that a 3D scanner can capture varies significantly between scanners. Find a scanner that fits your size and resolution requirements without too much overhead, as cost typically increases with scan volume.
Handheld scanners can be manually moved around the object and have fewer size constraints than desktop models. Most inexpensive handheld scanners can capture objects from the size of a basketball to an entire room. High-end handheld scanners have an even wider range, and fill the niche for all objects that require precise measurements, but cannot fit in a desktop scanner. Handheld scanners are also able to capture objects nearly instantaneously, which makes them well-suited for taking human measurements (where the subject is not perfectly still) for ergonomics and medical applications.
If the area of the model can’t be seen by the scanner, it will cause a gap in the model. You can automatically repair small missing sections with most scan software programs to create a 3D printable model. However, repaired holes are rarely accurate to the original object. For parts that demand close to perfect accuracy, auto-repair of gaps or holes will not be sufficient. Read our MeshMixer tutorial for advanced tips to edit and repair 3D files for 3D printing.
Many scanners use turntables to increase what the scanner can see. The sophistication of a scanner’s turntable affects how easily and completely the object is captured: some scanners have the ability to move the object around multiple axes, imaging the object from more angles. This feature is important when reverse engineering plastic parts with deep recesses and ribs, which are impossible to capture from a single angle.
Scanners may rotate the object to capture occluded areas. Red regions are occluded and will be missing in the scan. Areas with deep relief are difficult for a single axis turntable to fully capture due to occlusion.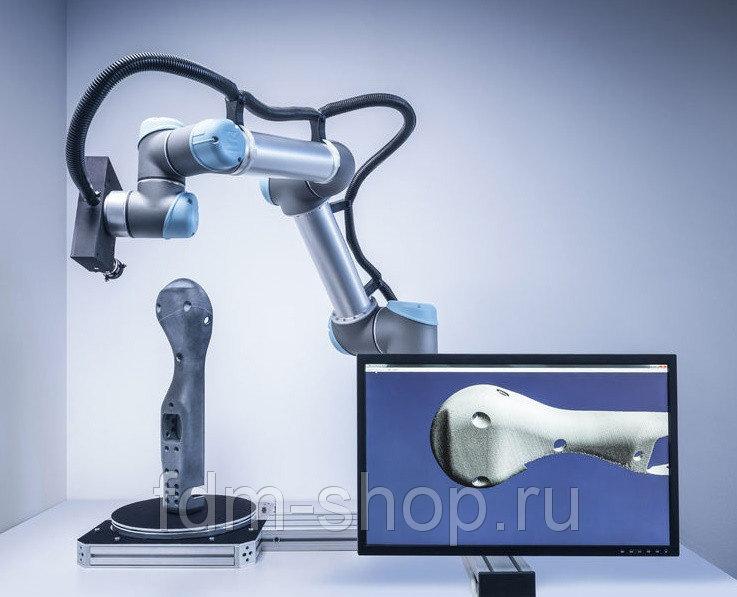
Cost concerns are straightforward; how much you are willing to spend on a scanner will reflect your business’s budget and how often the scanner is going to be used. Higher cost scanners will be able to capture small objects and create highly-detailed meshes that don’t require significant touch-ups in CAD software. Handheld scanners are also often on the higher end of the price range, due to their portable nature. The low-cost scanning market offers a wide range of options, but you have to know what to look for.
Use this flowchart to determine what scanner you need based on accuracy, scan volume, and budget.
Download the high-resolution version of this infographic here.
A 3D scanner expands the capabilities of a 3D printer, allowing you to replicate the shape of almost any object. Together, the two technologies create a powerful, digital workflow that can simplify and sophisticate processes in a range of industries.
The output from a 3D scanner is a mesh of triangles representing the surface of an object at a real-world scale.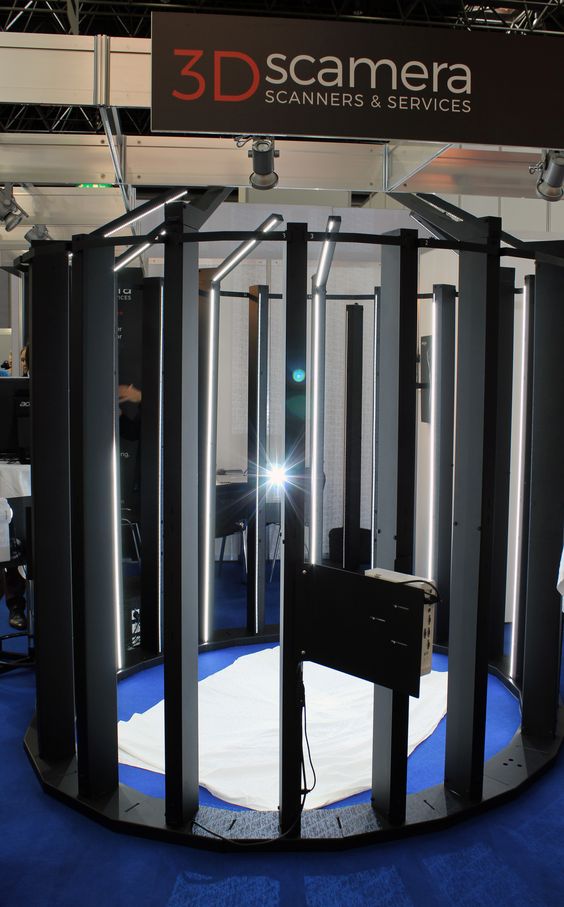 In some cases, the scan can be used directly to replicate objects without any CAD work. A hybrid workflow can also be powerful, where solid CAD models are combined with scanned 3D models. For example, customized ergonomics capture a physical imprint of a part of the human body, and integrate them with a mechanical design.
3D scanners are also valuable tools for measuring the accuracy of manufactured objects. Many factors affect 3D print accuracy, and metrology-grade 3D scanners provide a clear picture of how a material performs for demanding applications.
A variety of powerful workflows are enabled by combining a 3D printer and a 3D scanner:
- Reverse engineering to create replacement parts, products with custom ergonomics, and more.
- Replication and restoration of parts, especially in art and jewelry.
- Consumer audio for creating custom earpieces.
- Dental and medical applications, and how 3D scanning is enabling patient-specific workflows.

- Metrology to validate and measure the accuracy of manufactured objects.
Webinar
Watch this webinar for a detailed look at how to start using 3D scanning to improve part design and production when paired with reverse engineering CAD and 3D printing.
Watch the Webinar Now
3D scanners and 3D printers are essential parts of digital workflows across industries. Download our white paper or watch our webinar to get a detailed look into how to start using 3D scanning to improve part design and production and learn how to pair 3D printing and 3D scanning to empower a variety of workflows in engineering, product design, and more.
Learn more about the 3D printer side of the equation: get to know stereolithography (SLA) and selective laser sintering (SLS) 3D printing technologies and see Formlabs advanced 3D printing materials for yourself with a free sample 3D printed part.
Explore Formlabs 3D PrintersRequest a Free Sample Part
Installation - Artec Studio 16 documentation
System requirements
To use with Artec 3D scanners, your computer must meet the system requirements.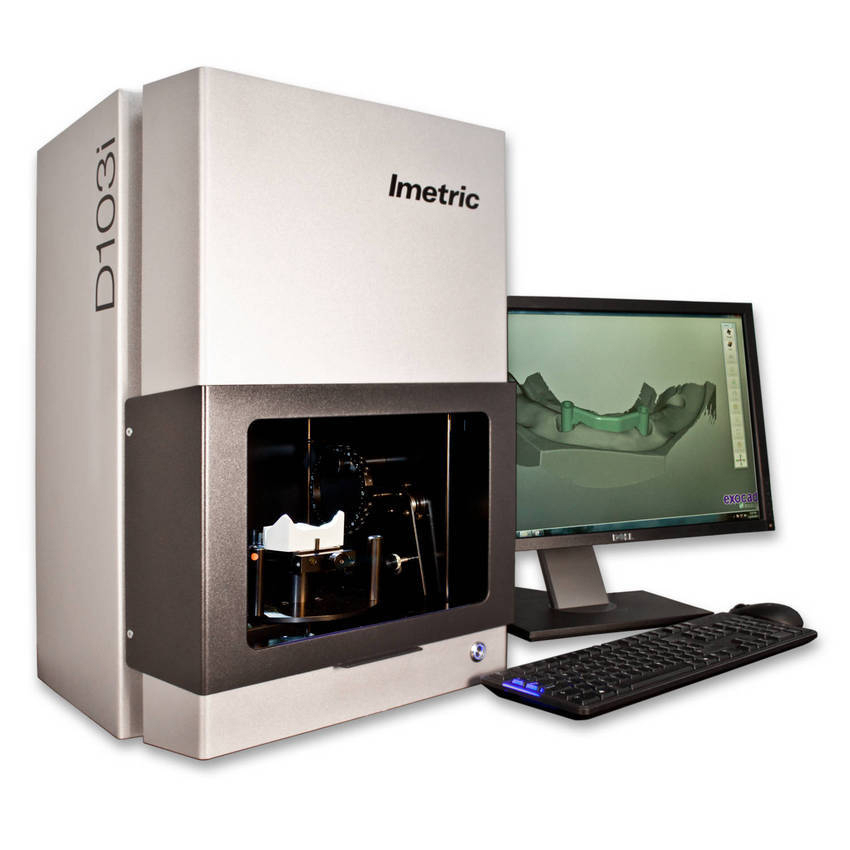
Also note the following:
-
Real Time Fusion Mode (Real Time Fusion Scan): Make sure your graphics card has at least 1 GB of VRAM or your Intel HD Graphics 4600 chipset and above (detailed information can be found in the FAQ article).
-
Using Multiple Scanners (Multi Camera) requires your workstation to have as many independent USB controllers as there are scanning devices. You can get the required number of USB controllers by installing PCI/PCI Express USB cards.
-
Using HD mode
-
If you intend to use the scanner in HD mode, make sure your Nvidia GPU has at least CUDA 6.1 processing power and 2 GB of memory (4 GB for scans with Leo) or more, and your computer has at least 32 GB RAM.
-
If your computer does not meet these requirements, you can still perform HD reconstruction, but this may take up to several hours.
 In this case, it is recommended to use lower values of HD data density (see Enabling HD mode for details).
-
User account
To install Artec Studio and receive timely updates, register a free account on my.artec3d . Registration is also required to activate the Artec 3D scanner. In addition, the site allows you to track your 3D scanners and software.
The my.artec3d account is valid for all Artec sites and services (including viewshape.com ).
Fig. 22 Start screen my.artec3d .
To register, follow these steps:
-
Go to my.artec3d and click please sign up.
-
Fill in all the fields in the registration form (by clicking Next) and click Create account.
-
Receive a registration email containing a confirmation link.
-
Click on the link or copy it to your browser to confirm your registration.
 Go directly to your account at my.artec3d .
Scanner activation
Before using the Artec scanner, it must be activated and associated with an account on my.artec3d . These operations are performed using the Artec Installation Center, a separate utility available for download from my.artec3d . If you are a new user and you do not have Artec Installation Center installed yet, please read below How to start Artec Installation Center. Otherwise, go to Activating the 3D Scanner using the Artec Installation Center.
Warning
Do not connect your scanner to the USB port until the Artec Installation Center is complete.
Launching Artec Installation Center
Before using Artec Installation Center, make sure your computer is connected to the Internet. Any computer with a USB2.0 or USB3.0 port will do. If necessary, you can install and activate Artec Studio on another computer. Also make sure you have an account at my. artec3d ; if not, go to User account.
-
Log in with your account at my.artec3d and download the Artec Installation Center. The download link for the Artec Installation Center installer executable is available in section My software .
-
When the download is complete, open the folder containing the installer executable, run it, and follow the instructions on the screen. Once Artec Installation Center is installed, a window will open asking for your email address and password. For authorization, use your account details on my.artec3d as shown in Fig. 23.
Fig. 23 Authentication with Artec Installation Center
Activating the 3D scanner using Artec Installation Center
To activate the 3D scanner using Artec Installation Center, make sure that the application is installed on your computer and that it is connected to the Internet.
-
Start the Artec Installation Center (via the Start menu: click Start → All Programs → Artec Group → Artec Installation Center ), the window shown in Fig.
 40.
40. -
Connect your Artec 3D scanner to your computer and wait while Windows detects the device and installs the necessary drivers. A message similar to the one shown in Fig. 24.
-
Go to the Artec Installation Center window, click Update and wait for the new scanner to appear in the Scanners section. Click the Activate button (to the right of the scanner serial number) to start using your 3D scanner. The scanner status will be changed to Activated as shown in Fig. 25.
Fig. 24 Windows message about device installation.
Fig. 25 3D scanner activated
Installing Artec Studio
There are two ways to download and install Artec Studio:
-
Using the Artec Installation Center (either during installation or by clicking the Install button in the application, as shown in Fig. 26 )
-
From site my.artec3d : log in, go to section My software and download the executable file (see Figure 27)
Fig.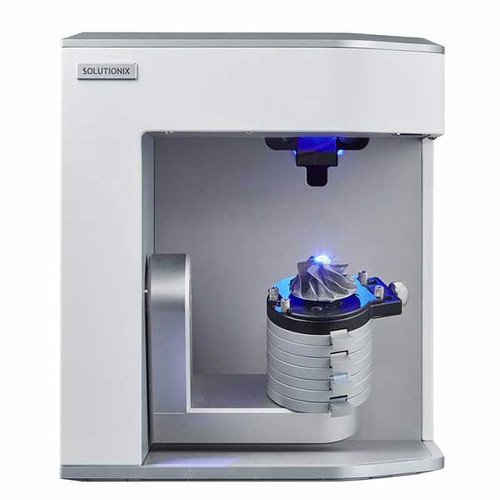 26 Artec Installation Center is ready to install Artec Studio.
Fig. 27 Part of page My software to my.artec3d .
If you downloaded the executable, run it to start the installation; otherwise, click the Install button in Artec Installation Center. To continue the installation, click Next, the License Agreement will open (see Fig. 28). After reading its text, confirm your consent to the installation by clicking on the Yes button.
Fig. 28 License agreement
fig. 29 Installation location
30 Selection of installed components
fig. 31 Click Install to start the installation process.
Fig. 32 Artec Installation Center with activation window Artec Studio
33 Completing the installation
Specify the path to the installation directory (it is recommended to use the default one), as shown in Fig. 29. Then go to the window for selecting installed components (see Fig. 30):
- Program-menu shortcuts
-
creates an icon in the start menu
- Desktop shortcut
-
creates an icon on the desktop
- Start-menu shortcut
-
adds a shortcut to the Start menu and Quick Launch
- English manual
-
installs English user manual
- Artec scanner drivers
-
installs drivers for Artec
3D scanners - Artec Ray drivers
-
installs drivers for Artec Ray
3D scanner - Artec Micro drivers
-
installs drivers for Artec Micro
3D scanner - PrimeSense Carmine / Asus Xtion drivers
-
installs drivers for PrimeSense/Asus
3D sensors - Intel RealSense Runtime
-
installs drivers for Intel RealSense
cameras
By default, the application creates all the shortcuts listed above and installs the user manual and drivers for Artec 3D scanners.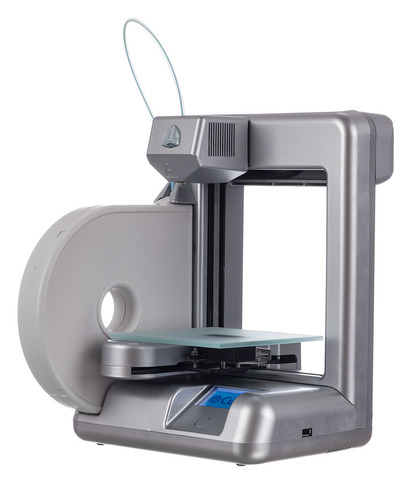 Click Next to continue with the installation.
If you are just starting the installation of Artec Installation Center, an authorization window will appear, as in Fig. 23. If you are not connected to the Internet, see Offline Activation for a description of the Artec Studio offline activation process.
If you have not previously associated your account with the computer on which you are installing Artec Studio, an activation confirmation dialog will open (see Figure 31).
Once the installation is complete (see Figure 32), the installer will prompt you to launch Artec Studio.
Offline activation
If the computer on which you are installing Artec Studio is not connected to the Internet due to security or other reasons, you can use the offline activation mechanism to activate the program.
Note
Artec Studio copies activated offline cannot be deactivated later. Therefore, offline activation is recommended to be used only in case of emergency.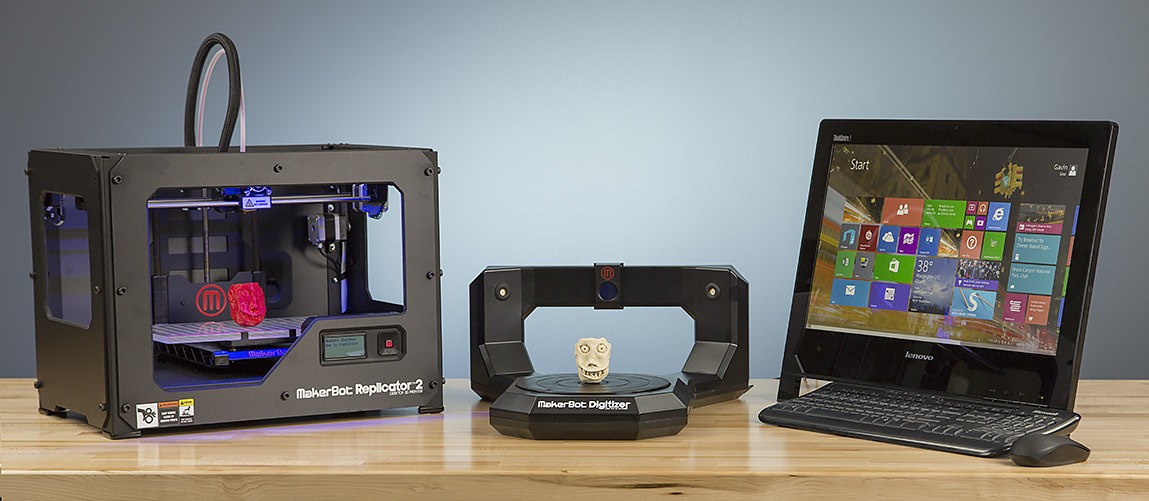
Note
Before performing offline activation, make sure that the scanner (see Scanner Activation) and Artec Studio are linked to your account on my.artec3d .
Offline activation requires the following:
-
Another computer connected to the Internet
-
Artec Studio installation file (preferably downloaded from my.artec3d )
-
Flash drive or other storage device for transferring files from a computer with an Internet connection to a computer where Artec Studio
will run
Fig. Fig. 34 Authentication window in Artec Installation Center
35 Artec Installation Center - Activate offline
Pic. 36 Offline activation window
Installation and activation process:
-
Start the Artec Studio installation process.
-
During installation, the registration data entry window will open, as shown in Fig. 34. Click the Continue offline button.
-
In the window that opens, click Activate offline.
-
In the offline activation window (Fig. 36), click Save… and save the file with the activation ID to a flash drive or other media.
-
On a computer connected to the Internet, log in to your account at my.artec3d and open the section My software .
-
Find Artec Studio and click on the appropriate link. A new page will appear as shown in Fig. 37.
-
Go to the link Activate application offline , then click the Select file button and specify the path to the file with the activation ID. Next, click Activate.
-
A new window will open where you can download the offline activation file. Save it to a flash drive.
-
Go back to the computer where Artec Studio is being installed, click the Activate and continue button and specify the path to the offline activation file.
Note
As soon as you create an offline activation file, my.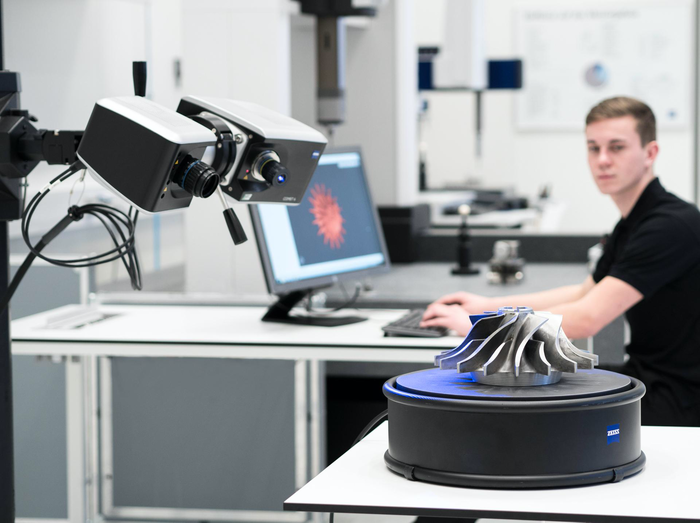 artec3d will decrease the number of activations available to you by one.
Upon completion of all the above steps, a copy of Artec Studio will be activated and all Artec 3D scanners will be installed on a computer not connected to the Internet.
Fig. 37 Offline activation on my.artec3d .
Note
If you purchase another Artec 3D scanner in the future, you will need to reinstall the application and go through the offline activation procedure again, as described above, in order to copy all the data files of the new scanner to your computer.
Deactivation
It is important to note that the deactivation procedure is only available for computers on which you have activated Artec Studio online, as described in Installing Artec Studio. Unable to deactivate Artec Studio application activated offline.
Note
The number of possible deactivations may be limited, so deactivate Artec Studio only if you really need to transfer the application from one computer to another.
Fig. 38 Deactivating Artec Studio.
To deactivate a license on a computer, do the following:
-
Make sure that the computer is connected to the Internet.
-
Go to Control Panel → Uninstall programs and select Artec Studio. The uninstall process will start.
-
A dialog will open as shown in Fig. 38. Check the box I understand. Deactivate Artec Studio.
-
Click Next to complete the removal process.
Managing Artec 3D scanners and products
Artec Installation Center is used to manage applications and scanners assigned to your account.
This is a feature rich application for Artec Studio that connects to my.artec3d and helps you install new applications, download updates, and manage your 3D scanners. To launch Artec Studio for the first time, you need to log in with my.artec3d . After this one-time authentication, you won't have to enter your email address and password every time you launch the app.
When Artec Studio is launched on the server, the Artec Installation Center checks for updates, and if a new version is available for any of the installed products, a message similar to Figure 1 is displayed. 39.
Fig. 39 An update for Artec Studio is available for download.
After authorization, Artec Installation Center will display information about your products.
Fig. 40 Artec Installation Center.
Section Applications Artec Installation Center provides information about all your software products:
-
List of available applications
-
Activation status of each application (activated or not)
-
Number of available and enabled activations
-
Activate, Install or Update buttons for the actions currently available to you:
-
Install - displayed if the program is not installed on the computer (usually, installation means activation)
-
Activate - displayed if the program is not currently activated on the computer.
 Activation reduces the number of available licenses by one per computer.
 -
Update - displayed if a new version of the installed program is available for download
-
Section Scanners contains a list of 3D scanners that you own or have connected to your computer. In the first case, the status Activated or the Activate button will be displayed, in the second case, the status Rented or the Rent button will be displayed.
At the bottom of the Artec Installation Center window, there are a number of buttons:0005
- Exit Artec Installation Center
Importing Images from Cameras and Scanners into Photoshop
User's Guide Cancel
Search
- Photoshop User Guide
- Introduction to Photoshop
- Dream about it. Do it.
- What's New in Photoshop
- Editing the first photo
- Create documents
- Photoshop | Frequently Asked Questions
- Photoshop system requirements
- Transfer of presets, operations and settings
- Introduction to Photoshop
- Photoshop and other Adobe products and services
- Working with Illustrator artwork in Photoshop
- Working with Photoshop files in InDesign
- Substance 3D Materials for Photoshop
- Photoshop and Adobe Stock
- Working with the built-in Capture extension in Photoshop
- Creative Cloud Libraries
- Creative Cloud Libraries in Photoshop
- Working in Photoshop using the Touch Bar
- Net and guides
- Create transactions
- Cancellation and transaction history
- Photoshop on iPad
- Photoshop on iPad | General questions
- Introduction to the working environment
- System requirements | Photoshop on iPad
- Creating, opening and exporting documents
- Adding photos
- Working with layers
- Drawing and painting with brushes
- Selecting areas and adding masks
- Retouch compositions
- Working with Adjustment Layers
- Adjusting the key of a composition using the Curves layer
- Applying transform operations
- Trim and rotate compositions
- Rotate, pan, zoom and restore canvas
- Working with text layers
- Working with Photoshop and Lightroom
- Getting missing fonts in Photoshop on iPad
- Japanese text in Photoshop on iPad
- Application parameter management
- Touch shortcuts and gestures
- Key combinations
- Image resizing
- Live stream your creative process in Photoshop on iPad
- Fix imperfections with Healing Brush
- Creating brushes in Capture and using them in Photoshop
- Working with Camera Raw files
- Creating and using smart objects
- Adjusting the exposure of images with the Dodge and Burn tools
- Photoshop Web Application Beta
- Frequently Asked Questions | Photoshop Web App Beta
- Working environment overview
- System requirements | Photoshop 9 Web App Beta0014
- Keyboard shortcuts | Photoshop Web App Beta
- Supported file formats | Photoshop Web Application Beta
- Opening and working with cloud documents
- Collaboration with stakeholders
- Limited cloud document editing capabilities
- Cloud Documents
- Photoshop Cloud Documents | Frequently Asked Questions
- Photoshop Cloud Documents | Workflow Questions
- Work with and manage cloud documents in Photoshop
- Cloud storage update for Photoshop
- Unable to create or save cloud document
- Troubleshooting Photoshop cloud documents
- Collection of cloud document synchronization logs
- Cloud document sharing and editing
- File sharing and commenting in the application
- Working environment
- Working environment basics
- Learn faster with the What's New panel in Photoshop
- Create documents
- Working in Photoshop using the Touch Bar
- Tool gallery
- Performance settings
- Using tools
- Touch gestures
- Touch gesture capabilities and customizable workspaces
- Technology overview versions
- Metadata and comments
- Default key combinations
- Touch gesture capabilities and customizable workspaces
- Putting Photoshop images in other applications
- Installations
- Default key combinations
- Rulers
- Show or hide non-printing auxiliaries
- Specifying columns for the image
- Cancellation and transaction history
- Panels and menus
- File storage
- Positioning of elements with referencing
- Positioning with the ruler tool
- Setting sets
- Customizing keyboard shortcuts
- Net and guides
- Web, screen and application content development
- Photoshop for design
- Artboards
- View on device
- Copy CSS from layers
- Splitting web pages into fragments
- HTML options for snippets
- Changing the arrangement of fragments
- Working with web graphics
- Create web photo galleries
- Understanding images and working with color
- Resizing images
- Working with raster and vector images
- Image size and resolution
- Importing images from cameras and scanners
- Creating, opening and importing images
- Image viewer
- "Invalid JPEG marker" error | Opening images
- Viewing multiple images
- Customize color palettes and color swatches
- HDR images
- Image color matching
- Converting between color modes
- Color modes
- Erase sub-images
- Blend modes
- Choice of colors
- Making changes to indexed color tables
- Image information
- Distortion filters not available
- Color details
- Color and monochrome corrections with channels
- Selecting colors in the Color and Swatches panels
- Sample
- Color mode (or picture mode)
- Shade
- Add color mode change to operation
- Add swatches from HTML CSS and SVG files
- Bit depth and settings
- Layers
- Understanding Layers
- Reversible editing
- Create and manage layers and groups
- Selecting, grouping and linking layers
- Putting images into frames
- Opacity and layering
- Layer masks
- Application of smart filters
- Layer compositions
- Move, arrange and lock layers
- Layer masking with vector masks
- Manage layers and groups
- Layer Effects and Styles
- Editing layer masks
- Retrieve resources
- Display layers with clipping masks
- Generation of graphic resources from layers
- Working with Smart Objects
- Blend modes
- Combining several fragments into one image
- Combining images with Auto Layer
- Alignment and distribution of layers
- Copy CSS from layers
- Load selections based on layer boundaries or layer masks
- See-through to show the contents of other layers
- Layer
- Mixing
- Composite images
- Background
- Selections
- Select and Mask workspace
- Quick area selection
- Getting Started with Selections
- Selecting with the Marquee Toolbox
- Selecting with the Lasso tools
- Selecting a color range in the image
- Pixel highlight setting
- Convert between contours and selection boundaries
- Channel Basics
- Moving, copying and deleting selected pixels
- Creating a temporary quick mask
- Saving selections and alpha channel masks
- Selecting focus areas in an image
- Duplication, splitting and merging of channels
- Channel calculation
- Extraction
- Bounding box
- Image corrections
- Perspective distortion
- Blur reduction due to camera movement
- Healing Brush Tool Examples
- Export color lookup tables
- Image sharpness and blur correction
- Introduction to color grading
- Applying the Brightness/Contrast setting
- Shadow and Highlight Detail Correction
- "Levels" correction
- Hue and saturation correction
- Juiciness correction
- Adjusting the color saturation in image areas
- Quick tone correction
- Applying special color effects to images
- Image enhancement with color balance correction
- HDR images
- View histograms and pixel values
- Image color matching
- Crop and straighten photographs
- Converting a color image to black and white
- Adjustment and fill layers
- Curves correction
- Blend modes
- Target Imaging for Press
- Color and tone correction with Levels and Curves eyedroppers
- HDR Exposure and Toning Compensation
- Filter
- Blur
- Lighten or darken image areas
- Selective color correction
- Changing object colors
- Adobe Camera Raw
- Camera Raw system requirements
- What's New in Camera Raw
- Introduction to Camera Raw
- Creating panoramas
- Supported lenses
- Camera Raw 9 Vignetting, Grain, and Haze Removal0014
- Default key combinations
- Automatic perspective correction in Camera Raw
- Reversible editing in Camera Raw
- Camera Raw Radial Filter Tool
- Manage Camera Raw settings
- Processing, saving and opening images in Camera Raw
- Image enhancements with Camera Raw's improved Spot Remover
- Rotating, cropping and modifying images
- Camera Raw color correction
- Function overview | Adobe Camera Raw | Issues for 2018
- Overview of new features
- Processing versions in Camera Raw
- Making local adjustments in Camera Raw
- Fixing and restoring images
- Removing objects from photos using Content-Aware Fill
- Content-aware patching and relocation
- Retouching and fixing photos
- Image Distortion and Noise Correction
- Basic troubleshooting steps to solve most problems
- Image transformation
- Object transformation
- Crop, rotate and canvas adjustment
- Crop and straighten photographs
- Creating and editing panoramic images
- Deformation of images, shapes and contours
- Perspective
- Using the Liquify filter
- Content-aware scale
- Transforming images, shapes and paths
- Deformation
- Transformation
- Panorama
- Drawing and painting
- Drawing symmetrical ornaments
- Options for drawing a rectangle and changing the stroke
- Drawing details
- Drawing and editing shapes
- Paint tools
- Creating and modifying brushes
- Blend modes
- Adding color to contours
- Edit contours
- Painting with mix brush
- Brush Presets
- Gradients
- Gradient interpolation
- Fill and stroke selections, layers, and paths
- Drawing with the pen tool group
- Making patterns
- Creating a pattern with the Pattern Builder filter
- Loop control
- Managing pattern libraries and presets
- Drawing with graphics tablet
- Creating textured brushes
- Adding dynamic elements to brushes
- Gradient
- Draw stylized strokes with the Archive Art Brush
- Drawing with pattern
- Synchronizing presets across multiple devices
- Text
- Adding and editing text
- Universal text editor
- Working with OpenType SVG fonts
- Character formatting
- Paragraph formatting
- Creating text effects
- Text editing
- Leading and letter spacing
- Font for Arabic and Hebrew
- Fonts
- Troubleshooting Fonts
- Asian text
- Creating text
- Text Engine error when using Photoshop's Type tool | Windows 8
- Adding and editing text
- Video and animation
- Video editing in Photoshop
- Editing video and animation layers
- Introduction to video and animation
- Video and animation preview
- Drawing frames in video layers
- Import video files and image sequences
- Create frame animations
- Creative Cloud 3D Animation (Preview)
- Creating timeline animations
- Creating images for videos
- Filters and effects
- Using the Liquify filter
- Using Blur Gallery group effects
- Filter basics
- Filter effects guide
- Adding lighting effects
- Using the Adaptive Wide Angle filter
- Oil Paint Filter
- Effects and Layer Styles
- Application of specific filters
- Image area feathering
- Saving and exporting
- Saving files in Photoshop
- Export files to Photoshop
- Supported file formats
- Saving files in other graphic formats
- Move projects between Photoshop and Illustrator
- Saving and exporting video and animation
- Saving PDF files
- Digimarc copyright protection
- Saving files in Photoshop
- Printing
- Printing 3D objects
- Printing with Photoshop
- Printing and color management
- Checklists and PDF presentations
- Print photos in a new image layout
- Spot color printing
- Duplexes
- Printing images on a printing press
- Photoshop Color Enhancement
- Printing troubleshooting | Photoshop
- Automation
- Create activities
- Creation of data-driven images
- Scenarios
- File batch processing
- Operation playback and management
- Adding conditional operations
- About actions and the Actions panel
- Recording tools in operations
- Add color mode change to operation
- Photoshop UI Development Kit for Plugins and Scripts
- Color Management
- Understanding Color Management
- Accurate color assurance
- Color settings
- Working with color profiles
- Color management of documents for viewing on the web
- Color management when printing documents
- Color management of imported images
- Perform proofing
- Content authenticity
- Learn more about content credentials
- Identity and origin of NFT tokens
- Connecting accounts for creative attribution
- 3D objects and technical images
- 3D in Photoshop | Common questions about deprecated 3D features
- Creative Cloud 3D Animation (Preview)
- Printing 3D objects
- 3D drawing
- 3D Panel Enhancement | Photoshop
- 3D Concepts and Tools
- Rendering and saving 3D objects
- Creating 3D objects and animations
- Image stacks
- 3D graphics workflow
- Measurements
- DICOM files
- Photoshop and MATLAB
- Image object count
- Combining and transforming 3D objects
- Editing 3D textures
- HDR Exposure and Toning Compensation
- 3D panel settings
You can copy images to your computer by connecting a digital camera or memory card reader to your computer.
-
The Get Camera Photos command in Adobe® Bridge® lets you upload photos, organize or rename them, and assign metadata to them.
-
If your digital camera or memory card reader appears as a storage medium on your computer, copy the images directly to your hard drive or to Adobe Bridge.
-
Use the software that came with your digital camera, Windows Image Acquisition (WIA), or Image Capture (macOS). For more information about using Windows Image Acquisition and Image Capture, see the documentation that came with your computer.
Some digital cameras allow you to import images using Windows Image Acquisition (WIA). When using WIA, Photoshop interacts with Windows and digital camera or scanner software so that images are imported directly into Photoshop.
-
Select menu File > Import > WIA Support .
-
Select a folder on the computer where the image files will be saved.
-
Make sure Photoshop has Open Captured Images selected. If you are importing a large number of images, or if you plan to edit images at a different time, clear the Open acquired images check box.
-
To save imported images directly in a folder named with the current date, select the Unique subfolder check box.
-
Press Start .
-
Select the digital camera from which images will be imported.
If the camera name does not appear in the submenu, check if the software and drivers are installed correctly and if the camera is connected.
-
Select the image or images to be imported.
-
To import an image, click the image in the thumbnail list.
-
Hold down the Shift key and select multiple images to import them all at once.
-
Select Select All to import all available images.

-
-
Press the button Get photo to import the image.
Scanner software and drivers are provided by the scanner manufacturers, not by Adobe. If you have problems scanning, make sure you are using the latest version of the scanner software and driver.
Scan and import images from a separate scanning application
Most scanners come with a separate scanning application that you can use to scan and save images.
If the scanner manufacturer has not provided updated software and drivers that are compatible with current operating system versions, third-party scanning solutions may be required. The following third-party utilities are specialized scanning solutions and are more suitable for scanning a large amount of sensitive material:
- VueScan
- Silverfast
Using a dedicated scanning application allows you to retouch and edit images in Photoshop while scanning is in the background, which can increase efficiency.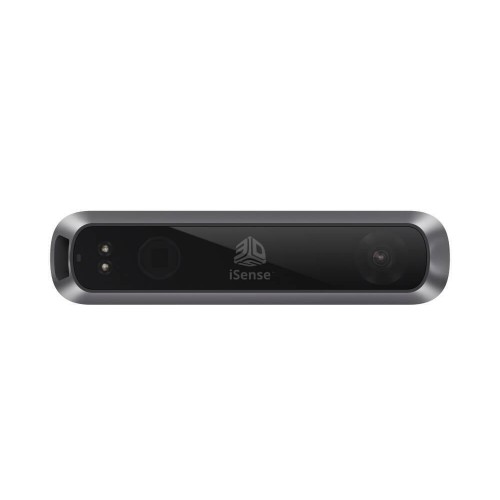
If you are using a separate scanning application, save your scanned images as TIFF, then open them in Photoshop.
Some versions of the scanner software allow you to specify Photoshop as the external image editor after scanning is completed. Check the documentation that came with your scanner or contact the scanner manufacturer for more information.
-
Start the scanning software and set the parameters as required.
-
Save scanned images in TIFF format.
-
In Photoshop, open the saved TIFF files.
Scan and import images using Apple ImageKit (macOS)
-
Select menu File > Import > Images from device .
Apple Image Capture application starts.
-
Select the scanner you want to use from the DEVICES list in the left column.
If the name of the scanner does not appear in the DEVICES list, check that the software and drivers are installed correctly, and that the scanner is connected.

-
Select Create New Photoshop Document to open the resulting scanned image in Photoshop as a new document.
-
Specify the color, resolution, size, destination folder, file name, and file format settings for the scanned image.
-
Click Scan .
-
The scanned image will open in Photoshop for editing.
Scanning and importing images using the WIA interface (Windows)
-
Select menu File > Import > WIA Support .
-
Select a folder on your computer where the image files will be saved.
-
Press Start .
-
Select in Photoshop Open received images (if there are few images to import and you want to edit them now).
-
Select a unique subfolder if you want to store imported images in a folder named with the current date.

-
Select the scanner to be used.
If the name of the scanner does not appear in the submenu, check that the software and drivers are installed correctly, and that the scanner is connected.
-
Select the type of image you want to scan: Color image, grayscale image, or black and white image or text.
To specify custom settings, select Adjust Scan Image Quality.
-
Press button Display . If necessary, move the bounding box handles to adjust the size of the scan area.
-
Press Scan .
-
The scanned image will open in Photoshop for editing.
Scanning and importing images using the TWAIN interface
The TWAIN plug-in is not supported by in available versions of Photoshop .