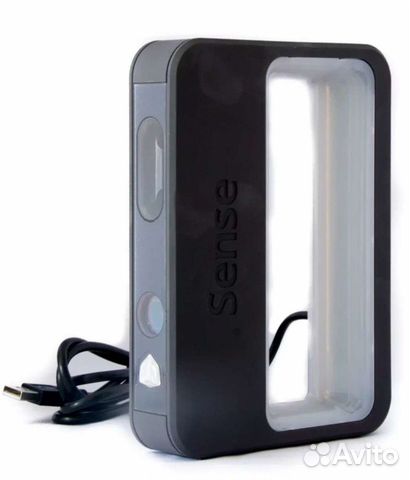
3D scanner unboxing
Revopoint Pop 3D Scanner Unboxing
INTRO
How’s it going everyone? This scanner just came out, I did not get the Kickstarter, I got the pre order that they were doing after the Kickstarter. So this is the first batch of, I suppose, real product.
UNBOXING
Let’s see what’s in the box. We have some QR codes and coupons for sharing this product, a back drawn or placement stickers, and a couple miscellaneous things. Let me just take everything out first. Let’s lay it down here so we have a turntable and power adapter for that. Now when I bought this, they had a lot of different options whether you want to just the scanner or with the turntable as well. I don’t remember the other options, I think one was Android versus iPhone, the mind was the iPhone version with the turntable.
That’s why we have a mount for this. Now this is interesting… it’s perhaps some sort of cast, but it’s supposed to be for the demo, I guess, in case you don’t have anything to scan
we have some gloves, it doesn’t detect black objects very well, or shiny objects, reflective objects. If you’re holding something and you’re wearing a black glove, it’ll just scan your product. And on that note of black backdrops and not being able to detect black, we have just a piece of plastic, perhaps a garbage bag. Oh, somewhat open it up. It looks like a garbage bag. I’m not sure whether it would be better to use something like a plastic bag that is black and shiny, which the scanner doesn’t see that well. Or if it’s better to use fabric that isn’t shiny, but still black. I’d be curious to try that. It looks like we have ourselves a fancy USB that is not marked at all. But that’s kind of cool. Holds up party decorations. Yay. Then we got some sticky stuff… probably something along the lines of blue tack. To be used in case you need to somehow put an object at some weird angle. Just put some of this sticky stuff down and it should do the trick. And lastly, we have… I don’t know the technical term for this but I guess tracking markers? Dots that can see the position for scanning larger items. I also saw a video, I believe it was this product, and they scanned a whole car which was kind of cool. I wonder if it has to be specifically this size and these trackers or if you can make your own. That’s also something to look into.
All right. And now we get to the good stuff. Okay, got a little warranty card here. Got a tripod, well built for being a tiny tripod. We have our cables is USB, a 3.02 Micro We’ll be 3.0 And we have USB C to micro B 3.0. And there you go. There. You. Go.
WHY I GOT THIS REVOPOINT POP 3D SCANNER
When I was looking for 3D scanners, I was looking for a few different features. One of them was price point, I wanted something cheap enough that I didn’t have to spend a couple $1,000.:quality(80)/images.vogel.de/vogelonline/bdb/1541900/1541907/original.jpg) This one was roughly $570. It’s a little cheaper without the turntable, about $500, if I remember correctly, and the second feature was to 3D scan fine resolution: fine resolution in smaller objects. The third feature I wanted was so I could pick up the scanner and move it around a large object. I can do that with the tracer dots here. I don’t know if I’m going to scan my car yet, but I’ll have the option.
This one was roughly $570. It’s a little cheaper without the turntable, about $500, if I remember correctly, and the second feature was to 3D scan fine resolution: fine resolution in smaller objects. The third feature I wanted was so I could pick up the scanner and move it around a large object. I can do that with the tracer dots here. I don’t know if I’m going to scan my car yet, but I’ll have the option.
CONCLUSION
I know, I know. I haven’t explained any details on this product at all. And haven’t showed you any of its capability. Unfortunately, it’s going to have to be another video. This one’s just unboxing and letting you know what is in the box when you get it. I’ll have to tinker around with it to give you a full scope of its capabilities. If you have any questions about the product, leave it down in the comments.
– Affiliate links –
=== Gear Used in Video ===
— Main Camera —
Sony Alpha 7S III – https://amzn.to/3bbNurZ
— Overhead Camera —
Sony Alpha a6400 – https://amzn. to/3pu0YUZ
— Lighting —
GVM 80 – https://amzn.to/3avWMA1
28″ Deep Parabolic – https://amzn.to/2NvulsS
Godox Strip softbox – https://amzn.to/3qreR7O
— Backdrop Lights —
Aputure 2 H672W LED Panels – https://amzn.to/37jSaL4
— Backdrop —
Westcott 139 9×20-Feet White – https://amzn.to/37lKDeZ
— Lenses —
Tamron 28-75mm F/2.8 – https://amzn.to/2LV4V7k
Tamron 70-180mm F/2.8 – https://amzn.to/3dlUBkm
Tokina ATXAF120DXC 11-20mm f/2.8 – https://amzn.to/37mB6nF
— Mic —
Deity V-Mic D4 Duo – https://amzn.to/3s5G28B
Creality CR-Scan Lizard Review - An easy-to-use 3D scanner
Hey, Karl here, and today we are going to review Creality’s CR-Scan Lizard. This device is a 3D scanner that uses the structured light process to 3D scan. Instead of visible light, it uses non-visible light. I have no idea where lizards come into play but here we are. I have been waiting for quite some time for a lower-cost consumer 3D scanner. I attempted a DIY structured light scanner a long time ago, with some success…..but the time it took was unacceptable. It took me hours to set up perfectly and many more cleaning up point clouds and aligning even for a small scan. Leading me to give up on the project. I search around the Internet periodically but have never found a good working DIY solution. I am glad we are starting to see some relatively good cheapish scanners come out in the past year.
Creality CR-Scan Lizard specifications
- Precision: 0.05 mm
- Resolution ratio: 0.1 – 0.2 mm
- Single capture range: 200 x 100 mm
- Operating Distance: 150 – 400 mm
- Scanning Speed: 10 fps
- Tracking mode: Visual tracking
- Light: LED+NIR (Near-infrared mode)
- Splicing Mode: Fully automatic geometry and visual tracking (without marker)
There are 2 scan modes: turntable and handheld. You can scan black and white textures in both modes and color is only available in turntable mode.
Unboxing
Unboxing went well and I really like how everything ended up fitting in the carrying case at the end.
The CR-Scan Lizard base kit includes a scanner, a power supply, a turntable, a mini tripod, and a proprietary Y cable, as well as a nice carrying case.
The kit I received included some extras and was considered a premium upgrade. The upgrade is for capturing textures with a separate camera. The idea is to use a smartphone or camera in conjunction with the scanner to capture color textures.
The turntable starts turning as soon as power is applied and is not controlled.The camera box included with the color kit is lit by a USB-powered led strip. Like I previously stated, the 3D scanner does not use visible light and works regardless of the visible lighting conditions and is only needed for color textures.First scan with CR-Scan Lizard
The CR-Scan Lizard kit came with a USB stick with software and instructions but I learned it is out of date while researching. I navigated to Creality’s website and downloaded the latest version. The software is available for Windows and Mac. As of Nov 21st, CR Studio 2.5.4.0030 is the latest software available and what I tested with. Windows showed the error above before executing. One gripe for me is that the software requires admin access every time it is launched. I can’t see why it needs admin privileges and feel it should not be required and Creality needs to fix this.
I decided to see how the help file was and I ended up following it as well as referencing it a couple of times for the keyboard/mouse combination. It is an updated version of the included paper quickstart guide. One thing that I was not expecting is the lack of calibration. This is pretty fantastic. Creality calibrates the CR-Scan Lizard scanner at the factory. The very first step after installing the software is importing the calibration from the network. I found the calibration file and it is specific to my device’s serial number. Calib.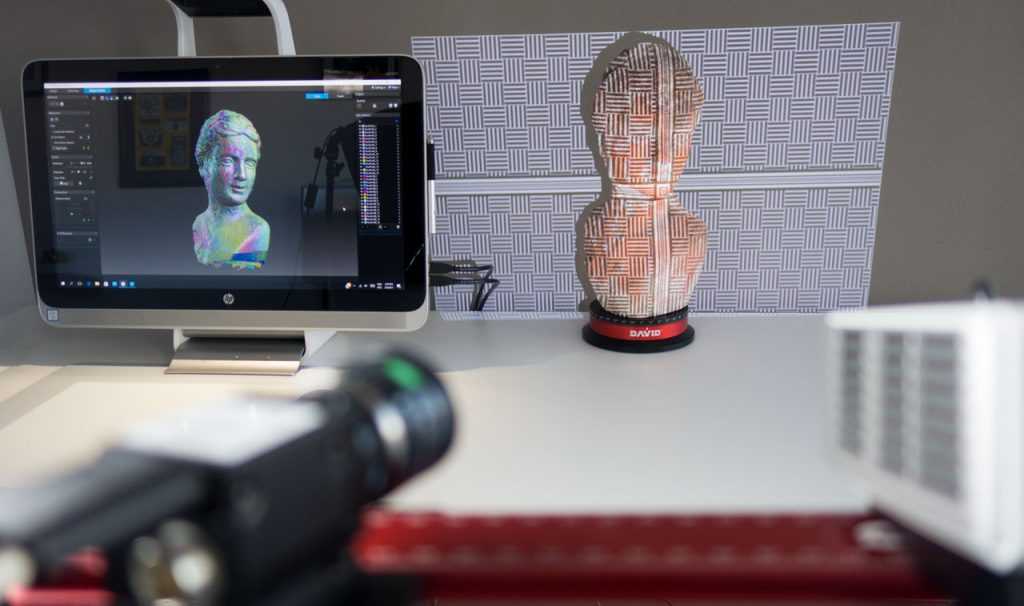 txt is the name of the file. I can see this being an issue down the road. I have backed up my calibration files. I did a test reinstalling and importing the text file without issue. The only thing I saw interesting in the calibration file is a reference to the camera’s resolution of 1280×720.
Here is my first turntable scan. I was pretty stoked to see how well it turned out and just how little effort it takes. I tried scanning this exact object and spent hours with the DIY scanner without success. Creality’s workflow is pretty simple. Take multiple scans at different angles on the turntable ensuring all details are captured. Then allow the software to line the scans up, sometimes with a little help. This scan took all of 5 minutes to do with acceptable results.
Software/Hardware
This is when things started to get interesting for me. After I found the calibration files I started looking around the files.
Mindvision appears to be the manufacturer of the camera based on files I found in the installation directory.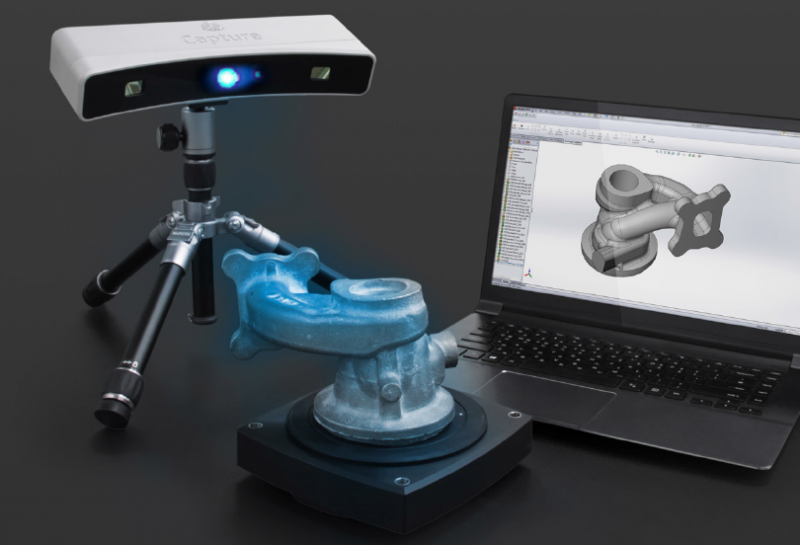 When I plugged the scanner into my Windows machine I could only see the 2 additional cameras. I also plugged it into a USB port on my Unraid server to confirm. Windows is not the most user-friendly when doing this type of investigation.
This makes sense when looking at the physical device. Two cameras and one “projector”. I was able to confirm the functions of each hole in the scanner by accessing the cameras through Windows Camera App and blocking each one. I was a bit confused when the second camera had blinking LEDs turned on while viewing. I did find out later the blinking LEDs are used for capturing black and white textures.
Here is an excerpt from Wikipedia explaining how the structured light process works.
Projecting a narrow band of light onto a three-dimensionally shaped surface produces a line of illumination that appears distorted from other perspectives than that of the projector, and can be used for geometric reconstruction of the surface shape (light section).
A faster and more versatile method is the projection of patterns consisting of many stripes at once, or of arbitrary fringes, as this allows for the acquisition of a multitude of samples simultaneously. Seen from different viewpoints, the pattern appears geometrically distorted due to the surface shape of the object.
Although many other variants of structured light projection are possible, patterns of parallel stripes are widely used. The picture shows the geometrical deformation of a single stripe projected onto a simple 3D surface. The displacement of the stripes allows for an exact retrieval of the 3D coordinates of any details on the object’s surface.
Here is a short video demoing what the projection looks like and what the camera sees. I was really surprised that the pattern doesn’t seem regular and the lines are not parallel like I have seen on other scanners.
A few other points regarding the software. It is written using QT for Python with OpenCV doing the heavy lifting. I don’t have the skills but believe if this was open sourced the community could/would help with development.
I investigated the config files to see what extra stuff I could tinker with. I spent several hours messing with these settings. The somewhat useful setting I found was the ScanFrameCnt. The default is 320 which gets about 1 full revolution of the turntable.
[Algo] useNewCode=1 optimize_method=0 usePreprocess=0 alignFromRuler=1 ScanFrameCnt=640
| 1 2 3 4 5 6 | [Algo] useNewCode=1 optimize_method=0 usePreprocess=0 alignFromRuler=1 ScanFrameCnt=640 |
Here are some other settings that led to much time wasted. scaner_settings_Lizard.ini had the next most interesting time-wasting settings.
[PoissonRecon]
userConfig=0
resotulion=1.7
samples_per_node=1. 5
trim_value=2.0
islandAreaRatio=0.05
| 1 2 3 4 5 6 | [PoissonRecon] userConfig=0 resotulion=1.7 samples_per_node=1.5 trim_value=2.0 islandAreaRatio=0.05 |
Above are the default settings in the file. The resolution was the most interesting. After changing userconfig to 1 the settings start to have an effect. I believe the scanner’s resolution is .2 by default lining up with the specs. I tested .1 and the files got big and I thought my PC hung. It does affect the point cloud but might be more noise than anything. The picture above shows when I thought it hung up. I took a quick snapshot before force closing. I got a little excited seeing all the additional detail but after inspecting closely it appeared to be just noise. Maybe with some additional post-processing like laplacian smoothing the results would be better. At first, I thought the scanner was picking up layer lines. I did go back and try again and was a little more patient. Maybe with some additional testing, we can eke out a little more detail.
PC Considerations
I can’t find any recommended PC specs. I have an AMD Ryzen 9 3900X with an RTX 3070 in an Unraid VM and have to wait considerable amounts of time when doing some operations. A VM does leave a little bit on the table because I give 3 CPU to all the services but should be on par with a Ryzen 3700X. The GPU can help with these 3D tasks and the software does appear to utilize my Nvidia 3070. Scanning doesn’t seem too CPU intensive but I could see someone being frustrated using a laptop or older PC while generating a mesh. Meshing fully utilizes my CPU most of the time. You have been warned. Moral of the story: be wary if trying to use a potato for meshing. Note: I was imaging a MicroSD card at the time of the screenshot which explains the 100% usage of Disk 1.
Scanning
I wasn’t able to do a lot of scanning with the limited amount of time.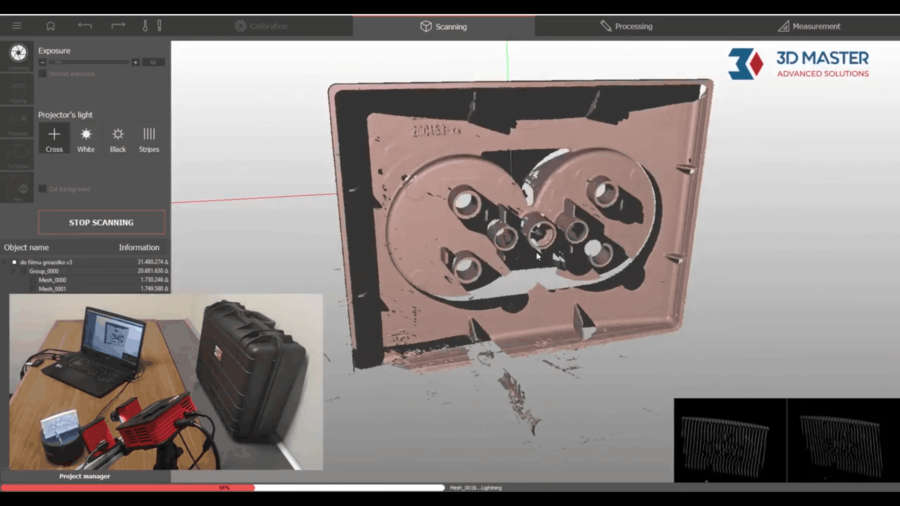 Here are some that I completed with the Creality CR-Scan Lizard.
Everything but the black eyes and beak turned out well. There were even some details I didn’t notice on the back of the owl which I thought were artifacts. But upon inspection and the right lighting, I was able to see feather lines.
The CR-Scan Lizard scanner doesn’t capture very small details well.
This was the most difficult thing for me to scan and I tried a lot. This is a Radxa SBC. This was my first attempt at using dry shampoo as a helper. Without this treatment, I wasn’t able to get anything. Too small of details and too shiny.
For my final scan, I took on a pretty complex object. I really got to know the software and feel pretty confident using it. I used all the features: Turntable scan, Freehand scan, Auto alignment, Manual alignment, and Trimming unwanted data. I worked on this and it took a couple of hours in total over 2 days. I wasn’t able to scan in one sitting because I didn’t have any spray to help with the shiny and dark areas. Cheap dry shampoo works really well as a temporary paint to make it easier for the scanner to pick up. I could do some more cleanup and I missed the underside of the chuck. Overall it looks really good to me.
CR-Scan Lizard’s accuracy
Onto accuracy. Below is a chart for accuracy measurements. I did 2 simple scans. The plumber’s tape was a single scan. The Apple charger was 2 scans. I chose these light-colored items to give them the best possible chance for accuracy. Then I went back to the drill which had 12 scans and took some random measurements. To measure the 3D object I used Microsoft 3D builder by hand. I checked the outliers several times to try and avoid human error. Overall, the average delta was .74125.
Experiments and quirks
The turntable provided with the CR-Scan Lizard is super basic but effective. I did some experimenting after I found out how to increase the number of frames in the config file for a turntable scan. The thought was if I double the frame count and half the turntable speed, I could capture more points giving better scans. I sacrificed a cheap USB extension cable and installed a pot to lower the voltage. I went as far as to more than triple the frames and third the speed of the turntable….but alas I couldn’t see any appreciable difference and just added time.
Another quick experiment was seeing if I could scan completely untethered. This setup is using a Steam Deck with Windows installed along with a power bank that can output 12V for the scanner. I had to purchase a USB-C hub for the Steam Deck and I already had the power bank. I did one proof of concept scan and went as expected. The software is not really designed for this small of a screen and I had to auto-hide the taskbar to fully access all the buttons and sliders. I did the scans on the Steam deck then moved the files over to my PC to create the 3D mesh. I could see designing a 3D printed case with ¼ 20 thread for the scanner and making this a completely mobile handheld scanner.
Is it me or are high-speed USB 3 devices universally finicky? This is my second AM4 motherboard whose USB acts odd randomly. After about a week of scanning without issue, I ran into an issue, the scanner started glitching out and I could not get a successful scan. After some troubleshooting, I ended up having to move devices around to find a working configuration. I know nothing changed because I used a long active USB cable running under my desk to the other side that is permanently installed.
Another quirk is I had to plug the CR-Scan Lizard scanner in a specific order or else all my USB devices would act weird and sometimes I had to do a full reboot to recover. The scanner has a Y cable with a USB male Type-A and a barrel connector for power that goes to a wall wart. The power needed to be applied first to the barrel connector and then plugged into the USB port.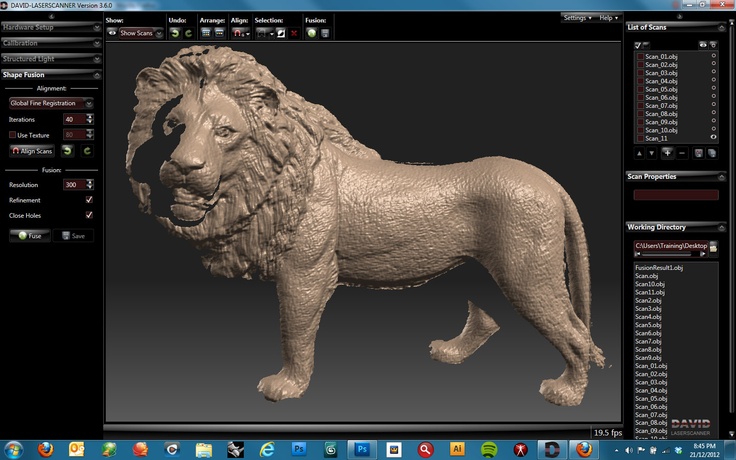 When I was done I had to do the opposite, unplug the USB and then power it off. After I figured this out I stopped having this issue.
Textures scanning with CR-Scan Lizard
To wrap this up I was able to squeeze in one final test and that is scanning with texture.
Using the CR-Scan Lizard’s built-in black and white scanner was really uneventful and took only marginally longer. Just 1 check box to capture black and white textures using the second built-in camera. Color scanning is shown.
I did an experiment with the black-and-white scan. You can either export STL or OBJ files. STL files only include the geometry so I had to export to OBJ. OBJ’s are just the 3D portion and companion files can be referenced. One of which can include a JPG texture file. With this experiment, I took the JPG texture and ran it through an online black-and-white colorizer. While this in no way represents the real colors, I thought it turned out pretty interesting and stylized. I did not spend too much time trying to improve or test out different websites and workflows. It might be possible to get better results with experimentation.
I think it was a miss, not incorporating either an additional low res color sensor or replacing the black and white with a color. There might be a technical reason for the latter. You will understand the reasoning behind the low res comment in a moment.
Color textures are another thing entirely. First, the setup is unique and a bit clunky. I couldn’t find written instructions so followed this video that Creality produced. The video shows the old software and needs to be updated, but it was close enough to gather how it works. Included with the color kit is an additional heavier tripod with a mounting bar that incorporates 2 ¼ 20 threads to support the scanner and additional camera weight. A USB-enabled remote trigger is part of the kit to, as the name implies, trigger your smartphone or camera remotely.
An additional step is added to the process to capture color textures. Setting up is similar to a regular scan and I used a Pixel 6 to capture photos. Which turned out to be way overkill.
First is the preview step. You line up the smartphone and scanner and get your distance correct while looking at the preview in the software. The next step scans the turntable by itself with nothing on it so the platform can be removed from the scans, followed by placing the object on the turntable and scanning. This would be the last step before meshing unless additional scans at different angles were taken if not capturing color. This final step for color textures triggers your camera every couple of seconds via Bluetooth. If you need additional angels repeat steps 3 and 4 until all details are captured.
After capturing, you align the scans either automatically or optionally manually, then create the mesh. About 30-40 seconds are added to each scan to capture color data. Then copy all the pictures taken over to the PC into a folder in your project folder. Then press external texture mapping and another window is opened. Tell it where the photos are and a preview is opened. You place a box around the object and the software crops all the photos, reducing their size and removing unwanted data. Press next and wait forever. There is a dialog that says this could take a long time and they aren’t joking.
Notice the committed memory. It was absolutely ridiculous and was hammering my NVMe SSD. I stopped after about an hour and took some steps to keep it from ballooning past the 20 GB of memory that I have available. In order for me to get it under 20 GB, I manipulated the pictures. First bulk compressed them. I went from about 100 MB of pictures down to 13 MB running it through an online bulk image processor. I started the texture mapping over and this turned out not to be enough. The resolution seemed to be the culprit. Uncompressed pictures from the pixel are 4080×3072 and about 1.5 MB each. Compressing brought it down to about 200KB per picture. Then I ran them through another tool to reduce the resolution. After some trial and error, I got them down to 1020×768. And after cropping in the software they ended up 858×482. It still took 2 hours but at least I wasn’t wearing out my NVMe SSD. Surely a low-cost camera could have been incorporated to capture color data.
In hindsight, I could have done some things differently. First I zoomed in on my camera app to try to capture as much data as possible when I was setting the camera up. I should have tried to keep it small. Potentially orienting the camera behind the scanner. I am not positive this will work though. The camera needs to be as close to the scanner’s camera as possible to avoid parallax errors. I could also reduce the output file size by reducing the quality in my phone’s camera app.
Success Rate
I would say I had about an 80% success rate in turntable scanning. Meaning I had to delete every 5th scan and redo. I didn’t have to reorientate the scan just start it over. Hand scanning was not nearly as successful on some objects. If there were not enough unique overlapping tracking points in the field of view it lost tracking pretty easily or a repeating pattern would cause issues. I would lose tracking and get funky scans and it was difficult to recover.
Auto alignment worked 4 out of 5 times as well. Only a few times I had to manually align. The rest of the time I took over the auto align. The way this works is you pick 2 scans that overlap the most. Assign 1 that doesn’t move and auto-align the second to the static one. Work your way through the scans until all are aligned. Success with auto alignment boiled down to the order of operation. I was really impressed with how little rescanning and aligning I had to do. I had a really tough time with these tasks with the DIY solution.
Final thoughts
I like it. I don’t care about textures and that is why I did them last. For me, I am going to use the CR-Scan Lizard scanner for reverse engineering and the base model is what I would go with. Meaning scan the object then bring into Fusion 360 for a reference and digitally create the object. This is a really powerful tool in my opinion. I can accept a little bit of inaccuracies and correct anything critical by taking real-world measurements.
I was disappointed in the performance while scanning a PCB because it was one of the first things I thought of when asked to review….but they are not that difficult to just measure and the real time savings are when needing measurements/references for complex objects. If you are in the market for a scanner and run into one of those turntable laser pointer line 3D scanners. I wouldn’t even consider one of them. It is an expensive toy. I was sent one a long time ago and I never posted a review because it performed so poorly.
I see now why I was asked to complete the review last Friday. Creality has the base model on sale for $493 vs the $617 normal price on their storefront. It is available for the next few days (Nothing like a sense of urgency). European readers can also purchase it for 607.20 Euros and if the promotion is over use the coupon code LizBlog for a 15% discount. Alternatively, the CR-Scan Lizard base model is currently available on Amazon for $674.
Karl Johnson
Karl is a technology enthusiast that contributes reviews of TV boxes, 3D printers, and other gadgets for makers.
Unpacking Shining 3D AutoScan-DS-EX
Hello everyone, the company 3Dtool is with you.
Today we got a rather interesting thing from the company Shining 3D , namely the 3D scanner Shining 3D AutoScan-DS-EX .
And, especially for you, we decided to unpack it.
The scanner comes in such a box, it is quite thick and strong, which allows you not to damage the scanner during transportation. nine0015
Inside the box is another box, but with the corporate identity of Shining 3D.
We open it and see a black polystyrene package, it is equipped with:
► CEO
Raise the top styrofoam and see the scanner and the box. What lies in this box, we will show further, but for now we will get the scanner and consider it in more detail. nine0005
Under the scanner in a special pocket are the power cords and PC connections.
The first thing I want to say about this scanner is that it is designed for the dental industry, with an unrivaled compactness and light weight - the perfect combination for cramped service desks and dental laboratories.
The scanner itself is packed in a thick bag.
Full white scanner with Shining 3D logo on inside and outside, looks very stylish. nine0005
The scanner supports all kinds of functions, including scanning in the articulator, triple scanning (top, bottom and dental imprint), as well as digitizing textures.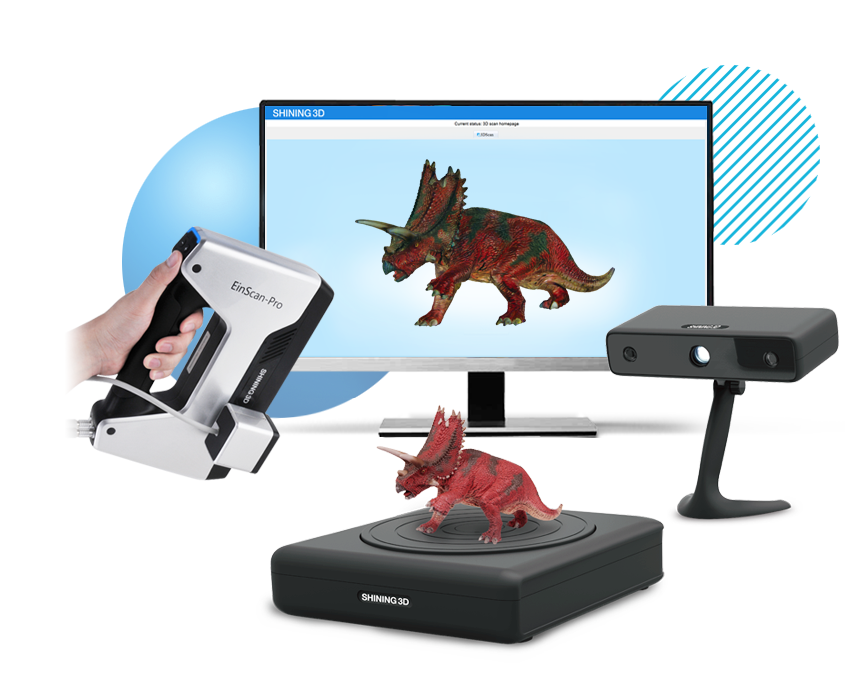
We invite you to familiarize yourself with its technical characteristics:
Scan technology: structured illumination
Resolution: 1.3 megapixels
Accuracy: <15 microns
Capture area: 100x100x75 mm
Scan time: 18 seconds per bite, 42 seconds top and bottom, 90 seconds per print
Operating temperature range: 10°C to 30°C (higher temperatures may affect scan quality)
Dimensions: 260x270x420 mm
Weight: 5 kg
File format: STL, OBJ
· Interface: USB3.0
· Power supply: AC 24V
Now let's look at it from all angles.
The adjustment key is located on the bottom of the scanner, which is very convenient and saves time searching for it. nine0005
There are only 2 connectors on the back of the scanner, for connecting power and for connecting to a PC, as well as a power button.
Now let's look inside the box next to the scanner.
Inside is a calibration field packed in a separate bag.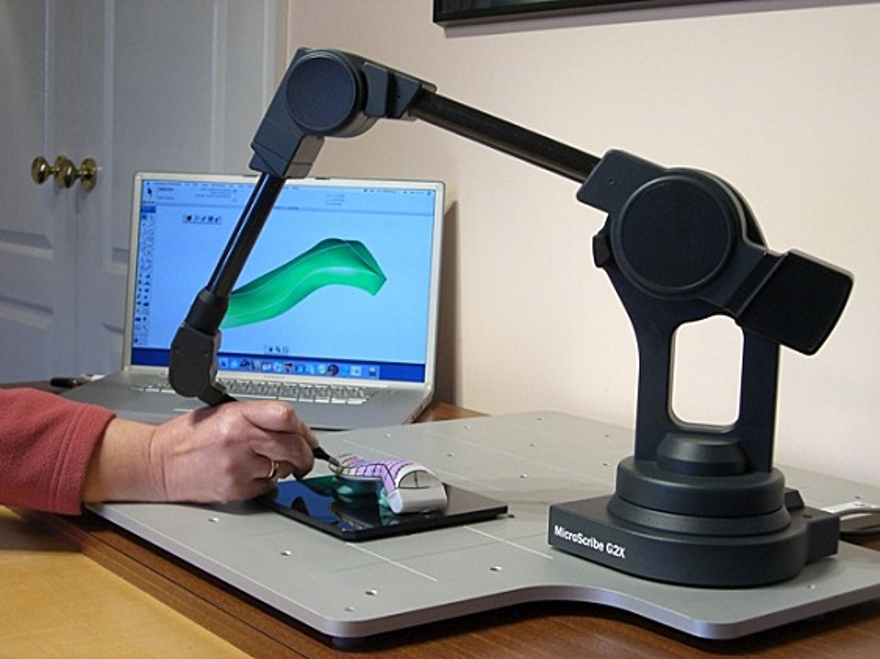
Two USB flash drives
Parts clip
And several options for scanning fields
Here is such an interesting equipment for this scanner.
Link to the scanner: https://3dtool.ru/product/3d-scanner-shining-3d-autoscan-ds-ex/
And subscribe to our groups in social networks:
INSTAGRAM
VKontakte
Facebook
Our Youtube channel
Unpacking and setting up the Wanhao Duplicator i3 3D printer
in Russia and in Europe. Due to the simplicity of design, low price and high print quality, the Duplicator i3 will impress any user. The Duplicator i3 3D printer is already widely used in various fields and solves many 3D printing tasks, from simple home to complex engineering. nine0005
In this article, we will show you how to properly unpack, assemble and set up the Duplicator i3 3D printer for the first test print.
Unpacking and assembly. |
Instructions for setting up, calibrating and test printing. |
1 . Safety information
1.1 Attention: The Duplicator i3 generates high temperatures and includes moving parts that can cause injury. Do not touch the printer platform and print head (extruder) of the Duplicator i3 while it is in use. Stop printing and allow the platform and extruder to cool down.
The Duplicator i3 is sensitive to ESD. Make sure you are free of static electricity by touching a grounded object before using the Duplicator i3 or attempting to make any changes. When opening the Duplicator i3 for service, make sure the power is off and the cord is unplugged. nine0005
2. Setting up
The spools of thread are mounted on the spool holders. Now you can connect the power supply.
When you're done, turn on the power button on the back of the Duplicator i3. If the discharged air flow is too strong, you should contact technical support at [email protected]
When you turn on the Duplicator i3, you should see the Wanhao logo on the LCD screen and the initial temperature settings. As a rule, at the first start, the ambient temperature is displayed on the screen.
There is a joystick control near the LCD screen. Rotate and press it to navigate and select.
The next step in this manual is to help you level the bed, load the filament, and perform a test print.
Follow the instructions below to set up your Duplicator i3 for the first time! And remember, if anything goes wrong, or if anything happens differently than what's in this manual, unplug the printer and contact us.
Attention! Before proceeding with the next step, remove all shipping labels from the platform and from the level sensors. nine0005
3. Platform Leveling
3.1 Pay special attention: a properly leveled platform affects print quality! First of all, go to menu function "Quick Setup" - "Home All". The extruder should move to the bottom left of the printer.
Attention! When setting up for the first time, be sure to watch the extruder move, if the extruder nozzle presses on the platform, be sure to turn off the printer, check if the transport stickers on the extruder height level sensor are removed, then lower the edge of the platform according to the note described below. nine0005
Now there is no power on each engine. Thus, you can move the extruder freely in the X-axis. The print bed can also move freely in the Y-axis. Manually move the extruder to different positions above the print platform while adjusting the distance between the extruder nozzle and platform with adjustment screws and a sheet of paper placed between the platform and nozzle. nine0005
Note:
To level the build platform, you need to install the four adjustment screws that are under the print platform. Loosen these four adjustment screws and raise the work platform.
• Tightening the adjusting screws [turning them to the right] moves the build platform away from the extruder nozzle.
• Loosening the adjusting screws [by turning them to the left] moves the build platform towards the extruder nozzle. nine0005
• The distance between the extruder nozzle and the work platform must be suitable for the thickness of the A4 paper. For successful operation, this thickness should be about 0. 12 mm.
The following is a diagram of how to correctly calculate the distance between the nozzle and the platform.
Duplicator i3 nozzle height is now normal.
If your platform is set too low, the print may not stick to the surface, if it is too high, it will damage the platform coating and nozzle. These cases are out of warranty If you have problems, or if you just need to re-level your platform, you can always return to the chapter on assembling the working platform. nine0005
4. Loading the filament
4.1 The first step in loading the filament is to trim the end of the filament so that it is as sharp as possible. Then go to function "Quick setting" - "Filament preheat" depending on your material type PLA or ABS. The printer will start heating the extruder to the set temperature.
nine0005
4. 3 At this time, insert the filament into the hole all the way to the end of the extruder. Then release the lever and you can feel the filament being tightly gripped by the extruder.
Turn the control joystick clockwise to load the filament.
Make sure the filament is loaded from the top of the spool so you don't get any jams while printing. After you have skipped the thread, release the Control Joystick. The machine will stop extrusion.
IMPORTANT NOTE
Wait a few minutes after heating starts. Be careful not to touch the bottom of the Stepped Extruder while it is heating up - it heats up to 220°C, which is too hot and could cause burns! nine0005
After the nozzle has reached the correct temperature, you can load the filament. You will need to apply some force, but as long as you only hold the thread, you will not damage the Duplicator i3.
Maintain tension on the thread, release the spring lever and after a few moments you should feel the motor tighten the thread. You will see a small amount of plastic begin to come out of the nozzle. After that, release the control joystick. Don't be surprised if you don't see the color you expect - there may be some plastic left inside the extruder from the testing process. nine0005
After the Duplicator i3 has finished extrusion, wait a few seconds for the extruded plastic to cool before pulling it out. You can dispose of it with your regular trash, or recycle if your recycling system can process PLA or ABS filament. Do not leave plastic on the extruder nozzle - if plastic remains on the nozzle, the newly extruded plastic may stick to the nozzle instead of the print bed.
5. Your first print
5.