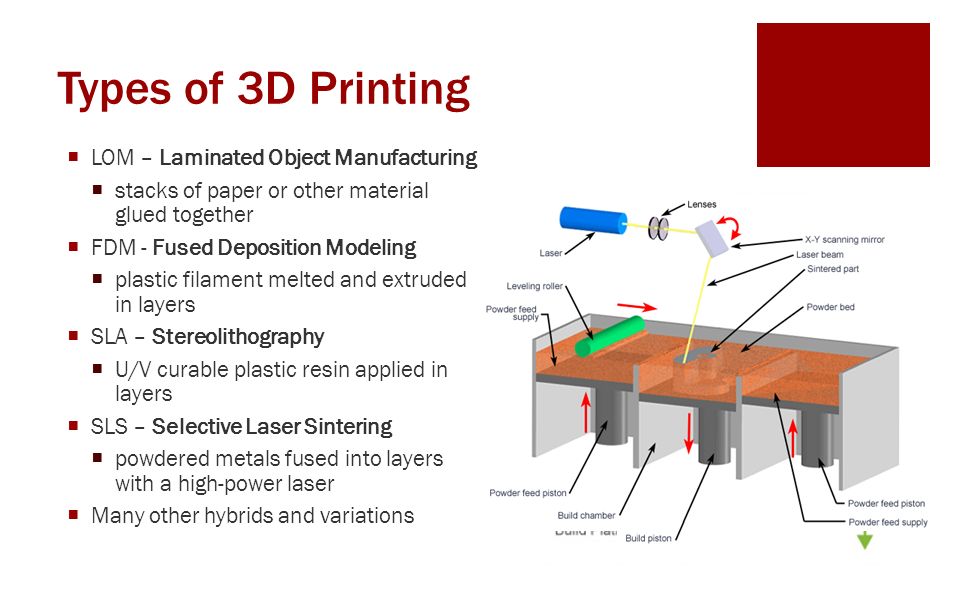
3D printing support types
Types, Structure, How to Add & Remove
You don’t always need to 3D print with supports to craft incredible 3D prints. Still, many fantastic projects require these additional structures. Thus, Gambody wants you to look at the main types of 3D printing supports you can use, especially if you are a beginner and wish your figurine or statue to look professional.
Knowing how to 3D print supports also helps to avoid many common problems with 3D printers. Besides, when you select the correct type of additional structures, your model will be smoother, more comfortable to make, and quicker to remove the extras. It will also require less additional filament to save your money.
Once you discover everything you need to know about 3D print supports and patterns, it is best to learn how to 3D print without supports, discover the 45-degree rule and overhang 3D print secrets.
Table of contents:
- 3D Printing Supports;
- 3D Printer Supports Hard to Remove;
- Dissolvable Supports;
- Support Structure 3D Printing Rules;
- 3D Print with Supports: Pros & Cons.
FAQ:
- How to remove supports from 3D prints?
- How to add supports to 3D prints?
- When to use supports while 3D printing?
- What is the best support pattern in 3D printing?
- Do all 3D prints require supports?
- Why do my 3D printing supports fail?
3D Printing Supports
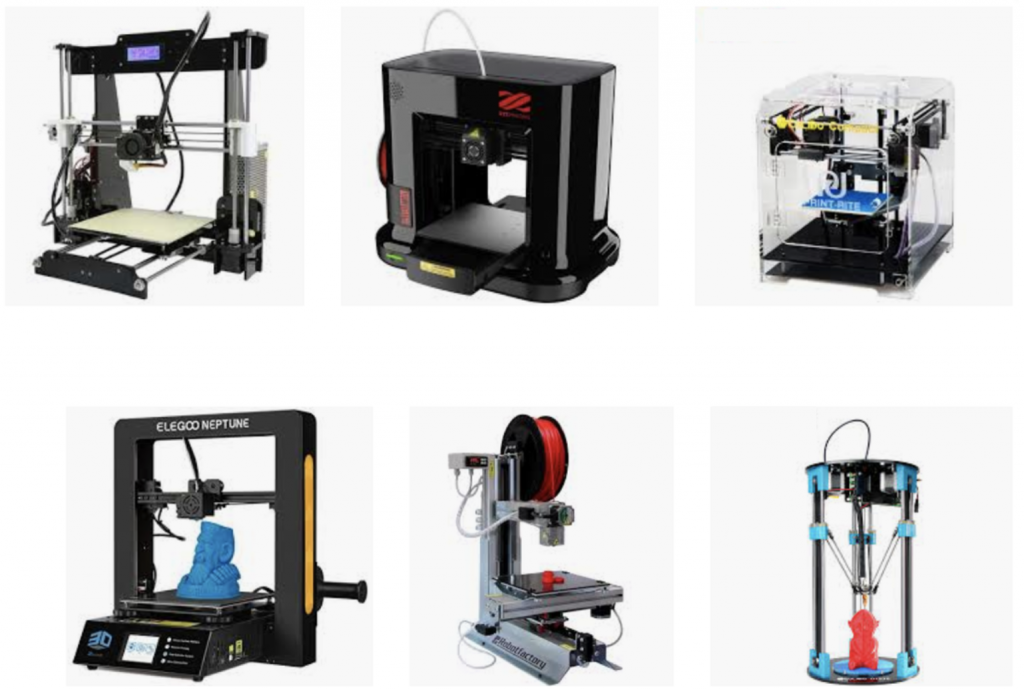
If you have an affordable FDM 3D printer, you will see how it deposits layer over layer of filament while at work. Layers support each other. And if there is an overhand or a bridge that lacks support below, new structures are added to lead to a great-looking 3D printed model.
Some 3D printing tips for beginners can assure you that sticking to the default settings in your slicer software is a good thing. However, such a method does not guarantee a fantastic result.
When you are not using supports in 3D printing that correspond with your model, you can come across failed overhangs and other unpleasant 3D printer issues. Thus, it is better to understand which are the main 3D printing support patterns and how they can lead to a steady, nicely supported print or bad-looking model (if misused).
Read also: Free STL Editor 2022: How to Edit and Repair STL Files
1. Linear 3D Print Supports
Image source: UltimakerThis 3D print support type is also called “accordion” and sometimes “lattice.” Most 3D printer beginners and professionals rely on it in the most significant number of prints.
Linear supports touch the whole underside of an overhang. They are great for angular, steep, and flat overhangs. They look like columns that grow at the platform and up to the overhang’s bottom.
Linear supports. Maker: Sercan GüzelIf you are using Cura software, the linear 3D printing supports will be set by default. Still, you can select between several “linear” patterns, including concentric for spheres, lines for simple shapes, zig-zag, grid, etc.
Their pros are:
- Reliable support for steep, flat, angular overhangs;
- Great support for bridges.
But they also have cons to mention. Firstly, the linear 3D printing support structures are often hard to remove because they touch the entire bottom of the bridge or overhang.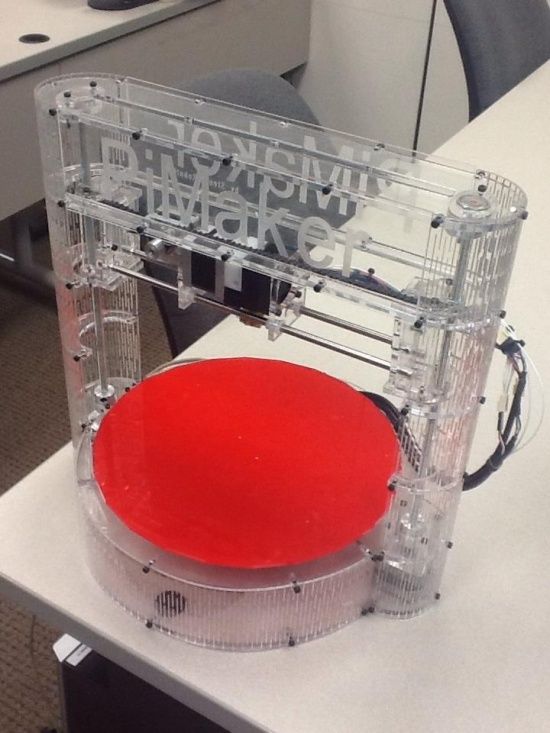 Secondly, they can easily damage your 3D print surface during the removal process. Besides, they use much filament and take more time to print.
2. Tree-Like 3D Printer Supports
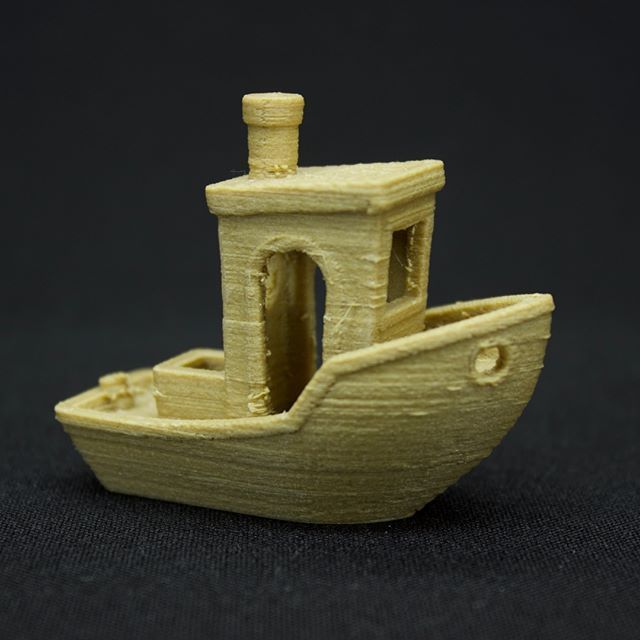
Tree-like supports. Maker: Krystian GranatowskiModels that have non-flat overhangs should use tree-like support structures. They do remind many of trees with branches. Their “trunk” grows at the print’s base, and their branches touch the overhang parts of the model at various points.
There are several pros to using tree-like supports in 3D printing:
- They are quicker and simpler to print and remove;
- They require less filament;
- They do not harm the overhangs’ underside that much.
Of course, there are also cons to consider. Tree-like structures are significant for 3D printing models that have non-flat overhangs.
If you are using Cura program, you will find tree-like structures in the “Experimental” menu. Please note that they take some time to generate, and it will be necessary to check the “tree support” box.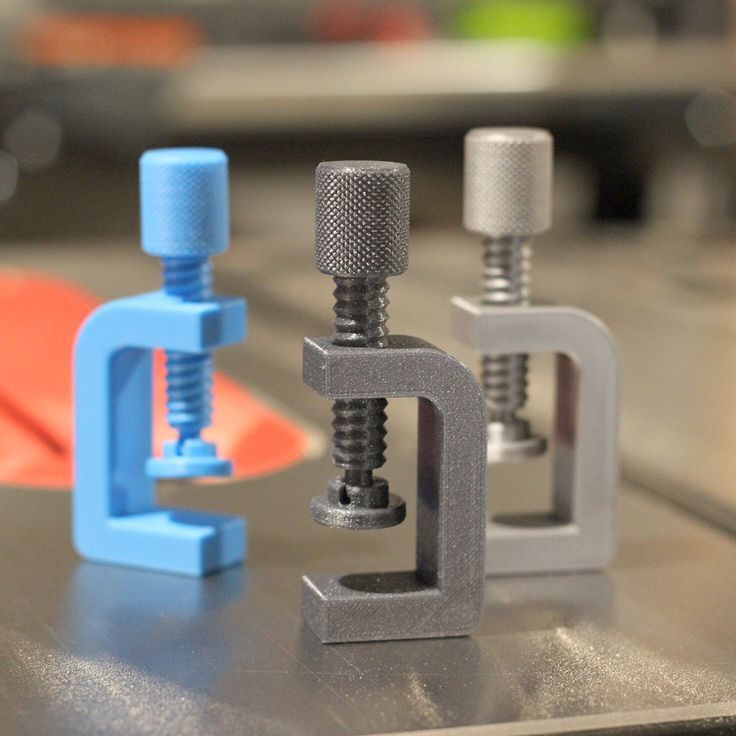 They work great with printing fingertips, different parts of the human body that overhang, for making animals, organic shapes, etc. But they are not as reliable and stable when you use them with flat protrusions.
Here is a great video to understand the types of 3D printing support structures offered by Cura:
CHEP about Cura 3D printing supports3D Printer Supports Hard to Remove
Regular support structures you manage via your 3D modeling software or slicer are usually made from the same material as the rest of your model. Thus, it could be a pain to remove supports from a 3D print.
You can follow these tips to ease your task:
- Do your best to first gently remove all the support structures that ease under your fingers and move with no additional tools.
 Try not to break anything too hard.
 - You can try to carefully remove, slice, or scrap the rest of supports with a knife or a plier. Move slowly trying to leave the surface unbroken.
- If you still see the light remains of supports and wish to make the model smooth, use sandpaper of different grits and gently polish the surface.
- Often, as you get rid of supports that are hard to remove, the model is left with scratches and little holes. You can use clay, putty, or nail polish varnish to cover those minor issues.
Read also: Best Tips on How to Store 3D Printer Filament
Dissolvable Supports
These 3D printing support patterns are not typical because they are used only in dual-extruder printers. They are not available for one-extruder machines.
If you have a dual-extruder printer, you can make one nozzle to build your project in PLA filament and the other nozzle to work on supports with PVA or water-soluble filament.
How PVA material dissolves in the waterSuch 3D printed models are elementary to clean from the additional structures. Just soak your project into the water, and wait until the water-soluble filament dissolves.
Support Structure 3D Printing Rules
Not all bridges and overhangs in your 3D printing project require supports. There are magnificent “degree” rules to remember. They can save you much filament, time, and nerves.
1. 45 Degree Rule for Overhangs
Image source: 3D HubsIf your model has no overhangs that are over 45 degrees, you might need no 3D printing supports at all. It happens because the layers stack on top of each other with a small offset. It is how your machine can work with many overhangs with a fantastic result.
It is best to look at the illustration with T, H, and Y letters.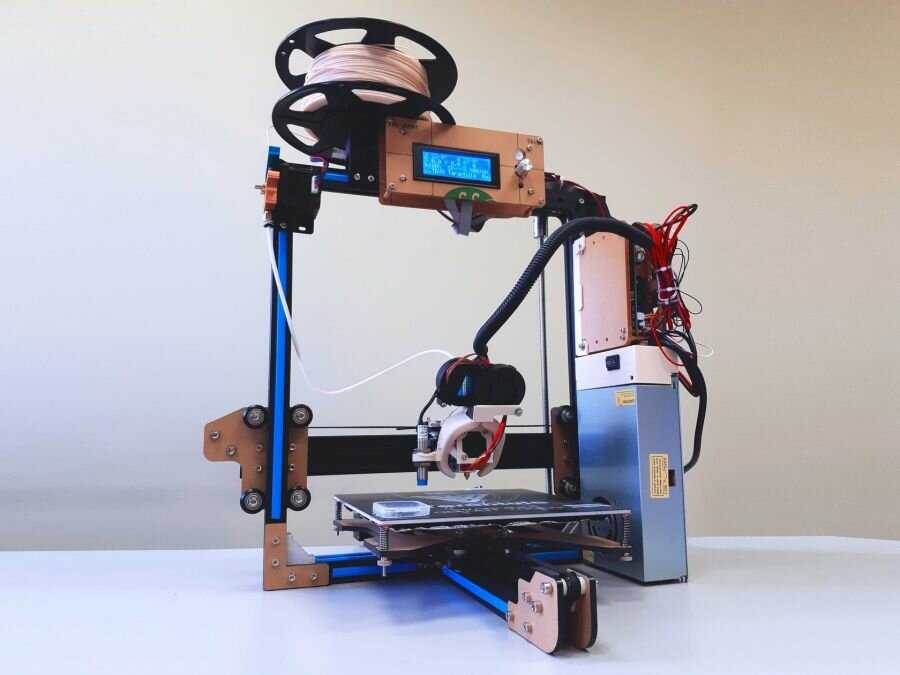 They all come with overhangs. However, T and H require you to 3D print supports, and Y can be printed without these structures because its angel is under 45 degrees to the vertical line.
2. 5 MM Rule for Bridges
Image source: All3DPThere is also an excellent rule for 3D printing bridges. It is known as the 5 mm or 0.2 inches trick. It is also simple to remember.
If your model has a tiny bridge with a length under 5 mm (0.2 inches), you can build it without adding any support structures. The modern 3D printers can stretch the hot filament for distances under 5 mm, and your project will have just a little sagging.
Of course, complex models with bridges that are 5 mm long or longer require using extra support patterns.
3. When to Use Supports in 3D Printing
No matter which 3D printer you are using, the software where you can see the model before it is actually built can show you which areas require support.
Those parts which need additional structures are usually highlighted in red.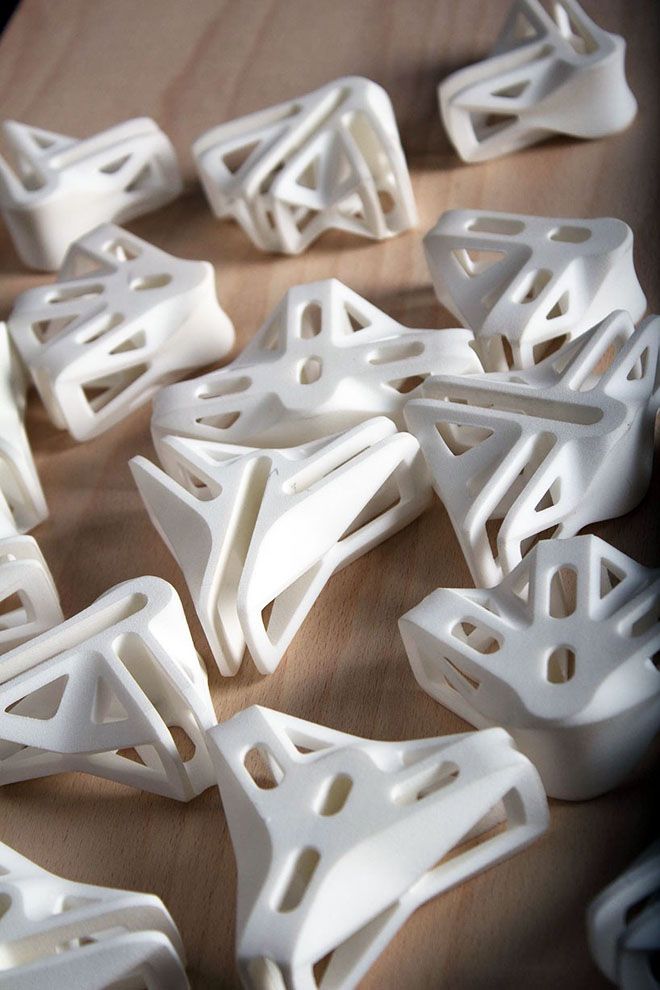 You can manually add and manage support patterns, rely on the default settings, or ask other 3D printing enthusiasts for advice.
3D Print with Supports: Pros & Cons
Even though many complicated and highly-detailed 3D models require you to 3D print them with supports, there are pros and cons to consider.
Pros of Using 3D Printing Support Patterns
Support for 3D printing can help you achieve a nicely built model with complex overhangs, holes, and bridges. Thanks to them, you can end up doing a professional-looking figurine or model you’ll be proud of.
Here are the main advantages of 3D printing with supports:
- You can bring to life a 3D model of any complexity, with bridges and severe overhangs;
- If you have a two-extruder 3D printer, you can enjoy using dissolvable supports that are fast to remove;
- Your 3D prints will look professional if you master support structure management.
Cons of Using 3D Supports
It is best to keep in mind all possible downsides of 3D printing supports. This way you can always rethink the way you position your 3D model on a bed or sculpt/model it.
These are the most common downsides of 3D printing with supports:
- Sometimes it is hard to remove supports from a 3D print;
- Adding support structure to your model makes you spend more on 3D printing material;
- It takes a long while to 3D print and remove supports from a figurine or model;
- You can damage the project while removing support structures;
- You should learn how to add and remove supports which takes time.
Gambody – Premium 3D printing marketplace, for example, recommends how to support a model before print. You can use these recommendations, or you can join Gambody community on Facebook to ask questions and get answers about the types of 3D printing supports you might need for your project.
FAQ:
How to remove supports from 3D prints?
There are two main types of 3D printing supports by how you remove them. They are break-away and dissolvable structures.
If you have a one-extruder printer, you might find 3D printing supports hard to remove because it is a must to break them away or use an additional tool (knife, plier, scraper) to cut off or scrape them.
If you have a machine with two extruders, you can use water-soluble 3D printing material for support. It could be PLA, HIPS, or something else. Such structures can be washed away in Limonene or water without issues.
How to add supports to 3D prints?
If you use Cura or another software to prepare your projects for 3D printing, you can let it generate the support patterns for you by default. Cura, for example, used to offer only linear supports until the 3.2 beta release. Starting from that version, you can choose either linear or tree-like support patterns for your models.
When to use supports while 3D printing?
Before adding support to a 3D print, evaluate it. If you see major overhangs and long bridges, you should choose 3D printing support patterns that meet your situation the best.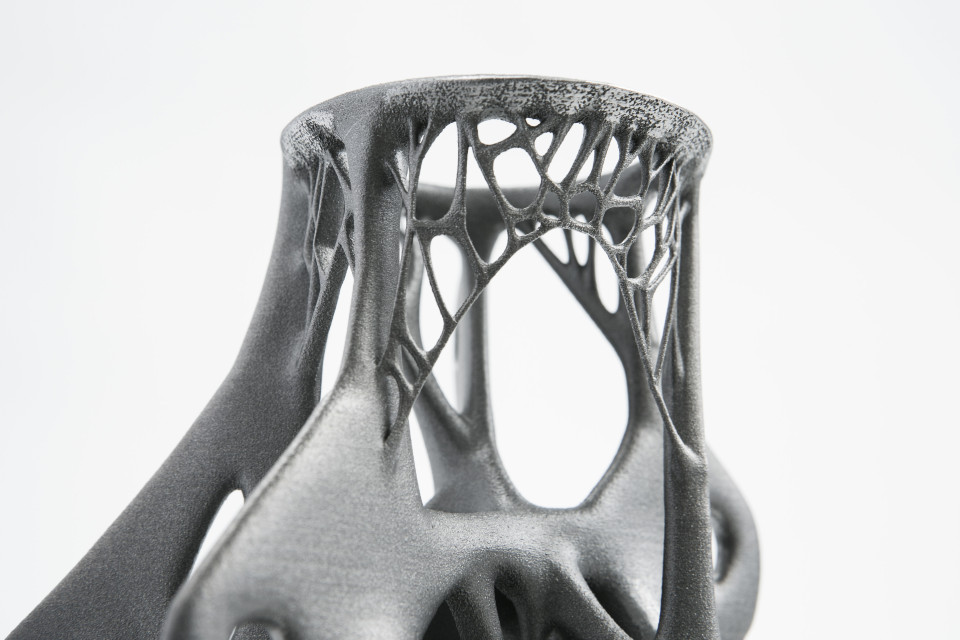
So, when there are unsupported areas and arches, rely on your 3D printing software and add 3D printer supports as suggested by the tool or manually.
What is the best support pattern in 3D printing?
If your project has too many non-flat overhangs, it is best to use tree-like support patterns while 3D printing. It is relatively easy to remove them and avoid damaging the well-visible surfaces of your model because such a pattern usually touches your overhangs from underneath.
If your model has many flat overhangs and severe bridges, you should use a linear support pattern. It provides good stability but is hard to remove and can damage the project’s surface.
Do all 3D prints require supports?
You don’t have to 3D print supports with every model you make. Many simple and quick projects require no support. Also, bridges shorter than 5 mm and most overhangs below 45 degrees need no support structures.
Still, a lot depends on how old and well-maintained your printer is. Some old machines fail to print overhangs at 35-40 degrees and make you always ensure you are 3D printing support structures.
Even though the 3D print supports add filament or resin costs to your project and require you to spend extra time removing the support structures, they can save your model, and make it professional-looking, and highly detailed. At the same time, supports might damage the project’s surface, so be careful when using them.
Why do my 3D printing supports fail?
Even when you follow the 45-degree and 5-mm bridge rules, your 3D printing supports may fail due numerous reasons. Your 3D model might have heavy bridges and grave overhangs, poor design, weak base. There could be issues with your 3D printer, slicer software, and 3D printing materials that warp, split, drop, curl, cause layer shifting, etc.
Sometimes it is best to test your 3D printer before working with complex projects. Find massive overhang testing models online and print them. You will learn if your machine works well with recreating 20-, 25-, 30-… 70-degree overhangs with no 3D printing supports or fails.
(Visited 9,726 times, 1 visits today)
Author
What are supports in 3D printing? When and why do you need them?
What are support structures in 3D printing? Depending on the technology you use to produce parts, you may need to print support structures to maintain part geometry. This article covers what support structures are in 3D printing, when they’re needed and how supports may affect the quality and price of your part.
3D printing builds parts layer by layer, so there always has to be a previous layer to build upon. Depending on the specific 3D printing technology and complexity of the 3D model, you may need to produce your part with support structures.
When deciding which 3D printing technology to use, it’s essential to consider support structures and how they affect the quality and price of your part.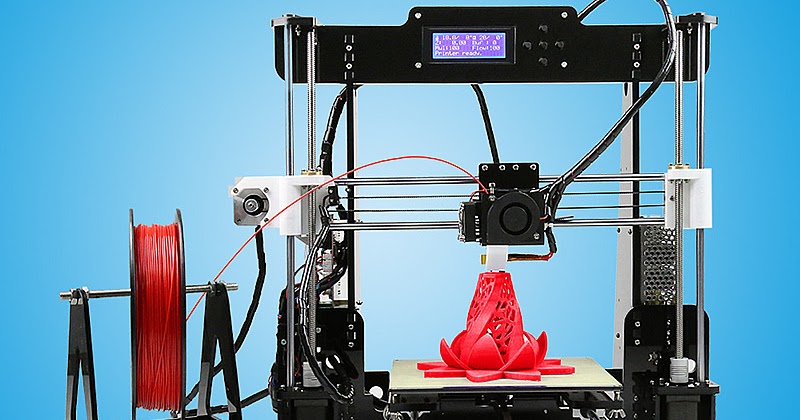 As well, support structures will have an impact on your part’s surface finish. Removing supports from a part often results in blemishes or surface roughness.
This article defines what support structures are for 3D printing, how they’re implemented for each technology and how using supports can affect your choice of manufacturing technology.
How do supports work for FDM 3D printing?
Fused deposition modeling (FDM) extrudes a metal filament onto a build surface along a predetermined path. As the material is extruded, it cools, forming a solid surface that provides the foundation for the next layer of material.
With FDM printing, each layer is printed as a set of heated filament threads which adhere to the threads below and around it. Each thread is printed slightly offset from its previous layer, allowing a model to be built up to angles of 45 degrees. This way, prints can expand beyond the width of preceding layers of filament.
When a feature is printed with an overhang beyond 45 degrees, it can sag enough to potentially ruin the print. This is when you need support structures.
When do you need support structures for FDM?
Let’s imagine you have to 3D print models of the letters Y, H and T.
An FDM printer can easily print the arms of the letter Y without requiring support structures. Even though these features are outstretched, they don’t extend past 45 degrees.
The letter H, on the other hand, is a bit more complicated. If the center bridge is under 5 mm, it can be printed without support or any sagging. Support is required if the bridge exceeds 5 mm. In the example shown here, the center bridge is over 5 mm, so it’s printed with support structures.
The letter T requires support for the top features extending from either side of the model. There is nothing for these out arms to be printed on and the material will fall down without supports.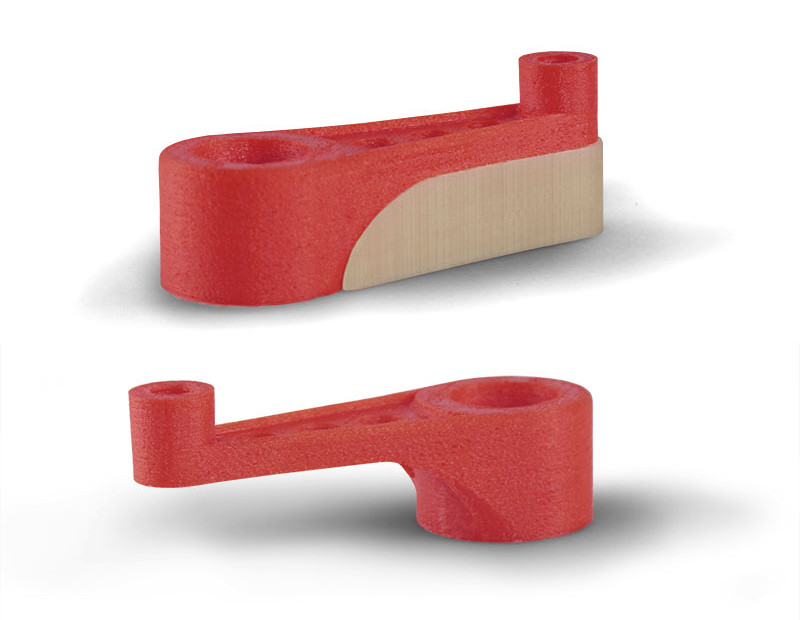
The image below illustrates these three examples. The support material is shown in light gray.
An illustration of when you need support structures for FDMHere is how these models look when printed. The second image shows the result of the T printed without support. The surface has significant sagging and will require a lot of post-processing to clean up.
Models of a Y, H and T printed with supports via FDM Without any support structures, FDM will fail to print the letter TWhat is bridging in FDM?
In some cases, there is an exception to this overhang rule.
Hot material can be stretched short distances between two points of a print. This method is known as bridging. Bridging allows parts to be printed without support materials and with minimal sagging. If a bridge is over 5 mm long, support structures are required if you’re hoping to achieve an accurate surface finish.
Curious about the price and material options for FDM?
Explore our FDM services Get a free, instant quote today
What are the disadvantages of support structures in FDM?
The potential need to use support structures is one reason why FDM is not always the right technology for your application. One of the limitations of using supports in FDM printing is that post-processing is then required, which results in marks or damage to the surface in contact with the support materials.
Another issue is that layers printed on support structures will be less even because the supports won’t be stationary like solid layers of extruded filament. On top of this, supports can be difficult to remove from small, intricate features. This bit of post-processing could break your model.
Furthermore, having to print support structures adds to the cost of FDM. Supports require additional printing material that later needs to be removed, creating more work (and waste) for the operator. More materials and more human intervention equal higher costs.
How much support material do you need for your FDM print?
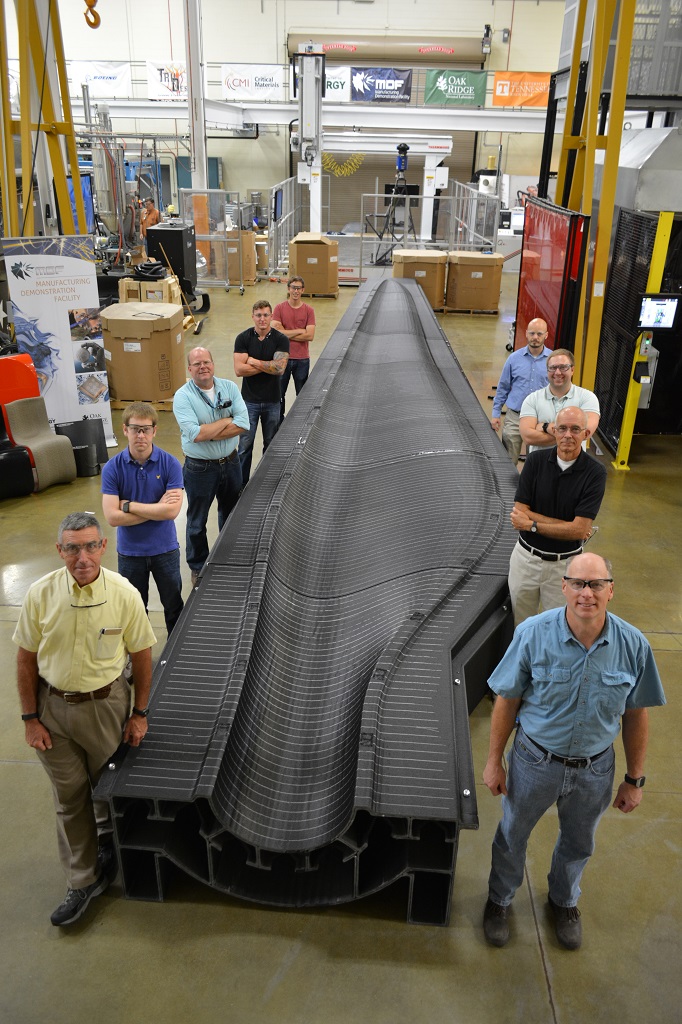
The amount of material you’ll need for support structures will ultimately depend on the design. If you’re printing a replica of the Gateway Arch in St. Louis, for instance (like the example below), you’ll only need a limited amount of support placed in the correct location to allow accurate printing.
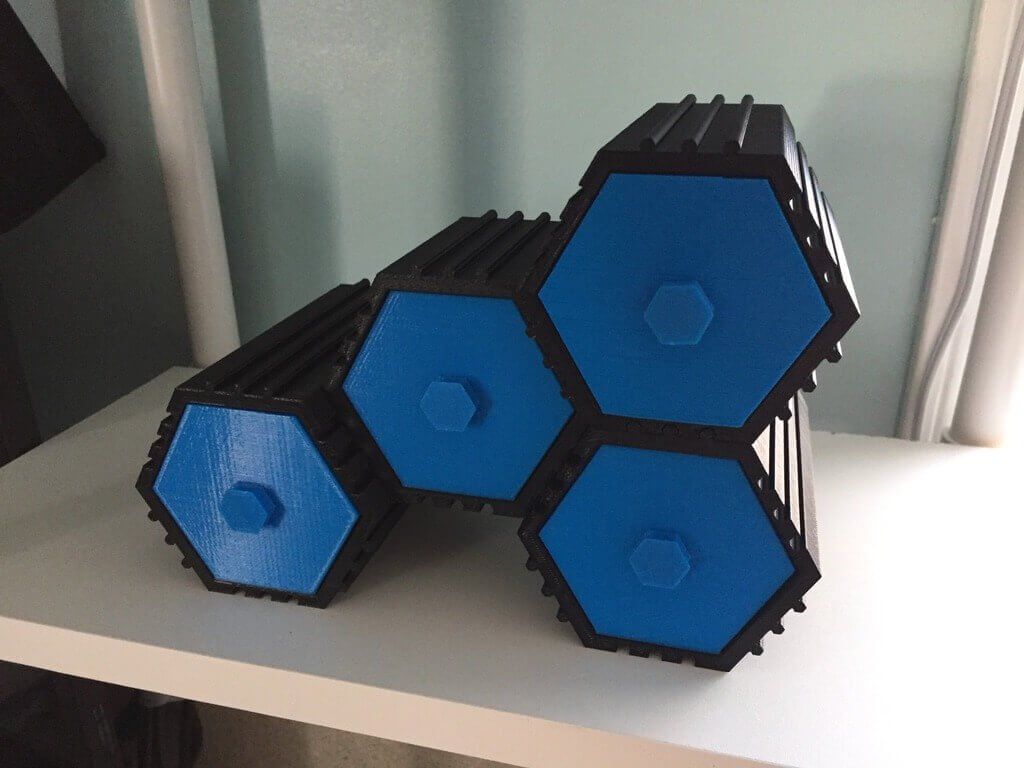
This model of the Gateway Arch in St. Louis shows how to use supports when printing an arch-shaped objectNow, if you’re printing a “ball in a cube” (shown below), you’ll need quite a lot of support material, which means a sizable amount of removal time as well.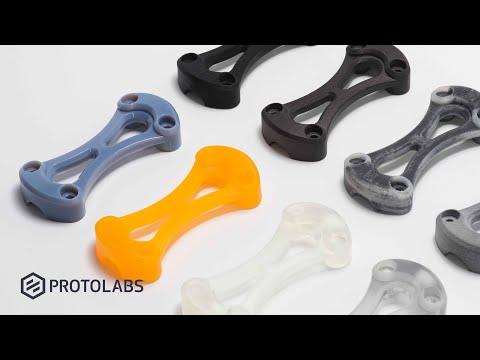
Removing the supports in this example is complex and involves getting rid of each support element with needle-nose pliers while attempting to limit the damage to the surfaces surrounding the supports. Sanding or smoothing these surfaces after support removal presents another difficulty.
However, without support materials, this model can’t be printed with FDM, unless you want to compromise on quality and accuracy. In this case—despite the added cost and print time—the additional support material used is essential to being able to print this design.
This close-up shows where supports are required when components are printed inside of other componentsWhat are the two types of support structures for FDM?
FDM 3D printing uses two types of support structures. The most common (and best suited for most FDM partS) is a sort of flat accordion or lattice structure. The other is “tree-like” support, which has less contact with the print surface and can leave you with better surface finishes after post-processing.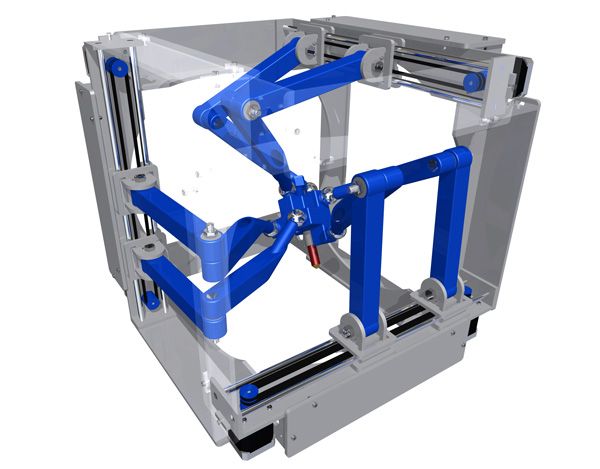 Though it’s less common, the latter is much preferred by some operators.
The FDM printer operator will generally specify the type of support that best suits your application and minimizes the cosmetic impact it’ll have on your design.
These are two different types of support structures: According (left) and tree (right)Are there dissolvable supports for FDM?
Finely-tuned printers with two print heads can print support structures with a dissolvable material that doesn’t tear away from the part. Instead, you can dissolve this material in a chemical solution that won’t adversely affect the printed model.
This results in a better surface finish where the support is in contact with the main material, however, it can be expensive and time-consuming.
All industrial FDM machines are equipped to use dissolvable support materials. For instance, you have the Ultimaker 3, which can print PVA that dissolves quite easily post-print.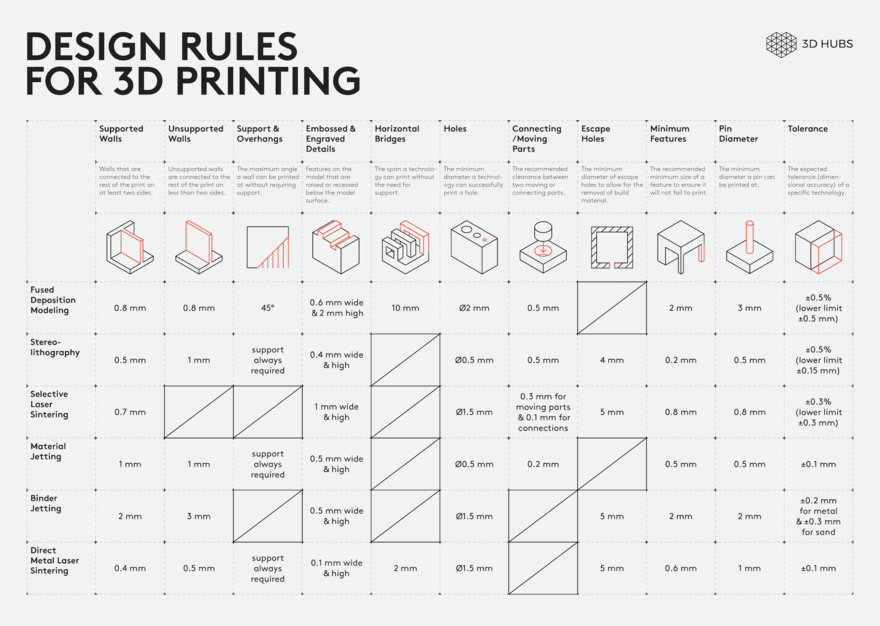
Do you need support structures for SLA & DLP 3D printing?
Stereolithography (SLA) and Digital Light Processing (DLP)create 3D printed objects from a liquid (photopolymer) resin by using a light source to solidify the liquid material.
Depending on the exact type of printer, you have two main methods of producing a model. Certain printers pull a model out of a vat that contains liquid material, solidifying it via a light source through a translucent window at the bottom (bottom-up). Others submerge the model into the liquid as the top layer is tread by a light source from the top (top-down).
To make sure that the prints adhere to the print platform and don’t float around in the vat, SLA and DLP printers almost always use supports.
Support structures from these printers look like thin ribs, with only small tips actually touching the model to save material and printing time.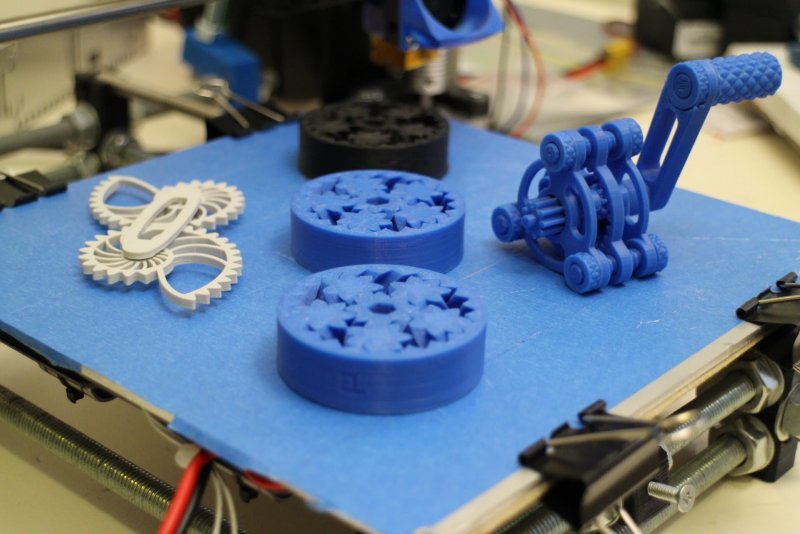 The number of supports, their location, where they touch the model and the structure are calculated by the software and are dependent on the shape, orientation and weight of the part being printed.
SLA and DLP are some of the most accurate technologies, capable of printing even the smallest and most intricate objects with accurate detail. With proper post-processing, printing with support does not impact the quality of the part.
An SLA print with support structuresHow do you remove support materials from SLA & DLP prints?
First, Isopropyl Alcohol (IPA) is used to wash liquid resin off your completed parts. Support structures can be either broken off the surface of the model or removed using pliers. The spots where the support was in contact with the object are then sanded to remove any remaining marks.
Curious about the cost and materials available for SLA/DLP?
See all SLA/DLP materials Get a free, instant quote today
Do you need support structures for material jetting?
Material Jetting (Stratasys PolyJet and 3D Systems MultiJet Modeling) technologies are similar to inkjet printing, but instead of jetting drops of ink onto paper, these 3D printers jet layers of liquid photopolymer onto a build tray and cure them instantly using UV light.
These printers require the use of support material in all cases where there are overhanging features, regardless of the angle. Supports are either water-soluble or are removed during post-processing using plyers, water jetting, ultrasonic baths and sandblasting.
Unlike FDM, supports for these technologies are in no way detrimental to a part’s cosmetic appearance, surface quality or technical properties. After proper post-processing, it’s practically impossible to distinguish where support materials were removed from your part.
Post-processing for material jetting involves power tools like waterjets and sandblasters, and using these tools may damage or bend the more intricate features of your model. We recommend that you follow our Material Jetting rules to avoid these sorts of issues. In fact, you may want to opt to print your parts using SLS if your model has intricate features and thin wires.
Do you need support structures for SLS?
Selective Laser Sintering (SLS) 3D printers fuse powdered material in a chamber using a laser.
For SLS, there’s no need for support structures since the powder acts as a form of support when the object is built up layer by layer. This gives a lot of design freedom but also generally increases the cost and time to print a part. SLS requires time for the build chamber to cool down and cleaning the print requires a multi-step finishing process, including removing unfused powder, typically with an air gun.
When printing with SLS, the unfused powder surrounding the print functions as a natural support structure that's also easy to removeCurious about the cost and materials available for SLS?
See all SLS materials Get free, instant quote today
Do you need support structures for binding jetting?
Binder jetting is similar to SLS in that the printer uses thin layers of powdered material to build up an object. Instead of using a laser to sinter layers together, however, binder jetting printers use a binding agent extruded from a nozzle to bind the powder together.
Similar to SLS, there’s no need for support structures with binder jetting since the powder supports the object as it’s built. As well, you have to clean and post-processing the print over several steps, including removing unfused powder with an air gun or another tool.
Unfused powder being removed from a binder jetted printDo you need support structures for metal 3D printing?
Metal 3D printing technologies use support structures to keep models fixed to a base plate during the building process. However, overhangs with an angle greater than 35 degrees can be printed without support.
When you do need supports for metal 3D printing, it’s important to ensure that they are easy to access, or else it’ll be challenging and maybe even infeasible to remove them during post-processing.
Using supports won’t impact the overall quality of your part, and with the proper post-processing methods, you can remove all marks from the printed model.
These metal prints, which are still attached to the print bed, still have visible support structuresHubs' top tips & tricks for optimizing 3D printing with support structures
Whether or not you need to use support materials for your specific application, it’s important to know the best practices for this aspect of the 3D printing process.
-
Support structures will generally affect the cosmetic appearance of a part, so you’ll need to rely on post-processing to improve the surface finish after removing supports. Material Jetting is the exception to this rule.
-
The more support structures you print, the more complex a design can be for certain 3D printing technologies. You can optimize the amount of support material you use by addressing part orientation and part accuracy (among other design and manufacturing factors) to lower the cost and print time.
Which 3D printing technologies require support structures?
At the end of the day, this is the most essential question. The table below summarizes whether support is required for each of the 3D printing technologies we offer at Hubs.
| 3D printing technology | Do I need support structures? |
|---|---|
| FDM (desktop & industrial) | Depends on model geometry |
| SLA & DLP | Always |
| Material Jetting | Always (dissolvable) |
| SLS & MJF | Never |
| Binder Jetting | Never |
| Metal 3D printing | Always |
Ready to transform your CAD file into a custom part? Upload your designs for a free, instant quote.
 Get an instant quote
What is support in 3D printing?
One of the most frequently asked questions when working with clients is “What is 3D printing support?”. In this section, we will clearly show what is commonly called support and what types of support exist at a given point in time.
Support material (supportmaterial) is an auxiliary material used in 3D printing to build complex objects and increase the quality and stability of construction. Without the use of support, it is impossible to 3D print models with cavities, overhanging structures, complex detailing, thin walls or ceilings, and other complex elements. nine0003
Simply put, support serves as a kind of temporary foundation for the printed product. Layered construction assumes that each next layer of the product relies on the previous one. In the case when the design of the product does not provide support under the first layer in one place or another, support comes into play.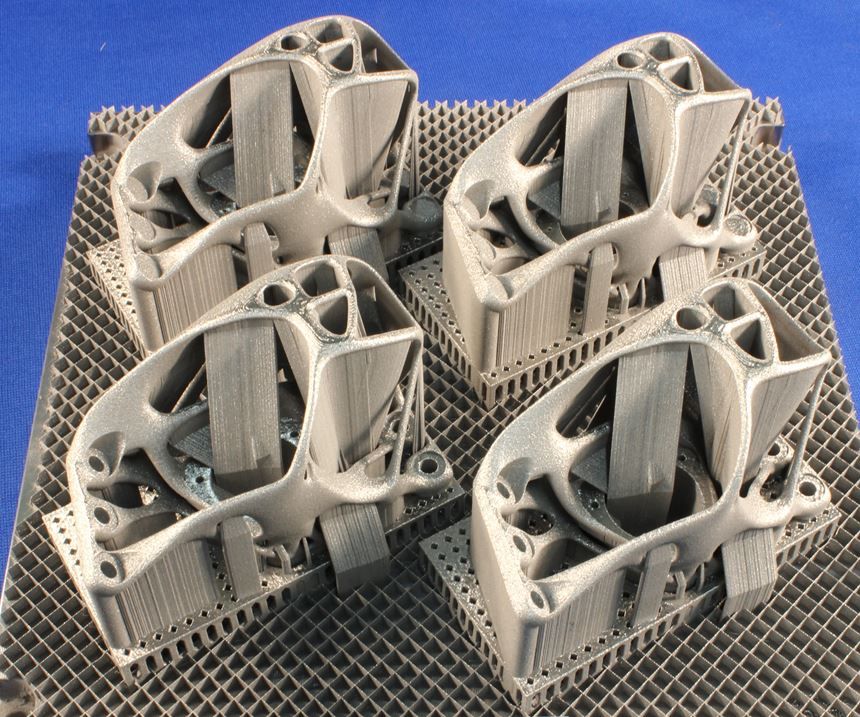
It must be understood that the removal of supporting structures is one of the most difficult types of work.
Therefore, this article was written, fully explaining what support structures are and why they are needed in 3D printing. nine0003
How to determine where support is needed?
This is done automatically by the software supplied with all professional 3D printers. You just need to upload a file in STL format, and the program will independently calculate where the use of auxiliary material is necessary for high-quality construction. It is worth noting that most software also allows the user to edit the number and location of auxiliary structures. The software is directly related to the capabilities of a 3D printer and will automatically show you where support is needed and where it is not. nine0003
In addition, the program calculates the amount of auxiliary material needed before printing.
If we do not agree with the automatic calculation of supports by software for a three-dimensional printer, then software comes to our aid where supports can be placed manually.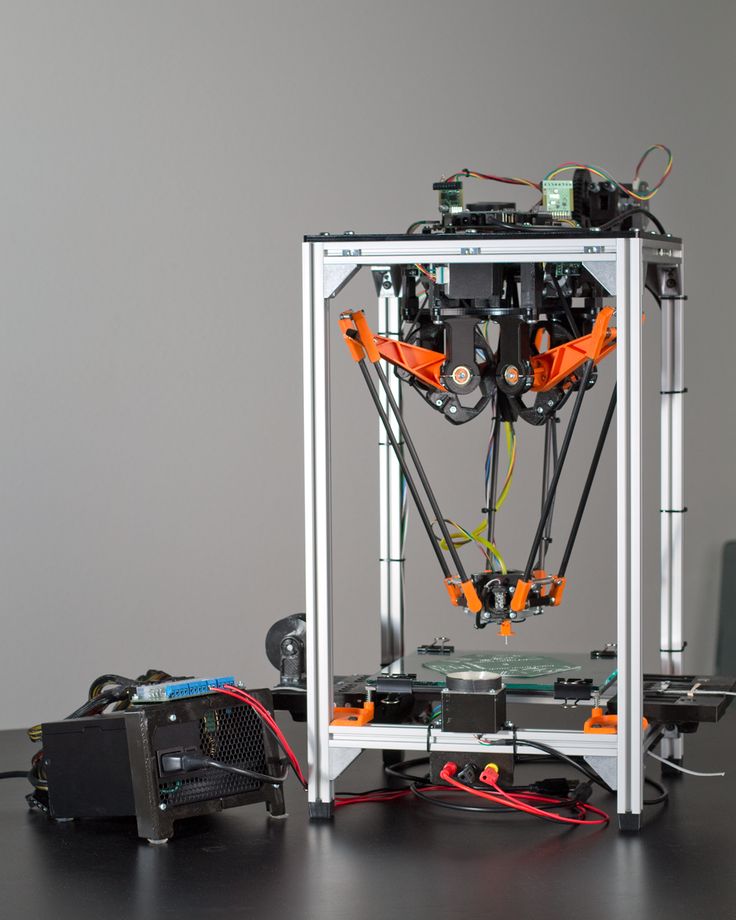 The picture shows an example of manually building supports in the AutoDesk MeshMixer program.
Types of support materials
Soluble
There are 2 types of soluble auxiliary materials such as HIPS and PVA. These types of plastics are used for printing supports in complex models, where high quality of the resulting product is an important component.
Each type of plastic has its pros and cons.
For example, HIPS can be used both as a base material and as an auxiliary. This plastic is soluble in limonene, so it is excellent for printing supports, where the main plastic is ABS, since they do not interact with each other. It also has its drawbacks - this is the high cost of limonene. nine0003
PVA, on the other hand, is used exclusively as an auxiliary material. It dissolves well in water and is only compatible with plastics where PLA is the main material. But there are two important differences from HIPS: the high cost of the material and the more simplified post-processing of the finished product.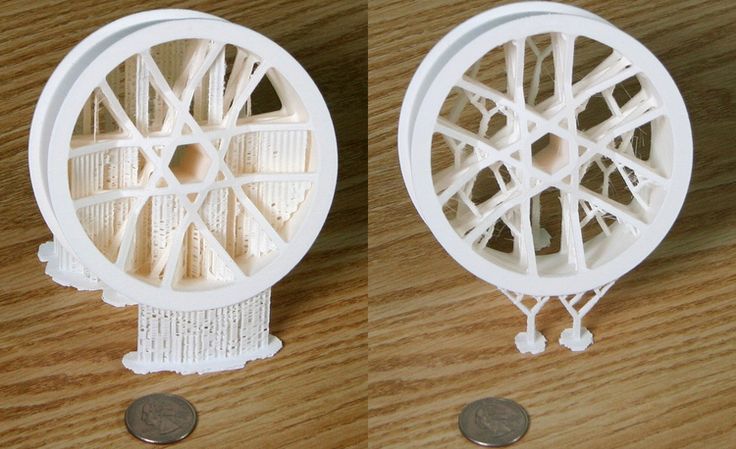
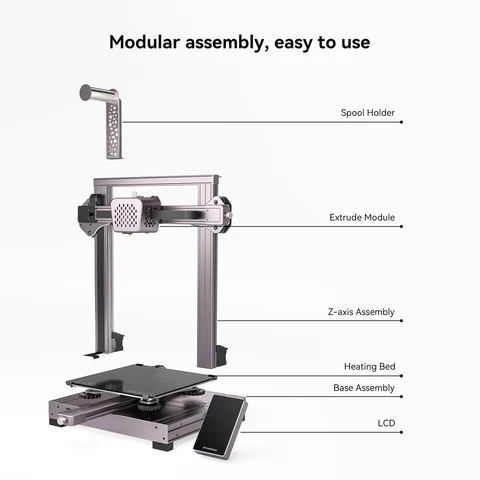
3D printer in the process of printing with support structures.
The finished product immediately after 3D printing.
Detail after washing out the supporting structures.
Mechanically removed
Excess material is broken off, sawn off, scraped off. In this case, the support is the same material from which the model itself is built. But, in order to facilitate its subsequent removal and reduce the consumption of model material, the support is built more “sparsely” compared to the object itself. It has a much lower density and strength, only sufficient to temporarily support the weight of the object being grown. nine0003
Fused
Melts and flows out with slight heating (much lower than the deformation temperature of the main product). Usually has a wax base. Advantages: delicacy, accuracy of application. Used in photopolymer and wax 3D printers of the ProJet series by 3D Systems.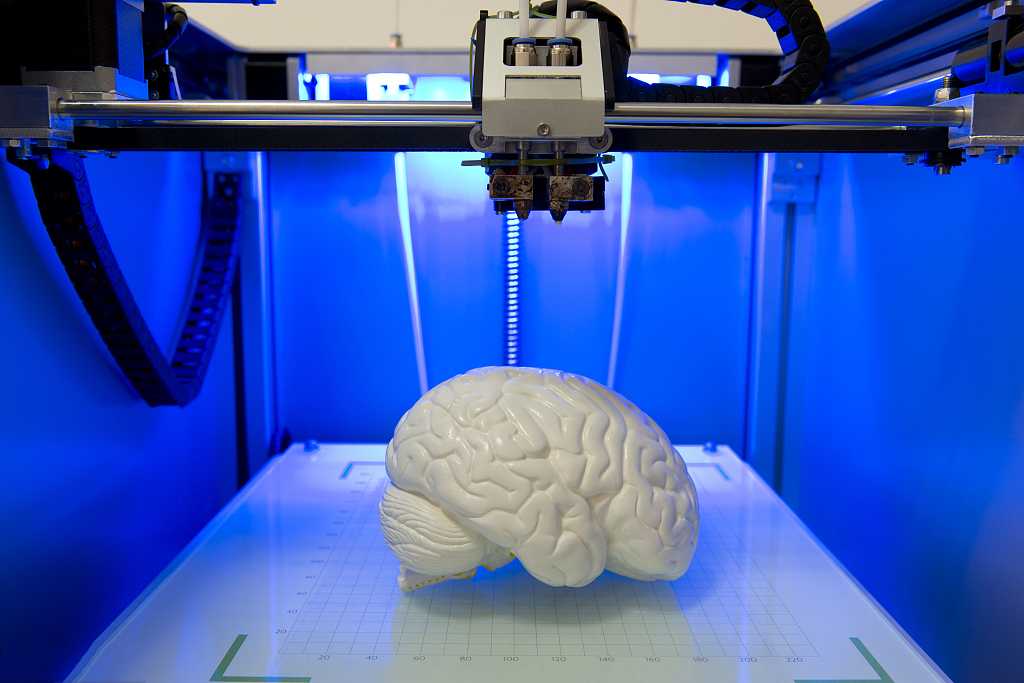
Powder support
Separately, it is worth mentioning powder 3D printing technologies. Here, the same material acts as auxiliary and main. However, that part of the powder that was "auxiliary", after cleaning, can be reused as the main material. Due to this, such technologies are practically waste-free. The only exception to the rule is metal 3D printing. When printing with metal, metal shrinkage must be taken into account. In order for your part not to twist or warp during the printing process, it is necessary to fix it with supports. nine0003
Tags: 3D printing, 3D printer, 3D printers, Additive technologies, Parts, Inventions, Housing parts, support material, support
Overview of 3D printing support materials, 3D printing support materials
Support materials are the second most important consumable for 3D printers after print raw materials. They serve as a kind of skeleton, supporting structures for three-dimensional objects with complex detail, cavities, overhanging elements, etc.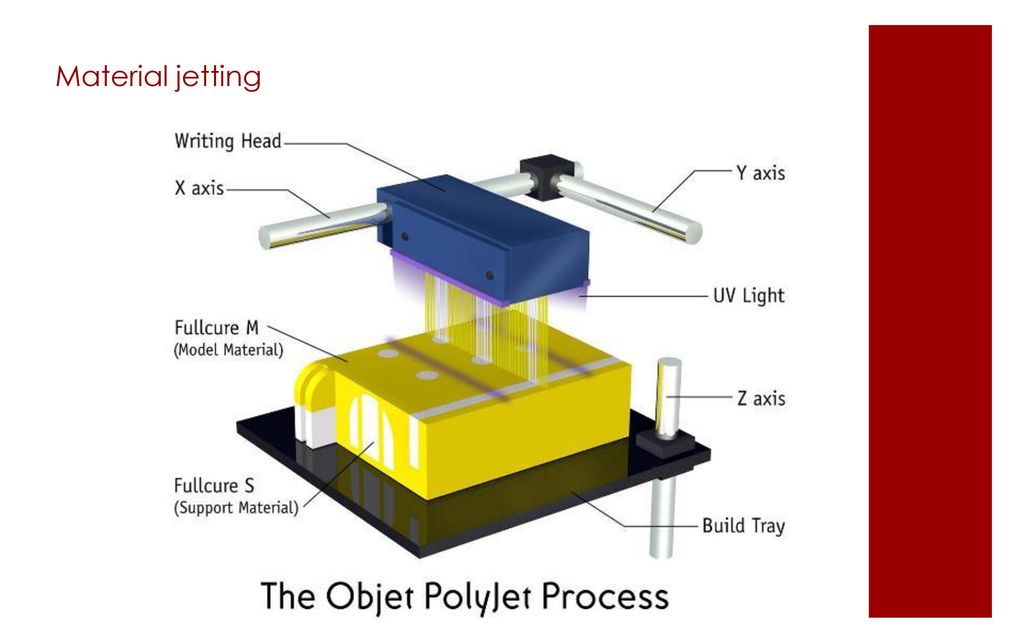 Auxiliary materials are especially important in the layer-by-layer creation of products, when a gap between layers is provided in one place or another. nine0003
The number and location of supports is automatically calculated by the 3D printer software, but the type of material depends largely on the printing technology.
Types of supports in 3D printing
1. Low-melting
This category includes materials with a low melting point (from 60 to 100˚C), which flow out of the product when heated with a hair dryer or in a special oven. Usually these are gel-like or waxy substances. It is important to ensure that during the heating of the support material, the deformation of the model itself does not begin. nine0003
On the plus side:
- complete removal from the facility;
- the possibility of reusing the material;
- application precision;
- allows you to create multi-component models, including those with hinged joints.
The downside is the impossibility of using materials with a low melting point when printing the product.
Used in 3D printers using FDM, SLA, PolyJet technology. nine0003
2. Powder
Used when creating three-dimensional objects by powder printing (DMLS, SLS). In this situation, the powder serves as both a shaping and supporting material. The essence of the method is that in the total powder mass, according to a given drawing, the contours of the model are created, and the remaining particles of the material serve as a frame. At the end of the process, the product is removed from the powder, the remains of which can be used to print the following models. Powder type support helps to print products of any degree of complexity and cavity. At the end of the printing process, excess powder is simply brushed off or blown out. nine0003
3. Washable or soluble
A plastic or gel-like material that dissolves in a chemical solution or plain water. This category includes:
- PVA
- HydroFill
- HIPS.
Very handy type of support for 3D printing complex products with a lot of internal voids. The removal time is from 30 minutes to 2 hours under a stream of warm water or in a container with a chemical solution. At the same time, the thickness of the layer of the washed-out material does not matter - it dissolves completely from all cracks and pores, without requiring post-processing after itself. nine0003
4. Mechanically removable
The most budgetary and least convenient option for creating support when printing 3D objects. It is usually used in home-type 3D printers or in cheap desktop models that work on the principle of layer-by-layer modeling of products with plastic (most often these are ABS and PLA filaments). As a support material, the same one from which the model is created is usually used, only more diluted in order to reduce the consumption of raw materials. At the end of the work, the supporting frame is removed manually, and the broken places are cleaned and polished.