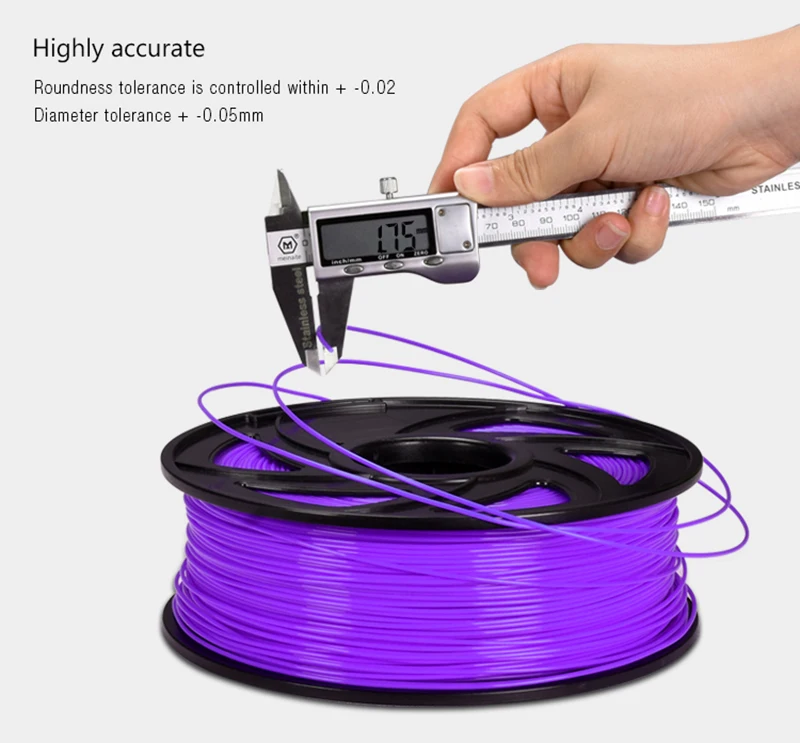
3D printing pla temperature
PLA bed temperature & print temperature settings
Polylactic acid (PLA) filament is the most popular material for consumer FDM 3D printing, and there are a few reasons why this is so. For one, PLA is highly affordable, meaning users can buy in bulk and iterate designs over and over without worrying about wasted material. Another reason for PLA’s popularity is its printability at low temperatures: with a glass transition temperature of around 60 °C, PLA can be printed using moderate heat settings without high-end, high-temperature equipment.
That being said, finding the ideal PLA bed temperature and print temperature isn’t always straightforward. Although the material generally requires low temperatures, the ideal range can vary depending on the brand of filament and the type of 3D printing hardware. And, as with other filaments, printing below or above the optimal temperature range can lead to issues like under-extrusion or stringing. Furthermore, the particularly low melting point of PLA makes it susceptible to a range of temperature-related 3D printing issues even after it has been printed.
This article serves as an introductory guide to PLA bed temperature and print temperature settings. It suggests suitable temperature ranges, identifies symptoms of printing at too high or too low a temperature, and offers tips on discovering the optimal temperature range for your specific 3D printing setup.
One of the key advantages of PLA — especially for beginners — is its ability to be printed without a heated print bed. This makes it suitable even for low-cost printers without heated bed capabilities.
For FDM 3D printing materials generally, a heated bed provides some important benefits. Firstly, it helps with bed adhesion. When the print bed is hotter than the ambient temperature, it allows the first layer of extruded filament to stay soft for longer, giving more time for first-layer adhesion to take place. Additionally, when the heated bed is eventually switched off, the rapid temperature reduction can help facilitate part removal; in some cases, the finished parts will simply “pop off” the build surface. A heated bed can also improve print quality by reducing warping. Parts cool down slower, reducing the severity of contraction and curling.
The PLA bed temperature should be around 50 °C or off altogether
Due to its low printing temperature, PLA is actually fairly resistant to first-layer adhesion issues and warping, especially compared to common alternatives like ABS. However, using the heated bed of a 3D printer can sometimes lead to better results when printing PLA, especially when the room temperature is on the cooler side or when printing a particularly large part.
If using a heated build plate when printing PLA, a temperature of around 50 °C works best. Cura, the popular slicer application, uses a value of 60 °C on its PLA print profile. Here are some recommended PLA print bed temperature settings from a selection of material manufacturers:
MatterHackers Build Series PLA: 40±15 °C
Fillamentum Extrafill PLA: 55 °C
Ultimaker PLA: 60 °C
Note: the heated bed temperature is not the only factor that affects first-layer adhesion. The build surface is equally important: when printing PLA, glass coated with an adhesive like hairspray or glue stick provides good adhesion as well as good print surface quality on the bottom layer. Calibrating the bed level can also improve the adhesion of PLA printed parts on the printer bed.
When attempting to get the best results from PLA filament, the nozzle or hot end temperature is more important than the bed temp. The print temperature affects the print in several ways: higher temperatures improve material flow, enabling faster printing and good interlayer bonding.[1] However, too high a temperature can result in overly melted extruded layers which then sag and cause part deformation, in addition to other problems like material accidentally oozing from the nozzle. Using the lowest temperature you can get away with can therefore lead to the best visual results.
PLA requires a lower nozzle temperature than ABS or PETG
Compared to other thermoplastic printing filaments, PLA prints best at a moderate temperature, typically around 210 °C. To put that into perspective, that’s around 50 °C cooler than you would use for ABS and 30 °C cooler than PETG. The reason for PLA’s low print temperature is the very low (around 60 °C) glass transition temperature of the material.[2] However, the optimal printing temperature depends on a few different variables. These include the specific filament variety, the printing speed (faster prints require a higher temp), and the nozzle size (larger diameters need a higher temp).
Rather than attempting to compute all these different variables at once, the best way to determine PLA print temperature is to run some test prints, as discussed in the final section of this article.
Most FDM printer users set their PLA print temperature to around 210 °C. Here are some recommended PLA print temperature settings from a selection of material manufacturers:
MatterHackers Build Series PLA: 205±15 °C
Fillamentum Extrafill PLA: 220±10 °C
Ultimaker PLA: 200–210 °C
Recommended reading: PLA vs ABS: Which filament should one use?
Failed or low-quality PLA prints are often the result of overly high bed or print temperatures. Setting these values too high can occur when using the wrong printing profile in your slicer, for instance, or when using a narrower nozzle diameter that requires a lower print temperature than the default settings.
Symptoms of excessive PLA bed temperature:
Elephant’s foot: A common PLA printing issue is when the first few layers of the print are splayed outwards due to being overly melted by the heated print bed then subjected to stress from subsequent layers. Elephant’s foot can be resolved by reducing the bed temperature or disabling the heating function altogether.
Over-adhesion: A heated bed can improve the first-layer adhesion of PLA parts. But setting the bed temperature too high can actually lead to the part sticking too well and requiring extensive scraping to remove it from the build surface. Slightly lower temperatures can maintain adhesion while reducing the need for scraping and prising.
Symptoms of excessive PLA print temperature:
Heat creep: If the nozzle temperature is too high, it can inadvertently melt the filament outside of the designated melt zone, especially when using an all-metal hotend.
 Heat creep often kicks in midway through a print, after the temperature has gradually risen up the hotend, and results in patchy or incomplete sections.
Sagging: When printed at too high a temperature, PLA parts can droop and sag, particularly during bridging (the printing of unsupported horizontal features). This can often be resolved by reducing the print temperature or by increasing the cooling fan power. Note, however, that excessive cooling can potentially lead to other issues like poor interlayer adhesion.
Oozing and stringing: High nozzle temperatures can lead to inadvertent leakage of the material from the nozzle during travel movements. This issue can be mitigated by reducing the print temperature or adjusting retraction settings.
Recommended reading: 3D printer stringing: How to fix it
The low temperature requirements of PLA mean that issues caused by too-low temp settings are less common.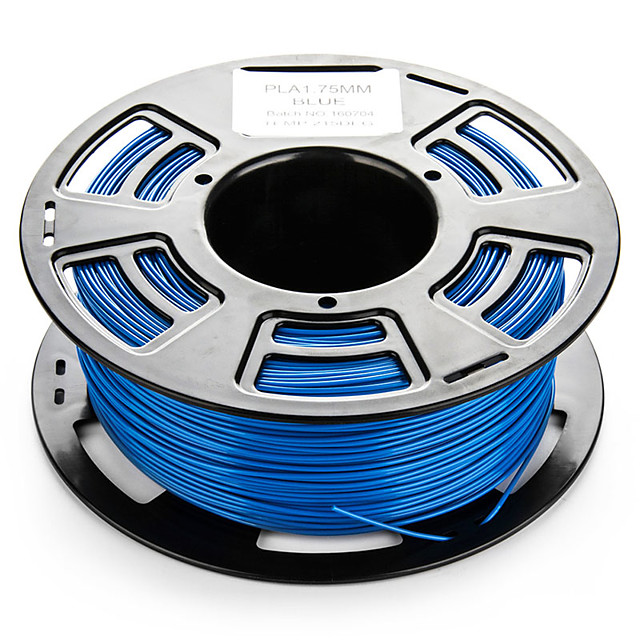 However, these issues can still arise in certain circumstances: when using nonstandard PLA filament, when the ambient temperature is especially cool, or when using a wide-diameter nozzle, for example.
Symptoms of insufficient PLA bed temperature:
Poor first-layer adhesion: In rare instances, PLA can fail to adhere to the print bed, leading to a dislodging of the part and ultimate print failure. This issue might be fixed by increasing the bed temp, but other solutions can include lowering the cooling fan power, cleaning the build surface (or introducing an adhesive coating), and bed leveling.
Symptoms of insufficient PLA print temperature:
Under-extrusion: When printing PLA, an insufficient nozzle temperature can lead to under-extrusion, which can manifest itself as holes in the print or a rough surface texture.
Clogs and jams: Insufficient temperatures can lead to insufficient melting of the PLA filament, potentially resulting in clogging of the nozzle and jamming that interrupts the print.
 These issues can be mitigated by increasing the print temperature or using a wider nozzle.
Recommended reading: How to fix under extrusion: Maintenance and print settings
Manufacturers of PLA filament typically provide recommended bed temperature and nozzle temperature settings that are optimized for their unique product. In some cases, however, these recommended settings do not lead to satisfactory results.
One way to find the best PLA printing temperature for your particular 3D printing setup — printer, nozzle, material, etc. — is to run some test prints and evaluate the results. But instead of printing a selection of ordinary parts, it can be helpful to print a particular 3D model known as a temperature tower.
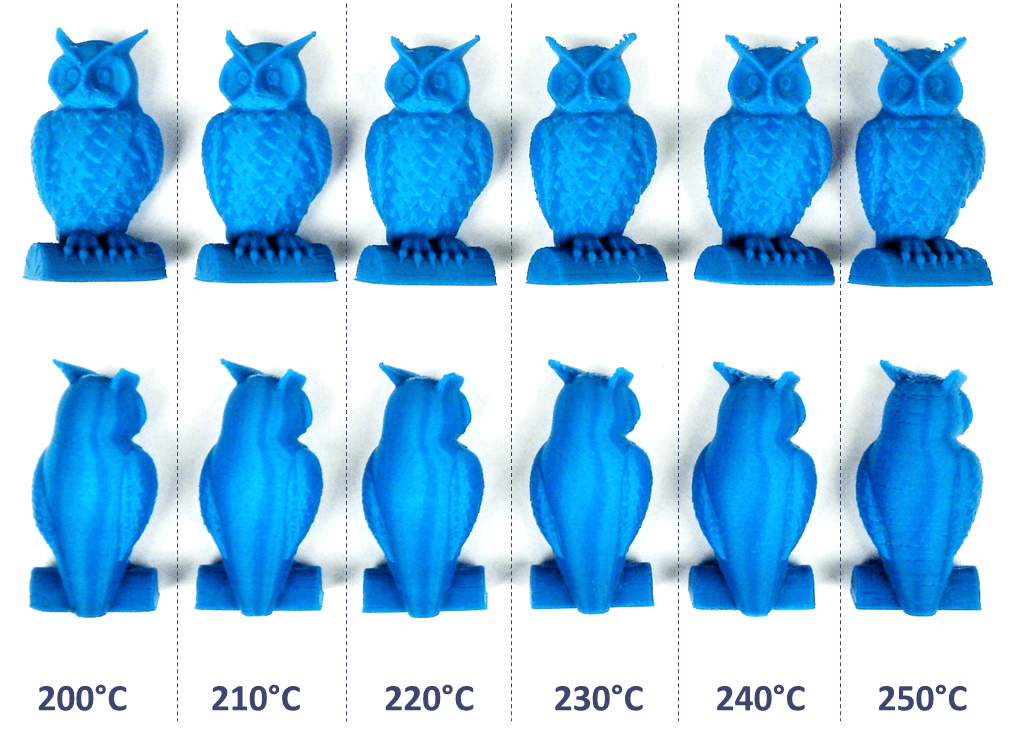
Temperature tower exhibiting failure at lowest temperature
A temperature tower such as this one consists of several horizontal blocks, each of which is printed at an incrementally higher or lower temperature than the last. The numbers are printed onto the side of the tower (200, 205, 210, and so forth) so the user can quickly identify which block has been printed at which temperature. Each block of the temp tower typically contains features like gaps, overhangs, and fine features, providing a clear picture of the printer’s performance with each different temperature setting.
Of course, printing a temperature tower is a little trickier than an ordinary print, because the slicer must instruct the printer to adjust the temperature at each relevant increment. (Cura users can install and utilize the ChangeAtZ plugin to switch the nozzle temperature at the required intervals along the Z-axis.)
When the temperature tower has finished printing, users can simply visually inspect the print to see which blocks have printed well and which have not. The block with the least stringing or artifacts and the best quality on fine features indicates the optimal print temperature for the material on that specific printing setup.
In general, the best PLA bed temperature is around 50 °C, while the best PLA print temperature is around 210 °C. As we have seen, however, different factors can affect the optimal temperature range, which makes testing imperative when printing PLA for the first time.
[1] Vanaei HR, Raissi K, Deligant M, Shirinbayan M, Fitoussi J, Khelladi S, Tcharkhtchi A. Toward the understanding of temperature effect on bonding strength, dimensions and geometry of 3D-printed parts. Journal of Materials Science. 2020 Oct;55(29):14677-89.
[2] Bergström JS, Hayman D. An overview of mechanical properties and material modeling of polylactide (PLA) for medical applications. Annals of biomedical engineering. 2016 Feb;44(2):330-40.
PLA 3D Printing Speed & Temperature – Which Is Best? – 3D Printerly
Being an avid printer of PLA material I was thinking to myself, is there a perfect 3D printing speed & temperature that we should all be using to get the best results? I set out to answer that very question in this post so keep reading to see what I found out.
What is the best speed and temperature for PLA?
The best speed & temperature for PLA depends on what type of PLA you are using and what 3D printer you have, but generally you want to use a speed of 60mm/s, a nozzle temperature of 210°C and a heated bed temperature of 60°C. Brands of PLA have their recommended temperature settings on the spool.
There is more important information that will allow you to print some of the best quality PLA that you’ve ever printed, and a bunch of tips to avoid common issues that people experience, many I’ve experienced myself.
Better your 3D printing journey and learn the optimal settings.
If you are interested in seeing some of the best tools and accessories for your 3D printers, you can find them easily by clicking here (Amazon).
What is the Best Printing Speed & Temperature for PLA?
Generally speaking, the faster printing speed you use, the worse the final quality of your objects will be.
In terms of temperature, getting this right doesn’t necessarily improve the quality, more so than preventing issues that cause imperfections in your prints such as stringing, warping, ghosting or blobbing.
There are many things that can negatively affect your prints so making sure your speed and temperature are optimal is important.
Don’t forget that it varies in environment too. 2 different homes/offices can have different temperatures, different humidity, different airflow. 3D printing is very much an environment dependent process.
Best PLA Printing Speed
This mainly depends on your 3D printer and what upgrades you’ve done to it. To print PLA on a standard Ender 3 without any upgrades, you should have a 3D printing speed between 40mm/s & 70mm/s with the recommended speed being 60mm/s.
You can get different types of heater cartridges and hardware to enable you to print at higher speeds. Many tests and experimentation is happening to increase printing speeds so rest assured, things will get faster over time.
I will describe the best method on how to find your optimal printing speed and temperature below.
Best PLA Nozzle Temperature
You want a nozzle temperature anywhere between 195-220°C with the recommended value being 210°C. As previously mentioned, it depends on the filament manufacturer and what they personally recommend for their brand.
PLA is manufactured in different ways and colors and these factors make a difference on what temperatures best work for printing with.
If you have to exceed the recommended temperature to print PLA successfully, you might have other underlying issues that should be addressed.
Your thermistor could be giving inaccurate readings meaning your temperature isn’t actually getting as hot as it’s saying. Check that your thermistor is properly seated within your hotend and that there aren’t any loose connections.
You could also be missing the insulation on your hotend which would usually be original yellow tape insulation or a silicone sock.
Another possible issue that you could be experiencing is you not having the hot end side of the Bowden tube cut flat and pushed right up against the nozzle.
It’s unlikely this is the issue because it would cause bigger problems that a higher temperature wouldn’t necessarily fix. It results in a gap inside the hotend where melted filament blocks the extruder area.
Filament might not flow evenly if your extrusion temperature is too low so it’s important to get this right. You want to avoid being midway through a print and start seeing gaps between layers due to bad extrusion.
Best PLA Print Bed Temperature
An interesting fact with PLA is it doesn’t actually require a heated bed, but it is definitely recommended amongst most 3D filament brands.
If you’ve looked around at PLA filament brands, you’ll see a common theme with bed temperatures being between 50-80°C, mostly having an average of 60°C.
A higher temperature heated bed is advised if you are printing in a cooler environment because you want your overall temperature to remain high. PLA prints best in a warm room, non-humid environment.
Using a heated bed when printing with PLA solves many common issues such as warping and first layer adhesion.
Ambient Temperature for 3D Printing PLA
It’s important to remember that the environment your 3D printer is in will have an effect on the quality of your prints. You don’t want a windy environment, nor do you want a cool environment.
This is why many 3D printers have enclosures, to regulate the temperature and ensure external factors don’t negatively affect your prints.
For example, if you are printing with ABS and don’t have an enclosure or heat regulation, you are very likely to see warping and cracking at the end of your print.
Controlling the temperature and conditions of your environment is an important step to perfecting your 3D printing quality.
An awesome enclosure that I stumbled across recently is the Comgrow Creality Enclosure (Amazon). It fits an Ender 3 with very easy installation (about 10 minutes with no tools required) and easy to store away.
- Keeps a constant temperature printing environment
- Improves printing stability & is very strong
- Dust-proof & great noise reduction
- Uses flame-retardant material
Differences in PLA Brands & Types
There are several filament manufacturers out there with different ranges of PLA out there which makes it difficult to determine a specific temperature that it optimal for all forms of PLA.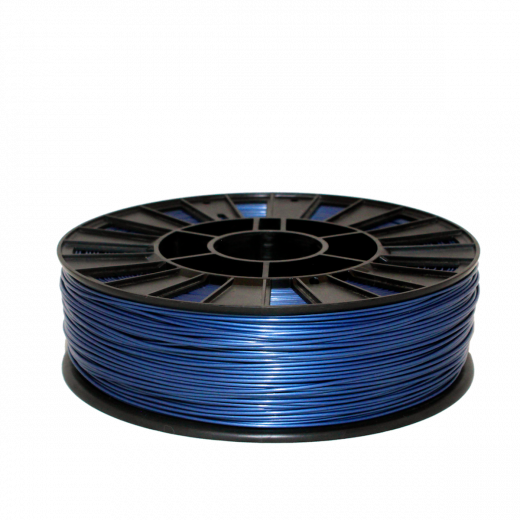
Since PLA can be made in ways that make it more or less susceptible to heat, temperatures have to be tested and adjusted to get it perfect.
Even darker color filaments are known to require a higher extrusion temperature because of the color additives in the filament. The chemical makeup of PLA can be altered depending on the manufacturing process.
One user mentioned that Prusa had sensitive filament when printed with a brass nozzle, all the way to the point where he had to half his speed to get the print successful.
Proto-Pasta, on the other hand, would need high temperatures and an 85% speed compared to his normal speed.
You have wood filament, glow in the dark filament, PLA+ and so many other types. It just goes to show how much different your settings can be depending on what PLA filament you have.
Even down to the nozzle, some require different temperatures and speed changes depending on the nozzle size and material type. The first step is making sure your first layer comes out good, then looking at stringing and retraction tests.
How to Find Your Perfect PLA Printing Speed & Temperature
I do my trial and testing by starting with the recommended printing speed & temperature then changing each variable in increments to see what effects it has on the printing quality.
- Start your first print at 60mm/s, 210°C nozzle, 60°C bed
- Pick your first variable which can be the bed temperature and raise it by 5°C
- Do this multiple times up and down and you’ll find a temperature where your prints complete the best
- Repeat this process with each setting until you find your perfect quality
The obvious solution here is to do some trial and testing to see what works best for your PLA brand, your printer and your settings.
There are general guidelines that you can follow which usually give you great results, but these can definitely be fine-tuned and made even better.
For nozzle temperature specifically, a good idea is to print something called a Temperature Tower from Thingiverse.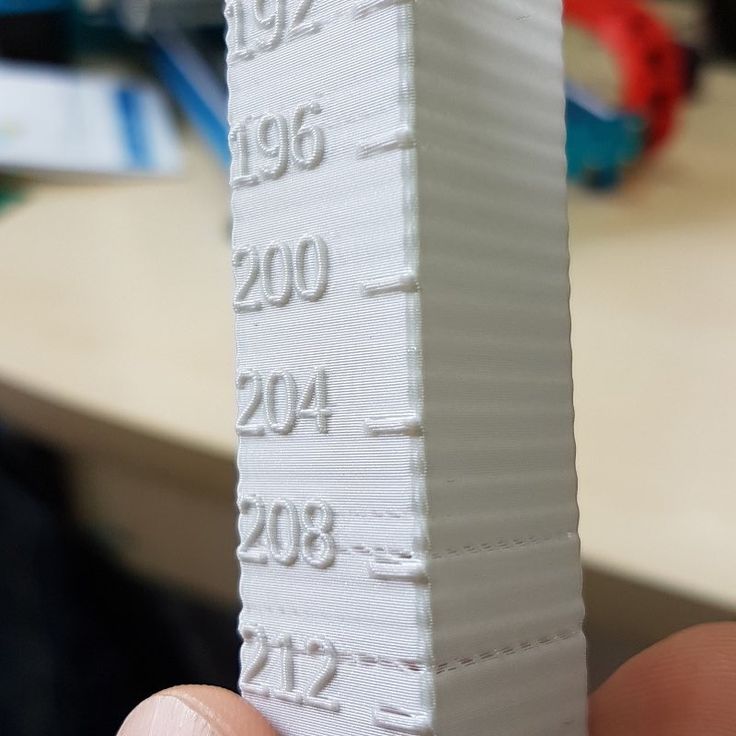 It is a 3D printer test to see how well your PLA is printing under each input temperature by adjusting temperatures during one big print.
Is There a Relationship Between Printing Speed & Temperature?
When you think about what’s occurring while your filament is being extruded, you realize that the material is softened by the high temperature and is then cooled down by your fans so it can harden and settle to be ready for the next layer.
If your printing speed is too quick, your cooling fans won’t have enough time to cool down your melted filament and is likely to result in uneven layers or even a failed print.
You need to carefully balance your 3D printing speed and nozzle temperatures to get the ideal extrusion and flow rates.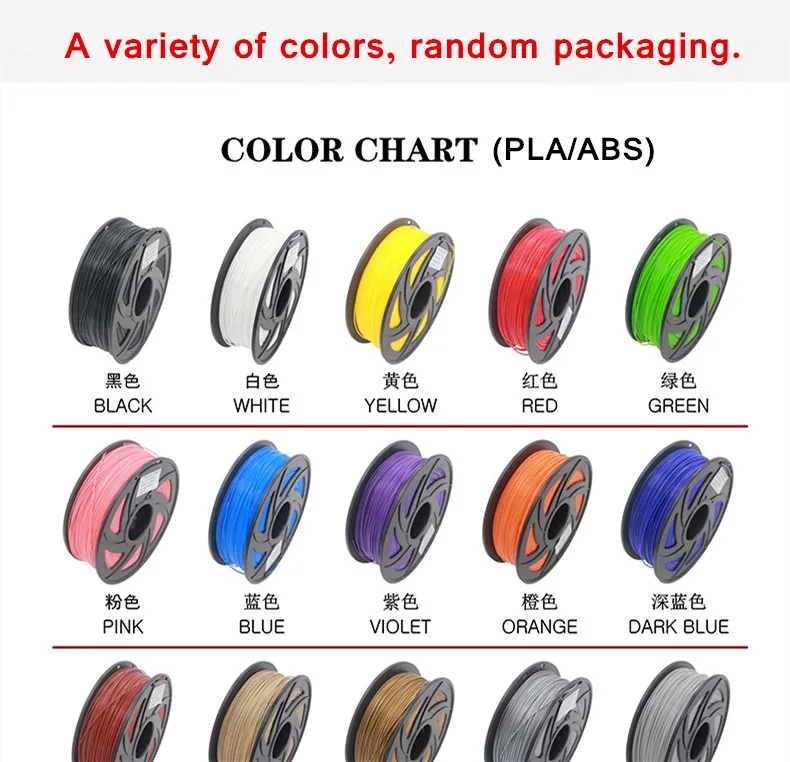
Vice versa if your printing speed is too slow, your cooling fans will have cooled your filament quickly and can easily lead to your nozzle clogging as the material isn’t being extruded fast enough.
Simply put, there is a direct trade-off between printing speed & temperature and it needs to be properly balanced to achieve optimal results.
Best Upgrade to Get the Optimal Printing Speed & Temperature
Some of these possible issues can be tackled by using upgraded parts such as your extruder, hotend or nozzle. These are the most important parts to getting your prints perfect.
The highest printing speed will be achieved by having a top-tier hotend like the Genuine E3D V6 All-Metal Hotend. This part has the ability to reach temperatures of up to 400C, you won’t be seeing any meltdown failures from this hotend.
There is no risk of overheating damage because the PTFE filament guide is never subjected to high temperatures.
This hotend has a sharp thermal break which gives great control over filament output so retractions are more effective and reduces stringing, blobbing and oozing.
- It will help you print the widest range of materials
- Amazing temperature performance
- Easy to use
- High quality printing
If you love great quality 3D prints, you’ll love the AMX3d Pro Grade 3D Printer Tool Kit from Amazon. It is a staple set of 3D printing tools that gives you everything you need to remove, clean & finish your 3D prints.
It gives you the ability to:
- Easily clean your 3D prints – 25-piece kit with 13 knife blades and 3 handles, long tweezers, needle nose pliers, and glue stick.
- Simply remove 3D prints – stop damaging your 3D prints by using one of the 3 specialized removal tools.
- Perfectly finish your 3D prints – the 3-piece, 6-tool precision scraper/pick/knife blade combo can get into small crevices to get a great finish.
- Become a 3D printing pro!
How to properly print with PLA filament
Let's take a closer look at the process of 3D printing with PLA filament.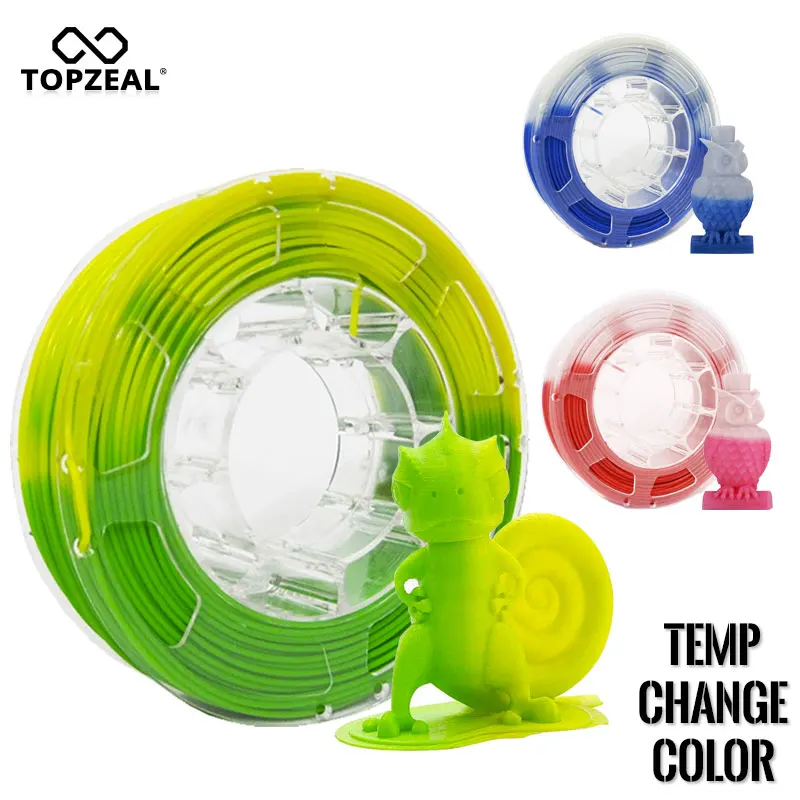 We will discuss what PLA is and how to make friends with your printer, how to choose the right temperature and what surfaces to print on.
PLA is an amazing material for 3D modeling. But it is non-toxic and smells pleasant during operation. PLA comes in a wide variety of colors, and because of its temperature characteristics, it's exceptionally easy to make great objects.
If you've worked with ABS, you'll find that PLA is harder, applies more slowly, and produces remarkably smooth details more easily. PLA is less distorted by temperature, and it is easier for them to print large objects. It should be taken into account that since this material is more rigid, it is therefore more brittle. If you are going to use your printed object in an environment where it will experience a lot of impact and violent collisions, PLA may not be the best choice.
Another important consideration when printing PLA is the temperatures that the print will be exposed to. PLA becomes soft at 70-80°C, and objects made from this plastic will deform if exposed to temperatures above these for extended periods of time. That's why ABS or some other material should be used near the extruder. We usually print all other parts of the printer from PLA - except for those next to the extruder, they are from ABS.
Check the quality of the filament
Problem The plastic filament is brittle and breaks in the hand. When printing, the layers lay unevenly, rough, frequent gaps and smudges, clicks and pops are heard. (Happens with ABS and PLA)
PLA and ABS are hygroscopic, meaning they absorb moisture from the environment. Wet rod becomes more brittle and brittle. Can break by hand when bent. Such a filament, if not broken in the extruder feed mechanism, entering the hot end in a split second is heated to the boiling point of water, as a result of which even a small moisture content instantly boils and breaks out, creating a characteristic explosion. Outwardly, such plastic will not differ from healthy one, but it will be more fragile and brittle. Quality PLA and ABS should not break by hand without effort.
Solution dry the plastic spool
- Place the filament in an electric oven for 2-3 hours at 70°C. You can use the closed chamber of the printer with a heated table for these purposes.
- Store unused plastic in sealed box or desiccant bags. The correct factory packaging for PLA and ABS is a sealed vacuum bag with a silica gel bag.
- The desiccant will not dry out the plastic, but will provide excellent protection against excess moisture.
- Use non-hygroscopic grades of SBS and HIPS plastic - they do not absorb moisture, can be stored as long as you like without the risk of deterioration
Problem Plastic leaks from extruder nozzle.
It is very difficult to find the right extruder temperature for some brands. Capricious printing, the layers do not lie evenly, the print quality leaves much to be desired. This is not an ideal plastic, all that remains to be done is to select the temperature of the extruder with each loading of plastic.
Solution Purchase quality materials from trusted manufacturers.
How to print the first layer correctly
The first layer is the most important part of any printout. There are a few things that need to be done to get the first coat to stick well.
- The mounting plate (or print substrate) must be installed at the correct level.
- The extruder must be at the correct height above it.
- The base material must be good enough for the PLA to stick to.
Printing on a Backing
Use Adhesive Materials: Backings are one of the easiest and fastest ways to get great prints from PLA, just like ABS, SBS or HIPS.
Used to be 3M blue duct tape - not perfect, but very easy to use until it was discontinued. But sometimes during printing, your part could tear off the tape from the table, and in such cases the object will have distortions.
Heated bed printing
If you have a temperature controlled table, you can print directly on the glass quite successfully. The recommended table temperature for PLA printing is 70°C.
When printing on glass, it is extremely important to set the table and extruder to the correct height. If the extruder is too far away from the table, the PLA won't stick AT ALL; if too close, the glass will completely block the extrusion of the material, and again it will not stick AT ALL.
If your first coat doesn't stick
- Check table level.
- Make sure the printhead is close enough to properly extrude the first layer. The gap between the nozzle and the table surface is checked with a plain sheet of paper. The leaf should be able to fit through this distance, but not get stuck.
- Make sure you run the extruder enough before you start printing so that the filament is on the table during the entire printing process of the first layer. In slic3r you can set the number of passes up to 4 or 5 depending on the part.
- Clean glass with denatured alcohol.

When everything is set up correctly, glass is the best option for working with PLA. It produces a wonderful shiny bottom layer, and the table heating ensures that everything comes out smoothly and evenly.
Other printable surfaces
Printing on a transparent self-adhesive film for a 3D printer table
Transparent self-adhesive polyester film with a permanent heat-resistant adhesive layer. Stick the film on the printtable. This film is much denser and stronger than Kapton tape, so you can print much longer, withstand high temperatures. Brim (Brim) is not needed - gears without Brim are great. Lasts longer than Kapton.
Printing on Kapton ribbon
Many people have had good results printing on Kapton ribbon. To print on it with PLA, a heated pasteboard is required. We used to print exactly like this, but when we learned how to do everything right on glass, we stopped considering this option the best. The process of printing on kapton tape is almost identical to printing on glass, but requires more preparatory work and cleaning. If you know of any other benefits of kapton tape, please share. We are constantly working to improve the process.
Printing on polycarbonate
We experimented a bit with polycarbonate, lightly oiling it with vegetable oil. Polycarbonate works, everything prints well. That's just the part is difficult to remove, so the benefits are somehow not obvious. It seems to us that this method deserves a deeper study, and we will report our research as soon as they are carried out. In the meantime, we recommend working with blue tape.
What to watch out for
If the temperature is too high
Between different parts of the print you will notice a lot of a kind of string (snot) and the extruder will "leak", releasing a lot of plastic when moving between different printable areas. If this happens, you should try to lower the temperature in 5 degree increments until there is no more material coming out of the extruder.
Sometimes you have to work with a material that is simply less viscous than PLA usually is and therefore flows more easily even at lower temperatures.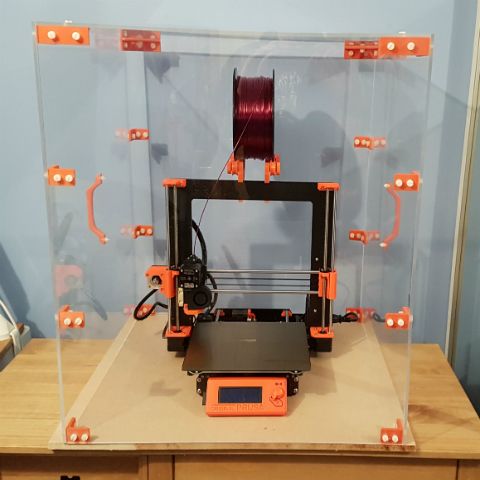 We recommend increasing the return feed by a few millimeters (retract)
If the temperature is too low
You will notice that the filament either does not adhere to the previous layer and you get an uneven surface, or the part is not strong enough and is easy to separate. One way or another, you should increase the temperature by 5 degrees and continue to increase it until you get good cuts on each layer, and after printing the part is strong enough.
Filament change
PLA color change:
- Set the cold extruder to 80 °C and wait for it to heat up.
- When the temperature reaches 80 °C, remove the filament from the extruder. You can pull it out by hand, or reverse feed may be required.
- If you have trouble removing the filament, increase the temperature to 100°C and try again.
- Increase the temperature further and insert new filament in the usual way.
- Run it through the extruder until it comes out clean, i.
 e. just a new color. If you are switching from a darker color (such as black) to a lighter color (such as white or natural), run longer to ensure there are no dark stains:
- Clean the extruder gear and blow out any particles from the inlet.
- Print something you don't mind if it has some previous color, or run the extruder for a few minutes. This process can take 10 to 15 minutes before you can confidently note that the dark material is no longer mixed with the light material.
We recommend removing the filament when it is in a soft, rather than fully melted state - then there is less chance of melted material depositing on the inside of the extruder or even before the melt chamber. In both cases, this kind of residue can lead to hard-to-remove clogging of the printing mechanism. You can also shove a flexible piece of filament through to make sure all contaminants are removed from the end of the extruder.
What to do if something is wrong
There are a few key things to check if printouts are not coming through. But before we consider the solutions, we must briefly characterize the symptoms.
"First coat does not stick at all".
- Make sure the extruder is at the correct height. Set the limiter or the extruder itself to a height of 0.
- Make sure the table is level. The gaps at all calibration points between the nozzle and the table should be approximately the thickness of a sheet of paper.
"Part has poor inner layers and top surface."
- Check extrusion temperature (you may need to increase it in 5 degree increments)
- Check filament tension.
- Clean the filament feed gear
“There are a lot of small bumps on the edges of my part.”
- Make sure the printer is getting enough data. When printing from a computer, make sure that it is not overloaded and sends commands to the printer normally. If the printer slows down, it usually means that it is overloaded.
- Print from an SD card. On some printers, you can try printing from an SD card. This often helps the printer get enough data and run more smoothly.
- Buy better quality PLA. We have found that the quality of the source material can have a significant impact on print quality. Buying higher quality PLA can help you achieve better results. However, do not rush to blame everything on PLA. With the right settings and a lot of patience, 3D printers have been able to successfully print a wide variety of materials, many of which have very low viscosities and very large inhomogeneities. You have to be able to get at least functionality out of a part - even if with slightly lower quality filament.
"The vertical elements of my print look melted or stuck together."
- Turn on "cooling". If your printer has a cooler, you must enable "cooling" in the print settings.
- Purchase a small fan. If your printer does not have a built-in cooler, you should consider looking for a small desktop fan.
 This will greatly improve the situation with the vertical elements of your printouts and will help with "bridging" (where the top layer bridges the gaps on the bottom).
"My printer is not outputting any media."
- Make sure the hotend gets hot at all. If not, the printer needs to be serviced. Most likely, your connection is broken or the electronics are “fried” (this is if the printer is connected at all and responds to program commands :)
- Clean feed gear and adjust tension. The very first thing to do is to clean the feed gear that touches the filament and make sure the thread tension is correct. Incorrect tension or a clogged feed gear usually results in much the same pattern as a low filament temperature, but sometimes it will block extrusion altogether. Clean the pinch roller with a wire brush and make sure the filament tension is good and tight (too much can also interfere with extrusion, usually with direct feed printers - when the motor directly turns the feed gear; this happens less often with intermediate gears).
- Remove the loaded filament. Perhaps small particles of plastic are stuck in the very tip of the extruder and clog it. Use the filament change technique described above to remove all particles from the end of the extruder.
- Check for blockage between extruder and hot end and correct. This problem is the most extreme because it can only be fixed by disassembling the extruder. Sometimes the filament from the hot end can flow back into the extruder, resulting in bubbles that then freeze and block further work. This usually happens at the junction of the extruder and the hot end. Remove the extruder and remove all the PLA you can (you may need to preheat the hot end to 80-100°C for this). If you can't remove all of the filament by pulling it out, you can try pushing it through the hotend. To do this, we usually use a small hex (inbus) key. If it still doesn't work, you can try drilling out the extruder or hot end, but then they may need to be replaced. Be sure to take precautions against electric shock and burns.
 If you don't have enough experience, find someone who does - it's better than risking injury.
Optimal table and hot end temperatures for PLA 3D printing
3DPrintStory 3D printing process Optimal table and hot end temperatures for PLA 3D printing
In an ideal world, there would be an ideal temperature where you could set up your 3D printer once and just hit the button to start 3D printing. But in reality, there is no ideal temperature for PLA plastics. And in order to get a good 3D printing result, you need to spend some time and effort.
PLA is quite forgiving when it comes to temperature, and as long as you don't deviate too much from the recommended 3D printing temperatures, the result will be good. What's more, PLA is a great way to get started in the world of 3D printing and experimentation, as it's easier to use than, for example, ABS or PETG.
One important thing to keep in mind when checking suitable temperature ranges is that different brands and even colors of PLA plastics can have different optimal 3D printing temperatures.
Optimal temperature range for hot end
As mentioned above, it would be nice to know one temperature for printing PLA materials, but in fact there is none. There is a recommended range within which you need to adjust the nozzle temperature of your 3D printer. For PLA plastics, the recommended hot end temperature range is 190°C to 220°C.
If you notice that the layers do not adhere to each other during 3D printing, you can raise the temperature within the above recommended range. On the other hand, hot end cooling can improve 3D printing quality . If the extruder is too hot, the PLA filament can become very soft and brittle. This results in the model being printed with visual defects.
Incorrect 3D Printer Hot End Temperature Signs
Another indicator that the hot end is too hot is if your 3D printer is not printing bridges well. This could mean that the plastic is so hot that it doesn't have time to cool down enough. If the hot end is too hot, your 3D models will look "dirty" and "tarnished". Lowering the temperature can help with this.
Meanwhile, if the 3D model does not adhere well to the table, then this may be a sign of insufficient hot end temperature. A cold hot end can also make it difficult to form good corners on your 3D models.
One of the best ways to achieve the ideal hot end temperature is to experiment. By slowly adjusting the temperature, increasing or decreasing, you will gradually find the optimal temperature for your 3D printer and plastic.
Heads from different manufacturers and different colors also affect the optimum temperature of the hot end. For example, a black PLA spool can print well at around 215°C, while a similar blue PLA spool from the same manufacturer will perform well at 210°C. Even small temperature differences can make a big difference in the quality of your 3D models.
Best 3D Printing Table Temperature Ranges
Heated tables have a huge impact on 3D printing quality. Although they are not available on all 3D printers, for those where they are installed, the temperature must also be adjusted correctly. While the recommended bed temperature for PLA 3D printing is 70°C, this does not always work perfectly. There are recommendations for a heated table temperature range of 55°C to 70°C for PLA plastic. So the temperature of the table as well as the hot end should be adjusted to your own realities.
Signs of incorrect 3D printer table temperature
The most obvious sign that your table temperature is too low is that your 3D models are not sticking to it. If they don't stick well, you can raise the temperature a little. A warmer 3D printer bed can help soften the plastic, allowing it to better grip at the base of the model. Just be careful not to overheat the table or you'll run into an elephant's paw problem. In short, this effect is manifested in the fact that the first few layers melt under the weight of the 3D model.
The "elephant leg" is especially strong, especially when the 3D model is very heavy, as there is more pressure on it. This annoying side effect can be easily fixed by lowering the temperature of the 3D printer bed a bit. Again, don't overdo it and don't set the temperature too low. Measure is needed everywhere!
External influences
External influences can also affect PLA print temperatures. If, for example, a cool breeze is blowing from the window, you can increase the temperature of the hot end and the 3D printing table by a couple of degrees. Air conditioning vents can also lower the temperature of 3D printing.
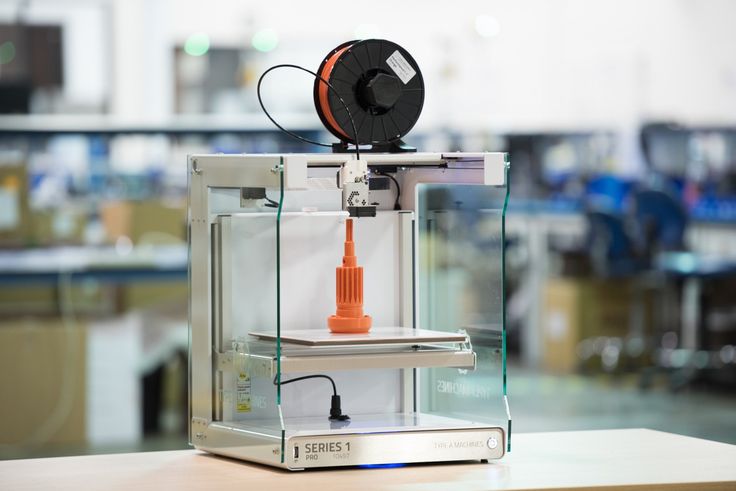
To minimize the impact of external factors, we strongly recommend making an enclosure for your 3D printer. When it comes to temperature, the case serves two purposes: keeping the outside temperature from affecting your 3D models, and keeping the heat inside.
There are quite a few open source 3D printer case designs, so feel free to google it or make your own. As materials for the case, plywood, plexiglass and fasteners are often used, which are printed on the same 3D printer.
How to find the optimal temperature settings for a 3D printer?
It has already been mentioned many times, but we will repeat it again: the best way to determine the temperature of the table and hot end is trial and error in your specific conditions, with your 3D printer, your plastic and the place where the 3D printer is standing during printing . If you find that your products are uneven, reduce the temperature of the hot end a little. If your models are not sticking to the table, you may need to lower the hot end temperature and raise the table temperature. Elephant paw can also be a key indicator that your table is too hot.