3D printing gyroid infill
Understanding the Gyroid Infill in 3D Printing
In 3D printing, infills are automatically generated internal geometries that enable makers to reduce printing times and save on material costs. Common infill patterns include grids and lines, as well as triangular, cubic, and honeycomb structures. These are fairly basic patterns that can be generated in slicer software programs before printing to reduce the density of a 3D printed part. The gyroid infill, for its part, is one of the most advanced and advantageous infill patterns, especially when it comes to achieving the best strength to weight ratio for 3D printed parts. Keep reading to learn more about the 3D gyroid infill pattern, the benefits it offers, and when to use it.
What is a Gyroid Infill?
First thing is first: what is a gyroid? A gyroid is a naturally occurring structure that was discovered in 1970 by NASA scientist Alan Schoen.[1] Its unique structure is characterized by the lack of straight lines and the fact that it is a triply periodic minimal surface (TPMS). TPMS are “surfaces with zero mean curvature and are characterized by local area minimizing which means any sufficiently small patch taken from the TPMS has the smallest area among all patches created under the same boundaries.”[2] In less technical terms, a gyroid is a 3D geometry made up of intersecting 2D wavy lines that create a strong, robust structure.
A gyroid infill refers to when a 3D printed object integrates a gyroid pattern as its internal geometry. In fused deposition modeling (FDM) 3D printing, it is common to generate an infill pattern to decrease the density of the 3D printed part. From the outside, the finished part looks solid, but inside the infill geometry allows for hollow spaces that help save on filament costs and printing time while still providing more strength and resistance than a purely hollow part.
It is also worth noting that with the gyroid structure, it is also possible to 3D print structurally sound objects without a shell—the external layer of the part.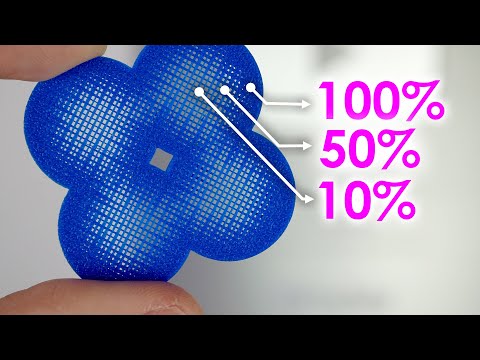 Because of the interesting curvature and style of the gyroid infill, some makers choose to integrate the structure into the look of their final part.
Properties of Gyroid Infill
In slicer software programs such as Cura, you can adjust infill settings related to the gyroid infill. The most important setting is the infill density. Infill density is represented as a percentage (and is sometimes called infill percentage) and essentially refers to the amount of infill you want. For example, a 3D printed part with 100% infill will simply be a solid part, while a 3D printed part with 50% infill will be half hollow and half filled. The lower the percentage, the more low density the infill will be.
Gyroid infills allow users to minimize the infill density without sacrificing shear strength and resistance. This is because of their continuous structure. While many standard infill patterns, such as grids or hexagons, repeat the same 2D pattern for every layer, the gyroid infill is created through the continuous extrusion of wavy lines and each layer is different than the one before, creating the complex undulating pattern that displays strength and resistance in all directions.
In Cura, it is also possible to adjust other infill parameters, like infill layer thickness. If the infill is enclosed within a shell, it can be advantageous to increase the layer thickness for the infill only to speed up printing times. If you do choose to change the layer height of the infill, it is important that the thickness be a multiple of the outer layer height (i.e. if the layer height for the part is 0.1 mm, the infill layer thickness could be 0.2 mm).[3]
3D printed gyroid structure made by MIT in 2017 (Photo: Melanie Gonick | MIT)
Advantages of Gyroid Infill
Nearly isotropic properties
A gyroid infill enables the printing of parts with nearly isotropic properties. Isotropic materials demonstrate the same strength and material properties no matter which direction they are subject to loads or stresses. The pattern of a gyroid infill, while not technically isotropic, imparts similar properties due to its cubic symmetry.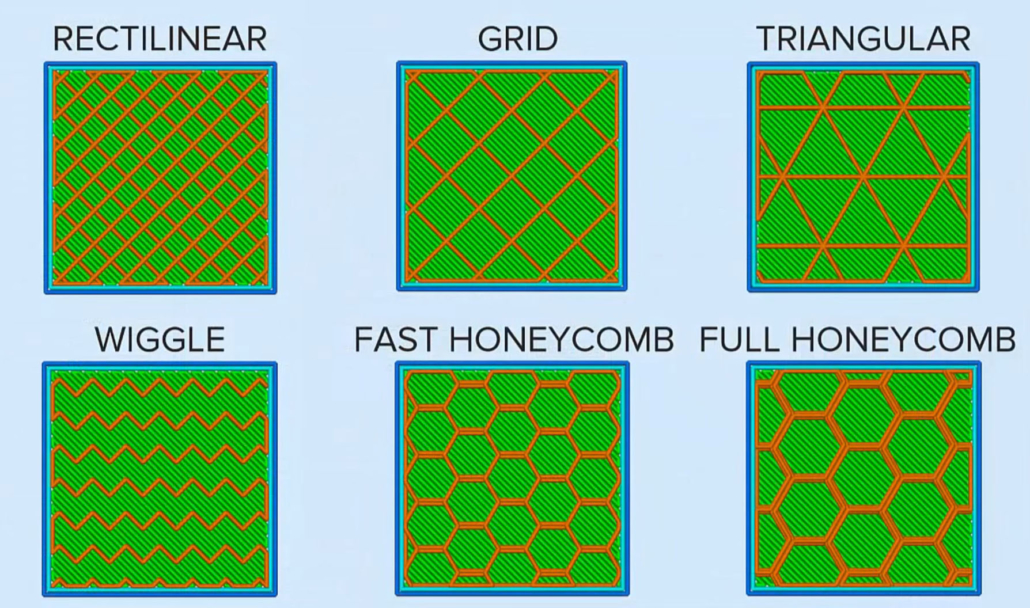 This means that 3D printed parts with this type of infill have similar degrees of resistance on all three axes. Most 2D infill patterns, on the other hand, are stronger in one direction.
Good strength:infill density ratio
The gyroid infill has one of the best density to strength ratios of any 3D printing infill. In 2017, MIT researchers discovered that compressing graphene into a gyroid structure with just 5% density of steel could achieve a strength 10 times greater than steel. This discovery could also be translated to other materials, like 3D printed filaments like PLA and ABS, where the gyroid structure can improve the overall material strength properties.[4]
Less material consumption
Thanks to the near-isotropic strength provided by the gyroid structure and the excellent strength to infill density ratio, less filament material is needed to achieve 3D printed parts with superior properties. In other words, it requires less filament to achieve the same strength as many other infill patterns with higher densities. It therefore goes without saying that this feature can also save on material costs and can help produce more lightweight parts.
Faster printing speed
Due to the curvy structure of the gyroid infill pattern, it can actually be faster to 3D print compared to other 3D infills. In an experiment by CNC Kitchen comparing many different infill patterns, the test cube with the gyroid pattern took the same amount of time as the much simpler cubic infill (125%) and was significantly faster than the honeycomb (310%) and 3D honeycomb (288%) infill patterns.[5]
Disadvantages of Gyroid Infill
Longer slicing times
Because gyroid infills are more complex than standard 2D infill patterns, generating the G-code for the 3D printer requires more processing power. If you are working with an insufficiently powerful computer, gyroid infills can therefore be slower to process and generate than simpler 2D infills like grid infill or line (rectilinear) infill.
3D printer vibrations
Unlike infill patterns that use straight lines, gyroid infills are made up exclusively of curvy lines. This means that the 3D printer extruder is continuously moving in wavy motions. If the infill density is too high and the infill waves are too close, the extruder’s movements can create vibrations in the 3D printer, which can lead to 3D printing defects. Fortunately, high densities are rarely required for gyroid infills, so this problem can usually be avoided.
Gyroid Infill 3D Printing Use Cases
The unique properties of the gyroid infill make it a good option for a number of applications. On the one hand, the infill is one of the most visually interesting infills available in slicer programs. This makes it a great option for making highly aesthetic 3D models. Because you can 3D print gyroid infill parts without a shell, it is possible to create objects like vases, lamps, and other home decorations that put the maze-like 3D pattern front and center.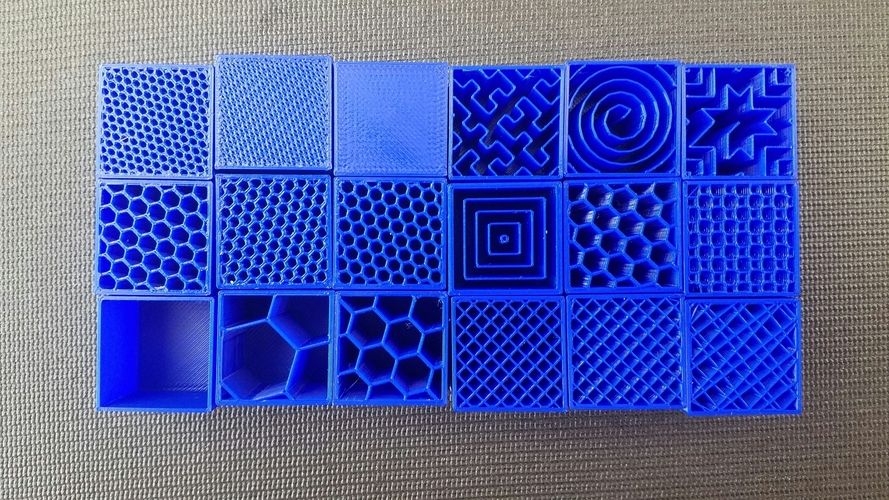 Using a clear filament with shells is another way to display the attractive gyroid pattern within the part.
3D printed lamp with gyroid infill designed by Dizingof (Photo: Dizingof | GrabCAD)
But the gyroid infill is not only suitable for aesthetic applications. Thanks to the structure’s excellent strength and resistance on all axes, the gyroid infill is also of interest for functional applications. For instance, the combination of strength and lightweight properties that the gyroid structure offers could be highly beneficial in industries like aerospace and automotive where fuel efficiency depends on the reduction of weight. The gyroid shape could also have applications in filtration and energy storage applications thanks to its continuous structure and large surface area.[4]
Conclusion
The gyroid infill is one of the more advanced infill patterns available in slicer programs. The unique bio-inspired geometry of the infill offers many advantages, especially if strength and weight are key considerations. As we’ve seen, the gyroid infill offers one of the best strength to infill density ratios and can save users both time and money (in terms of material usage). The gyroid infill also offers a more interesting visual aesthetic than more traditional infill patterns, with a continuous geometry with no straight lines. This unique combination of properties make the gyroid infill a great option for functional components as well as visual 3D printed parts without shells.
References
[1] Plus Magazine, September 12, 2011. “Meet the Gyroid” [Internet] https://plus.maths.org/content/meet-gyroid [Accessed April 6, 2022].
[2] Materials & Design, March 5, 2019. “Mechanical properties of 3D printed polymeric Gyroid cellular structures: Experimental and finite element study”. [Internet] https://www.sciencedirect.com/science/article/pii/S0264127519300176 [Accessed April 7, 2022]
[3] Ultimaker, March 9, 2022. “Infill Settings”. [Internet] https://support.:quality(90)/images.vogel.de/vogelonline/bdb/1862100/1862140/original.jpg) ultimaker.com/hc/en-us/articles/360012607079-Infill-settings [Accessed April 6, 2022].
ultimaker.com/hc/en-us/articles/360012607079-Infill-settings [Accessed April 6, 2022].
[4] MIT News, January 6, 2017. “Researchers design one of the strongest, lightest materials known”. [Internet] https://news.mit.edu/2017/3-d-graphene-strongest-lightest-materials-0106 [Accessed April 7, 2022].
[5] CNC Kitchen, July 27, 2018. “TESTING 3D printed INFILL PATTERNS for their STRENGTH”. [Internet] https://youtu.be/upELI0HmzHc [Accessed April 6, 2022].
all you need to know! – 3D Solved
Most makers in the 3D printing community are aware of the importance of choosing a correct infill pattern and percentage when it comes to creating working parts for both prototypes and production purposes.
In recent years, many new patterns have emerged in order to address specific technical issues. Some patterns found their place in the maker’s toolbox, while others were tossed away and are remembered as an interesting experiment.
You may be aware of the existence of the Gyroid Infill, which is interesting because of multiple factors. Let’s find out what the gyroid pattern is and how it is useful.
The Gyroid Infill is a pattern whose most important feature is its cubic symmetry, which in contrast to all other patterns is an almost isotropic structure, which means that it is equally resistant to forces coming from all directions. Its main advantage is its sheer resistance and overall strength, even at lower infill percentages.
Table Of Contents
- What is a Gyroid Infill?
- What is a gyroid
- Properties of Gyroid infill
- Gyroid infill slicer settings
- Creative uses with Gyroid Infills
- Conclusion
- Check out our recommended products section
What is a Gyroid Infill?
An egg printed with Gyroid Infill and no outer shells. SourceMost 3d printed objects need an internal structure that links perimeters and top/bottom layers. That’s why we set an infill pattern and percentage during slicing. Any type of structure can handle this, but each one has its own advantages and disadvantages. For example, the Lines Infill is faster but relatively weaker than the other patterns unless the forces applied to it are following the infill lines.
As the maker community tried out special designs, new ways to fill 3d printed parts were incorporated. In 2017, studies carried out on gyroid-type graphene structures revealed that this shape gave the pieces an exceptional resistance. When applied to 3d printing, this results in a structure that combines both stiffness and printing speed.
The Gyroid Infill is made with continuous curvilinear movements of the extruder. That results on a smooth movement and a highly constant filament deposition.
Its resistance is often compared to honeycomb’s, another infill pattern inspired by nature. The main difference between them is how they are built. Honeycomb, like most infills, repeats its shape in every layer. That forces you to set a higher infill percentage if you need to increase compression resistance on the Z-axis.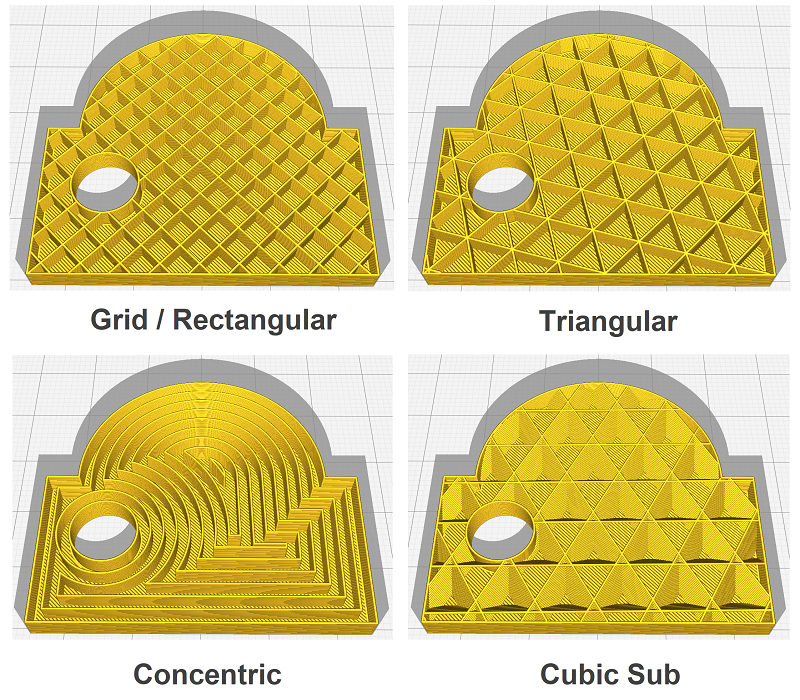 When using gyroid, you distribute equally the object’s resistance for each axis, so the infill percentage is more efficient. In technical terms, the Gyroid Infill is close to being isotropic, which is one of its biggest advantages.
Another pattern that varies on each layer is the cubic infill. It forms small cubes as the extruder ascends during printing. This makes the object very resistant to compression forces coming from all directions. Regardless, the Gyroid Infill is also better in cases where your print requires shear resistance.
What is a gyroid
Visual representation of Gyroid in the mathematical sense. SourceA gyroid is technically a Triply Periodic Minimal Surface (TPMS). These surfaces do not self-intersect, and because of this they form a “maze.” They can be subdivided up to a unit cell in three dimensions, so they can be replicated in a 3d printer.
In addition to its use in graphene structures, this pattern has applications in supercapacitors, solar cells, and nanoporous membranes.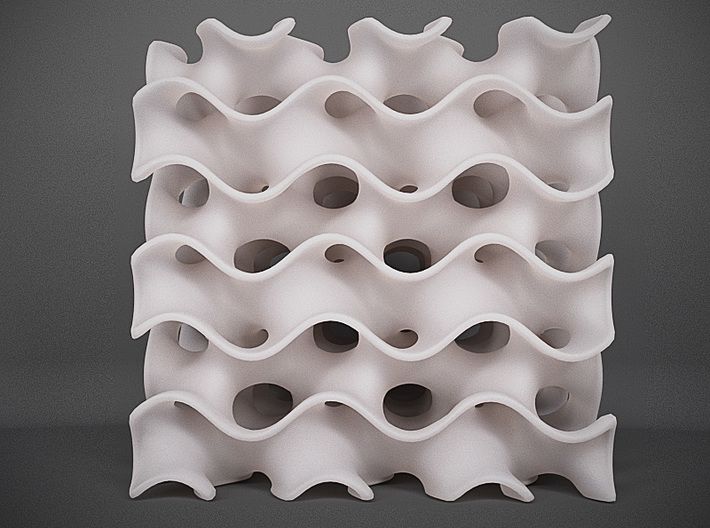 Similar patterns are seen on butterflies’ wings, which explains their lightweight and high resistance.
The most important property of the gyroid in relation to 3d printing is its cubic symmetry. This means that, although it is not totally true in the mathematical sense, we can consider it an isotropic structure. An isotropic object has the same resistance in any direction. Among the different infill patterns, gyroid is the most suitable for pieces that require sheer strength. It’s weight/strength ratio is much lower than most known patterns, so a piece with this infill can withstand greater loads using less material.
Properties of Gyroid infill
Since the Gyroid Infill began to be used, many users have put this structure to the test, to show if it really has superior properties to the honeycomb pattern, a structure based on hexagons.
I found an experiment1 that tested the resistance of different infills by applying a shear force to 3d printed bars. For this, three identical bars were printed, with different infill patterns: lines, honeycomb, and gyroid. The maximum weight supported by each bar was then recorded.
The conclusions of this experiment were as follows:
- The gyroid was the strongest structure overall when using the same infill percentage.
- The weight of the printed gyroid bar was almost 10% lighter than the honeycomb bar.
- The printing time of the gyroid bar was the shortest of the three.
The gyroid pattern is proven to be stronger and faster, and it uses less material than the others. If we don’t take perimeters into consideration, the gyroid’s weight is almost 30% lighter than honeycomb’s. So it saves money and time without major inconveniences.
Advantages of Gyroid Infill
Close to being isotropic:
An isotropic material maintains its properties in any direction. Although technically not true in the purest mathematical definition, the symmetry of the Gyroid Infill in all of the three axes helps to equalize its resistance in any direction.
Some patterns, such as lines, only have good strength if the forces are coming from the same direction as the infill.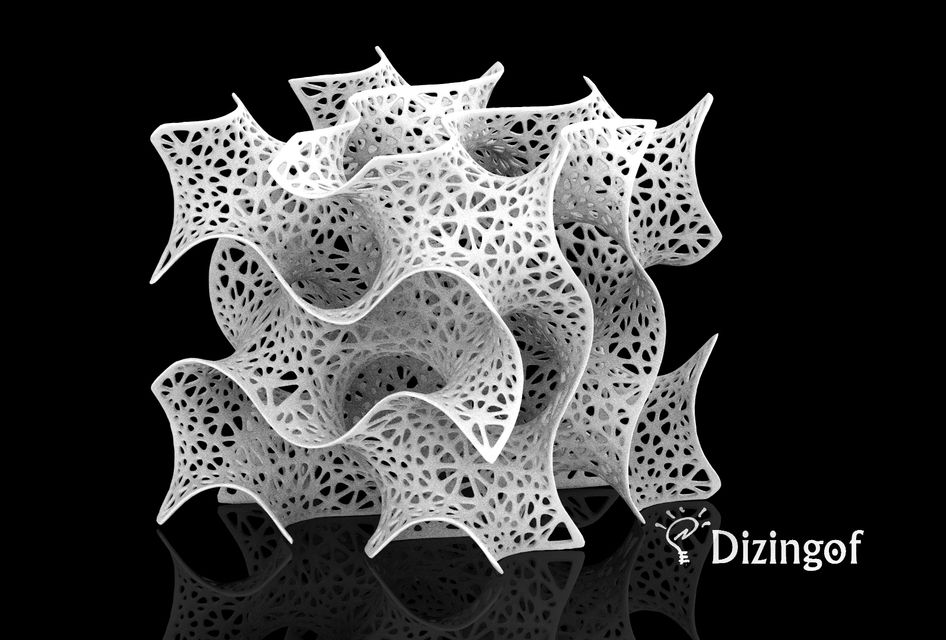 Others are good when compressed, but weak to shear stresses. The gyroid has very good resistance to any combination and direction of forces.
Overall very strong
The gyroid infill is so strong that it can even be printed without using perimeters. Some objects are designed by locating perimeters only in absolutely necessary parts. The other infill patterns need to “lean” on the perimeters, otherwise, their structure would collapses.
Shorter printing times
Given the same infill percentage, the gyroid prints 2% to 5% faster than the rectilinear pattern. When we talk about mass production, these values are significant.
Less material consumption
Another economic factor: with less filament a more resistant piece can be made. As it can be printed without walls while being functional, you could reduce its weight even more.
Good-looking infill
Although it is a matter of personal taste, the gyroid infill could be considered the most attractive of all currently available patterns.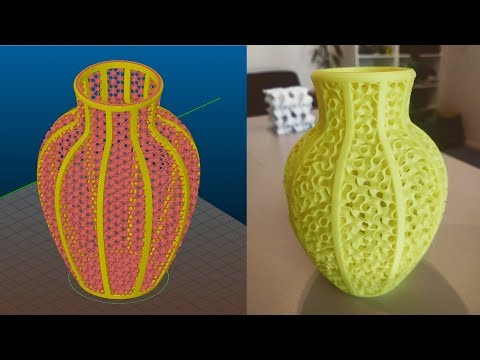 Many designers have modeled vases, glasses, or pots without perimeters, exposing the filling. The results are amazing as we will see later.
Dos not overlap on the same layer
The structure has no weak points since its lines are continuous along with the entire layer. This also reduces extrusion problems or nozzle clogging.
It is orientation independent
Sometimes you need to print the object with a specific orientation. That orientation might not be the same as the required to get the best resistance. With a gyroid infill, you can solve this issue, since it has the same resistance in any direction. This property might help reducing filament consumption, as you need fewer supports with a proper orientation of the object.
Allows you to consider using weaker materials
When we need a strong 3d printed object, we often think of ABS or Nylon as the obvious choice, as they are strong and resistant. But we could improve PLA resistance by using a gyroid infill, making the object cheaper and easier to print.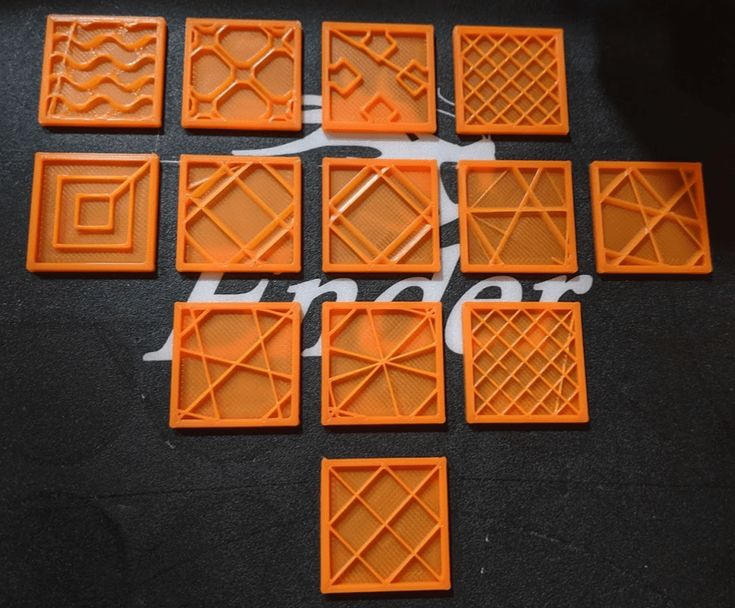
It does not need supports
Every TPMS is self-supporting in nature, making them perfect for FDM manufacturing.
It allows fluids trough itself
You could use this pattern for applications which require air or water flow, like electronic packaging or heat sinks.
Disadvantages of Gyroid Infill
Higher slicing times
Although this factor gets underestimated often, the slicing time can be excessive if we have to rely on a low-performance computer. The G-codes generated are usually bigger when using the gyroid. This can cause prints to fail when the printer is connected to the computer via USB.
Printer vibration can be quite high on higher infill percentages
Since the gyroid is formed by curves, the extruder has to move a lot in every direction. This produces unwanted vibrations that are transmitted to the object, especially at high speed. The solution is to reduce the infill percentage to achieve wider extruder movements and slow down infill speed. Remember that this pattern doesn’t need much infill to work well.
Gyroid infill slicer settings
The main advantage of the gyroid pattern is that it does not need a lot of infill percentage in order to be resistant: a small piece with 2 perimeters and 10% infill supports almost 10 kg. If you raise the percentage, the resistance will increase in a non-linear fashion. You can start with a 5% infill and increase it in cases where more resistance is needed.
Print speed may be slightly higher. Anyway, I recommend you continue using the same speed you have been using. Rest assured that by lowering the infill percentage and maintaining the movement speed, the printing time will still be reduced substantially.
If you do not find Gyroid in your slicer settings, download Cura’s latest version. This also applies to PrusaSlicer, Simplify3D, and other popular slicers.
Creative uses with Gyroid Infills
Due to the interesting shape of a gyroid, this pattern has caught the attention of both artists and makers. Let’s see how the properties of gyroid can be used to make complex and interesting parts:
3D Printable Gyroid by Dan O’Connell
Link (miminyfactory.com).This design is simply a cube with no outer walls. With this piece we can test the resistance of the object, placing heavy objects on any of its faces. It also allows you to see how its “labyrinth” permits the water (or any fluid) to enter and exit completely, without stagnating in some internal nook. It is an ideal piece to show the gyroid structure to those who have never seen one.
3D Printable Gyroid Lamp by Greg
Link (mimynifactory.com)A spherical lamp with a gyroid pattern. As the gyroid is a surface (technically it is not a body) it allows the light of the lamp to pass through. In addition, its structural resistance protects the lamp from direct hits. It looks great when printed with translucent materials, like PETG.
3D Printable Gyroid Bookmark by PlasticPasta 3D
Link (myminifactory.com)This design (a bookmark) combines the high strength of the gyroid with its structural beauty.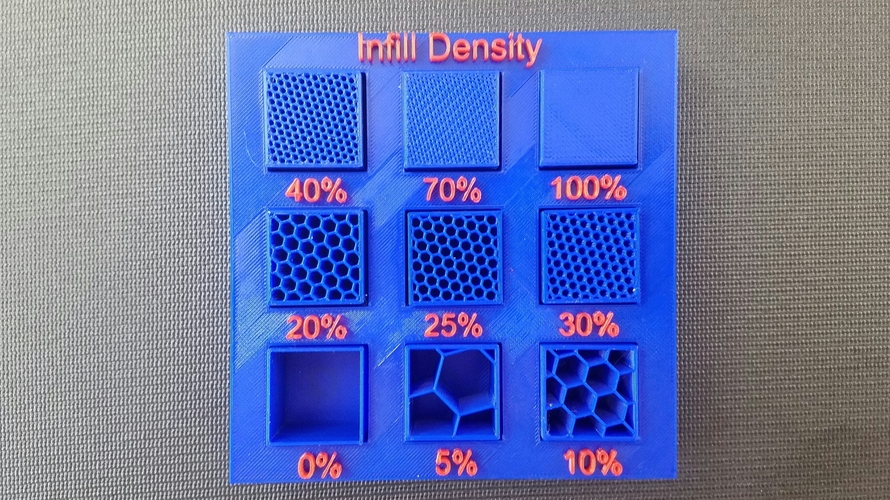 It shows that this infill pattern can be used to enhance the aesthetics of familiar objects. On the other hand, books and nerdy things get along very well…
3D Printable Gyroid Shelf Bracket by Alexander
Link (myminifactory.com).This shelf bracket was designed to support weights greater than 20 kg, using only 67 g of material! That is more than 20 books. It demonstrates that 3d printing still has things to say.
In addition, its “bone sponge” look looks great when printed in white…
Once you try the gyroid, there will be no going back. High strength, low weight, and shorter printing times, everything a maker wants!
Conclusion
Having gone through the technical details and the artistic applications of the Gyroid Infill, I hope that I could transmit at least a little bit of the amazement that I have for this pattern. Although I already use this pattern as my default infill, I’m still blown away by the way it looks and the properties it has. You should definitely consider start using it or at least giving it a try!
We created a recommended products section that will allow you to remove the guesswork and reduce the time spent researching what printer, filament, or upgrades to get, since we know that this can be a very daunting task and which generally leads to a lot of confusion.
We have selected just a handful of 3D printers that we consider to be good for beginners as well as intermediates, and even experts, making the decision easier, and the filaments, as well as the upgrades listed, were all tested by us and carefully selected, so you know that whichever one you choose will work as intended.
(There is a solution) What are the advantages of filling a gyroid?
infill
I've seen a few slow motion videos lately that use gyroid infill: wavy lines that deform across layers so that the waves eventually alternate between the two axes. Besides making slow motion videos look much cooler, what are the benefits of this fill style over the more common shading or cross shading?
@Dan Hulme, 👍34
4 answers
Best answer:
▲ 31
From this link you can read that:
Gyroid is a natural structure that occurs in butterfly wings and even in the membranes inside cells.
In 2017 MIT researchers found that when graphene was shaped into a gyroid structure, it had exceptional strength properties at low density. However, they then discovered that a crucial aspect of this was actually the structure of the gyroid itself, and that other materials such as plastic, could benefit from this.
This infill type is supposed to have better fail-safe properties than the conventional infill types we know.
A test by an author named Martin can be found here. He printed out a test piece and flexed it to test its resistance to shear stress.
It can be concluded from the figure that the gyroid filling has better bending resistance with less weight.
The advantages of gyroid filling over proven filling types are as follows:
- high shear strength and
- light weight (so less filament required).
In addition to these advantages, gyroid infill prints relatively quickly compared to some other infill types and is close to isotropic (i. e. uniform in all orientations), meaning it is very suitable for flexible prints.
, @ 0scar
▲ 23
0scar gave a great answer, but I wanted to add to it.
Stefan from the CNC kitchen does a lot of testing on 3D printers. He covered the gyroid and other patterns. Despite the difference in the filament used, the significant differences are strength * and print speed . Here is his 8 minute video for testing the fill pattern; below are some screenshots. I stopped typing honeycomb as soon as this video came out. Maybe I should switch to a gyroid too.
* yes, I call it "strength". Don't look at me, physics and materials science are peeping, I know it's inaccurate.
, @ tedder42
▲ 14
This answer is based on both 0scar's answer and tedder42's answer:
Martin's experiment was about shear strength, where, like Stephan's experiment at CNC Kitchen, it was about compressive strength in 2 directions.
It is reasonable to conclude from their experiments that the gyroid performs well in sheer strength and is above average in compressive strength.
Why use a gyroid?
- If your print requires shear strength, use a gyroid.
- Otherwise, if printing requires lateral or both compressive strength, use cubic.
- Otherwise, if only perpendicular compressive strength is required for printing, use a triangle.
- If your print is filled naked, each pattern has its own beauty.
See also:
Martin's experiment (note how he used a water bottle to test various structures for shear strength):
https://www.cartesiancreations.com.au/gyroid-infill- tests/
Stefan from the CNC Kitchen experiment (note how he used his homemade machine to compress various structures):
https://www.youtube.com/channel/UCiczXOhGpvoQGhOL16EZiTg
Examples of the gyroid aesthetic can be found in Matt's links : nine0003
https://mattshub.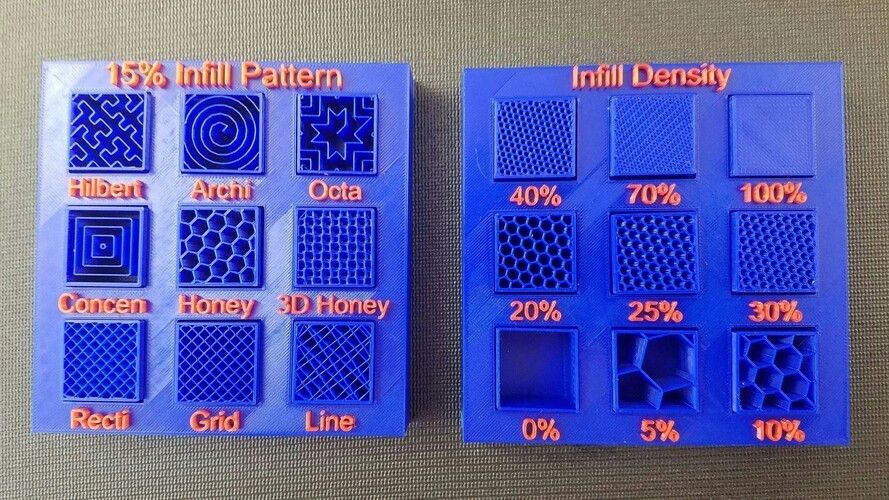 com/2018/03/15/gyroid-infill/
. @ zyc
▲ 12
About ten years ago we considered the "gyroid filling structure" (which we called a sheet solid). We considered it as a linear elastic solid and as a possible construction of bone frameworks:
https://www.sciencedirect.com/science/article/pii/S0142961211006776
a wide class of structures that make up the gyroid) had interesting elastic moduli.
However, one thing is worth noting: the gyroid is not isotropic. Rather, it has cubic symmetry, i.e. 3 rather than 2 linear elastic constants. But it's pretty close to isotropic
. @ Gerd Schroeder-Turk
Infill for 3D printing. What are there and how to choose the right one
6203 views Posted on: 13. 12.2015
Author: 3D4U.COM.UA
By now you should have printed a lot of objects, because the best way to master something is to gain experience and do a lot of activities in the chosen area.
You've probably seen several infill options in your 3D printing software, and you may have wondered how one or the other infill will affect the final result of your product. There are a huge number of different filling options, but in this article we will focus on the 4 most common types. These are rectangular, triangular, wavy and hexagonal (honeycomb).
Rectangular
Rectangular infill is the most common type of infill, although it doesn't really provide any real benefit. In most slicer programs, it is set as the default value, due to which it has become the most popular. Many beginners use it because they have not yet explored all the possibilities of 3D printing and software.
Wavy
Wavy filling is practically useless. Its only use is to reduce the rigidity of a part and give it more flexibility.
Triangular
Triangular filling increases the strength of the outer walls and withstands high side loads. It is rational to use it for 3D printing of long thin structures or for strengthening walls. Examples are bridges or support beams for ceilings or roofs.
Hexagonal
Hexagonal infill is the best option for increasing the strength of the model, in addition, it significantly speeds up the 3D printing process due to the efficiency of its shape. Hexagonal filling saves you energy, time, material and money, and ensures high strength and rigidity in the final product. That is why bees form their combs in the form of hexagons. Nature uses this variant everywhere because it is efficient, mathematically perfect and elegant. Upon closer examination, one can find out that this unique natural phenomenon is a combination of spheres to form a mosaic. Doubt? Take a straw and soapy water and create some bubbles. Obviously the soap bubble is spherical, but try to surround it on all sides with six small identical bubbles and see what happens when you do that.
In summary, what conclusion can we draw from the above? No matter how experienced or creative your designers or engineers are, nature will always take its toll, and we must pay attention to its lessons. Hexagonal infill will suit almost any of your creations, ensure the strength of your object, save material, as well as your time and money. In our opinion, hexagonal infill should be the new default in slicer software.
If you have not purchased a 3D printer yet or you do not want to understand the intricacies of 3D printing, you can order the production of parts on a 3D printer from 3D4U. We will select for you the appropriate filling option, its density, as well as the material and accuracy of 3D printing
Related items
- Top 20 interesting toys for children on a 3D printer.
Category: 3D printing
02/15/2022
11364 views
What kind of toys can be created on a 3d printer? What are the advantages of 3d printing toys at home? In this article you will find.

Learn more