Comgrow creality ender 3 3d printer review
Creality Ender 3 Pro Review: An Ideal First or Tenth 3D Printer
Tom's Hardware Verdict
The Creality Ender 3 is an open-source, DIY kit 3D printer that is ideal for beginners looking to get started in 3D printing or professionals looking to create an inexpensive fleet of printers for manufacturing.
Pros
- +
+ Beginner-friendly assembly process
- +
+ Highly accessible and modifiable frame
- +
+ 350W 24V power supply heats up quickly
- +
+ Simple first-party app offers solid print quality
Why you can trust Tom's Hardware Our expert reviewers spend hours testing and comparing products and services so you can choose the best for you. Find out more about how we test.
Today's best Creality Ender 3 Pro and deals
992 Amazon customer reviews
☆☆☆☆☆
$215.90
$101. 56
View
Reduced Price
$224.99
View
$339.99
$246
View
Reduced Price
Show More Deals
Retailing for a very-reasonable $240, the Creality Ender 3 Pro is one of the most popular filament-based 3D printers, attracting both beginners and budget-focused makers. The device ships unassembled and uses an open-source design that makes it easy to modify. However, the great support and solid output quality of this printer also make it easy-to-use. Whether you’re interested in buying your very first 3D printer or you’re looking to set up a fleet for manufacturing, the Creality Ender 3 Pro is one of the best 3D printers you can buy.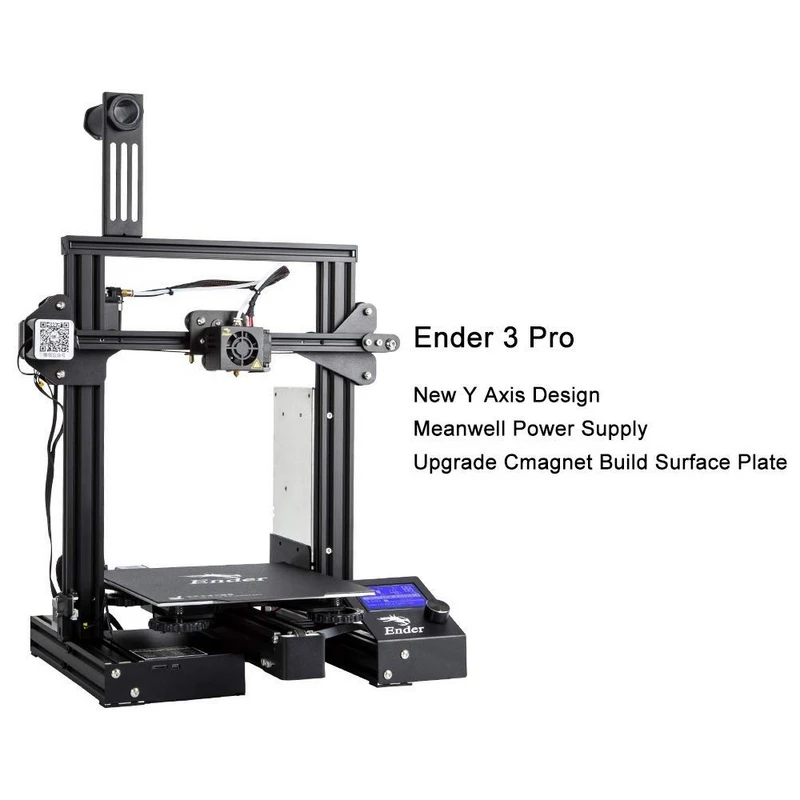
Specifications
Swipe to scroll horizontally
| Machine Footprint | 17.5 x 17 x 18 inches (44.5cm x 43.2cm x 45.7cm) |
| Build Volume | 8.7 x 8.7 x 9.8 inches (220mm x 220mm x 250mm) |
| Material | 1.75mm PLA, ABS, PETG |
| Nozzle | .4mm |
| Build Platform | Removable Flexible Textured Sheet |
| Connectivity | microSD, USB |
| Interface | 3.25" LCD w/ Dial Button |
Creality Ender 3 Pro: Included in the Box
(Image credit: Tom's Hardware)The Creality Ender 3 Pro ships unassembled and includes all of the tools you need to put it together and get it running. In addition to all of the printer components, the box includes: a full set of Allen keys, zip ties, a set of flush cut wire snips for cutting filament, a scraper for removing parts from the bed, a microSD card, a microSD-to-USB reader, a small sample coil of PLA filament, and a few extra parts for the assembly process.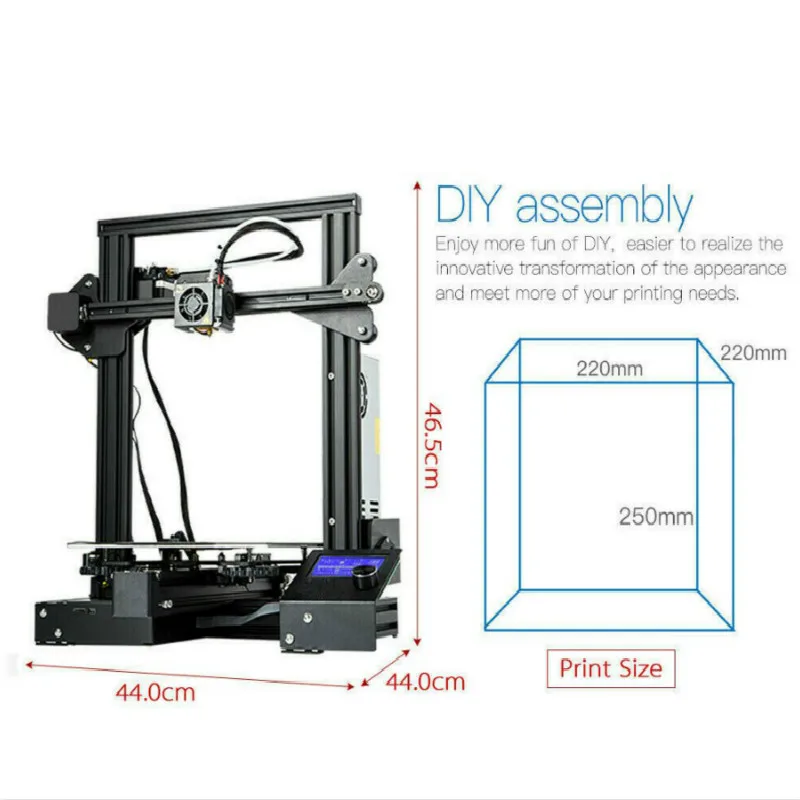 All of the bolts are bagged in sets which are labeled with their measurements, which is very helpful during the assembly process.
- Creality Ender 3 Pro at Walmart for $101.56
Assembling the Creality Ender 3 Pro
(Image credit: Tom's Hardware)Although the Creality Ender 3 Pro is a DIY kit 3D printer, the overall assembly process is designed to be friendly to users of all skill levels and can be comfortably completed in an afternoon. There is no soldering, crimping, or other advanced techniques required that would put this kit out of reach for a beginner with limited tools and/or experience. Building the Ender 3 Pro took me just over an hour from unboxing to flipping the power switch, and I didn’t need a single tool that wasn’t included with the printer.
The assembly guide breaks down the assembly into 12 steps that are easily completed sequentially and is also included as a digital .pdf on the microSD card. Creality also includes a video showing the assembly process on the microSD card if you prefer a video guide instead of a written one.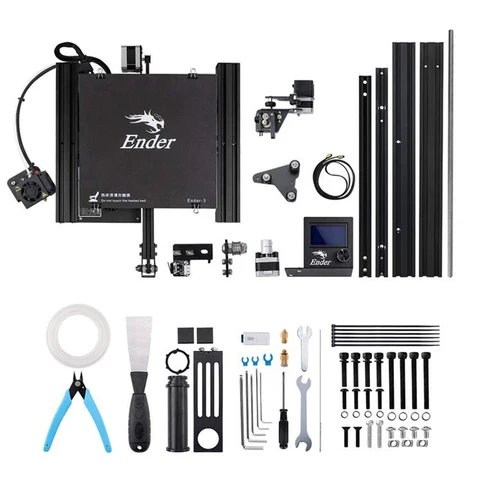 Among various quality-of-life improvements over the original Ender 3, the Ender 3 Pro has built-in belt tensioners for the X and Y axes that allow you to manually adjust tension if the belt isn’t stretched properly.
Loading Filament and Leveling on the Creality Ender 3 Pro
(Image credit: Tom's Hardware)Loading the filament is a breeze. I was able to easily load filament through the injection molded extruder and into the white Bowden tube. The 350 Watt Meanwell-brand power supply heated both the nozzle and the bed to loading temperature in just under two minutes, which meant I wasn’t waiting around for the bed to reach printing temperature after the nozzle had already heated.
(Image credit: Tom's Hardware)Once I had loaded filament into the extruder, I leveled the bed by using the included triangular piece of paper and adjusting the nozzle height with the thumbscrews at all four corners of the bed. This process is relatively straight-forward and I didn’t run into any problems during leveling. If you level the bed carefully, you'll get prints that adhere well to the build platform without being deformed. The piece of paper should be lightly pressed down into the build platform; too close and the paper becomes pinned down, too far and it can move freely. This can be difficult on a flat glass bed if the glass isn’t perfectly flat, but the combination of aluminum bed and textured sheet was easy for me to level quickly and accurately.
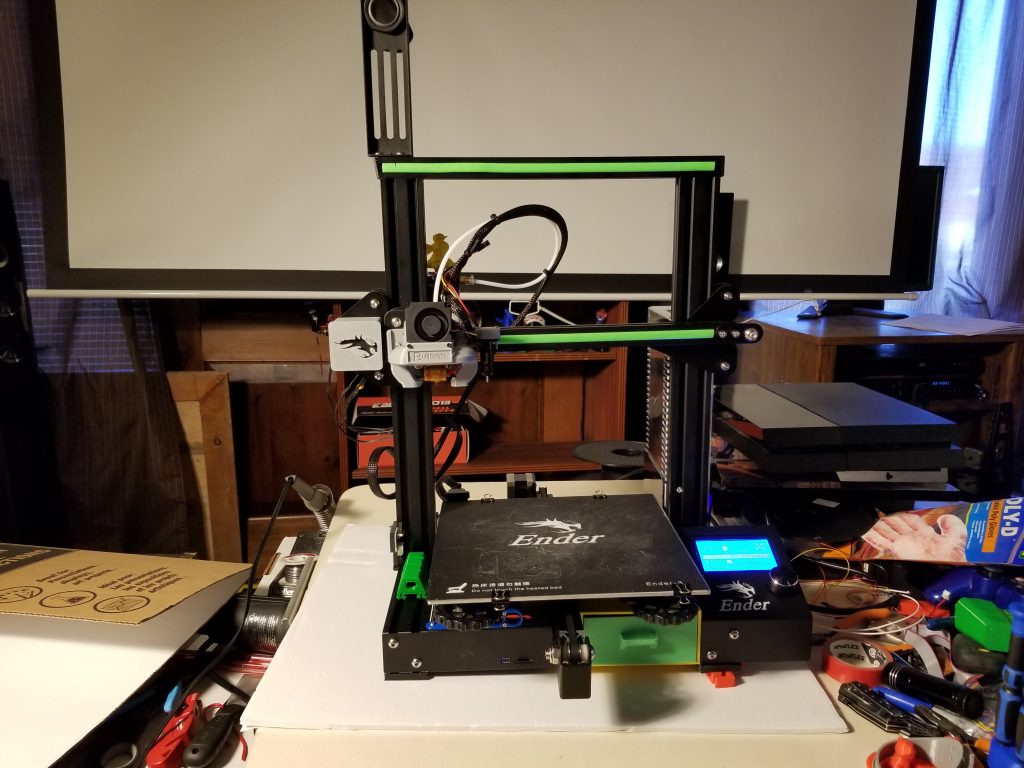
Creality Ender 3 Pro Build Quality
(Image credit: Tom's Hardware)The Creality Ender 3 Pro ships with the V4.2.2 controller board, which is the standard board for this model of printer. The wiring job is professional, with several of the wiring connectors affixed with a silicone potting compound into their sockets to prevent them from coming loose during shipping or operation.
The wires are bundled and the overall cable management is clean and allows for good airflow over the stepper drivers. The board accepts a microSD card for uploading .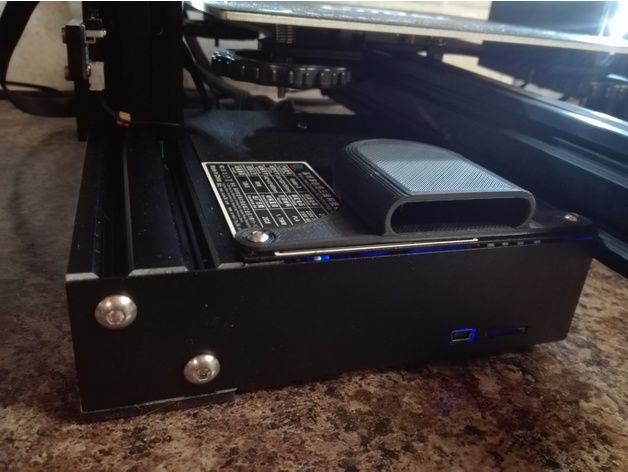 gcode instructions and can also be controlled via the USB port on the front of the machine.
The Ender 3 Pro's V4.2.2 controller board features HR4988 stepper drivers, which can create a noticeable amount of noise during printing. Combined with the noisy fan that cools the controller board and the intermittent fan on the power supply, this printer makes a surprising amount of noise when printing. The buzzing from the stepper motors reminded me of my very first 3D printer from 2013, a Printrbot Jr. that could be heard from clear across the house through multiple walls when it was printing.
If you’re planning to use this printer near your desk, it may be distracting during fast travel movements and when the power supply fan kicks on. I found that I was unable to concentrate with the machine on my desk, and had to move it to the other side of the room while it was running.
Printing on the Creality Ender 3 Pro
(Image credit: Tom's Hardware)The Ender 3 Pro ships with a microSD card that contains a user manual, a troubleshooting guide, various USB drivers, and several pre-sliced models in .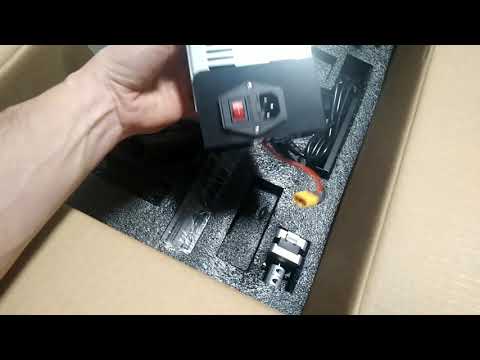 gcode format. These pre-sliced models can be printed by simply inserting the microSD card into the printer and selecting a model.
I ran my first test print using the “cat-3.5H.gcode” file and, while it was printing, I took a look at the .gcode file in a text editor. The file was sliced at a .1mm layer height, using 3 perimeters, and prints completely hollow with 12 solid layers on the bottom and top of the model. This is an unusual strategy for printing small models, as having an internal infill structure can help to support any material overhangs that occur on the inside of the model.
(Image credit: Tom's Hardware)Despite the unusual printing configuration of this test file, the printed model featured a good amount of surface detail with no major visible defects aside from some stringing that occurred while printing the ears. To remove the print, I peeled the flexible magnetic build plate off and bent slightly, allowing the print to pop right off. The raft separated easily from the model and didn’t leave any defects on the bottom surface. The test part is an impressive example of what the Creality Ender 3 Pro is capable of.
Software and Settings
(Image credit: Creality)Creality ships the Ender 3 Pro with their own slicer called ‘Creality Slicer’, which is compatible with Windows PCs and is based on the open-source software Cura.. Other common slicers for this open-source printer include Cura, PrusaSlicer, and Simplify3D.
A typical printer in this price range, such as the Mingda D2 ($235 on Amazon) , will ship with a copy of Cura and a printer profile that was designed for that specific machine. These profiles can be hit or miss and typically require a lot of dialing in to get a good result.
For this review, I used both Creality Slicer as well as PrusaSlicer to print a model and used the default settings at .2mm layer height for both to directly compare them.The model I used is the Benchy, a common benchmarking test used for this style of 3D printer that offers an insight into the performance of the printer when making difficult-to-produce geometry.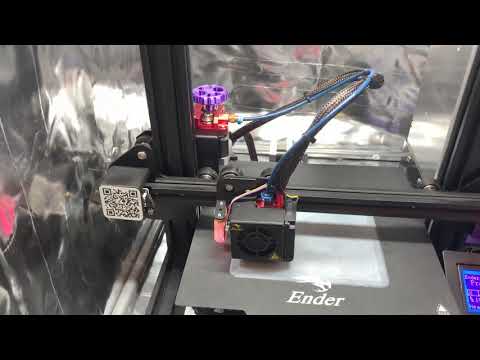
Creality Slicer Settings on the Ender 3 Pro
(Image credit: Tom's Hardware)Swipe to scroll horizontally
| Profile | Fast (0.2mm) | Row 0 - Cell 2 |
| Material | Common PLA | Row 1 - Cell 2 |
| Platform Adhesion | None | Row 2 - Cell 2 |
I used the default ‘Fast’ profile for the Ender 3 Pro built into Creality Slicer to test out the printer and see how much detail it was able to produce. The model printed with no major visible defects, save for the infamous ‘hull line’ which typically occurs when the printer transitions from sparsely filled layers to solid layers.
The layers laminated evenly, and I only saw a few visible bumps caused by the start and stop point of each toolpath on the outermost contour.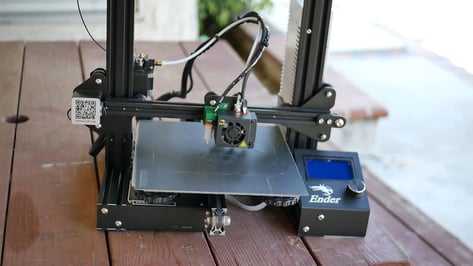 For a part printed with no changes to the software, I was satisfied with the overall quality of the Benchy.
PrusaSlicer Settings on the Ender 3 Pro
(Image credit: Tom's Hardware)Swipe to scroll horizontally
| Layer Height | 0.2 mm |
| Infill Percentage | 20% |
| Print Speed | 40mm/second |
| Extruder Temperature | 205 degrees Celsius (401 degrees Fahrenheit) |
| Heated Bed Temp | 60 degrees Celsius (140 degrees Fahrenheit) |
I ran the same test print using PrusaSlicer, another common slicer program that also includes a native printer profile for the Ender 3 Pro. In addition to the hull line artifact, this print also showed some banding towards the top of the print and seemed to lack a bit of the detail present in the model sliced with Creality Slicer.
This print wasn’t quite where I would like to see a benchmark print, and some optimization of the software (print speed, retraction settings, etc.) would likely be required to get this part to an acceptable level of quality. I’ve printed this part using similar settings on the Prusa MK3S using the same material in the past, and the quality is much higher than what I saw here. While the Prusa MK3S is a more expensive machine, I was still surprised to see this much of a difference in a test part using the same software.
Printing a second test print on the Creality Ender 3 Pro
(Image credit: Tom's Hardware)I was curious about the amount of banding present in the model printed with PrusaSlicer, so I decided to re-run another one of the pre-prepared files from the SD card to confirm the problem wasn’t being caused by a hardware issue. I ran the piggy bank test part, and it came out without any of the visible banding that I noticed on the model sliced with PrusaSlicer. The vertical walls were smooth and even, and the model seemed to be clear of any major defects.
The PrusaSlicer profile, while a good starting point for this printer, clearly requires a bit of calibration to get the best results. I’ve found that reducing print speed is typically a quick way to troubleshoot and can have a major impact on the overall quality of the part, and that may be a setting worth experimenting with to get the best results.
Adjusting retraction is another important consideration, as the Ender 3 uses a Bowden extruder, which pushes the filament through a long tube before it gets to the hot end. This pushing (and pulling during retraction) can cause defects in the print if not properly calibrated, so this might be worth investigating as well.
(Image credit: Tom's Hardware)By including Creality Slicer with the Ender 3 Pro, Creality has simplified the printer experience for first-time users who are interested in getting their printer up and running without spending a lot of time experimenting with third party software.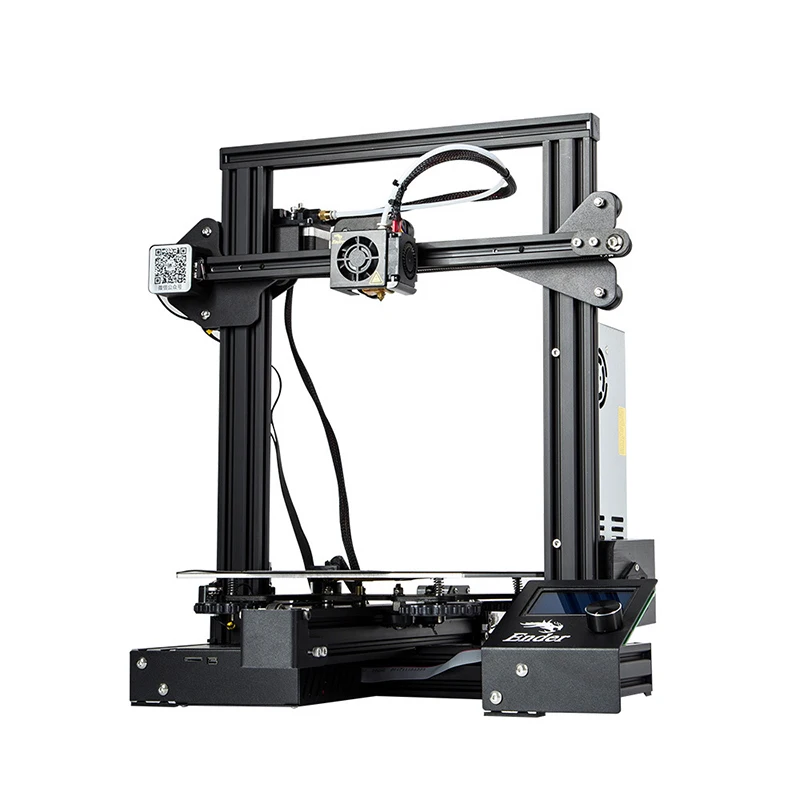 I was impressed with how easy the Creality Slicer software was to install and use with the Ender 3 Pro, because most other manufacturers with printers in this price range ship without first-party software. The basic settings to create a print are brought to the front of the app and the included “expert” mode will let you adjust settings as you become more comfortable with the printer.
Whether you are a beginner interested in building your very first printer or an experienced entrepreneur looking to create a print farm to produce 3D printed products, the Creality Ender 3 has a lot to offer with only a few notable drawbacks. The noise produced by the Ender 3 Pro while printing is definitely a downer for anyone living in a studio apartment, and the lack of an enclosure to retain heat should be considered by anyone interested in printing with a higher-temperature material like ABS or Polycarbonate. Creality also offers the Ender 3 Pro V2 ($279 on Amazon) , which features silent stepper drivers and a more modern interface at a slightly higher cost.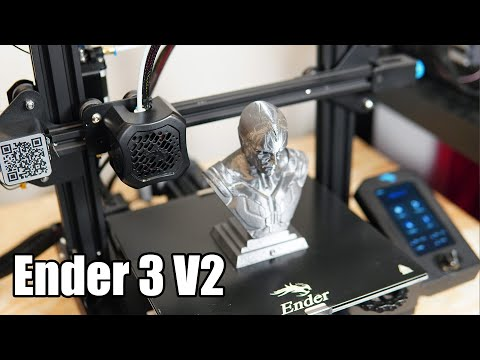
Other printers in this price range, such as the Anet ET4X ($199 on Amazon) , offer similar features and specifications, but the removable textured build platform and the fast-heating 350W power supply on the Ender 3 Pro make it an easy choice for anyone looking for a user-friendly machine. In addition, the open-source Ender 3 Pro has a large and robust user base and multiple online communities dedicated to modifying and experimenting with their Creality machines.
It’s clear that Ender 3 Pro has a lot to offer anyone who is interested in 3D printing. It’s an excellent first printer for a beginner or an additional machine for the experienced hobbyist.
(Image credit: Tom's Hardware)Andrew Sink first used a 3D printer in 2012, and has been enthusiastically involved in the 3D printing industry ever since. Having printed everything from a scan of his own brain to a peanut butter and jelly sandwich, he continues to dive ever more deeply into the endless applications of additive technology.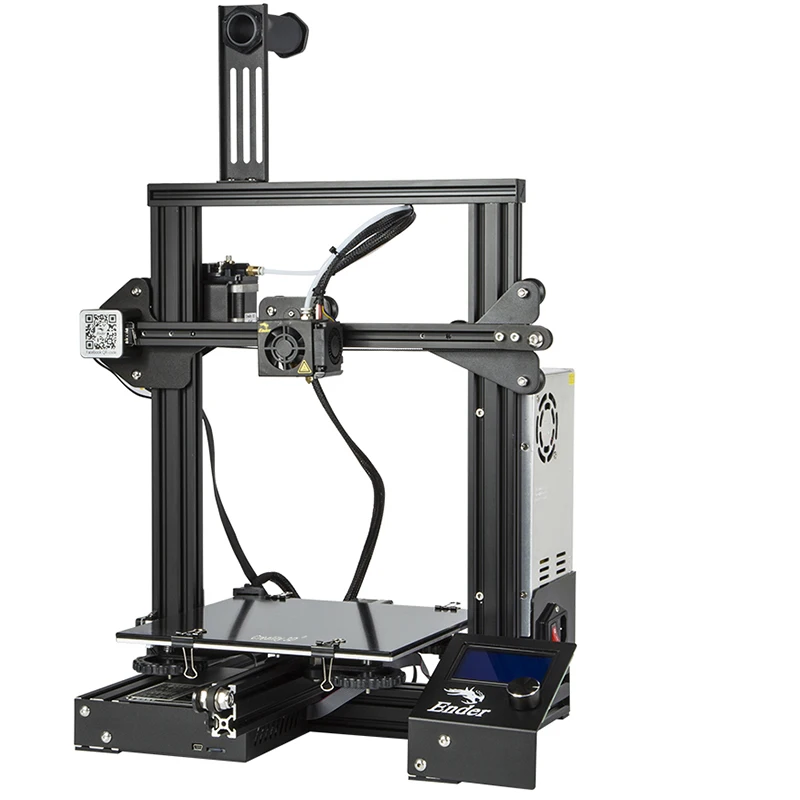 He is always working on new experiments, designs, and reviews and sharing his results on Tom's Hardware, YouTube, and more.
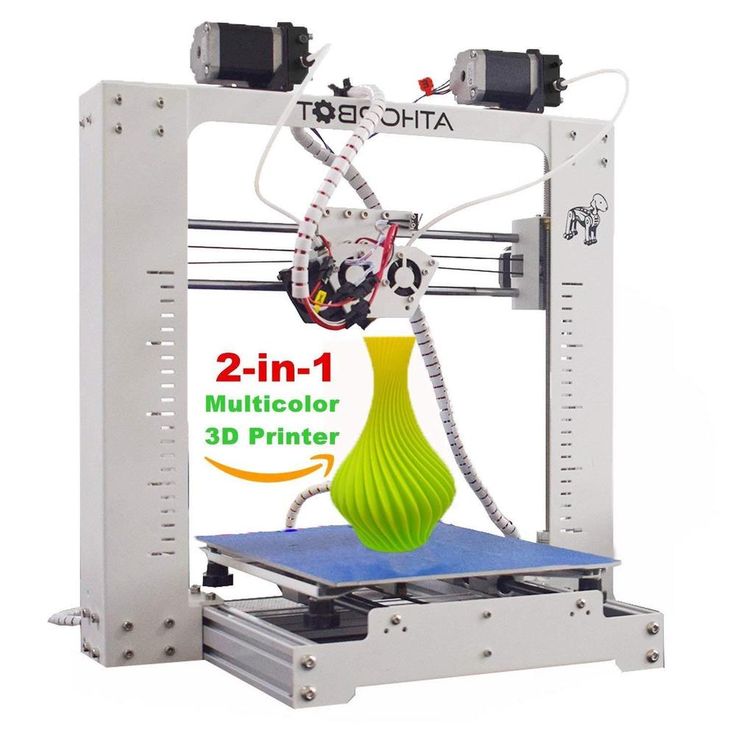
Comgrow Creality Ender 3 Pro Aluminum 3D Printer
Last updated date: February 9, 2022
DWYM Score
Why Trust DWYM?
DWYM is your trusted product review source. Along with our in-house experts, our team analyzes thousands of product reviews from the most trusted websites. We then create one easy-to-understand review. Learn more.
Show Contents
Contents
- Our Take
- Features
- Specifications
- From The Manufacturer
- Expert Reviews
- Overall Ranking
- Our 3D Printer Buying Guide
- Our 3D Printer Tip and Advice
We looked at the top 3D Printers and dug through the reviews from some of the most popular review sites. Through this analysis, we've determined the best 3D Printer you should buy.
Overall Take
You can learn the basics of 3D printer construction while finishing the assembly. It comes partially set up so it’s almost ready to go. It features a resume print function and a safe power supply.
In our analysis of 44 expert reviews, the Comgrow Creality Ender 3 Pro Aluminum 3D Printer placed 6th when we looked at the top 12 products in the category. For the full ranking, see below.
From The Manufacturer
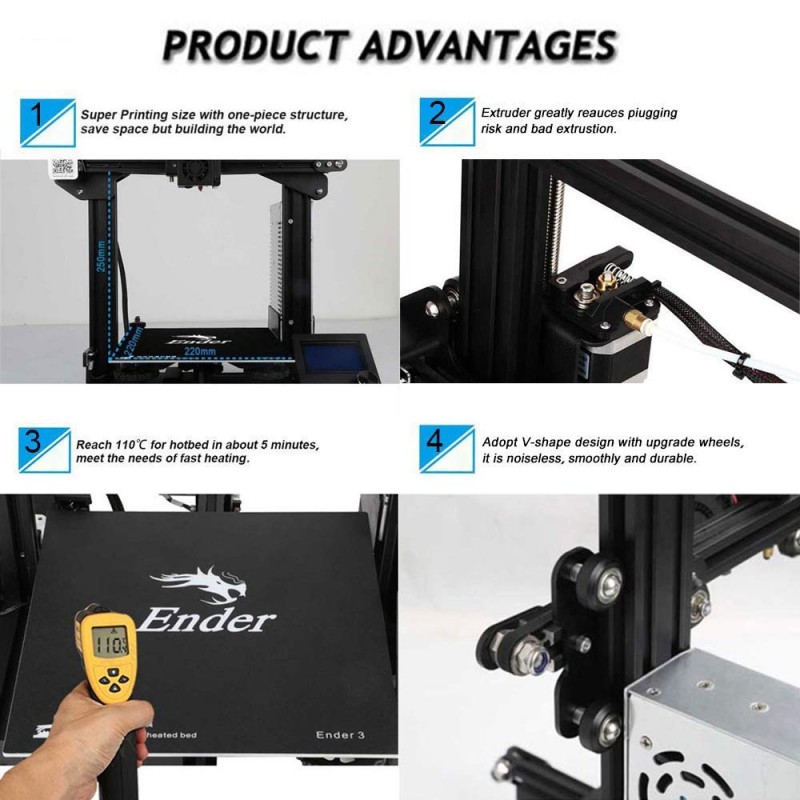
REMOVABLE BUILD SURFACE PLATE: Provide all-round protection to your 3D printer build plate and ensure consistent temperature throughout the build surface. Easy to remove the printing models after cooling. SAFE POWER SUPPLY: Ender 3 Pro comes with a UL Certified power supply, protecting your printer from unexpected power surges, that can heat the hot bed to 110℃ in just 5 minutes. RESUME PRINT FUNCTION: Ender 3 Pro can resume printing from the last recorded extruder position after suffering unexpected power outages. SEMI-ASSEMBLED KIT: This easy-to-setup kit comes partially assembled, allowing you to learn about the basic construction of 3D printers as you finish putting it together. A fun STEM educational experience in mechanical engineering and electronics. WHAT YOU GET: Ceality Ender 3 Pro 3D pinrter, lifetime technical assistance and 24 hours professional customer service.
Expert Reviews
Expert Summarized Score
4 expert reviews
User Summarized Score
2,655 user reviews
What experts liked
Other Products We Considered
- BestReviews
| Full review
Highly affordable. The printer is completely open-source. The print quality is admirable.
- Pick 3D Printer
| Full review
Comes with a removable build surface plate giving your printer all-round protection. This printer also ensures that the temperature is always consistent across the build surface. The most impressive feature of this printer is that you can remove the printed object easily once the model cools down.
- Walyou
| Full review
It is an excellent printer for the person just starting into the maker world. It is a straightforward machine that uses fused deposition modeling. It has a large print size and will allow you to create some larger sized pieces.
- 3D Knowledge
| Full review
What experts didn't like
User may find slight difficulty in leveling the bed. The machine requires manual calibration.
- Pick 3D Printer
| Full review
Filament needs to be purchased separately. May not support very complex projects.
- Walyou
| Full review
Not suitable for professionals or businesses. `Not make configurable settings. Basic machine, but has many accessories available separately.
- 3D Knowledge
| Full review
1. EcubMaker TOYDIY USB 3-Layer 3D Printer
Overall Score: 10.0
2. Sovol SV01 Alloy Steel Removable Glass Plate 3D Printer
Overall Score: 9.6
3. ANYCUBIC Personal Computer Compatible Anti-Clogging 3D Printer
Overall Score: 9.5
4. R QIDI TECHNOLOGY X-Plus Ventilating Stable 3D Printer
Overall Score: 9.4
5. Geeetech A10M 2-In-1 LCD Display 3D Printer
Overall Score: 9.4
6. Comgrow Creality Ender 3 Pro Aluminum 3D Printer
Overall Score: 9.2
7. Artillery Sidewinder Easy Install 3D Printer
Overall Score: 9.1
8. Dremel Digilab Polylactic Acid 3D Printer
Overall Score: 9. 1
1
9. FlashForge Finder Non-Heated Build Plate 3D Printer
Overall Score: 8.3
10. ANYCUBIC Large Screen High Resolution 3D Printer
Overall Score: 8.0
11. ELEGOO Mars Multi-Language Interface 3D Printer
Overall Score: 7.7
12. XYZprinting da Vinci Nano STEM User-Friendly 3D Printer
Overall Score: 7.0
A 3D printer is a marvelous piece of technology that is taking businesses and home offices by storm. In a short amount of time and with the right designs, you have the ability to print almost anything. For example, you can print useful household items like bowls and plates if you accidentally break a piece of your dinnerware. You can print a planter for your new herb garden, or even a simple stationary holder for your desk. If you want to print a small set of cutlery for taking to work or school, you can print out a unique fork, knife and spoon from your 3D printer as well.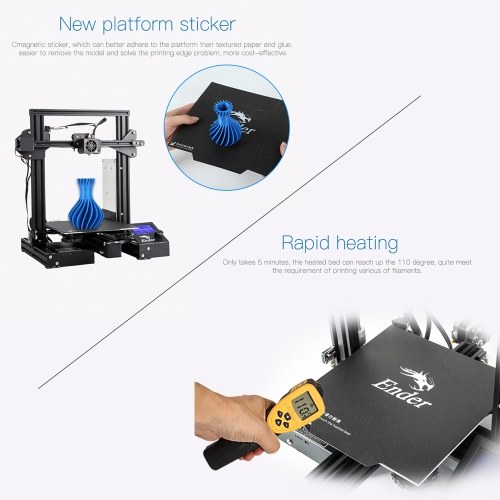
In addition to household items, a 3D printer can also print out toys for your kids. Whether they are into dinosaurs or blocks, you can find patterns to print for numerous playthings. From whistles to fidget spinners to toy cars, almost any toy can be created using a 3D printer at home. Plus, you can also print accessories for yourself, like a wallet or orthotics for your shoes. There are endless possibilities to take advantage of when you have a 3D printer.
There are several different types of 3D printers on the market, each with their own advantages. A fused deposition modeling (FDM) printer is a basic one that is loved by beginners to 3D printing. It works by heating a filament and shaping it along X, Y and Z axes. Within this category, there are two different types of FDM printers: cartesian and delta. A Cartesian FDM printer moves the printing bed on the Y axis, while the other two axes move with their own motors. Most FDM printers work this way as it is highly precise. A delta FDM printer has three motors on individual rods, which is not a common model.
Stereolithography (SLA) printers use a process that involves a chemical reaction to form layers of print. It is a highly precise result with smooth prints. This kind of model is perfect for printing items that require extremely fine printed details. A similar model is the digital light processing (DLP) printer. It works by using light, which targets a specific area of the resin and hardening it into a sculpture.
Both SLA and DLP models produce exceptionally smooth prints as compared to an FDM model, which can have rougher results. If you want to print industrial parts, then a selective laser sintering printer is a good choice. The process it uses involves laser precision, and is good for highly complex designs and detailed items.
In addition to the type of 3D printer you need, you’ll also have to consider what kind of printing materials are best for the objects you want to create. If you’re going with a printer that uses filament, you have a couple of options. Polylactic acid (PLA) is a kind of plastic made from plants. It can be useful for creating items for indoor use. However, it does deteriorate after a lot of sun exposure, so you shouldn’t use it for any items that are kept outdoors. Polyethylene terephthalate glycol (PETG) is a food-safe plastic. If you want to use it to create items like plates or cutlery, you will still need to finish it with a food-grade epoxy. Acrylonitrile butadiene styrene (ABS) is a a highly sturdy plastic that is perfect for items that will be used outdoors.
If your are going with a SLA or DLP printer that uses resin, then you can choose the quality of liquid resin you need based on what you’re making. Standard resin is a good option for small gadgets like pencil holders. Professional resin is best for engineering applications that will see high impact and high usage. Medical-grade resin is often used for making custom dental work or hearing aids.
- The type of 3D printer you need will really depend on the kinds of objects you want to print.
 That’s why it’s best to consider the range of needs you have before purchasing a printer. For example, if you primarily want to print household objects for indoor use, then you can use an FDM printer. For objects that you will be using outdoors, the type of filament is what will make a difference. You have to use an ABS filament that can withstand the sun. If your goal is to print artwork with your 3D printer, then it’s best to use a resin printer, which will be able to handle the delicacy of your designs, unlike an FDM printer. For tools, opt for an FDM for home use. For professional-grade tools, then you will need to use a resin-based 3D printer.
 - An important factor to note for 3D printers is resolution. The resolution for 3D printers is measured in a unit called microns. For example, an FDM printer, which is most common for individual use, has a resolution of 25 microns. Resin-based 3D printers, which are common for professional applications, have a resolution of 100 microns.
 This means that you will get much finer details on a resin printer. Consider the kind of details you need printed and how smooth the object needs to be. The higher the microns, the higher the precision of the printer.
 - In addition to the hardware of the actual 3D printer, you’ll also need software to create the printer files. The software program for your computer, on which you create the 3D printing files, is referred to as a slicer. Popular slicing software includes Cura and Slic3r. There are other slicer software options available as well. Be sure to read reviews online before landing on a 3D printing software for your computer.
- Making a 3D printed object can take time. During the printing process, your printer may be interrupted by a number of issues. As a result, the object that you’re printing can be ruined in progress, wasting resources and time. In order to reduce the amount of unexpected interruptions during the 3D printing process, look for a printer that has a print resume feature.
 This will ensure that your print isn’t ruined partway through as a result of an issue. If the printer does have to pause, it can easily pick up where it left off with your object.
 - The first layers of your printed object are like the foundation of a house. Everything else rests on those layers, and it’s is critical that they are well-formed, stable and staying in place. In order to ensure that the bottom layers of your print are solid, you will need a heated bed. Different types of filament have specific temperatures they require in terms of heat, so you may need to experiment to find what is right for you.
- An intuitive user interface will make all the difference on your 3D printer. If you have one that is manual, such as one with a rotary knob, it can be difficult to navigate. Even a touchscreen that is confusing can cause unnecessary problems with your printing process. Look for a streamlined touchscreen user interface that is easy to understand and doesn’t require complex instructions.
- When you first start using your 3D printer, you may have to adjust the tension of the X, Y or Z axes by tightening or loosening them. Having a printer where the tension belt is easy to access and adjust will make life a lot easier. Otherwise, you will have to figure out how to remove specific components in order to access the tension belt, which require time and intricate knowledge of the printer hardware. Plus, if you aren’t able to put everything back in place the right away, it will cause further issues.
Checkout Our Other Buying Guides
Review of the 3D printer Ender 3
Content
-
- Packaging and equipment
- Technical characteristics
- Printer assembly
- Calibration
- Design and design features
- Extruder
- Platform
- 9000 Software
- Results
Our review is dedicated to the Ender 3 3D printer assembly kit from the Chinese brand Creality3D.

This model was released in the summer of 2018, and in a matter of months it has gained popularity among users around the world as a very low-cost and high-quality solution for amateur 3D printing.
Since the launch of the Ender 3 series, subsequent printers have undergone an upgrade, the manufacturer has made certain improvements. An interesting feature of the printer is that Creality3D made the Ender 3 completely open source.
Therefore, do not lament if you did not have time to buy printers of the first echelon, now the Ender 3 model is much more perfect and more reliable.
There are 3 models in the Ender 3 series:
- Ender-3 - assembly kit
- Ender-3 Pro - assembly kit
- Ender-3S is a pre-assembled printer.
The main differences between the Ender-3 Pro and the usual three-ruble note are the presence of a magnetic sticker for better adhesion and a more powerful Meanwell power supply.
Similar to the Pro model but comes pre-assembled. Suitable for users who do not want to spend time assembling the printer or are not entirely confident in their abilities.
In this review, we will consider the cheapest and simplest model, or rather the assembly kit, Ender 3.
Packing and contents
Ender 3 comes in a compact box. All components are fixed with a foam seal, which ensures good safety during transportation.
The contents are as follows:
In addition to printer parts, the kit also comes with:
- hexagon set
- small roll of PLA plastic (5 m)
- nozzle cleaning wire
- spatula, wire cutters and screwdriver
- SD card 8 GB and USB adapter for SD card
- replacement nozzle
- fixing kit and cable tie kit
- spare pneumatic fitting
- instructions in Russian in electronic form (assembly and quick start)
- warranty card
Among other things, the supplied SD-card contains proprietary software and test models to start the first print.
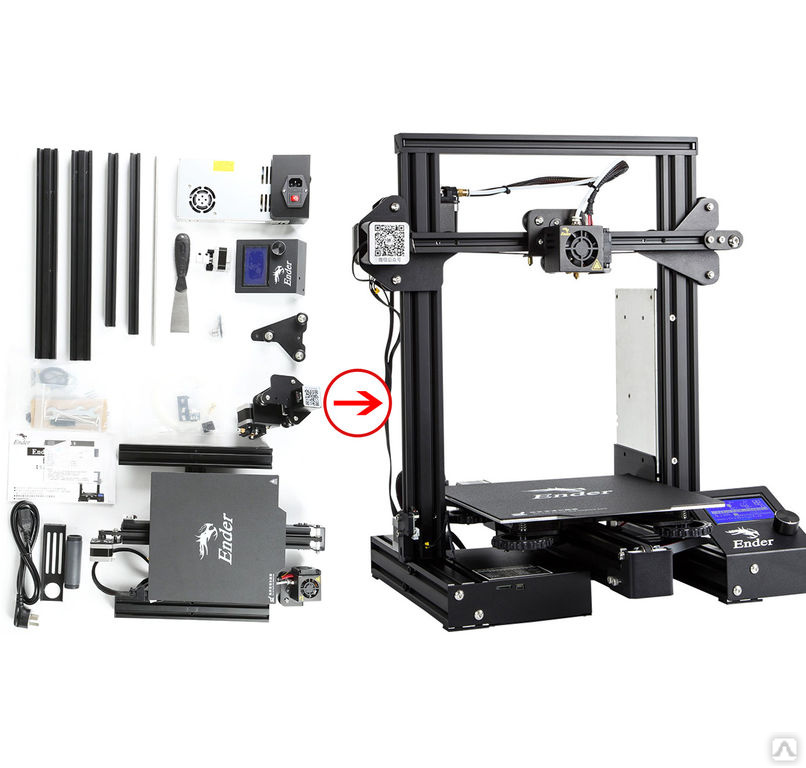
The bundle was a pleasant surprise, such an abundance is not always found in more expensive models, there is even a replaceable nozzle, an adapter for an SD card and a spare fitting.
Specifications
Print Technology FDM/FFF Thread diameter 1.75 mm Material type ABS, PLA, others Construction area size 235x235x250 mm Housing material steel Number of extruders (print heads) one Site heating temperature Max. 110℃ Layer thickness 0.1-0.4mm Nozzle diameter (mm) 0.4 Working temperature of the extruder Max. 255℃ Extruder travel speed Max.  180 mm/s
 Display 3.5 inches Connection interface SD Software Repetier/CURA/Simplify 3D Operating Systems Linux, Mac OSX, Vista, Windows 7.10 XP Supported file formats STL, OBJ, G-code Energy consumption 115/230V, 50/60Hz, DC24V, 270W, 15A Weight (without packaging) 6.6 kg Printing Accuracy ± 0.1mm Dimensions (without packaging) 410x420x465 mm Country of Origin China Ender 3 prints ABS, PLA, TPU, PETG and other plastics, but given the open housing for ABS printing, it is better to build something like a hood on the printer. There may also be a problem when printing with soft plastics due to the bowden feed.
 But there are some semi-rigid heads (like the Ninja Cheetah) that won't be a problem even with bowden feed.
 Assembling the Printer
For those new to 3D printing, assembling a printer can be a daunting task. It took us about 50 minutes to assemble and calibrate. A user who does this for the first time will need about 1.5-2 hours.
The lower part of the frame with the table is supplied already assembled, which makes the task much easier. Also, you do not have to assemble the extruder and the motor along the X axis.
The printer comes with an electronic version of the Russian-language assembly instructions, consisting of 12 steps. Everything is described in sufficient detail and clearly, but there are still a few points that need additional explanation, we will talk about them below.
- The first step is to assemble the printer frame: vertical profiles, power supply and display are attached to the bottom.

- The next step is to install the limiter and the Z-axis motor.
- Next, proceed to the assembly of the X axis. The extruder motor, the extruder itself on rollers, the belt, the belt tensioner and the tension pulley are mounted on the aluminum profile. Some users in their reviews noted that the X-axis belt actually turned out to be a little longer and had to dance with a tambourine to achieve the desired tension. Fortunately, we did not have such a problem, maybe it was a shortcoming of the first batches of printers.
- And there is little left to do...
- Install the spool holder, connect all the tubing and electronics and... the printer is fully assembled.
Everything is simple here, further assembly steps will be somewhat more complicated.
It is very important here to set the Z-stop at a distance of 32 mm from the base. Placement lower or higher may interfere with further calibration.
The Z-axis motor must be adjusted in height for the normal movement of the profile on which the extruder is attached. For these purposes, a standard plastic card is ideal:
Fasten the top profile.
Another important point: although the table and the bottom frame are assembled at the factory, it is better to tighten the fastening screws for high-quality printing. In any case, you should definitely check them before starting the printer.
Calibration
The platform is calibrated using giant nuts placed at each corner of the platen. Thanks to their large size, they are easy to turn, making calibration as easy as possible.
Calibration takes place in the standard way at the four extreme points of the table using a sheet of paper folded in half.
If there is any doubt that the calibration was successful, it is better to repeat the procedure until you achieve the desired result.
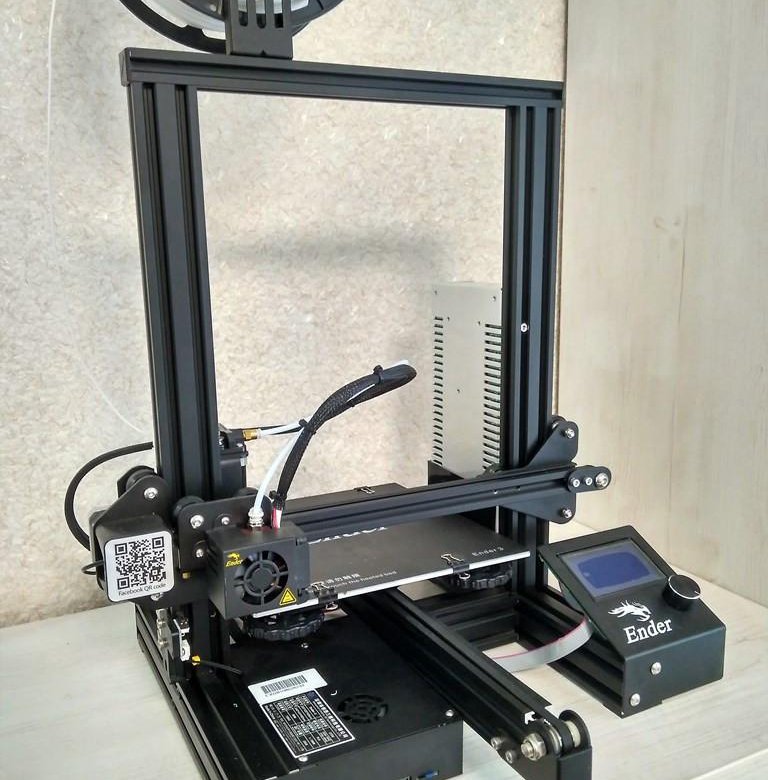
Design and construction features
Design
The assembled printer is simple and concise. The design is standard for budget FDM printers - "pryushchee" kinematics with an open case. Trapezoidal screws are installed along the Z axis. All electrics are located inside the lower frame.
Extruder
The Ender 3 has an omnivorous MK10 extruder with a bowden feed, which means that soft plastics will be problematic to print, but such a feed, in theory, will allow you to develop faster print speeds without losing quality.
Display
The small display mounts directly on the base of the printer, unlike the newer and more expensive Creality3D CR-10, where the control box and screen come separately. On the one hand, this is a plus, especially if you plan to periodically move the printer from one place to another. On the other hand, if you close the printer with a case, then the electronics will also be under it and additional heating cannot be avoided.
The display is the simplest and displays basic information, such as set and current nozzle and table temperatures, print time, progress bar, etc. Controlled using a standard knob.
Platform
The Ender 3 has a 235x235mm printbed with a surface reminiscent of the good old Wanhao. In principle, there were no problems with adhesion, sometimes even additional efforts were required to remove the model from the platform. The Ender 3 Pro comes with a more convenient magnetic sticker that improves adhesion and makes it easier to remove.
Software
Creality3D has its own slicer that looks like a slightly upgraded CURA. Installation files are supplied with the printer, and advanced users can download the software and firmware from the manufacturer's website.
Printing
Now let's move on to our Ender-3 print results. We used several different types of plastic, and the printer coped with all tasks adequately.
 There was one failed model with uneven layers, but after adjusting the print settings, there were no more quality problems.
 This is Esun gray PLA waiter (however, the trunk suffered a small fiasco and did not finish printing a bit):
The small skull also turned out well:
As it turned out, the printer copes well with both small objects and larger models.
Next we tried PLA-txt 8.2 Magic from North Bridge. It turned out very well.
Transparent plastic Transparent eTwinkling:
Polimaker's Esilk PLA Piggy is not the best, but for such a budget printer it is quite decent.
Results
In conclusion, we can say that the Ender 3 3D printer performed very well in terms of print results, especially for its money. The printed models turned out to be no worse than those created on the most expensive printers. We were also pleasantly surprised by the reliability of the design and the quality of the printer's parts, we expected that it would be a more flimsy device with cheap components.

True, there is one “but” - the printer will not work “right out of the box”, it requires some enthusiasm, understanding of the process and skills in working with technology.
We can recommend Ender 3 to people who already have experience in 3D printing, well, or to enthusiastic beginners. When building Ender 3, you will have to spend time solving some problems and taking into account certain nuances. If you don’t really want to spend time on this, then it’s better to buy an already assembled Ender-3S printer.
The scope of the printer is very extensive: from use as a toy and assistant, to artistic modeling and even printing prototypes of parts and functional elements.
For the price and in capable hands - an excellent choice!
Ender 3, Ender 3 Pro and Ender 3 v2
Chinese manufacturer Creality's Ender line of 3D printers is a budget segment of 3D printers that are among the most popular in the world.
 Their success is due to the availability, ease of use, reliability and good quality of printing out of the box, which fully explains the widest circle of admirers of this line of 3D printers.
 Ender 3, Ender 3 Pro and Ender 3 v2 are versatile tools for any application, and their full potential is realized in the competent application of the final 3D printing product.
For those who just want to get acquainted with 3D printing or want to introduce it into their production, educational or research process, this series of printers is the best fit, and all thanks to a whole set of qualities, which we will discuss below.
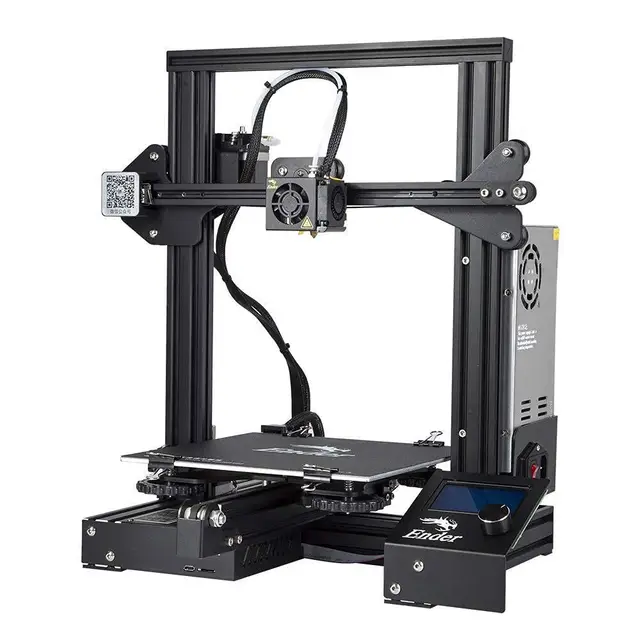
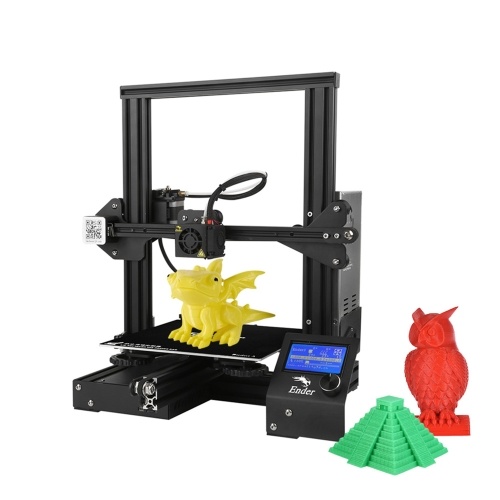
Let's start with the youngest representative of our review - Creality Ender 3:
Creality Ender 3 belongs to the category of starter printers, which is ideal for beginners or for those who are fond of 3D printing at home.
Thanks to the classic sliding table kinematics, the user can easily understand the principle of operation of the printer and the main moving parts, which will simplify its maintenance and operation.
 Assembling the printer shouldn't be a problem, but it does take some skill to run (if necessary) the connections and do an initial calibration that should also be easy for users familiar with 3D printing.
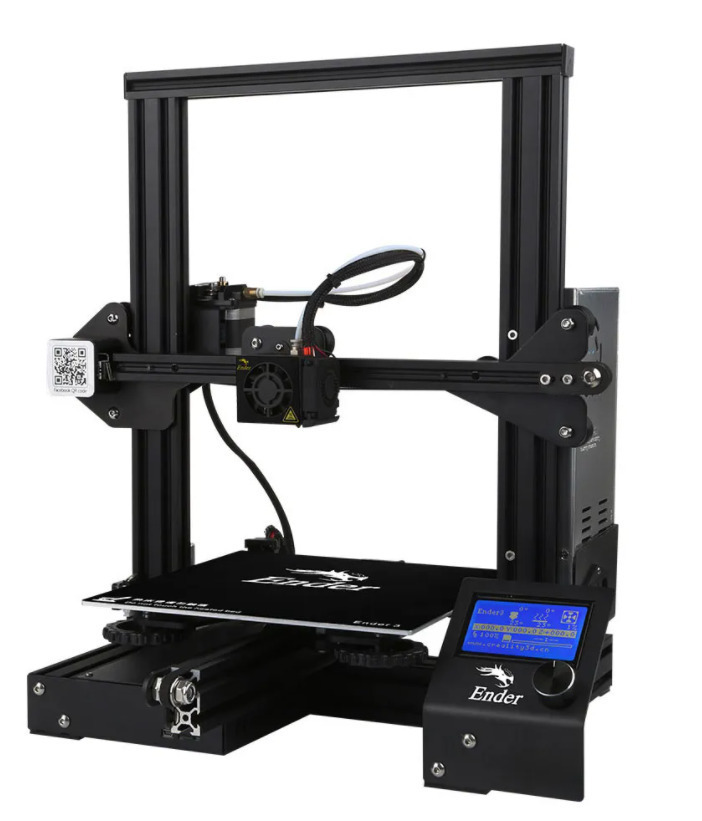
 The Creality Ender 3 printer is supplied for DIY assembly from prefabricated blocks.
Creality Ender 3's main advantages include its low cost with decent print quality and overall rigidity: the printer frame made of machine-tool aluminum profiles with carriage movement on rollers provides a sufficient level of structural rigidity to obtain very good 3D printing results with proper skill. Adjustment of the roller pressure is carried out by eccentrics and allows you to level the output that remains on the rollers as a result of operation, which prolongs the life of the entire structure without loss of print quality.
The 24 volt power supply provides good heating and temperature maintenance for both the bed and the extruder.
The printer is controlled by a push encoder and a 3.
 2" monochrome screen.
 The Ender 3 3D printer comes with a roughened table pad for clothespins.
Creality Ender 3 specifications:
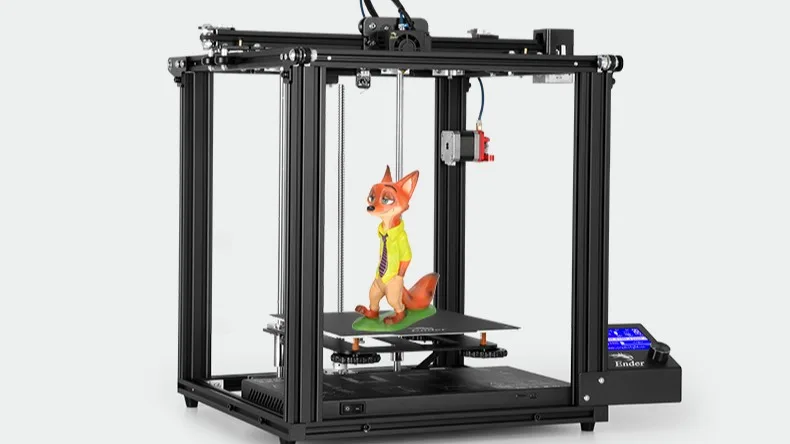
Ender 3 Pro
The Ender 3 Pro 3D Printer is an upgraded version of the Ender 3, what are the changes?
Creality Ender 3 Pro is also available for DIY use
The Ender 3 Pro has a smaller form factor power supply and a reinforced Y-axis on the 40x40mm profile for more table stability, which is a positive affects the quality of 3D printing.
The Ender 3 Pro, unlike the Ender 3, has a magnetic, flexible table pad that allows you to remove printed models without unnecessary labor, by bending which you can easily peel off the model.
Specifications Creality Ender 3 Pro:
Ender 3 v2
.
Ender 3 v2 is supplied with carborundum glass, which has better adhesion of parts to the surface and faster heating.

Screw-on belt tensioners installed, power supply tucked into the base of the printer, and a tool box next to it.
The printer is also controlled by a rotary encoder with a button, and the information is already displayed on a graphic color display.
The Ender 3 v2 has a plastic printhead cover instead of a metal printhead cover with a tighter fit that eliminates the thermal barrier cooling fan. In general, the printer has become more solid both in design and design.
Specifications Creality Ender 3 v2:
As you can see, the Creality Ender 3 v2's characteristics make it suitable for a wide range of applications, from education to small-scale production.
In the modern world, additive technologies have taken a strong position, and if we take a large part, and not the entire area of the real sector of the economy, then the lack of competencies and the use of additive technologies puts the industry one step lower and reduces competitiveness, in comparison with similar areas, already integrating 3D printing into their processes.
Learn more