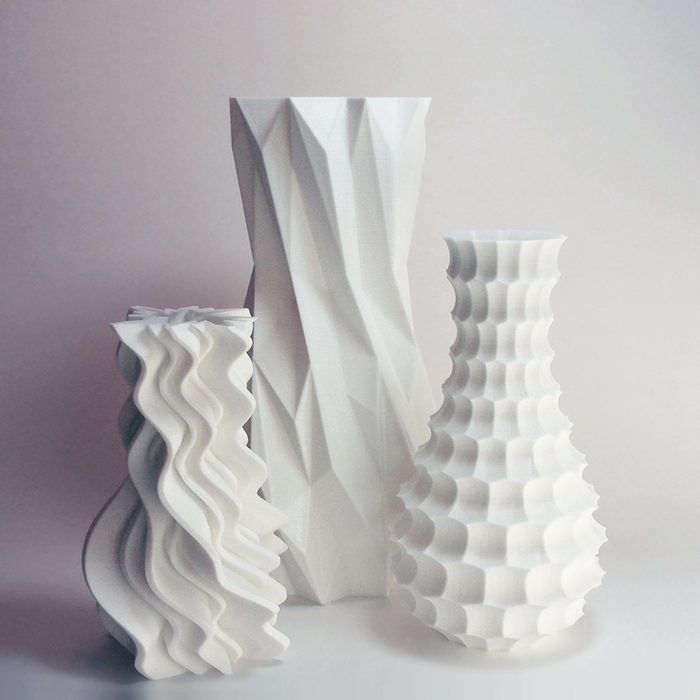
3D printing forms
Types of 3D Printers, Materials, and Applications
Skip to Main Content
3D printing or additive manufacturing (AM) technologies create three-dimensional parts from computer-aided design (CAD) models by successively adding material layer by layer until physical part is created.
While 3D printing technologies have been around since the 1980s, recent advances in machinery, materials, and software have made 3D printing accessible to a wider range of businesses, enabling more and more companies to use tools previously limited to a few high-tech industries.
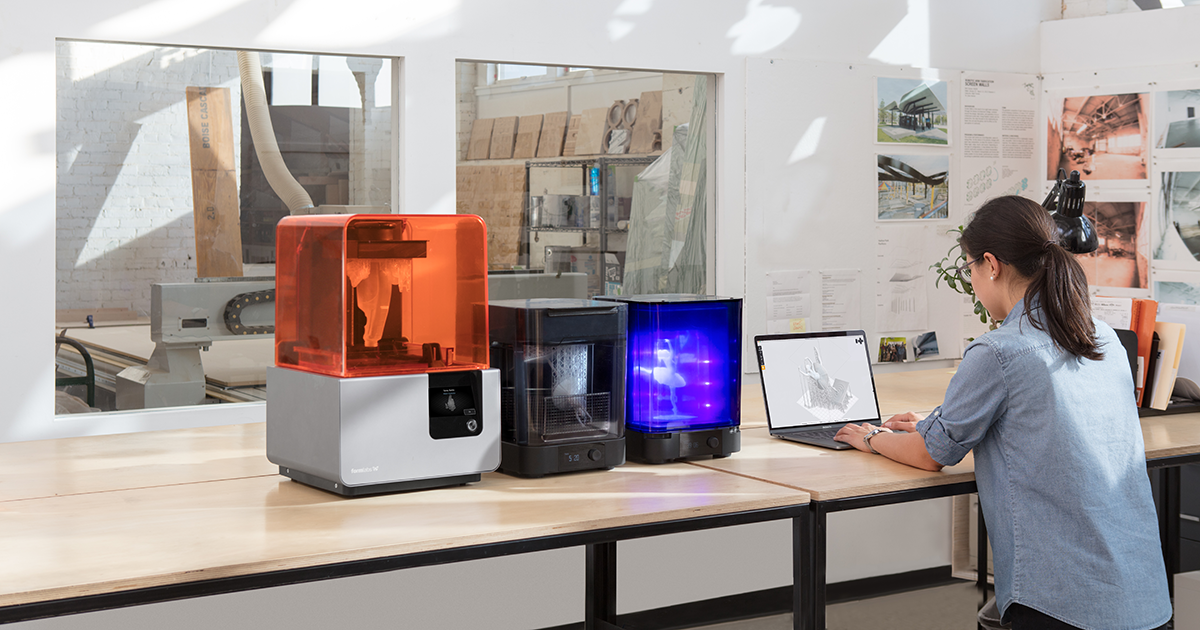
Today, professional, low-cost desktop and benchtop 3D printers accelerate innovation and support businesses in various industries including engineering, manufacturing, dentistry, healthcare, education, entertainment, jewelry, and audiology.
All 3D printing processes start with a CAD model that is sent to software to prepare the design. Depending on the technology, the 3D printer might produce the part layer by layer by solidifying resin or sintering powder. The parts are then removed from the printer and post-processed for the specific application.
See how to go from design to 3D print with the Form 3 SLA 3D printer. This 5-minute video covers the basics of how to use the Form 3, from the software and materials to printing and post-processing.
3D printers create parts from three-dimensional models, the mathematical representations of any three-dimensional surface created using computer-aided design (CAD) software or developed from 3D scan data. The design is then exported as an STL or OBJ file readable by print preparation software.
3D printers include software to specify print settings and slice the digital model into layers that represent horizontal cross-sections of the part. Adjustable printing settings include orientation, support structures (if needed), layer height, and material. Once setup is complete, the software sends the instructions to the printer via a wireless or cable connection.
Some 3D printers use a laser to cure liquid resin into hardened plastic, others fuse small particles of polymer powder at high temperatures to build parts. Most 3D printers can run unattended until the print is complete, and modern systems automatically refill the material required for the parts from cartridges.
With Formlabs 3D printers, an online Dashboard allows you to remotely manage printers, materials, and teams.
Depending on the technology and the material, the printed parts may require rinsing in isopropyl alcohol (IPA) to remove any uncured resin from their surface, post-curing to stabilize mechanical properties, manual work to remove support structures, or cleaning with compressed air or a media blaster to remove excess powder. Some of these processes can be automated with accessories.
3D printed parts can be used directly or post-processed for specific applications and the required finish by machining, priming, painting, fastening or joining. Often, 3D printing also serves as an intermediate step alongside conventional manufacturing methods, such as positives for investment casting jewelry and dental appliances, or molds for custom parts.
The three most established types of 3D printers for plastics parts are stereolithography (SLA), selective laser sintering (SLS), and fused deposition modeling (FDM). Formlabs offers two professional 3D printing technologies, SLA and SLS, bringing these powerful and accessible industrial fabrication tools into the creative hands of professionals around the world.
Stereolithography was the world’s first 3D printing technology, invented in the 1980s, and is still one of the most popular technologies for professionals. SLA 3D printers use a laser to cure liquid resin into hardened plastic in a process called photopolymerization.
SLA resin 3D printers have become vastly popular for their ability to produce high-accuracy, isotropic, and watertight prototypes and parts in a range of advanced materials with fine features and smooth surface finish. SLA resin formulations offer a wide range of optical, mechanical, and thermal properties to match those of standard, engineering, and industrial thermoplastics.
Resin 3D printing a great option for highly detailed prototypes requiring tight tolerances and smooth surfaces, such as molds, patterns, and functional parts. SLA 3D printers are widely used in a range of industries from engineering and product design to manufacturing, dentistry, jewelry, model making, and education.
- Rapid prototyping
- Functional prototyping
- Concept modeling
- Short-run production
- Dental applications
- Jewelry prototyping and casting
Learn More About SLA 3D Printers
Stereolithography (SLA) 3D printing uses a laser to cure liquid photopolymer resin into solid isotropic parts.
SLA parts have sharp edges, a smooth surface finish, and minimal visible layer lines.
Selective laser sintering (SLS) 3D printers use a high-power laser to sinter small particles of polymer powder into a solid structure. The unfused powder supports the part during printing and eliminates the need for dedicated support structures. This makes SLS ideal for complex geometries, including interior features, undercuts, thin walls, and negative features. Parts produced with SLS printing have excellent mechanical characteristics, with strength resembling that of injection-molded parts.
The most common material for selective laser sintering is nylon, a popular engineering thermoplastic with excellent mechanical properties. Nylon is lightweight, strong, and flexible, as well as stable against impact, chemicals, heat, UV light, water, and dirt.
The combination of low cost per part, high productivity, and established materials make SLS a popular choice among engineers for functional prototyping, and a cost-effective alternative to injection molding for limited-run or bridge manufacturing.
- Functional prototyping
- End-use parts
- Short-run, bridge, or custom manufacturing
Learn More About SLS 3D Printers
SLS 3D printers use a high-powered laser to fuse small particles of polymer powder.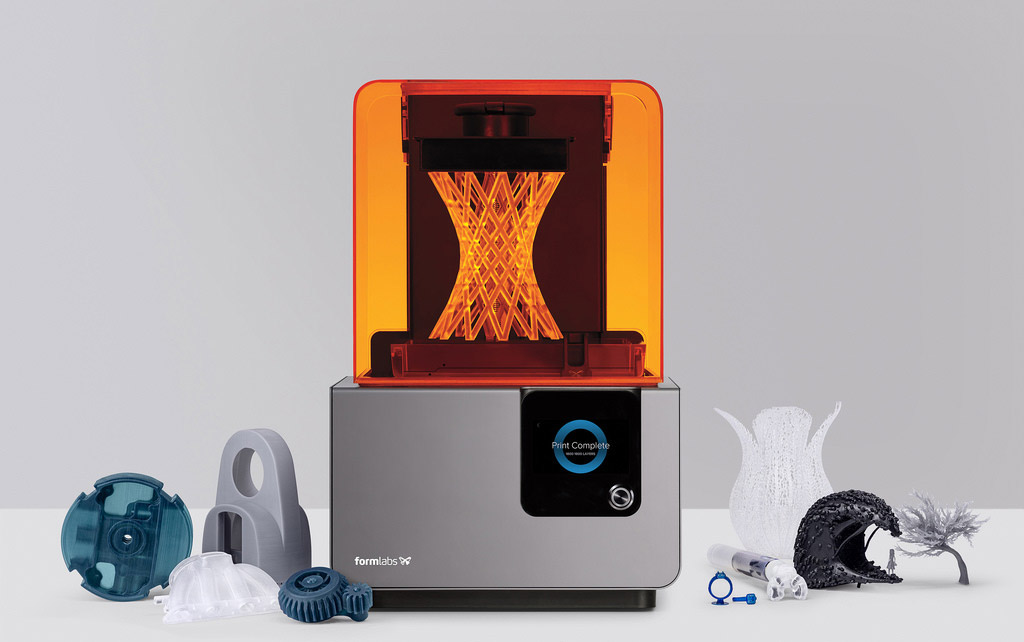
SLS parts have a slightly rough surface finish, but almost no visible layer lines.
Fused deposition modeling (FDM), also known as fused filament fabrication (FFF), is the most widely used type of 3D printing at the consumer level. FDM 3D printers work by extruding thermoplastic filaments, such as ABS (Acrylonitrile Butadiene Styrene), PLA (Polylactic Acid), through a heated nozzle, melting the material and applying the plastic layer by layer to a build platform. Each layer is laid down one at a time until the part is complete.
FDM 3D printers are well-suited for basic proof-of-concept models, as well as quick and low-cost prototyping of simple parts, such as parts that might typically be machined. However, FDM has the lowest resolution and accuracy when compared to SLA or SLS and is not the best option for printing complex designs or parts with intricate features. Higher-quality finishes may be obtained through chemical and mechanical polishing processes. Industrial FDM 3D printers use soluble supports to mitigate some of these issues and offer a wider range of engineering thermoplastics, but they also come at a steep price.
- Basic proof-of-concept models
- Simple prototyping
Learn More About FDM 3D Printers
FDM 3D printers build parts by melting and extruding thermoplastic filament, which a printer nozzle deposits layer by layer in the build area.
FDM parts tend to have visible layer lines and might show inaccuracies around complex features.
Having trouble finding the best 3D printing process for your needs? In this video guide, we compare FDM, SLA, and SLS technologies, the most popular types of 3D printers, across the most important buying considerations.
Each 3D printing process has its own benefits and limitations that make them more suitable for certain applications. This video compares the functional and visual characteristics of FDM, SLA, and SLS printers 3D printers to help you identify the solution that best matches your requirements.
Do you need custom parts or prototypes fast? Compared to outsourcing to service providers or using traditional tools like machining, having a 3D printer in-house can save weeks of lead time. In this video, we compare the speed of FDM, SLA, and SLS 3D printing processes.
Comparing the cost of different 3D printers goes beyond sticker prices—these won’t tell you the full story of how much a 3D printed part will cost. Learn the three factors you need to consider for cost and how they compare across FDM, SLA, and SLS 3D printing technologies.
As additive manufacturing processes build objects by adding material layer by layer, they offer a unique set of advantages over traditional subtractive and formative manufacturing processes.
With traditional manufacturing processes, it can take weeks or months to receive a part. 3D printing turns CAD models into physical parts within a few hours, producing parts and assemblies from one-off concept models to functional prototypes and even small production runs for testing. This allows designers and engineers to develop ideas faster, and helps companies to bring products more quickly to the market.
Engineers at the AMRC turned to 3D printing to rapidly produce 500 high-precision drilling caps used in drilling trials for Airbus, cutting the lead time from weeks to only three days.
With 3D printing, there’s no need for the costly tooling and setup associated with injection molding or machining; the same equipment can be used from prototyping to production to create parts with different geometries. As 3D printing becomes increasingly capable of producing functional end-use parts, it can complement or replace traditional manufacturing methods for a growing range of applications in low- to mid-volumes.
Pankl Racing Systems substituted machined jigs and fixtures with 3D printed parts, decreasing costs by 80-90 percent that resulted in $150,000 in savings.
From shoes to clothes and bicycles, we’re surrounded by products made in limited, uniform sizes as businesses strive to standardize products to make them economical to manufacture. With 3D printing, only the digital design needs to be changed to tailor each product to the customer without additional tooling costs. This transformation first started to gain a foothold in industries where custom fit is essential, such medicine and dentistry, but as 3D printing becomes more affordable, it’s increasingly being used to mass customize consumer products.
Gillette's Razor Maker™ gives consumers the power to create and order customized 3D printed razor handles, with the choice of 48 different designs (and counting), a variety of colors, and the option to add custom text.
3D printing can create complex shapes and parts, such as overhangs, microchannels, and organic shapes, that would be costly or even impossible to produce with traditional manufacturing methods. This provides the opportunity to consolidate assemblies into less individual parts to reduce weight, alleviate weak joints, and cut down on assembly time, unleashing new possibilities for design and engineering.
Nervous System launched the first-ever 3D printed ceramic jewelry line, consisting of intricate designs that would be impossible to manufacture using any other ceramic technique.
Product development is an iterative process that requires multiple rounds of testing, evaluation, and refinement. Finding and fixing design flaws early can help companies avoid costly revisions and tooling changes down the road. With 3D printing, engineers can thoroughly test prototypes that look and perform like final products, reducing the risks of usability and manufacturability issues before moving into production.
The developers of Plaato, an optically clear airlock for homebrewing, 3D printed 1,000 prototypes to fine tune their design before investing in expensive tooling.
3D printing accelerates innovation and supports businesses across a wide range of industries, including engineering, manufacturing, dentistry, healthcare, education, entertainment, jewelry, audiology, and more.
Rapid prototyping with 3D printing empowers engineers and product designers to turn ideas into realistic proofs of concept, advance these concepts to high-fidelity prototypes that look and work like final products, and guide products through a series of validation stages toward mass production.
Applications:
- Rapid prototyping
- Communication models
- Manufacturing validation
Learn More
Manufacturers automate production processes and streamline workflows by prototyping tooling and directly 3D printing custom tools, molds, and manufacturing aids at far lower costs and lead times than with traditional manufacturing. This reduces manufacturing costs and defects, increases quality, speeds up assembly, and maximizes labor effectiveness.
Applications:
- Jig and fixtures
- Tooling
- Molding (injection molding, thermoforming, silicone molding, overmolding)
- Metal casting
- Short run production
- Mass customization
Learn More
3D printers are multifunctional tools for immersive learning and advanced research. They can encourage creativity and expose students to professional-level technology while supporting STEAM curricula across science, engineering, art, and design.
Applications:
- Models for STEAM curricula
- Fab labs and makerspaces
- Custom research setups
Learn More
Affordable, professional-grade desktop 3D printing helps doctors deliver treatments and devices customized to better serve each unique individual, opening the door to high-impact medical applications while saving organizations significant time and costs from the lab to the operating room.
Applications:
- Anatomical models for surgical planning
- Medical devices and surgical instruments
- Insoles and orthotics
Learn More
High definition physical models are widely used in sculpting, character modeling, and prop making. 3D printed parts have starred in stop-motion films, video games, bespoke costumes, and even special effects for blockbuster movies.
Applications:
- Hyper-realistic sculptures
- Character models
- Props
Learn More
Jewelry professionals use CAD and 3D printing to rapidly prototype designs, fit clients, and produce large batches of ready-to-cast pieces. Digital tools allow for the creation of consistent, sharply detailed pieces without the tediousness and variability of wax carving.
Applications:
- Lost-wax casting (investment casting)
- Fitting pieces
- Master patterns for rubber molding
Learn More
Hearing specialists and ear mold labs use digital workflows and 3D printing to manufacture higher quality custom ear products more consistently, and at higher volumes for applications like behind-the-ear hearing aids, hearing protection, and custom earplugs and earbuds.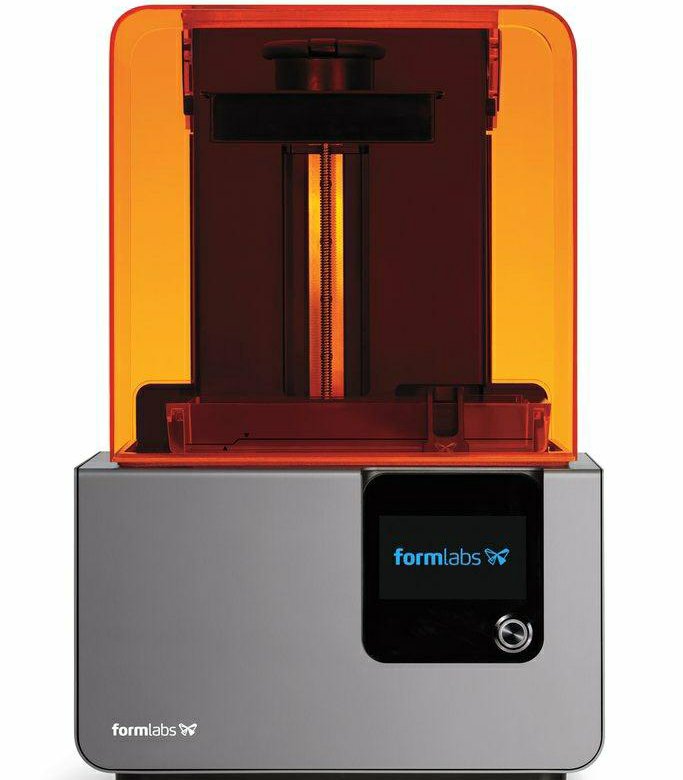
Applications:
- Soft silicone ear molds
- Custom earbuds
Learn More
The market for 3D printing materials is wide and ever-growing, with printers for everything from plastics to metals, and even food and live tissue in development. Formlabs offers the following range of photopolymer materials for the desktop.
Standard 3D printing materials provide high resolution, fine features, and a smooth surface finish ideal for rapid prototyping, product development, and general modeling applications.
These materials are available in Black, White, and Grey with a matte finish and opaque appearance, Clear for any parts requiring translucency, and as a Color Kit to match almost any custom color.
Explore Standard Materials
3D printing materials for engineering, manufacturing, and product design are formulated to provide advanced functionality, withstand extensive testing, perform under stress, and remain stable over time.
Engineering materials are ideal for 3D printing strong, precise concept models and prototypes to rapidly iterating through designs, assess form and fit, and optimize manufacturing processes.
Explore Engineering Materials
Medical resins empower hospitals to create patient-specific parts in a day at the point of care and support R&D for medical devices. These resins are formulated for 3D printing anatomical models, medical device and device components, and surgical planning and implant sizing tools.
Explore Jewelry Materials
Jewelry resins are formulated to capture breathtaking detail and create custom jewelry cost-effectively. These resins are ideal for jewelry prototyping and casting jewelry, as well as vulcanized rubber and RTV molding.
Explore Jewelry Materials
Specialty Resins push the limits of 3D printing, featuring advanced materials with unique mechanical properties that expand what’s possible with in-house fabrication on our stereolithography 3D printers.
Explore Specialty Materials
In recent years, high-resolution industrial 3D printers have become more affordable, intuitive, and reliable. As a result, the technology is now accessible to more businesses. Read our in-depth guide about 3D printer costs, or try our interactive tool to see if this technology makes economic sense your business.
Calculate Your Savings
New to 3D printing? Explore our guides to learn about the key terms and specific characteristics of 3D printing to find the best solution for your business.
For further questions,
Explore 3D Printing Resources
Types of 3D Printers: Complete Guide
3D Insider is ad supported and earns money from clicks, commissions from sales, and other ways.
3D printing is the latest thing to excite anyone who loves easy-to-use interactive technology. Engineers and scientists have actually been working with this amazing equipment since way back in 1983. That’s the time when an American engineer named Charles (Chuck) Hull invented the first ever 3D printer. He called it his SLA machine, which stands for stereolithography apparatus.
Don’t Miss: Best 3D Printers of 2018.
Some in the industry refer to part of the 3D printing process as Additive Manufacturing (AM), but we’ll use its practical name here—3D Printing. This will keep the guide consistent and easy to read.
The Reasons for Several Types of 3D Printer
The reasons there are different types of 3D printers and printing processes are similar to that of the 2D printers we’re so familiar with. It all comes down to the following six considerations:
- Printer cost
- Print quality
- Print speed
- Printer capability
- Practicality
- User expectations
Some printers only print text—others text and graphics. The technologies and materials used also vary, and the way the machine extrudes ink to paper. 3D printers are even smarter. And like their 2D counterparts, they also offer a range of options including quality, materials, and price.
The 3D Printing Process in a Nutshell
The 3D printing process is no longer difficult for the home user once you grasp the basic principles. OK, so printers, printing materials, printed objects, and 3D printing software can all vary. Yet despite this, the process from design to end product follows a similar path. We’ve covered these processes in some detail in another guide, but here’s how it looks in a nutshell:
- User has access to a 3D modeling application or a 3D scanner
- User creates a virtual design (3D model) of the object they want to print in 3D
- User typically saves their design as a Computer Aided Design file, or CAD for short
- User slices their CAD file before sending it to the printer
- User uploads the sliced CAD file to the 3D printer
- Printer reads each slice in the 2D file to create the three dimensional object
Who Is this Guide For?
This simple guide is for those who want to understand the differences between different 3D printing types. It’s also for hobbyists, schools, libraries, and anyone else who wants to invest in this amazing technology. If you know nothing at all about 3D printing—but would like to learn—this guide is for YOU. Don’t worry, we’re not going to overwhelm you or blind you with science.
By the end of this guide, you’ll have a good, basic understanding of all the 3D printer types available today. If you’re thinking about investing in a 3D printer, we’ve got you covered. You’re going to be in a much better position to make a well-informed decision before parting with your hard earned cash.
The Focus of this Guide
This guide focuses on the most common types of 3D printers in use today. We’ll introduce each of these machines by their long names first. After that we’ll use the appropriate acronyms to keep the reading easy. For example, stereolithography becomes SLA. And Laminated Object Manufacturing becomes LOM, as two examples.
Here are the nine 3D printer types you will learn about:
- Stereolithography (SLA)
- Digital Light Processing (DLP)
- Fused deposition Modeling (FDM)
- Selective Laser Sintering (SLS)
- Selective Laser Melting (SLM)
- Electronic Beam Melting (EBM)
- Laminated Object Manufacturing (LOM)
- Binder Jetting (BJ)
- Material Jetting (MJ)
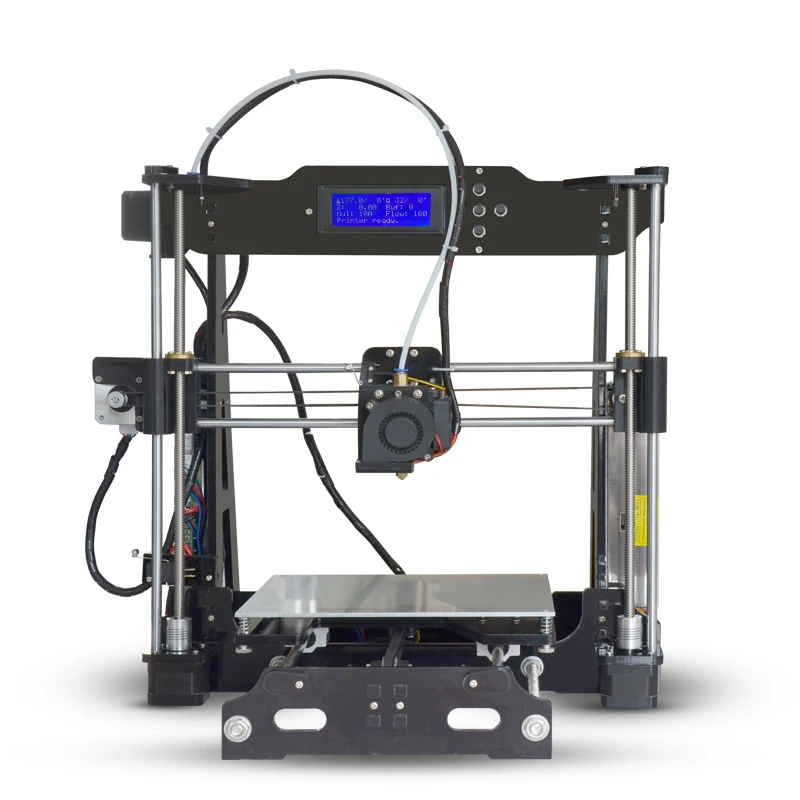
The Basic Components of a 3D Printer
Before we begin to look at the various 3D printer types and printing practices, we’ll take a moment to list the main components of these machines.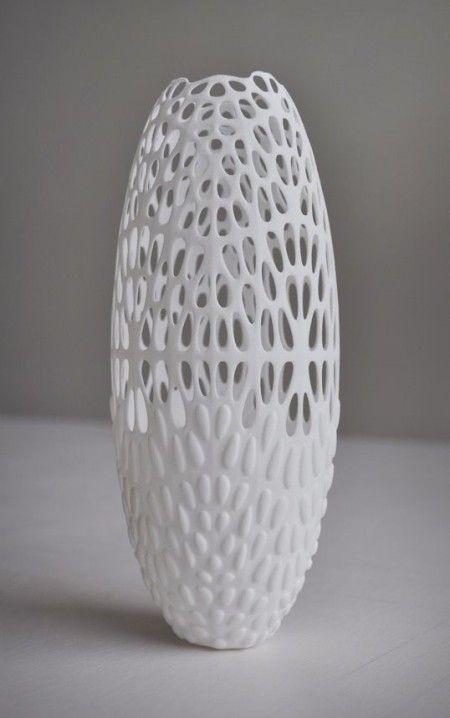 There are many parts, and each one plays a crucial role in the printing process. We’re not going to get too technical here. It’s still important, however, to know what the main components are. This will help you to better understand the printing processes as you read through the various sections.
The main components, and their use, in a 3D printer are:
- 3D Printer Frame: Holds the machine together
- 3D Printer Head movement mechanics: moves relative to the print bed in all directions
- 3D Printer Head: Nozzle that deposits filament or applies colors and liquid binder
- 3D Build Platform or Build Bed: The part of the printer where the object is printed
- 3D Printer Stepper Motors (at least 4): Used for precise positioning and speed control
- 3D Printer Electronics: Used to drive motors, heat the extruder and much more
- 3D Printer Firmware: Permanent software used to control every aspect of a 3D printer
- 3D Printer Software: Not part of the actual printer but still needed for the printing process
You can read a more in-depth explanation of the 3D printer components here.
3D Support Substances
Many 3D printers use various substances that support complex geometries. Support materials are as essential to the 3D printing process as the actual base materials. Without support during the build there would not be a successful outcome. These materials offer a better solution than the old physical support structures of the past. Once printing is complete, the user simply removes any support substance from the finished part.
Some 3D technologies use support materials that dissolve when placed into a chemical bath. Others will use the surrounding powder as a way to keep everything in place. And there are those which use a squidgy, gel-like substance. You will read about which printing process uses what kind of support materials in this guide.
1) Stereolithography (SLA) Technology
SLA is a fast prototyping process. Those who use this technology are serious about accuracy and precision. It can produce objects from 3D CAD data (computer-generated) files in just a few hours. This is a 3D printing process that’s popular for its fine details and exactness. Machines that use this technology produce unique models, patterns, prototypes, and various production parts. They do this by converting liquid photopolymers (a special type of plastic) into solid 3D objects, one layer at a time. The plastic is first heated to turn it into a semi-liquid form, and then it hardens on contact. The printer constructs each of these layers using an ultra violet laser, directed by X and Y scanning mirrors. Just before each print cycle, a recoater blade moves across the surface to ensure each thin layer of resin spreads evenly across the object. The print cycle continues in this way, building 3D objects from the bottom up.
Once completed, someone takes the 3D object from the printer and detaches it carefully from the platform. The 3D part will usually have a chemical bath to remove any excess resin. It’s also common practice to post-cure the object in an ultra violet oven. What this does is render the finished item stronger and more stable. Depending on the part, it may then go through a hand sanding process and have some professional painting done. SLA printing has become a favored economical choice for a wide variety of industries. Some of these include automotive, medical, aerospace, entertainment, and also to create various consumer products.
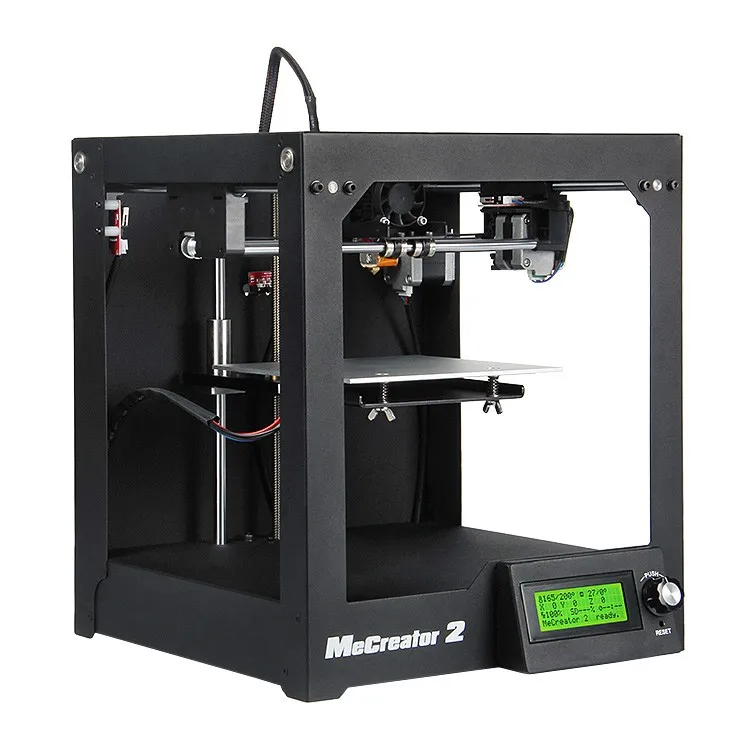
Some SLA printers include: 3D printer Pegasus Touch SLA technology, XYZprinting Nobel 1.0 SLA 3D Printer, SUNLU SLA Desktop 3D Printer, Form 1+ SLA 3D Printer.
2) Digital Light Processing (DLP) Technology
DLP is the oldest of the 3D printing technologies, created by a man called Larry Hornbeck back in 1987. It’s similar to SLA (see above), given that it also works with photopolymers. The liquid plastic resin used by the printer goes into a translucent resin container. There is, however, one major difference between the two, which is the source of light. While SLA uses ultra violet light, DLP uses a more traditional light source, usually arc lamps. This process results in pretty impressive printing speeds. When there’s plenty of light, the resin is quick to harden (we’re talking seconds). Compared to SLA 3D printing, DLP achieves quicker print times for most parts. The reason it’s faster is because it exposes entire layers at once. With SLA printing, a laser has to draw out each of these layers, and this takes time.
Another plus point for DLP printing technology is that it is robust and produces high resolution models every time. It’s also economical with the ability to use cheaper materials for even complex and detailed objects. This is something that not only reduces waste, but also keeps printing costs low.
Some DLP printers include: Makex M-one Desktop DLP 3d Printer, Desktop UV DLP, LumiPocket – Miniature DLP, Solus DLP 3D Printer
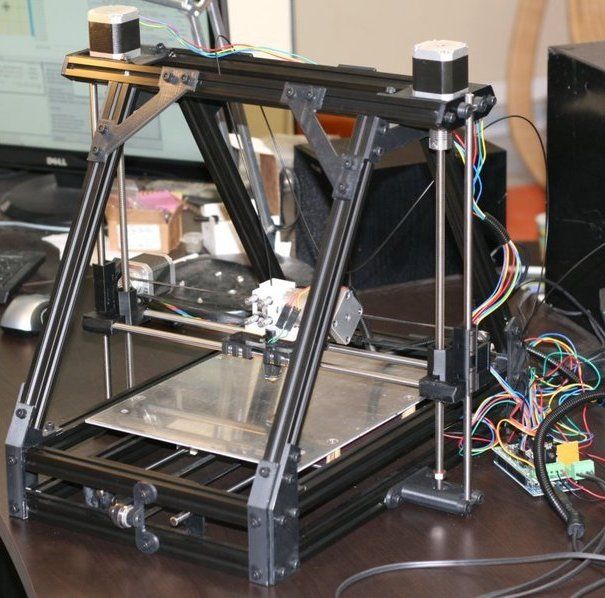
3) Fused Deposition Modeling (FDM) Technology
FDM is a 3D printing process developed by Scott Crump, and then implemented by Stratasys Ltd. , in the 1980s. It uses production grade thermal plastic materials to print its 3D objects. It’s popular for producing functional prototypes, concept models, and manufacturing aids. It’s a technology that can create accurate details and boasts an exceptional strength to weight ratio.
Before the FDM printing process begins, the user has to slice the 3D CAD data (the 3D model) into multiple layers using special software. The sliced CAD data goes to the printer which then builds the object layer at a time on the build platform. It does this simply by heating and then extruding the thermoplastic filament through the nozzle and onto the base. The printer can also extrude various support materials as well as the thermoplastic. For example, as a way to support upper layers, the printer can add special support material underneath, which then dissolves after the printing process. As with all 3D printers, the time it takes to print all depends on the objects size and its complexity.
Like many other 3D technologies, the finished object needs cleaning. Raw FDM parts can show fairly visible layer-lines on some objects. These will obviously need hand sanding and finishing after printing. This is the only way to get a smooth, end product with an even surface. FDM finished objects are both functional and durable. This makes it a popular process for use in a wide range of industries, including for mechanical engineering and parts manufacturers. BMW uses FDM 3D printing, as does the well-known food company Nestle, to name just a couple.
Some FDM printers include: JGAURORA 3d Desktop FDM Printer, ALUNAR High Resolution Desktop FDM 3D Printer, Original Prusa i3 MK2, PowerSpec 3D Pro, Lulzbot Mini, FlashForge Creator Pro.
4) Selective Laser Sintering (SLS) Technology
An American businessman, inventor, and teacher named Dr. Carl Deckard developed and patented SLS technology in the mid-1980s. It’s a 3D printing technique that uses high power CO2 lasers to fuse particles together. The laser sinters powdered metal materials (though it can utilize other materials too, like white nylon powder, ceramics and even glass). Here’s how it works:
The build platform, or bed, lowers incrementally with each successive laser scan. It’s a process that repeats one layer at a time until it reaches the object’s height. There is un-sintered support from other powders during the build process that surround and protect the model. This means the 3D objects don’t need other support structures during the build. Someone will remove the un-sintered powders manually after printing. SLS produces durable, high precision parts, and it can use a wide range of materials. It’s a perfect technology for fully-functional, end-use parts and prototypes. SLS is quite similar to SLA technology with regards to speed and quality. The main difference is with the materials, as SLS uses powdered substances, whereas SLA uses liquid resins. It’s this wide variety of available materials that makes SLA technology so popular for printing customized objects.
Some SLA printers include: XYZprinting Nobel 1.0 SLA 3D Printer, SUNLU SLA Desktop 3D Printer, Formlabs Form 2, 3D Systems ProJet 1200, DWS Lab Xfab.
5) Selective Laser Melting (SLM) Technology
Image from ProtoshapeSLM made its debut appearance back in 1995. It was part of a German research project at the Fraunhofer Institute ILT, located in the country’s most western city of Aachen. Like SLA (see above), SLM also uses a high-powered laser beam to form 3D parts. During the printing process, the laser beam melts and fuses various metallic powders together. The simple way to look at this is to break down the basic process like thus:
Powdered material + heat + precision + layered structure = a perfect 3D object.
As the laser beam hits a thin layer of the material, it selectively joins or welds the particles together. After one complete print cycle, the printer adds a new layer of powered material to the previous one. The object then lowers by the precise amount of the thickness of a single layer. When the print process is complete, someone will manually remove the unused powder from the object. The main difference between SLM and SLS is that SLM completely melts the powder, whereas SLS only partly melts it (sinters). In general, SLM end products tend to be stronger as they have fewer or no voids.
A common use for SLM printing is with 3D parts that have complex structures, geometries and thin walls. The aerospace industry uses SLM 3D printing in some of its pioneering projects. These are typically those which focus on precise, durable, lightweight parts. It’s a costly technology, though, and so not practical or popular with home users for that reason. SLM is quite widespread now among the aerospace and medical orthopedics industries. Those who invest in SLM 3D printers include researchers, universities, and metal powder developers. There are others too, who are keen to explore the full range and future potential of metal additive manufacturing in particular.
Some SLM industrial printers include: SLM Solutions SLM 125, 280, and 500, Realizer SLM 125, Optomec LENS 450, others.
6) Electron Beam Melting (EBM) Technology
A Swedish company called Arcam AB founded EBM® in 1997.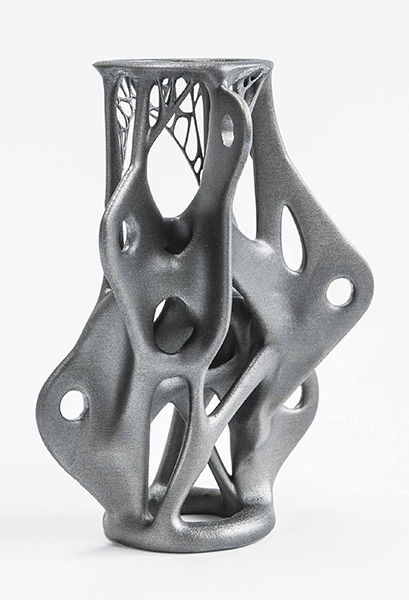 This is a 3D printing technology similar to SLM (see above), in that it uses a powder bed fusion technique. The difference between the two is the power source. The SLM approach above uses high-powered laser in a chamber of noble, or inert gas. EBM, on the other hand, uses a powerful electron beam in a vacuum. Aside from the power source, the remaining processes between the two are quite similar. EBM’s main use is to 3D print metal parts. Its main characteristics are its ability to achieve complex geometries with freedom of design. EBM also produces parts that are incredibly strong and dense in their makeup.
Here are a few of EBM’s other impressive features:
- Doesn’t need extra auxiliary equipment for the 3D printing process
- Has increased efficiency using raw materials
- Lessens lead times resulting in parts getting to market faster
- Can create fully functional, durable parts on demand for wide-ranging industries
The printing process starts like most others in that the user has to first create a 3D model, or computer-generated digital file.
An industrial EBM printer includes: Arcam Q20
7) Laminated Object Manufacturing (LOM) Technology
A Californian company called Helisys Inc. (now Cubic Technologies), first developed LOM as an effective and affordable method of 3D printing. A US design engineer called Michael Feygin—a pioneer in 3D printed technologies—originally patented LOM.
LOM is a rapid prototyping system that works by fusing or laminating layers of plastic or paper using both heat and pressure. A computer-controlled blade or laser cuts the object to the desired shape. Once each printed layer is complete, the platform moves down by about 1/16th of an inch, ready for the next layer. The printer then pulls a new sheet of material across the substrate where it’s adhered by a heated roller. This basic process continues over and over until the 3D part is complete.
According to Wikipedia, the LOM printing works as follows:
- Sheet is adhered to a substrate with a heated roller.
- Laser traces desired dimensions of prototype.
- Laser cross hatches non-part area to facilitate waste removal.
- Platform with completed layer moves down out of the way.
- Fresh sheet of material is rolled into position.
- Platform downs into new position to receive next layer.
- The process is repeated.
It might not be the most popular method of 3D printing today, but LOM remains one of the fastest nonetheless. It’s also perhaps the most affordable method for creating 3D prototypes. The reason for this is because of the low cost of materials used (papers and plastics). It’s also a process that can create fairly large 3D printed objects. Those who continue to use LOM printers today include architects, artists, and product developers.
One popular LOM printer is: The Mcor Matrix
8) Binder Jetting (BJ) Technology
Image from Andrew WalravenThe Massachusetts Institute of Technology (MIT) first invented BJ 3D printing.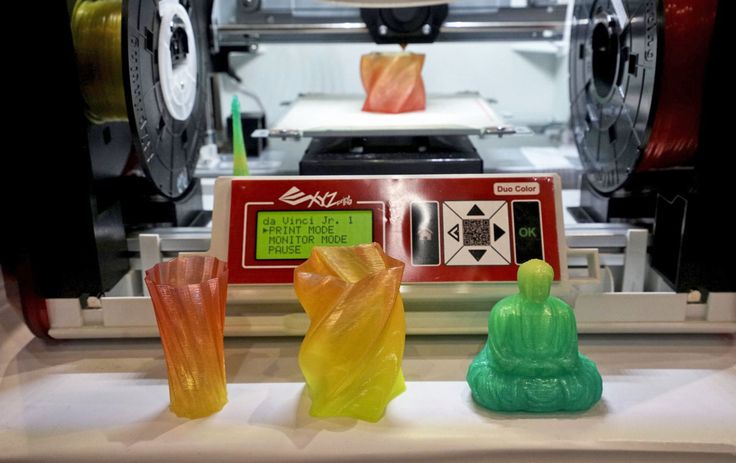 You may also hear this technology referred to in other names, including:
- Powder bed printing
- Inkjet 3D printing
- Drop-on-powder
- Binder jetting (BJ). This is the most popular name and the one we’ll use to refer to it.
BJ is a 3D printing process that uses two types of materials to build objects: a powder-based material (usually gypsum) and a bonding agent. As the name suggests, the “bonding” agent acts as a strong adhesive to attach (bond) the powder layers together. The printer nozzles extrude the binder in liquid form similar to a regular 2D inkjet printer. After completing each layer, the build plate lowers slightly to allow for the next one. This process repeats until the object reaches its required height.
The four popular materials used in BJ printing include:
- Ceramics
- Metals
- Sand
- Plastics
It’s not possible to get super high-resolution or overly rugged 3D objects with BJ printing, but there are other advantages. For example, these printers allow you to print parts in full color. To do this, you simply add color pigments to the binder, which typically include black, white, cyan, yellow, and magenta. This technology is still advancing, so expect more great things to come in the future. At the time of writing, some applications of BJ 3D printing include rapid prototyping, and various uses in the aerospace, automotive, and medical industries.
Some BJ printers include: Addwii Unveils The X1, ExOne R2, ZCorp Spectrum z510
9) Material Jetting (MJ) Polyjet and Wax Casting Technology
You will also hear Material Jetting referred to as wax casting. Unlike other 3D printing technologies, there isn’t a single inventor for MJ. In fact, up until recent times it’s been more of a technique than an actual printing process. It’s something jewelers have used for centuries. Wax casting has been a traditional process where the user produces high-quality, customizable jewelry.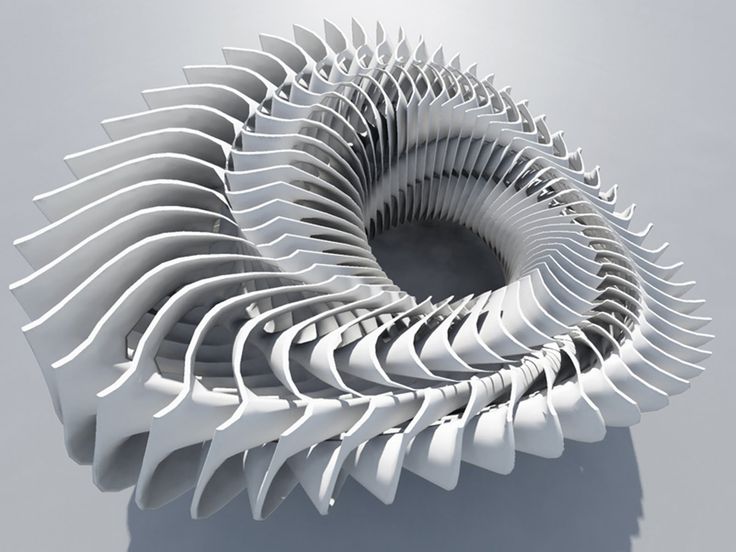 The reason it gets a mention here is because of the introduction of 3D printing. Thanks to the arrival of this technology, wax casting is now an automated process. Today, MJ 3D printers produce high-resolution parts, mainly for the dental and Jewelry industries,
For jewelers who want to experiment with various casts—as most jewelers do—MJ is now their leading 3D technology. At the time of writing, there are a few high-quality professional wax 3D printers on the market. Here’s how they work:
Once the 3D model (CAD file) is uploaded to the printer, it’s all systems go. The printer adds molten (heated) wax to the aluminum build platform in controlled layers. It achieves this using nozzles that sweep evenly across the build area. As soon as the heated material lands on the build plate it begins to cool down and solidify (UV light helps to cure the layers). As the 3D part builds up, a gel-like material helps to support the printing process of more complex geometries. Like all support materials in 3D printing, it’s easy to remove it afterward, either by hand or by using powerful water jets.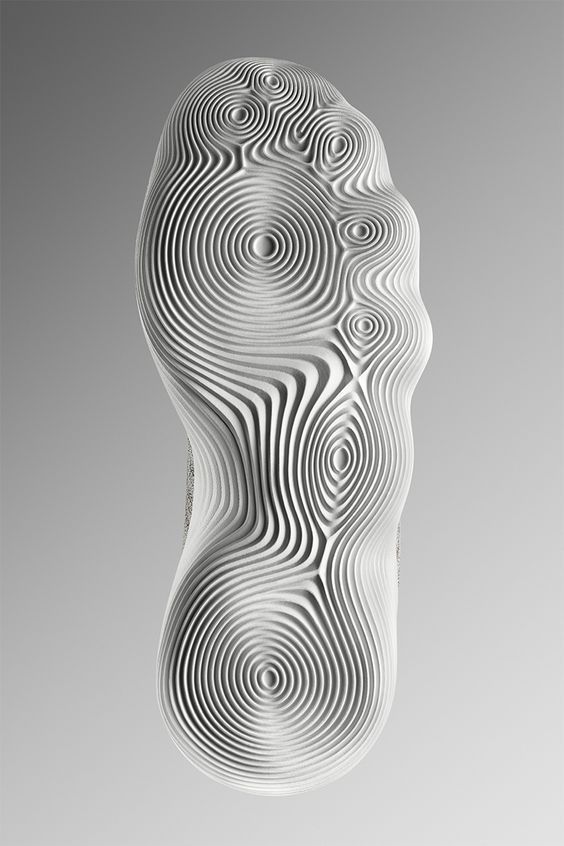 Once the part is complete you can use it right away, no further post-curing necessary.
There are also Polyjet MJ 3D printers, which use photopolymer-resins rather than synthetic waxes. Polyjet technology also offers very good resolution. Unlike digital wax printers, people use Polyjet devices to create parts for a wide range of industries.
Some MJ printers include: ABS 3D printer, PLA 3D printer (large format), HP Multi Jet Fusion
Summing Up
3D printers and print technology is advancing all the time. As it does, prices will continue to fall as the devices and processes become ever more impressive. If you’ve read this guide from top to bottom, you will now have a good basic understanding of the different 3D printers and how they work. You will also know of the various materials printers use and the industries they support. And if you need a refresher, you can simply revisit any section of this guide at any time.
No Printer No Problem
Remember too, you don’t have to own a 3D printer to learn the technology or to print in 3D.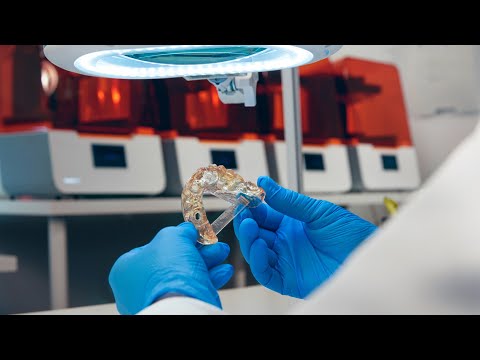 There are plenty of free web-based 3D printing design & modeling software programs to choose from. Once you have your 3D design, you are good to go. You should be able to find someone in your local area with a 3D printer who will print your project for a nominal fee. Check out the schools, libraries or small startups at local co-working centers. Failing that, submit your 3D digital file online and let one of the 3D services print your model.
Warning; 3D printers should never be left unattended. They can pose a firesafety hazard.
3D printing mold making
Desktop 3D printing molding allows engineers and designers to get more functionality out of a 3D printer beyond prototyping. Molding opens up a world of production materials and provides the opportunity to produce small batches and sample test molds before using expensive
tools.
This booklet covers the following three mold making strategies: injection molding, high temperature molding and injection molded elastomers.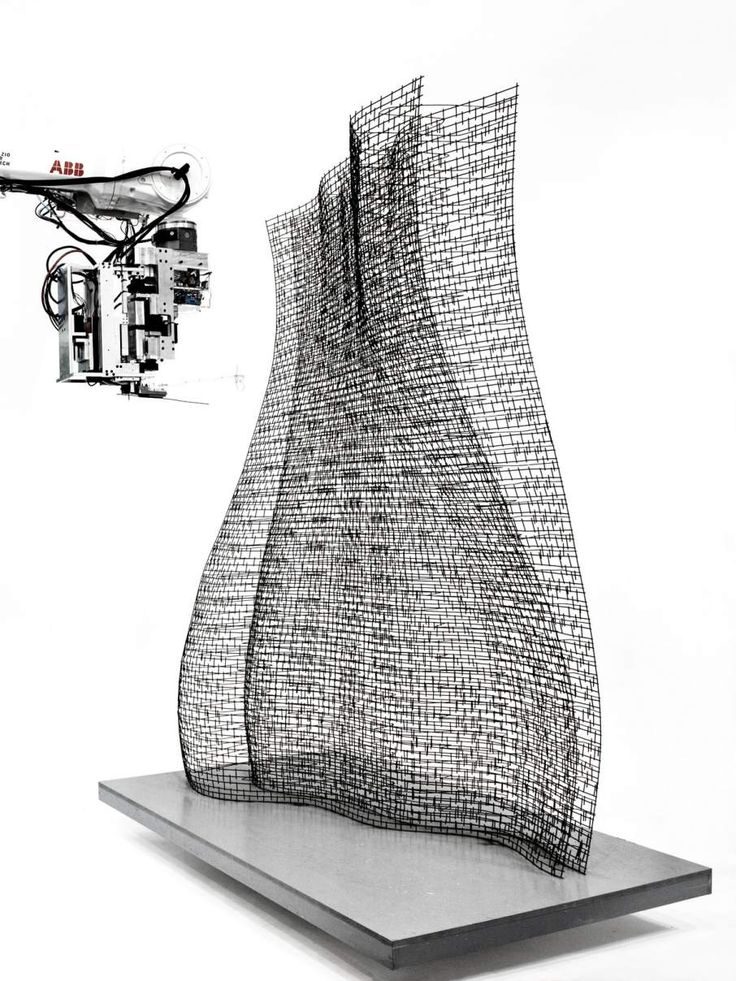 Typically, molds are made from Formlabs clear resin, which is preferred for its transparency, although any standard resin can be used, and high temperature resin is ideal for processes with high temperature requirements. It should be noted that these processes are best suited for stereolithographic 3D printing (SLA) because the printed parts are isotropic and waterproof.
Prototyping and small-scale production with 3D printing tools
| Process | Equipment | Run time | Material cost (for example: 300 ml/cm3) |
| Do-it-yourself mold making and parts making | Mold 2 and injection molding machine | 5 to 24 hours (form print time) | Approximately $50 for High Temperature Resin |
| Outsourced SLA Form | injection molding machine | 3-5 days | Approximately $700 for back office printing on industrial SLAs |
| Outsourced metal mold | injection molding machine | 1-2 weeks | Approximately US$6,400 for office desk, aluminum finish |
| Outsourced mold Creation and production | no - full outsourcing | 1-3 weeks | $4,000 to $15,000 depending on volume and materials |
Silicone molding and some desktop molds are available using Formlabs Standard Resins High Temp, which has the highest HDT at 0.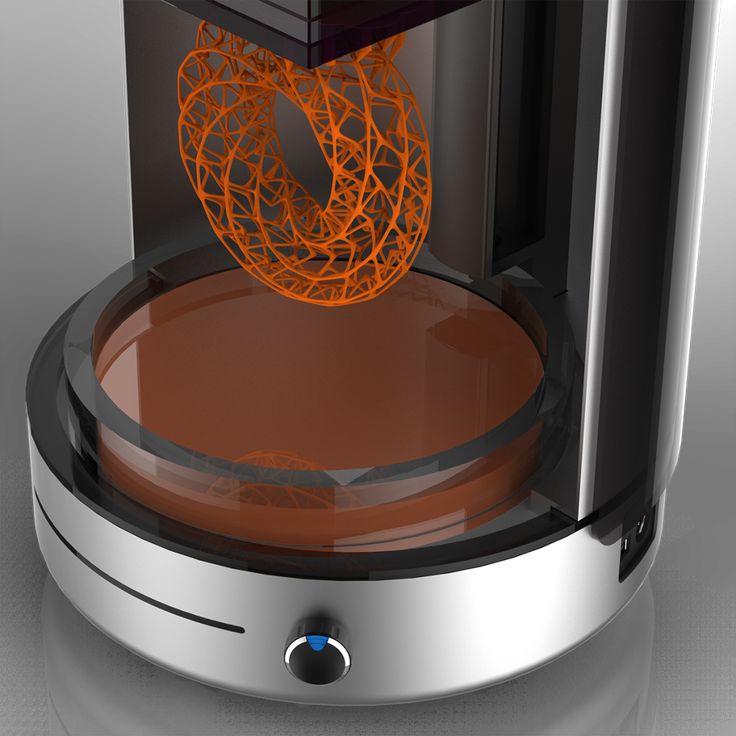 45 MPa for any 3D printed materials currently on the market and allows print parts that can be used for high temperature forming such as thermoforming and injection molding of materials with higher melt temperatures
Injection molding
High-resolution SLA 3D printing on the Form 2 can be used to quickly prototype inexpensive injection molds that can be used to make real parts from a wide variety of
thermoplastic materials. Injection molds can be used to test mold designs prior to metal tooling or to produce low-volume parts
3D Printed Injection Molding covers injection molding using Formlabs clear resin printed molds. Following the release of Formlabs High Temperature Resin, designed to achieve higher heat resistance and stiffness, the booklet has been updated to describe the benefits of High Temperature Resin plates that are less likely to break due to thermal shock or temperature-related deformation
USB Device Enclosure Mold, 3D Printed on Form 2 High Temperature Resin
This mold contains a core, a cavity, and two "gates" leading to the two halves of the enclosure.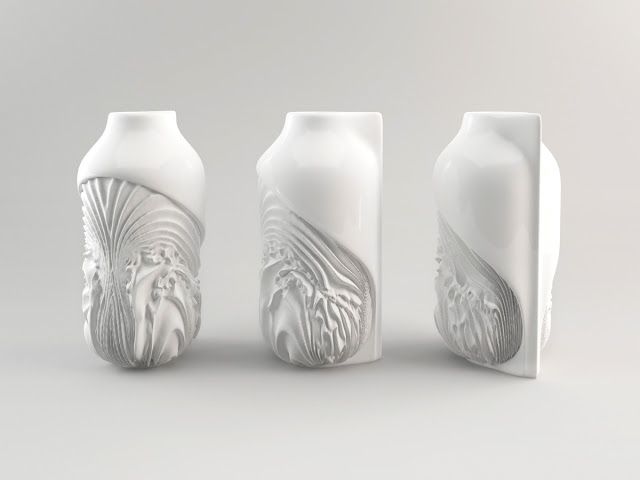 High temperature resin molds can be used to mold a wide range of thermoplastics without thermal stress or temperature-related deformation
Formlabs High Temperature Resin can be used to injection mold a wide range of plastics.
3D printed mold tools reproduce the exact quality of the SLA print finish on the Form 2. Forms can be printed at 100 microns for faster prototyping or the recommended 50 microns for fine detail and smoothness
electronics molded in HDPE with a High Temp tool.
This shape of the USB case has been adjusted over three iterations to remove cavities, entrapped air, and partial shrinkage. Total cost of materials for prototyping this high temperature resin mold tool: $25
Thermoforms
Form 2 3D printed thermoformed dies are a fast and efficient way to create high quality vacuum formed parts for low volume production. Printed thermoformed dies can be used to make packaging prototypes, clean orthodontic retainers, and food-safe molds for chocolate confectionery.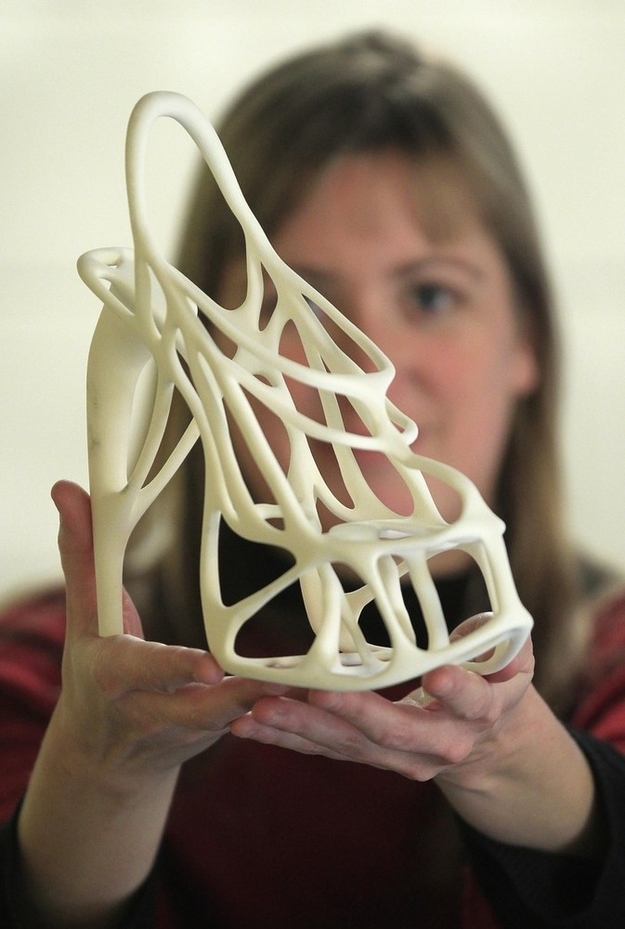
Thermoforming dies experience less pressure than injection molds, but still reach high surface temperatures.
High temperature polymer resists deformation and surface degradation from the combined heat and pressure of thermoforming for most plastics. Standard resins may also be suitable for thermoforming with some low temperature plastics such as vinyl.
APPLICATION EXAMPLE
Formech thermoformed prototype packaging.
Thermoforming a thin sheet of polycarbonate over a high temperature polymer matrix produces a transparent detail by matching the geometry and detail of the matrix. Thermoformed packaging can be easily prototyped and incorporated into the design process along with 3D printed product prototypes, and all this is achievable on the Form 2. The printed matrix was used without additional processing and the need for UV curing. Texture is recommended in thermoforming design to prevent air trapping under the sheet - layer lines on the printed thermoforming die can be helpful in this regard.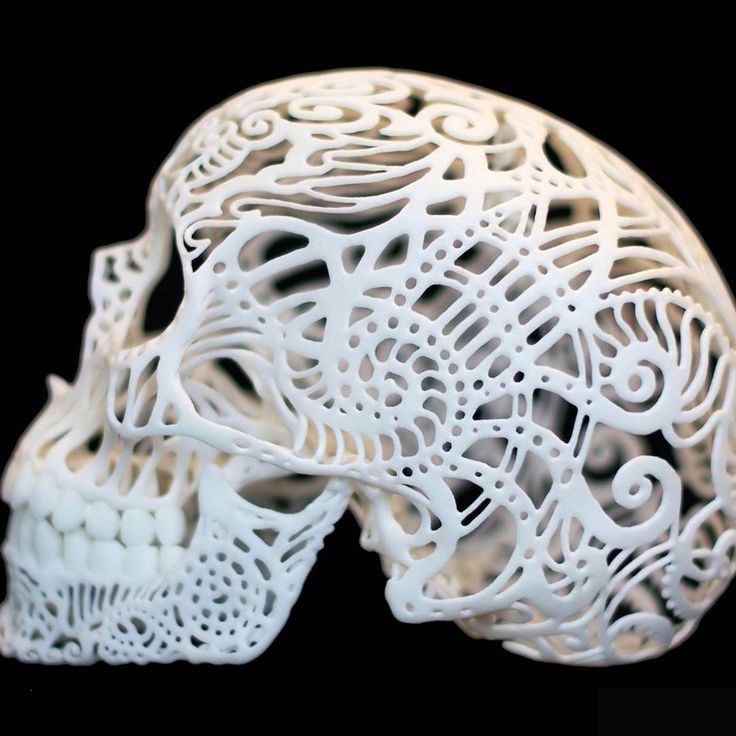
TEMPERATURE CONTROL
High Temperature Polymer Cycle Thermoforming
The surface temperature of the die reaches 130°C. The high temperature resin is highly resistant to deflection, whereas with standard resins you must allow the print matrix to cool between cycles, otherwise warping and degradation may occur.
If temperature rise becomes a limiting factor in molding efficiency, cooling channels are an effective way to remove heat from the print. When used in conjunction with an automated thermoforming machine, the water-cooled die can produce more parts with shorter cycle times.
Conformal water channels visible in the thermoforming high temperature die.
Thermoforming die surface temperature
Conformal cooling channels are easy to implement when designing for SLA 3D printing and print successfully without any internal supports to interfere with flow. After printing, the channels are flushed with uncured resin using isopropyl alcohol.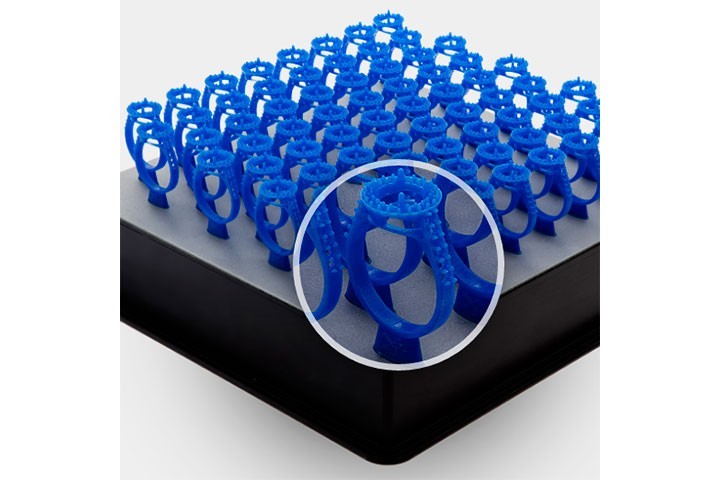 The mold is connected to a pump and a source of cold water.
Integrated water cooling as a strategy can also be applied to standard and rigid polymer parts to reduce heat dissipation when used in higher temperature environments.
Elastomer casting
Precision molds for most flexible elastomers such as silicone and urethane rubber can be printed on the Form 2 using standard resin. The transparency of Clear Resin allows the material to be observed during the pouring or injection process. Flexible materials can be easily removed from rigid SLA printing plates, and applications from model production to functional molding can be obtained. Silicone molding can also be used to quickly replicate master prints, greatly reducing production time when multiple rigid parts and objects are needed.
APPLICATION EXAMPLE
Forms printed on Form 2 are used to create composite parts with advanced built-in features. Assembly subcomponents such as electronic, metal and SLA printed elements can be embedded and sealed in soft surface molds.
RightHand Robotics used the Form 2 to create the production blocks of their robotic gripper using urethane molding. The forms were printed in clear resin, with black resin inserts forming the internal structure.
The Form 2 printer allowed RightHand Robotics to move from prototypes to small-scale production without the need for expensive tooling. The rapid transition from original printed prototypes to production materials that have longer flex cycle life was done with 3D printed plates on the same Form 2 hardware they used for initial prototyping.
The first layer applied from RightHand Robotics' multi-stage process includes urethane compounds that can withstand multiple flex cycles while still providing the high elasticity needed to securely return the gripper to its open state.
The outer layer provides improved tactile grip and control, as well as sealing the sensor electronics with softer, lower durometer rubber.
SLA 3D printed parts can also be encapsulated inside molds to provide a rigid structure for flexible materials. The overlay can be mechanically bonded to the insert by adding holes, recesses, and columns to the printed parts, which enhances assembly and reduces the need for chemical adhesive.
Conclusion
Form 2 molding is a powerful strategy for the production of parts in small batches, as well as production from commonly used plastic and elastomer materials. 3D printing tools allow engineers and designers to easily prototype parts that look and function exactly like the final product, with geometries and material configurations that are quite complex, using 3D printing, such as in the case of encapsulated electronics and thin packaging. For high temperature forming, high temperature polymer offers superior thermal properties at a lower cost and with shorter lead times than process outsourcing
Injection molding from 3D printed molds
Study of low-volume production of small plastic parts
SUMMARY on a Form 2 printer and injection using a Galcom Model-B100 injection molding machine.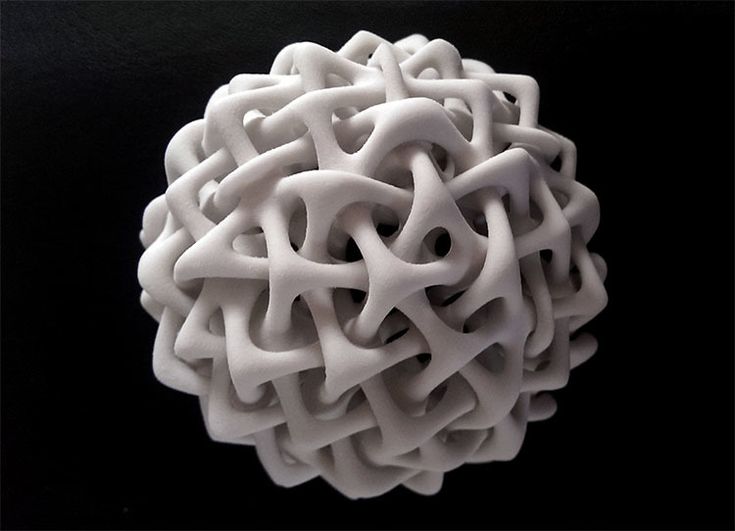 Two transparent resin molds were tested: one large butterfly mold and one mold with four small butterflies in one block. A third mold for the USB stick case was tested in high temperature polymer. These molds were 3D printed by Formlabs and the castings were made by Galomb Inc and Formlabs in a variety of materials.
Formlabs and Galomb, Inc.
LOW-VOLUME 3D PRINTED PARTS PRODUCTION
Most of the plastic products in the world today are made by injection molding. Using inexpensive desktop 3D printers and injection molding machines, molds can be created to produce small functional parts from manufacturing plastics.
For low volume production (approximately 10-100 parts), 3D printed molds save time and money. They also allow for a more flexible approach to manufacturing, giving engineers and designers the ability to easily modify molds and continue iterating their designs at low time and cost.
The Form 2 Stereolithographic 3D Printer (SLA) produces completely solid, smooth parts that can withstand the temperature and pressure of desktop injection molding. 3D prints produced using SLA are chemically bonded so that they are completely dense and isotropic, producing functional shapes with a quality not possible with FDM.
Formlabs is partnering with Galomb Inc., a manufacturer of low cost injection molding machines, to test and demonstrate the viability of SLA injection mold printing.
Fig. 2 : 3D printed molds in aluminum frames.
METHOD
Both clear and high temperature resins can be used to print small functional forms, with high temperature resins offering compatibility with a wider temperature range of
thermoplastic melts. Formlabs Clear Resin was chosen for its strength, high detail and smooth surface Clear Resin is preferred for its transparency as you can easily see when forms are being filled, but any of the standard Formlabs Resins (clear, white, black and grey) can also be used as they have similar mechanical properties. The plates were printed with a layer height of 100 µm and took approximately 5 hours per plate.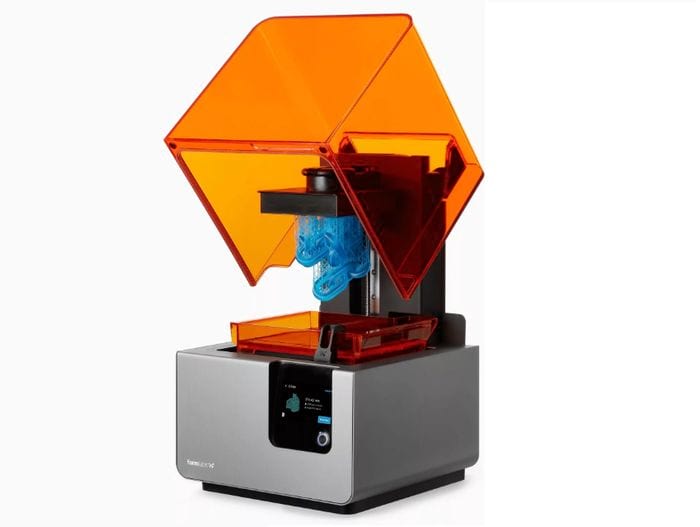 Depending on the geometry, multiple shapes can be printed at once on the build platform to improve printing efficiency.
Fig. 3 : Printing setup in PreForm with cavities up.
Two forms were printed from transparent resin. Parts and subsequent molds were designed to match Galomb machine vise sizes, 1 in3 injection cylinder capacity, and Form 2 build volume. supports were polished.
The parts were then cured for one hour under a 405 nm UV lamp to achieve full mechanical strength and rigidity. For a better understanding of the impact of post-curing on parts, see the Formlabs UV post-curing booklet.
Fig. 4 : 3D printed molds in aluminum frames and die-cast parts.
The first was a large Formlabs butterfly logo and the second was four small Formlabs butterfly logos. Both molds had a cavity, narrow inlets, and sprue at the point of injection and were designed in Solidworks. The molds were inserted into aluminum frames to provide protection from the downward pressure and heating of the injection nozzle.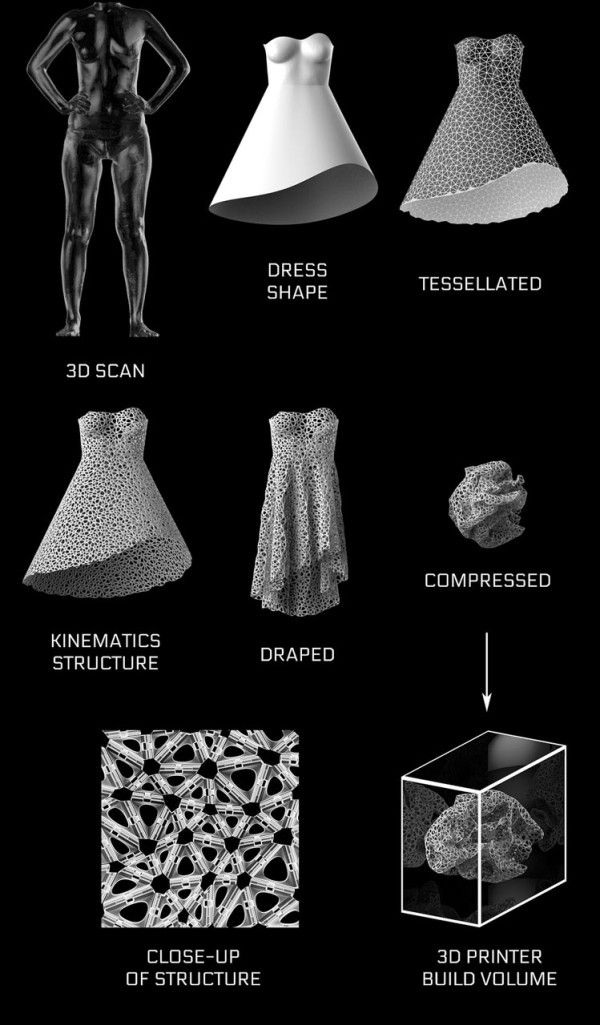 Aluminum frames can also prevent the shape from deforming after repeated use. The frames shown in figures 2 and 4 were custom made by Whittaker Engineering in Scotland, but standard aluminum frames are readily available on request from injection molding machine manufacturers.
Plastic pellets can be purchased online or from suppliers such as IASCO-TESCO. To create different colors, the molten plastic was pre-mixed with powdered dyes prior to injection.
Using a Model-B100 benchtop injection molding machine, Galomb tested printing plates with 25 shots of LDPE. LDPE melts at approximately 325°F (163°C) and was chosen for its low melting point. Of note, Formlabs Clear Resin has an HDT at 0.45 MPa 73.1 ºC after post-cure (see Material Data Sheet). HDT is a measure of the thermal properties of a material, but does not rule it out for use, although LDPE has a higher melt temperature. Whether your 3D printed mold will withstand the injection molding process depends on the melt temperature of the injection material, part geometry, and cooling and cycle times.
RESULTS FOR CLEAR POLYMER
After 25 injections of LDPE, there was no noticeable deterioration in the surface of the molds (chips, cracks or scratches). LDPE is not prone to sticking to polymer molds when tested, but other plastics may require the use of a mold remover to assist in part removal. Adhesion of the part to the mold can cause mold wear during ejection. Release agent is widely available, and silicone release agent is compatible with Formlabs standard and high temperature resins.
The cycle time for each injection was approximately three minutes. This process was accelerated by using compressed air to cool the mold. Cyclic injection into forms printed on the Form 2 causes the form to heat up. To counteract this, the cooling time between open mold cycles must be increased. While the mold cannot deform, too much residual heat will reduce molding success if the mold is opened too early. Galomb also improved molding success by etching shallow (0. 05 mm deep) vent holes (not shown) leading from cavity edge to mold edge so that air does not enter the cavity during injection.
Some of the injections showed a leak in the parting line due to deformation of the polymer mold during the cooling phase after several injections. Increasing the clamping force in the vise can help mitigate leakage, as can polishing the parting plane of the mold to make it as flat as possible. Galomb proposed incorporating channels into the mold design to include metal tubes and fill them with aluminum epoxy, as a strategy to strengthen the mold, reduce warping, and improve cooling time.
Fig. 5 : A range of injection molding parts made using 3D printed molds.
FURTHER TESTING WITH HIGH TEMPERATURE POLYMER
Clear resin molds have been successfully tested using LDPE, which has a relatively low melt temperature. Higher melt temperatures can cause thermal shock in clear resin printed parts, which manifests itself as a deformed mold surface.
Transparent resin molds experience thermal shock when exposed to higher temperature molten plastic.
Formlabs printed the shape of a USB device case in High Temp Resin to test
| Melting Point | plastics | High Temp Polymer (HDT at 0.45 MPa = 289° C) | Clear Polymer (HDT at 0.45 MPa = 73.1° C) | |
| LDPE | 163 °C | ||
| PP | 177 °C | ||
| TPE | 177 °C | ||
| PLA | 180 °C | ||
| ABS | 204 °C | ||
| HDPE | 204 °C | ||
| EVA | 204 °C | ||
| Polystyrene | 226 °C |
High temperature polymer molds showed no temperature degradation at the mold surface for any of the tested plastics.
*DURABLE RESIN polymer is under development and final specifications are subject to change.
High Temp and Standard are the polymers best suited for molding. Of the Formlabs resins, High Temp has the highest HDT at 0.45 MPa and low thermal expansion. It is also the stiffest material with the highest stretch factor.
The relatively high stiffness of High Temp Resin means that the mold will not deform when the part is removed. This makes the use of a release agent especially important for removing parts molded from rigid plastics such as polystyrene.
GENERAL TROUBLESHOOTING
Form overflow leak.
Leakage occurs when the injected plastic is forced out between the two mold halves. This can happen when the shape is overflowing, or if the split plane is not completely flat. Adding thin exit ports to the mold can help mitigate leakage from overpressure within the mold, facilitate part removal, and eliminate entrapped air that can cause bubbles in the molded part. Although not shown, the plates were tested without the aluminum frame. The downside to this approach is that these parts use more material, which increases printing cost and time, and the forms can be more prone to warping. With this method, a steel washer placed between the printing plate and the nozzle of the injection molding machine protects the print from direct contact and helps distribute forces. In addition, pre-sealing the injection molding cylinder against a metal block helps ensure there are no air pockets to disrupt the plastic flow.
Printed lines visible on some parts; this can be reduced by printing the form with a lower layer height. The plates used in this study were printed at 100 µm, but 50 or 25 µm could also be used. This will improve the cleanliness of the plate surface, but increase print time and reduce tank life.
Final USB device case molded from high temperature resin.
DESIGN INSTRUCTIONS.
When designing a form, evaluate what will print successfully, as well as what will successfully form.
- Adding one to three degrees of recess on surfaces perpendicular to the direction of the recess will allow easier part removal and minimize mold degradation. Fillets should be applied to the inside edges to reduce buckling from internal plastic stress and facilitate removal of the part.
- Embossed and engraved parts must be offset from the surface by at least 1 mm.
- If you plan to use an aluminum frame, The surfaces of the split planes can be polished with fine sandpaper to reduce flare. add an extra 12mm thick plate to the back of the mold plate to account for compressive forces and ensure complete sealing.
- Be sure to orient the mold halves in the PreForm so that the cavity is facing up. This will prevent reference marks inside the cavity and make post-print processing easier.
90° angle
2° recess
Optimum condition 2° recess and round.
PROCESS SUMMARY
STEP 1:
Part design in CAD.