3D printer with glass bed
Can You 3D Print Directly on Glass? Best Glass for 3D Printing – 3D Printerly
3D printing on glass is something that works really well for build plate adhesion and getting a great finish on the bottom of 3D prints, but some people can’t figure out how to do it right.
I decided to write an article about 3D printing directly on glass, answering the basic questions that should set you in the right direction to 3D print like the professionals out there!
Keep on reading to get some useful information that you can put to use straight away in your printing process.
Can You 3D Print Directly on Glass?
3D printing directly on glass is possible and is popular with many users out there. Adhesion can be difficult on a glass bed, so it’s recommended that you use adhesives to help your 3D prints stick to the glass and not warp around the edges. A good bed temperature is fundamental for 3D printing on glass.
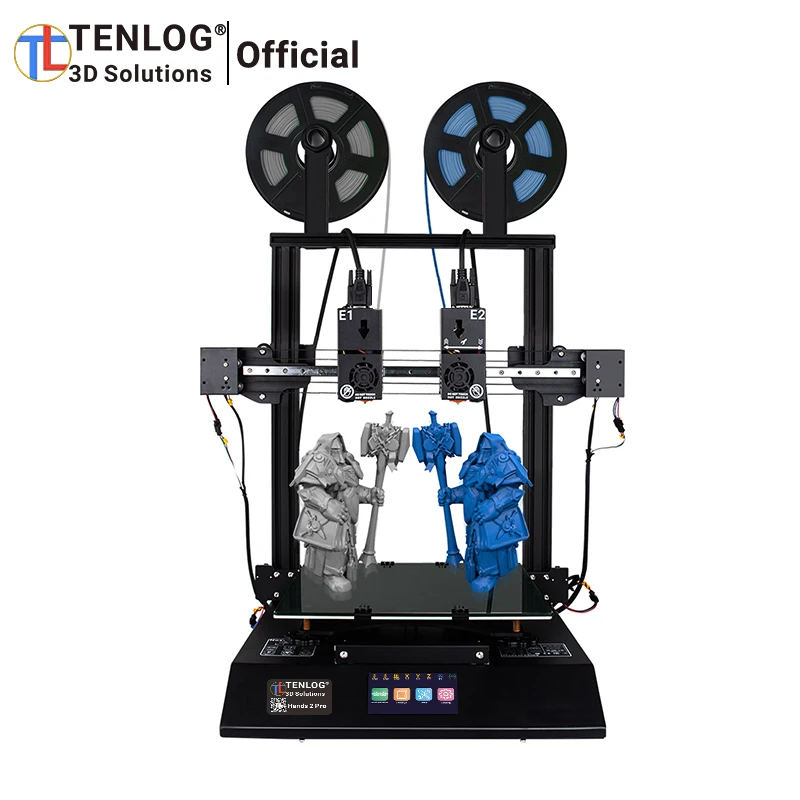
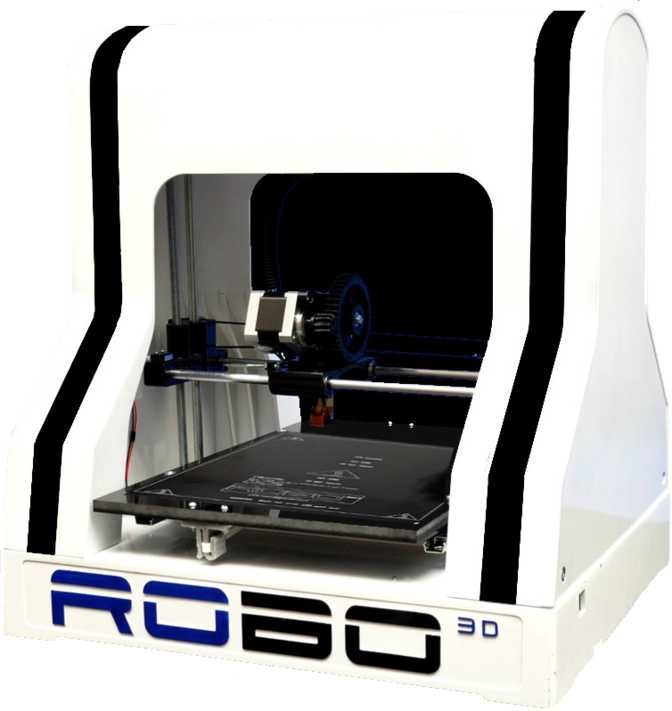
You’ll see plenty of 3D printer beds that are made out of glass because it has many characteristics which make it ideal for 3D printing. One of the main benefits is how glass tends to stay flat and not warp like other bed surfaces out there.
The bottom layer of your 3D prints also look better when printed on a glass bed, giving a smooth, shiny look. You can produce certain effects at the bottom of your 3D prints depending on what surface you use.
How Do You Make a 3D Prints Stick on Glass?
When we talk about 3D printing in general, the issue of bed adhesion arises. Often, bed adhesion can make or break your print and I remember how it feels to have a 3D print going successful for hours, then failing out of nowhere.
There are multiple ways to make your 3D print stick to the glass bed better so take these tips on and implement them in your own routine as you see fit.
The good thing is glass bed adhesion is quite easy to figure out, let’s see how.
Leveling Your Bed Surface
Leveling the bed is the foremost thing you should do before beginning your printing process. Level the bed in such a way that any point on the build plate is the same distance away from the nozzle.
It may seem minor, but it plays a critical role in glass bed adhesion and determining the quality of your print.
Ideally, you implement a strategy which means your bed doesn’t move very much in the first place. One thing I found to help reduce the need to level your bed so often are Marketty Bed Leveling Springs from Amazon.
These work so well because they are much stiffer than your stock bed springs, meaning they don’t move as much. It helps your overall stability during the printing process, and means you don’t have to level your bed all the time.
Many people who were first reluctant to change their bed springs changed over and were very happy with the results.
One user even said that after 20 prints, they still didn’t need to level the bed!
You can also get yourself an automatic bed leveling system to help correctly level your bed. The ANTCLABS BLTouch Auto Bed Leveling Sensor from Amazon is a pretty good choice for this.
It works with any kind of bed surface and is pretty easy to apply.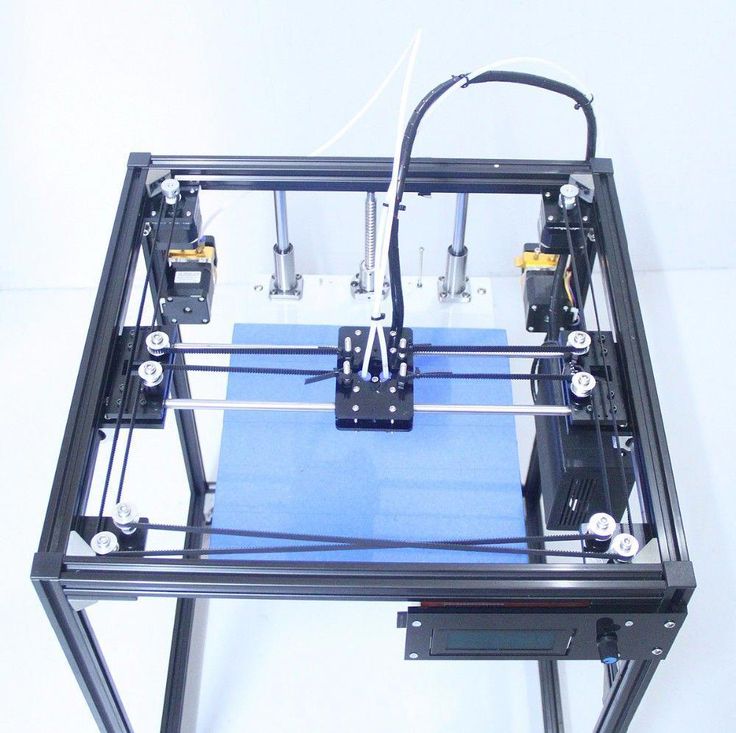 You do need to gather up some basic information and firmware settings to get it working, but there are some great tutorials you can follow to get there properly.
Once you calibrate your Z-offset, you shouldn’t really have to level your bed in the future, and it even accounts for a warped surface (glass is usually flat so this doesn’t matter too much).
Cleaning Your Print Surface
Cleaning the bed paves way for good adhesion and a successful print. Make sure you clean the bed before printing and in between if the need arises. Often, dirt, oil, or grease can be present on your glass bed.
It will create a layer on the bed thereby not allowing the print to stick to it. By ensuring your glass bed is clean at all times, bed adhesion won’t be an issue anymore. You can use a glass cleaner or isopropyl alcohol for this purpose.
Using an alcohol-based cleaner works to break down the dirt and easily remove it from the bed. I’d recommend going with the Dynarex Alcohol Prep Pads from Amazon, which is saturated with 70% isopropyl alcohol.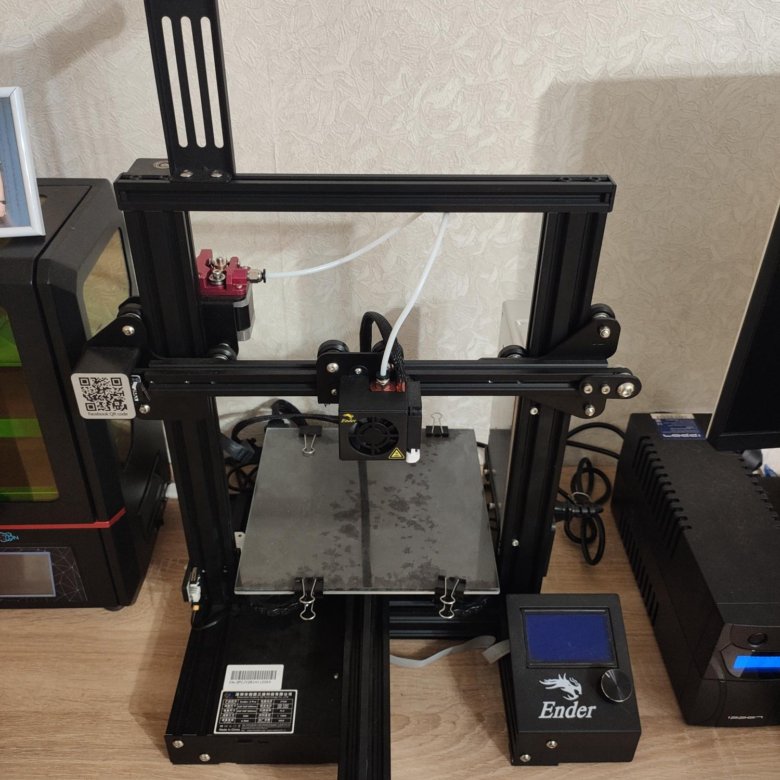
Check out this video below for some great tips for making prints stick on glass just using dishwasher liquid! He says you can wash your bed every 10-20 prints and it should work well, but if the bed gets dusty it can mess with adhesion.
Add an Extra Build Surface to the Glass
Users suggest investing in a PEI (Polyetherimide) sheet if you’re aiming for large prints.
You’ll love the Gizmo Dorks PEI Sheet with Preapplied Laminated 3M Adhesive from Amazon. Thousands of users are making use of this premium bed surface for good reason.
It installs quickly onto your 3D printer with a bubble-free application, and is endlessly reuseable for multiple prints.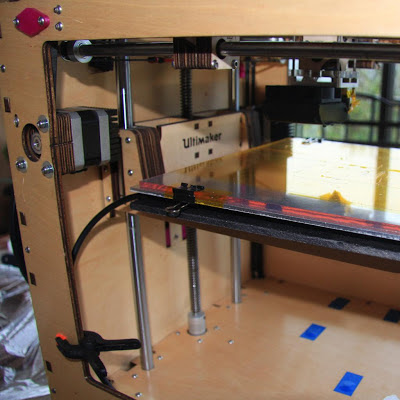 ABS and PLA filaments can easily print directly on this PEI surface without the need of extra adhesives.
Using Adhesives
If you do want to go the adhesives route, like plenty of 3D printer hobbyists out there, then you have many options.
When using adhesives, people tend to go for products like glue sticks, hairsprays, or specialized 3D printer bed adhesives for the task.
For glue sticks, tons of people recommend the Elmer’s Purple Disappearing Glue Sticks from Amazon because they work so well. It is non-toxic, easily washable, and let’s you easily see where you applied it.
After applying, the purple marks disappear which is a really cool feature.
Figure out why plenty of people love these glue sticks and get a set from Amazon for yourself.
For hairsprays to use on your glass 3D printer bed, I’d recommend the L’Oreal Paris Advanced Control Hairspray from Amazon. It’s the hold aspect of the hairspray that provides the great adhesive plenty of people use for their bed surfaces.
Reviewers that have used this for 3D printing mention that say it is fantastic for having your 3D prints stick down with no warping. The prints even “pop out easily once your build plate cools”, and on top of all that, it’s very affordable.
One of the most popular specialized 3D printer adhesives has to be the Layerneer 3D Printer Adhesive Bed Glue from Amazon. Using glue sticks can be quite messy, as one user mentioned, but after changing over to this, he was very pleased.
The great thing about this adhesive is that you don’t need to keep on reapplying it, and one single coat can be recharged with a wet sponge to get more uses. Over time, although the price is higher, it is really cheap in the long run.
You aren’t getting any harsh smells since it is low-odor, and it’s water soluble also. The built-in foam tip makes application to your glass bed very simple, and spill-proof.
On top of all of this, you get a full 3 months or 90 days manufacturer guarantee so you can ensure that it works just as you desire.
You’ll be joining plenty of users who have transformed their 3D printing experience with the Layerneer Bed Adhesive Glue, so get yourself a bottle today.
Regulating Z-Offset
Proper distance between the nozzle and print bed is fundamental for good adhesion and successful prints. The filament won’t stick to the glass bed if the nozzle is far away.
Likewise, if the nozzle is too close to the bed, your first layer may not look so good. You want to adjust your Z-offset in a way that leaves just enough room for your printing filament to stick to the glass bed.
This can usually be solved with leveling your bed surface, but if you add a glass bed to your 3D printer, you’ll either need to move your Z-endstops or increase your Z-offset.
Adjust Your Bed Temperature
Adjusting your bed temperature can definitely improve your results when it comes to bed adhesion. When you increase your bed temperature, it usually helps with adhesion due to not letting filament cool too rapidly.
I’d recommend increasing your bed temperature in 5-10°C increments to combat bed adhesion issues.
A lot of warping issues come from quick changes in temperature, so having a more consistent bed temperature helps out.
One product that helps out with improving your bed temperature through faster heating, and keeping temperatures consistent is the HWAKUNG Heated Bed Insulation Mat from Amazon.
Print Speed and Fan Settings
Print speed can also be responsible for glass bed adhesion issues. A print speed too fast can cause ringing and under extrusion, leading to poor glass bed adhesion.
Make sure you slow down your first few layers in your slicer to give it a better success rate of sticking to your glass bed.
For your fan settings, your slicer usually defaults to having the fan off, so double-check that your fan is off during the first few layers.
Add Rafts or Brims to the Print
Within your slicer software, you can add some build plate adhesion in the form of a raft or brim to make your 3D prints stick to glass better. They are created with an air gap, so the extra material can easily be separated from your actual model.
You don’t use much plastic for rafts and brims depending on the size of your 3D print, but you can reduce how much it extends out. The default “Raft Extra Margin” in Cura is 15mm, but you can reduce this to about 5mm.
It is simply how far out the raft extends out from your model.
What Types of Glass is Used for 3D Printing?
3D printing involves printing on surfaces of various kinds, ranging from acrylic to aluminum to glass beds. Glass beds are increasingly gaining popularity among creators and 3D printing enthusiasts alike.
3D printing on glass offers plenty of advantages over its traditional counterparts. Now let’s look at the types of glass used for 3D printing.
- Borosilicate Glass
- Tempered Glass
- Regular Glass (Mirrors, Picture Frame Glass)
Borosilicate Glass
A blend of boron trioxide and silica, Borosilicate is highly durable, has an extremely low coefficient of thermal expansion, and is resistant to thermal shock as well.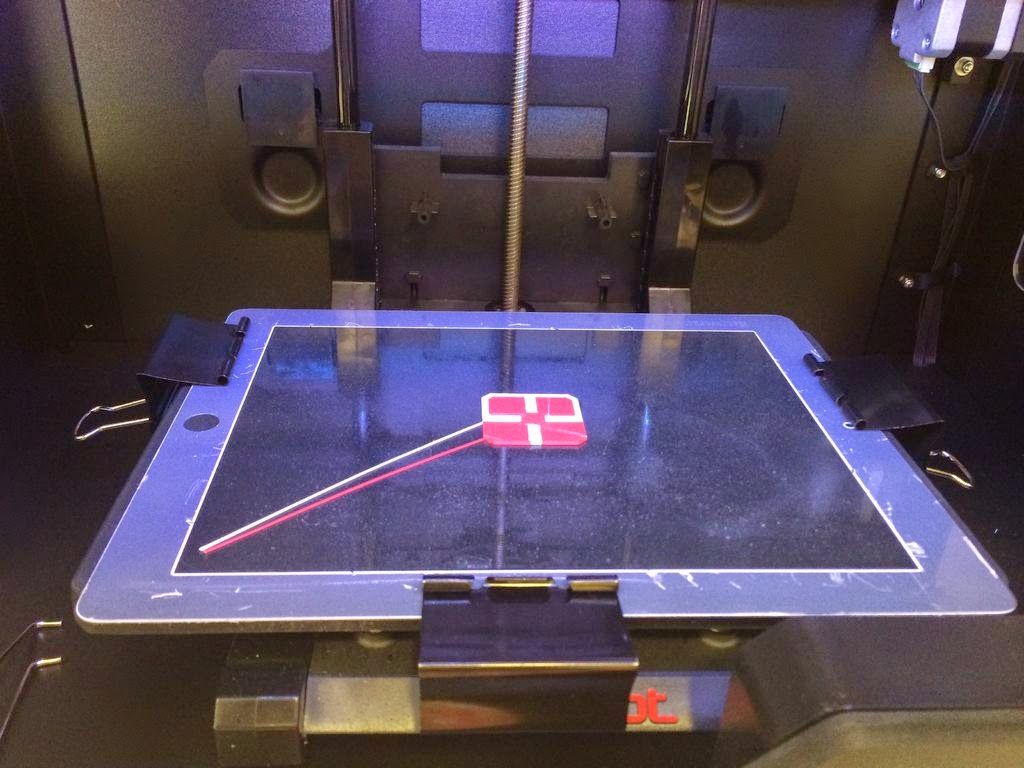
Unlike regular glass, Borosilicate glass does not crack under extreme and sudden temperature change, minimal to no physical changes occur during the printing process.
These properties make Borosilicate glass an optimal choice for industrial and technical applications, laboratories, and wineries, etc.
Borosilicate glass when paired with a heated bed largely helps reduce the possibility of warping, as the heated bed slows down the cooling process of the printed item.
Borosilicate glass offers an immaculate surface quality in addition to having good thermal and chemical resistance, no air bubbles, and high durability. This makes it an ideal choice for 3D printing.
Creators worldwide swear by Borosilicate glass, have received exceptional results consistently, and highly recommend it to users.
Tempered Glass
Tempered glass, in simple terms, is glass treated to provide better thermal stability. It means that this glass can be subjected to higher temperatures with no adverse effects to deal with. It is possible to heat tempered glass up to 240°C.
If you intend on printing with extremely high-temperature filaments like PEEK or ULTEM, tempered glass is your ideal choice.
With tempered glass, you can’t cut it to size because the way it’s manufactured means it will pop. Tempering the glass provides it with more mechanical strength, and is good protection against mechanical shocks.
Regular Glass or Mirrors
Apart from the above mentioned types of glass, users also 3D print with regular glass, mirrors, and glass used in photo frames, etc. This has more of a tendency to break since it is not treated to withstand those higher temperatures and print removal.
Some people have mentioned that they get pretty good success with them though. Many people have reported getting 3D prints sticking a little too well to these types of glass, requiring them to put it in the fridge to detatch the print.
What is the Best Glass Surface for a 3D Printer?
Borosilicate glass is the best glass surface for 3D printing.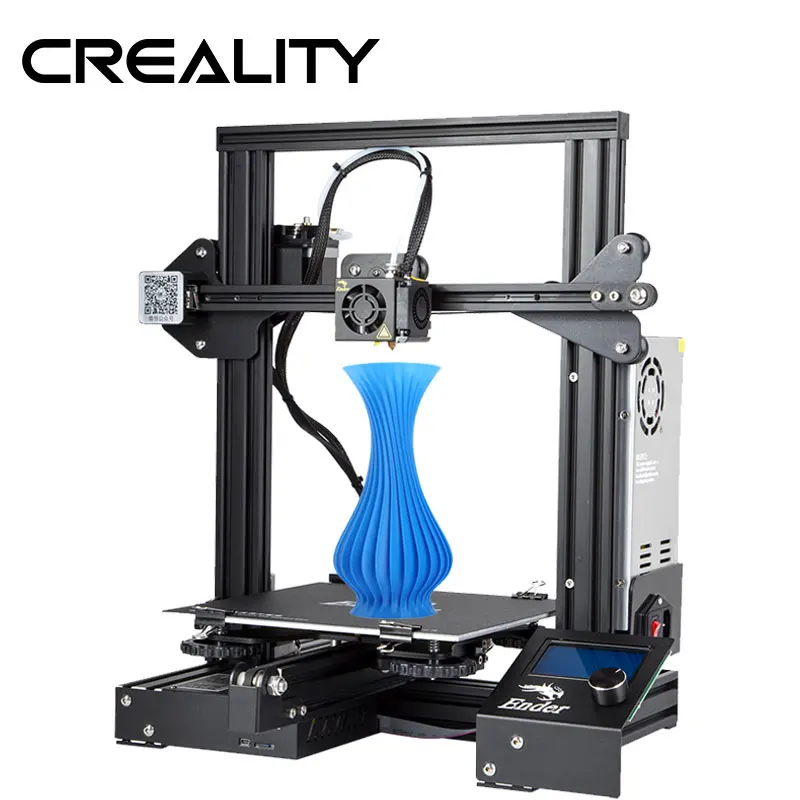 With low thermal expansion, high heat and temperature shock resistance, Borosilicate glass makes for an ideal choice for 3D printing.
Its smooth, flat, and strong surface provides consistent results with great bed adhesion and little to no warping issues.
Incredibly easy to clean and maintain, 3D printing on this glass will give you a delightful experience.
If you’re looking to invest in a glass surface that will not only give you excellent prints, immaculate surface quality, and minimal adhesion issues but also help you save money, time, and energy, Borosilicate glass is for you.
I’d recommend getting yourself the Dcreate Borosilicate Glass from Amazon for a respectable price. It comes in at a 235 x 235 x 3.8mm size and a weight of 1.1 lbs.
One user who implemented this bed had trouble at first, but with some good hairspray, they got their PLA 3D prints sticking very well.
Since these beds don’t warp, you don’t need a raft as much as with a warped 3D print bed since it doesn’t have to account for those uneven surfaces, but it can still help out if you choose to.
Rather than continuing with window glass, a reviewer said it cracked and scratched easily. Since getting theirselves a borosilicate glass bed, they noticed how thick the glass is and how it holds and distributes heat effectively.
This fits an Ender 3 just perfectly according to many people, so I’d definitely look to getting this as an upgrade to your 3D printer today.
You’re also getting an 18-month warranty and a 100% hassle-free replacement for quality issues.
Voxelab Carborundum Glass Bed for Aquila FDM 3D Printer
🎅 Super Sale: Up to 61% OFF
-
Day
- :
-
Hrs
- :
-
Min
- :
-
Sec
🎅 Christmas Sale: Up to 61% OFF 🎄 Proxima 6.
 0 4K only $119 🦌 Resin: Buy 2 Get 1 Free
 loading
Share the product to
- Overview
- Parameter
- In the Box
- Comments
- FAQ
- More
Carborundum glass platform
High-strengthen stalinite+ Carborundum surface Enjoy top-quality printing experience
Fast
warmup
High
stickiness
Easy Model
removal
No edge
warps
Steady Heating after Warmup
Warmup in 5 Minutes
Smooth Carborundum Composite Material Paintcoat
High Stickiness
High stickiness eliminates edge warps.
In Heating
High Stickiness
Micropore expands to take in more melting filament.
In Cooling
Easy Removal
Micropore contracts to squeeze out solidified filament.
Manually Take-off in Ease
After the model cooling down, simply remove it without extra tools.
Long-lasting service life
Made by Stalinite
High-secure, Strength and Heat Stability
None-Distortion
Smooth and Thin Surface
Smooth Surface Made by Carborundum,
Eliminate the Error in First-layer Printing
1-Minute Quick Install Instruction
Tears off the protective film from the glass plate.
Place the Carborundum glass platform following the margin of heating platform.
Ensure the buckle is fixed tightly to the platform.
Simple Maintenance
Stalinite’s hardness avoids extra scratch and abrasion.
Easy to clean up with wet and alcohol wipes.
Product Parameters
Size1
235*235*4mm
[For Aquila, Aquila X2, Aquila C2]
Size2
245*255*4mm
[For Aquila Pro]
-Product Name
Carborundum glass platform
-Material
Stalinite + Carborundum surface
Product Presentation
1 Piece of Voxelab Aquila Carborundum Glass Build Plate For Aquila
All comments ( 0 )
No questions.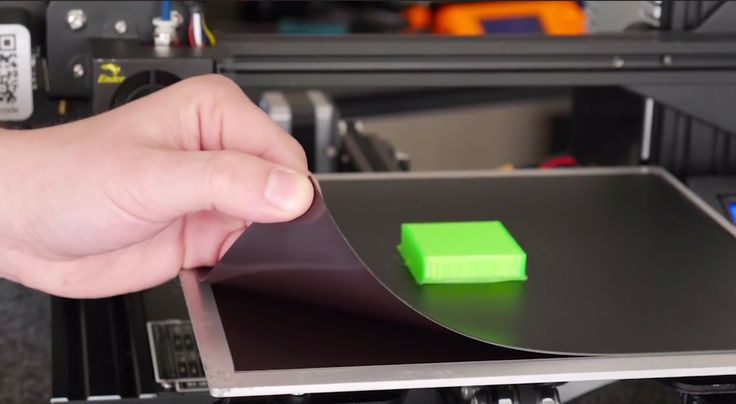
Your questions will be answered by the users who have purchased this product
May not be greater than 255 characters.
Cleaning the 3D printer table. Tips and Tricks.
3D printing is a very unstable process, I think everyone who is at least slightly familiar with plastic filament printing technology will agree with this. Unpleasant crashes in the 3D printer can occur for various reasons, and one of the most common reasons is the detachment of the model being grown from the desktop surface. And as a rule, this happens in the middle of printing, when you are already convinced of the stability of the press and are distracted by another activity. It is precisely for this reason that ensuring good adhesion of the first layer to the platform is very important for the successful completion of 3D printing. nine0003
Today there are many ways to improve the adhesion of the first layer to the bed.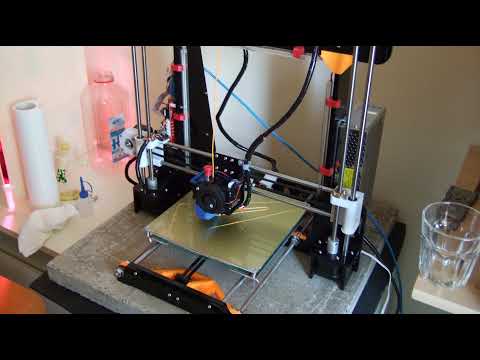 A lot of articles and recommendations have been written about this, so we will not talk about them. It is worth noting one of the simplest methods - is keeping the desktop of a 3D printer clean . Regular and thorough cleaning of the platform will not only improve adhesion, but will make printed models more beautiful and smooth.
In this article we will look at the best way to clean the 3D printer table, using the example of popular coatings: nine0003
Remember to be careful when using the methods below, as spilled liquid may damage the 3D printer. We recommend removing the bed from the printer before cleaning (if possible).
PEI sheet surface cleaning
Recently, PEI sheet has become a very popular material for improving adhesion in 3D printers. It provides excellent adhesion to various materials, and when it cools down, the printed model lags behind it very easily. The sheets are very simple and not fussy to use, and most often it does not require additional application of glue or adhesive tape. nine0003
Unfortunately, in order to achieve maximum efficiency, the PEI surface also requires regular and high-quality cleaning. If PEI is touched frequently, it can develop greasy spots that reduce adhesion to the material. Rough cleaning can also damage the surface and reduce sticking. Regular cleaning and maintenance of PEI will ensure that your models do not come off.
How to clean the surface of PEI
To clean this surface, we recommend using isopropyl alcohol (Chemical pure, odorless) with a concentration of more than 70%. You can use it with a smell, but it is very caustic and unpleasant, the room will need to be ventilated. nine0003
Wait for the platform to cool, then liberally soak a dry cloth or paper towel with alcohol and wipe the surface. This will remove a significant portion of the fats and oils from the bed.
Acetone is also good at dissolving plastic residues on the surface. In the same way, liberally moisten the cloth with liquid, then gently wipe the surface of the 3D printer desktop. We strongly recommend doing this work in a well-ventilated area, as acetone is highly flammable and its vapors can penetrate the electronics of the device
If you have been using PEI sheet for quite a long time, and visually its resource has been significantly used up, then we recommend using fine grit sandpaper (1500+). With gentle, circular motions, sand the surface until light scratches and depressions are removed.
When should I clean?
Most manufacturers recommend cleaning the surface with isopropyl alcohol every 2 to 3 prints. After a few months of use, sand the surface and wipe thoroughly with acetone.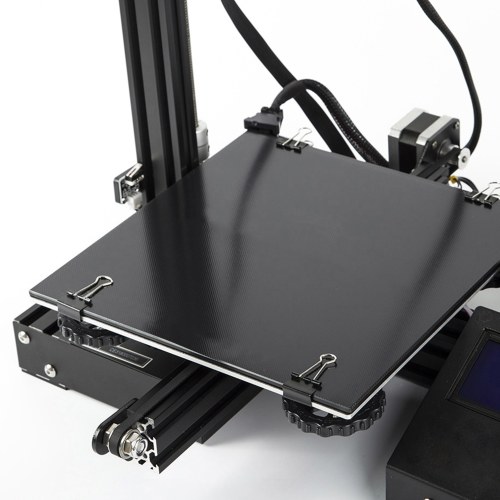 If it is no longer possible to restore the surface by the listed methods, then replace it with a new sheet from PEI. The lifespan of such material varies depending on the brand and frequency of use of the 3D printer. nine0003
Glass Surface Cleaning
Glass is another very common 3D printer desktop material. Much more durable than PEI and similar surfaces. The glass plates provide a smooth and level surface at the bottom of the model.
This surface is usually used in combination with other aids (eg glue stick or hairspray) to improve the adhesion of the first coat. Such products are especially popular on tables that are not equipped with heating. Therefore, regular cleaning of the glass is necessary to prevent adhesive or varnish from sticking. nine0003
How to clean the glass platform
The easiest way to clean a glass plate is to use a scraper or a non-metal spatula. If the table is heated, then heat it until the material remains soft, after which they should be easily removed with a scraper.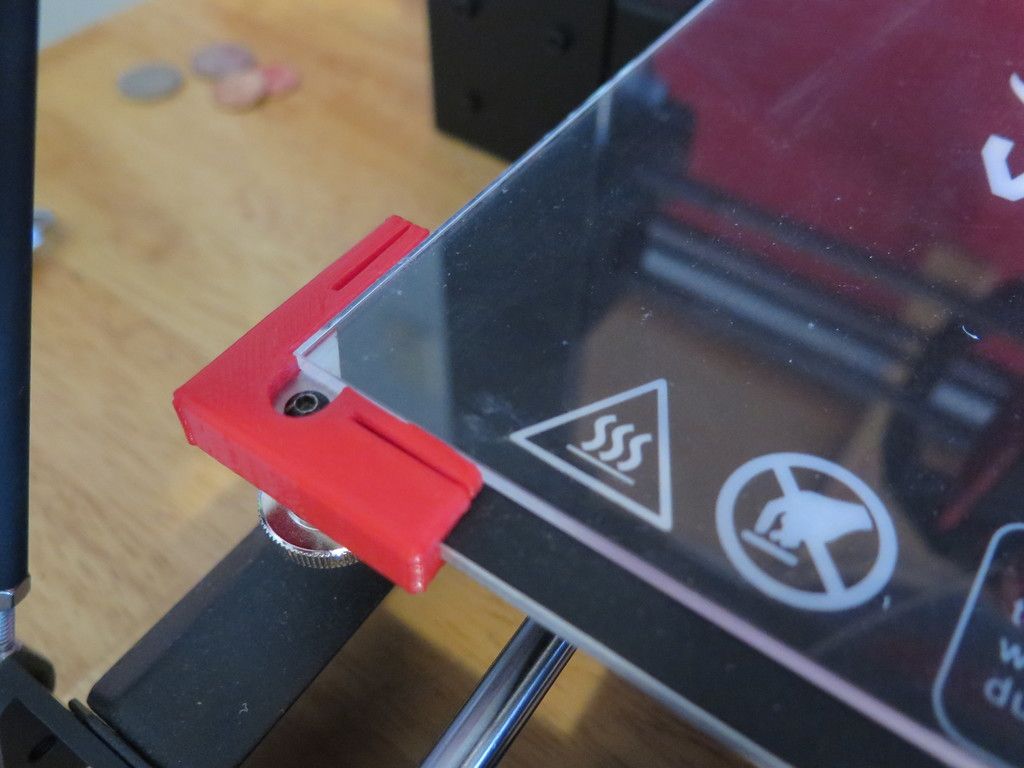
Be careful when scraping. Depending on the scraper, the blade can be very sharp, so be careful not to scratch the surface. We recommend that you put your hand on the handle of the scraper, and with the other hand press down on its middle, so that the greatest force is directed downwards. nine0003
If this does not work, try wiping the glass with warm soapy water. Although simple, this method is very effective for removing hairspray, glue, and other adhesives. Keep in mind that this method is only recommended if the 3D printer allows you to remove the platform. Spilled water can seriously damage the heating element, power supply or other electronics of the device.
Dirt can also be removed with specialized cleaning products. For example, wet alcohol wipes, window cleaner, isopropyl alcohol will also effectively wash away adhesive residue and restore the glass surface. However, do not take too strong cleaners. Such substances can severely damage the surface or even the 3D printer. In order to be sure to select a cleaning agent for your particular 3D printer, it is best to contact its manufacturer. Most often, they willingly make contact with users and willingly give advice. nine0003
When to clean the glass surface
Again, this will depend on how often you use the printer. We recommend cleaning the surface after each print to prevent buildup of glue or varnish. Such a procedure will not take much time, but the print will be more stable, and the resulting prints will have a beautiful and even surface. Once the models stop sticking (usually after a month), try washing the surface with soap and water. After about two to four months, you will have to resort to isopropyl alcohol or other specialty drugs. substances. nine0003
Cleaning adhesive tapes
Adhesive tape is another proven way to increase adhesion to the print platform. Today, this method is more common on 3D printers without the function of heating the desktop.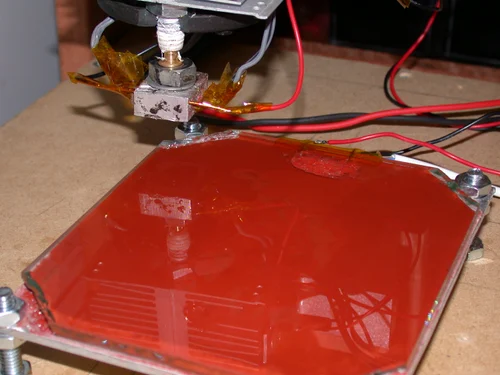 Masking tape is the most common remedy, but so are Kapton and others.
One of the reasons for the popularity of such linens is their ease of use and relatively inexpensive cost. They are easy to stick to the surface and are available at almost any hardware store. However, there are also disadvantages: the tape quite often peels off when the printed model is removed, so it must be reapplied regularly. nine0003
How to clean?
Unfortunately masking tape is one of the most difficult to clean due to its fragility. however, we have found that gentle scraping is one of the most effective ways to clean it. With light pressure, evenly scrape off the remaining plastic thread from the surface, being careful not to tear it.
If the tape does break during cleaning, replace this area with a new strip. The main thing is not to overdo it and do not apply a thick layer, this can adversely affect the quality of the print. If the tape is full of holes and looks like Swiss cheese, then it needs to be completely replaced.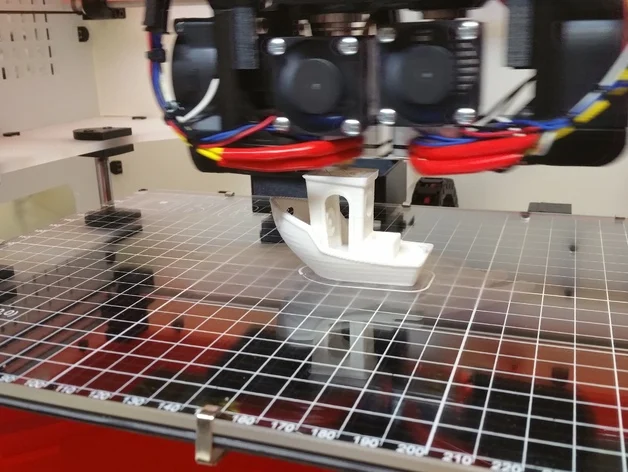 Strip and scrape the old tape from the surface. Then wash the platform with warm soapy water to remove adhesive residue. nine0003
Once the old tape has been removed and the surface has been thoroughly washed, apply a new layer of masking tape or Kapton. Squeeze out any air bubbles if necessary.
When should I clean?
Masking tape wears out quickly and needs to be replaced much more frequently than PEi for example. We recommend lightly scraping off any plastic that has stuck to it after each print. Depending on the frequency of printing, you will need to change such a surface daily, weekly or once a month. nine0003
Best 3d printer for beginners Creality Ender 3 Max
Hover over image to enlarge Click image to enlarge
Save$70.00
Creality
Ships From: China
Variant of
China - $269. 00
00
Share this product
Antinsky: The Creality Ender 3 family is the most popular 3D printer in the world. They are simple, cheap, easy to operate and good quality, so Creality ender is the best 3D printer for beginners. 2020 Creality publishes ender 3 max with larger print size to meet the needs of more people. nine0003
Functions:
【Integrated structure design: Alumina frame and H-shaped metal base create a stable integrated machine structure that is both practical and artistic.
【High precision printing: Ender-3 Max has a modular hotend With heat-resistant copper nozzle, which is conducive to fast melting of the filament and smooth extrusion of the filament. work throughout the whole process, smooth movement and stable printing. Dual cooling fans, effectively dissipating heat..
【Full Metal Extruder & Carborundum Glass Platform: The all metal Bowden extruder features powerful and smooth filament feeding. Carborundum glass platform contributes to faster heating of the hearth and better adhesion of prints. Super smooth even on the first layer.
【Print resume function and thread breakage detection: The printer can save a print record when the power is turned off and continue printing when the power is restored. Auto stop printing when filament runs out or breaks..
【Safe Power Supply & Silent Driver TMC2208】Powerful power supply, safe and stable to use.
【Wide Application】Large print size 300*300*340mm to meet a variety of printing requirements, support a variety of 1.75 filament printing mm, such as PLA / TPU / PETG / ABS / Wood, etc. Widely used in toys, architecture, furniture, education, medicine, daily necessities and other fields..
Model: Ender-3 Max
Output Voltage: DC 24V
Rated Power: 350W
Molding Technology: FDM Print Size: 300*300*340mm
Print Accuracy: 0.1mmm
Print speed: 30-60mm/s (recommended), 100mm/ss
Nozzle diameter: 0.