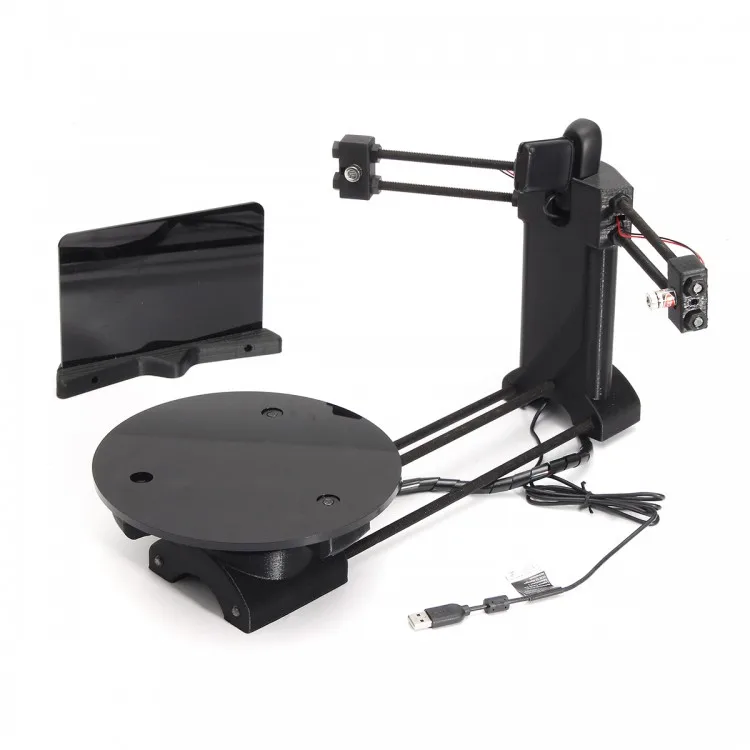
Open 3d scanner
SCANNER | OpenScan
Scanner
Scan volume: 18x18x18cm
Compatible pi shield
DSLR, Smartphone and Raspberry Pi Camera support
several modifications available (size, design ...)
aimed at tinkerers
MORE DETAILS
Scan volume: 8x8x8cm
Compatible with pi shield
Raspberry Pi Camera or Arducam IMX519 only
aim: easy to use scanner
--> "one-click-solution"
MORE DETAILS
Controller
compatible with all recent Raspberry Pis and various scanner builds
support various camera types (DSLR, pi camera, Arducam)
Browser-based User Interface
easy to use OpenScanCloud
a lot of potential :)
MORE DETAILS
SHOP
OUTDATED!
compatible with Arduino Nano
supports various cameras via external trigger
basic two axis stepper controller with camera trigger and ringlight connector
MORE DETAILS
Other Builds
Head 04/2020
-
aim: multi-camera support, larger objects
-
pros: scalable solution
-
cons: difficulty to create reliable software
-
status: hibernating
-
links: unpublished yet
Laser-cut 09/19
-
aim: laser-cut version of OpenScan
-
pros: no 3d printing
-
cons: not happy with the design
-
status: hibernating
-
links: unpublished, as the design is pretty half-baked
The Wheel 3 (06/18)
-
aim: DSLR support
-
pros: fun build and decent results
-
cons: not rigid, lot of 3d printing, not adjustable to different object sizes
-
status: stopped
-
link: Thingiverse
The Wheel 1 (04/18)
-
aim: mimic natural movement around the object
-
pros: object is static
-
cons: not rigid, difficult lighting, a lot of 3d printed material
-
status: stopped
Large 02/2020
-
aim: accomodate larger objects
-
pros: scalable solution
-
cons: difficult lighting, wire management .
..
-
status: hibernating
-
links: Thingiverse
CNC 08/19
-
aim: CNC version of OpenScan
-
pros: no 3d printing
-
cons: I do not have a CNC, not happy with the design
-
status: hibernating
-
links: unpublished, as the design is pretty half-baked
The Wheel 2 (05/18)
-
aim: mimic natural movement around the object
-
pros: object is static
-
cons: not rigid, difficult lighting, a lot of 3d printed material
-
status: stopped
-
links: Thingiverse
pre-OpenScan (01/18)
-
aim: first try to rotate/tilt the object
-
pros: great results, easy to build
-
cons: weak stepper motors, inefficient design
-
status: improved version
-
Links: Thingiverse
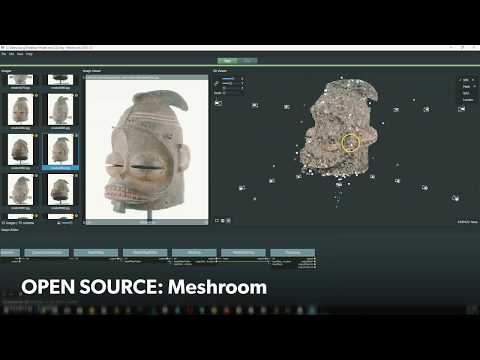
Explore 3D scans with this open source tool
Image by:
CC BY 3. 0 US Mapbox Uncharted ERG
Light detection and ranging, better known as LiDAR, is a method of taking photographs of 3D space using lasers and GPS. That sounds like science fiction—I can think of a few scenes in some movies that probably reimagined this technology without realizing it—but it's a technology that's existed for over 50 years.
LiDAR is useful for topographical surveying and archaeological recordkeeping, and it's useful for obtaining sources for 3D printing. I was introduced to it while working on a movie that needed to integrate an imaginary (or was it?) dragon with a real-world forest and foresting town.
For all of these things to appear seamlessly in the same movie, digital artists were tasked with recreating, with 3D models, a tree or building that actually existed. To get the real-world objects exactly right in the 3D-modeling application, the artists needed to essentially trace the real-world object, just as you might trace a photograph to produce an accurate drawing on tracing paper.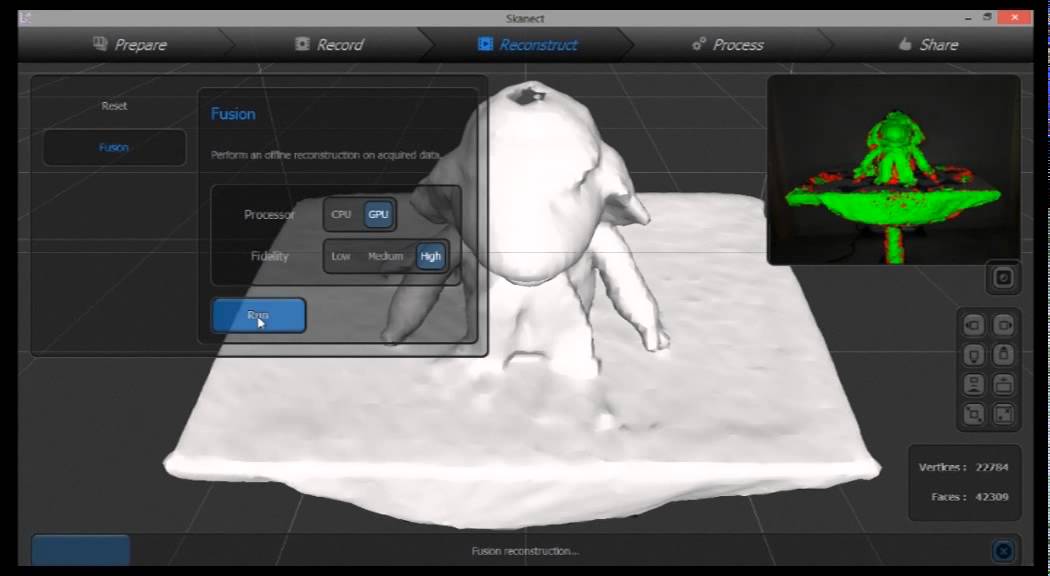 Instead of photographs, the 3D-modeling artists used LiDAR scans, which allowed them to "trace" an object in all dimensions.
Anyone can play with the potential of LiDAR with MeshLab, an open source LiDAR point cloud viewer and editor.
Install MeshLab on Linux
MeshLab is available on most Linux distributions from your package manager.
On Fedora, Mageia, and similar distributions:
$ sudo dnf install meshlab
On Debian-based distributions:
$ sudo apt install meshlab
I use MeshLab as a Flatpak, and there's a convenient AppImage available on MeshLab.net.
Getting a LiDAR scan
LiDAR equipment isn't easy to obtain, so unless you're working on a project using LiDAR scan, you probably don't have a LiDAR scan just lying around.
However, the OpenHeritage project is dedicated to archiving scans of significant scientific and public interest. The project has scans of ancient ruins at Tikal; cathedrals in France, Spain, and Italy; palaces in Syria and Jordan; and more, published under the terms of Creative Commons licenses.
LiDAR scans contain millions of points that define an object, so they're very taxing on system resources. To work on a LiDAR scan comfortably, anticipate requiring a good graphics card and plenty of RAM. If you just want to browse through a scan, the Pantheon (10.26301/t9sj-mf53) dataset is surprisingly clean and is only 89 MB with just 6 million vertices.
The Pantheon scan is attributed to Gerd Graßhoff, Michael Heinzelmann, Markus Wäfler, Christian Berndt, Jon Albers, Oskar Kaelin, Bernd Kulawik, Ralph Rosenbauer, Nikolaos Theocharis, Michael Lustenberger, Bernhard Fritsch in 2021, and is distributed by Open Heritage 3D under the CC BY-NC-SA license.
After downloading the mesh file, unzip it to uncompress the .e57 file.
For this article, the terms mesh, point cloud, data set refer to the same thing: the collection of vertices produced by a LiDAR scan.
MeshLab interface
When you launch MeshLab, there's usually no LiDAR scan loaded. To import one, go to the File menu and select Import Mesh or press Ctrl+I on your keyboard.
Select your mesh.
Image by:
(Seth Kenlon, CC BY-SA 4.0)
You can adjust your view of a point cloud by clicking and dragging on one of the axis handles (the trackball, in MeshLab terminology) appearing around the origin point of the mesh.
Use your scroll wheel to zoom in and out on the point cloud. Scroll down to zoom in and scroll up to zoom out. Don't confuse this with scaling. The trackball doesn't change with your mesh, so the point cloud only appears to be scaling up or down, but the panel at the bottom of the window reveals that your points haven't changed.
Image by:
(Seth Kenlon, CC BY-SA 4.0)
The top toolbar of the MeshLab window displays your primary editing tools. The first batch of tools are file operations used to load and save and export meshes.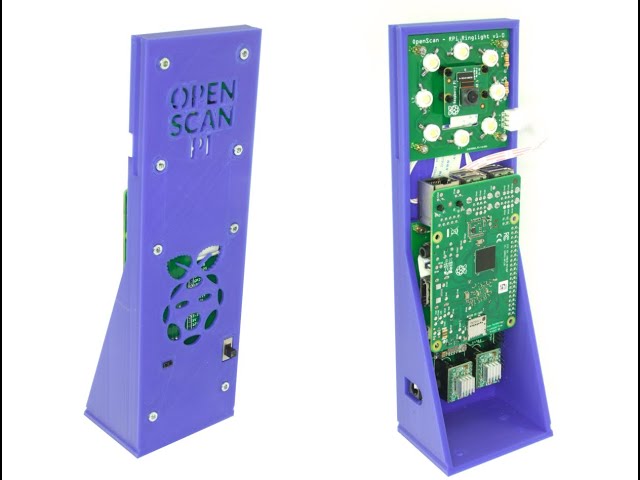 The second batch are display options you can use to change how you're viewing the dataset: you can view just the bounding box around the point cloud, the points within the cloud, just a wireframe, a gridded background layer, axis labels, and so on. The rest of the toolbar contains tools for editing meshes.
When no editing tool is selected, you're in viewing mode.
Transforming a point cloud
MeshLab is not a 3D-modeling application, even though there are many similarities in the general interface. However, MeshLab does edit meshes, so there are some tools that can transform a point cloud. The most basic edits are Rotate, Scale, and Translate.
To transform a mesh, click the Manipulators tool icon in the top toolbar.
Image by:
(Seth Kenlon, CC BY-SA 4.0)
With the Manipulators tool active, you can press T to translate your mesh's position, R to rotate your mesh, or S to scale your mesh.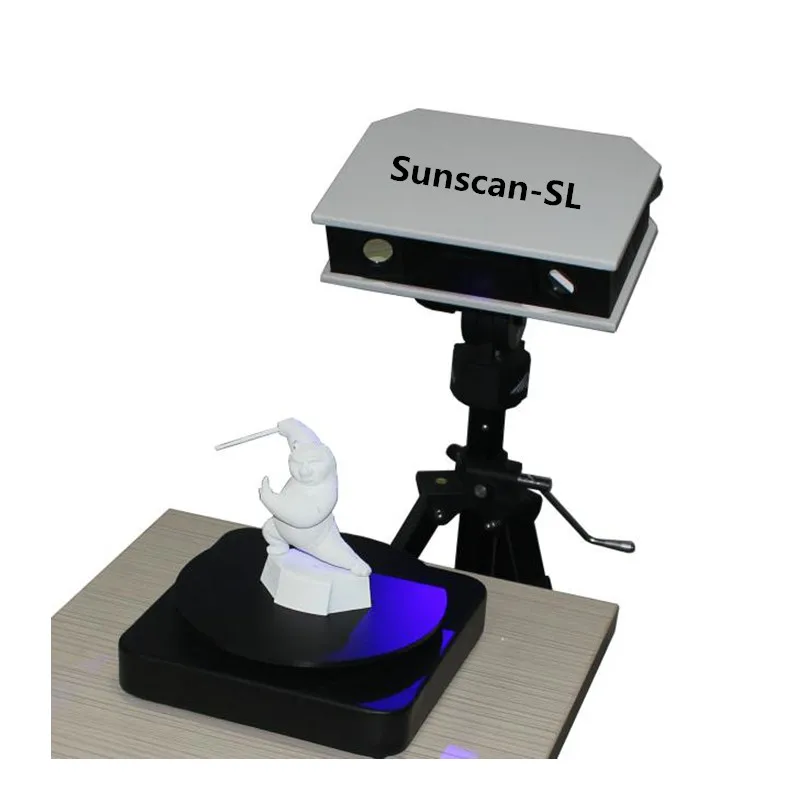 Controls appear for each operation, and, as with Blender, you can press extra keys to further constrain what you're doing. For example, press X in translation mode to constrain your translation just along the X-axis. Instructions like these are provided in the top left corner of the MeshLab window.
Image by:
(Seth Kenlon, CC BY-SA 4.0)
When you're finished with a tool, you must click its icon again to deactivate it. Clicking on a new tool does not deactivate your current tool.
Pressing Escape on your keyboard switches you to view mode, and pressing it again returns you to your previous tool. This way, you can adjust and edit and adjust quickly with no added mouse clicks.
Selecting points
A common task in a mesh editor is cleaning up a LiDAR scan by removing extraneous points. The LiDAR scan of the Pantheon is pretty clean as it is, but not all are, and it can save a lot of processing power and hard drive space to eliminate vertices you don't need.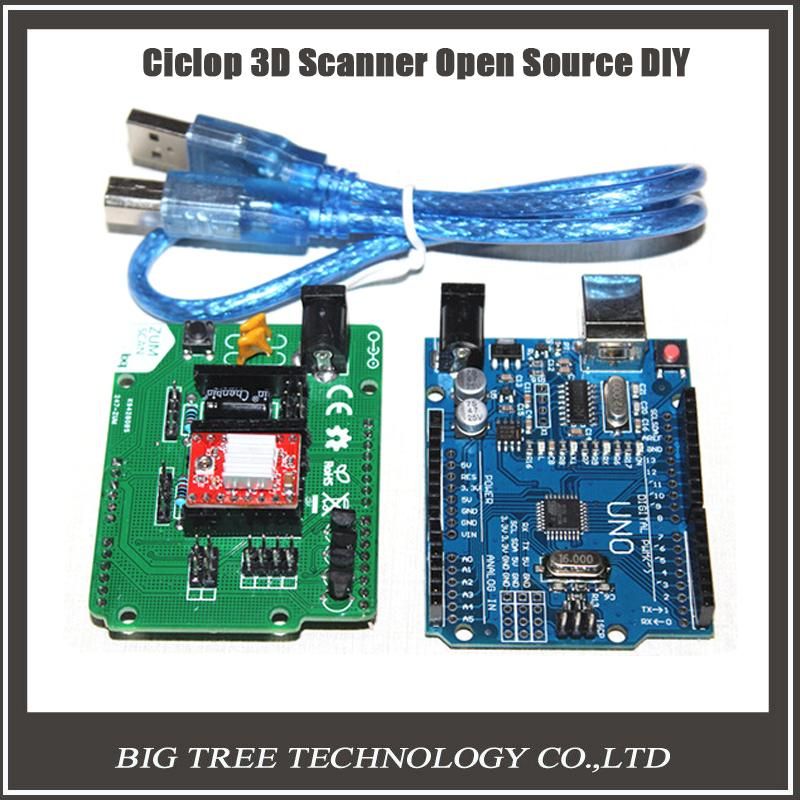
You can select points using the Select vertex clusters, Select vertices on a plane, and Select faces/vertices inside polygonal area tools. The concept is similar to selection in any graphic application, although it's a little more complex in MeshLab because you're interacting with 3D space.
My favorite selection method is with the Select faces/vertices inside polygonal area tool:
- Draw a polygonal selection area encompassing the points you want to select.
- Once you've got a selection area, press Q on your keyboard to activate the selection on the points within your polygon. Selected points turn red.
- Press Escape on your keyboard to switch to view mode and rotate or reposition your point cloud to see it from a different angle.
- Add to your polygon selection and press Q to add the new points.
Repeat that process until you have everything you need in your selection.
You can refine your selection by pressing C to clear your polygon and start a new one.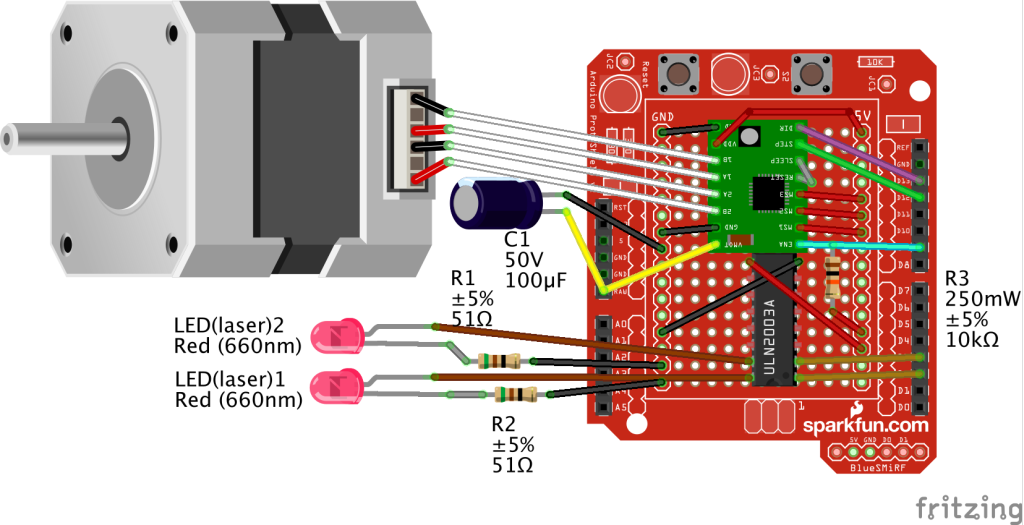 Pressing C doesn't clear your selection, just the selection area, so you can draw a new polygon and either add more points with Q or remove points you didn't mean to select with W.
Image by:
(Seth Kenlon, CC BY-SA 4.0)
Once you've got a selection, click on the Filters menu and browse through the Selection submenu to perform whatever action you need on your point cloud.
Exploring LiDAR
MeshLab is packed with features, and this article has only covered the basics.
There are lots of filters and lots of ways to read data in from reference sources, point cloud simplification, Z-painting, model aligning, and much more.
Whether you're diving into LiDAR to clean up scans for your 3D printer, adjusting origin points for a carefully orchestrated tracking shot in the next blockbuster, or recording the states of historical sites over the years, MeshLab is an invaluable and unique open source tool.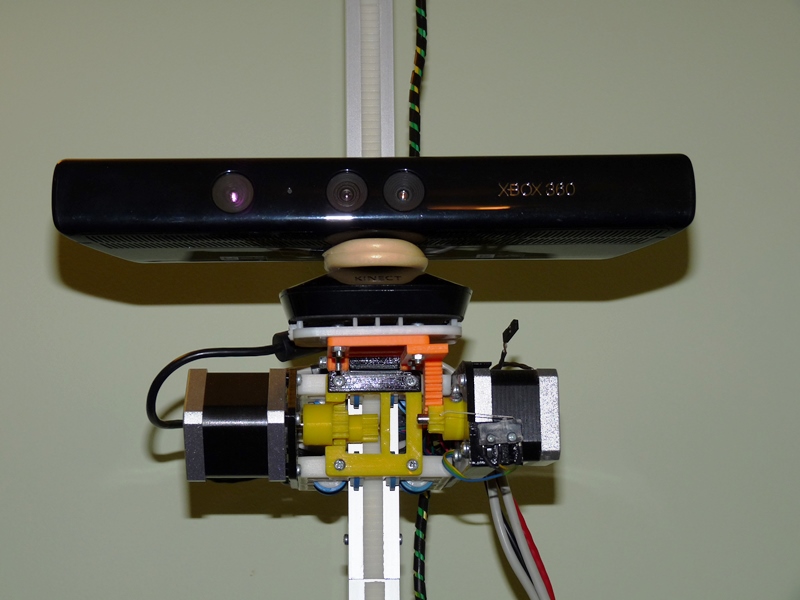
This work is licensed under a Creative Commons Attribution-Share Alike 4.0 International License.
iPhone LiDAR 3D Scan | arvr.media
As you probably know, the latest generation of iPhone (12 Pro and 12 Pro Max) is equipped with a lidar camera. 3D photography for me is a natural evolution of photography and I have been waiting for this day for almost 10 years.
Several 3D shooting applications have recently been released that take full advantage of this new capability. I have tested almost all of them available, and for the last 3 months I have been actively involved in 3D scanning. I am often asked what apps I recommend and how to get beautiful shots. Here is information about the apps that I love about each, as well as some general tips for using LiDAR on iPhone. nine0003
So here are my 6 scanning apps, all of which support exporting directly to Sketchfab:
Scaniverse
Scaniverse generally works well, is fast and easy to use, creates great textures, and does a good job of eliminating voids. Make sure you are working with your shots in ultra mode. This tool is very good for scanning things like cars. This frozen Mini is one of my best lidar shots. All my scanner shots are here, and the application is here. nine0003
Polycam
Polycam is fast and handles textures well. You can process the image in HD mode and get instant scan results. Very good for scanning things like rooms or murals and street art. You can see my Polycam shots here, and the app itself is here.
3D scanner app
The 3D scanner app offers a host of options that give you total control. For example, you can easily separate or trim excess space in an application. You can cut even with the help of a sphere. I think the app is especially good for small things like this dollar bill. Make sure you are using HD mode. Here you can see all my 3D scanner app images, and the application can be downloaded here. nine0003
Record3D
Record3D allows you to shoot 3D video, also known as 4D content, i.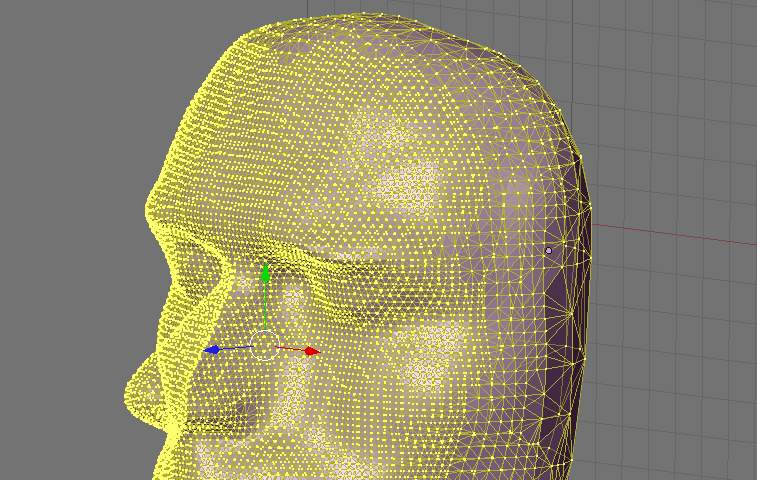 e. 3D scanning per frame of video. Here are my daughter's first steps. Keep in mind that this format ends up with very heavy files, so you only need to shoot for a few seconds to be able to upload the video to Sketchfab. Here you can find all my recordings in Record3D format, and the application is here.
SiteScape
SiteScape is great for quickly creating accurate point clouds. You can adjust the density and size of dots. I like to use it for complex and intricate scenes or structures. Also can be great for cars. This is where all my SiteScape snapshots are located. The application can be found here. nine0003
Everypoint
Everypoint is great for large point clouds, like this subway mosaic. The developers are teasing us about the upcoming app update combining lidar and photogrammetry, looking forward to trying it out. You can find all my Everypoint shots here, and the app is here.
General Tips
Here are some general tips for lidar scanning on iPhone:
- Remember that you can scan.
 People often get frustrated when scanning on the iPhone, usually scanning things that don't stand a good chance on their own. The most important thing to remember is that the scanner does not work with small things and objects. For example, a regular boot is often too small. Also, iPhone lidar does not work well with shiny/reflective elements
 - Avoid rescanning an area already covered, this will most likely create misalignment issues and create artifacts in your image
- Scanning around something small/thin - like a statue, chair, or wall - generally doesn't work well
- Make sure that every part of the scanned area is well scanned to avoid gaps and voids. To do this, I usually use something like a spray gesture, a bit like if I were painting with spray paint
- Walk slowly and carefully. Don't flinch
- A beautiful and neat 3D image significantly affects the overall perception. 3Dscannerapp, Polycam and Scaniverse offer cropping directly in the app
- Sketchfab offers many options to help turn a bad scan into a normal one.
 I like to add shadows (2nd editor tab) and then post-process effects like sharpening, depth of field, saturation
 - Adding 3D annotations to Sketchfab is a great way to turn a scan into a mini story
Sell 3D photos
Sketchfab store allows you to monetize your 3D creations. It seems to me that most of my iPhone lidar shots are still a little behind in quality in order to put them in the store. That being said, I put 2 of them up for sale (mini and doctor's office) because users actually asked me how they could buy them. The bottom line is that you never know how someone might use your scans, and it's often more about setting an appropriate price based on the quality and limitations of the content. Don't forget that the quality (and my skills) continues to improve, so I expect to be able to offer more 3D images for sale in the future. Remember that if you scan something with intellectual property (like Mini), you can only post it under a publishing license.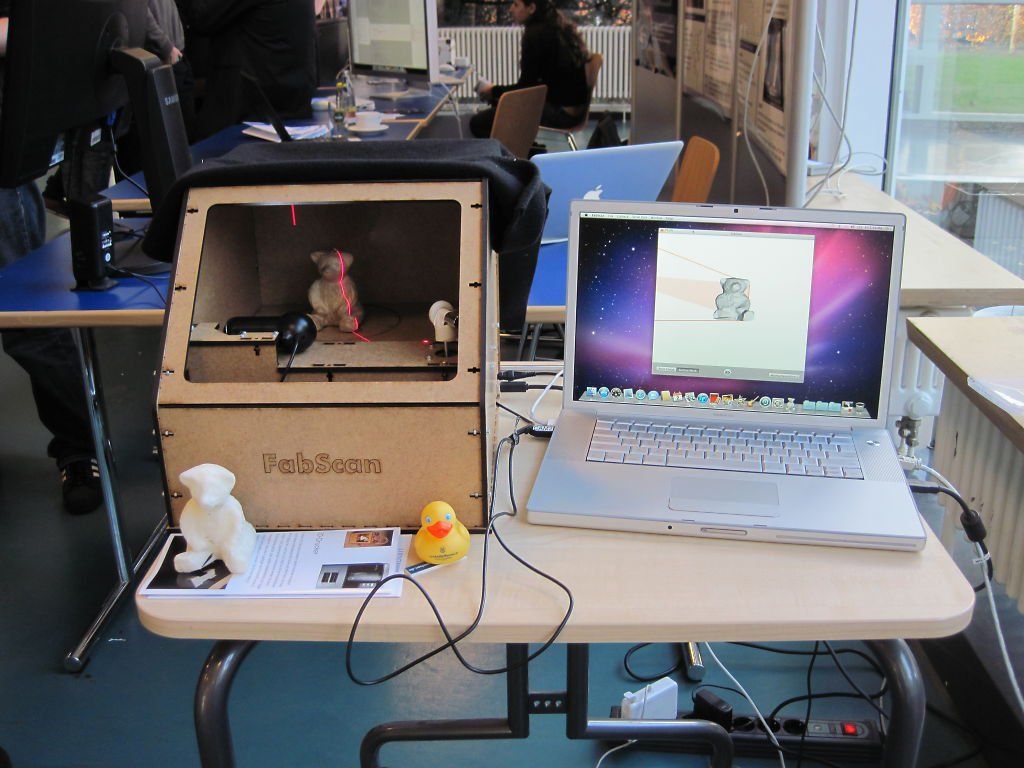 nine0003
This article brings together the best LiDAR apps for iPhone and iPad to help you unlock the full potential of this technology.
Read article
Here is a post about my go-to apps, what I like about each of them, and some general tips for iPhone lidar scanning.
3D scanning with the iPhone lidar
About the author
Vladimir Voronov
Member since September 24, 2017
Discussion
nine0074Write a comment
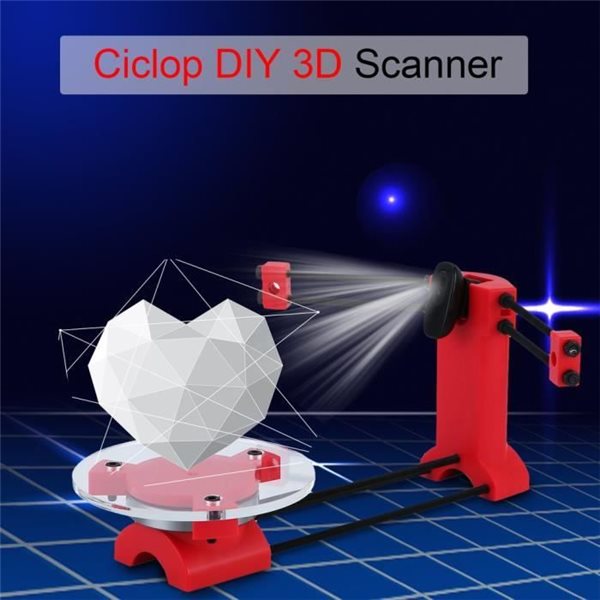
3D laser scanner
3D laser scanner with scanning accuracy of 0.01mm.
But the production of a high-quality 3D model is associated with a number of difficulties:
• Long time to create a quality model.
• Need for a qualified designer.
• High cost of making models "on the side"
In many cases, the solution to such problems is possible with the use of 3D scanners. As a result of retrofitting the machine with such a device, the machine allows you to quickly and accurately scan almost any object. For example, you can make a product from plasticine and scan it to get a finished computer model of the product. Also, you can scan a finished 3D product, such as a thread, and after some correction obtained by a computer model in a 3D editor, you can manufacture your product on a CNC milling machine using the scanned model. nine0003
Advantages of this technology for obtaining 3D models:
• it is possible to produce 3D models without participation of a 3D designer.
• Ease of preparation of the product for production
• Significantly less work for a computer designer
• Ability to quickly prepare for the production of a product that would take much more time with manual modeling. For example, manual modeling of one large carved element can take several weeks, and scanning and subsequent fine-tuning of the resulting model can take only a few hours! nine0094 • High accuracy of repetition of the original product, often unattainable with manual modeling.
Device and principle of operation of the 3D scanner
The laser scanning machine is a three-axis system that smoothly moves the laser measuring head over the scanned object. When moving the measuring head, the laser beam constantly measures the distance at the current point between the laser head and the object. The measuring head moves line by line over the entire surface of the measured object and the coordinates of all measured points on the surface are written to a file, which can then be opened in any modern 3D editor and, if necessary, correct the resulting model. nine0094 Due to the fact that laser scanning is a non-contact measurement method, it allows you to scan at a fairly high speed (up to several thousand points per second) and allows you to scan with high resolution. When working with a laser scanner, keep in mind that transparent and mirror objects cannot be scanned.
How the laser head works
The laser beam is directed at the object to be measured and reflected back into the head.