3D printer vibration damper
Do Stepper Dampers on 3D Printers Work? – Printing It 3D
If you’ve owned or used a 3D printer before, you’ve probably wondered how you can silence the machine. Some people don’t mind the sound of their 3D print coming to life, but not all of us want to hear the noise across the house for hours. There are several options for reducing a 3D printer noise, but stepper motor dampers are the most effective and cost-effective option.
Stepper dampers do work on 3D printers. These attachments absorb the shock that would come out as a result of vibrations to reduce the vibration noise and optimize the response time of step motor systems.
This article will discuss what stepper dampers are in detail and the types you need for your 3D printers. Since noise is also a factor here, we’ll investigate the effect of stepper dampers on 3D printers and how to mitigate these issues.
What Are Stepper Dampers?
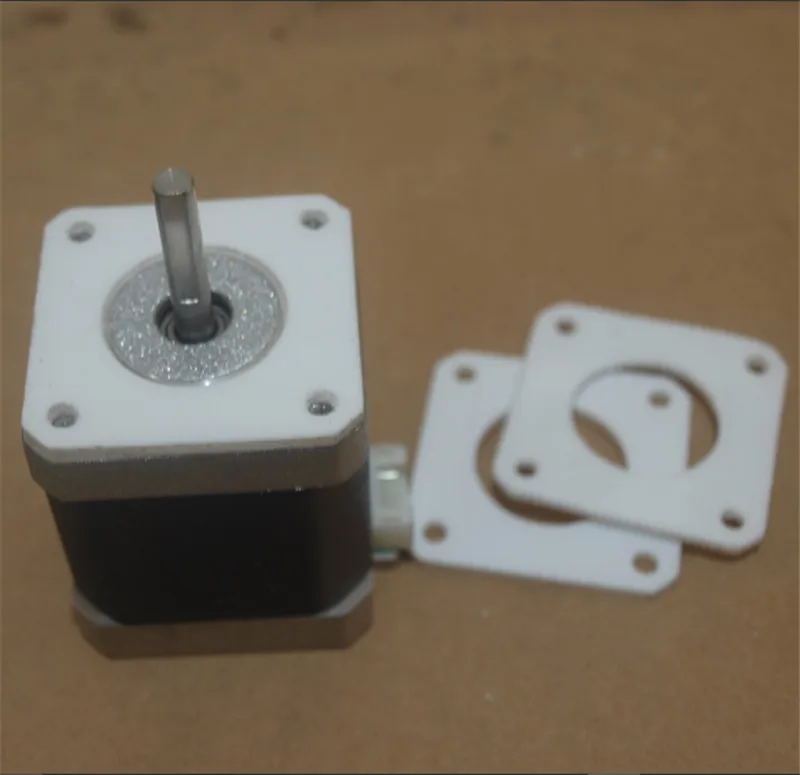
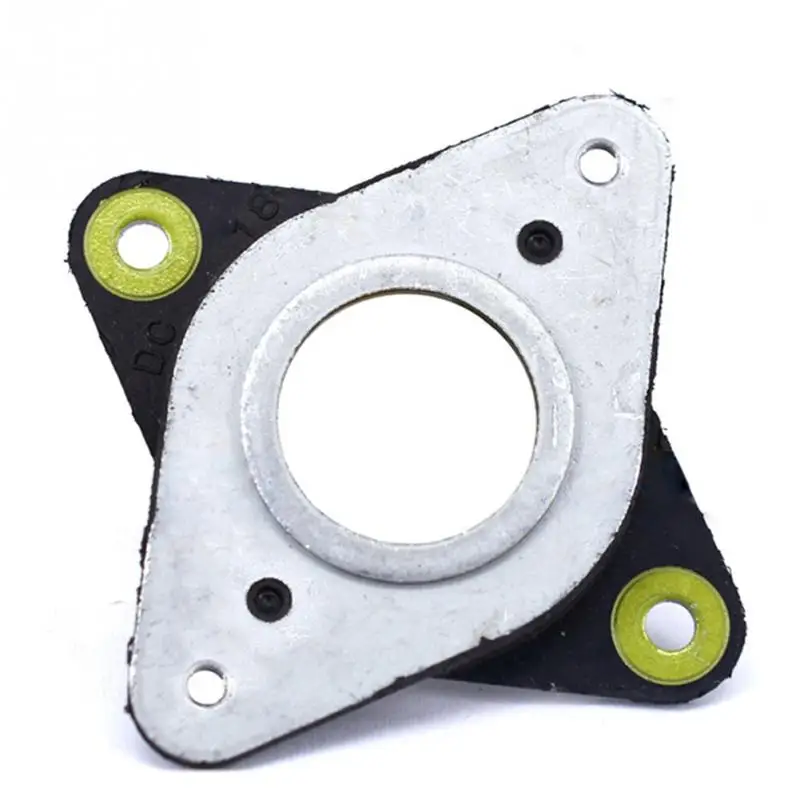
Stepper dampers are shock absorbers that lessen mechanical vibrations and resonance in stepper motors. They have two metal plates separated by a rubber spacer, allowing the motors to move while absorbing any output.
During operation, stepper motors vibrate and produce noise due to the vibrations. However, a stepper damper can help reduce the number of vibrations produced by these motors while also limiting the vibration transfer to the frame and other components of your 3D printer, thus reducing the noise.
A popular example of stepper dampers used in 3D printers is the NEMA 17 Steel and Rubber Stepper Motor Vibration Damper (available on amazon.com), suitable for NEMA 17 stepper motors and any other types of stepper motors.
Types of Stepper Dampers You May Need
3D printers have various moving parts, many of which produce noise. This is why there are different types of stepper dampers, and strategic placement of these dampers will help you more closely target the area of your 3D printer that you want to quiet down.
The three types of stepper dampers are the X-axis dampers, Y-axis dampers, and extruder dampers.
X-Axis Stepper Motor Dampers
The X-axis motor is one of the most significant sources of 3D printer noise because the extruder moves nonstop throughout prints. The vibrations enter the frame and magnify the sounds, resulting in audible mechanical screeches.
This noise can be very irritating, and printing takes hours. An X-axis stepper motor damper that absorbs that noise drastically enhances your printing experience.
Y-Axis Stepper Motor Dampers
The Y-axis stepper motor is responsible for your 3D printer’s movement along the Y-axis. It also contributes significantly to the loud screeching noise a 3D printer will produce. The Y-axis stepper motor damper catches the resonance from the Y-axis motor and absorbs it to eliminate the vibration noise.
Extruder Stepper Motor Dampers
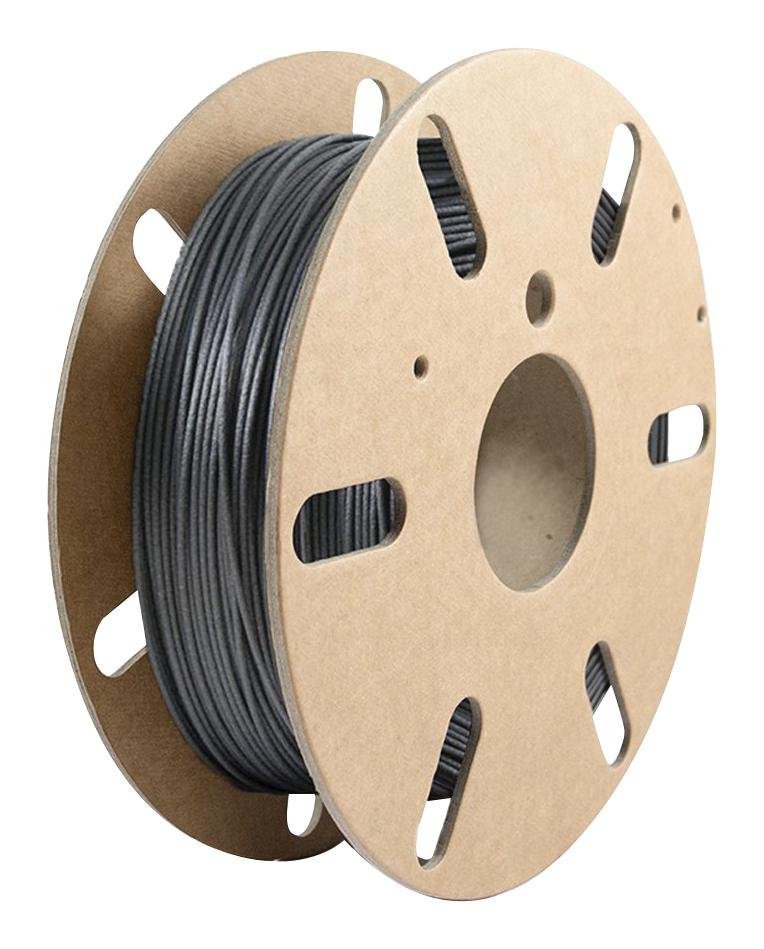
The extruder stepper motor is in charge of feeding the filament and controlling its movement so that it melts in the hot end and subsequently emerges as a fine thread of melted plastic from the hot end’s nozzle.
While using stepper motor dampers on the extruder isn’t advised, many 3D printer owners do so to reduce noise further.
The extruder stepper motor damper helps suppress the retraction movements significantly. But, it may affect the quality of your 3D prints.
Evaluating the Efficacy of Stepper Dampers on 3D Printers
The general opinion of people who buy and use stepper motor dampers is that the upgrade seems to be working positively and effectively to eliminate noise from most 3D printers.
There are also cheaper stepper dampers available for sale online, and most people report that they work just as well in reducing the noise.
Installation is easy, and anyone can do it at home with the help of the numerous online video tutorials available to follow. Here’s one of the YouTube tutorials you can follow to install stepper dampers on your 3D printer:
Many people have also conducted experiments on their 3D printers to see whether the stepper dampers work and are advertised. Most people report positive results in terms of noise reduction. Some also show experiments to test the quality of the models with the different types of stepper dampers installed.
Check out this YouTube video showing the differences in noise with and without stepper dampers:
Effect of Using Stepper Dampers on 3D Printers
Using stepper dampers to eliminate the noise from your 3D printer is an easy fix to the solution, but it comes with its flaws. They reduce the vibration and facilitate heat transfer in the stepper motors, shortening their lifespan.
They’re also not a permanent solution to the noise problem. It’s like putting a band-aid on a bullet wound. The stepper dampers don’t stop the vibrations from happening. They absorb the output and reduce the noise.
Due to the potential problems created by stepper motors, many people are opting for more sophisticated strepper drivers, which attach to the printer’s mainboard and significantly reduce the noise level.
However, to solve the heat transfer problem in stepper dampers, you can use aluminum heat sinks with thermal tape to boost heat conduction and cool the motors.
The source produces heat which dissipates as it moves away from the source. The heat sink spreads the heat evenly, dissipating it away. Active heat sinks use forced air to increase fluid flow across the hot area.
Instead of buying a heat sink from manufacturers, you can print your 3D heat sinks and use them on your printer.
Final Thoughts
All 3D printers vibrate, and without proper optimization of the print speed, jerk and acceleration settings, and the weight of the mechanical parts, the vibration may produce unwanted screeching noises. Stepper motors are an effective way of reducing this noise.
Stepper dampers are applicable for both the X and Y axis of your 3D printer. You can also install them on the extruder, although doing so could potentially hurt the quality of your 3D model.
Additionally, stepper dampers introduce a heat dissipation problem that may reduce your motor’s lifespan. Installing a heat sink is one way to reduce this risk.
Simple 3D printer noise reduction with a concrete paver — CNC Kitchen
I print a lot and this also means that many of my prints run overnight. Unfortunately, our bedroom is right next to my office in which my main printers usually are. When I got into 3D printing it was a real pain because the printing noises just kept me from some good night sleep so I usually only ran them during the day. A couple of years ago I started putting cheap pavers below my machines that you can get in many different sizes from the hardware store. You can see them in plenty of my videos and viewers keep asking, what they are and why I use them. What are your favorite cheap and effective printer upgrades? Let us all know in the comments?
So why do I use a heavy piece of concrete under my printers? Well, primarily because they reduce the noise level of the printer significantly. And the important thing here is that they don’t only reduce it in the room in which they are. Even more important, the setup that I use makes the printers way less hearable in the rest of the house.
Printing noise usually has two main sources. The first one are the stepper motors with induce higher frequency vibrations. As their name already suggests, they don’t turn continuously but in discrete steps. Most motors have a step angle of 1.8°, which means 200 steps per revolution. Stepper motor driver chop those full steps down to microsteps the make the motion more smooth, still it will never be 100% smooth after all. This stepping and the magneto-mechanical system that gets excited cause the well-known printing noise of machines that use, for example the good old Allegro A4988 drivers. More recent drivers eliminate that problem very well, but there are still some vibrations caused, especially during fast travel moves. The other, lower frequency vibrations emerge during direction changes, so accelerations, that induce forces on the frame and basically shake it.
Still, most of the sound isn’t actually directly coming from the motors themselves, but from other parts of the printer, like the bed or the frame, that resonate at those frequencies and emit sound. You probably all know these small music boxes. If you hold them in your hand and turn the crank they play a song but not too loud. As soon as you put it on a table the sound gets highly amplified. And this is also what happens if you have your printer sitting on a desk. The printer itself emits noise but the table on which it’s sitting is basically acting like a big loudspeaker. Even worse, the table transmits the vibrations into the floor and into your house, making even the floor in your bedroom a speaker. I put a microphone on the floor of my bedroom and once ran the printer directly sitting on the table, and on a paver with foam below it. I applied similar amplification on the audio so that you can hear the difference.
To avoid that from happening, we need to decouple the vibrating parts from and resonance bodies. This could already start by using those stepper motor dampeners that you put between the motor and the mounting points. What we usually do is to add a couple of rubber feet or felt pads under our printer though there are also other solutions around, like these 3D printed spring feet, which can be a good start. As you’ve seen, I especially like to use these cheap concrete pavers because not only do they give me a level surface, they also enable me to put softer materials like foam under the machine. They distribute the load more evenly for even better decoupling.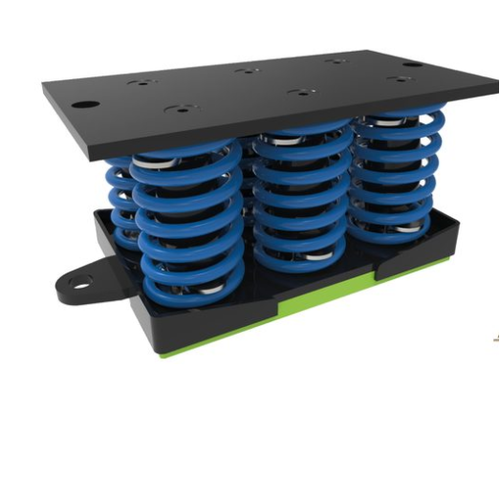 You shouldn’t put your machine directly a soft materials, because not only can they warp the frame, they also might get ineffective because they get totally squished. And a big piece of foam is a potential fire hazard. Though also with the paver, make sure that no wires constantly rub over the rough surface.
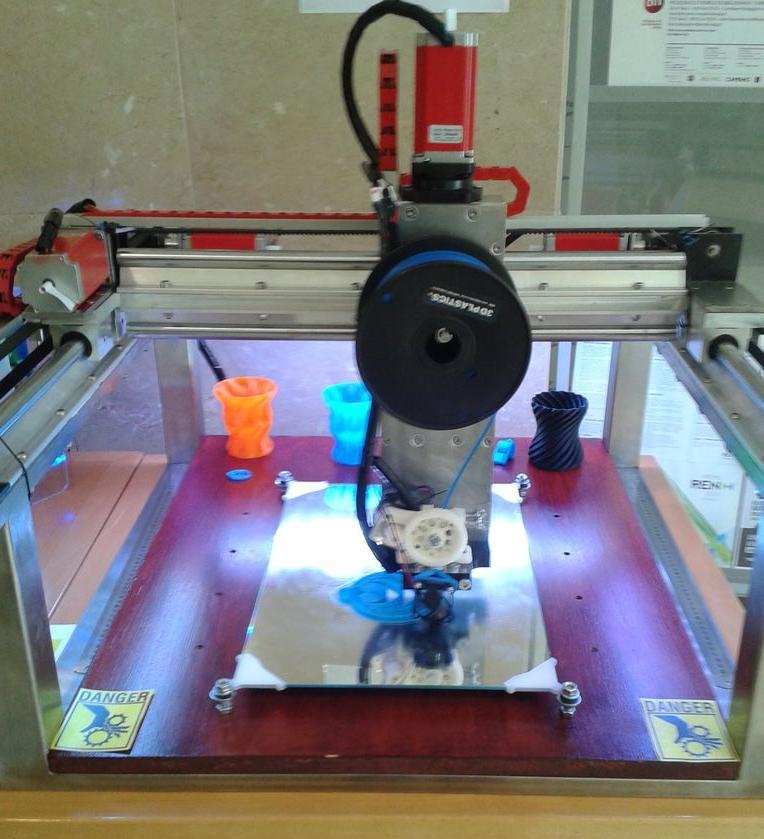
To find out how the different decoupling solutions work, I set up a small test in which I placed my old Prusa Mk2, that still has a bit louder stepper drivers, on a table with varying media of separation and then ran a short test GCode, while measuring the noise level. I’ll also talk about changes in printing quality with these methods at the end of the video. I always ran the test 3 times and calculated the average peak volume. First, I removed the felt pieces for our baseline. If we listen to the test pattern, the movements in the x-direction are pretty quiet, and movements of the bed, so when the y-axis is involved, are significantly louder.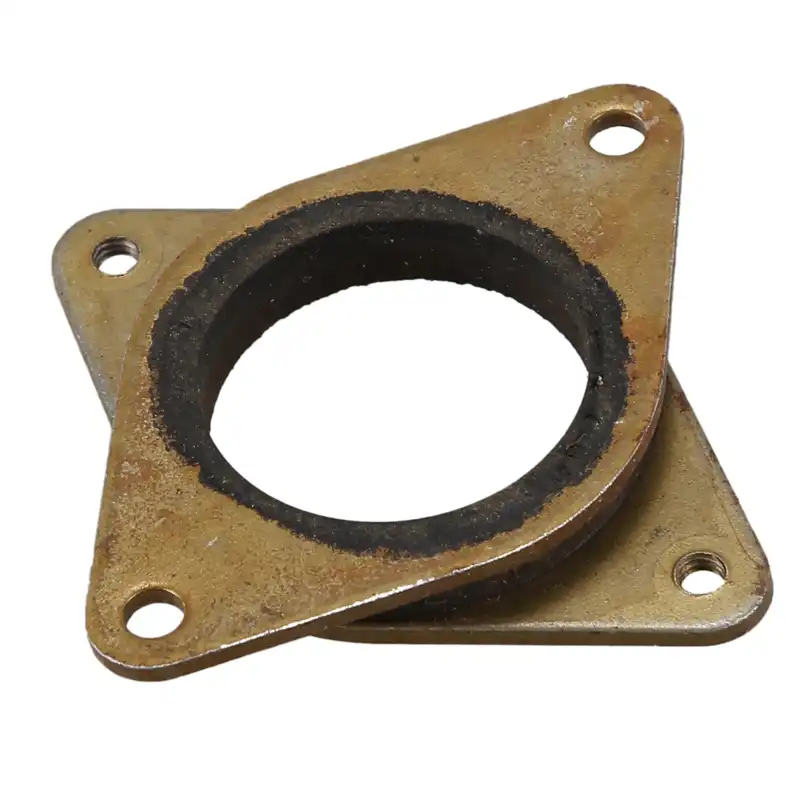 The bed acts as a resonator, which is excited by the stepper motor and probably also the linear ball bearings. The maximum sound level is 67.7dB.
Test setup with 1m distance to the printer.
Adding the felt pads already reduces the noise level significantly and we end up at 59.6dB. The felt pads came delivered with my MK2, so how can we further improve on the noise. The next significant reduction is the use of printed spring feet. Here we end up with a maximum noise level of 57.5dB. I used them years ago, but quickly noticed that they might not be optimal because of their springiness, on which I’ll go into details in a bit. These pads consisting out of pressed together rubber pieces are often used under washing machines for a very similar purpose. Putting those under the printer directly or under the concrete paver results in pretty much the same levels leaving us at around 57dB. Next comes probably the visually most pleasing solution, and this is the paver with thick felt feet. Here the resulting noise level was 56.5dB. These blocks made from foam pieces are the parts that I’ve been using for the last two years under my main machine but are sometimes hard to find. Their noise level was pretty much the same as the last one with 56.5dB. I got the best results from this really soft packing foam where we even got below 56dB during the travel moves. And here a comparison between the best, and the worst.
So the soft materials provide a separation layer and prevent the vibrations from traveling from one part to the other. Different types of materials have specific properties and use cases. Rubber is well known for this application and as a rubber mat can be used even for heavy parts like your washing machine. For the lighter 3D printers, this type is probably a bit too hard and prevents good decoupling. Rubber is on the one side springy but also is dampening, and this is a point I really want to talk about because spring and damper are often mixed up. A spring is a component that can store potential energy due to its elasticity and release it again. An ideal spring leaves the energy in the system but can cause catastrophic resonances. A damper, on the other hand, is a device that usually absorbs kinetic energy, so movement, and converts it into heat and radiates it away, so it takes energy out of the system. In reality, there is no pure spring and no pure damper; it’s always a combination of both, and the ratio of spring stiffness and damping ratio is essential for a dynamic system. This is a quite a technical and complex topic and in our case, it’s probably sufficient to use trial-and-error. Still, for our application, this means that we, on the one hand need the spring part for the vibration isolation and on the other hand, if we don’t add an additional damper, the springs can cause the whole printer to wobble around and resonate, potentially causing problems.
For this reason, the spring feet, even though they work, are maybe not the best idea to use under a printer because they only damp very little.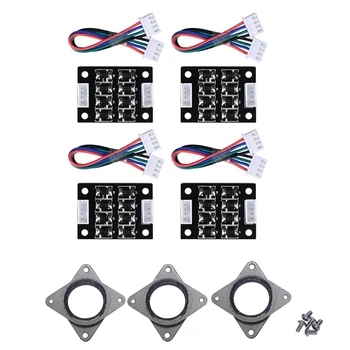 People have been tackling that problem by using squash balls between the printer and the table with great success, because they merge springiness with dampening. I tried to illustrate that with a small test by dropping different types of balls and recorded how high they bounced back. A hop ball is the worst in terms of damping and bounces almost all the way back, but that’s also by design. The golf ball lost 24% in height. The squash ball almost didn’t bounce back and lost 84% in height. At last, I also found a juggling ball that basically didn’t bounce back at all. It’s filled with beans, and the friction between the particles absorb most of the potential energy. So might this even be a better solution than a squash ball? Probably no, because, as I said before, we need both the elastic behavior and the dampening component, and the bean bag misses the springy part.
The squash ball seems to be a good compromise between both with some springiness but also lots of damping. Rubber has dampening properties due to the internal movement of the polymer chains. Foam, on the other hand, has also “some” of this property but also dissipates the energy because when it’s squised, the air inside travels through the pores and causes viscous damping. Due to the internal structure, so type of base polymer, open or closed porosity and so on, the amount of dampening can differ. Again I set up a small test where I dropped the golf ball on different materials and recorded the energy loss after the first bounce. The reference again lost only around 20% of energy. The harder and quite dense foam absorbed around 50% of energy. The rubber pad reduced the bouncing height by 64% and the soft foam sponge almost 77%.
So how do all of these results correlate with our noise isolation test? Actually pretty well, because also here the soft, open cell foam performed the best though also the other solutions were not that much worse.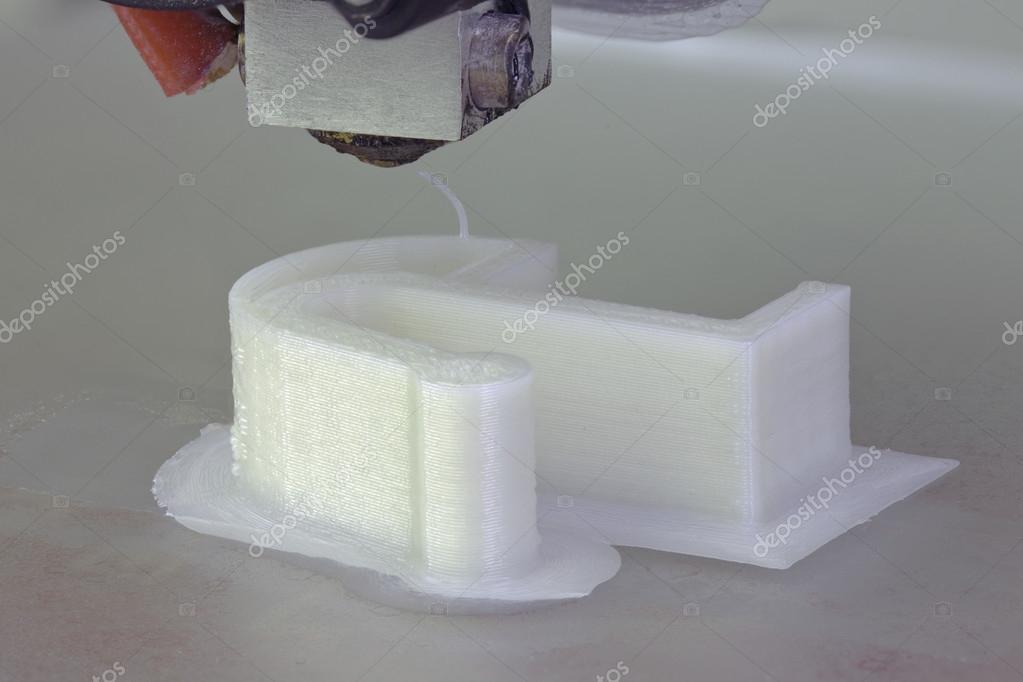 What I want to say with that is, that putting anything soft under your printer is usually beneficial because the elastic behavior decouples it from the table. Some damping might additionally be useful to prevent the printer from resonating. Oh, and by the way, if you enjoy this investigation, please consider subscribing and clicking the notification bell to not miss any upcoming videos.
Another interesting point I noticed in the past is, that adding some flexibility under the printer, can even improve your printing quality. For this reason, I chose four different printing bases and printed a 3DBenchy and also my ringing test on each using the same GCode. I placed the printer directly on the table with only the felt pads. I used the spring feet. I placed it on the concrete paver with only felt feet below and finally the paver on some foam. The difference on the Prusa was not huge, but you can see that there are fewer ringing marks on the parts that were on a flexible base. The part that were printed on a rigid surface showed a little more.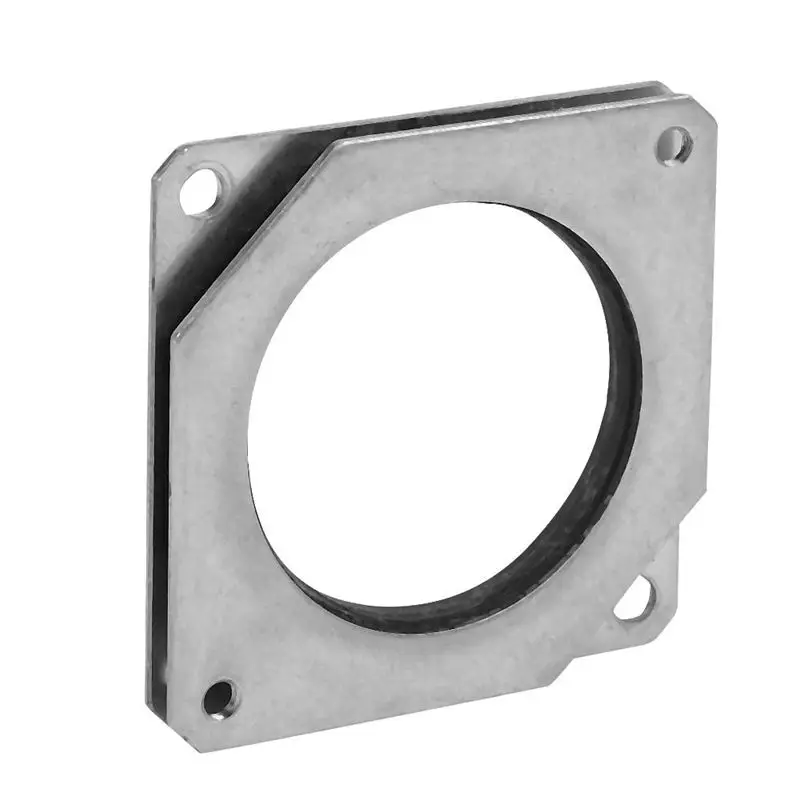 In the past I have seen this even more exaggerated to my CoreXY Sapphire Pro for example, where the moving print head sits on the top and has quite some leverage for causing vibrations.
Ringing marks on test parts
The explanation that I have for the improvement in quality is, that if you have a flexible base, the forces that are generated during the directional changes don’t cause the frame and other motion components to deform but will cause the printer to move as a whole unit and therefore deform less. The concrete paver here again has advantages because it moves as a unit keeping the base of the printer on one plane. If you have flexible components under each foot, your frame might warp. Maybe you have different thoughts on this topic. If so, then let me know down in the comments!
In summary, putting a $2 slab of concrete under your printers with some soft padding, even only the packing foam that your printer came with, is, in my opinion, one of the most simple and best upgrades that you can make.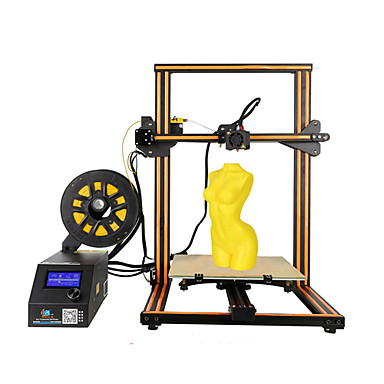 Not only have we seen that we can reduce the noise in the room the printer is, but we also prevent our house from becoming a big speaker. Besides that, I have found that adding some flexibility to your base can also improve your print quality by reducing ringing marks.
Stefan Hermann
0 LikesFree 3D file Vibration damper for FlashForge Creator Pro・3D printable model for download・Cults
Fun Octopus Flexi
Free
Rubber Band Gun remix² 5 shots
Free
Hexagonal vase (spiral print)
Free
Pile of Poo Emoji multi-component polished
Free
Fillenium Malcon (refurbished and complete models)
Free
Hinged chest with working lock and wood texture
Free
Flexi Rex with stronger bonds
Free
Pile of feces emoji (U+1F4A9)
Free
The best files for 3D printers in the Tools category
Pantone PLA
Free
Asian hornet trap
Free
3D Printing Tool Holder
1 €
Pegboard holder for toilet paper roll
Free
Small Printer Test Block
Free
Prusa i3 Pièces plastiques 3D Phoenix
Free
2020 Nozzle Rack
Free
Bestsellers in the Tools category
SUPERBOX
1,50 €
Ender 3, 3 V2, 3 pro, 3 max, dual 40mm axial fan hot end duct / fang.
 CR-10, Micro Swiss direct drive and bowden compatible. No support required for printing
 1.62 €
Ender 3 S1 Air duct for stock fan
1 €
Case for Chill Buddy lighter
0,95 €
PRECISE DIAL INDICATOR 3D PRINT DIY
1,90 €
ENDER 3 S1/PRO SPRITE, V3 AIR DUCT 5015 OR 4020
€2.49 -fifteen% 2.11 €
PET-Machine, make your own plastic bottle filament at home!
50 € -70% 15 €
Paint stand with scissors
5,30 €
Fire hydrant storage container
1. 92 €
92 €
Quick Print Stackable Parts Containers / Storage Boxes
2.91 €
Business card embossing system
3 €
PRECISION CALIPER 3D PRINT DIY
3,11 €
telephone ring holder
0,90 €
UNIVERSAL BED LEVELING INDICATOR FOR VERY ALL PRINTERS
2,87 €
Armadillo - flexible wire conduit
€1.72 -60% 0.69 €
Display holder FLSUN v400
€4.99
Do you want to support Cults?
Do you like Cults and want to help us continue our journey on our own ? Please note that we are a small team of 3 people, so it is very easy to support us in maintaining activities and creating future developments.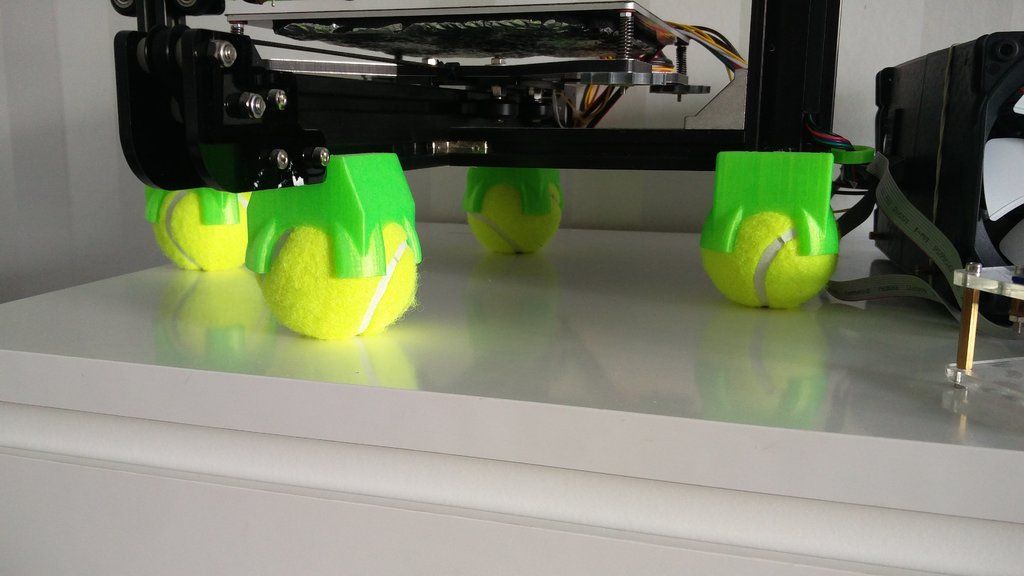 Here are 4 solutions available to everyone:
-
ADVERTISING: Disable the AdBlock banner blocker and click on our banner ads.
-
AFFILIATION: Shop online with our affiliate links here Amazon.
-
DONATIONS: If you want, you can donate via PayPal here.
-
* INVITE FRIENDS: * Invite your friends, discover the platform and great 3D files shared by the community!
Free 3D file Vibration damper for FlashForge Creator Pro (round legs)・Template for download and 3D printing・Cults
Fun Octopus Flexi
Free
Rubber Band Gun remix² 5 shots
Free
Hexagonal vase (spiral print)
Free
Pile of Poo Emoji multi-component polished
Free
Fillenium Malcon (refurbished and complete models)
Free
Hinged chest with working lock and wood texture
Free
Flexi Rex with stronger bonds
Free
Pile of feces emoji (U+1F4A9)
Free
The best files for 3D printers in the Tools category
Wing Knob for Photo Light Stand
Free
Star Trek: The Next Generation inspired Enhancement module
Free
Tool box for 3D printer
4,80 €
Tool Organizer
Free
Quadrant (Sexstant predecessor) - Celestial navigation - NO Supports
Free
Simple Keychain Tool
Free
Sand Carving Tools
Free
HODOR DOOR STOP - GAME OF THRONES
Free
Bestsellers in the Tools category
PET-Machine, make your own plastic bottle filament at home!
50 € -70% 15 €
UNIVERSAL BED LEVELING INDICATOR FOR VERY ALL PRINTERS
2,87 €
Display holder FLSUN v400
€4.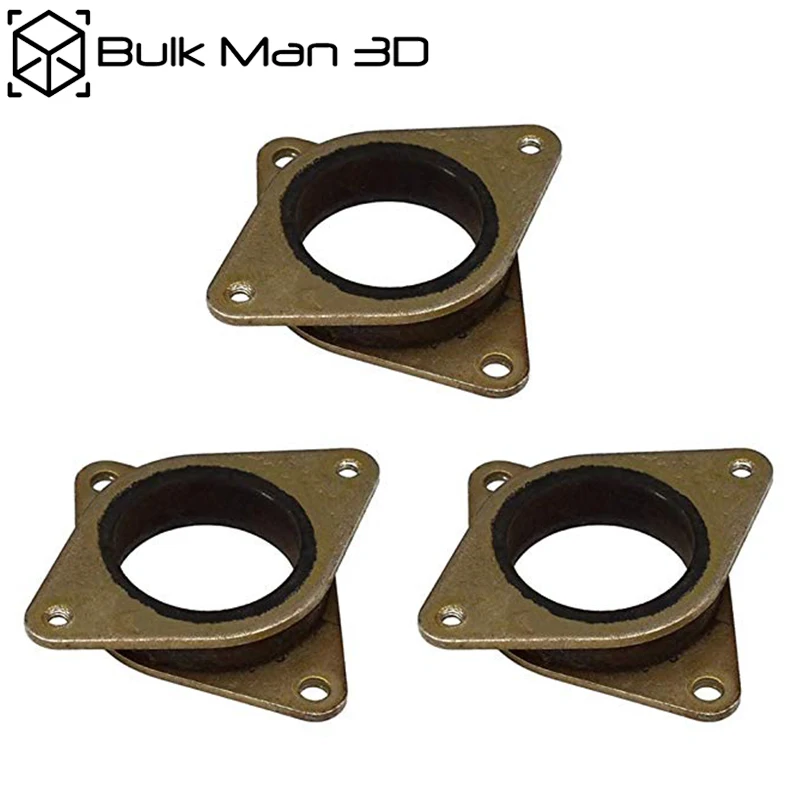 99
99
Cut-Man - PET bottle cutter with handle!
€3.49
PRECISION CALIPER 3D PRINT DIY
3,11 €
SUPERBOX
1,50 €
ENDER 3 S1/PRO SPRITE, V3 AIR DUCT 5015 OR 4020
€2.49 -fifteen% 2.11 €
ARTEMIS -> Shop for Alligator 2 || 6.5" arrows || Repeating crossbow
6.25 €
Case for Chill Buddy lighter
0,95 €
Ender 3 Briss fang Gen2, red lizard, spider, nf crazy, dragonfly, etc.
€1.80
BMG E3D V6 direct drive for Creality Ender 3 (Pro/V2) & CR-10
4. 49€
49€
PRECISE DIAL INDICATOR 3D PRINT DIY
1,90 €
Paint stand with scissors
5,30 €
Business card embossing system
3 €
telephone ring holder
0,90 €
GEAR AND DRIVE
€9.61 -40% 5.76 €
Do you want to support Cults?
Do you like Cults and want to help us continue our journey on our own ? Please note that we are a small team of 3 people , so support us in keeping the activities of and creating future developments of is very simple. Here are 4 solutions available to everyone:
-
ADVERTISING: Disable the AdBlock banner blocker and click on our banner ads.