3D printer telescope
I Designed and 3D-Printed a Newtonian Reflector Telescope. The Views Are Amazing | by Rafael Fiol | The Startup
When I pointed this thing towards the sky for the first time and peered through the eyepiece, two thoughts immediately struck me: 1) holy s*** it works!, and 2) wow, space is awesome.
Regarding my first thought… I wasn’t so much shocked that it worked, but I was shocked that it worked so very well. There’s a lot that goes into engineering a good telescope, and I was not sure if 3D-printing with plastic filaments would measure up. To my surprise, this thing works great.
To be fair, with its 6" (153 mm) primary mirror, this is considered a small reflector telescope, and the engineering problems increase dramatically with larger telescopes. Nevertheless, even in this size class, mirrors have to be collimated, the optical tube can’t flex when you tilt it, the focal length has to be measured and engineered accurately, and the primary mirror has to have proper plate and edge support.
I’ll show you how I solved for these engineering requirements, but first it’s time for a little background.
A Newtonian telescope is a type of Reflector telescope invented by Sir Isaac Newton in or around 1668. Today, this type of telescope is popular with amateur and DIY telescope makers because it has a relatively simple design (when compared to Refractor telescopes). Newtonian telescopes are usually less expensive than comparable quality/size telescopes of other types.
Generally speaking, there are two broad categories of telescopes: Reflector and Refractor. As a reminder, the 3D printed telescope we will be discussing is a Reflector. There are tons of great resources online that go into great detail about differences (and similarities) between the two. But for this article, I’ll keep it simple and say that Refractors use lenses to gather and focus light, while Reflectors instead use mirrors.
A Reflector telescope has two mirrors: the Primary (also called the Objective) and the Secondary. The primary mirror has a concave or parabolic surface and it is located at the tail end of the telescope. Its job is to reflect incoming light (which enters through the front of the telescope) towards a smaller secondary mirror positioned closer to the front of the telescope. Because of the parabolic shape of the primary mirror’s surface, the light is reflected along a cone-shaped path, towards a very specific focal point near (but just beyond) the secondary mirror. That secondary mirror is positioned at a 45-degree angle so as to reflect that light out towards the side of the telescope tube, where an eyepiece is attached. If the positions of the mirrors are accurate, the cone-shaped light comes to a point (the focal point) within the viewing limits of the eyepiece.
I designed this telescope using Autodesk Fusion 360. It’s an absolutely amazing piece of software. If you’re a Fusion 360 user, you can download my Fusion 360 project file and customize the design as needed. Or, you can simply download the STL files and send them directly to your 3D printer.
All of the project files are available on my website www.BigBigSpace.com. You’ll see two telescopes (at the time of this writing) on that website. The article you are reading now will focus on the telescope titled “Newton to See Here.” This scope is the second iteration of my 6" Newtonian telescopes, and a significant improvement over the first scope.
My first scope, named “Reflector? I Hardly Newt Her!”, is available for free. It’s a fine scope and works great, but I’ve learned a lot since then through field tests and studying proper telescope design. Those learnings are applied in the newer scope.
The two mirrors and the eyepiece (focuser) are not 3D-printed. Additionally, the truss tubes are also not 3D printed. The truss tubes in my project are 16mm (outer diameter) x 500mm (length) carbon fiber tubes which I purchased from Amazon. I chose them because they are light and very strong. You can substitute extruded aluminum tubes if you want to save a few bucks. Everything else (except for some screws and fasteners) is 3D-printed.
Obviously, you can’t print a mirror (yet). You’ll have to purchase a mirror or source one from a refurbished or discarded telescope. I purchased my mirror new from AngenaAstro.com. This one is guaranteed to fit the dimensions of the telescope, and has the proper focal length (750mm) for the truss tube design in this project.
Knowing the focal length of your mirror is critical. The focal length and tube diameter will determine your mirror placement. For our mirror with a 750mm focal length, we’ve placed our secondary mirror 540mm away from the primary mirror, leaving us 210mm to account for the radius of the tube and the length of the focuser.
The 3D-printable mirror box and upper optical assembly (UOA) includes truss tube connectors angled precisely so that our truss tubes (positioned at angles for rigidity) separate our mirrors by 540mm.
The primary mirror rests securely in the Primary Mirror Cell. This is an important part of the telescope that has a lot of responsibility. It must hold the mirror in place, making sure that it does not misalign as the telescope is moved on your alt-azimuth mount.
Primary Mirror Cell with 3-Point PLOP and Whiffletree Edge SupportThe mirror cell has to hold the mirror very gently and only touch the mirror in certain spots. Because as it turns out, mirrors are solids but not solid enough! They actually flex and change shape as pressure is applied. If the primary mirror flexes too much or in the wrong way, your view of the stars and planets will go from Wow! to Blah.
Fortunately, people way smarter than me have created formulae and software to help us design the optimal mirror cell. The most popular software is PLOP (PLate OPtimizer). PLOP can be used to calculate floating support points for the rear of the mirror. In other words, the primary mirror will rest on the support points (which are calculated to precise locations) in order to minimize deflection.
Using PLOP, I opted for a simple 3-point support design. PLOP tells us that the support points should be 31.4mm from the center. With our 6" primary mirror, this is more than adequate. Larger mirrors typically require more complex arrangements and floating 18-point designs are very common.
In addition to the rear support, the edge of the mirror must also be supported so that as the telescope is tilted, the mirror stays in place and does not warp (too much) as the pressure shifts to the edges. PLOP won’t help us here, but there are other tools and well-established best practices that will. Read this if you want to learn more. With our scope, I went with a modified whiffletree design — four edge support points separated by 45° (22.5° and 67.5° from the vertical).
Note that a true whiffletree design should pivot at the midpoint (45°), but I opted to keep it simple (no pivot), since this is a small mirror.
I chose to use Carbon Fiber tubes on this telescope, which I purchased from Amazon.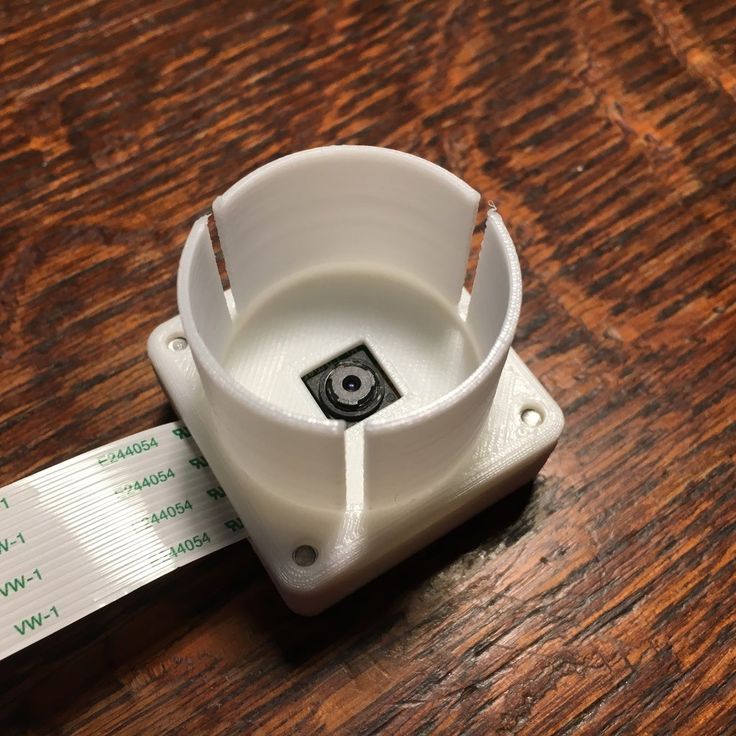 I chose them because they are light and very strong. You can substitute extruded aluminum tubes if you want to save a few bucks. The trusses need to be 480mm. The tubes I found on Amazon are 500mm, which means you’ll need to cut those down 20mm. No big deal. Easy to do.
Here’s a short video showing the assembly. It took me about 45 minutes. Most of that time was spent fighting the screws on the Upper Optical Assembly (UOA), because I didn’t have the right tools.
Enjoy a few photos taken with this telescope.
Conjunction 2020 — Jupiter, four Galilean Moons, Saturn + Earth’s MoonHead over to www.BigBigSpace.com. You’ll find all the files and a parts list. If you make one, leave me a message and let me know! Enjoy.
UPDATE: I posted step-by-step build instructions on Instructables.com. Oh, by the way, this project won the Grand Prize on a recent contest.
Telescope best 3D printer models・Cults
Celestron AVX/CGEM 1" Weight Plate Adaptor
Free
Adapter Sony E Mount to 1,25"
Free
joystick + 4 switches remote
Free
Remote v.
 2
2Free
Clip for telescope filters / bahtinov mask
Free
Ngc 7496 galaxy 3D software analysis
€2.50
Dobsonian Mount for Short NG 114mm Reflector Telescope
Free
National Geographic CF114 1.25" adapter for DSLR/mirrorless cameras
Free
Orion XT8 Fine focus knob
Free
1.25" adapter for Meade 4400 Telescope
Free
Laser finder mount for Barn Door Tracker
Free
TBS SourceOne - Complete set of lite-weight accessories
Free
Ikea Table Pi Cam Tripod Clamp
Free
Cell phone holder for telescope
Free
L1527 IRS James webb Picture 3D SOFTWARE ANALYSIS
€2. 50
50
Telescope
€7
telescope finder synta to dovetail type adaptor
Free
telescope finder dovetail to synta type adaptor
Free
Celestron Nexstar GT dovetail clamp adapter
Free
Steampunk Telescope
€0.50
Telescope
€6.79
3D printed telescope
€3
Cover for the Worm Gear or Belt Mod HEQ5
€9
Optical Test Stand for 4-8" Telescope Mirrors
Free
Bathinov mask SW 120
Free
Low resolutionTarantula nebula James Webb deep sky object 3D software analysis
Free
Low resolution NGC 3081 Hubble deep sky object 3D software analysis
Free
Boomerang nebula Hubble deep sky object 3D software analysis
€2
UGC 12158 Hubble deep sky object 3D software analysis
€2
All my (pack/bundle 18model) picture 3D software analysis
€27
AT72ED Bahtinov mask
Free
Telescope eyepiece plug
Free
Radio Telescope
Free
telescope
€1
Telescope Collimation - Primary Mirror Blank 114mm
Free
ZWO ASI 78mm Cable Managment / Cable Organizer ASIAIR
€2.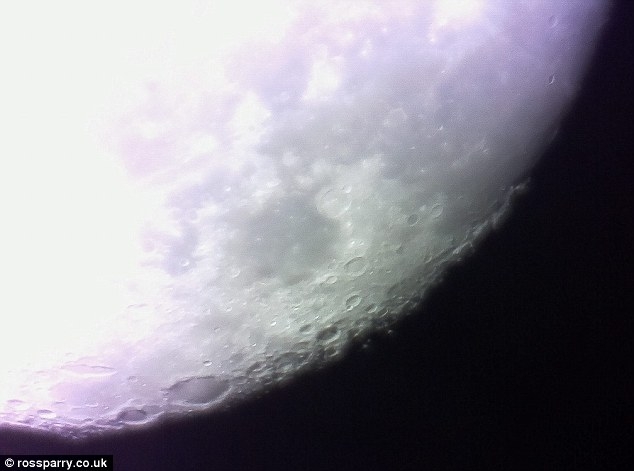 50
50
Astronomy Telescope
Free
61mm Triplet Refractor Telescope
Free
Opteka 650-1300mm Zoom Adjuster
Free
Rack and Pinion Telescope Focuser 1.25-2"
Free
Telescope Collimation - Cheshire
Free
Scope Phone Mount
Free
1.25" Telescope eyepiece case
Free
1x8 Plank Rocker Endcap
Free
DSLR Camera Mount for Meade ETX 70AT Telescope
€14.75
LGG6 Phone Prop
Free
2D Silhouette/Stencil Couple with Telescope Pointing
€0. 62
62
2D Silhouette/Stencil Group Looking and Pointing Telescope
€0.62
| 3DNews Technologies and IT market. Interesting news from the world of high-tech Photo of the day: pictures of the lunar surface of the tele... 09/24/2014 [06:33], Dmitry Prikhodko The mysterious and attracting attention of the Moon again fell into the lens of the telescope. However, unlike all previous cases, this time, photographs of its surface with an abundance of lunar craters were taken for the first time with a telescope made using 3D printing technology. nine0007 The model of the device called Pikon is interesting, first of all, because its cost is only $160. At the same time, the quality of images from the telescope is comparable to photographs obtained using equipment ten times more expensive. Taking into account the production method, which is not quite usual for this class of devices, Pikon has one more indisputable advantage in comparison with classical space observation devices. The developers of the unique telescope have uploaded to their website the source files needed to make all the elements of the frame on a 3D printer at home. The latter, by the way, will cost about $650. nine0007 The design of the Pikon is made according to the scheme of an optical telescope invented by Isaac Newton with a light-collecting element in the form of a mirror. In addition, the author of the idea, physicist Mark Wrigley, equipped his offspring with a $ 40 camera module that connects to the Raspberry Pi microcomputer board. The layout of the world's first 3D printed telescope also includes a concave parabolic mirror, which is needed to form and transmit a focused image directly to the Raspberry Pi's camera sensor. Due to its miniature dimensions, the camera module can be positioned as close to the mirror as possible. The telescope, if we continue to consider its technical side, boasts a 160x magnification. Therefore, on a cloudless night, the owner of Pikon will have the opportunity to examine in sufficient detail both the only natural satellite of the Earth and begin to study other celestial bodies. Scientists began to jokingly call the affordable telescope project "subversive technology". This means that despite the low prevalence of the presented solution, it will play a key role in the future. Telescopes from a 3D printer are captivating with their versatility, so the day is not far off when they will help to consign classic models to oblivion. And the main reason for this will be the growing popularity and availability of 3D printing to the general public. nine0007 Source: If you notice an error, select it with the mouse and press CTRL+ENTER. Related materials Permanent URL: https://3dnews. Headings: Hardware news, photo, video, phrase of the day, interesting things from the world of hi-tech, space, 3D technologies, Tags: hardware, 3d printer, 3d printing, 3d technologies, telescope, specular, space, moon, raspberry pi, photography, photosensor ← В past To the future → |
Model of a telescope for printing on a 3D printer / Habr
alizar
Astronautics 3D printers DIY or DIY
Build your own telescope and observe the stars right from the roof of your house - what could be more tempting? Soon the dream of every astronomy lover will become a reality.
A group of enthusiasts from London created the non-profit organization Open Space Agency and set out to develop a model of a simple but powerful Ultrascope telescope, which can be made by yourself using 3D printing, laser cutting and Arduino.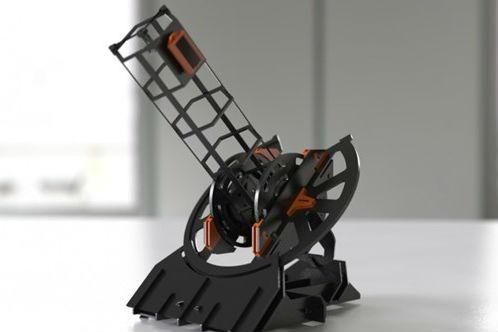 The "digital" telescope is controlled remotely from a mobile application. Photos are also taken from a smartphone or tablet. nine0072
The telescope prototype is ready. There is also a mobile application. The illustration shows a photograph of Jupiter and its moons taken with an Ultrascope and a smartphone.
Project activist James Parr showed the existing work to Science magazine. He says that Ultrascope belongs to the ARO class (Automated Robotic Observatory, robotic observatory).
James Parr says parts for the telescope will cost no more than £200 (about $300). The model will be made available to the public, so that anyone can download files, print parts, buy electronics and optics, and assemble the telescope with their own hands. The Open Space Agency does not intend to make money from its development, so the application code and printout files will be distributed according to the Open Source model under a free license. nine0007
The Ultrascope mobile app automatically uploads captured photos to the cloud.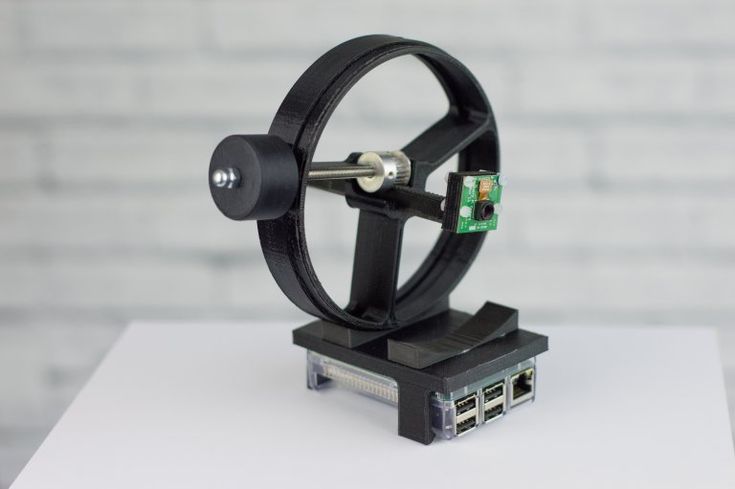 James Parr hopes that over time a large gallery of publicly available photographs of space will form online.
Open Space Agency engineers are about to unveil a model telescope with a 9 cm mirror at the San Diego Maker Faire in California in October 2015.
The Odyssey will later be released with a 20cm mirror and later with a 30cm mirror. Such a powerful telescope is able to track even asteroids near the Earth. Through the efforts of thousands of amateur astronomers, it is possible to detect objects that escaped the attention of NASA and real "observatories", because they cannot simultaneously view the entire sky. nine0007
"This dream was almost unattainable just 24 months ago," says the Ultrascope website. “The level of precision required to make a scientific-grade telescope at home would lead to cumulative errors, which would be a disappointment to astronomy enthusiasts. However, the advent of low-cost 3D printers and laser cutting, along with Arduino microcontrollers, and cameras like the Lumia 1020 — with its 41-megapixel CCD — make such projects eminently possible.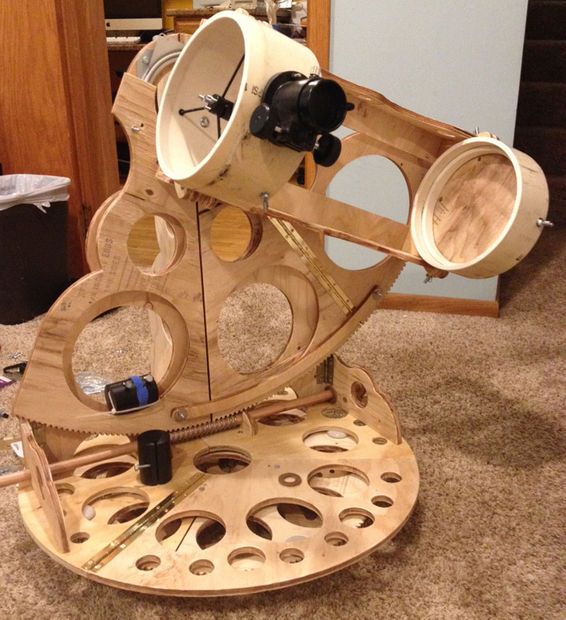


 nine0007
  ru/902278