3D printer soundproof enclosure
How To Soundproof A 3D Printer QUICKLY – Easy Home Soundproofing
Soundproofing a 3D printer isn’t a very difficult task- yet there are so many who never get around to it.
Unless you have a big space to yourself, you might seriously cheese off flatmates and/or neighbours with the incessant noises a 3D printer makes.
Even if that’s not a concern, you certainly can’t leave most amateur 3D printers on if you want a good night’s sleep!
Luckily, there are some really easy fixes that just about anyone can do.
Along with that, I’ll also cover some more involved noise reducing solutions that require a bit of technical know-how.
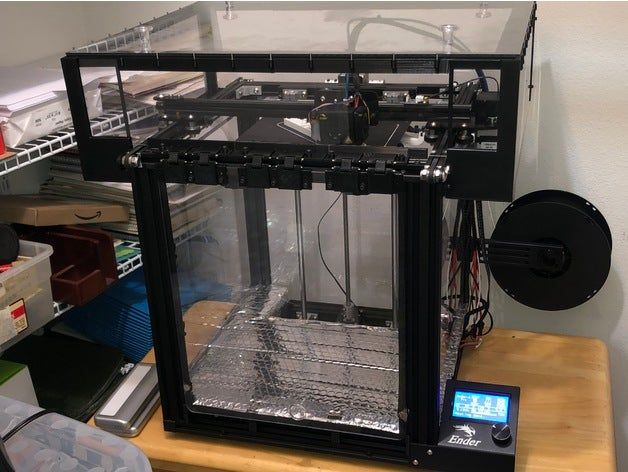
Best Way To Soundproof a 3D PrinterThe simplest way I found online was to just block all sounds coming from the printer by building a box/cabinet to place the printer in or buying one.
You might find it difficult to buy a cabinet that’s just the right size for your printer, though, so you may just have to do a bit of work here.
Going by several accounts online, you can get up to 10 dB reduction in noise doing this- that’s more than 50% noise reduction.
There are 3 things that you should keep in mind though:
First, the cabinet should not be combustible. Most DIYers will use wood , so make sure you use a thick plywood that won’t catch fire easily.
If you have found a pre-made cabinet, it’s even better if it’s made of aluminum or steel with thick insulated glass.
Secondly, also remember to think about accessibility while buying your cabinet. Ideally, you should be able to open it from all sides so that if you need to adjust or change any part of the 3D printer you don’t have to take it out entirely and then make the adjustments.
Third, you’ll want to read up on the ventilation aspect of your cabinet. My research on this suggests that you don’t need ventilation for all types of builds and having a closed environment could even be beneficial for your build.
Essentially, it all depends on the filament you use and the optimal temperature to use it.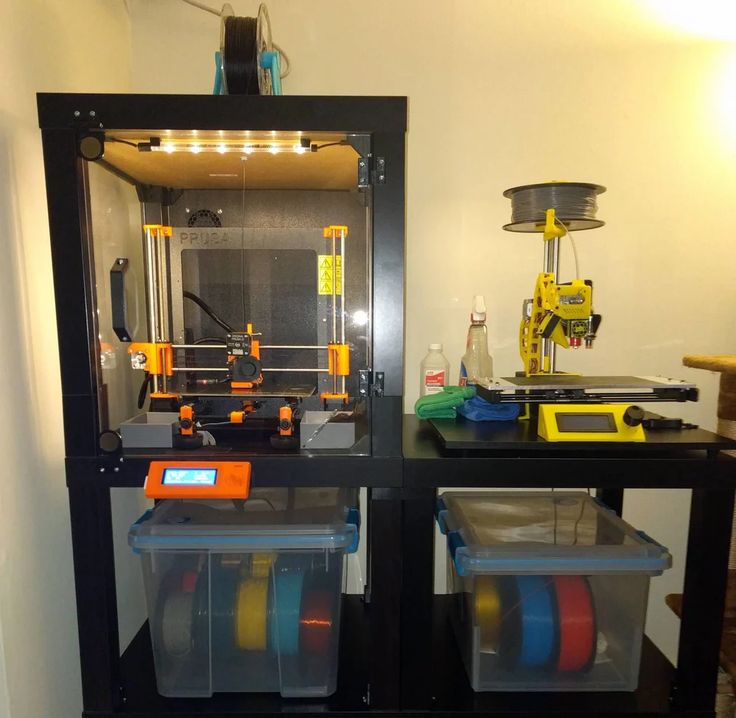
After having gone through a couple of tutorials online to build such cabinets/ enclosures for 3D printers, I realized that there are two things you can do and then forget about the ventilation problem altogether.
Mind you, this requires one to be a little bit handy with tools and electronics, but if you are comfortable doing it, you could:
- Remove the filament coil and install it on top of the cabinet. You’ll need to drill a hole through a cabinet to allow the filament to feed through.
- It’s also a good idea to install the stepper motors outside of the cabinet since these need to be kept cool
You can read how this guy ventilated his printer enclosure here.
Some Further 3D Printer Soundproofing Tips#1 Place rubberized mats under the 3D printerSome at-home 3D printers tend to vibrate a bit excessively while functioning. The cause could be anything- from loose screws and belts to just a generally inefficient functioning of the 3D printer.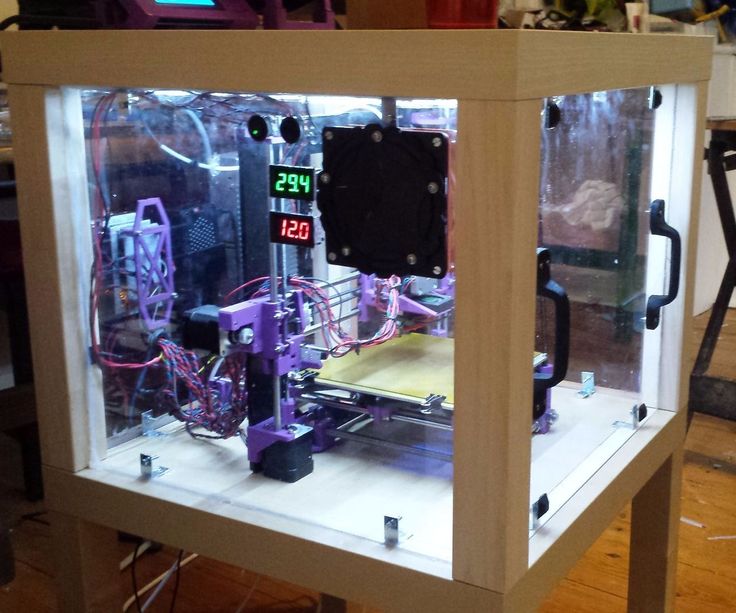
The easy fix for this is to dampen the vibrations by placing some insulation under the 3D printer. You could buy specially designed anti vibration pads such as this one on Amazon, or, if you’d rather not spend money here, try out cheap hacks such as placing a thick yoga mat under the 3D printer, cutting up spare tire tubes from the inside and using that as insulation etc.
The only thing you should keep in mind here is that your 3D printer stays level after placing the insulation under it- otherwise it will definitely affect the accuracy of your builds.
#2 Put some lubricant on your linear rodsOver time, with wear and tear, the rods that form the X, Y and Z axes accumulate dust, grime and will need to be cleaned as well as lubricated.
Ultimaker, for instance, recommends using a drop or two of sewing machine oil on each rod for this purpose.
There also are some pretty cheap lubricants that you can buy, such as this one on Amazon. While it’s not branded for printers especially, lot of people in the reviews section have mentioned that they use it for 3D printers.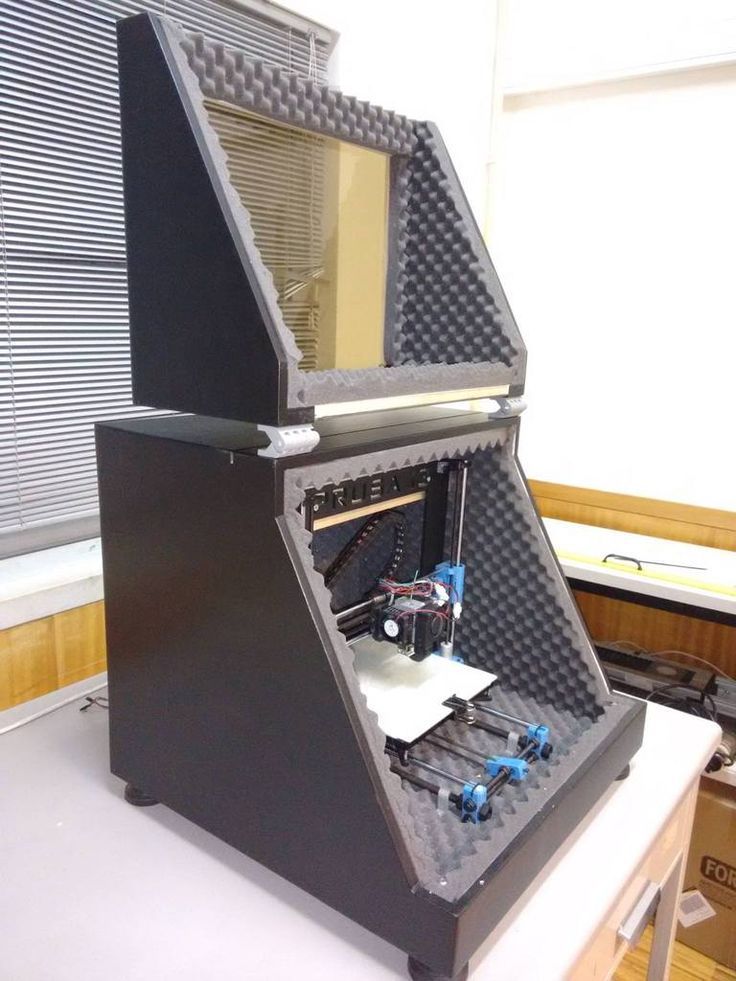
If you are in a pinch and absolutely need some lubrication you can also use WD-40 as it’s usually available in most homes.
WD or ‘Water Dispersant’- 40 isn’t a normal lubricant, rather- is a mix of multiple lubricants along with water repellent substances, among other things. However, most 3D printer owners I came across on forums recommend you avoid it for this very reason- that it also has water repellant properties which makes the dries the surface you put it on.
DIY 3D Printer Soundproofing tips#1 Reduce current supply to the stepper motorThe stepper motor is a major source of noise in most 3D printers. Within permissible limits, reducing the current being supplied to it will reduce the amount of noise it makes. You will need to fiddle around with the potentiometer connected to the stepper motor a bit for this
#2 Change the stepper motorIn case the above step isn’t enough you might want to consider changing the stepper motor itself. There are quite a lot of alternatives that provide relatively silent functioning as compared to the default motors in most 3D printers.
The most popular one is the TMC2130 Stepper Motor Driver. It comes with wireless integration, so the best part is that you don’t even need to manually change the resistance values or fiddle with the board at all- it automatically does that and you can monitor it from your computer.
For an in-depth look at the TMC 2130, here’s a video demonstration:
Along with the stepper motor, cooling fans are generally the noisiest parts of a 3D printer. You can easily replace them with quieter ones, such as this one on Amazon
#4 Rubber dampeners for stepper motorYou could buy specific rubber dampeners for placing under each stepper motor to dampen the vibrations, effectively, at the source.
From user reviews online- while most are happy, some of them say that it affects the build quality slightly. They are cheap though, so you could try them out if you wanted. The Nema 17 is the most popular solution.
This is more of a recurring maintenance tip, but you should check each and every screw- if it is too tight or too loose it might be affecting how much noise your printer makes. Similarly you should check the pulleys, belts and tighten them if they are loose.
Common Sources Of Noise In A 3D PrinterHere are the few common sources of noise in a 3D printer:
- Stepper motor
- Fan noise
- During X, Y or Z axis motion
- Vibrations from the frame of the printer
That’s about it, but I’d like to hear from you now. Have you used these tips or any other solution to quieten your 3D printer?
Let me know in the comments!
Some Cool Tips To Reduce Noise – 3D Printerly
3D printers are very useful machines, but they can be a bit of a noise disturbance depending on what 3D printer you have.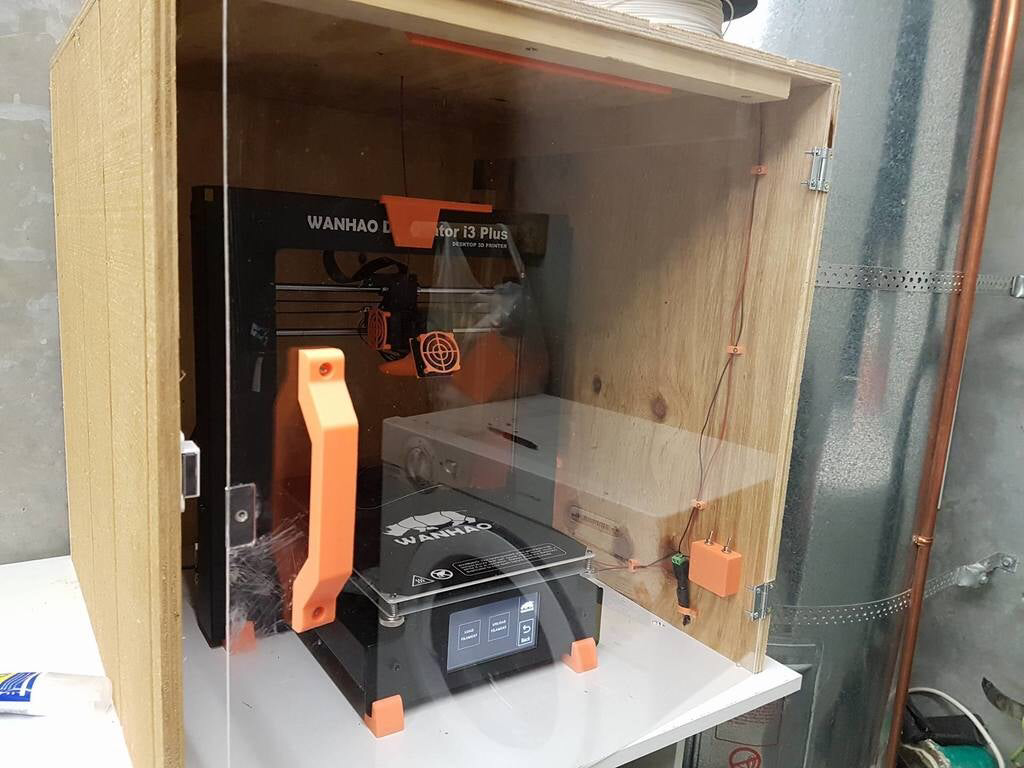 You’ve probably been thinking about getting a 3D printer and wonder, just how loud are 3D printers?
The average 3D printer is around 50 decibels, which is as loud as a normal conversation. Cheaper 3D printers tend to be the loudest, as well as FDM printers because of all the moving parts. Thankfully, there are many ways to reduce how loud your 3D printer is.
Considering 3D printers usually run for hours on end and maybe even days, it’s important for it to not be too loud. I’ve looked into how loud 3D printers can be, and also found some cool tips to reduce noise so keep reading to found out.
How Loud is the Average 3D Printer?
So as previously mentioned, the average 3D printer is roughly 50db, but this is without using techniques and tips to reduce noise. Some 3D printers are actually known to be relatively quiet.
One of these printers is the Monoprice Maker Select v2. It’s something that will be very hard to hear in the next room over. They can be too loud to have in quiet rooms such as an office or library, but if had this 3D printer in your dining room while you watch TV, it won’t be too noticeable.
It’s important to note that noise sensitivity affects people in different ways, so you should try to be as accommodating as possible.
Creality Ender 3’s are pretty loud on the surface, at roughly 58db (conversation at a restaurant), but when you convert the right parts such as stepper motor dampers and premium fans, it can be a lot quieter.
The Prusa MK3 actually has a silent mode which makes a big difference on how loud it is. On it’s a normal mode, the loudest parts seem to be the fans, which is as loud as a laptop fan at maximum capacity.
The Ultimaker 2 works pretty quietly, with just minimal noise coming from the stepper drivers and fans.
The Flashforge Creator Pro, is the opposite, where it can be heard from the next room, even with the door closed.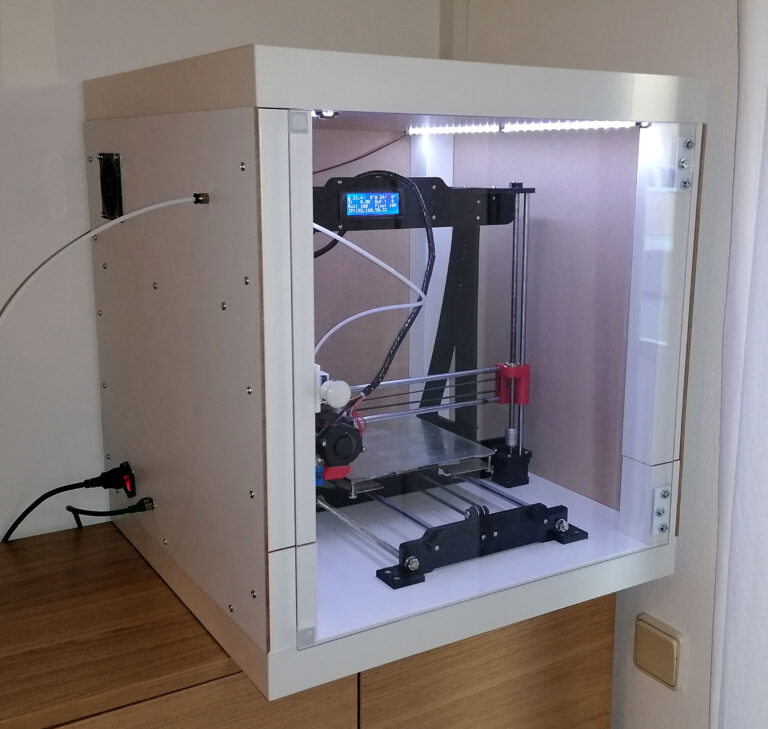
The Anycubic i3 Mega has an average of 55db being roughly 3 feet away.
What Makes A 3D Printer Loud?
How loud your 3D printer will depend on a few different things, but it’s mainly based on vibrations.
The main things that make a 3D printer loud are: Motors, fans, bearings and stepper drivers. Cheaper printers do tend to be a lot noisier due to the cheaper mechanical parts and result in more vibrations. A lot of the time, this can be alleviated by changing to better parts.
Most 3D printers are relatively quiet, but are still too noisy to be in the same room with for many hours. The average decibel range of 3D printers is around 40db-55db, but it can get a lot quieter with some basic techniques.
Fans also make a portion of the noise of 3D printers, similar to a laptop fan on high blast. Radial fans seem to be the loudest of fans out there.
FDM printers which are the most popular have several stepper motors in them, as well as many moving parts.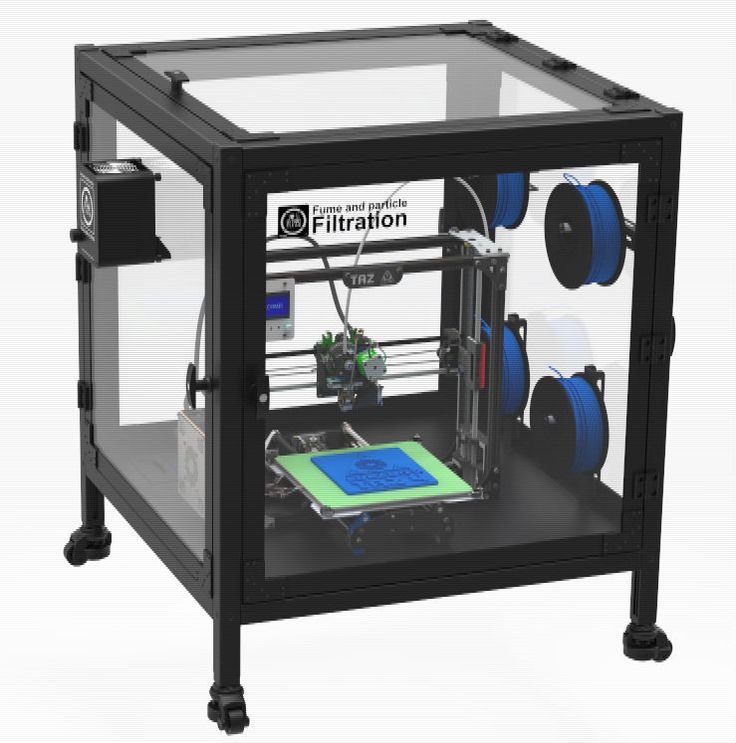 On the other hand, SLA resin printers only have a moving build plate and maybe a few smaller bits, but these a lot more expensive.
How Can I Reduce How Noisy My 3D Printer Is?
Many people wonder, “how do I make my 3D printer quieter” because they can be quite distracting, especially if it is operating near you.
If your 3D printer is loud, your best bet is first identifying what is making the most noise. If it is a vibrating noise, find out where it’s coming from then you can narrow down solutions to your issue.
Reducing Noise From A Stepper Motor
A lot of the time, simply replacing a few parts on your 3D printer will quieten it down to acceptable levels. Replacing the stepper driver is one of the main culprits of noisy printers.
Slowing your printer speed should also reduce how loud your 3D printer gets, so you can do this overnight when noise isn’t ideal in most cases. You do have to know what level you can reduce your printer speed down to, as it can affect how your printer runs.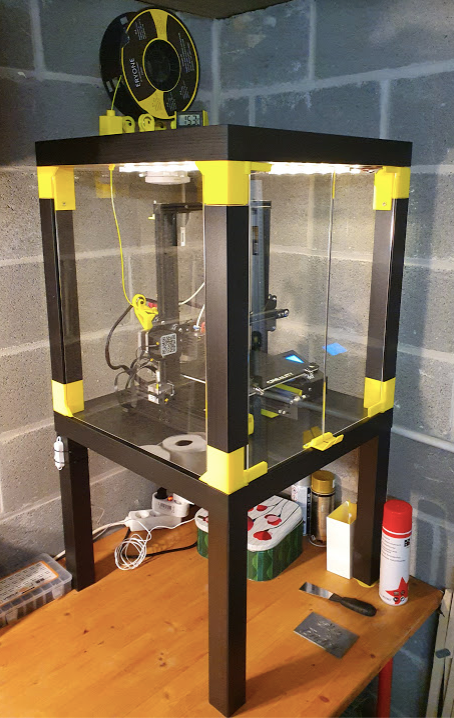 This information should be accessible online on forums or on your 3D printer brand’s website.
The 3D printing community is very helpful, and have even solved this problem for other 3D print artists out there. Here is a link for a vibration dampener for the Prusa i3 Mk2, which attaches to your printer. The comments from people who have used this design give it very positive reviews so I’d give it a go!
Dampers for stepper motors have seen huge improvements in sound reduction for many people, especially with any high-pitched harmonic sounds. A customized design for the Creality Ender 3 has great reviews and looks like it does the job, so you may not have to buy one just yet.
Is Your Cooling Fan Too Loud?
While your 3D printer is working, you can bet your fan will be working too. With cheaper 3D printers, you can expect manufacturers to use cheap parts. A cheaper cooling fan is likely to lead to problems of being loud.
Quieter fans can be purchased and installed to reduce how loud your 3D printer is and they aren’t too expensive either.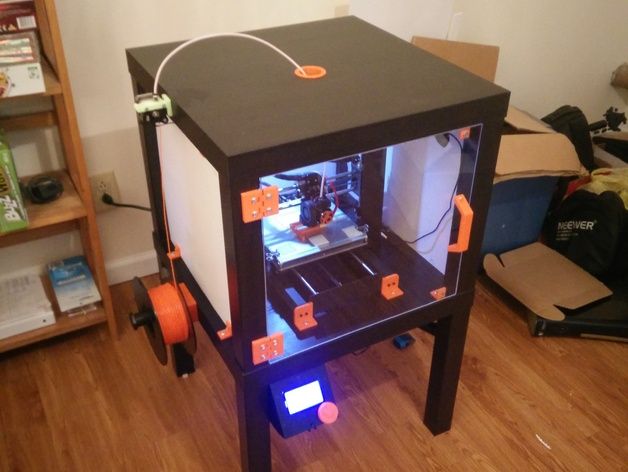 If you identified your fan as being loud, this is definitely a great solution to this problem.
Reducing Noise From X, Y & Z Axis Movement
I’ve seen someone recommend using thin machine lubricant on your X and Y axis linear bearings. It has to be a thinner grease because a heavier grease will cause your internal bearings to slide instead of roll which can cause unnecessary wear and dirt build-up.
If you do want to use WD-40, make sure it is the White Lithium Grease formula and not the standard formula. The standard formula is too thin and does not act as a brush on type of lubricant. You want to use machine oil on your linear rods and bearings.
Decoupling Your 3D Printer From The Floor
With the vibrations from your 3D printer, it definitely contributes to how noisy it gets. This isn’t an ideal situation if you have neighbors below you because it can really disturb them. This is where decoupling comes in, which simply means to separate it from direct contact.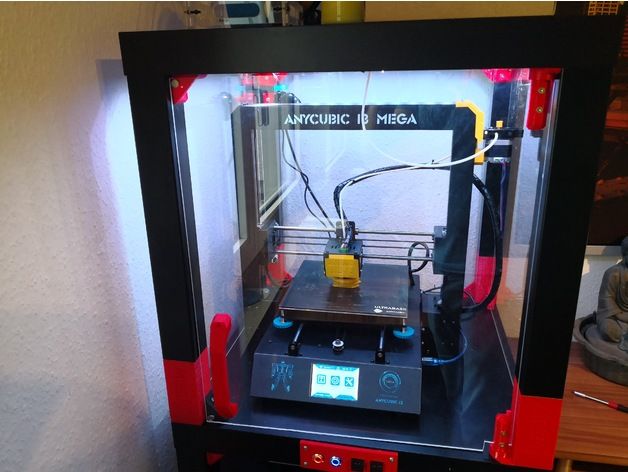
A quick DIY fix for this is to put a thick yoga mat under your printers to dampen the sound, or even carpet. This does the trick because it absorbs the vibrations below the printer. Some people have put sponges and even foam underneath to get the same result.
You want to make sure whatever you put underneath your 3D printer to dampen vibrations is straight and level. You don’t want your prints being negatively affected by having a slanted print bed.
Using a Sturdy Enclosure For Your 3D Printer
This is hands down, the easiest method to get the best results. Simply having a good quality enclosure for your 3D printer can make it so it is relatively quiet and won’t disturb yourself or people around you.
If you have a printer that’s enclosed, it will absorb some of that noise compared to an open style printer. Some printers come already enclosed, which is great but if not, you’ll benefit from getting yourself one.
If you have an open style printer, the sound can be reduced by getting foam core boards and making a box around the printer.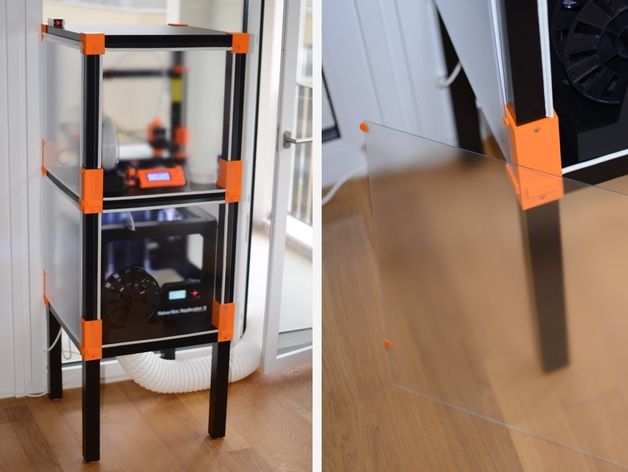
A basic enclosure you can get is the Creality Fireproof & Dustproof Enclosure from Amazon. One user who got this mentioned that the sound went down about half as loud as it was before, but definitely not soundproof.
You could probably even add some padding to the enclosure to improve its sound dampening effect.
More Useful Tips To Reduce Noise
You can get sorbothane feet, which are small anti-vibration rubber stands to absorb vibrations from your 3D printer. People have reported this working very well to substantially reduce sound.
Another solution is changing your board to a Duet3D board or Soundboard Heat box. These do a fantastic job with dampening loud sounds from your 3D printer.
Regular maintenance of your printer will do wonders to reduce noise, as get the most life out of it. Making sure loose screws are tightened and screws that are too tight, loosened will have a beneficial impact.
I’d recommend getting some sound dampening objects around the room such as heavy curtains, foam pads on the walls, hanging up objects so the noise vibrations don’t reflect too much.
The video below explains how to make high performance sound absorption panels for cheap.
Examples of People Making Their 3D Printer Quieter
Reading around on this issue, there are a few basic examples of people using tips to make their 3D printer quieter. One example is from someone reporting a 50% decrease in decibels after using a good quality enclosure.
Enclosures don’t only block out sounds, but they have multiple benefits such as helping with temperature stability, reducing the risk of physical injury and reducing the spread of air pollutants.
If you have the DIY skills, you can essentially make your 3D printer almost noise-free.
One individual went through many steps with their Ender 3 3D Printer:
- Replaced the frame nuts with square nuts then added on lock washers to prevent rattling.
- Replaced it’s metal bearings with higher quality Dry-Lin Polymer Bearings
- Added EVA anti-vibration pads which are designed to eliminate vibrations coming from motor-driven equipment due to its special composite foam with vibration dampening technology
- Installed cork gaskets on the motors to reduce vibration.
Are Resin 3D Printers Quiet?
Resin 3D printers are usually quiet compared to filament 3D printers, but they do still emit a decent amount of noise from the stepper motors (50 dB). You want to find a resin 3D printer that has quiet stepper motors like the Elegoo Mars 2 Pro, rather than one like the Anycubic Photon which can get loud.
Soundproof 3D Printer Enclosure
If you want to create a soundproof 3D printer enclosure, you can create an IKEA Lack Enclosure or your own DIY enclosure.
Here is a video of the IKEA Lack enclosure.
Here is a video of a DIY 3D printer enclosure.
Summary
With this information, hopefully you’ve learned that you shouldn’t worry too much about your 3D printer being loud. The advised method to reduce noise from your 3D printer is to use a combination of these methods to get the best results.
Get yourself a 3D printer enclosure, get a good quality stepper motor, cooling fan, with a thick yoga mat and make sure your printer maintenance is top-notch!
Acoustic reality suppression device, or music from a 3D printer / Sudo Null IT News
Good day to you, dear geeks and sympathizers!
According to my observations, almost all owners of 3D printers are divided into two groups: those who need it, and those who really need it. It was with the aim of stimulating the growth of the number of citizens in the second group that this publication was written.
Anyone who is interested in what connects a 3D printer and music, why some old sayings have lost their relevance, and how to turn a simple cardboard into a steel blank - welcome under the cut! nine0007
It's no secret that thanks to the efforts of greedy scoundrels effective management and unscrupulous scammers modern marketers, the shelves of audio equipment stores are mostly filled with ordinary garbage, the real technical characteristics of which are skillfully hidden under kilometers of advertising texts with incomprehensible abbreviations and inflated results of some meaningless tests.
What should a lazy and stingy person who wants to buy inexpensive, but high-quality "desktop" speakers do? As in most of these cases, the question already contains part of the answer: the columns need to be done. nine0003
Taking this opportunity, I decided to realize my old dream - omnipolar loudspeakers. These speakers differ from conventional front speakers in that sound waves are emitted simultaneously in all directions with the same amplitude and phase, which in theory should create the most natural sound picture. In its simplest form, this is achieved by placing a diffuser cone on top of the upwardly directed full-range loudspeaker head. The correct calculation of such acoustic systems (hereinafter referred to as AC) is not an easy task and requires serious education in this area. Therefore, I chose the oldest method of conducting research
 incomprehensible garbage complex processes - empirical. Simply put, you will have to act at random and at random, with alterations and design improvements in the manufacturing process.
The most important component of any speaker, which cannot be modified at home, is the loudspeaker head (hereinafter referred to as HG). Since I decided to make a compact and inexpensive single-way speaker, choosing a head turned into a non-trivial task with many unknowns.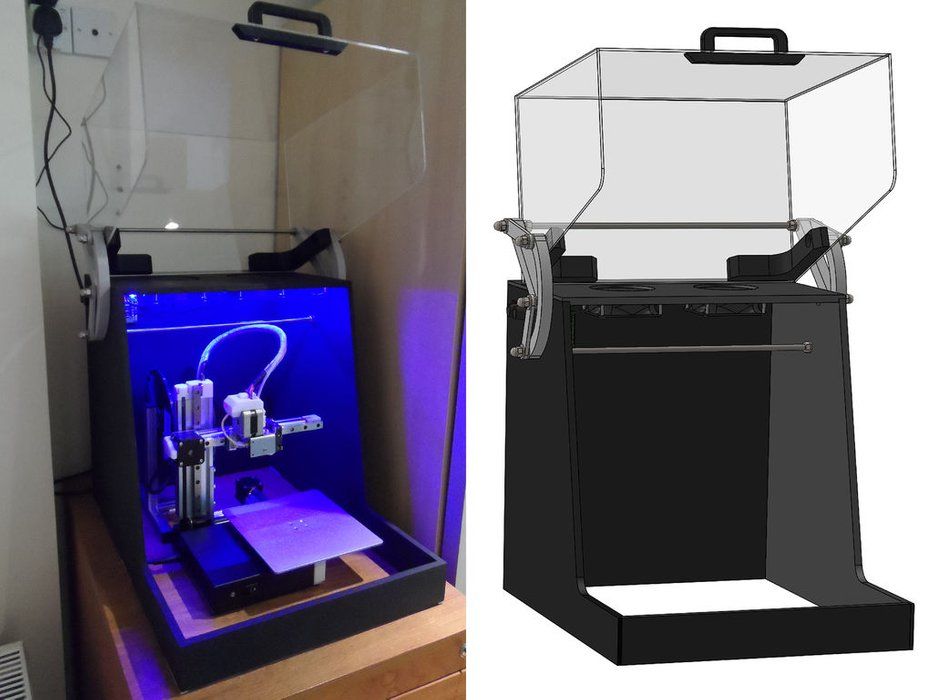
For myself, I have developed the following search algorithm: suitable size - bandwidth - uniformity of frequency response and phase response - nominal resistance - price. nine0003
The leader of the search was the broadband GG FR88EX manufacturer Fountek:
This driver has an aluminum frame and cone, a wide frequency range, smooth frequency response and phase response. All parameters are given by the manufacturer in the technical documentation:
For the speakers, the simplest design was chosen: a cylindrical body, a GG is fixed on the upper end. A sound-diffusing cone should be fixed above the GG. The design of the case is an acoustic impedance panel at the bottom end, loose sound-absorbing material throughout the volume of the speaker. For the case, a pipe made of thick cardboard with a diameter of 125 mm (corresponding to the dimensions of the GG) was chosen. Self-adhesive bituminous vibration-absorbing mats were glued to the inner surface of the pipe, which made it possible to completely suppress vibrations and the boom of the body. The technology is simple: heating the mats with a hair dryer, we roll them with the sticky side to the pipe from the inside using an aluminum “rolling pin”. The hardest part here is finding a woman with a hair dryer. nine0003
Further, highly scientific experiments were carried out. In absolute contradiction to the proverb “Measure seven times, cut once”, diffusers were printed, crushed, cut, melted, thrown away and reprinted for the sake of experimental curiosity. By the way, PETG as a material is ideal for printing experimental parts of the speaker.
The conical sound diffuser is the undisputed winner. On the right side of the photo, this cone is visible above the GG, mounted at the end of the case on a plug-holder printed on a 3D printer. nine0003
A few words about the design: due to the use of dissimilar materials and the complex shape of parts, I excluded gluing with some kind of veneer or similar material as unnecessarily labor-intensive. The black color was considered boring, the silver color was considered vulgar. I decided to make my modest contribution to the creation of the post-apocalyptic universe and give the AU the appearance of a battered military equipment created using radioactive materials.
The process of creating parts of the speaker looked like this: creating a model in DesignSpark Mechanical - printing on a 3D printer - cleaning the part - priming - painting. At the same time, in the process of priming the AC case, the wet primer was partially erased with fingers, which ensured the presence of distinct traces of metal corrosion hello Spider . The parts were painted in several stages: first, the parts were painted with stainless steel effect paint and thoroughly dried on the heated working platform of the printer. The next layer was applied transparent varnish, followed by drying for 24 hours. The last layer was applied paint "khaki forest green", roughly corresponding to the color of the old Soviet military equipment. After two hours of drying, you can begin to create the effect of worn metal. To do this, with a piece of cloth soaked in acetone, you need to carefully wipe off the last layer of paint from protruding parts, edges, roundings, edges and “corroded” surfaces. As they say, it's better to see once:
A very complex detail: bottom cap with acoustic impedance panel grille and cable connector panel.
After painting and drying, one speaker was assembled to check the sound quality. The next photo shows a part of the structure: the M3 studs are passed through the end cap - the holder and the holes in the flanges of the GG and the sound-diffusing cone. All parts are secured with M3 flange nuts. The cone is fixed high enough above the GG: this position was determined experimentally by the maximum of reproducible high frequencies. nine0003
Unfortunately, in this case, the considerable length of the relatively thin studs resulted in significant vibration of the diffuser cone.
As a measure to eliminate this unpleasant effect, I decided to make the sound diffuser heavier and “muffle” by filling it with loose vibration absorber. Since the volume of the cavity of the sound diffuser cone is small, an additional hollow part with a cap was designed and manufactured:
A mixture of lead shot and fine quartz sand was chosen as a filler. Lead was chosen for its high specific gravity, and fine quartz sand suppresses vibrations well and prevents the shot from turning the cone into a rattle. Due to the presence of lead in the cone, the cap with the radioactivity symbol is not only decorative, but also a functional element (lead contains a certain amount of radiogenic isotopes). nine0003
The final version of my homemade omnipolar speakers looks like this:
Unfortunately, on this optimistic note, my camera gave its soul to God, and more photos did not come out. The sound quality of these speakers fully meets my needs: gray everyday life melts into the enchanting sounds of “Spente le stelle” by Emma Shapplin already at a third of the available volume, and if you wish, you can effortlessly eject from reality along with “Teutonic Terror” from Accept. nine0003
Published under WTFPL license
And the traditional: Have fun!
At the request of workers 3D models and dimensions of the case: drive.google.com/folderview?id=0B3W31PA4TxKDdjU3ZHA4bEt4Rms&usp=sharing
DIY 3D Printer Case: 10 Cheap and Easy Solutions - FacFox 3D Printing Service - Knowledge
Cases for 3D printers protect your printer, improve print quality and reduce noise and odors. Check out the best inexpensive DIY options! nine0003
The 3D printer housing is not required to be in your 3D printing shop, but having one can improve print results. Having a 3D printable housing offers many benefits, such as better control of the temperature in the printing environment, thereby reducing warping.
The enclosure also protects both users and printers. For users, this reduces noise and can control exposure to odor-causing gases, and for the printer, it limits its contact with external elements such as dust that can damage both the machine and models.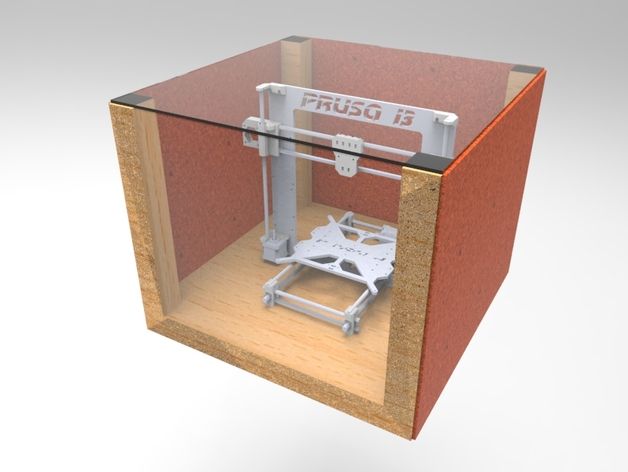 nine0003
In this article, we'll take a look at our best DIY 3D printer cases so you can find the one that best suits your needs and helps you create the perfect prints.
Considerations
A few screws and some glue and your case is ready to go! (Source: TheCarmichaelWorkshop via Instructables)
3D printer cases aren't always available, so we've selected the best DIY cases or items you can use for this purpose. To do this, we took into account the following:
-
Availability: Whether it is a DIY cabinet or a custom cabinet, the design must be such that access to the printer is not obstructed. With this in mind, enclosures that must be completely removed to access the printer are not included.
-
Safety: All enclosures selected are made of materials or designed to heat the printer to high temperatures and therefore should not present a fire hazard (although special care should be taken if specified).
 nine0003
 -
Price: Since the purpose of this article is to provide affordable alternatives for enclosures, the kits provided must be cheap or materials for DIY options must be less expensive than commercial enclosures.
-
Additional Considerations: In addition, some cases may have attractive features such as lighting for better visibility, temperature detection, a camera, or other factors that may make them preferred. nine0003
With these aspects in mind, let's take a look at our best DIY 3D printer cases!
READY
First, let's take a look at some of the available 3D printer cases. They still require assembly, but they definitely don't require much effort in terms of DIY. Choose wisely, taking into account your budget, the 3D printer you have, space availability, and appearance preference! nine0003
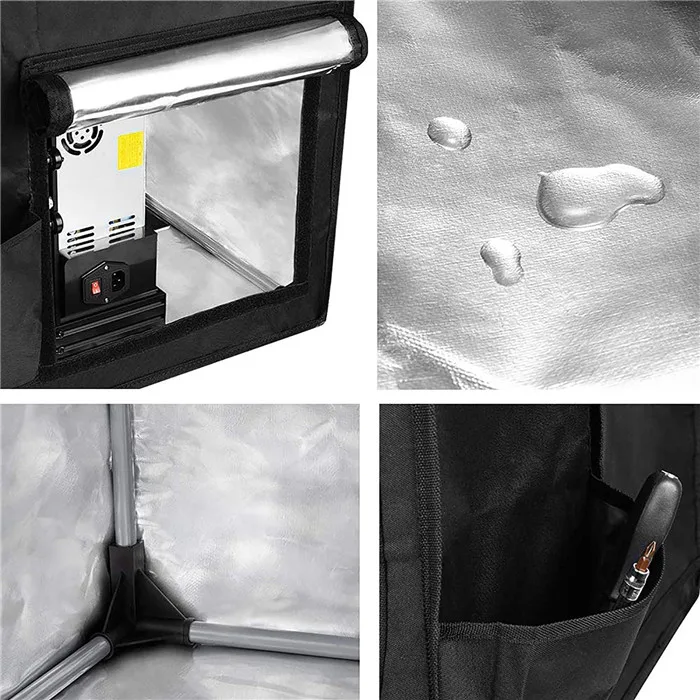
Photo tent
Photo studio tent is great for a 3D printer (Source: Mykolas Zuza via PrusaPrinters)
The purpose of the enclosure is to insulate your 3D printer from dust, and also keep the inside temperature constant.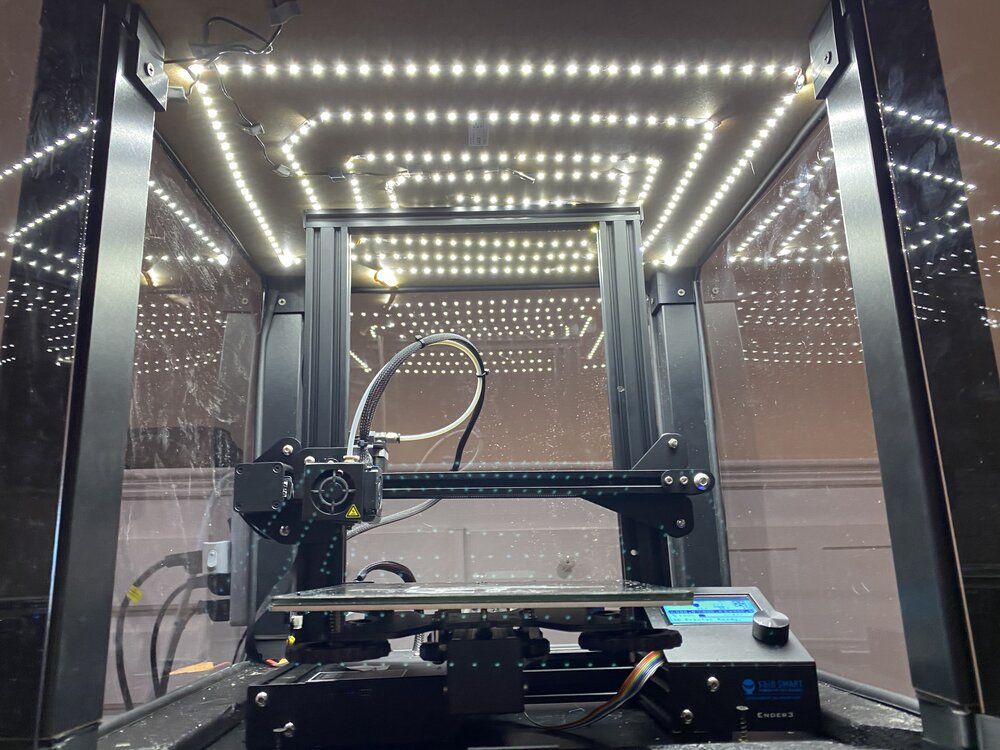 A photography tent is an inexpensive and effective way to do both.
They are generally white and made of a flexible synthetic material which, in the context of photography, acts as a light diffuser so that objects inside can be more evenly illuminated. An added bonus is that you can take amazing pictures of your printer as you work! nine0003
Be aware, however, that the material commonly used to make these tents is flammable, so to be on the safe side, don't choose sizes that make it tight. In any case, a little "respite" is useful for accessing the printer.
-
Costs: ~$40
-
Difficulty: Easy
0003
3D printer enclosures, especially those made for a specific printer, can be very expensive, but we can always count on Creativity to provide affordable options. True to form, they sell an affordable case that is easy to carry and safe thanks to its flame retardant material. It opens on all sides for easy access and can fit a Creativity CR-10, Ender 3, or Ender 5.
This is ideal if your printer fits inside and you need a quick and affordable solution that doesn't require hours of work. nine0003
-
Costs: ~$65
-
Difficulty: Easy
RE-DESIGNED
just need a little redesign and not a lot sometimes! In this category, we selected projects that take household items and recycle them into 3D printed cases.
Ikea Lacquer
Ikea table and a little 3D printing make a solid case! (Source: Buster 2006 via Thingiverse)
The Ikea Lack Desk is one of the most popular DIY cabinet options, probably because it's affordable, looks neat, and matches the design of the printer. It's often used to fit the Prusa i3 MK3S but will fit many different printers - you just might need to increase the height if your printer is quite tall.
The concept is simple: you buy two (or even three) Ikea Lack tables and stack them on top of each other to make a 3D printer stand.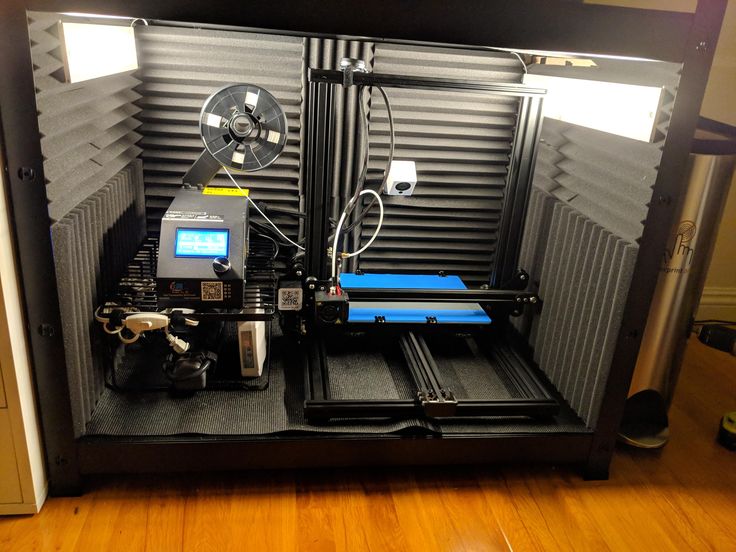 You can add plexiglass doors to close the case while still maintaining easy access. Thread guides and other accessories. nine0003
People made 3D printed parts to avoid drilling the tables themselves and make it easier to assemble and disassemble the system. An important aspect to consider is that placing the thread on top requires some way for it to get in, so make sure the design you choose allows for the slight movement of the thread.
-
Costs: ~$70
-
Difficulty: Medium
-
Main Components: Ikea Lac tables, plexiglass, 3D printed parts
-
Who designed it? cizard, Florentiusbon, and many others
-
Where can I find it? Universe
Storage Boxes
You can build a 3D printer case out of two Ikea boxes (Source: rjacobsson via Instructables)
This is an option that is easy to make and adaptable to many sizes.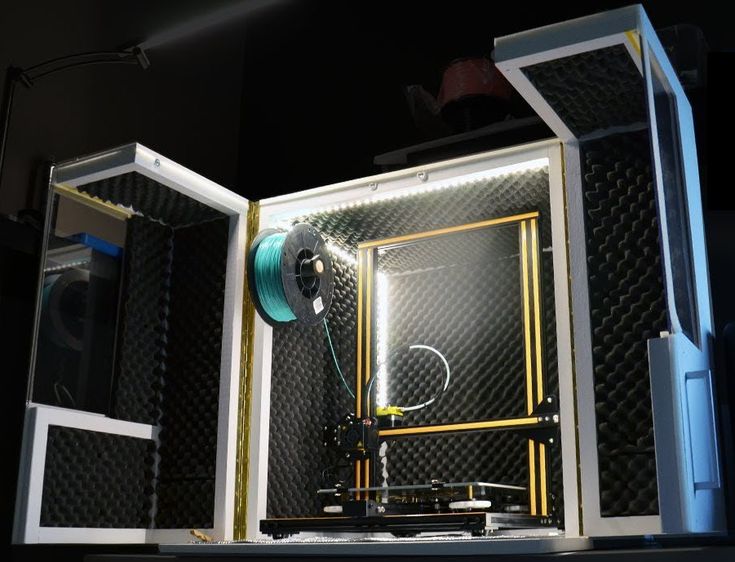 It takes a bit of DIY, but not much: you just need a few plastic boxes stacked together and you're done. Because they are transparent, they won't get in the way of checking the print status, and you can arrange and stack them however you like so you can access your printer. nine0003
There are many ways to do this, but we recommend the following to get you started: This Instructables using Ikea plastic boxes. The boxes will cost you between $30 and $40, according to the creator. You just need to cut a few holes and slots to accommodate the printer and its cables.
Due to the high temperatures that can be reached and because not all plastic boxes can be flame retardant, it is better if the body is not a tight fit. nine0003
-
Expenses: ~ $ 40
-
Difficulty: Light
-
Main components: Tupperware boxes, cutting instruments
-
who developed it? Jacobsson
-
Where can I find it? Tutorials
DIY PROJECTS
We've seen quick and easy solutions that just require a smart purchase, but what if you're ready for a bigger challenge or want a more sophisticated look? nine0003
The following options are do-it-yourself projects that will require some time to purchase, build, glue and assemble, but the end result will give you protection, aesthetics, and in some cases additional benefits such as remote monitoring of print status, better lighting .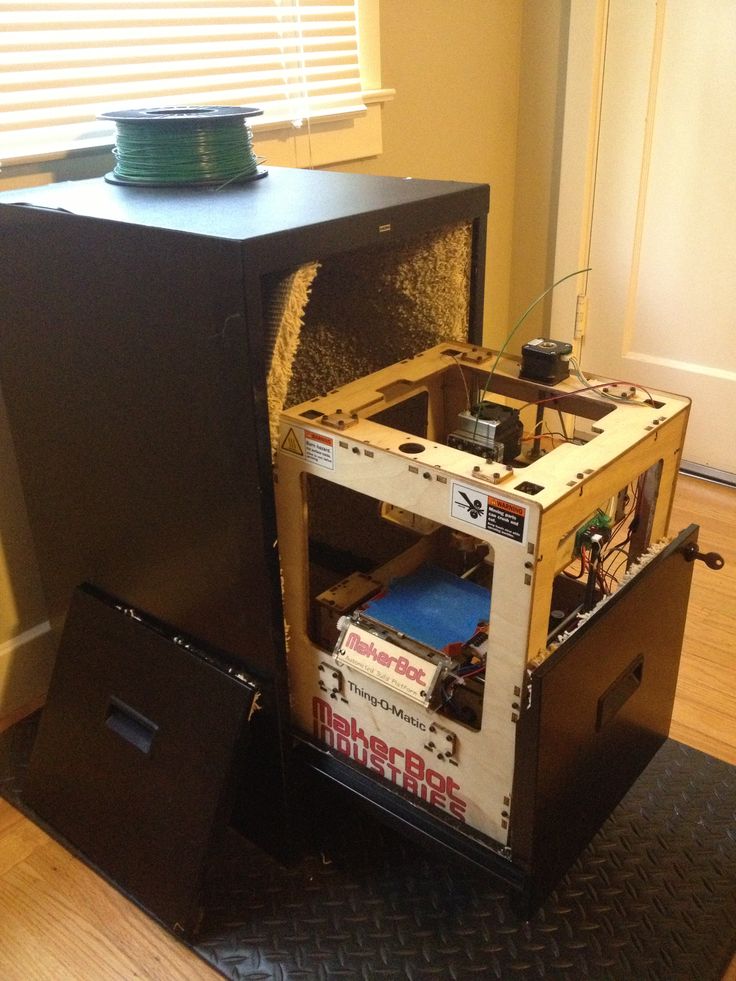 or temperature measurement.
PVC foam
It even includes a wireless print camera (Source: Just Barran via YouTube)
This case option is designed for the Creality Ender 3, but you can install similar sized printers or easily adapt it to larger ones machines. The structure itself is fairly easy to build as it consists mostly of PVC foam walls, but the project also includes some electronics to take it to the next level. Such additions include aesthetic elements such as LED lights and safety features such as a heatsink tube and fans to remove hot air and gases during the printing process. nine0003
However, be aware that you will need to solder, hot glue and drill, among other things, to assemble the parts. You may also need an extra pair of hands to assist you during construction.
-
Expenses: ~ $ 150
-
Difficulty: Advanced
-
Main components: foamed PVC, loop, LED, RECOUNITION
? nine0103 Prosto Barran
-
Where can I find it? YouTube
Soundproofing
Making your own cabinet allows you to tailor it to your needs (Source: Leisure Time Store via YouTube) a fairly large 3D printer, so if you have something smaller it should fit just fine.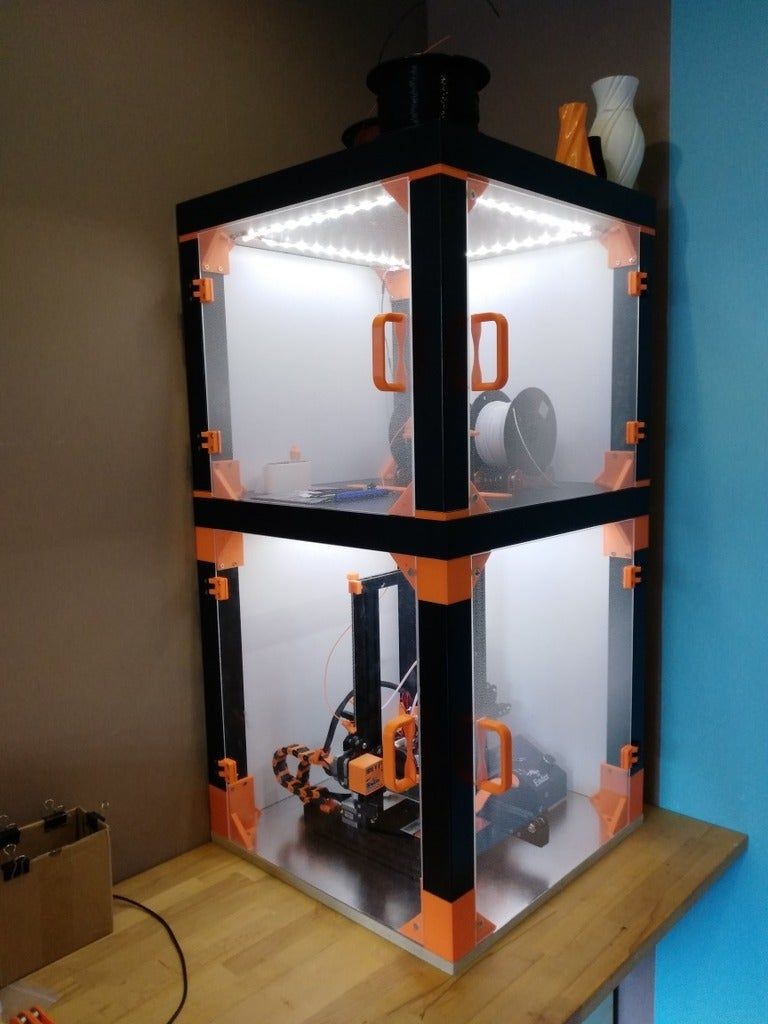 nine0003
Materials are very affordable, mainly MDF, insulating foam and reflective foil. As you can understand from these materials, it isolates noise and evens out the temperature. The result is a professional looking enclosure with doors designed for easy access. The only downside might be the amount of space needed to mount the case, especially given the size with the doors open.
-
Costs: ~$200
-
Difficulty: Medium
-
Main components: MDF, insulation foam, reflective foil, hinges
-
Who designed it? Leisure time shop
-
Where can I find it? YouTube, Tutorials
Total visibility
Simple, effective and DIY! (Source: schlem via Instructables)
This housing keeps your machine protected from outside particles while providing maximum visibility. It is easy to set up for any printer size as it only requires plexiglass, a few 3D printed hinges and a few screws.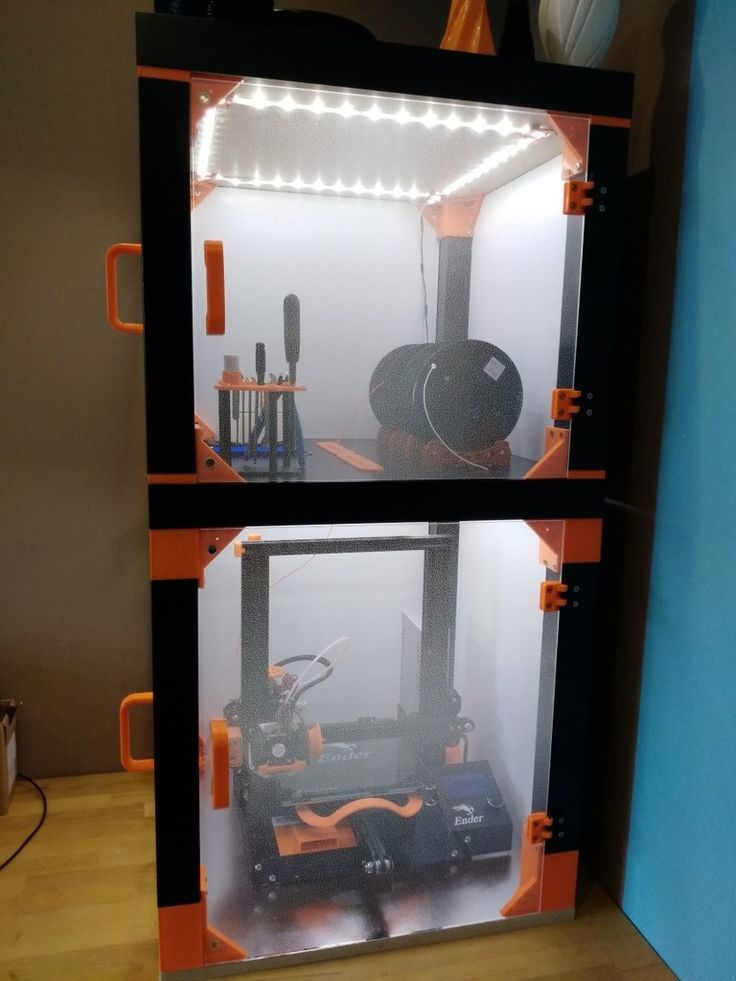 In addition, you may need some workshop tools such as a saw or a CNC machine. nine0003
This design mainly provides dust protection. It does not include a ventilation or temperature monitoring system, so it is important to consider this, since, for example, ABS will require an additional opening with a fan to remove toxins from the printing process. However, if your main goal is to keep your printer out of the hands of your child or cat, this case will do the job.
-
Costs: ~$120
-
Difficulty: Medium
-
Main components: Plexiglas, 3D printed parts
-
Who designed it? helmet
-
Where can I find it? Tutorials
LED lighting
Light up your world and your prints (Source: TheCarmichaelWorkshop via Instructables)
This is an inexpensive option that makes your printer look like a gaming PC.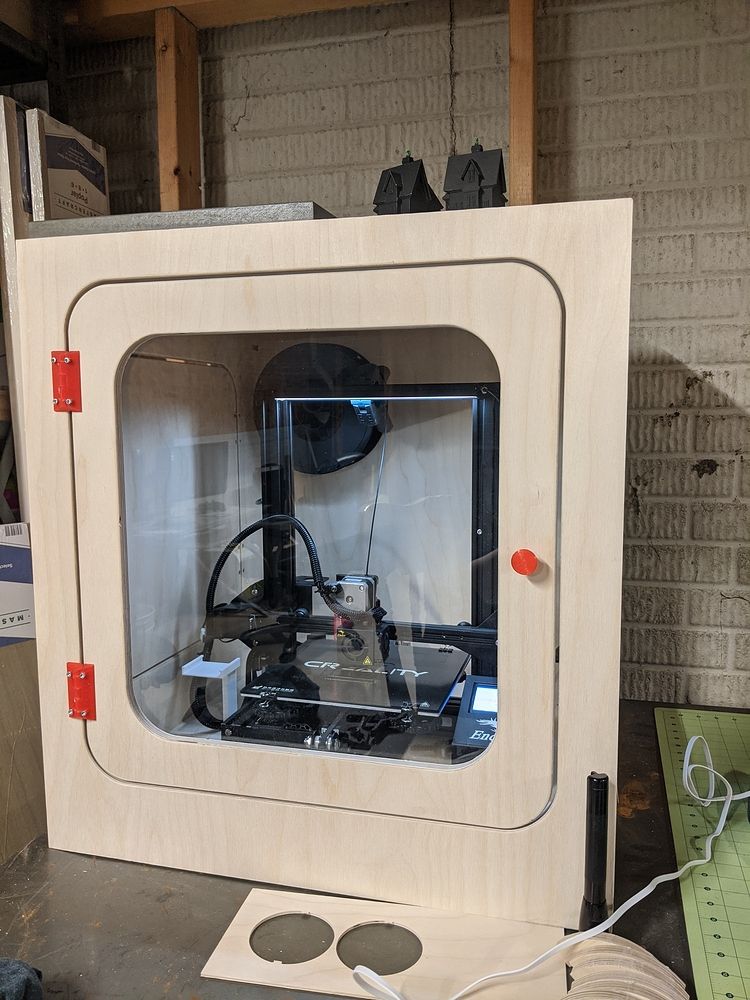 The option includes a display slot so you can remove it from the actual machine and place it outside, allowing you to interact with the machine without having to open the case. nine0003
MDF
Improve print quality without the high price! (Source: moczys via Thingiverse)
The main purpose of this box variant is to maintain a constant indoor temperature and keep odors out. The design is very easy to make as it only requires MDF, a door panel and some 3D printing and costs less than $50 including screws and nuts.
The model has seven successful Makes in Thingiverse. The only file provided is the STL, which, while not providing much information, is sufficient to export each view as a DXF and cut it out on a CNC machine. nine0003
-
Expenses: ~ $ 50
-
Difficulty: average
-
Main components: MDF 3/4 ″, Door 902 ? motsis
-
Where can I find it? Universe
DIY hot box
Long awaited improvement! (Source: Jonathan Brazo via GrabCAD)
While the design may seem a bit complex, the results are well worth it, and the creator has included a complete and detailed build guide on the road to success.