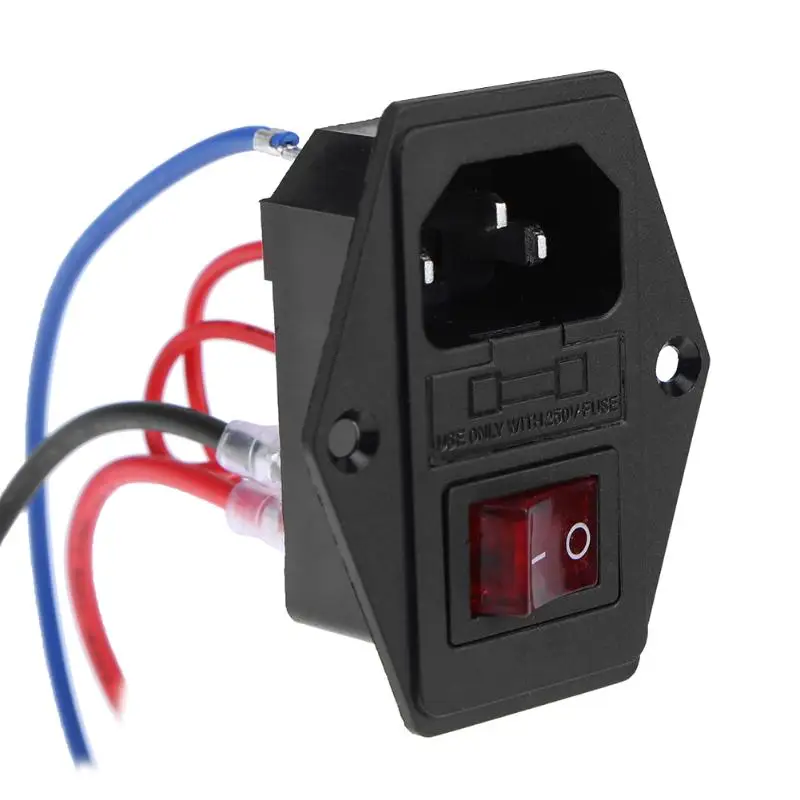
3D printer power supply switch
3D Printer Power Supply - dDIY 3D Printer from scratch
Welcome to 3DPrinterChat.com, this article is part of the DIY 3D Printer from scratch, and we will learn how to choose the best 3D Printer Power Supply.
1 What are the available kinds of power supply?
1.1 Switch-mode power supplies:
1.2 Linear power supplies:
2 How to choose the you switched power supply model?
3 Power factor correction, why this matters (or don’t) ?
3.1 Understanding the PFC
4 PSU Efficiency and why it matters!
4.1 If my PSU is rated for 80% efficiency, where does the other 20% go?
4.2 Will there ever be 100% efficient Power Supplies?
4.3 If I have a 500w PSU, does that mean it will always draw 500w of power?
4.4 How to choose the most efficient PSU? What the 80 Plus ratings mean?
4. 5 What is in it for me?
5 Conclusion:
5.1 How much watts do i need?
5.2 Related
What are the available kinds of power supply?
There are two main kinds of power supply available, we will focus on the Switch-mode because of its efficiency, but is always good to know the other option.
Switch-mode power supplies:
Nowadays practically all power supplies within the power range required by RepRap printers (250~350W) are switch-mode power supplies (as opposed to linear power supplies, which are considered technologically outdated).
Switch-mode power supplies have relatively complex circuits that convert mains AC electricity to the DC voltages required by RepRap steppers and electronic circuits. The main advantage of an Swith-mode power supply is its high-efficiency in converting energy. for more information you might want to take a look at this full explanation
There is also this video, it talks about step-up converters, they are NOT the same, but the logic behind it is, and its easier to understand:
Linear power supplies:
This kind of power supply usually use a transformer to reduce the AC voltage, to about 16V AC, then a rectifier circuit will take care of converting the AC voltage into DC, and a stabilizer circuit will make it stable.
The disadvantage of this system is its low efficiency, high cost and taking huge amounts of space. You can read more about this here
How to choose the you switched power supply model?
There are two main models of switched power supply available, the ATX and the INDUSTRIAL (also known as CCTV or OEM). we wont talk about Xbox/Playstation power supply because they are simply the same, with less power output and worse cooling.
Industrial PSU’s
Industrial PSUs are switch-mode PSUs designed to supply a fixed DC 12V or 24V rail with high current capabilities (1A to 100A or even more).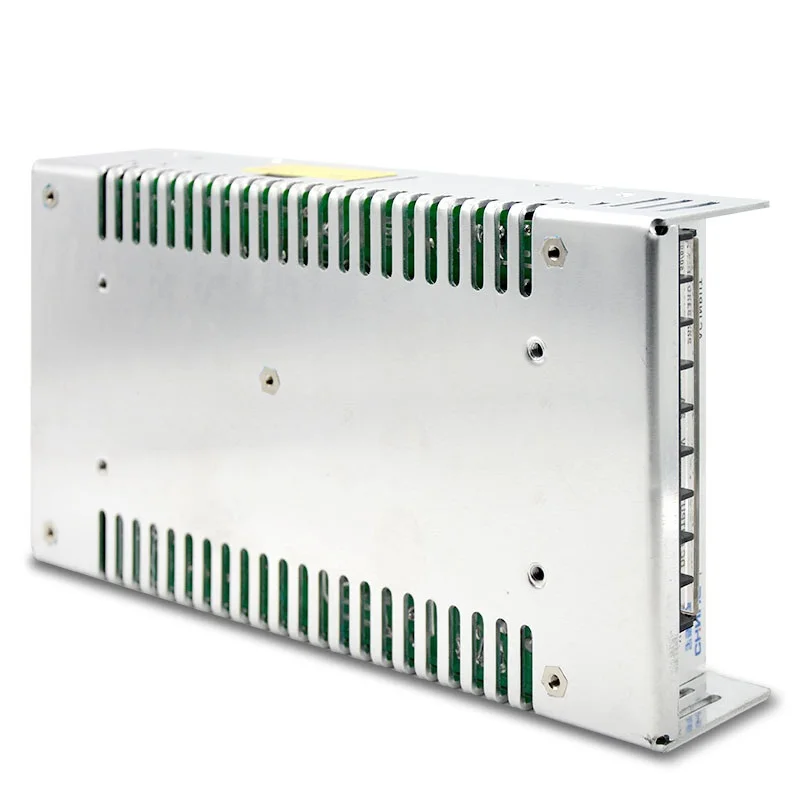 In the last couple of years, due to the development of LED lighting and CCTV, they have become relatively inexpensive and are now widely available. There are many models available, some with extremely good output, some not. you might want to check the reviews that the PSU got.
Main advantages:
- Cheap (30A is about 20-50$)
- Regulated output voltage between 9-16v
- Regulated fan (less noise when not in use)
- Easily replaceable (under 5 min)
- widely available
ATX PSUs
ATX PSU’s also are switch-mode PSUs designed to supply some fixed voltages to be used in a computer. In our case we only use the DC 12V output. Usually the ATX have a medium range current capabilities (from 20 to 40A), that are the required to run a computer properly. ATX power supply have the advantage of being extensively used, every computer has one, for this reason they are extremely cheap, while having great protection and output stability.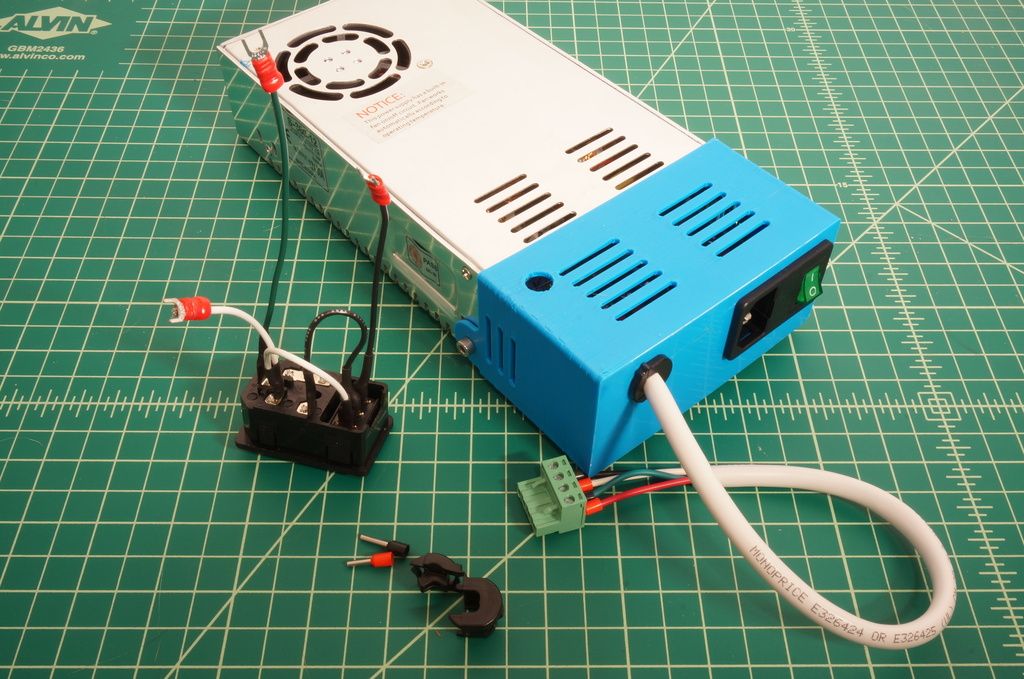
Main advantages:
- Cheap (400w is about 20-50$)
- Wide range of fixed voltages ( -12V; -5V, 0V or GND, +3.3V; +5V and +12V)
- Great protections embedded (short-circuit, wrong voltage input, wrong frequency input)
- Easily replaceable (under 5 min)
- Power factor correction
- widely available
- can be turned off automatically at the end of a printing (see more)
Main disadvantages:
- it takes more space.
- The total output is divided between all the voltages, meaning: in a 500W PSU, you might only have 300 available to the 12v rail.
- Soldering skills needed (or at least tools and a connection board) to assemble and make it work.
Power factor correction, why this matters (or don’t) ?
Power factor of an AC electrical power system is defined as the ratio of the real power flowing to the load to the apparent power in the circuit. This is confusing right? Let me explain better, take a look at this two kinds of power:
- Working Power – which is converted into useful work such as turning motors or producing light.
 This power is also called “Active” or “Real” power. It is measured in watts (W).
 - Non-working Power – which doesn’t do useful work and is only used to “energise” the magnetic or electrostatic properties of the equipment. This power is also called “Reactive” power. It is measured in volt-amperes-reactive (VAr).
Understanding the PFC
Now we will use the beer analogy:
The total content of the glass – beer and froth – represents the Total Power.
The froth, representing Non-working Power, does nothing to quench your thirst.
The beer, representing Working Power, does quench your thirst.
To get greatest value for money from the glass of beer it needs to be full of beer with no froth.
source
Now, going back to electricity terms:
Now you must be thinking: “Right, i understood why a PSU with power factor correction is good, but if i remember well, only inductive or capacitive loads gets affected by this, right?” Yes.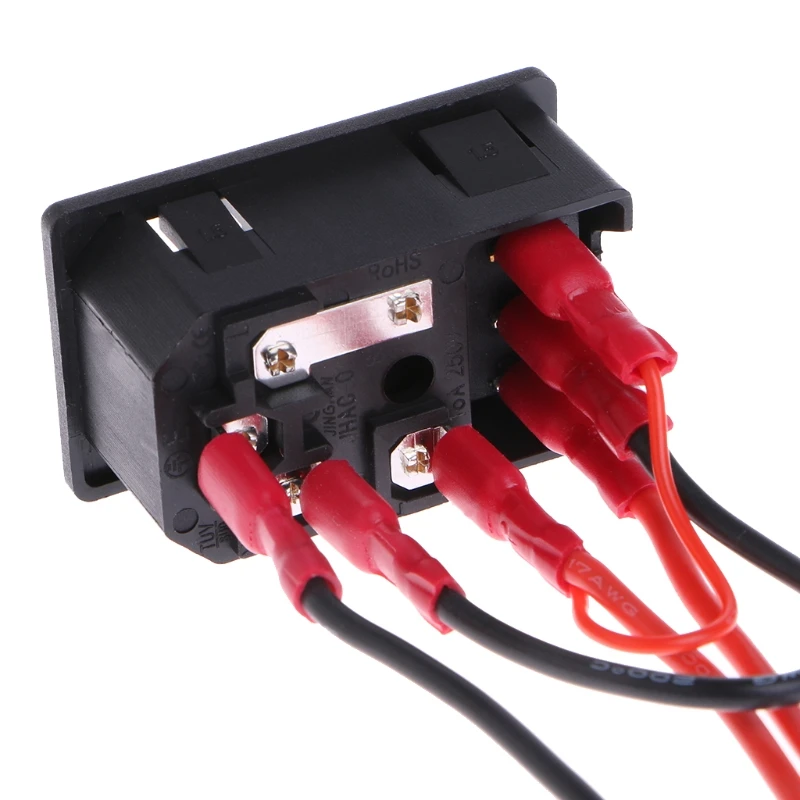 the steppers are inductive loads, and although they wont create a big phase dislocation, the price of an PSU with embedded active correction is almost the same as one without.
TL;DR: It’s good to use a PSU with PFC, but not mandatory!.
PSU Efficiency and why it matters!
If my PSU is rated for 80% efficiency, where does the other 20% go?Simple answer: Heat. Any electricity not converted from AC to DC is given off as heat (loss).
Will there ever be 100% efficient Power Supplies?Simple answer: Everything in the universe loses energy in some way (heat, radiation, light, etc). so it’s physically impossible. However we can get close, there are systems with 98% of efficiency. (i’ll not enter the strange world of superconductors or the quantum universe, since its simply a PSU for 3Dprinting, and not a nuclear fusion generator for an mars mining base…)
If I have a 500w PSU, does that mean it will always draw 500w of power?No.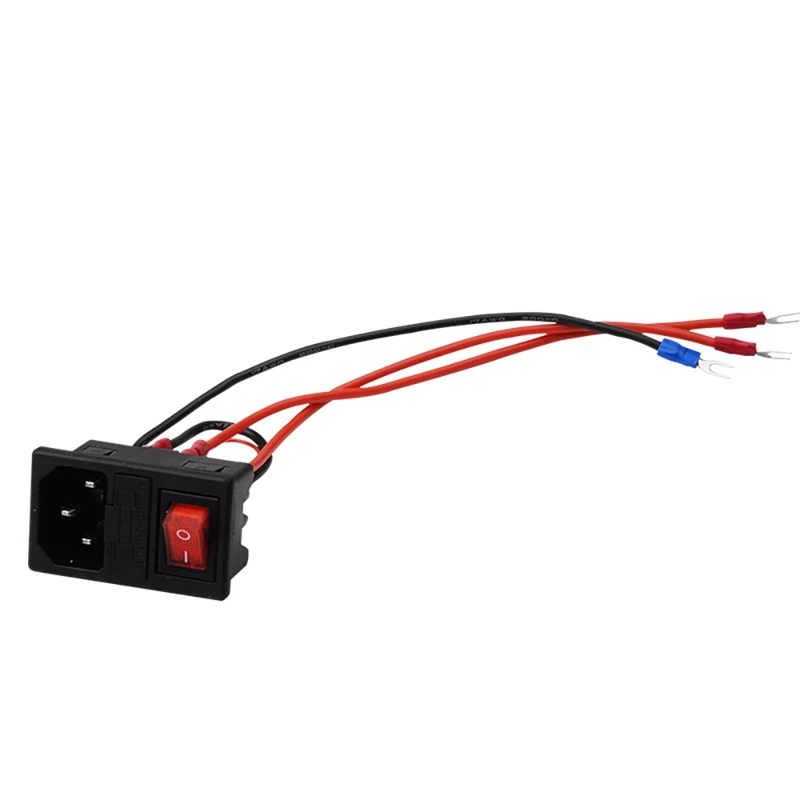 The amount of power drawn is determined by the components of the 3D Printer and how much they require. The amount of power drawn will only be equal to what is needed, and no more. If all the components require 300w to run, then the “load” on the PSU will be 300w and hence the power draw of the PC will always be 300w+Inefficiency no matter if it is a 500w PSU or 1000w.
How to choose the most efficient PSU? What the 80 Plus ratings mean?
The basic 80 Plus rating means that the PSU is rated for at least 80% efficiency at 20% load, 50% load, and 100% load.
The Bronze rating means that the PSU is rated for at least 82% efficiency at 20% load, 85% at 50% load, and 82% at 100% load.
The Silver rating means that the PSU is rated for at least 85% efficiency at 20% load, 88% at 50% load, and 85% at 100% load.
The Gold rating means that the PSU is rated for at least 87% efficiency at 20% load, 90% at 50% load, and 87% at 100% load.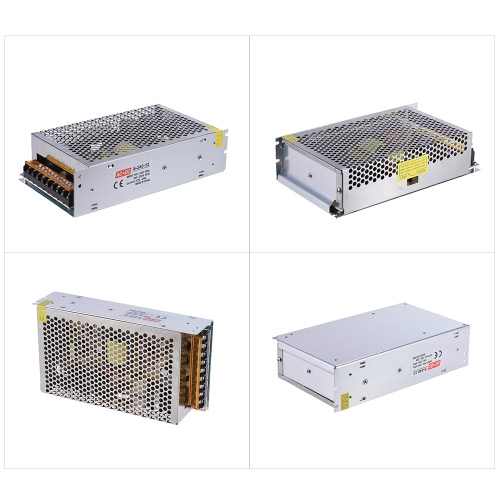
The Platinum(Extremely rare and expensive) rating means that the PSU is rated for at least 90% efficiency at 20% load, 92% at 50% load, and 89% at 100% load.
What is in it for me?
Good question! Take a look at these quick charts to show how much you save in a year over a standard 80% efficient 80 Plus PSU by going with an 80 Plus Bronze/Silver/Gold/Platinum
Some information about these charts.This assumes a 12 Cent/KwH energy rate. If you pay more for your electricity, then the numbers will be slightly higher.This also assumes the computer is running an average of 10 hours per day. Again if your 3D Printer printing takes longer, then your savings will be greater.
Also remember, “load” in that chart is the percentage load of the capability of the PSU. So 20% load on the 500w PSU would be 100w, that is actually a pretty good area for where a printer would be idle.
Conclusion:
Now, to finish this article i’ll say my opinion (please read the “personal opinion again”)
Which power supply you think is the best to use Italo?
answer: ATX Power supply with 80Plus Gold
How much watts do i need?
answer:
1- For a printer WITHOUT Heated bed: 200W
2- For a printer with 20×20 Heated bed: 400W
3- For a printer with 30×30 Heated bed: 600W
4 -For a printer with 40×40 Heated bed: 200W+, Bed powered by 220v AC using a SSR to control it.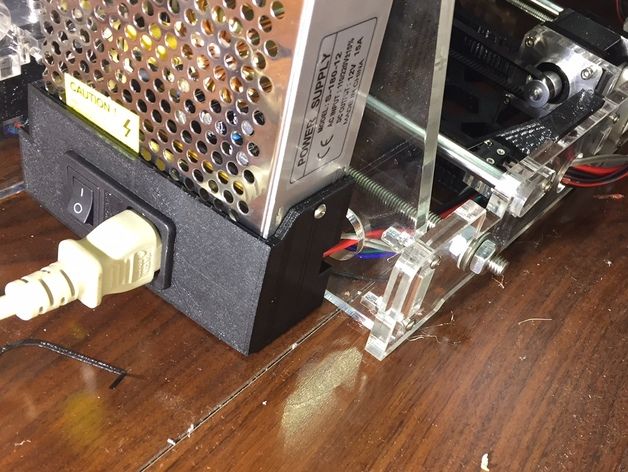
since using higher power PSU will be a waste of money and power.
Which one you think is the best? comment below and share your ideas!,
If you liked this article, please consider sharing it and subscribing to 3DPrinterChat.com Newsletter!
Also, take a look on my latest guides:
Heated bed too slow to heat? check some possible fixes
3D printers are catching fire (literally).
[wysija_form id=”1″]
Free 3D file Power supply cover with slot for Ender 3 switch・3D printing model to download・Cults
LG Sound Bar Mounts
Free
Inner washer for PLA filament recharging
Free
Quest Q30 Wireless Hammer Detector Stand
Free
Best 3D printer files of the Tools category
Tracing guide / tracing guide
€0.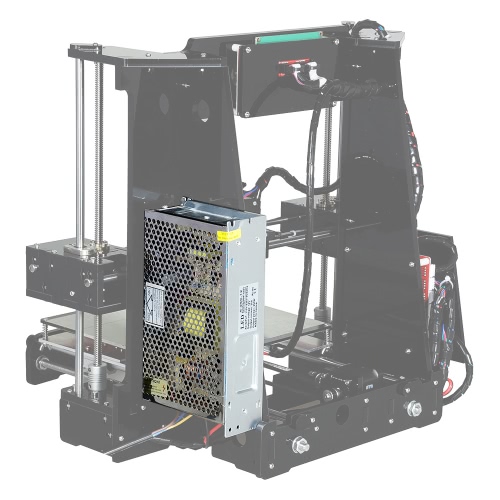 50
50
Dyson vacuum cleaner head wall bracket
€5
pelican 2690 LED Headlamp replace part
€1.89
Delonghi Satrap coffee machine steam valve knob/arm
Free
Filament Roller No Need Screw; No need Glue
€3
simple tools holder
Free
Torture Test
Free
1.75 mm Filament Spool Retaining Clip for AIO
Free
Best sellers of the category Tools
Scissor Paint Rack
€5.21
UNIVERSAL INDICATOR FOR BED LEVELING FOR ALMOST ALL PRINTERS
€2.82
phone ring holder
€0.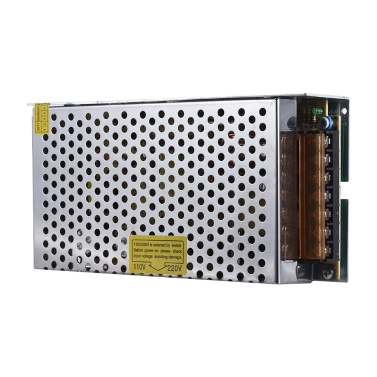 90
90
Ender 3, 3 V2, 3 pro, 3 max, dual 40mm axial fan hot end duct / fang. CR-10, Micro Swiss direct drive and bowden compatible. No support needed for printing
€1.57
ENDER 3 S1, S1 PRO, SPRITE, V3 AIR DUCT FAN 5015, ACCELEROMETER, LED Strip
€2.69 -20% €2.15
Spartan 4mm Hex tool bit holder
€1.80
PET-Machine, make Your own filament from plastic bottles at home!
€15
ENDER 3 S1, S1 PRO, SPRITE, HOT END DUCT 4020 OR 5015 FAN, PROBE NO Y OFFSET
€2.28 -20% €1.83
INDICATOR FOR BEST BED LEVELING FOR ENDER 3 V2
€2. 82
82
PRECISION CALIPER 3D PRINTING DIY
€3.13
Fire Hydrant Stash Container
€1.89
FLSUN v400 display holder
€9.99 -50% €4.99
ARTEMIS -> Magazine for Alligator 2 || 6.5" Arrows || Repeating crossbow
€6.25
Fast-Print Paint Bottle Rack (6 Sizes)
€2.84
Chill Buddy Lighter Case
€0.93
3D Printed Strain Wave Gear (Harmonic Drive)
€4.99
Would you like to support Cults?
You like Cults and you want to help us continue the adventure independently? Please note that we are a small team of 3 people, therefore it is very simple to support us to maintain the activity and create future developments. Here are 4 solutions accessible to all:
ADVERTISING: Disable your AdBlock banner blocker and click on our banner ads.
AFFILIATION: Make your purchases online by clicking on our affiliate links here Amazon.
DONATE: If you want, you can make a donation via PayPal.
WORD OF MOUTH: Invite your friends to come, discover the platform and the magnificent 3D files shared by the community!
Free STL File Ender 3 V2 Automatic Power Switch
Motorcycle helmet corner plastic 2- Deer horn decoration accessories 2- 3D printing
1 €
Motorcycle helmet plastic corner - horn decoration accessories
0,80 €
horn
Free
nine0003 Cylindrical gears/Pressure angle 20dg/Helix angle 45degFree
Dual Z Axis Ender 3, pro, v2
Free
Guitar Finger Nail
Free
stars, moon, planet 2d - universe in the bedroom!!!
Free
Straight coupling rigid - standard type from MISUMI
Free
The best files for 3D printers in the Tools category
Fly Fishing Reel
Free
Cordeau for the garden
Free
Disco helmet
Free
Sailing Aircraft - Control Surface Deflection Meter
Free
Bridge test mod
Free
Co2 Valve Coffee Bean Canister
0. 94 €
94 €
Dust collector for drill
0,50 €
BIG SPOOL (3Kg) IKEA Skadis spool holder with bearings
Free
Bestsellers in the Tools category nine0037
ENDER 3 S1, S1 PRO, SPRITE, HOT END DUCT 4020 OR 5015 FAN, PROBE NO Y OFFSET
€2.28 -20% 1.83 €
UNIVERSAL BED LEVELING INDICATOR FOR VERY ALL PRINTERS
2,82 €
Quick Print Ink Bottle Rack (6 sizes)
2.84 €
PET-Machine, make your own plastic bottle filament at home!
15 €
Fire hydrant container
1. 89 €
89 €
Ender 3 S1 BEST cable guide - vertical
2,50 €
Business Card Embossing System
3 €
3D printed wave transmission (harmonic drive)
4.99 €
Cut-Man - PET bottle cutter with handle!
€3.49
Paint stand with scissors
5.21 €
Bit holder Spartan 4 mm Hex
1,80 €
nine0003 Case for Chill Buddy lighter0,93 €
PRECISION CALIPER 3D PRINT DIY
3,13 €
Ender 3 S1 pro fan duct 5015 4020
1,30 €
Display holder FLSUN v400
€9. -50% 4.99 € 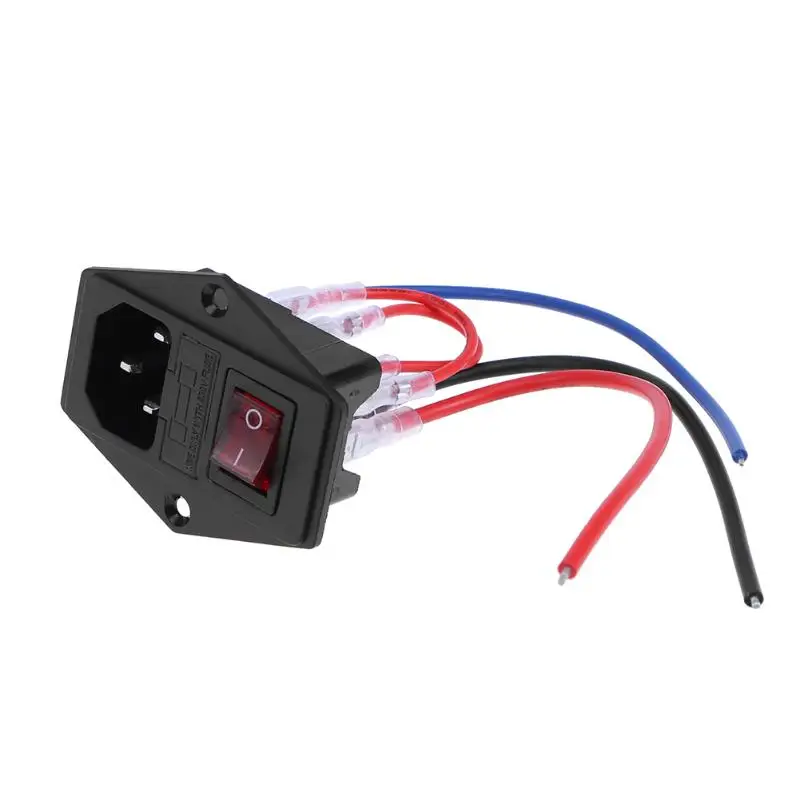 99
99
Armadillo - flexible wire conduit
1.68 €
Do you want to support Cults?
Do you like Cults and want to help us continue our journey on our own ? Please note that we are a small team of 3 people, so supporting us in maintaining activities and creating future developments is very easy. Here are 4 solutions available to everyone:
-
AD: Disable the AdBlock banner blocker and click on our banner ads.
-
AFFILIATION: Shop online with our affiliate links here Amazon.
-
DONATIONS: If you want, you can donate via PayPal here.
-
* INVITE FRIENDS: * Invite your friends, discover the platform and great 3D files shared by the community! nine0006
Simple automatic printer shutdown.
Personal diaries
Follow the author
Subscribe
Don't want
25
I’ll make a reservation right away, this scheme will only work on printers with a heated table .
I'm tired of the fact that the printer, after finishing printing at night, remains on until the morning. I began to look for solutions, I wanted something simple, so as not to go into the firmware and from the available details. In the internet I came across a popular thermal relay (thermostat) W1209, the device is simple and reliable, well, its price is ridiculous. There is really one structural trouble in the form of large elements located on the front of the board, but this is quite easily solved by transferring them to the back of the board. Here is a link describing how this can be done: Modifying the W1209 thermostat. The power supply on my printer is 360 watts, which means that the current in the primary circuit will be no more than 2 amperes, on the thermostat the relay is designed for a current of up to 5 amperes when switching 220 volts, it is enough with a margin. Here is the wiring diagram:
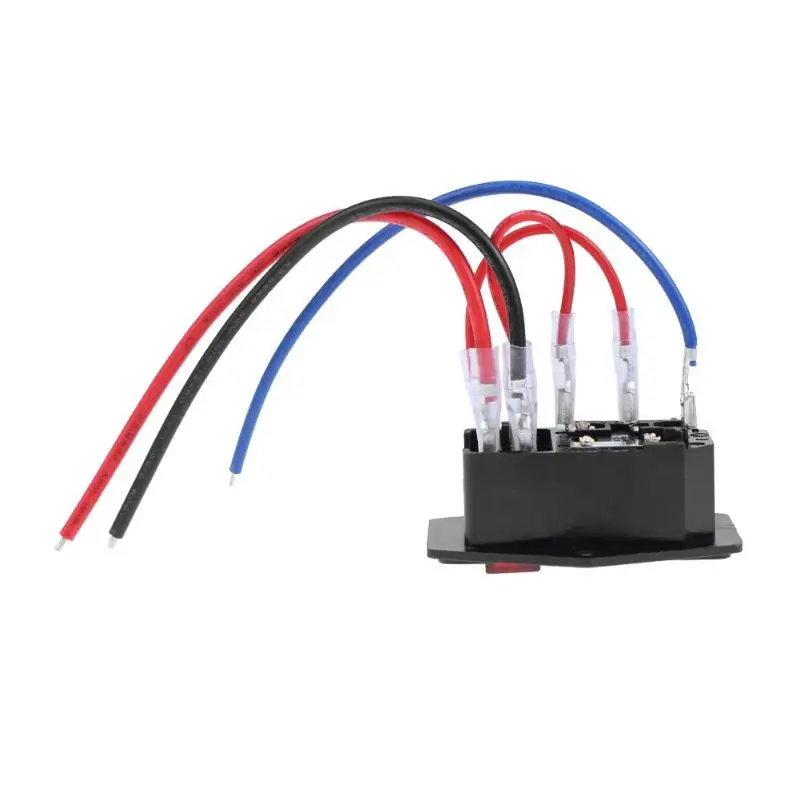
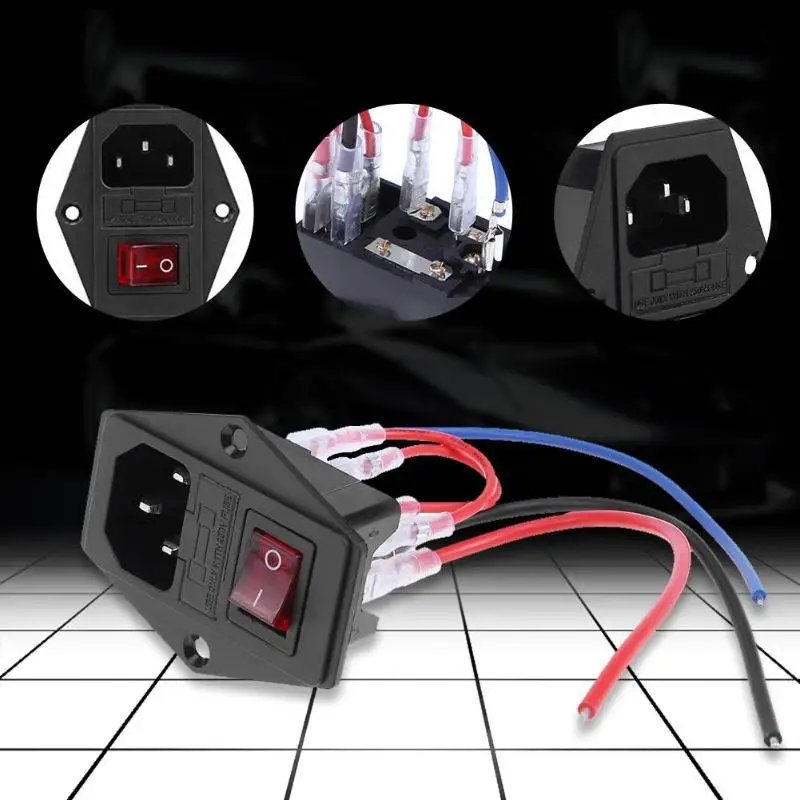
To implement it, you need to change the power button to a two-button one, the W1209 thermostat relay must be connected in parallel with one of the switch keys, the thermostat itself is connected to the printer power supply (on my printer, the power supply is 24 volts, so the thermostat was connected through a step-down converter). The thermostat sensor must be fixed on the heating table in any place, in any convenient way. I attached it to the bottom of the table with high-temperature sealant, not far from the wires soldered into the table, and ran the connecting wire next to the wires for heating the table. nine0006
How it works:
When the printer is turned on, 12 volts from the power supply is supplied to the thermostat circuit, which can operate in two modes, heating and cooling, we switch it to cooling mode and set the response temperature below the table heating temperature, say 40 degrees -50. You need to do this only once, because.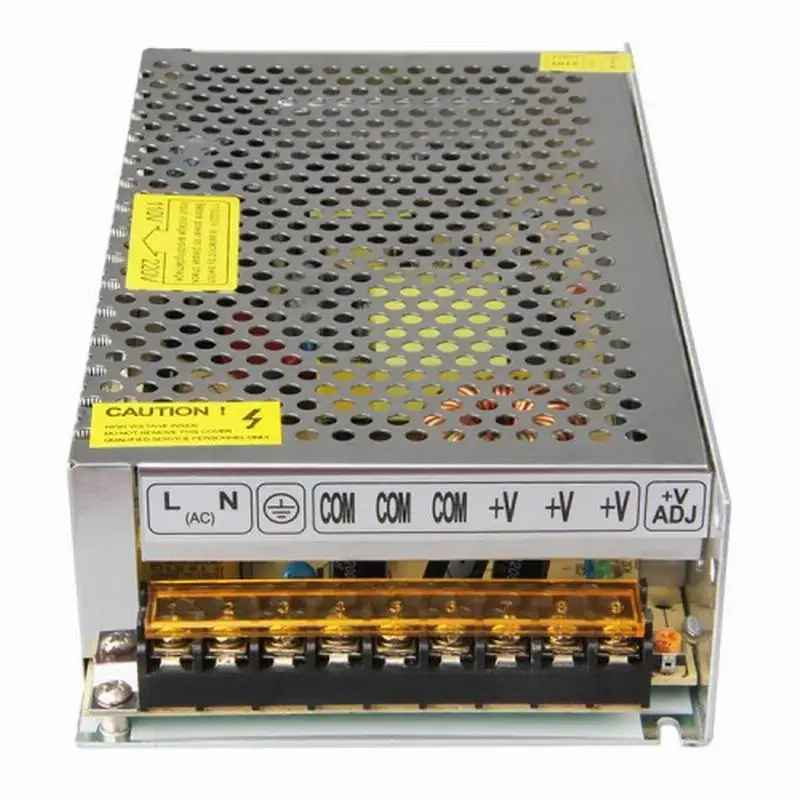 The thermostat remembers the settings and does not reset them after the power is turned off. Then we start printing on the printer. When the table heats up above the set temperature, the relay on the thermostat will turn on and shunt the contacts of the switch in parallel to which it was connected. The fact that the relay is on will be indicated by the LED on the thermostat lit. Now the switch, in our diagram it is designated as K1, can be opened, the current will flow through the closed thermostat relay. After printing is completed, the table will begin to cool down, when its temperature drops below the set temperature, the relay will open, thereby breaking the power circuit and the printer will turn off. What is the second switch K2 for? In the event of an emergency shutdown of the printer, without it, you would have to pull out the power cord. This scheme is quite simple so that it can be repeated on any printer with a heated table, does not require knowledge of electronics, of course it must be remembered that the voltage of 220 volts is life-threatening and safety precautions must be observed.