3D printer level sensor
Auto Bed Leveling (ABL) Sensor Comparison – 3DMaker Engineering
One of the best upgrades you can add to a 3D printer to improve both performance and ease of use is an auto bed leveling sensor. Although they technically do not level the bed, they create a topological map of your bed and adjust the Z position of the nozzle to follow imperfections of your build surface for a more consistent first layer.
The first upgrade we do to all of our printers is solid mount the bed (remove the bed springs) and add an auto bed leveling sensor. This allows us to level the bed once and never have to worry about it again. When you have a print farm, the last thing you want to have to worry about is adjusting bed leveling knobs on a large number of printers.
Disclaimer: We currently sell a physical, hall effect type probe. We want to be upfront that we have not skewed our opinions based on this. The fact is, we tested each type of sensor extensively in our print farm and came to the conclusion that for our needs this was the most well-rounded option. Because of this, we decided to partner with a sensor manufacture to develop the 3DM Touch. We could have just as easily went with a capacitive or inductive style sensor which typically is much cheaper to manufacture.
If you Google “3D Printer Bed Leveling Sensors” you will find an endless number of manufacturers selling sensors of all shapes and sizes. To help simplify things we will break it down by sensor type instead of sensor brand. If you can understand the pros and cons of each of the technologies available it will help you determine the best one for your application.
Capacitive Sensor (ex. EZABL):
A non-contact sensor that can sense both metallic and non-metallic surfaces. This sensor works by monitoring the capacitance (how much energy the onboard capacitor can hold) which changes when an object is placed near its sensing face. It can detect any surface that has a die electric constant greater than air which should cover every build surface you will use (including glass).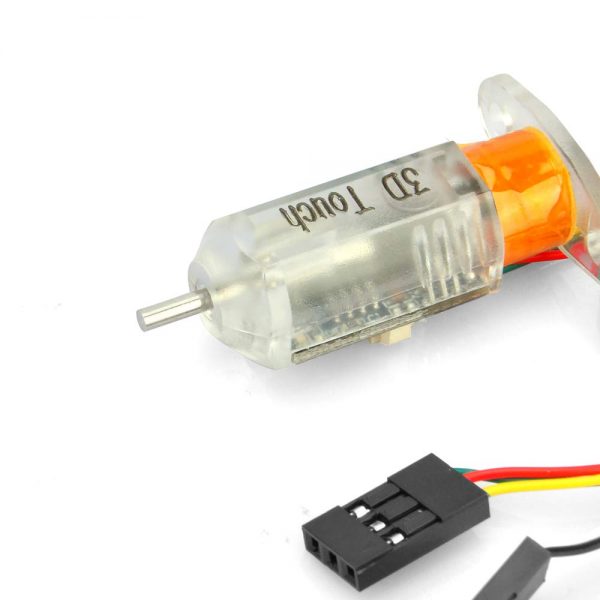 Another advantage of this sensor type is that it can probe extremely fast, saving you time during each print. Below is a basic diagram of how the sensor works.
One drawback is that while it can sense almost any surface, the distance at which it reads it will change depending on build surface type, temperature, and humidity. This is no problem if you only have one build surface and do not use an enclosure. If you plan to switch between different surfaces (ex. garolite, glass, PEI, polypropylene, etc.) like us, you will find yourself having to continually tweak your z-offset. Additionally, if you print in an enclosure where ambient temperatures vary, you will again need to adjust your z-offset.
Inductive Sensor (ex. P.I.N.D.A.):
This is another non-contact sensor, however, this type can only detect metallic surfaces. This means when the probe is analyzing a PEI spring sheet, it is actually mapping the spring steel and not the PEI surface you are printing on. This is usually not an issue, however, as the two surfaces should be relatively parallel with each other.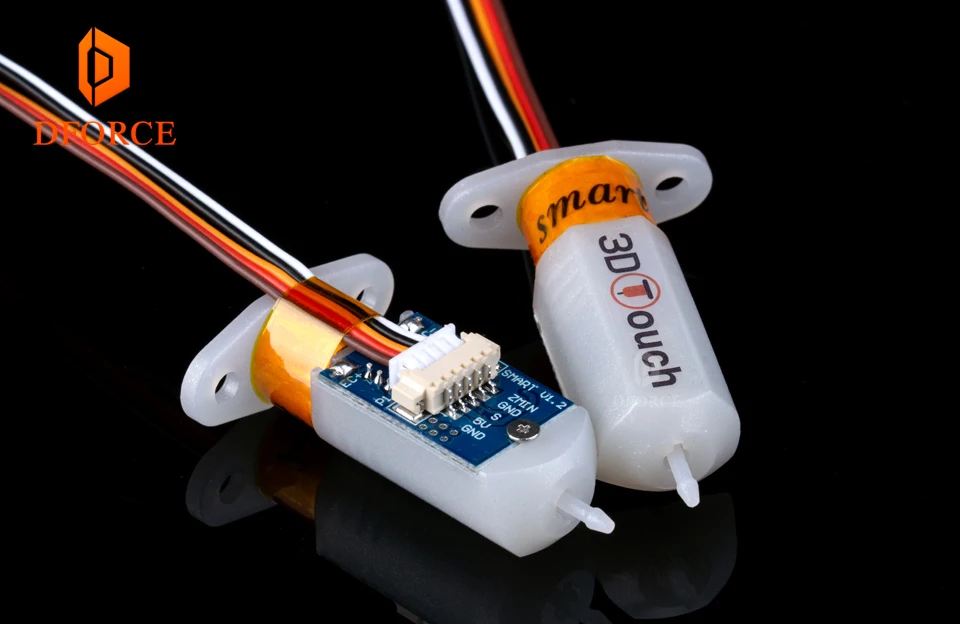 If you are someone who likes to print on glass, garolite, or polypropylene—you may want to look for another option as these materials will not be detected. Although these sensors look very similar to a capacitive sensor, they work based on a completely different principle. They use the electrical principal called inductance. In a nutshell, an inductor coil in the sensor creates a magnetic field that changes when a metallic object is within its sensing distance. Non-metallic surfaces do not affect the magnetic field which is why the surface must be metallic.
Similar to the capacitive sensors, their readings are affected by temperature and humidity changes, so be prepared to make adjustments if you expect to see large temperature shifts. Some printer manufacturers, like Prusa, have done their best to use onboard sensors to automatically adjust for ambient temperature changes but in our experience it’s hit-and-miss. We have MK3S printers where we calibrated the z-offset at room temperature, put them in a heated enclosure, and found that the z-offset was then completely incorrect. If you are not printing in an enclosure, the temperature compensation seems to work fairly well for minor changes in room temperature, which is what we think it was really intended to do.
Physical-Hall Effect Sensor (ex. 3DM Touch+):
This is the only sensor on the list that actually makes contact with the bed as a means of detection. Because of this, it is unaffected by temperature and humidity changes like the other two contenders. It functions by using a plastic plunger (pin) and a hall effect sensor to detect your build plate. As soon as the plastic pin makes contact with the bed, it is retracted and registered by the hall effect sensor. Also, there is a built-in solenoid that allows you to extend and retract the probe via g-code which gives you plenty of clearance while printing. Below is a diagram of how a basic hall effect sensor works. Please note, the plastic plunger has a magnet embedded towards the top which is what the hall effect sensor is actually monitoring.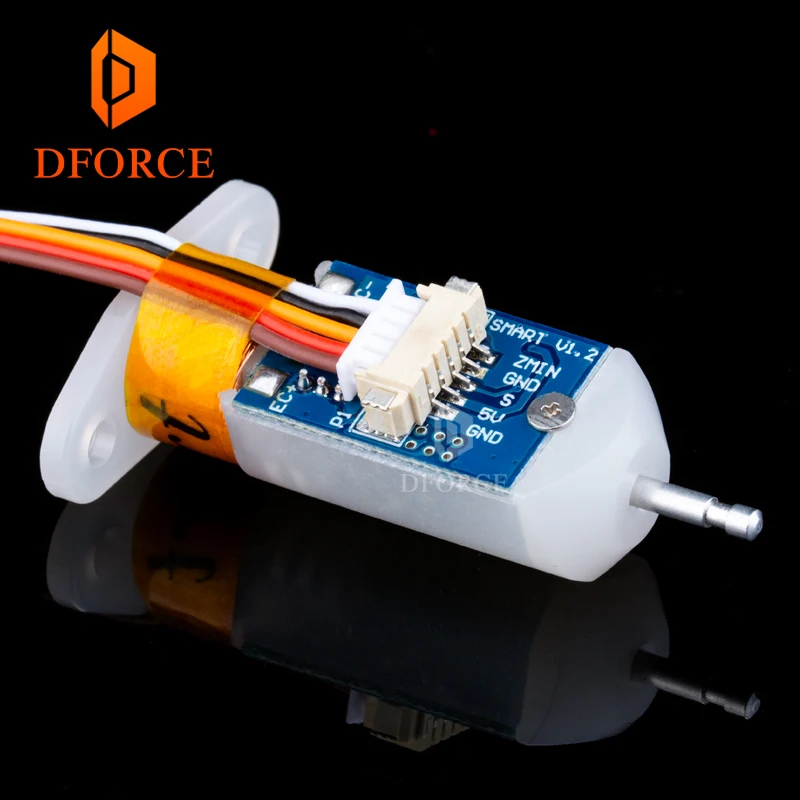
The main drawback of this sensor type is that it is slower compared to the other non-contact types. While there is only a few seconds difference per probe point, this can add up if you are doing a 7X7 (49 points) or greater grid pattern. The good news is that in Marlin 2.0 and newer, there is a feature called HSMode which allows you to probe nearly as fast as the others. The next issue is that it contains moving parts so, in theory, there is more that can break on the sensor. Luckily, the mechanism is extremely simple so there is almost no chance of it actually failing. The new plastic probe tips are also made to bend so if you accidentally crash it, you can simply bend the plunger back in place and get back to printing.
All testing was done with three brand new Prusa MK3S printers modified to accommodate the different sensor types.
Accuracy:
We wanted to test how well the three probes could continually reproduce a 0.24mm, single layer print without any other variables changing such as temperature or build surface types.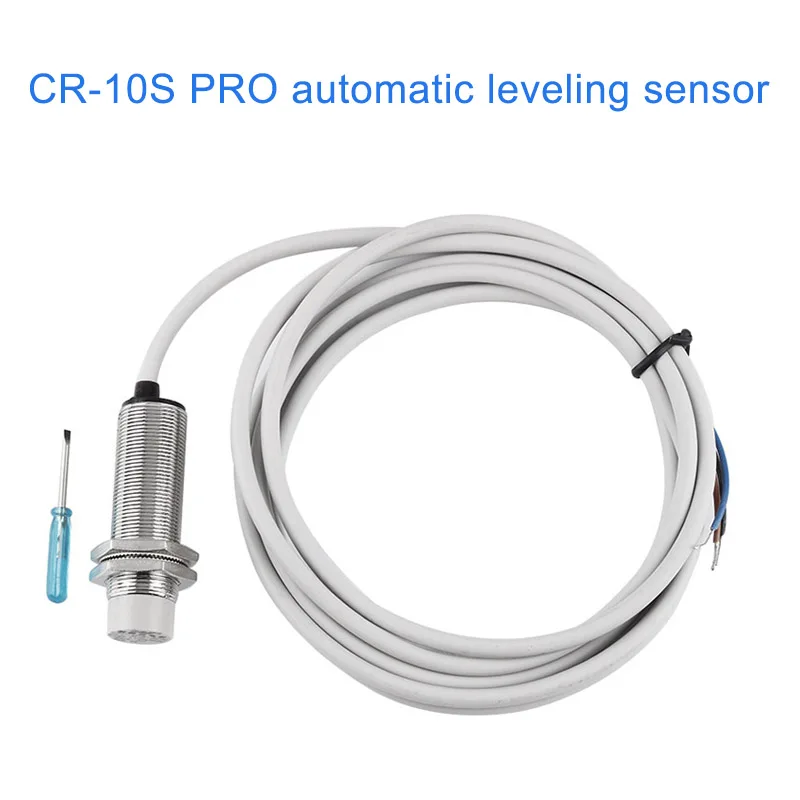 We tested this by using micrometers to adjust the z-offsets until all three printers were printing a true 0.24mm thick first layer. Once dialed in, we printed the test print 5 more times and measured the thickness in several spots using the same micrometers. All of the probes were able to reproduce a 0.24mm thick first layer consistently without any deviation. If the inductive and capacitive probes are more accurate, they did not translate into any real-world results. Our conclusion: in a controlled environment all three options will provide accurate readings.
Winner: Tie (Inductive/Capacitive/Physical-Hall Effect)
Versatility:
Our expectations: set the z-offset once and continually get a perfect first layer, regardless of the build surface type or ambient temperature. When you have several printers, you don't want to have to think about tweaking z-offsets every time your printer setup changes. This saves both time and frustration which, in our opinion, is the most important function of a bed leveling probe.
On paper, the two non-contact sensors should be the most accurate. Their lack of moving parts and the sensing method give them a leg up (and was shown by Thomas Sanladerer on his YouTube comparison). However, when you throw in real-world variables such as different build surfaces and drastic temperature changes present in an enclosure, the Physical-Hall Effect type sensor comes out head and shoulders above the rest.
Similar to the previous accuracy test, we set our first layer height to 0.24mm and then printed an object that was only one layer thick. We then removed the print and measured it with micrometers and made adjustments until it was exactly 0.24mm. Once the z-offset was adjusted to produce a true 0.24mm first layer, we then heated the enclosure to 35°C and hit print without adjusting anything. The 3DM Touch was the only one that was able to reproduce the same 0.24mm first layer while the other two failed to have a successful first layer. We did this 4 more times and the results were the same each time. The non-contact sensors just weren’t able to give the same z-offset reading with the large change in temperature.
The next test was about switching between build surfaces. We did not test the inductive sensor as it can only sense metal and knew it wouldn’t be able to handle this task. For this test, we again adjusted the z-offsets on the two printers to produce a 0.24mm first layer using a spring steel build surface. After this, we then swapped out the spring steel build surface for a polypropylene plate. As expected, the 3DM Touch printed the same 0.24mm first layer while the capacitive (EZABL) sensor gave us a first layer height of 0.17mm which is an error of 30%. This is because even though the capacitive sensor can detect polypropylene, it detects it at a different distance than spring steel. If you plan on using different build surfaces, we recommend staying away from the inductive sensors as they will fail to detect everything except metal.
Winner: Physical-Hall Effect Sensor
Probing Speed:
Both non-contact sensors are considerably faster than the physical probe. They don’t have any moving parts so no time is required to cycle the probe up and down. As mentioned earlier, Marlin 2.0 has introduced HSMode for the 3DM Touch which has helped increase probing speed, however, even then it will still be ~10% slower to probe the same number of points. If probing speed is extremely critical in your application, an inductive or capacitive sensor might be the best choice for you.
Winner: Tie (Inductive/Capacitive)
Durability:
After testing each sensor type (multiple of each, over several months) none of them showed any signs of having issues with durability. Some argue that the 3DM Touch sensor has moving parts so it, in theory, could wear out. We are confident that your machine would need to be replaced long before the plunger mechanism wears out. The old BLTouch probes had metal tips that would get damaged if you crashed your machine but the newer ones all use “breakaway” plastic tips that deflect if crashed.
Winner: Tie (Inductive/Capacitive/Physical-Hall Effect)
Because the 3DM Touch is a lot more complex in its design, it tends to also be the most expensive. There are also very few manufacturers who produce them which is also a driving factor of cost. Quality capacitive and inductive sensors, on the other hand, can be found for less than $10. This is approximately a third of the cost of 3DM Touch-type probes. If you are on a tight budget and still want to add a bed leveling probe to your machine, both the capacitive and inductive sensors will be a great choice.
Winner: Tie (Inductive/Capacitive)
All three sensors seem to do a more than adequate job as long as you don’t plan on switching build surfaces or changing ambient temperatures drastically. Casual users who are on a tight budget will likely be extremely happy with either a conductive or inductive type sensor.
If you are a 3D printing “super-user” and have the extra budget, we would recommend the 3DM Touch as it requires the least amount of calibration in the long run. It handles everything from build surface changes to large temperature variation without ever needing to do any additional calibration.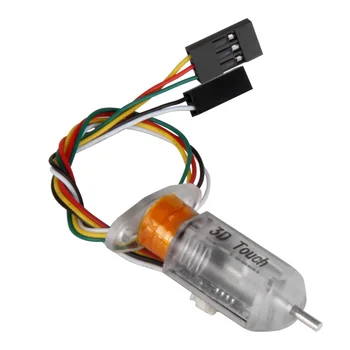
Each user is going to have a different set of requirements for their printing needs. For us, the 3DM Touch made the most sense; for others, it may be a capacitive or inductive sensor. We hope that this article helps clear up any uncertainty about the various options available and will help you make an informed decision for your own needs. If you have any questions about areas we did not cover, please feel free to contact us and we will do our best to provide answers.
-3DMaker Engineering
Bed Leveling Sensor types in 3D Printing! – 3D Solved
If you’re like me and are tired of having to manually level the bed every couple of prints (not really, if you get the proper upgrades you can probably get away with leveling it every month or so), then you might want to consider getting a Bed Leveling sensor to help you out!
There are a couple different ones and I will talk about them in this post as well as give you an overview of which ones are more versatile, more precise, durable, etc. , and I will also give you my opinion on which I think most people should go for.
So, without any further ado, let’s get started!
Table Of Contents
- What does Auto bed leveling do?
- Sensor Types
- Capacitive
- Inductive
- Physical Hall effect Sensor
- IR Sensor (Infrared)
- Piezo Sensor
- Duet3D Smart Effector
- Which one is more precise?
- Probing Speed
- Durability
- Versatility?
- Best auto bed leveling sensor for glass
- One Important Consideration
- Conclusion
What does Auto bed leveling do?
The bed of a 3D printer doesn’t usually stay leveled for too many prints and you’ll have to manually re-level it every now and then. This generally happens with cheaper printers such as the Ender 3, and even though you can swap out the leveling screws and increase the time the bed stays leveled, you generally will have to manually adjust it every so often.
Having a properly leveled print bed is probably the most important factor when it comes to getting a successful print that sticks well to the bed, since getting the first layer right is what generally makes or breaks your print.
Luckily, some printers have a built-in feature called auto bed leveling which ensures that every time a new print is started, the distance between the printing bed and the nozzle is set automatically to the perfect height, ensuring that every print adheres to the bed properly without also getting squished too much.
3D printers that features this auto-leveling feature have a sensor located near the tip of the print head which measures the distance between the printing bed and nozzle at specific points before the printing process even starts.
The printer then uses this information to adjust the distance between the nozzle and the bed across the entire surface creating a sort of “topographical map” of the print bed, adjusting the Z position of the nozzle to follow the build surface in a more consistent way.
The great thing is that if you have a printer that doesn’t come with this kind of sensor, you can install one yourself and never have to manually level the bed again.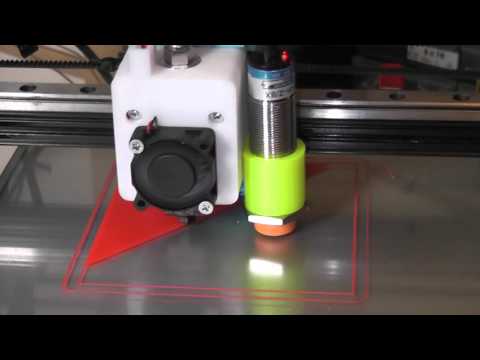
Auto Bed leveling also helps a lot if you have a build plate that is slightly warped, which is the case with many printers, since it will move the nozzle up or down depending on where the build plate is warped.
Sensor Types
The auto bed leveling sensors come in all shapes, sizes and costs. Let’s discuss the different sensor types, understand their technology and compare their pros and cons to help you figure out the best option for you, since some work well on most types of build surfaces while some other don’t.
Capacitive
A capacitive sensor is a non-contact sensor that works by measuring the capacitance, which is how much energy the capacitor can hold, that changes when its sensing face is placed near an object.
A capacitive sensor is one of the fastest sensors out there, and it works on both metallic and non-metallic surfaces and even transparent ones like glass as it can detect any surface as long as its die electric constant is greater than air.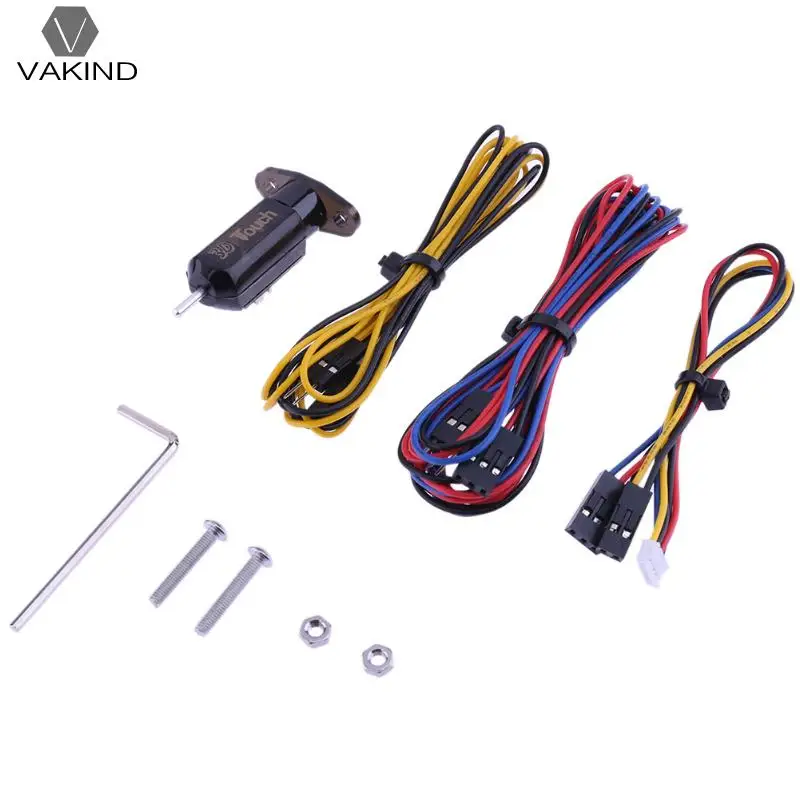
The downside of going with one of these sensor types is that they are highly sensitive to changes in temperature, humidity and build surface type. Any slight change in these three will affect their sensing distance and therefore, the level of the bed.
I print with a glass surface 99% of the time, so this kind of sensor works well for me, but if you’re someone who needs to swap out the build surface constantly, I wouldn’t recommend this kind of sensor.
Inductive
An inductive sensor is a non-contact sensor that works on the principle of electrical inductance. In simple terms, it produces a magnetic field that changes when its sensing face is placed near a metallic object (I think you can guess by now that this one will only work on metallic surfaces).
Similar to capacitive sensors, the z-offset of inductive sensors also needs to be adjusted to compensate for any changes in the temperature and humidity, which is why using an enclosure isn’t really recommended.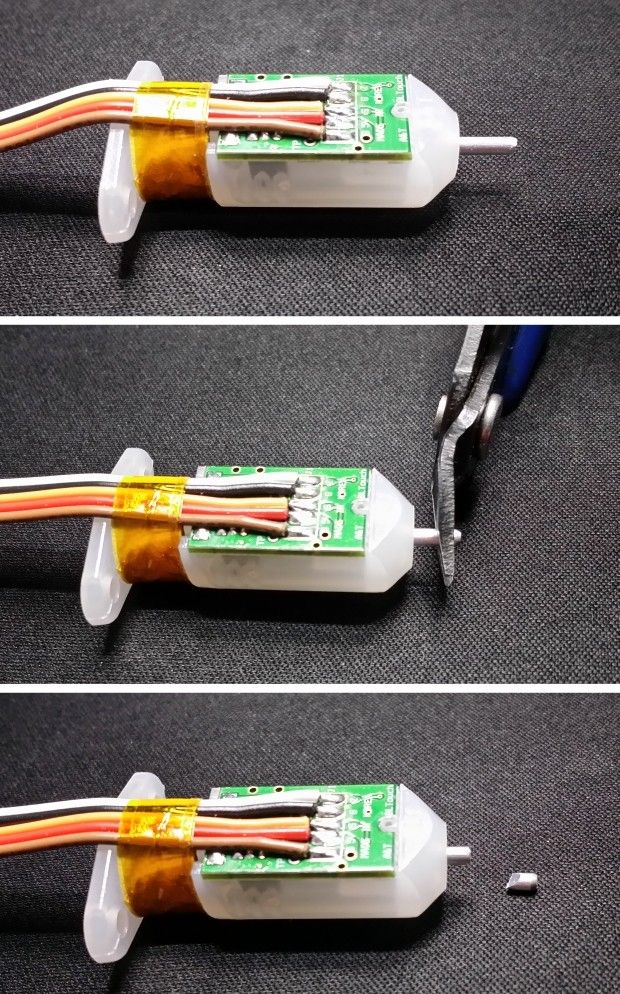 However, if you have your printer running in an open space, inductive sensors seem to work quite well.
Physical Hall effect Sensor
A physical Hall effect sensor has a retractable plastic plunger pin (containing a magnet) and a Hall effect sensor.
In order to detect surfaces the sensor has to actually make physical contact with them which then retracts the plastic pin resulting in change in the magnetic field. This change is picked up by the hall effect sensor which then expresses it in volts.
This sensor remains unaffected by changes in temperature and humidity, but it is considerably slower than the previous two sensors since it’s got mechanical moving parts which are extremely simple, therefore it’s less likely to fail or break, and even the plastic probes last very long since they are designed to bend and not break.
The BLTouch is one of these types of sensors, and the reason it’s so popular is because it works on every single surface and because temperature doesn’t affect it. I would strongly recommend most people to go with this kind of setup.
IR Sensor (Infrared)
An infrared (IR) sensor is an electronic device that measures and detects infrared radiation in its surrounding environment. When an object comes close to the sensor, the infrared light from the LED reflects off of the object and is detected by the receiver.
It is a small non-contact sensor that can be used to detect imperfections in metallic and non-metallic surfaces and it can also work on glass surfaces, but a matte backing is recommended.
Unlike capacitive and inductive sensors, this type of sensor measures the height to the top surface of a glass bed, not the distance to a backing plate, and it’s ideal for use where space is restricted, such as under the effector of a delta printer.
Piezo Sensor
Image Source: RepRap.A Piezo sensor is a contact sensor, similar to a Physical Hall Sensor, that is either attached to the nozzle itself or it can also be placed under the print bed (generally used with Delta printers and much less common).
It works on the principle of Piezo-electricity (the electric charge produced in certain solid materials when they experience pressure) and this can be measured as a voltage proportional to the pressure.
Piezo sensors are very precise and accurate, especially the one mounted on the hotend, and they can be used with any printing surface including Printbite, PEI, Buildtak, Glass, Aluminium, etc.
Duet3D Smart Effector
Image Source: Duet3d.The Duet 3D Smart Effector is only for delta printers and it allows the printer’s hotend to be used as a Z probe to accurately calculate the distance between the nozzle and the bed, taking care of any imperfections on the surface.
It also simplifies wiring of hotend components (thermistor, fans and the heater cartridge).
Which one is more precise?
Capacitive, Inductive and Physical-Hall Effect sensors are fairly similar in terms of overall precision, with the capacitive sensor being slightly worse. Duet 3D smart effector, IR sensor and hot end mounted Piezo sensor all are a bit more precise with the Hotend mounted piezo being the most accurate.
However, the Duet 3D smart effector is only compatible with Delta printers, so if you’re using a Cartesian or Core X/Y printer you won’t be able to use it.
Like I just mentioned, Capacitive sensor is not recommended if you need precision because it’s the one with the lowest precision compared to others on the list.
However, I would recommend the Physical-Hall Effect sensor the most (BLTouch, etc.) since these don’t really care whether your build surface is glass, magnetic, etc. because they have a probe that works mechanically, which makes it the most versatile one.
Probing Speed
The inductive and capacitive sensors have the highest probing speed because both of these are non-contact sensors and don’t have to probe or cycle up and down to make physical contact with the printing bed to get the ideal distance.
Durability
All sensors are fairly durable. In theory, the ones with the moving parts e.g. the Physical Hall effect sensor, have more chance of failing because of wear and tear, but in reality, their mechanisms are extremely simple and the probes are designed to bend instead of breaking, making them very durable.
In my opinion, there’s a higher chance that you will have to replace your printer before there’s any need to replace the Auto bed leveling sensors.
Versatility?
The physical Hall effect sensor is more versatile than the conductive and inductive sensors because it can detect all surfaces and its Z-offset is not affected by changes in the temperature and humidity.
All sensors except the 3D duet smart effector, hot end mounted and under the bed Piezo sensors have a separate Z probe. The relative height of the nozzle and the Z probe will vary if the print head tilts while moving in the XY plane which will lead to apparent variations in the trigger height with XY position. Mount the Z probe as close to the nozzle as possible to minimize this effect.
The IR sensors have an advantage here as they are light and small enough to be mounted closer to the nozzle.
Best auto bed leveling sensor for glass
Physical-hall sensors are generally the most suitable sensors for glass beds or any other non-metallic surface (even though they also work extremely well with metallic surfaces because they use a physical probe to measure the distance between the nozzle and the bed). Most sensors work well with a glass bed except for inductive ones since they won’t be able to detect the glass.
EZABL
EZABL is a capacitive sensor that offers electrical isolation from the motherboard, thermal runaway protection and zero temperature drift. It works with metallic and non-metallic surfaces including transparent ones. At $65, it’s a bit expensive but the extra cost might be worth it.
It has two drawbacks; you will either have to purchase the sensor mount separately or print it yourself, and to update the firmware you will have to use Arduino IDE and upload it via the 3D printer’s USB port, but this shouldn’t be a problem for experienced makers as it is one of the most well documented and well supported sensors that are currently available.
BLTouch
BLTouch is a mechanical sensor and is definitely the most popular auto bed leveling sensor out there, especially for the Ender 3. Its newer versions have the following three parts:-
- Onboard microcontroller
- Solenoid switch
- Physical push-pin
The older versions had hall effect sensors but newer ones use a solenoid switch in tandem with a microcontroller to detect surfaces when the push-pin retracts.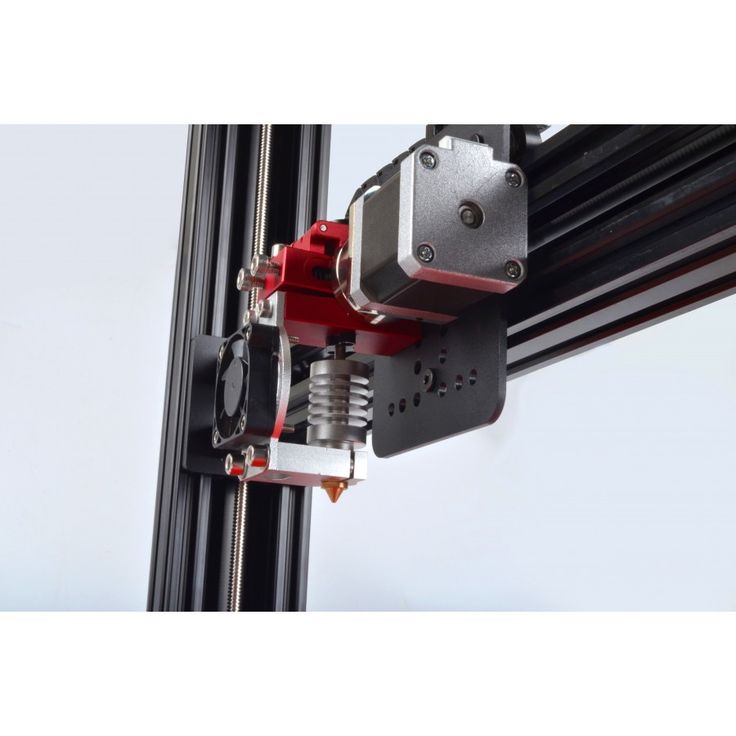 It can detect metallic and non-metallic surfaces including transparent ones (that’s kind of obvious since it works mechanically, but I wanted to make sure that you got the info). It costs around $50 and is suitable for beginners as it’s easy to install, and many instructional videos are available online to do so.
UPtanium Leveling Kit
The Uptanium auto bed leveling kit offers the best of both worlds. Just like EZABL, its a capacitive sensor but also like BLTouch it is suitable for beginners due to easier installation. It electrically isolates itself and can detect metallic and non-metallic surfaces. It costs
The one drawback is that it sells for around $65.
One Important Consideration
If your Z probe is separate from the nozzle, essentially all the previously mentioned ones except the Smart Effector, and both Piezo types (Hotend and bed mounted), then if the print head tilts as it moves in the XY plane then the relative heights of the nozzle and the Z probe will vary with the tilt as well, causing apparent variations in the trigger height with XY position.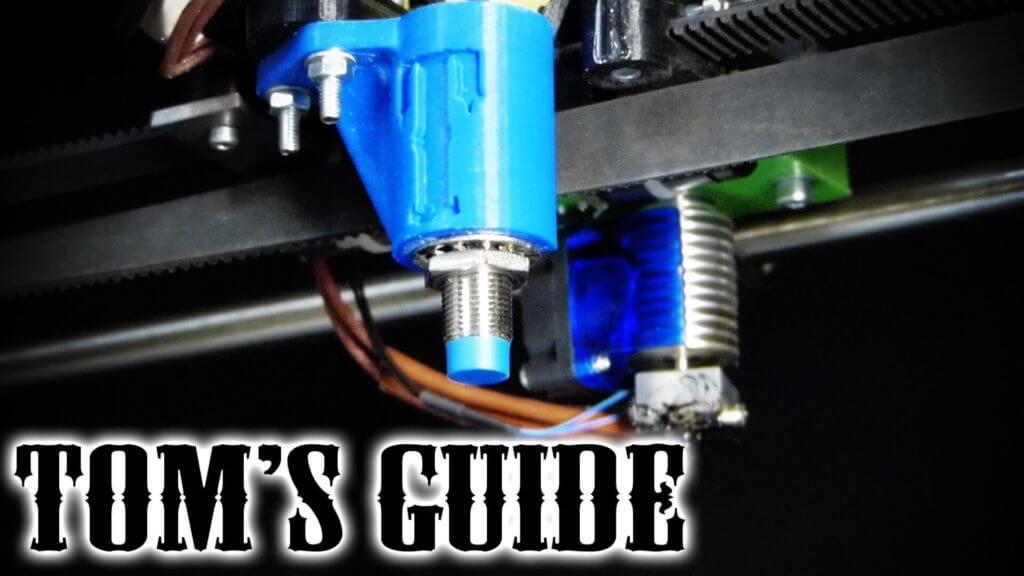
This effect can be reduced by mounting the Z probe as close to the nozzle as possible, but make as certain as possible that the Z probe is installed properly.
Conclusion
For most people, especially the ones who are new to the whole 3D printing world and that don’t have that much experience or knowledge of electronics and how to install the probes properly, I’d recommend going with the BLTouch since it’s a device that’s been tested by many different people and that just works! Plus, the installation is super ease when compared to the rest.
I hope this information was useful!
Have a great day!
We created a recommended products section that will allow you to remove the guesswork and reduce the time spent researching what printer, filament, or upgrades to get, since we know that this can be a very daunting task and which generally leads to a lot of confusion.
We have selected just a handful of 3D printers that we consider to be good for beginners as well as intermediates, and even experts, making the decision easier, and the filaments, as well as the upgrades listed, were all tested by us and carefully selected, so you know that whichever one you choose will work as intended.
everything you need to know
3DPrintStory Reviews BLTouch sensor for 3D printer: everything you need to know
Automatic table calibration is a fairly common feature in desktop FDM 3D printers. However, most 3D printers with automatic table calibration use a non-contact inductive sensor, which is easy to install, operate and configure. These inductive sensors work well with metal 3D printer tables, but tables made from other common materials such as glass are virtually invisible to inductive sensors.
Perhaps it is because of this lack of inductive sensors that many people hear about BLTouch sensors: if you need to use a non-metallic 3D printer slot base but need automatic calibration, these sensors are a great option.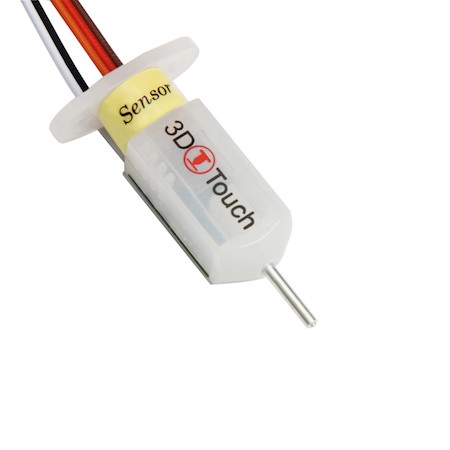 Another plus of these sensors is its high accuracy. BLTouch raw readings have one of the lowest standard deviations of any sensor type for automating 3D printer bed calibration.
In this article we will look at the BLTouch sensor, its advantages and how to use it for a 3D printer (by the way, there are many clones of BLTouch sensors, but the original design belongs to Antclabs from South Korea).
What is a BLTouch sensor?
According to Antclabs, the original manufacturer of the sensor, "BLTouch is an automatic table calibration sensor for 3D printers that can accurately measure the angle of the table surface." This sensor works on any type of surface, be it metal, glass, wood and others.
The 3D printer table tilt level sensor itself has a rather complex design. It consists of a microcontroller, a solenoid switch and a handpiece that is in direct contact with the table. The original BLTouch uses a Hall sensor for high accuracy, and this sensor, combined with the physical handpiece, allows it to be used with many types of tables.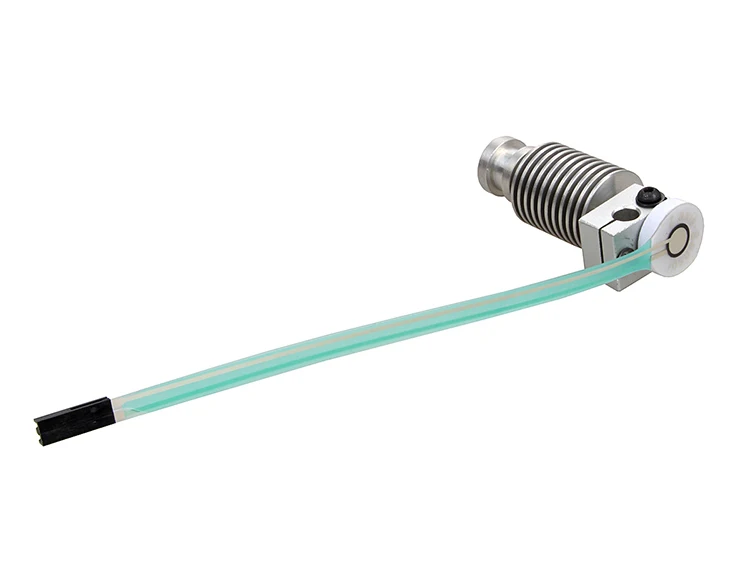
In a sense, this sensor is equivalent to a microswitch mounted on a servo. When the tool head is lowered to "return" the nozzle in the Z-axis, the table pushes the tip slightly up, the Hall sensor is activated, and then the tool head rises.
TheBLTouch is one of the most accurate and reliable sensors available, so it's no wonder some manufacturers like MakerGear and CraftBot use this device on their high end 3D printers.
Now that we know exactly what we're dealing with, let's compare the BLTouch with the other two types of sensors.
Different types of sensors for automatic 3D printer table calibration
Inductive sensor
The key difference between inductive sensor and BLTouch is that the BLTouch sensor physically touches the table during the calibration process. The inductive sensor uses currents induced by magnetic fields to detect nearby metal objects, so there is no direct physical contact with the table.
But therein lies the problem: induction sensors only work with metal tables, as they only work when they come into contact with metal. So if you are using glass, then this type of sensor will not work for you.
Microswitch (mechanical limit switch)
Don't discount the old-fashioned physical microswitch either. Compared to the BLTouch, this sensor is less accurate and possibly less reliable in the long run because the measurement is dependent on physical parts that can wear out over time.
However, these mechanical switches outperform other options when it comes to cost and ease of setup. Since mechanical switches are very simple to implement, easy to set up and cheap, they have found quite a wide application.
Alternatives
Pinda Probe
Pina Probe is a sensor developed by Prusa Research which is an induction sensor with a thermistor to account for changes in bed temperature. The Pinda probe is specially designed for the Prusa line of 3D printers, which have special dot-mounted calibration markers on the table that help with alignment and skew correction.
This is said to be a very accurate sensor for 3D printers, and although there aren't many numbers on the internet, the reviews seem to be positive.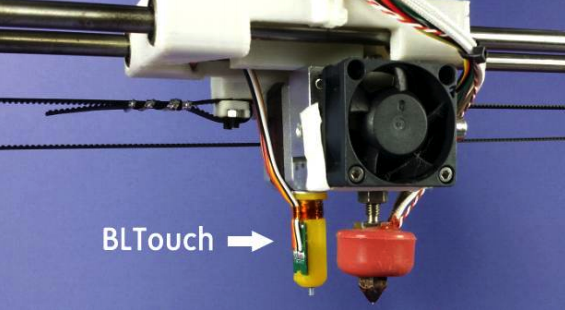 So it is worth considering that this is a good option if your 3D printer has a metal table.
Ezabl Pro
Ezabl Pro is a capacitive sensor manufactured. It comes with a connection board that uses an optical isolator to prevent high voltage damage to the motherboard in case of connection errors.
In terms of accuracy, it can measure to one thousandth of a millimeter, which is what 3D printers need. Ezabl Pro also has useful features such as double shielding that prevents any interference from other signals.
The main disadvantage of Ezabl Pro is the cost, which is about 65 dollars. But this sensor can work with glass tables.
Piezo Sensors
Piezo Sensor uses the piezoelectric effect to detect changes in force, pressure or strain and convert those changes into an electrical impulse. Precision Piezo is one of the few companies in the UK that makes piezo sensors for 3D printers. They have an accuracy close to 7 microns, which is pretty accurate for a 3D printer.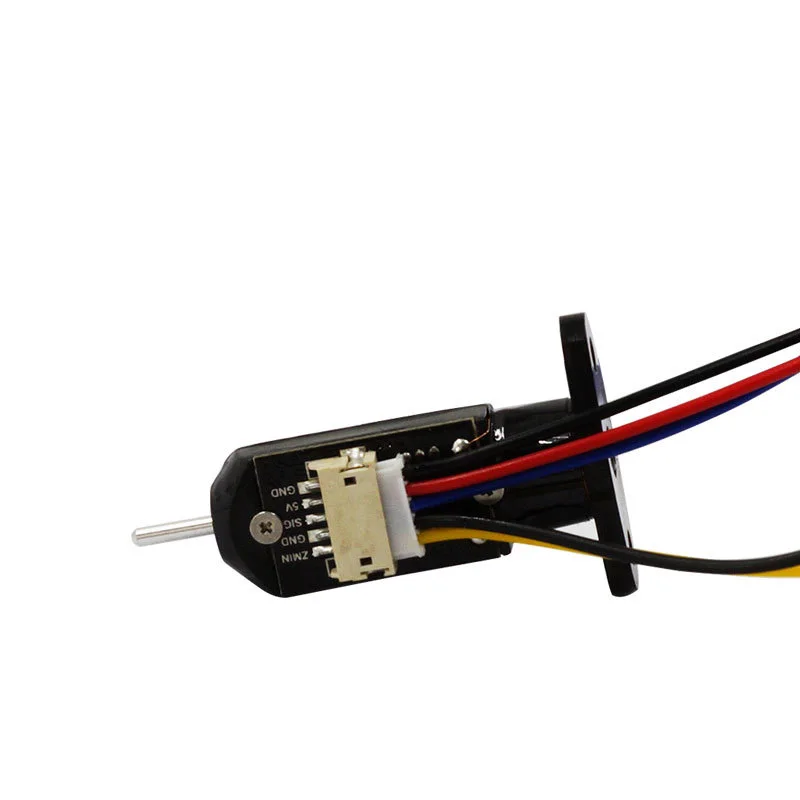
The advantage of the piezoelectric sensor is that a nozzle can be used as a sensing element without the need for additional components. In addition, a piezoelectric sensor can be placed on the print head or under the pressure platform. As for the price, it is in the same range as BLTouch.
BLTouch Sensor Setup Basics
Before you start modifying your 3D printer for BLTouch, you need to work through the following points.
Mounting the sensor
The BLTouch sensor must be installed as close to the printhead as possible. You can find many designs available for download on the internet. If you would like to design the mounting structure yourself, be sure to read the BLTouch documentation to take into account the overall dimensions of the sensor.
Some users have experienced a problem where the nozzle hits the table on one side and prints perfectly on the other. The reason for this is that the BLTouch is mounted at an angle to the nozzle.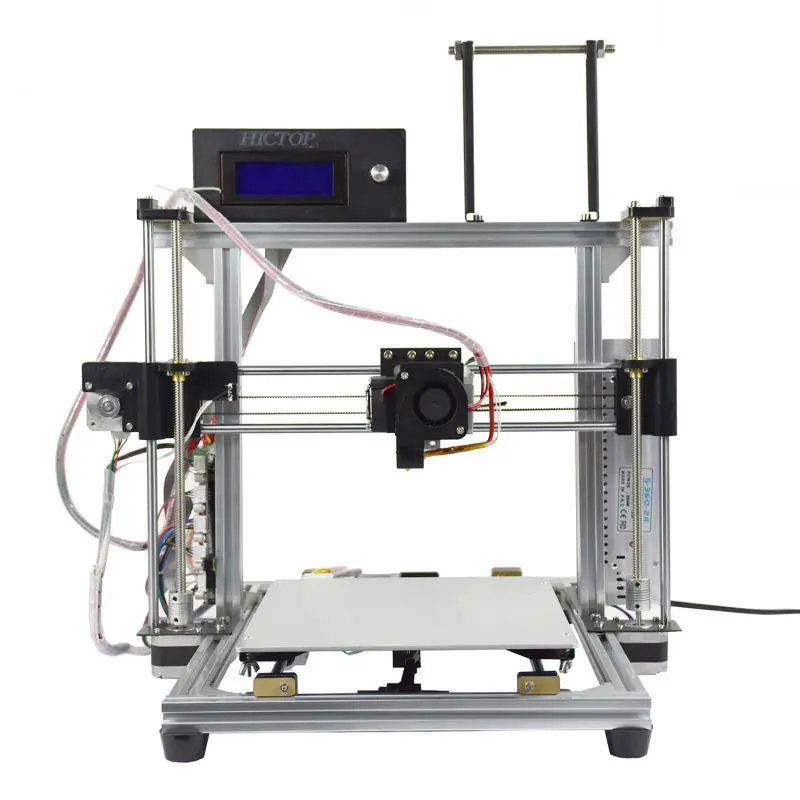 Therefore, when designing and installing equipment, make sure that the BLTouch is mounted perfectly at right angles and aligned with the nozzle.
After installing the sensor, be sure to record the distance between the BLTouch sensor and the center of the nozzle in both the X- and Y-axis.
We used Marlin firmware version 1.1.9 which was updated in March 2020. Enter the marlin.ino file and go to the configuration.h tab.
The first step is to activate the BLTouch sensor by declaring it. Remove the two slashes to uncomment the define statement:
#define BLTOUCH
The next step is to set the BLTouch offset using the X and Y distances you should have measured when you installed the sensor. Z-shifting may seem like a more complicated procedure, as the BLTouch probe protrudes below the nozzle for direct measurements. You will need to find the distance between the sensor and the end of the nozzle when the sensor is fully extended.
Also, since the probe goes below the nozzle, the offset must be negative.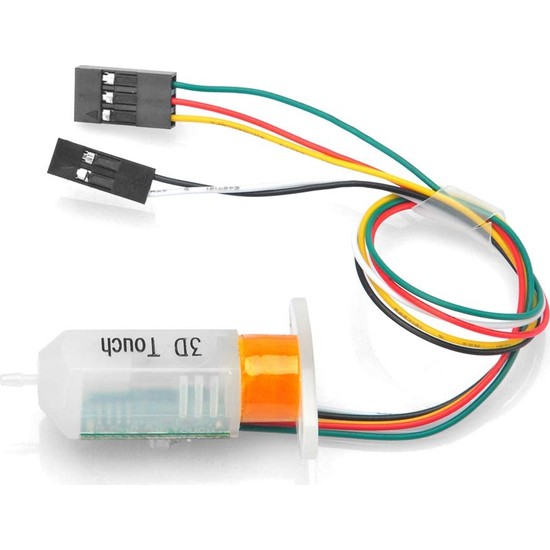 We recommend setting it to around -2.5 for safe first runs and then adjusting. You need to change the values of the following lines to match your numbers:
#define X_PROBE_OFFSET_FROM_EXTRUDER 30 // X offset: -left + right [nozzles] #define Y_PROBE_OFFSET_FROM_EXTRUDER 20 // Y offset: -front + back #define Z_PROBE_OFFSET_FROM_EXTRUDER -2.5 // Offset Z: -below + above
After you're done with the offset, you'll need to choose a table alignment type. You can choose from five different compensation methods, below we will give an example using the bilinear method as it is easy to get started with.
To select the appropriate option, uncomment it by removing the slash. Please note that only one option can be left without comment. Your code should look something like this:
//#define AUTO_BED_LEVELING_3POINT //#define AUTO_BED_LEVELING_LINEAR #define AUTO_BED_LEVELING_BILINEAR //#define AUTO_BED_LEVELING_UBL //#define MESH_BED_LEVELING
You can also set the number of mesh points that you will base your calibration on.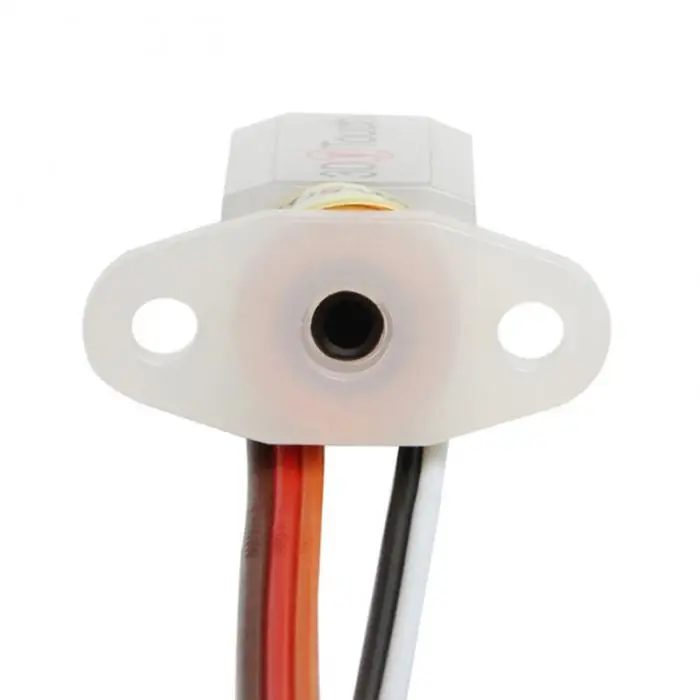 Default is 9points that form a 3-by-3 grid along the x and y axes. The number of points can be increased for more accurate results, but keep in mind that the probing time will also increase proportionally.
#if ENABLED (AUTO_BED_LEVELING_LINEAR) || ENABLED (AUTO_BED_LEVELING_BILINEAR)
// Set the number of grid points per size.
#define GRID_MAX_POINTS_X 3 #define GRID_MAX_POINTS_Y GRID_MAX_POINTS_X
Testing
After setting up the firmware, you will need to check if the BLTouch is working properly by doing a basic test. Once it's complete, you can start adjusting the Z offset. There's a great video from 3DMakerNoob that walks you through the process step by step.
Slicer setup
Be sure to add the G29 command to your Gcode right after the G28 command.
Troubleshooting
Troubleshooting
The creators of the original BlTouch at Antclabs mentioned that the original sensors come with a QR code built into the circuit board on the back.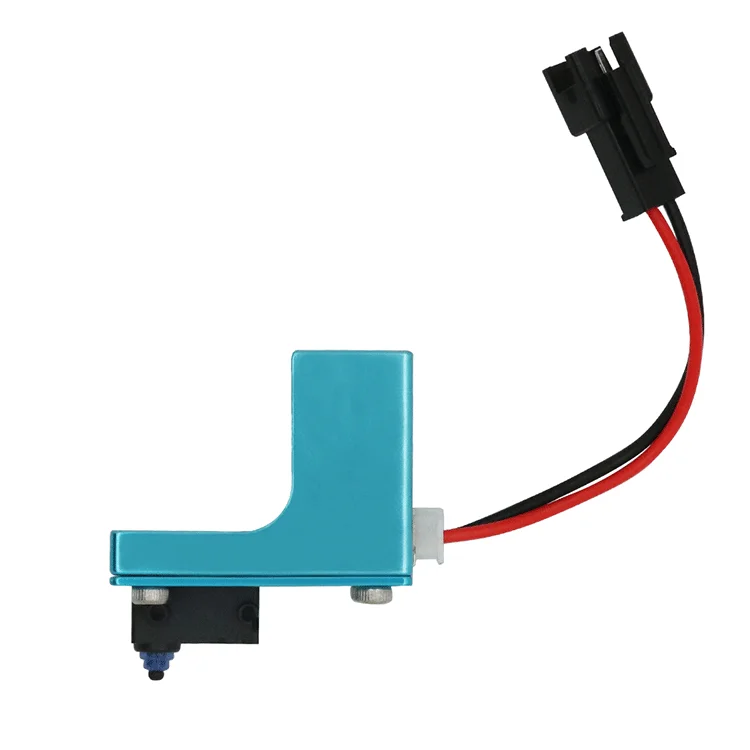 Other Chinese manufacturers, called TL Touch and 3D Touch, are also known to produce lower quality products, resulting in poorer quality. When buying online, be sure to purchase from one of the authorized resellers that are listed on the Antclabs website.
Known Issues with BLTouch Sensor
The latest version of BLTouch V3 had issues with Creality printers where it did not work properly. The Marlin firmware developers worked closely with Antclabs and determined that certain changes needed to be made to the firmware.
An excellent tutorial video on how to fix this problem was made by Teaching Tech. After making changes, many users finally solved the problem.
Disadvantages of BLTouch
Although the BLTouch is an extremely accurate level sensor, it also has several disadvantages.
When using the BLTouch, it is important that there is no debris on the surface of the bed. A mechanical sensor detects the surface of the table and any damage or debris on the surface will result in inaccurate readings.
The BLTouch is also known to suffer from interference from currents in the hot end heater wires. This interference causes incorrect BLTouch readings. The Marlin firmware has a special line of code that will help you turn off the heaters while the sensor is triggered. To activate it, find and uncomment the following:
#define PROBING_HEATERS_OFF
Experimental 3D printer platform level sensor
Good evening!
Lately I've been focusing on developing my own version of the autolevel sensor. I set myself the task of creating a universal solution for all types of printing table covers. I formulated the key requirement for a new device as follows: plug and play (Plug and Play).
A significant difference from the popular BLTouch auto level sensor from Korean developers (link) is that there is no need for manual calibration after changing the nozzle or repairing the hot end.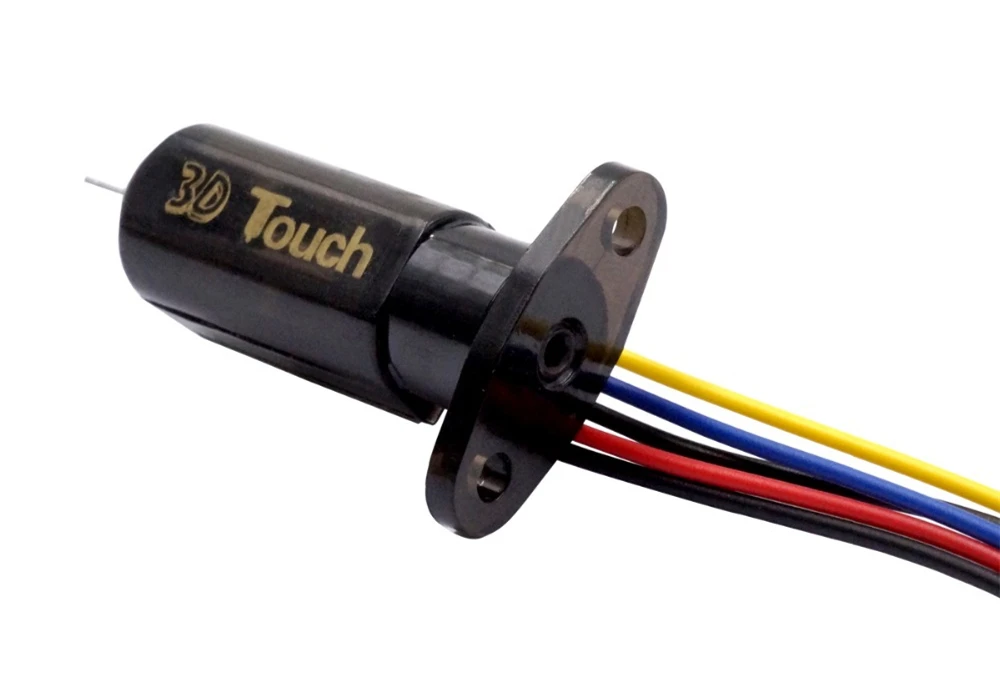 The operation algorithm of the developed sensor during platform calibration will consist of two stages:
1. Nozzle level detection;
2. Measure all calibration points on the print platform. The measurement is made remotely without contact between the nozzle and the surface.
All measurements are made with a probe rod. The length of the stem extension is 15 mm and it can take measurements along the entire length of the extension with a resolution of 1 µm. At the first stage, the level of the nozzle is determined by the moment the rod stops when the tip of the nozzle reaches the table surface (the nozzle stops the table). The adjustable sensor triggering parameter at this stage is the predicted movement of the table in the absence of a nozzle - that is, if the rod stops and the difference between the rod stop point and the point where it would move without stopping becomes more than the setting, then the sensor is triggered; You can set this parameter in the range (20µm-1mm).
The second stage of the algorithm is as follows: the sensor on the rod makes a “mark” that determines the position of the nozzle, then adding an integer to the value obtained, (let’s say 3 mm) the probe starts to respond to a new mark, thereby remote sensing of the table surface is carried out, without contact with the nozzle. At the same time, in the printer firmware, after measuring points, the entire grid is shifted by this remote sensing value (3mm). Tests
The developed and assembled first copy of the experimental auto-level sensor does not yet work according to a full-fledged algorithm in two stages. The firmware is divided into two parts, and each of them is separately tested for accuracy and repeatability. The video below shows the tests for the M48 command.
The second test is the operation of the sensor on the conditional value of the rod mark, without contact between the nozzle and the table surface.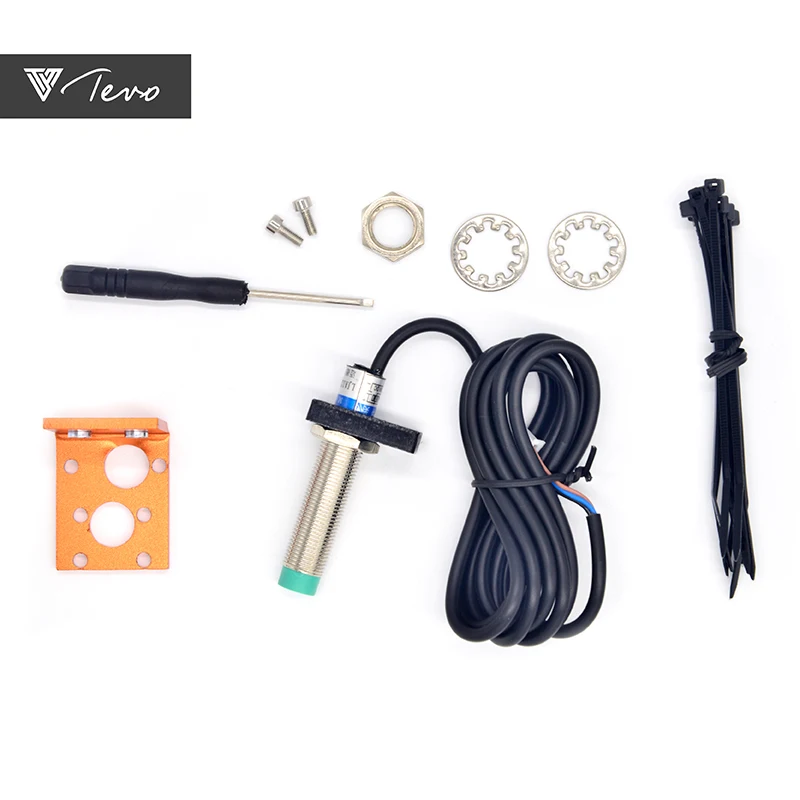
During testing, I was wondering how correctly the nozzle level is determined in test 1? In order to clarify this, I connected the output of the sensor instead of the end stop of the Z axis, edited the G-code, adding to the value of the height of the first layer the offset that is in the sensor (setting 50 μm), i.e., instead of 0.2mm, I entered 0.25mm. I placed the model at the point closest to the homing position and started printing.
Design
The sensor consists of a lifting mechanism and a measuring unit. For the reliability of the sensor in the lifting mechanism, I used a micro stepper motor controlled by an A4988 driver chip. The use of a stepper motor with controlled current determines the durability of the developed design. The screw lifting the stem is mounted on two bearings. Steel rod probe with a diameter of 3 mm, moves in porous bronze oil-filled bearings. In the serial model, I plan to use IGUS polymer bearings, however, their use may impose a limitation on the operating temperature of the device, in connection with this, two versions are expected - standard up to 70-80 degrees and high-temperature.
The dimensions of the developed sensor are 40x40x12 mm3. The sensor is made in the form factor of a fan, which is very convenient for installation on the printer's print head. The dimensions of the serial sensor are expected to be 40x40x10 mm3, which completely repeats the dimensions of a standard fan. Application.
The design of the sensor is intentionally flat. This will allow you to conveniently place it for measurements at a point as close as possible to the nozzle. The large extension of the rod allows you to remove it from the heating zone after measurements. As mentioned earlier, the sensor can work with any table surface. So, for example, in some professional printers, printing is carried out on a film held by a vacuum on the table.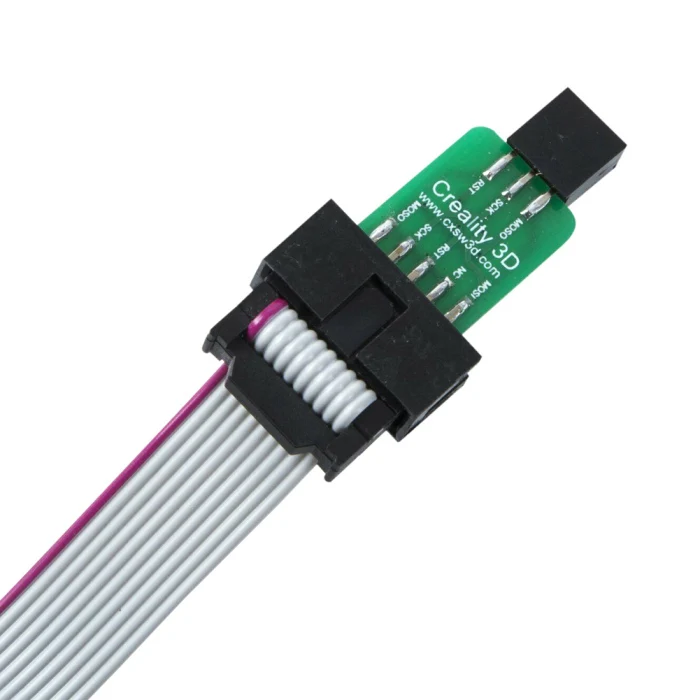 To operate the sensor with such melting surfaces, the nozzle level is measured in place, it will be necessary to install a metal plate of any thickness. The plate thickness will be automatically taken into account by the sensor during further remote probing of the table.
The setting for determining the nozzle level according to the first stage of the algorithm (20µm-1mm) will be available to users. By increasing it, you can adjust the crushing of the plastic flowing out of the nozzle on the table, and, since this setting is nothing but the length (unlike tensor-autolevels, where the setting is mass), then, regardless of its value, the sensor will take it into account in the final sounding of the platform .
For a thermal chamber with shutters, the rod is also convenient, since it can be made of any length and the sensor itself can be easily removed from the heating zone of the chamber (an additional support in the form of a linear bearing may be required).
Development.
The two-stage sensor operation algorithm will be implemented in my firmware and with my board (link) and tested in the near future. How to implement all this into existing Open Source, while I can’t imagine .... Obviously, at the first stage, you can try to use the BLTouch commands and work only according to the first stage of the algorithm - to probe the entire surface of the table with a nozzle. At the same time, you can make commands for the probing mode in two stages. It is quite possible that in the future support for such commands will be implemented in Open Source firmware by their authors.
In my project, the sensor is controlled by the RS485 protocol. Since I put internal diagnostics into the sensor firmware, all modes and any deviations in measurements will be visible in a special printer menu page, from there you can control it and measure the curvature of the table at the specified points. Also in my project in the future it will be used in another important function, as it turned out not just an auto-level sensor, but an accurate measuring tool.
On the basis of the developed sensor, it is possible to create any other one with a maximum stem length of 60 mm and with any stepping motor of choice.
An interesting direction for the development of the sensor will be to integrate its parts into the heatsink of the hotend, that's why I tried aluminum soldering (link), because even at that time I assumed that the heatsink would not only cool ... but also be a housing for the autolevel sensor. By integrating all parts of the sensor, you can win in overall dimensions, weight and bring the probe rod as close to the nozzle as possible. But these are still reflections, but now this idea can be implemented.
PS/ I decided to describe separately, a very important point, the article describes a method for determining the level of the nozzle - this is that the nozzle will stop the table when moving, but in fact, since the sensor is installed on the printer's print head and the response setting is 50 microns is very small, then when the printer nozzle comes into contact with the table, the table does not have time to deform or bend, since the print head of the printer, together with the sensor, physically rises due to backlash in the beam bearings, and the beam has a slight deflection.
Learn more