3D printer leaking filament
How to Fix Filament Oozing/Leaking Out the Nozzle – 3D Printerly
A 3D printer nozzle can experience oozing and leaking even before prints start or during the printing process, which can cause issues. This article will detail how you can fix filament that leaks and oozes from your nozzle.
The best way to make sure filament stops oozing from your nozzle is to reduce your printing temperature so that filament isn’t melting more than it needs to. Enabling retraction settings are also important for fixing leaks or oozing out the nozzle. Make sure your hotend is assembled properly without gaps.
This is the simple answer, but there are more details you’ll want to know. So, keep on reading to learn how to solve this issue properly.
Why Does Filament Leak & Ooze Out of the Nozzle?
Filament leaking and oozing out of the nozzle when preheating it or during printing can be quite troublesome. It can be due to issues with your hardware (nozzle, hotend) setup or problems with your slicer settings.
Some of the issues that can result in the 3D printer’s nozzle leaking include:
- Printing temperature too high
- An incorrectly assembled hotend
- A worn nozzle
- Wrong filament and nozzle diameter in Cura
- Printing with wet filaments
- Poor Retraction Settings
Whether you are experiencing filament leaking around your nozzle on an Ender 3, Ender 3 V2, Prusa or another filament 3D printer, going through these causes and fixes should help finally solve your problem.
Many people experience their hotend and nozzle oozing filament, even before the print starts, which can cause issues with the print. PLA and PETG are filaments that are known to start leaking from the nozzle.
How to Stop & Fix Nozzle from Leaking & Oozing
You can stop your nozzle from oozing and leaking by fixing up your hardware and tweaking your settings. Here are a few ways you can do this.
- Use the Correct Printing Temperature
- Enable Retraction
- Re-Assemble Your Hotend Properly
- Inspect Your Nozzle for Wear
- Set The Correct Nozzle and Filament Diameter
- Keep Your Filament Dry Before and While Printing
- Print a Skirt
Use the Correct Printing Temperature
Using a printing temperature way higher than what the filament manufacturer recommends in the data sheet can also cause leaking and oozing from the nozzle. At these high temperatures, the filament in the nozzle becomes more melted and less viscous than it needs.
As a result, the filament can start to move out the nozzle from gravity rather than from the pushing of the extruder.
To avoid overheating the filament, always print within the correct temperature range for the filament. Manufacturers usually specify the optimal temperature range for printing the filament on its packaging.
Whether you have the stock hotend or have an E3D V6 leaking, it can be fixed by using the correct temperature. PETG oozing out the nozzle is a common instance when your temperature is too high.
I always recommend printing yourself a temperature tower so you can find the optimal temperature for a particular filament and your specific environment. Check out the video below to see how to do that directly in Cura.
I wrote a more in-depth article about 3D Printer Enclosures: Temperature & Ventilation Guide.
Enable Retraction
The Retraction feature pulls the filament back from the nozzle into the hotend while the nozzle is moving and isn’t printing to avoid leaks. If the retraction settings aren’t set correctly or turned off, you can experience a leaking or oozing nozzle.
It may be that the printer isn’t pulling the filament back enough into the extruder or isn’t pulling the filament fast enough. Both of these can result in leaks.
Retraction helps stop the nozzle from leaking over your model when traveling. Enabling it will reduce the leakage in the nozzle to an extent.
To enable retraction in Cura, go to the print settings tab and click the Travel sub-menu. Check the Enable Retraction box.
The optimal Retraction distance varies depending on the extruder you’re using. So, start at the default value of 5.0mm and increase it in 1mm intervals until the oozing stops.
You probably want to avoid increasing it past 8mm to avoid the gears grinding the filament as it might pull back too much. For more information on how to set the optimal Retraction settings, you can check out my article How to Get the Best Retraction Length & Speed Settings.
Re-Assemble Your Hotend Properly
If your 3D printer is leaking filament out of the heating block, an improperly assembled hotend could be the cause. Most hotend setups consist of a heating block, an connective PTFE tube, and a nozzle.
If these parts aren’t assembled correctly before printing and there are gaps, the hotend may leak filament. Also, even if they’re assembled correctly, many factors like heat expansion, vibrations, etc., can ruin their alignment and seal.
Getting a proper seal and connection between your nozzle, heating block, and PTFE tube is key to avoiding leaks. Here is how you can assemble the nozzle nice and tight.
- Remove the hotend from the printer
- Disassemble the nozzle and clean off any bits and pieces of melted plastic on it. You can use a wire brush and acetone for this.

- Once it’s clean, screw the nozzle all the way into the heater block.
- After you screw the nozzle in fully, loosen it by two revolutions to create a gap. Leaving this gap is very important.
- Take the hotend’s PTFE tube and attach it in tightly until it touches the top of the nozzle.
- Assemble your hotend back in with all its electronics and attach it back to the printer.
- Heat the nozzle to the printing temperature (about 230°C). Around this temperature, the metal expands.
- Using pliers and a wrench, tighten the nozzle into the heater block one last time.
Check out the video below for a nice visual of the process.
Inspect Your Nozzle for Wear
A worn nozzle can be the driving factor behind your leaks. For example, if you’re printing abrasive filaments, it can wear down the tip of the nozzle resulting in leakages.
Also, if the threading on the hotend tube (Bowden setup) and the heater block are worn, this can result in a loose connection. As a result, you may experience the filament leaking out of these areas.
A worn-down nozzle can also result in poor print quality, so you have to address it immediately. You should inspect the nozzle frequently to avoid these problems.
To inspect the nozzle, follow these steps:
- Check the nozzle for accumulated filament deposits and clean it out.
- Inspect the tip of the nozzle for wear. If the hole is wider or the tip has been worn down to a round nub, you must replace it.
- Check the threads on the hotend PTFE tube and nozzle for any signs of wear and damage. If you find any extreme wear, replace the nozzle immediately.
Set The Correct Nozzle and Filament Diameter
The filament and nozzle diameter you set in your slicer helps the printer calculate the amount of filament it needs to extrude. Selecting the wrong values in the slicer can throw its calculations off.
As a result, there may be a massive flow rate error, with the hotend extruding way more or way less filament than the printer can handle. So, if the printer extrudes more than what’s needed, it can start to ooze or leak.
Setting the correct nozzle and filament diameters in your slicer is essential to get the correct flow rate and avoid leakage. This should be correct by default but if not, here’s how to do this in Cura.
How to Change Nozzle Size
- Open the Cura app
- Click on the Material tab
- Click on the Nozzle Size dropdown menu.
- Select the correct nozzle size for your printer
How to Change the Filament Diameter
- Open Cura
- Click on the tab which shows the printer name. Under it, select Manage Printers
- Under your printer’s name, click Machine settings
- Click on the Extruder 1 tab and put the right filament diameter under Compatible material diameter.

Keep Your Filament Dry Before and While Printing
Moisture in hygroscopic filaments, which is most of them, can also lead to leaking filament from the nozzle. As the nozzle heats the filament, the moisture trapped in it heats up, forming steam.
The steam creates bubbles within the molten filament as it comes out. These bubbles can burst, resulting in filament leaking from the nozzle.
Moisture in the filament can cause more than a dripping nozzle. It can also result in poor print quality and print failure.
So, it’s essential to keep your filament dry at all times. You can store the filament in a cool, dry box with a desiccant, or you can go for high-quality filament dryer boxes to regulate the humidity better.
If the filament is already infused with moisture, you can dry it out using special filament dryer boxes. You can also bake the filament in the oven to remove the moisture.
I don’t usually recommend this because ovens aren’t usually calibrated very well at the lower temperatures you’d need to use.
Stefan from CNC Kitchen shows you exactly why drying your filaments are important for producing the best 3D prints.
Print a Skirt
Printing a skirt helps purge the accumulated filament from your nozzle while also priming it. This is a great solution if you’re experiencing leakages while pre-heating your machine before printing.
You can find the skirt settings under the Build Plate Adhesion section. Under the Build Plate Adhesion Type Section, select Skirt.
A leaking nozzle can quickly ruin your print and create a mess that takes quite a long time to clean up. I hope these tips above can help you solve this issue and help you get back to printing clean, high-quality models.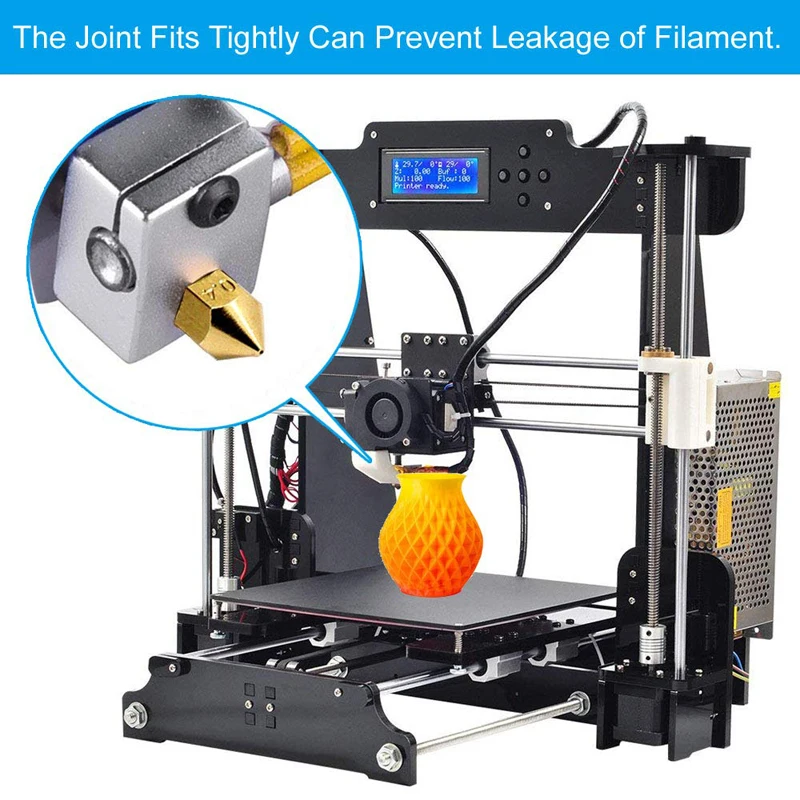
How to fix it! – 3D Solved
Have you ever noticed some plastic hair in your print going from a wall to another? Or did you find small plastic balls on the sides of the piece? Or maybe some leaks on every layer?
This type of error may occur when the nozzle “leaks”, causing the plastic to flow from the nozzle when we do not want it.
In this article, we are going to learn a little more about nozzle leaking, one of the most annoying and recurring 3d printing problems. We are also going to learn how it originates, which the main causes are, and how to prevent it.
You can identify a leaking nozzle if your prints display thin plastic “hair” or “string” on places where no plastic should have been extruded. This is caused because of too high extruding temperatures and or incorrect retraction settings. Set the temperature according to the filament manufacturer’s specifications. Additionally, you can start by setting the retraction distance to 6.5mm, retraction speed to 25mm/s, and minimum travel distance to 1mm.
We will go deep into every aspect in order to troubleshoot and solve your leaking nozzle, but before we get started, feel free to use the following table as reference:
| Parameter | Description | Baseline Value | Too Low | Too High | Test Model |
|---|---|---|---|---|---|
| Temperature | Temperature at wich the filament gets heated when extruded | Check manufacturers specifications. PLA: 190° to 220°C. ABS: 240° to 270°C. | -Underextrusion. -Nozzle not extruding. | Nozzle Leaking | Temp Tower |
| Retraction: Distance | How many milimeters the filament gets retracted every time | 6.5mm. | -Nozzle leaking | -Clogged Filament. -Underextrusion | Retraction Test |
| Retraction: Speed | How fast the retraction distance will be covered | 25mm/s. | -No improvement -Filament only stretches inside nozzle | -Leave marks on filament | |
| Retraction: Minimum Travel Distance | Minimum travel distance to enable retraction | 1mm. | -Rectracting too often | -Rectraction may never occur |
Table Of Contents
- 3D printing problems
- Why does a nozzle leak?
- How to solve a leaking nozzle
- Optimal extruding temperature
- What is retraction?
- Conclusion
- Check out our recommended products section
3D printing problems
As you probably already know, the final shape of a 3d printed object is achieved by moving the extruder by means of a CNC controller. This extruder is fed by a filament spool and can stop extruding when there is an empty space between two positions on the same layer.
If everything is working properly, the result will be a piece of the same measurements in height, width, and depth as the original digital model. It will also have the exact shape of the object previewed on your computer. Preferably, it also will feature few quality imperfections.
Of course, this will not be always the case, especially when you are first getting started or when you buy a new printer that has not been yet properly calibrated.
Among the many errors that can occur, we may find a leaking nozzle, one of the most common problems in 3d printing. Fortunately, solving this problem is possible and easy if you know what causes it.
Why does a nozzle leak?
The extruder is the part responsible for heating the plastic to a temperature that allows it to flow. At the entrance, the filament measures approximately 1.75mm. The extruder then pushes the hot filament into a smaller hole, which can measure between 0.1 and 1mm. The pressure originating inside the extruder makes the plastic flow through the small hole, called the nozzle.
That is the theory of how the extrusion system is supposed to work, either direct or Bowden. Sometimes the material does not come out as it should because the extruder is not capable of feeding correctly or because some setting was not correctly set.
Since 3D printing is all about melting, we should establish temperature as one of the main parameters to consider.
When we select the type of material to be used, it is often that the manufacturer provides us with a data sheet that includes an optimal temperature range for its use. Different materials have different ranges, and even the same plastic from different manufacturers may not be the same.
Always check the datasheet. You can probably find it published on the manufacturer’s website or, if you are lucky, on the back of the filament packaging.
Sometimes, that temperature range is too big, like “190 to 220 °C”. I do not know about you, but that range is not very helpful. How would you choose to dress if the weather forecast informs that tomorrow’s temperature will be between 0°C and 30°C?
Ok, let us go back to the extruder: if the temperature is too low, plastic will not be liquid enough to flow and it will probably get stuck. You can notice this when you see that the 3d printer is supposed to be working but is not extruding filament at all. A typical round scratch is left on the filament where the pushing gear of the extruder is located.
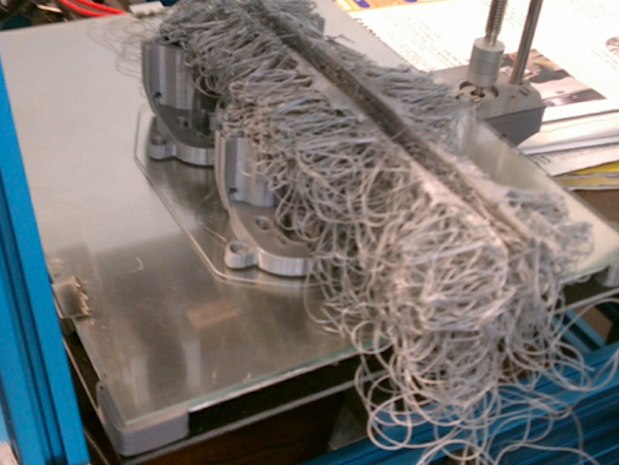
Having a high temperature causes the opposite: plastic gets too fluid and it doesn’t need to be pushed to flow through the nozzle. Its own weight causes the material inside the barrel to start oozing.
This means that the plastic will flow even when it is not supposed to do so. The nozzle will leave a trail while moving, like a thin plastic “hair” or “string”. That is the reason behind us calling it “stringing”, “hairy prints” or even “whiskers”.
I guess you already know what stringing really is. Nonetheless, if you are not sure and want to compare the problem you are facing with a real case of a leaking nozzle, take a look at the following photo:
Source: image taken from Prusa ForumAt this point, it is necessary to differentiate the leaking that happens when setting a high temperature from the normal leaking during the warmup of your printing. Plastic, like any other material, changes its volume when heated.
Inner pressure inside the barrel increases at the initial heating time, as the filament expands. That is a normal process and you have nothing to worry about.
On the other hand, if the nozzle is empty at the start of the print, the extruder will travel some distance without filament inside. A quick and effective solution is to add some skirt lines before the object starts being printed.
A leaking nozzle may also cause the tip to be empty during the first part of each layer. The extruder gear spins but no plastic gets out from the nozzle. It results in empty lines in the layer seams. The object looks bad, especially in thin areas.
How to solve a leaking nozzle
There two most important parameters that will help us with this problem are the temperature and retraction.
On the left: Retraction test. On the Right: Temperature tower.Optimal extruding temperature
In order to find the optimal printing temperature, you can print many pieces only by varying temperature. You will notice the prints are opaque at low temperatures and they get brighter as you set higher temperatures. Pick a point in the middle, with some bright but not too shiny.
Your printer probably also allows you to change the temperature during a print. It is a faster alternative to change the temperature in discrete intervals of 3° or 5° C and let the print run for a few layers.
If you see that the printing quality improves, keep changing the temperature in that direction until it starts to get worse again.
As this method can take a long time, some people already generated G-code files that vary the nozzle temperature every a certain number of layers, so you don’t have to print a lot of pieces.
For example, you can try printing this Temperature Tower from Thingiverse
You could also search for “temperature tower” on our own search engine and choose the one that best fits your printer. There are dozens of specific tests you can try. Be sure to check if the g-code was generated for a similar 3D printer to yours. If you like, you can edit the code to change the settings you need to test.
Remember that high temperature helps with the object’s adhesion to the bed. You can set a higher temperature during the first layers to ensure adhesion, and then reduce it for the rest of the printing time. This is especially useful to keep in mind if your printer does not have a heated bed.
What is retraction?
When printing, the extruder gear spins in one direction, forcing the filament through the nozzle. To avoid leaking, you can set your 3d printer to spin a little distance in the opposite direction when it has to travel to a certain point without extruding. This rotation retracts the filament inside the barrel and removes pressure in the nozzle. If this retraction is set properly, no plastic will ooze during travel and no strings will be left.
You can set three parameters for retraction: distance, speed, and travel distance. Let us find out how they work:
When you set Distance, you specify how many millimeters the filament retracts every time. A small distance will cause the strings to be thinner but it will not stop the problem.
On the contrary, if you set the distance too long, the nozzle will be empty when it resumes extruding, leaving holes as we already discussed.
Also, keep in mind that if you set your printer to retract too much, the filament may get clogged and your print will be ruined.
Retraction Speed sets how fast this distance will be covered. As the melted plastic complies with the properties of fluids, if you try to retract too slowly, the filament will only stretch and no improvement whatsoever will be achieved. However, a fast retraction can also cause problems.
Finally, Travel Distance specifies the minimum travel the extruder has to make when not extruding, before retracting.
Optimal Retraction Settings
Again, there are some ways to solve this, but, in my opinion, calibration tests are the easiest.
This retraction test is my favorite, but you can always choose another just by searching “retraction test” on search.3dsolved.com (our own search engine).
The procedure is easy and straightforward: print the object, change distance and speed parameters (one at a time), and print another until you get a nice print. Each test prints in roughly 15 to 20 minutes, so you will be able to troubleshoot and solve this issue in just a few iterations.
As a good starting baseline, I recommend using the following values:
- Retraction distance: 6.5mm
- Retraction speed: 25mm/s
- Minimum travel distance: 1mm
Another way to prevent stringing is to set a faster travel speed when not extruding. Less time leaking results in fewer strings and better prints.
If you want to learn more about retraction, I wrote an entire post on what settings to use.
Now we know more about nozzle leaking, so it’s calibrate our printers!
Conclusion
Now you not only know how to identify a leaky nozzle, but you also possess deep technical knowledge about the causes of the problem, the solutions, and most importantly, why these solutions work.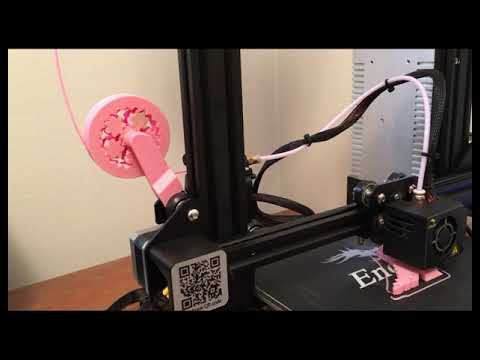 As you may notice, it always pays off to understand the issues instead of just following a recipe.
We created a recommended products section that will allow you to remove the guesswork and reduce the time spent researching what printer, filament, or upgrades to get, since we know that this can be a very daunting task and which generally leads to a lot of confusion.
We have selected just a handful of 3D printers that we consider to be good for beginners as well as intermediates, and even experts, making the decision easier, and the filaments, as well as the upgrades listed, were all tested by us and carefully selected, so you know that whichever one you choose will work as intended.
Threads in 3D printing
Dear friends, welcome!
This article would like to highlight the appearance of threads in printing. I will try to note the main factors influencing the appearance of threads.
1) Idling speed and acceleration. The idle run consists of the following stages - first there is a retract, then the movement of the extruder, then again a retract. The plastic is spontaneously squeezed out precisely during the idle time, forming various kinds of defects. Now imagine an example if the idling takes zero seconds. Under this condition, the plastic will not have time to spontaneously extrude. Therefore, the higher the speed and acceleration, the less time the idling lasts, which means there will be fewer threads. But speed and acceleration are limited by the motor driver, the motors themselves, and the rigidity of the printer frame.
Therefore, you can try to slightly increase the speed and acceleration with each print, but at the same time make sure that the motors do not overheat, otherwise microsteps may be skipped, which will lead to print rejects.
2) Idling path. Different slicers process parts according to different algorithms, which means that the idling trajectory may differ. Some slicers build more rational extruder motion than others. Therefore, you can try to prepare the same part in several slicers and stop at the option that will be more rational.
3) Feeder dependent, i.e. from the plastic supply system. Printers most often have one of two options: "bowden", i.e. far-distance or "direct", this is when the "feeder" is located near the extruder. Under the same printing conditions with direct, there will always be fewer threads than with bowden. But this does not mean that you can always switch from Bowden to Direct. It may also be that your printer will not be able to work with "direct" for one reason or another. The transition to "direct" must be considered with each printer individually.
4) Retract setting, i.e. plastic rollback - its task is to remove the residual pressure in the extruder during idling. Without retract, the threads will appear more intensely. For most printers, the values are as follows - for direct, the range is from 1 to 6mm, and for bowden, from 4 to 12mm. (the amount of retract also depends on the diameter of the nozzle).
5) Plastic quality. If you are constantly printing only budget plastics and are unhappy with the result, then try to buy plastic in a higher price category, and more importantly, with good reviews. And then compare the print quality. But the main thing - from different manufacturers, compare the same types of plastic - you should not compare, for example, ABS from one manufacturer, and PLA from another.
6) Plastic drying. By the way, this applies to almost all plastics, not just nylon. If you have unnamed or cheap plastic in your hands, it is recommended to dry it after opening it, because. it is not known whether the plastic was dried before packaging.
7) Nozzle diameter. The larger the diameter, the more plastic will spontaneously squeeze out during idling. There is nothing you can do about it, it just needs to be taken into account when choosing a nozzle diameter.
8) Extruder temperature. If you heat the extruder to the upper limit of the recommended range (indicated on the plastic that is being printed), then the fluidity of the plastic will be higher, and it will be more easily extruded from the nozzle. Plastic manufacturers give a temperature range for a reason. If you set the print speed to high, then the extruder temperature should be in the upper limit of the range. But if the print speed is low, then there is no need to heat up the extruder much, otherwise filaments may appear due to overheating of the plastic.
Therefore, you can try to reduce the temperature of the extruder as follows - during printing, every couple of minutes, reduce the temperature by 5 degrees over and over and watch the print closely. If the threads disappear, remember the temperature and stick to it. But if the temperature is greatly lowered, then the plastic will not be able to extrude at all. Don't overdo it.
9) Dependence of temperature on the type of extruder. There are many different models of extruders. For example, consider the E3D V6 and E3D V6 Volcano extruder. The E3D V6 Volcano has an extended nozzle and an extended aluminum block. And this means that the zone where the plastic is in the molten state is larger, so it can push through a larger volume of plastic per unit of time. As a result, this extruder will be able to print at higher speeds than the regular E3D V6. But here you need to understand the following - if you have a "powerful" extruder, and you print at low speeds, then the plastic will overheat, which will lead to the appearance of threads. Therefore, for powerful extruders, it is better to set the temperature in the lower limit of the recommended range. And on the contrary - for an extruder that cannot heat up a large amount of plastic, the temperature should be kept in the middle or at the upper limit of the recommended one.
The conclusion here is the following - for different models of extruders, different printing temperatures are needed.
10) Free travel distance. If you are printing multiple parts at once, try to space them closely to reduce the dry travel distance. Well, if a solid part is printed, with individual elements at a great distance from each other, in this case, you can try to change the location of the part in space so that there are fewer idle moves.
11) File analysis before printing. When your G-code is ready, do not be lazy and meticulously analyze it before printing, because. at the verification stage, you can detect unwanted elements that can create various kinds of defects, including the appearance of threads. By the way, in whatever slicer I prepare the file, I almost always check the finished code with the help of “Repetier-Host”, because it shows all the movements that can lead to certain defects.
12) Plastic type. All plastics have both strengths and weaknesses. For example, PETG plastic has a high tendency to filament. ABS, on the other hand, has a low predisposition to threads, but it will have to concentrate on the problem of shrinkage and a low degree of sintering of the layers.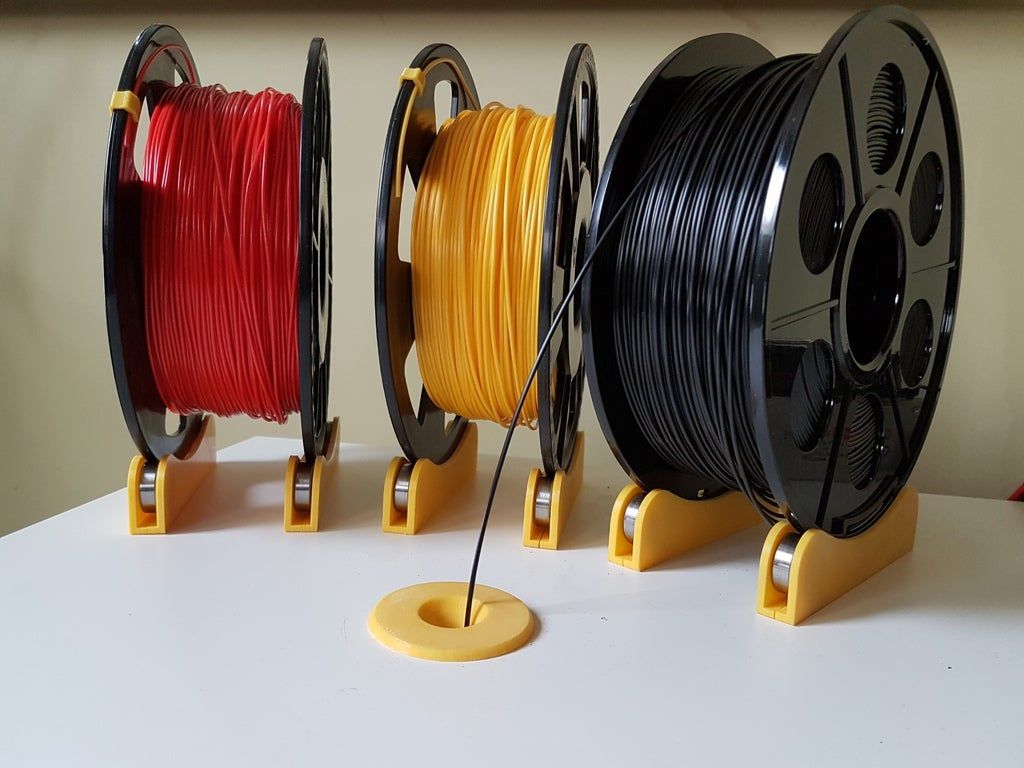
Therefore, before printing, familiarize yourself with the pros and cons of the plastic with which you plan to print.
13) Using the "Lift Z" function. When enabled, a gap will be created between the extruder and the printed part. It is needed so that during idle the extruder does not cling to the outer walls of the part. This feature can significantly reduce the number of threads. But it should be used if the printer has a powerful driver and a motor along the Z axis, as well as a screw with a thread pitch of at least 8mm. This is necessary to achieve high speed and acceleration on the Z axis. Well, if you try to use this function at low speeds, the problem will only get worse and there will be more threads, because. idle time, taking into account "Lift Z", will increase greatly. The idling time with the "Lift Z" function consists of: movement along the Z axis + retraction + idling + retract + movement along the Z axis.
Therefore, you can try to experiment with this function and see the result.
14) Problems with the extruder. Imagine a situation where you put a large retract, but a large plug of melted plastic formed in the thermal barrier between the nozzle and the Teflon tube. In such a situation, no matter how big you put the retract, this plug will not disappear, but will remain in its place. And, therefore, the retract will not be able to completely relieve the pressure in the system. Therefore, keep your extruder clean and in good working order.
15) Problem with the driver on the motor in the feed system (motor on the feeder). It's a rare phenomenon, but it's still there. I've run into a problem where the driver only spins the motor in one direction, regardless of the command, whether it's spinning one way or the other -- the motor only spins in one direction.
And in practice it looks like this: the motor advances the plastic during printing, and at the moment of idling, when a retraction should occur, the motor sharply squeezes out additional plastic (because the driver rotates the motor in only one direction).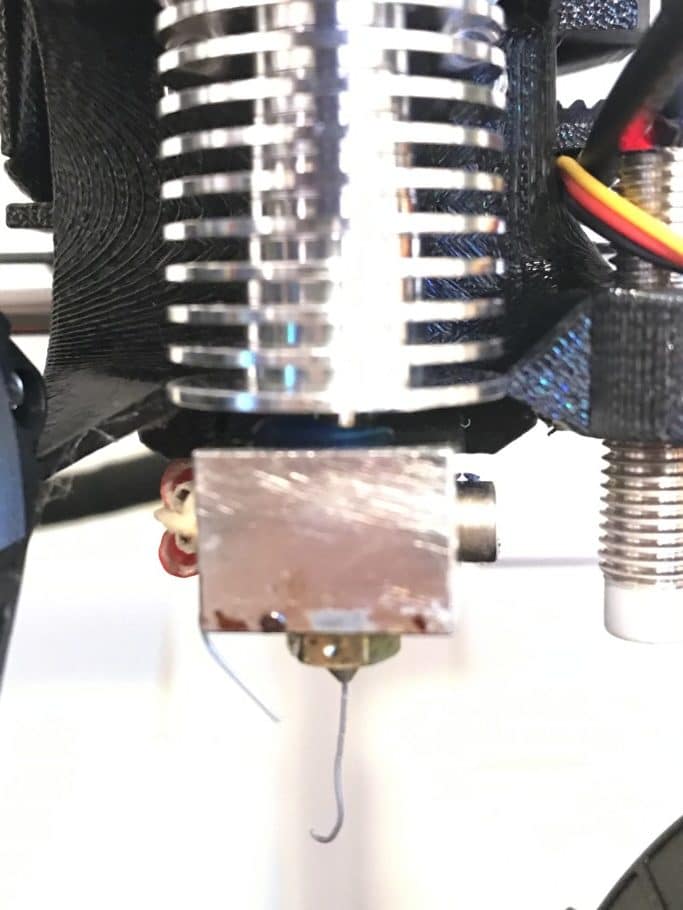
As a result, although this phenomenon is rare, it still took place in my practice.
Thank you for your attention, I hope the material was useful, I wish you all the best!
how to change, insert and eject
Modern 3D printing allows you to create objects and models of amazing complexity. However, the process requires experience and knowledge. Improper maintenance of the equipment, including changing the filament if necessary, may damage the device or result in loss of quality when printing products. In order to avoid such a problem, it is necessary to carefully study the nuances of the procedure before proceeding to change the filament. As a rule, for home 3D printing, plastic is used, which manufacturers have shaped into a filament, supplied in spools. It is about the replacement of this type of material that will be discussed in our article.
How to prepare a 3D printer for plastic replacement?
Since refilling is one of the most difficult tasks in 3D printing, it deserves more attention.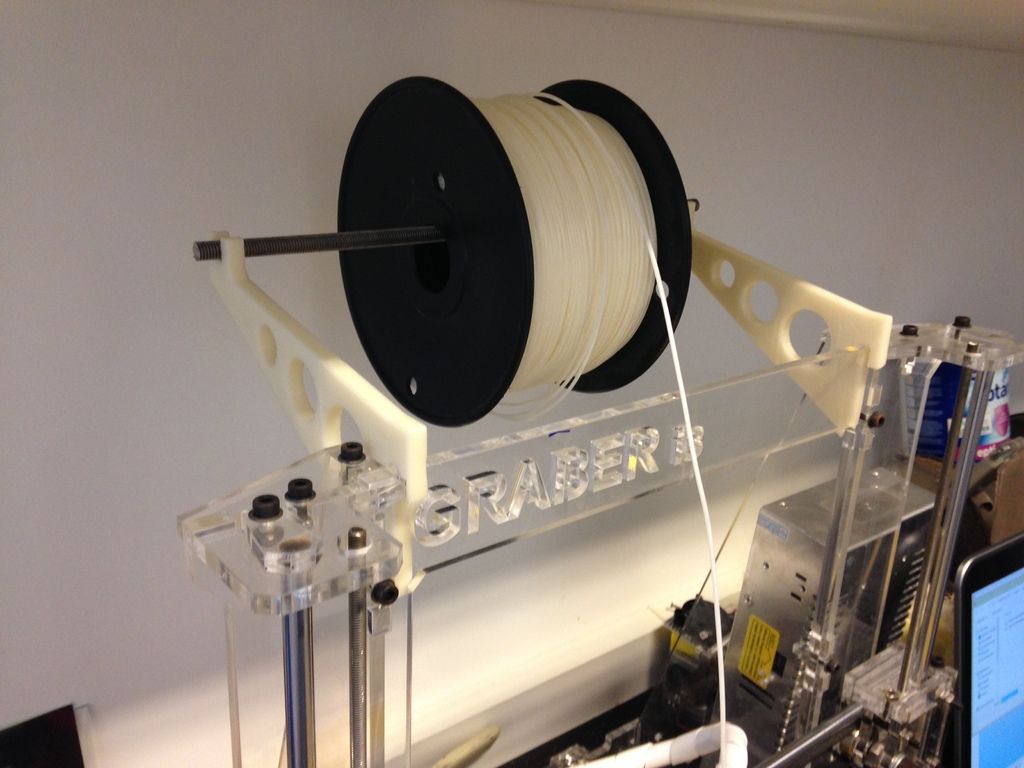
A key task for a user who needs to change the bobbin filament in their 3D printer is device preparation. Printer preparation must be carried out in a strictly defined order:
- First of all, make sure that the device is connected to the computer with a USB cable. It is necessary to check how tightly the cord is inserted into the input jacks, and then check the operation of the device and its “visibility” to the system.
- Use the control panel of the 3D printer to start warming up the device to operating temperature. It is almost impossible to remove the old filament from an unheated printer without damaging the mechanism.
- After the printer is sufficiently warm, inspect the extruder outlet for visible damage and excessive drips, and prepare the necessary materials and tools for changing the spool.
How to remove the plastic?
When changing the filament, most of the breakdowns occur when the remnants of the old plastic filament are removed from the working head of the extruder.
IMPORTANT! Do not remove filament residue until the printer has warmed up sufficiently. Otherwise, the operating mechanism may be damaged and print quality may be noticeably reduced.
In order to remove the filament from the extruder, you will need:
- Turn on the heat of the 3D printer.
- Wait until the required temperature has been reached. The temperature regime parameters must be set based on the characteristics of the replaced and refilled materials. For example, ABS and PLA plastics have different melting points, so replacement must be done as quickly as possible. When exposed to elevated temperatures, PLA deforms quickly and can clog the nozzle.
- Next, if the installed software supports the reverse function, you must enable this option and wait for the thread to exit the corresponding hole.
- If the software does not have a reverse function, you must manually clean the channel, cutting the old thread as close as possible to the exit hole and inserting a new one.
- During the run, the plastic from the old spool will gradually come out of the extruder nozzle and the new filament will take its place.
IMPORTANT! When old material is replaced by new material during a run, it is recommended to adjust the head heating temperature based on the characteristics of the new plastic.
Replacing plastic
In order to replace the old plastic filament in the extruder with new material, you must:
- Remove the remnants of the old filament.
- Set the extruder head to maintenance mode.
- Remove the channel tube by pulling it up.
- Pull the filament rod out of the extruder head by pressing down on the presser and gently pulling the plastic filament up.
- Thread the end of the plastic filament from the new spool by releasing the clamping mechanism and gently pressing on the end of the rod.
- When new filament is threaded into the feeder, the channel tube must be returned to the extruder.

- The final stage is the drawing of the filament. It is recommended to eject 30 to 50 units of material by warming up the printer to the required temperature and immediately removing the ejected material. You can perform this action from the control panel by selecting a command.
- The signal that the replacement of the plastic filament in the 3D printer was successful will be the uniformity of the emitted material and the absence of streaks in the process.
Resuming work
In order to resume work after changing the filament spool, the 3D printer must be returned to its original position. To do this, you will need to reuse the RepetierHost control panel section and the Home command.
In the event that all actions have been performed correctly, printing can be resumed.
3D printing technology has opened up new possibilities for users around the world. But equipment that allows 3D printing requires careful setup and competent maintenance.