3D printer heated bed wire gauge
How to Choose Wire Gauge and Length for Your 3d Printer
Home
Duet Wifi
How to Choose Wire Gauge and Length for Your 3d Printer
How can you calculate the wire gauge and length for 3d printer wiring? Most 3D printers use either 12V or 24V. The hotend of a 3D printer may draw up to 4A, while a heated bed draws nearly 12A. If the wire is not large enough or longer than needed, it will have more resistance which means less watts going through the wire. Copper wire size uses American Wire Gauge (AWG) which determines how much current it can handle safely. To calculate 3d printer wiring calculations, divide Current in Amps by Length in Feet to identify the correct size of wire material needed for your 3D printing project.”
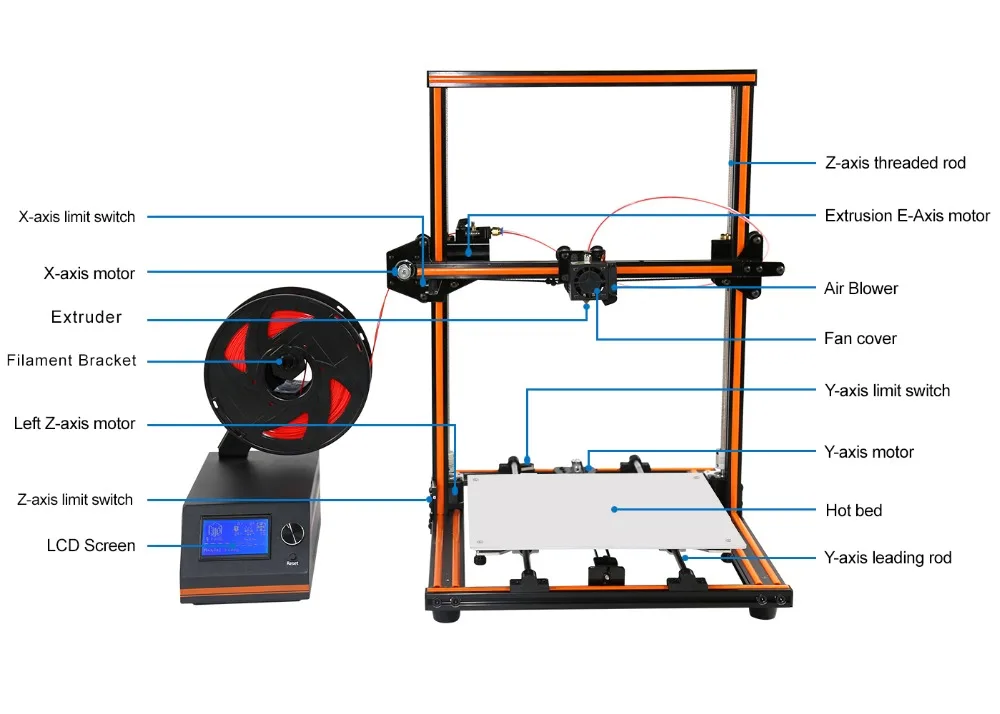
Stepper Motor WiringRated Current is the maximum current that can pass through both windings at the same time. Set the motor current to no more than about 85% of the rated current. To get maximum torque out of your motors without overheating them, you should choose motors with a current rating no more than 25% higher than the recommended maximum stepper driver current.
- Nema 17 Stepper Motors: 22 AWG wire with 4 conductors
- NEMA 17 motor wires are 26 AWG
Most motor torque data assumed 24 Volts, at 1.1 amp to 1.5 amp. Roughly 26 to 36 Watts, but remember that’s “chopped” or pulsed.
Wire size is based on power transmission requirements and length of wire.
If your wire gauge is not large enough or longer than needed the resistance will be higher This means less watts going through the wire. Copper wire size uses the American Wire Gauge (AWG). The lower the gauge number, the less resistance the wire has and therefore the higher current it can handle safely.
Most motor torque data assumed 24 Volts, at 1.1 amp to 1.5 amp. Roughly 26 to 36 Watts, but remember that’s “chopped” or pulsed. Wire size is based on power transmission requirements and length of wire.
Recommended Wire Size- 10 gauge wire – 30 amps
- 12 gauge wire – 20 amps
- 14 gauge wire – 15 amps
- 16 gauge wire – 10 amps
- 18 gauge wire – 7 amps
- 20 gauge wire – 3 amps (or slightly more)
- 22 gauge wire – 2 amps
- Maximum motor current 1.
 5A peak => Stepper motor rated current <= 1.9A
 - Maximum motor current 2.5A peak => Stepper motor rated current <= 3.0A
- Maximum motor current 1.6A peak with good fan cooling => Stepper motor rated current <= 1.7A.
3d printing at a higher speed uses more current and can cause wire overheating if wire thickness is not thick enough. Use motors with lower rated current (e.g. 1.0 to 1.2A) and 24V power, then the drivers will run cooler.
Duet 3 CurrentDuet 3 Mainboard 6HC and Expansion board 3HC has a recommended maximum motor current 6.3A peak/4.45A RMS) => Stepper motor rated current <= 6A
Duet 3 Toolboard has a recommended maximum motor current 1.4A peak) => Stepper motor rated current <= 1.75A
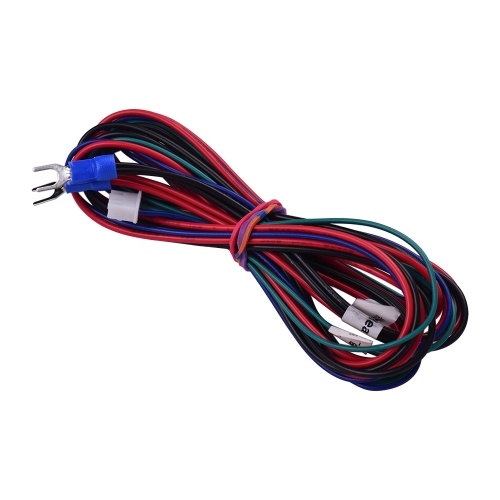
One solution is twisted pairs of wire to have one wire carrying the current while the other brings the current back. Use a shielded 4-core high current wire, so that the wiring creates much less capacitive and induced interference or a twisted pair of twisted pairs.
Each individual winding should have a twisted pair, and these two pairs should be twisted (in the opposite sense) together. Twisted pair will reduce induced interference to a minimum, and twist-on-twist is a very flexible way to combine 4 wires. Alas the construction will couple capacitively to nearby signal cables, so it pays to keep separate from them, or ensure all signal cables are shielded. Signal cables are things like limit switch wiring, encoders, etc….
Using a cordless drill and a bench vice, keep enough tension to prevent kinking, and reverse briefly to lose any torsion before releasing the wires.
Wire Connectors
The Molex 4 pin connector are rated at about 14 Amps (.093 inch / 2.36 mm diameter terminals.
Calculating the wire sizeA higher voltage means a lower current for the same amount of power. This gives you the opportunity to use smaller wires for the same job. Voltage is proportional to the current. A higher voltage means a lower current. Wire size influences the amount of current that can pass through it.
- A thicker wire will have less resistance per length
- Less resistance means loss
- The less loss means less temperature increase
In terms of wire size, 24V has an advantage over 12V, as the wires can be much smaller. A power supply of 300 watts running at 12V or 24V, will use less wire.
Wire Sizing Chart and FormulaCalculate the Voltage Drop Index (VDI) using the following formula:
- VDI = AMPS x FEET ÷ (% VOLT DROP x VOLTAGE)
- Determine the appropriate wire size from the chart above.
To compensate for voltage-drop, heat and current changes it is recommended to use 6 gauge wire and 4 gauge for over 15 feet.
While a Duet 3 won’t be replacing the Duet 2 anytime soon, it’s a much more professional electronics board that adds a range of options and functionality to your machine build. Although the Duet 3 may be overkill for most users, these options are not for everyone you do get much more out of Duet…
Keep reading
How To Wire The Duet 3 Mainboard 6HC The Duet 3 is a great board for your 3d printer, but wiring it up can be confusing. This tutorial will walk you through how to wire the Duet 3 mainboard 6hc to your Workhorse 3d printer. Duet Wiring Instructions This is a guide on how to…
Keep reading
Keep reading
DuetWifi Expansion Board Wiring and Firmaware Configuration
Keep reading
Stepper Motor Color Coding of Wires For any stepper motor to be wired up properly, we’ll need to determine which wires are “pairs” or connected to the ends of each coil. These are usually referred to as coil “A” and coil “B”. The exact order of the pairs Black/Green or Green/Black of pins does not…
Keep reading
What Size Stepper Motor Should You Use? While the size of a stepper motor is just the footprint it’s the winding that determines torque. There are Nema 17’s with as much torque as a Nema 23. Most 3d printers use stepper motors to drive z-axis motion lead screws to raise or lower the bed or…
Keep reading
3D Printer Kits & Parts
Shop 3D Printer Kits
Like this:
Like Loading...
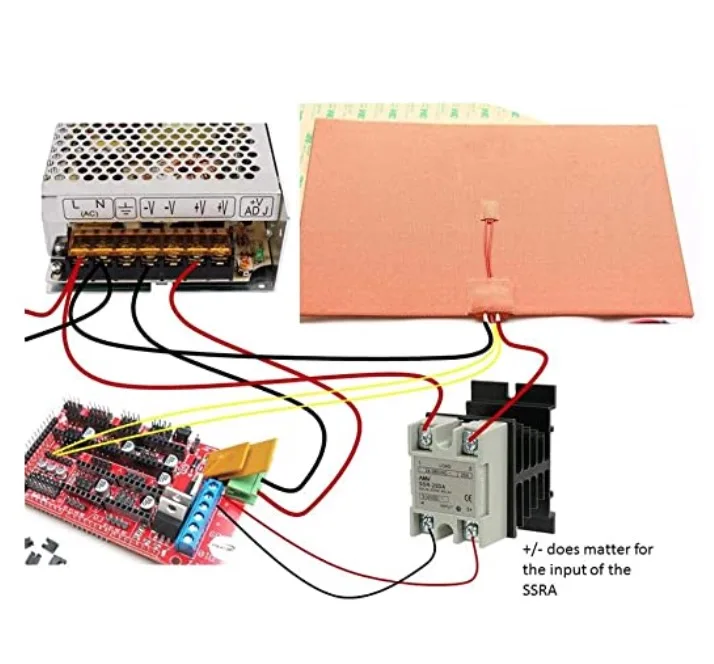
heated bed - How can I extend silicon hotbed wires safely?
Ask Question
Asked
Modified 1 year, 3 months ago
Viewed 875 times
$\begingroup$
I'm in the middle of building a D-Bot printer, and have run into a bit of an issue when it comes to the heat bed wires. The heated bed is an aluminum plate with a silicon heater attached to it, and the heater wires are not long enough to make it through the drag chain when the Z-axis is fully extended.
The silicon pad is 120 V AC / 750 W and will be turned on/off by a Fotek SSR. The heater wires are cloth-covered and are probably 22-24 AWG. (Gauge is not labelled)
I suspect I'll need to extend the wires by putting in some sort of coupler at the top of the drag chain, but I'm not certain if there are specific requirements for the wires for an AC powered heat bed.
To this end, I was wondering:
- Is there a specific wire gauge that I should use for the heater wires, and should it have a specific cladding?
- What type of connector would be best for connecting the wires together securely in this case?
Thanks in advance!
- heated-bed
- wiring
$\endgroup$
3
$\begingroup$
750 W at 120 V is 6.3 A. 22-24 AWG is on the thin side for this. I would recommend 18 AWG or thicker. You don't need a specific style of insulation for this (other than something that is rated for the voltage and temperature the wire will need to withstand, but most commonly found wire should be good).
A good way of connecting the wires would be to solder them. If you do not want to solder, there are many products on the market for connecting wires. A butt connector that you crimp could be a good option, or you could use a WAGO clamp. Whatever option you end up using, be sure to provide adequate strain relief as the connection point (be it soldered or with a connector) is more likely to fail from fatigue.
$\endgroup$
1
$\begingroup$
750 W at 120 V is around 6.3 A.
You can use a voltage drop calculator to find out how much power is lost in the wires, and therefore their temperature increase.
I did it for you. With 10 feet (2x5 feet) 20AWG wire and 6 A current, 7 W are dissipated on the wires.
It's 0.7 W/foot which is ok for silicone wires, also because the bed doesn't operate at 100% except for the initial heating up (and then the heat goes to the air around, which is fine anyway).
If you use another website, you can see that 20 AWG with 6 A current produces, in free air, around 10 degrees temperature increase. Silicone insulation will worsen that, but silicone holds well over 100 °C...
Use thicker wires if you can, or go on if you cannot.
The most important thing is to very effectively join the two, so that no extra resistance is introduced. I would place them next to each other and physically solder them. Then heat shrink tube around the joint.
See for info what not to use for the joining
$\endgroup$
1
$\begingroup$
To add to the answers here, use a finely stranded wire for the bed.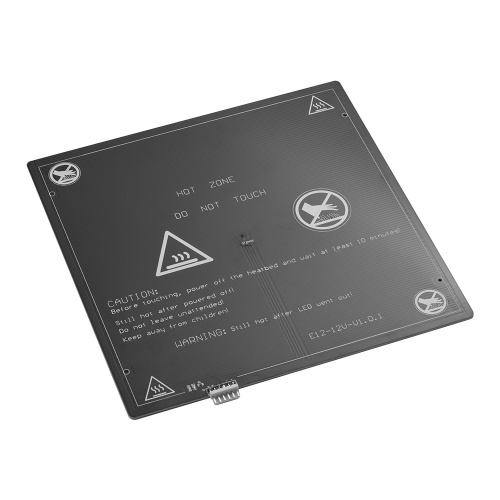 It does better with being constantly flexed. Finely stranded wire is hard to source, except it is usually what is used for wall warts/AC adapters. They come in the heavier gauge you want, just check the writing on the wire.
$\endgroup$
Original Prusa i3 MK2
3D printer reviewSpecifications and features
Prusa i3 is an open source software and mechanical project. And the MK2 model gives us new interesting features.
The MK2 design is a tried and tested solution with a vertical center plate that is the base for the Z and X axes and M12 guide screws. This design allows for a working space of 250 mm wide, 210 mm deep and 200 mm high.
The model is printed on the heated table MK42. This solves most adhesion problems. This table has good rigidity, so you don’t have to invent a bicycle and install some kind of heat-resistant glass surface on top. In addition, the top of the printing table is covered with a thin PEI film.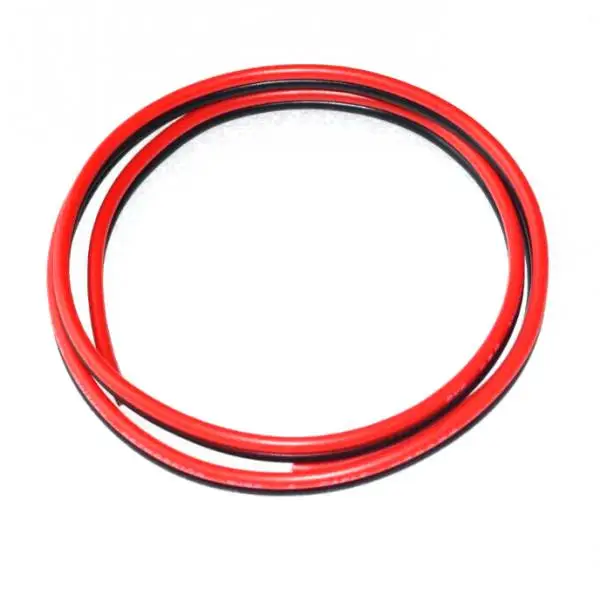 Thanks to this, fingerprints will not remain on it. The table heats up and cools down very quickly. If you're printing with PLA, the platen heats up at about the same speed as the extruder.
In addition, the MK42 table has zones with different heating characteristics. Due to this, such an unpleasant moment as more intense cooling at the corners of the table is compensated (the fact that the table has different temperatures from the edges to the center has a bad effect on printing 3D models from high-temperature plastics with a large contact surface).
The Original Prusa i3 MK2 has an E3D v6.1 all-metal extruder. This means that you can use almost any material for 3D printing: PLA, ABS, PET, nylon, wood-based materials or brass particles. If you want to experiment with carbon, you can put a hardened nozzle. If you need precision, you can install a nozzle with a diameter of 0.25 mm. In fact, the print quality with the original nozzle is excellent, but you can't help but notice how much flexibility the E3D v6.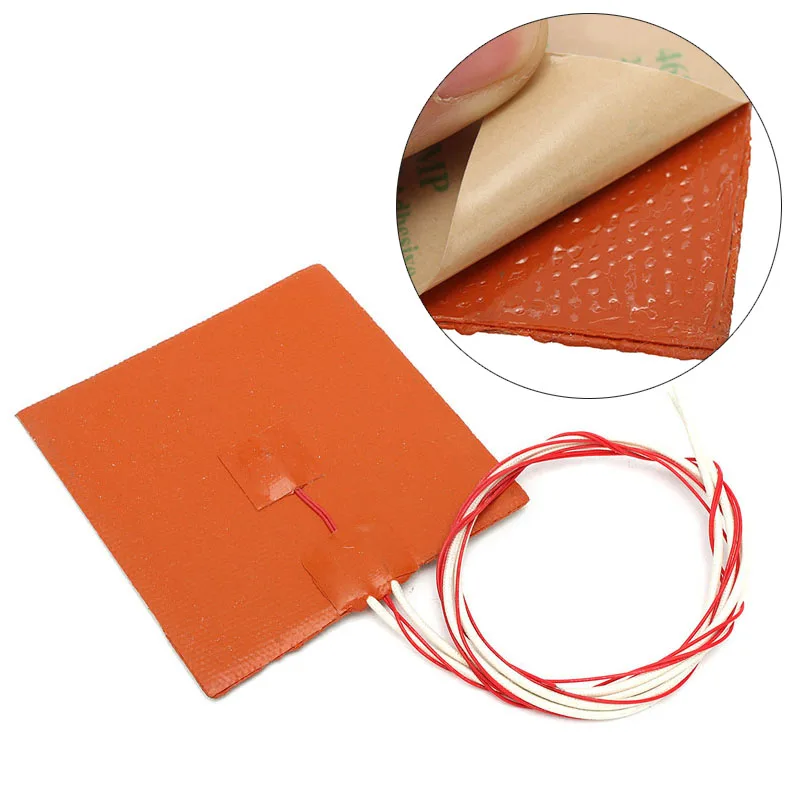 1 gives you.
An inductive sensor is located next to the extruder. In my opinion, such a solution should be implemented in all modern 3D printers. This inductive sensor is easy to set up, operates directly from 5V, takes up very little space.
The sensor performs several tasks. First, the virtual mesh of the 3D printing table is corrected. Due to this, even if there are small deformations, they are included in the extruder movement program. Secondly, if you have built the original Prusa i3 MK2, it has special calibration spots on the print table. Thanks to these calibration sections, the X and Y axes are automatically calibrated and small deviations, which are bound to occur during assembly, will also be compensated.
By the way, in many reviews of this 3D printer model, for some reason the last moment is missed. Well, it calibrates itself, and it's great ... But! Automatic calibration technology using calibration squares was not just developed by the Prusa Research team. Since it's open-source, this technique has become part of the Marlin firmware and now anyone can use it!
In most cases, you will interact with the Original Prusa i3 MK2 via an inconspicuous LCD control panel. In our opinion, the handle with the wheel looks amazing! In addition, the handle is very comfortable to use. Yes, this seems to be a trifle, but in fact, it is precisely such trifles in total that make a 3D printer as a whole better and more convenient. And it is the little things that distinguish a quality product from a quality fake.
Using the LCD screen, you can start calibration, feed media. And it won't be running simple scripts. If something goes wrong, such as the heating elements don't respond with the correct signal or the sensor doesn't send a signal at the expected distance, the Original Prusa i3 MK2 will not continue in "self-destruct mode"
During operation, the heating systems are protected by the Ultimachine Mini Rambo . On the opposite side of the frame is a power supply without a cooler.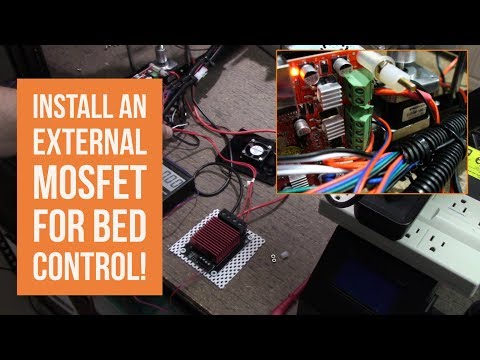 During operation, it is hot to the touch.
It is very convenient that the power supply has a special cover on the side of the connectors. You do not have to worry about connecting individual wires, just connect the power cord to the IEC fuse connector, and the other side of the cable to the Mini Rambo motherboard. This is amazing! The frame is also grounded using the power supply.
Another interesting innovation concerns wires. Among the wires that go to the extruder and the heated table, 3 mm nylon thread is mixed in, which prevents them from tangling and bending. In our opinion, a very interesting and elegant solution to the problem with wires.
Assembly and print quality
If you decide to assemble the Original Prusa i3 MK2 yourself, you need to set aside five hours. There is a high-quality video of the complete assembly and launch of this model, which was recorded by Thomas Sanladerer (the author of the original English review, by the way).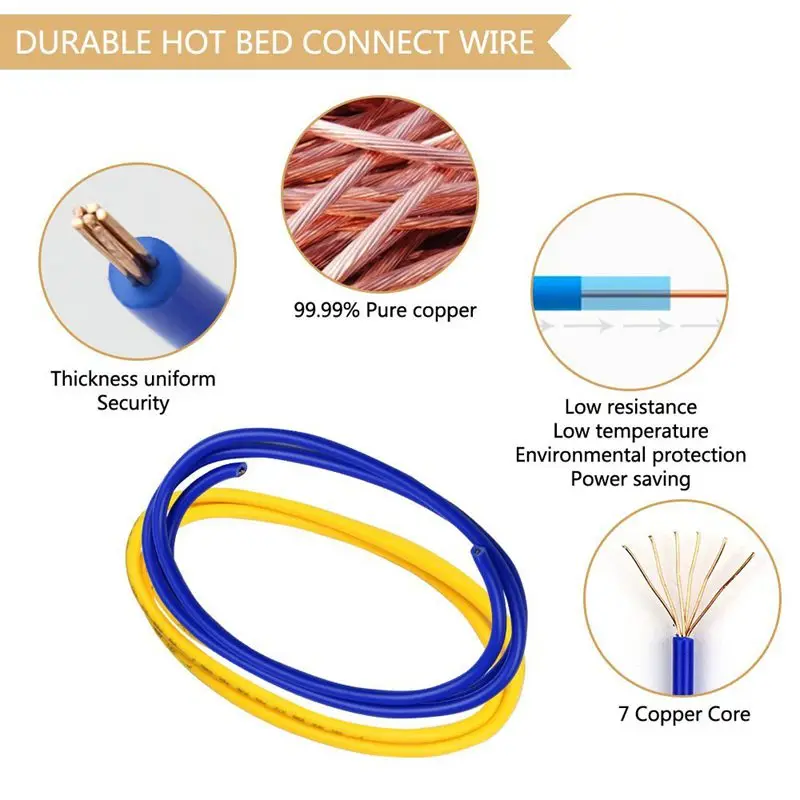 On the video, the assembly took more than 5 hours, but you also had to spend time on entertaining the audience ;).
The manual covers each assembly step, the automatic calibration process. Although the quality of the photographs in the printed version is not the best, you can find the same instructions online. There, the images are stored in excellent quality.
Two 3D printers were ordered for the review. One fully assembled and the second as separate parts for self-assembly. Unfortunately, the assembled printer arrived with minor damage. Apparently, the table latch broke and as a result the LCD case was damaged. I printed the new case myself, but in fact, if such a situation arises, Prusa Reseach will send you a new part under warranty without any problems.
After assembling the Prusa Kit, it turned out that they work exactly the same. In fact, if it weren't for damage in transit and slight differences in frame color, they could only be distinguished by the serial number.
Each printer comes with a test program. And the quality is really amazing!
The dragon pictured below is the first piece printed on the assembled Original Prusa i3 MK2. Printed through a cloud service, without installing software on a PC. There is simply nothing to complain about!
But what's the point of a quality test print? After all, we are counting on excellent printing of our own, not test 3D models. Well, Prusa Research provides all the necessary programs for installation on different operating systems: Windows, Mac OS. If you are using GNU/Linux, there are separate instructions for installing the required packages. The software contains all the necessary drivers, pre-configured slicer, printer host, Netfabb installer, tools for color printing.
I would like to consider drivers separately. When you connect Original Prusa i3 MK2 via USB, it connects via serial port. So you can use it from PC, Raspberry PI, Octoprint or other cloud based 3D printing solution. There is full support for Windows 10 (most likely Windows 8.1 as well), so you can use the integrated Builder app to print directly from professional CAD programs like Solidworks.
This is really cool, and apart from 3D Systems and Stratasys, no other 3D printer provides such a wide range of possibilities. In general, if you become the proud owner of an Original Prusa i3 MK2, you can use any Windows application that supports direct 3D printing. Very, very comfortable.
Naturally, you can use the traditional methods of exporting your model to an STL file and processing it in a slicing software. Slicing software Slic3r with ready-made settings is included. This version has some features and modifications compared to those available for official download.
It has a full profile with settings for a 3D printer, for different layer heights, nozzle sizes and a whole range of 3D printing materials - from standard ones like PLA, ABS, PET to Taulman T-Glase or Bridge Nylon. All the materials we tried to work with gave excellent 3D printing results (if, of course, you choose the right settings).
If you prefer to work with other slicing programs such as Cura or Simplify3D, you can download ready-made profiles with printer settings from the official Prusa website.
In our opinion, the availability of ready-made settings for different slicing programs is a huge plus. After spending half a day or more building a 3D printer, having fun with settings and messing up the first 5-10 models is not the most inspiring thing to do. And thanks to ready-made configurations, you can set up your usual software in one click and get excellent quality 3D printing on the Original Prusa i3 MK2.
You will only have to play with the settings if you are using a really unusual material for 3D printing.
Let's now move on to the software part. The software for the Original Prusa i3 MK2 is constantly being improved and if you use Slic3r you will see notifications about the possibility of updating the firmware.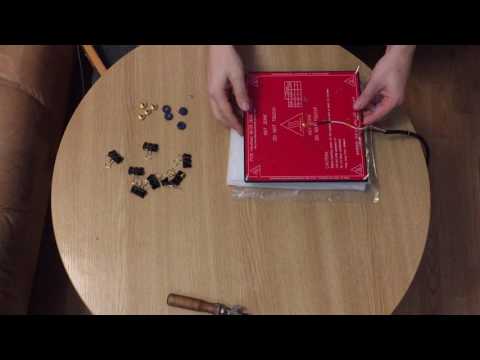 After tuning, we were offered some updates that should improve performance, but to be honest, the difference is not noticeable.
One of the coolest features is color printing. Even though the Original Prusa i3 MK2 prints in one color, the development team has included some features to implement color 3D printing (by changing the material in the extruder). You can set up color printing using the LCD controller or by adding G-code coordinates, after reaching which the 3D printer will prompt you to change the material in the extruder.
Original Prusa i3 MK2 - the perfect 3D printer?
Yes, we can say that the testing of the Original Prusa i3 MK2 showed that it is indeed a very good 3D printer. But do not forget that although this is a very successful, but still an ordinary FDM printer, which has certain limitations inherent in the technology of layer-by-layer deposition modeling.
There was an example of bad 3D printing. But in defense, we can say that the model is already complicated and at the same time was reduced relative to the base dimensions.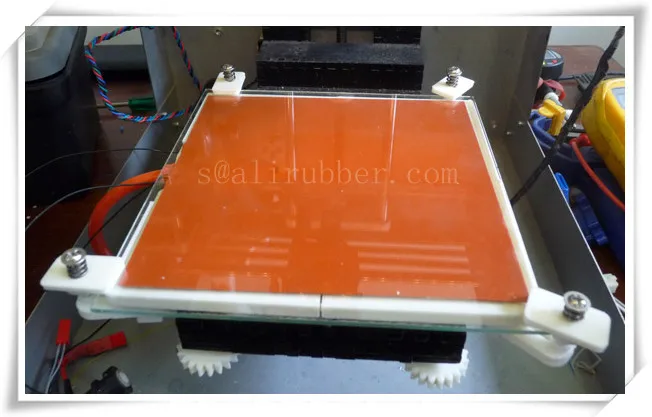 As a result, the transitions were too sharp and you can see the result in the photo below.
While the Original Prusa i3 MK2 is running, you can choose between "power" or "silent" mode. The failed model was printed in quiet mode (this mode is really quiet. The loudest part is the working cooler to cool the model). Perhaps printing in powerful mode would be better. But if you use the powerful mode, being in the same room with a 3D printer is not comfortable. 9The 0005
Original Joseph Prusa i3 MK2 is $845.79 (self-assembled) or $1,087.79 (assembled). Although not the most "advanced" mainstream model, it is in many ways superior to its counterparts and even the most innovative models. At the same time, some fundamentally new and really useful features have been implemented.
Original Prusa i3 MK2 prints great right from the start, without the need for tedious manual adjustments. Probably, this is really one of the highest quality open-source 3D printers today.
5 INTERESTING THINGS ON THE WANHAO DUPLICATOR I3 MINI 3D PRINTER — voltNik
Hello friends, I have prepared 5 interesting things printed on a 3D printer for you, combined this video with a review of the Wanhao Duplicator I3 Mini printer, more about it: https://goo . gl/Fo5bxJ
Printer provided by Top3DShop: http://top3dshop.ru/ company channel with reviews and digital technology news on YouTube: https://goo.gl/FGGGfM
Printed models:
1. Emblem of the 2018 World Cup: https://www.thingiverse.com/thing:2938306
2. Carbine: https://www.thingiverse.com/thing:1819242
3. Kinder: https://www. thingiverse.com/thing:2805211
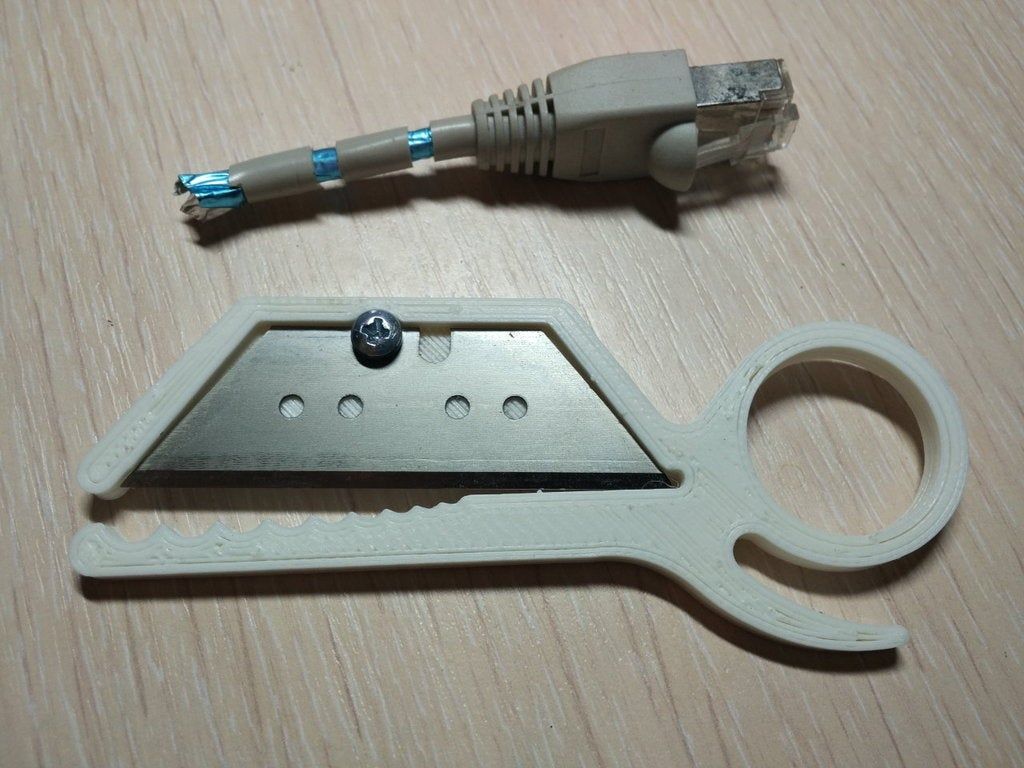
4. Can opener: https://www.thingiverse.com/thing:1097099
5. Toothed bearing: https://www.thingiverse.com/thing:53451
Hello friends, prepared for you, another selection of interesting things that can be printed on a 3D printer. And at the same time, let's look at a new compact and budget 3D printer.
So, the printer is in the box, opening it we immediately see a small brochure. It contains the delivery kit and describes all the steps to start the printer in operation. Well, here it is inside, handsome, already fully assembled. We get it. The model is called Wanhao Duplicator I3 Mini. This entry-level printer is compact, thoughtful, and completely friendly.
In addition to the brochure, the set also includes detailed instructions. 10 meters of red plastic for test printing, spare table sticker. In a separate box there is a power cable, spatula. I respect those manufacturers who complete their printers with a spatula, this is the most useful tool from the whole kit. Next, stationery glue, a pencil, was also put - thank you! Rack for plastic reel, flash drive for one gigabyte, USB cable, cable ties, drill. Who can guess why? Write your guesses in the comments. They also put a card to calibrate the table.
So... to prepare the printer for work, first we fasten the plastic stand. The spool will fit comfortably on the side of the printer. We bite the transport ties, connect the power, turn it on and it remains only to adjust the level of the table.
The table setting is the same for all similar printers. We select the “Bed level” item in the menu, the extruder descends to the first point and the printer asks to put a sheet of paper under it, then with a nut we make sure that the nozzle rests on it, but does not press. After that, driving the extruder in the menu in four corners, you need to adjust the exact same height of the nozzle with the rest of the nuts, so that a sheet of paper passes under it without getting stuck.
Next, turn on the preheating of the nozzle. We install the plastic and push it through until it starts to climb out of the nozzle. First, some blue plastic climbs, which means that the printer was checked in print before packaging and the chance of getting a marriage is almost zero.
Due to its compact size, the printer has a small printable area. It is 120 by 135 and 100 millimeters high, at first it seems that this is not enough. But most models of plastic parts are just small, so they can be printed on it without any problems. The printer is designed to print with PLA plastic, so there is no heated table. And for better adhesion of the plastic to the table, you just need to use the clerical glue pencil from the kit, smearing the surface with it before printing.
Install the memory card from the kit. It turned out that several dozen ready-made models were recorded on it at once in order to try to print something.
I'll select the first file on the map, like thumbs up or like. And yes, do not forget to slap Uncle Voltnik a big fat like for this video, I will be very pleased. Because the nozzle has already warmed up - the printer immediately starts printing. But as you can see, the plastic does not stick to the table, but all because I did not smear it with glue. We interrupt the printing and smear the table with a clerical pencil. Well, now the plastic has stuck. And here is the finished like. The model was printed on a stand (called rafts). With the backing off, it looks like this. Minimum errors. I print the calibration cube. Ready. To me, he's perfect. And this is all print out of the box.
Now let's print five interesting things on this printer.
- Now the World Cup is on. I was the first to decide to print his emblem. I will print it with three different plastics so that it turns out in color.
 And after printing, we just put everything together. The emblem is very beautiful. She will decorate my desktop for the championship.
 - Carbine. First the yellow kit, and then the red kit. This is what it looks like together. We assemble and get two interesting multi-colored carbines. There are no springs here. The return is made by grooves in the printed plastic.
- Kinder. Those. those who watch videos about 3D printing for the first time often ask about the poor quality and visibility of plastic layers on finished parts. The answer is that the print quality depends on the set level of layers, for example, this egg is printed in maximum quality in layers of 1/10 of a millimeter and it turns out like a cast one. Printing takes a long time, so 2 or 3 tenths is often set to speed up. Everything else was printed in 2/10 quality. The egg is ready. There are flaws on it in places where the plastic rolls back, but this can also be corrected with the settings in the slicer.
 The hinge here is printed already assembled and there is still a lock. Kinder same can not be empty. Therefore, we print a fire truck that will fit inside. Done, look at her, even the wheels are spinning, and she fits perfectly into her place inside the egg. Excellent.
 - Bottle opener. Well, such a universal thing, it allows you to grasp the caps of bottles of different sizes and open them. Whatever. I agree.
- Gear bearing. I printed it with a quality of 2/10 and reduced the plastic consumption a little, but the gears still stuck together a little. By swinging them up and down, I managed to quickly unstick them. And this is what it looks like at work. The beauty. Such a bearing can be installed inside the plastic coil and when it rotates there will be beauty. Bullshit you say? Useless? But no! Do not forget that any model can be scaled and printed. Those. Size doesn't matter in 3D printing. This bearing can be printed small 30 by 30 or enlarged and printed 100 by 100 and it will work.
 Don't forget it.
I would like to thank the TOP3DSHOP online store for providing a 3D printer for printing. Thanks to them, I had the opportunity to feel and try this model, and you were able to see this review. I will return the printer, they gave it to me to drive. And of course, a little advertising, the guys from TOP3DSHOP sell 3D printers, 3D scanners, various CNC machines, there are engravers, milling machines and lasers. And they serve it all. Their range is very large, includes budget and professional models, there are consumables. The store also maintains its own channel on Youtube, where various news on 3D printing are published, I recommend subscribing so as not to miss the news from this 3D world.
Well, let's summarize. The printer has its advantages and disadvantages. I liked the fact that it is already fully assembled. No need to twist, screw, think about it, watch instructions and video guides. We took it out of the box, twisted 4 nuts for setting the table and you can already print.