3D printer glass bed cleaning
How to Clean a Glass 3D Printer Bed – Ender 3 & More – 3D Printerly
Cleaning a 3D printer surface seems like such a simple task but it can be a little tougher than it seems. I’ve had trouble cleaning glass surfaces myself and searched high and low for the best solutions to do it properly, which I’ll be sharing in this post.
How do you clean a glass 3D printer bed? The best way to clean a glass bed is to slightly heat it then apply a cleaning solution, whether it be warm soapy water, window cleaner or acetone to your printer bed, leave it to work for a minute then cleaning with a paper towel or scraping it with a tool. A second wipe down is a good measure to take.
A common occurrence with 3D printer beds is having filament residue left over after removing a print. The worst part about it is how thin and strongly stuck down this residue is, making it very difficult to remove.
You should remove it because it can affect the quality of future prints. Residue can mix up with new filament preventing adhesion in places, thus potentially ruining your next print.
So keep reading for some great solutions to cleaning your 3D printer bed whether it’s adhesive residue or material left over from a previous print.
If you are interested in seeing some of the best tools and accessories for your 3D printers, you can find them easily by clicking here (Amazon).
How to Clean Your Ender 3 Bed
The simplest method of cleaning your Ender 3 bed is to use a scraper of some sort to remove the residue from a previous print or from an adhesive that you have used.
This usually works by itself with enough force, but definitely be careful where you put your hands because you don’t want to accidentally push the scraper into your fingers!
A good practice is to use one hand on the scraper handle and the other hand pushing down in the middle of the scraper to apply more force downwards.
With enough force and technique most beds can be cleaned to a good standard.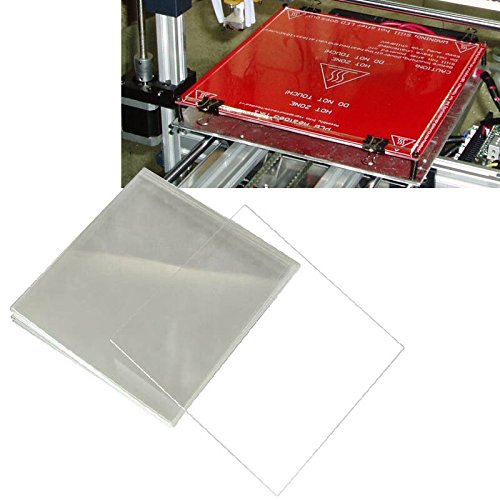 Most 3D printers come with a scraper so this is a convenient fix.
One of the better scrapers out there is the Reptor Print Removal Kit which comes with a premium knife and spatula set. These tools slide comfortably underneath prints so your bed surface is protected and works well with all sizes.
It has a smooth ergonomic grip and it made of hardened stainless steel to do the job every time.
You want to remember to avoid using massive amounts of pressure and force on your printer’s bed because over time it can lead to unnecessary damage and scratches on the surface.
If this manual scraper method isn’t enough, you want to figure out the best cleaning solution for what material or residue is left over.
Some cleaning solutions work pretty well against most materials such as Isopropyl Alcohol (Amazon) which is 75% alcohol or Sterile Alcohol Prep Pads with 70% alcohol.
A lot of 3D printer users have gone for the sponge and warm water with soap method and this works pretty well for them. I’ve tried it a few times and I can say it’s a good solution.
You don’t want your sponge to be dripping because there are many electrical parts which can be damaged like the heating unit or the power supply.
Get some of the soapy water mix and gently rub it on the residue with your sponge or a paper towel until it softens and is removed. It can take some effort to get it to work.
This problem usually arises when residue is left overtime and builds up, some printers can be worse than others. A good practice when removing residue is to heat your bed up so the material is in it’s softened form.
It will allow you to clean off the residue a lot easier than it being hardened and cold which is why warm water works so well.
So to summarize:
- Use a Scraper and some force to remove residue
- Apply a cleaning solution of warm soapy water, isopropyl alcohol, window cleaner or other
- Let it sit and work to breakdown the material
- Use the scraper again and it should work just fine
Getting Rid of Glue on a Glass Bed/Build Plate
Many 3D printer users use 3D Printer Original Adhesive and apply a thin layer of this to their print bed to help objects stick to the bed and reduce warping.
People simply apply some glue to the general area where their print will be layered down. After the print is finished, you’ll find that there is glue residue on the glass or printing surface which has to be cleaned before starting another print.
It’s a good idea to remove the glass plate for thorough cleaning and use a reputable glass cleaning solution or window cleaner to get through the residue.
Rather than just using water, these cleaning solutions actually break down and tackle the residue, allowing for easy and simple cleaning.
- The first step is making sure your hands are washed, clean and dry before getting started.
- Now you want to simply use a dry cloth or normal paper towels to wipe down the glass.
- Take one paper towel sheet and fold it twice into a thicker, smaller square.
- Apply your cleaning solution directly on the glass bed, a few sprays should be enough (2-3 sprays).
- Let the solution sit on the glass bed for a minute to let it work and slowly break down the residue.
- Now take your folded paper towel and wipe the surface of the glass thoroughly, with medium pressure so all the residue is removed from the surface.
- After the first wipe down, you can add a few more sprays and a second wipe down to properly clean the surface.
- Remember to wipe down all around the surface including the edges.
Once you’ve properly cleaned your surface, there should be a clean, shiny surface with no residue left over.
Use your hands to feel over the glass bed to make sure it’s clear.
Now you just want to make sure your 3D printer bed surface is clean and level before placing the glass bed back onto your printer.
Cleaning PLA off a Glass Bed
PLA has got to be the most popular material used in 3D printing, which I can definitely agree with myself. The methods I’ve described above should do a great job cleaning PLA off a glass bed. This won’t be much different to the information above.
If the piece stuck down on your glass bed is the same color as your next print, some people will just print over it and remove it with the next object in one go.
This can work if your first layer adhesion isn’t too negatively affected so the print can form a solid foundation and actually finish.
My usual solution for cleaning the glass bed on my printer is a glass scraper (basically just a razor blade with a handle on it):
Cleaning ABS off a Glass Bed
ABS can be cleaned quite well by using acetone because it does a good job breaking down and dissolving it. Once you’ve applied acetone to your bed, leave it for a minute then wipe the residue off with a paper towel or clean cloth. You shouldn’t need to heat up your bed or use much force here.
If you aren’t already using a glass printer bed check out the links below and the reviews as to why they are so good. They do the job you need it to do with ease, at a competitive price and gives a lovely finish on the bottom of your prints.
Borosilicate glass for the following printers (Amazon links):
- Creality CR-10, CR-10S, CRX, Ultimaker S3, Tevo Tornado – 310 x 310 x 3mm (thickness)
- Creality Ender 3/X,Ender 3 Pro, Ender 5, CR- 20, CR-20 Pro, Geeetech A10 – 235 x 235 x 4mm
- Monoprice Select Mini V1, V2 – 130 x 160 x 3mm
- Prusa i3 MK2, MK3, Anet A8 – 220 x 220 x 4mm
- Monoprice Mini Delta – 120mm round x 3mm
If you love great quality 3D prints, you’ll love the AMX3d Pro Grade 3D Printer Tool Kit from Amazon. It is a staple set of 3D printing tools that gives you everything you need to remove, clean & finish your 3D prints.
It gives you the ability to:
- Easily clean your 3D prints – 25-piece kit with 13 knife blades and 3 handles, long tweezers, needle nose pliers, and glue stick.

- Simply remove 3D prints – stop damaging your 3D prints by using one of the 3 specialized removal tools
- Perfectly finish your 3D prints – the 3-piece, 6-tool precision scraper/pick/knife blade combo can get into small crevices to get a great finish
- Become a 3D printing pro!
How to clean 3D printer beds: Glass, PEI, adhesive
In the world of FDM 3D printing, the first layer of printing is often the most important. Poor first-layer adhesion, which can be caused by incorrect calibration, too-fast print speeds, or a badly prepared build surface, is the cause of many failed prints.
One of the best ways to prevent bed adhesion problems is to maintain a clean build surface. By taking good care of the surface, the extruded thermoplastic has a better chance of sticking to it, and the odds of print failure are significantly reduced.
However, it’s not always clear how to clean a 3D printer bed or its build surface. Different print surfaces are made from different materials, which react in different ways to certain cleaning solutions. This article goes over the basics of cleaning your 3D print bed, looking at the supplies you’ll need and the different methods you can use.
An FDM 3D printer is made of many parts, but the (literal) foundation of a good print is the print bed.
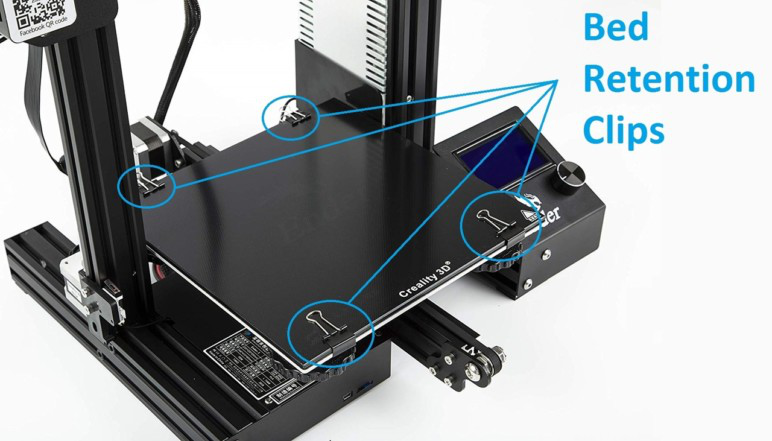
Usually made of glass or aluminum, the print bed is a solid, flat surface upon which the printed part gets made. In Cartesian-style printers, these beds are square or rectangular, while on Delta-style printers they are circular. Sometimes called a build plate, the print bed can be heated or unheated: a heated bed helps improve first-layer adhesion and makes it easier to remove the finished print.[1]
A clean bed results in better first-layer adhesion
Somewhat confusingly, not all FDM users use their built-in print bed as their build surface. The build surface is whatever substrate the nozzle deposits the first layer of plastic onto; it can be the print bed itself, or it can be something else like a removable glass plate, a rigid plastic sheet, or strips of masking tape. Furthermore, printer users often treat their build surface with additives like glue stick or hairspray to improve adhesion.
When we talk about 3D printer bed cleaning, we may be talking about cleaning the print bed or cleaning the build surface — or both! Cleaning the build surface is important because a dirty surface with filament buildup can negatively affect adhesion and lead to failed prints. But it is also important to clean the print bed even if it is not used as the build surface, as it will ensure a longer lifespan and better adhesion to removable surfaces like tape and BuildTak.
Isopropyl alcohol
Isopropyl alcohol (IPA) is a colorless chemical compound that is often found in antiseptics, detergents, and disinfectants. It is sometimes called “rubbing alcohol” due to its former use as a topical preparation for massages.
FDM users can use IPA (containing 70–90% alcohol) as a cleaning product on print surfaces like glass and PEI. The chemical substance is strong enough to remove grease and residue but is unlikely to damage these surfaces.
Acetone
Another compound used to clean 3D printer beds and build surfaces is acetone, which is found in products like nail varnish remover and paint thinner. The solvent is also used as a smoothing agent for ABS prints, as it is able to dissolve the plastic (though it won’t cut through PLA).
Acetone can be used to clean glass beds, working well against dirt, grease, and some types of plastic filament residue. It may also be used to clean PEI and other surfaces, though it can damage a plastic surface if used too frequently.
Window cleaner
Window cleaner can be used to clean a glass build surface
Spray-bottle window cleaners typically contain a form of alcohol such as ethanol or isopropanol, in addition to other grease-dissolving agents. They may also contain additives such as perfumes, though products with fewer additives are better for print bed cleaning.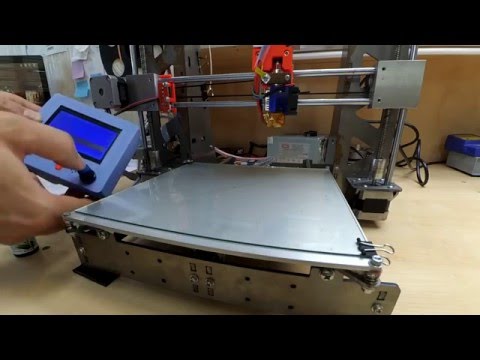
Window cleaning sprays are formulated for the cleaning of glass and can therefore work well for cleaning glass print beds and surfaces.
Soap
Ordinary dishwashing soap mixed with warm water is a cheap and effective solution for cleaning print surfaces of various kinds. Unscented products with minimal additives work best.
Equipment
In addition to chemical substances, a few pieces of equipment are needed to clean a printing surface. It is useful to have the following on hand:
Scraper: A flat-blade scraper is used to remove residue without damaging the print bed or build surface
Sandpaper: More abrasive than a scraper or cloth, sandpaper can help maintain an even surface
Cloth: A soft microfiber cloth can be used to apply various substances to the print bed or build surface
Paper towels: Paper towels are suitable for applying mild cleaning agents like soapy water and window cleaner
Glass
Glass is one of the most popular and effective build surfaces, since it distributes heat evenly and is relatively easy to clean.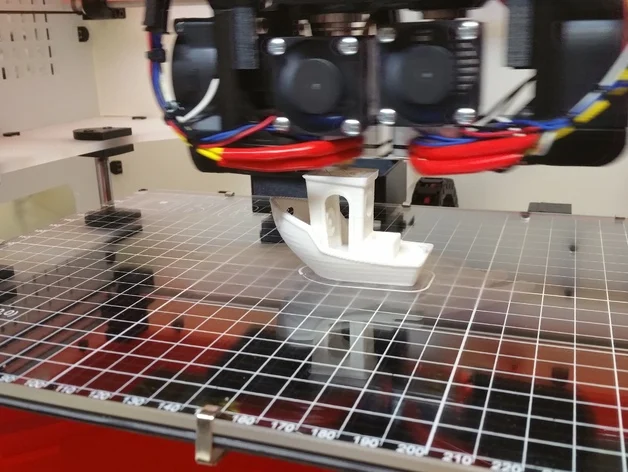 Some printers have glass print beds, while some users affix a removable glass sheet (usually borosilicate glass) to a metal print bed.
While glass provides a flat printing surface, its smoothness can actually prevent good first-layer adhesion. Because of this, users often apply glue or another adhesive to the glass surface before printing. This naturally creates a buildup of residue, which should be cleaned between prints.
How to clean glass 3D printing beds:
If possible, remove the glass plate from the print bed to avoid getting cleaning solution in the printer’s mechanical parts.
Scrape away any large pieces of glue or filament residue with a dry scraper, applying firm and even pressure.
Use a cleaning cloth soaked with warm soapy water to clean grease and other residue from the glass about once a month or when required (but only if the surface can be removed from the printer).
 Alternatively, use window cleaner.
While wearing protective gloves, soak a cloth with a small amount of IPA and wipe the surface before each print.
Avoid getting fingerprints on the glass where possible.
PEI
Polyetherimide (PEI) is a chemically stable thermoplastic that is used as a printing surface due to its good material characteristics such as heat resistance. Low-cost PEI sheets can be attached to a build plate and last many print cycles.
An advantage of using a PEI sheet over glass is its superior adhesion, particularly with materials like ABS. Typically, no extra adhesive like glue is used on the surface, which reduces buildup of residue. However, regular cleaning is required to maintain good adhesion.
How to clean PEI 3D printing beds:
If possible, remove the PEI surface from the print bed to avoid getting cleaning solution in the printer’s mechanical parts.
Soak a dry cloth in IPA and wipe the PEI bed surface to remove gunk and residue. Repeat this procedure between prints. Alternatively, use dish soap and warm water.
Apply acetone with a cloth around once a month to smooth down and further clean the plastic surface.
If the surface is scratched, use a fine-grit sandpaper to smooth it down. If the imperfections are too severe to be fixed, replace the PEI sheet.
Avoid getting fingerprints on the PEI where possible.
Adhesive tape
Blue painter’s tape — a kind of masking tape — and NASA-developed Kapton tape are common build surfaces for FDM 3D printers that do not have heated beds.[2] (A heated bed could melt the glue on the adhesive side of the tape.) Despite the improvised look of a taped print bed, the material works well and can easily be replaced.
The obvious disadvantage of using adhesive tape is that there will be small seams between each strip, which can leave a visible line on the base of a print. However, this problem can be mitigated to some extent by using thicker tape. Furthermore, the cleaning process for tape is trickier than with solid surfaces like glass, as tape cannot be treated with solvents or other wet cleaning solutions.
Blue painter's tape should be scraped clean and replaced when worn
How to clean adhesive tape 3D printing beds:
Use a dry scraper to remove residue and leftover filament.
Replace damaged sections of tape. If possible, try to keep the surface level and even to avoid issues with future prints.
Avoid getting fingerprints on the tape where possible.
Replace the entire tape bed when it is visibly worn, torn, or uneven. Clean the bed underneath with IPA or acetone to remove glue residue before applying the new layer.
BuildTak
One of the most popular branded printing surfaces is BuildTak, a low-cost, heat-resistant adhesive sheet that is easy to clean and replace. Although its material is not disclosed, users suggest it may be a mixture of PEI and glass.
How to clean BuildTak 3D printing beds:
Soak a dry cloth in IPA and wipe the BuildTak surface to remove gunk and residue. Repeat this procedure between prints.
Try using warm water if the IPA is unsuccessful.[3]
Avoid getting fingerprints on the BuildTak surface where possible.
Replace the BuildTak surface when it is worn and parts no longer adhere to the bed.
There are many print bed surfaces to choose from, and different surfaces suit different print jobs. ABS filament works best on surfaces like PEI sheet or BuildTak, but struggles when printed onto a very smooth surface like glass. PLA offers more options, working well on a heated bed with a glass surface.
Whatever surface you choose for your 3D print bed, cleaning and maintenance is vitally important — both for the longevity of the surface and for ensuring good first-layer adhesion that will prevent failed prints.
To get the most out of your FDM printer, always have a selection of cleaning supplies on hand, always wipe down hard print surfaces between prints, and carry out a thorough deep clean every few weeks or months.
[1] Nazan MA, Ramli FR, Alkahari MR, Abdullah MA, Sudin MN. An exploration of polymer adhesion on 3D printer bed. InIOP Conference Series: Materials Science and Engineering 2017 Jun 1 (Vol. 210, No. 1, p. 012062). IOP Publishing.
[2] Teliskova M, Torek J, Cmorej T, Kocisko M, Petrus J. Adjustments of RepRap type printer workbench. In2017 4th International Conference on Industrial Engineering and Applications (ICIEA) 2017 Apr 21 (pp. 15-19). IEEE.
[3] How to Clean a 3D Printer BuildTak Surface on the E2 [Internet]. Raise3D Academy. 2021 [cited 2022Mar8]. Available from: https://www.raise3d.com/academy/how-to-clean-a-3d-printer-buildtak-surface-on-the-e2/
Cleaning the 3D printer table. Tips and Tricks.
3D printing is a very unstable process, I think everyone who is at least slightly familiar with plastic filament printing technology will agree with this. Unpleasant crashes in the 3D printer can occur for various reasons, and one of the most common reasons is the detachment of the model being grown from the desktop surface. And as a rule, this happens in the middle of printing, when you are already convinced of the stability of the press and are distracted by another activity. It is precisely for this reason that ensuring good adhesion of the first layer to the platform is very important for the successful completion of 3D printing. nine0003
Today there are many ways to improve the adhesion of the first layer to the bed. A lot of articles and recommendations have been written about this, so we will not talk about them. It is worth noting one of the simplest methods - is keeping the desktop of a 3D printer clean . Regular and thorough cleaning of the platform will not only improve adhesion, but will make printed models more beautiful and smooth.
In this article we will look at the best way to clean the 3D printer table, using the example of popular coatings: nine0003
Remember to be careful when using the methods below, as spilled liquid may damage the 3D printer. We recommend removing the bed from the printer before cleaning (if possible).
PEI sheet surface cleaning
Recently, PEI sheet has become a very popular material for improving adhesion in 3D printers. It provides excellent adhesion to various materials, and when it cools down, the printed model lags behind it very easily. The sheets are very simple and not fussy to use, and most often it does not require additional application of glue or adhesive tape. nine0003
Unfortunately, in order to achieve maximum efficiency, the PEI surface also requires regular and high-quality cleaning. If PEI is touched frequently, it can develop greasy spots that reduce adhesion to the material. Rough cleaning can also damage the surface and reduce sticking. Regular cleaning and maintenance of PEI will ensure that your models do not come off.
How to clean the surface of PEI
To clean this surface, we recommend using isopropyl alcohol (Chemical pure, odorless) with a concentration of more than 70%. You can use it with a smell, but it is very caustic and unpleasant, the room will need to be ventilated. nine0003
Wait for the platform to cool, then liberally soak a dry cloth or paper towel with alcohol and wipe the surface. This will remove a significant portion of the fats and oils from the bed.
Acetone is also good at dissolving plastic residues on the surface. In the same way, liberally moisten the cloth with liquid, then gently wipe the surface of the 3D printer desktop. We strongly recommend doing this work in a well-ventilated area, as acetone is highly flammable and its vapors can penetrate the electronics of the device
If you have been using PEI sheet for quite a long time, and visually its resource has been significantly used up, then we recommend using fine grit sandpaper (1500+). With gentle, circular motions, sand the surface until light scratches and depressions are removed.
When should I clean?
Most manufacturers recommend cleaning the surface with isopropyl alcohol every 2 to 3 prints. After a few months of use, sand the surface and wipe thoroughly with acetone. If it is no longer possible to restore the surface by the listed methods, then replace it with a new sheet from PEI. The lifespan of such material varies depending on the brand and frequency of use of the 3D printer. nine0003
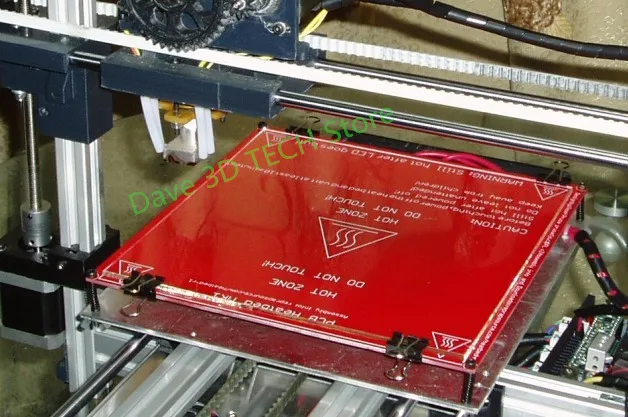
Glass Surface Cleaning
Glass is another very common 3D printer desktop material. Much more durable than PEI and similar surfaces. The glass plates provide a smooth and level surface at the bottom of the model.
This surface is usually used in combination with other aids (eg glue stick or hairspray) to improve the adhesion of the first layer. Such products are especially popular on tables that are not equipped with heating. Therefore, regular cleaning of the glass is necessary to prevent adhesive or varnish from sticking. nine0003
How to clean the glass platform
The easiest way to clean a glass plate is to use a scraper or a non-metal spatula. If the table is heated, then heat it until the material remains soft, after which they should be easily removed with a scraper.
Be careful when scraping. Depending on the scraper, the blade can be very sharp, so be careful not to scratch the surface. We recommend that you put your hand on the handle of the scraper, and with the other hand press down on its middle, so that the greatest force is directed downwards. nine0003
If this does not work, try wiping the glass with warm soapy water. Although simple, this method is very effective for removing hairspray, glue, and other adhesives. Keep in mind that this method is only recommended if the 3D printer allows you to remove the platform. Spilled water can seriously damage the heating element, power supply or other electronics of the device.
Dirt can also be removed with specialized cleaning agents. For example, wet alcohol wipes, window cleaner, isopropyl alcohol will also effectively wash away adhesive residue and restore the glass surface.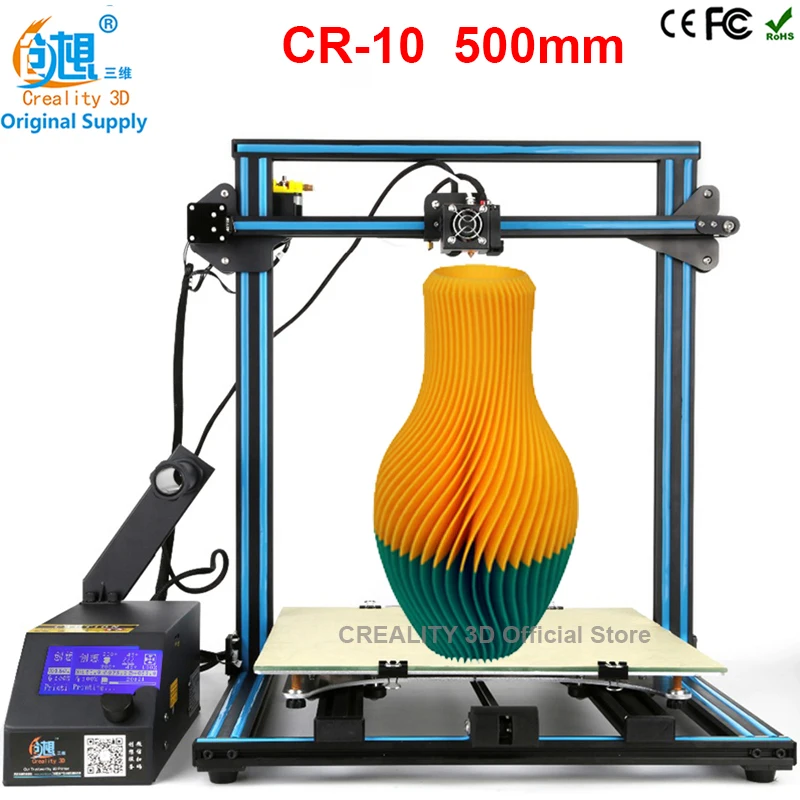 However, do not take too strong cleaners. Such substances can severely damage the surface or even the 3D printer. In order to be sure to select a cleaning agent for your particular 3D printer, it is best to contact its manufacturer. Most often, they willingly make contact with users and willingly give advice. nine0003
When to clean the glass surface
Again, this will depend on how often you use the printer. We recommend cleaning the surface after each print to prevent buildup of glue or varnish. Such a procedure will not take much time, but the print will be more stable, and the resulting prints will have a beautiful and even surface. Once the models stop sticking (usually after a month), try washing the surface with soap and water. After about two to four months, you will have to resort to isopropyl alcohol or other specialty drugs. substances. nine0003
Cleaning adhesive tapes
Adhesive tape is another proven way to increase adhesion to the print platform.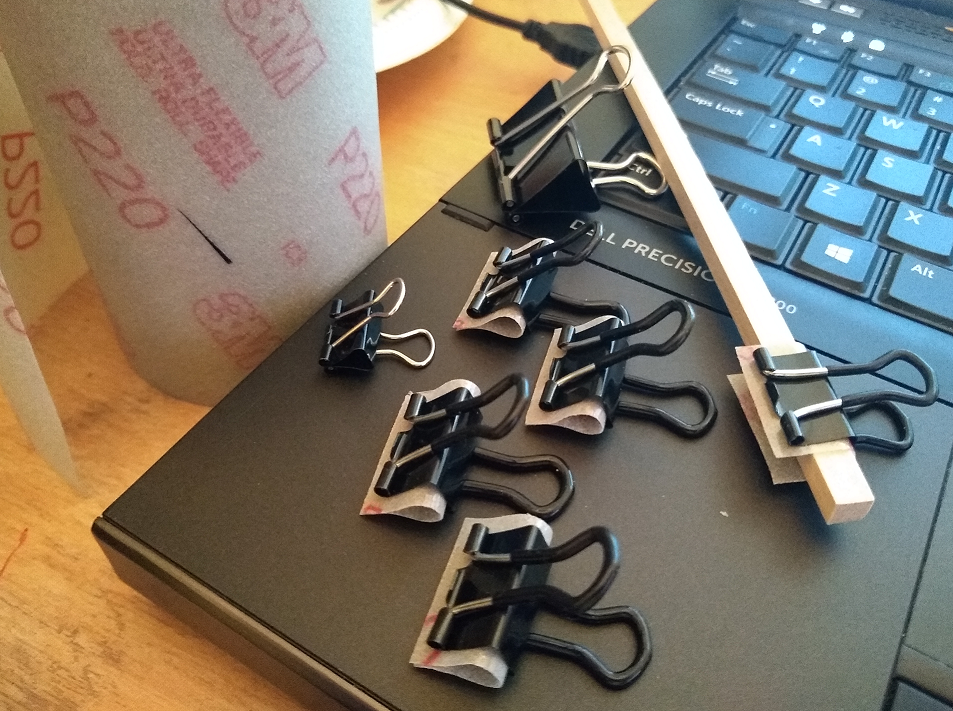 Today, this method is more common on 3D printers without the function of heating the desktop. Masking tape is the most common remedy, but so are Kapton and others.
One of the reasons for the popularity of such linens is their ease of use and relatively inexpensive cost. They are easy to stick to the surface and are available at almost any hardware store. However, there are also disadvantages: the tape quite often peels off when the printed model is removed, so it must be reapplied regularly. nine0003
How to clean?
Unfortunately masking tape is one of the most difficult to clean due to its fragility. however, we have found that gentle scraping is one of the most effective ways to clean it. With light pressure, evenly scrape off the remaining plastic thread from the surface, being careful not to tear it.
If the tape does break during cleaning, replace this area with a new strip. The main thing is not to overdo it and do not apply a thick layer, this can adversely affect the quality of the print. If the tape is full of holes and looks like Swiss cheese, then it needs to be completely replaced. Strip and scrape the old tape from the surface. Then wash the platform with warm soapy water to remove adhesive residue. nine0003
Once the old tape has been removed and the surface has been thoroughly washed, apply a new layer of masking tape or Kapton. Squeeze out any air bubbles if necessary.
When should I clean?
Masking tape wears out quickly and needs to be replaced much more frequently than PEi for example. We recommend lightly scraping off any plastic that has stuck to it after each print. Depending on the frequency of printing, you will need to change such a surface daily, weekly or once a month. nine0003
How to clean the 3D printer tray?・Cults
The plate is one of the most important parts of a 3D printer. For optimal printer performance, it must be properly cleaned after each print session. Traces of the thread are deposited on it over time.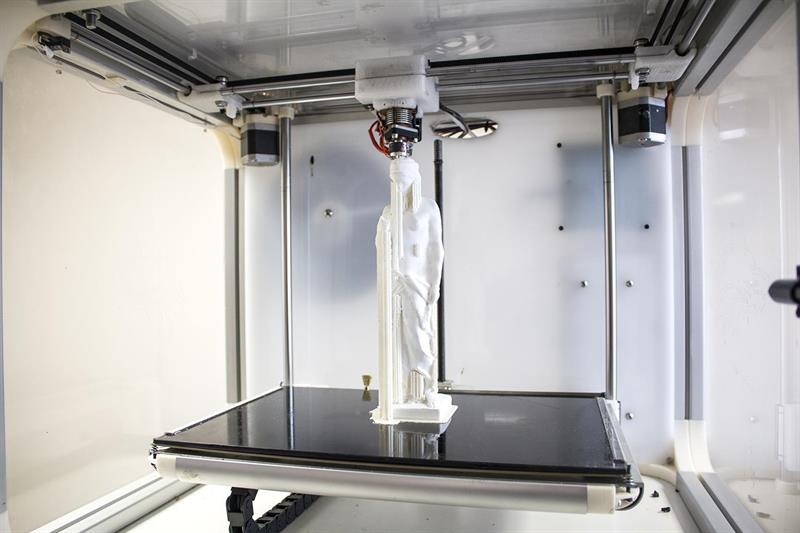 While cleaning a 3D printer plate is not a difficult task, it can quickly become one if you don't have an effective method or the right cleaner. How to clean this important part of the 3D printer? We invite you to identify the most effective methods. nine0003
Do you have a 3D printer? So how do I properly maintain my 3D printer is probably a question you often ask yourself, the first element of which lies, in fact, in the quality of the material you are using. As far as the print plate is concerned, when using the correct cleaning tools, the various parts of your 3D printer will have good adhesion of .
To clean the plate of your 3D printer, you will need the following tools: sandpaper, scraper, sponge, paper, cotton or microfiber towels and cleaners such as acetone or propanone, isopropyl alcohol (IPA) with a minimum concentration of 70%, soap for dishes... Ideal for effective cleaning of your 3D printer .
Cleaning your 3D printer's plate depends mainly on the plate material, as well as the product used for printing. Most often the plate is made of glass, polyesterimide (EPI) or is covered with adhesive tape . The printing plate of the printer can also be made of plastic, garolite, ceramics, granite, aluminum, but this is much less common. When cleaning the 3D printer plate, you must also consider the use of surface treatments that promote adhesion of parts to the plate. nine0003
Cleaning the 3D printer glass plate
Glass is a common material used for 3D printing. It has a much longer lifespan than PEI. In addition, the glass plate makes it easier to use the adhesive and varnish in the 3D printing process. This is because its surface does not react with any material. It is also relatively easy to clean. The 3D printer's glass printing plate is commonly used with adhesives such as glue stick and hair sprays. They increase the adhesion of the surface for the first print layer, which is necessary to ensure the stability of the rest of the model. nine0003
The glass plate can be heated to remove material residue. Heat makes it easier to scrape off these materials. However, care must be taken when scraping, as the glass is easily scratched by sharp objects. It is best to use aligned items such as a metal spatula or plastic ruler. If you choose to use metal, we recommend applying only as much pressure as is necessary to avoid scratching the glass plate. A metal scraper or spatula is also very useful for cleaning the print tray if you are using ABS, PLA, or nylon filament. nine0003
Alternatively, you can use the scraper blade to clean the glass plate of your 3D printer. This tool is very sharp. To do this, press down with one hand while holding the edge of the print tray with the other. This will allow you to effectively remove the remaining material from the 3D printer's print tray. Then make sure you clean the part of the plate that is in contact with your hands. It very often leaves residues of oil and dirt.
Plate cleaning PEI
PEI sheets are also used as printing plates for 3D printers. Their resistance to wear under extreme temperatures and radiation levels is well rated. Regular maintenance of the PEI printing plate allows the to maintain its quality. Over time, the adhesion of PEI sheets weakens under the influence of temperature, printing radiation or inks. Traces of dirt, oil, glue, etc. eventually settle on the surface of your 3D printer's PEI plate. However, physical cleaning procedures such as scraping and scraping are not the most effective and may even damage the print plate. nine0003
The best solution for cleaning the EPI Print Tray is to use a cleaner such as 70% strength unflavored IPA . In the case of a plate surface that is more exposed to dirt and oil, purer IPA can be used. However, before you start cleaning, wait for your 3D printer's PEI plate to cool down. For your protection, make sure you use this cleaner in a well ventilated area. nine0003
You can also use acetone to remove ink and plastic residue stuck to your 3D printer's PEI plate. This cleaner should not be poured directly onto the plate. Although PEI does not dissolve in acetone, acetone can damage PEI if you pour a large amount of it onto a plate. To do this, it is recommended to pour acetone on the fabric, and then wipe the print tray in a circular motion.
Ribbon plate cleaning
Adhesive tape is an inexpensive and easily replaceable product. Therefore, it is widely used by people who are just starting to master 3D printing. Ribbon is mainly used with non-heated printing plates due to its thermal sensitivity. To effectively clean the remaining filament from the 3D printer's print plate, scrape it off with a metal spatula. Sometimes the printed form stops being even. In this case, it is too worn out and it is better to replace it.