3D printer first print
How to Make Your First 3D Print: From STL to Printed Model
(Image credit: Tom's Hardware)Preparing your first 3D model for 3D printing can be a daunting experience. Fortunately, you don’t need to design your own model as there are thousands of great designs available for free as STL files on sites such as Thingiverse. However, once you’ve chosen a model that you want to print, you still need to follow a few steps to turn that STL file in physical print.
Below, we’ll show you how to print a typical STL file on a typical FDM printer, though no matter what device you use, the basic steps should be similar. If you’re never 3D printed before, this is a great way to get started.
Here’s what you need to 3D Print
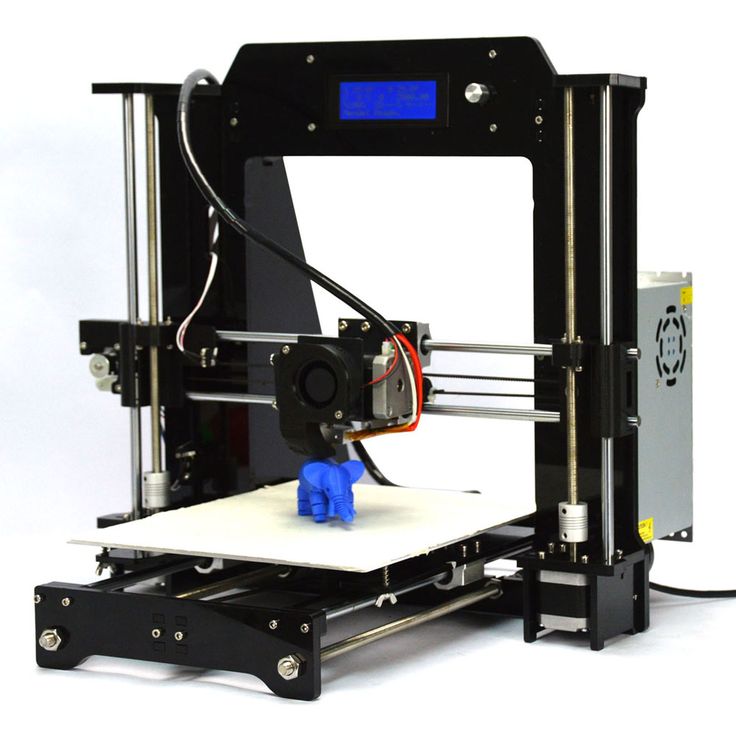
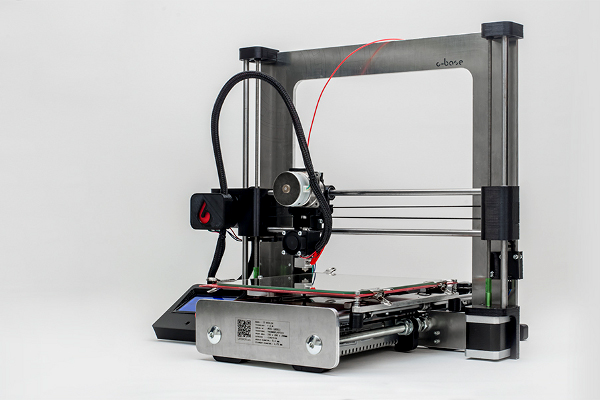
- 3D Printer: We’re using the Creality Ender 3 Pro, a solid entry-level 3D printer. However, other filament-based (aka FDM) printers should work similarly. If you need to choose, see our list of best 3D printers.
- Filament: PLA is one of the most commonly used materials on the Ender 3, and in this article we’ll be using Begonova branded material.
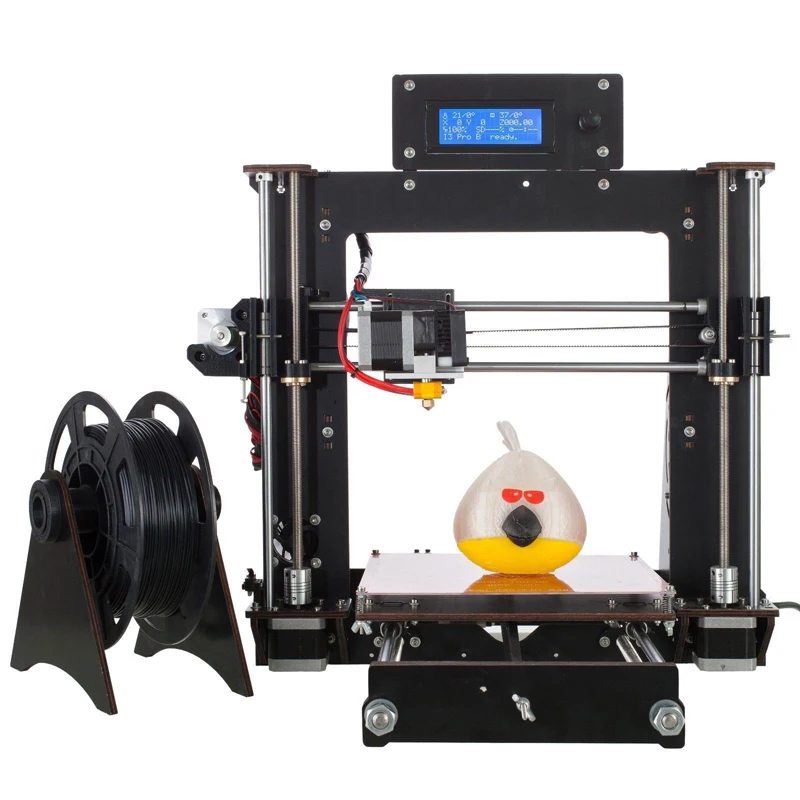
- 3D Model: The 3D Benchy is an ideal first print for your 3D printer; it offers a calibration test and is a fun model in a single print. However you can also download STL files from sites such as Thingiverse.
- Slicing Software: In order to print your model, you’ll need to convert it from a solid 3D model to a series of slices that can be printed using an app called a slicer. We’ll be using Creality Slicer for this article, but most slicing apps offer similar features and the basic principles are the same.
- microSD Card: The Ender 3 Pro includes an 8GB microSD card for transferring files, but some printers include a USB drive. Most sliced gcode files will be between 5MB and 15MB, so anything over 1GB should work fine.
Getting Started
Before we get started, you’ll need to download both your 3D model as well as the slicer software for your 3D printer.
- Download the 3D Benchy model from Thingiverse, an online repository of 3D models that doesn’t require an account to download files.
- Download the slicer software for your 3D printer. We’ll be using Creality Slicer for the Creality Ender 3 Pro, but other common slicers include Cura, PrusaSlicer, and Simplify3D.
Picking a Model to 3D Print
(Image credit: Thingiverse.com)The 3D Benchy model by CreativeTools is a great first print that will help you dial in the settings on your 3D printer and also leave you with a fun tugboat model to show off! The Benchy model typically prints in about an hour and a half, and many of the features and details of the model can be used to identify and diagnose any mechanical issues on your printer such as loose belts, inadequate part cooling, and Z-offset calibration. However, these instructions should work for other STL files you find on Thingiverse, including Plunderbuss Pete, Aquaticus the Water Dragon and Adalinda the Singing Serpent, all of which are great models for your first 3D print.
(Image credit: Creality)Creality Slicer accepts 3D models that use the . STL file extension, a common extension used for 3D models. Once you’ve downloaded the model, import it into Creality Slicer by opening the app and clicking File, Load Model File, and selecting the 3D Benchy model from the folder where you downloaded it. This will load the 3D model into Creality Slicer so it can be prepared for 3D printing.
Preparing the Model for 3D Printing
Once the model has been imported into the slicer app, we can convert the .STL file into a 3D printable file. A 3D printable file contains all of the instructions needed to turn the .STL 3D model into a printed part by controlling the XYZ motors, extruder, and heating systems of the printer.
(Image credit: Creality)Creality Slicer offers two modes for slicing .STL files: Quickprint and Full. Quickprint allows you to choose a material, profile, platform adhesion aid and also toggle support material on and off. While the Full mode offers more granular control over the print settings, we’re going to use Quickprint for this article so we can cover all the basics. Here’s what to choose on the menu:
- Material: This is the material being used for the print. Since we’re using PLA, we’ll select ‘Common PLA’ here.
- Profile: Selecting a profile automatically adjusts all of the settings used in making a print including layer height, print speed, travel speed, etc. While these settings are all individually adjustable in the Full mode, selecting a premade profile will get you printing quickly without much adjusting required. We’re going to use ‘Normal (0.15,mm)’, which strikes a good compromise between speed and quality.
- Other: The only option here is to toggle support material on and off. Because the 3D Benchy doesn’t require support material, we can leave this box unchecked.
- Platform Adhesion: Creality Slicer can automatically generate a brim or raft to aid adhesion when using high-temperature materials that tend to warp or curl during printing. Since we’re using PLA, we won’t need to select either of these options and can leave this drop-down menu set to ‘None’.
Toggling ‘Full’ mode on will reveal more adjustable parameters. By selecting the ‘Normal’ Quickprint setting, these settings will all be populated accordingly. While we’re not going to be adjusting any of these settings, it’s worth taking a minute to better understand what they all do.
(Image credit: Creality)The default values in the above picture are a great place to start, but you can always adjust them in your slicer software if you want to make changes. Some of the terminology may change slightly in different slicer apps, but these settings are generally the same across most common apps.
Quality
- Layer Height: Thicker layers will print more quickly, but they won’t capture as much detail as thinner layers.
- Shell Thickness: Printing a model with a thicker shell will create additional contours on the outside of the model, which can look better on sloping surfaces but will take longer to print.
- Enable Retraction: By enabling retraction, the printer will pull the filament back into the nozzle when moving, preventing stringing or blobbing between travel moves. Too much retraction and the filament may be damaged by the drive gear, too little and the material may ooze during printing. Dialing in retraction can be a time-consuming process, and it may not be needed depending on the type of 3D printer you’re using.
Fill
- Bottom/Top Thickness: Adding additional layers to the top and bottom of the print can help to hide the internal fill pattern, but will also take longer to print.
- Fill Density: Also known as infill, this setting controls the amount of material printed inside the model. Adding infill can make a part stronger, but will take longer to print. The default setting of 15% is a good starting value if you’re looking to experiment.
Speed and Temperature
- Print Speed (mm/s): Increasing your print speed will lead to faster prints, but the overall quality of the model can suffer if this is increased too much.
- Printing Temperature: Most PLA material will extrude at 200C, but sometimes you may want to increase or decrease this value for best results. Too hot and the heat will creep up the filament and cause it to soften and deform, too cold and the material won’t have time to get up to temperature and extrude through the nozzle.
- Bed Temperature: When using a heated bed, enabling this setting will help the material stick to the bed without curling or warping during printing. Similar to the case with the nozzle temperature, setting this too low won’t provide any specific benefit but setting it too high may cause the filament to soften and deform on the lower layers.
Support
- Support Type: The three settings in this dropdown menu are None, Touching Build Plate, and Everywhere. None will print a model without generating any support material, Touching Build Plate will only generate support material that originates on the build plate (for instance, an upright letter T would be supported fully, but an upright letter E would not), and Everywhere will create support material everywhere on the print.
- Platform Adhesion Type: Selecting None will print the model flat on the build plate, Brim will add a few toolpaths of material around the base of the model to help keep it from curling, and Raft will add several layers of material under the model to compensate for an uneven platform.
Filament
- Diameter: PLA filament is typically sold with a 1.75mm diameter, so this setting shouldn’t be changed unless you are using non-standard material.
- Flow: This setting adjusts how much material is fed through the extruder, and typically shouldn’t be changed unless your printer hasn’t been calibrated correctly.
Machine
- Nozzle Size: The Creality Ender 3 Pro (and most desktop 3D printers) ship with a .4mm nozzle, so this setting shouldn’t be changed unless you have swapped out the nozzle for a smaller or larger one.
Checking the Toolpath for 3D Printing
You can see the difference in the three Quickprint profiles in the above pictures (Fast, Normal, and High Quality). A quick way to spot the difference is by looking at the roof of the Benchy, where the number of layers increases with each jump in quality. Thinner layers will capture more detail but the overall print time will increase as well. The Normal setting strikes a compromise between speed and quality, so that’s the setting we’ll choose.
After you’ve chosen the settings for your model, the slicer software will generate a toolpath (instructions for the printer’s movement system) for your model. We can see this toolpath by selecting ‘Toolpath’ in the dropdown menu under the ‘View Mode’ button at the top right. This is a good time to check the file before printing, and make sure there are no areas that might cause problems later. Scrolling through the layers we can see the infill and outer shell, and determine that this model is ready for printing.
Preparing the 3D Printer
Once the model has been sliced and is ready for export, it’s time to make sure the printer is ready to print. There are two major components to this process: loading the PLA filament into the extruder and calibrating the build platform. Loading the filament gives the printer material to complete the print, and calibrating the build platform ensures that the nozzle is perpendicular to the build plate at all points and compensates for any warp or bowing present.
The steps here are for the Creality Ender 3 Pro, but any 3D printer with a Bowden extruder (remote drive) will use a similar process for loading filament and calibrating the build platform.
(Image credit: Tom's Hardware)Loading the PLA filament
- Turn on your 3D printer.
- Select Preheat PLA on the printer menu to bring the nozzle up to the correct temperature.
- Place the spool of PLA material on the spool holder, taking care not to let the material get tangled on itself.
- Insert the filament into the extruder by pushing on the spring-loaded lever and push the filament until you see it coming out of the nozzle.

Image 1 of 2
(Image credit: Tom's Hardware)(Image credit: Tom's Hardware)Calibrating the Build Platform
- Select Auto Home on the menu screen to automatically bring the printer to 0 on the X, Y, and Z axes.
- Once the printer has run the homing routine, select Disable Steppers to allow the gantry to be moved by hand.
- Slide a standard piece of printer paper between the nozzle of the printer and the build platform.
- Bring the print head to the front right corner of the build platform and adjust the thumbscrew until you feel a slight resistance when moving the piece of paper between the nozzle and the build plate.
- Repeat Step 4 for the front left, back left, and back right corners.
- Once you feel a slight resistance across the build platform, remove the piece of paper and visually verify the small gap between the nozzle and the build platform at all points on the build plate.
Printing the 3D Model
Once the model has been sliced and the 3D printer has been prepared, the next step is export the sliced model as a .gcode file. The Creality Ender 3 Pro uses a microSD card for transferring .gcode files from your computer to the printer, and Creality Slicer will export the file directly to the card. This prepared file was 5.8MB, which fits easily on the 8GB microSD card which came with the Ender 3 Pro.
(Image credit: Tom's Hardware)After calibrating the build platform and making sure the filament is properly loaded, we can insert the microSD card and get the print started. The Benchy print takes about one hour and 45 minutes to print using the Normal profile, and you should be left with a fun-looking boat that doubles as a calibration test. Once printed, you can remove the Benchy by removing the flexible build plate from the Ender 3 Pro and bending it, which will allow the printed model to pop right off.
Some things to look for on your first print are curled edges on the base of the print (which could indicate a problem with print temperature or speed), a rough looking outer surface (which could indicate a too-thin shell), or stringing between the cabin walls (which could indicate an issue with temperature or retraction). Half the fun of owning a 3D printer is making adjustments and dialing in your print quality, so now you’re well on your way to converting .STL 3D models to 3D prints.
Andrew Sink first used a 3D printer in 2012, and has been enthusiastically involved in the 3D printing industry ever since. Having printed everything from a scan of his own brain to a peanut butter and jelly sandwich, he continues to dive ever more deeply into the endless applications of additive technology. He is always working on new experiments, designs, and reviews and sharing his results on Tom's Hardware, YouTube, and more.
Topics
3D Printing
How to Succeed with Your First 3D Print
If your obsession with 3D printing is just beginning, check out these easy steps to a successful first print.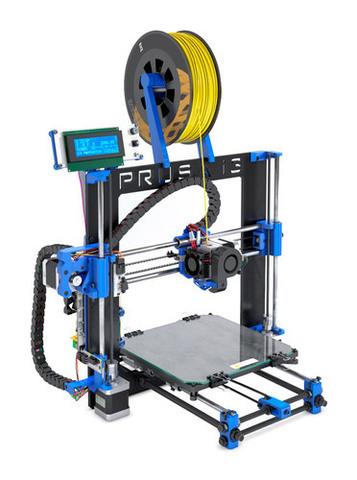 Seasoned vet? Never hurts to brush up!
Alec Richter
July 10, 2017
You did it! You've seen your friend's 3D printer or really liked the 3D printer you saw at work or school, so you bought your own... now what? You're in luck thanks to this handy guide to walk you through the steps of setting up your printer, the basics of using it, what to do with your prints, or where to even get models in the first place!
Creating a Model for 3D Printing
There are many 3D modeling programs that exist for 3D printing; some have a steep learning curve, and others are so easy that elementary schools regularly use it. Depending on your prior experience with 3D modeling, here are some options:
Introductory 3D Modeling Programs
These are the programs to use if you've never done any 3D modeling before:
- Sketchup: Free and easy to use, but the 3D models it creates usually needs repairs to become 3D printable.
- Tinkercad: Free, easy to use (designed with children in mind), limited to combining basic shapes like boxes, spheres, and cones.
 You can learn more about how to use Tinkercad here.
Example of TinkerCAD's interface
Intermediate 3D Modeling Programs
These are used for a multitude of applications, from mechanical fixtures to organic movie props, these are versatile programs:
- Fusion 360: Used to model very geometric parts like engine blocks, fixtures, mounts, or even 3D printer parts. It can also be used for organic models, like helmets and other props. It's free for startups [with a revenue less than $100,000 per year], hobbyists, and enthusiasts, but you'll need a subscription license otherwise.
- Meshmixer: A free, virtual clay modeling program, similar to Zbrush.
- Onshape: Like Fusion360, but most similar to Solidworks. It's free, but all files are public unless you pay for a subscription to enable private file hosting.
- Blender: With a steep learning curve, this mesh modeling program is most commonly used for modeling for video games or rendering.
 There are many tutorials, and it is free. Learn more about Blender here.
Example of Blender's interface
Advanced 3D Modeling Programs
These programs are perfect for people with extensive knowledge of 3D modeling, or for those feeling bold and are ready to fully commit to the art of 3D design.
- Solidworks: For geometric modeling, this is the top of the line product; it's feature rich, easy to use, and has it's own "Knowledge Base" to find the answers to all your Solidworks questions. It's $4,000 to $8,000 with a yearly renewal fee.
- 3DS Max: For mesh modeling, this is the best of the best - used across many industries, thus it comes at a steep price - $185/month or a $3,675 one-time fee.
- Zbrush: For sculpt-modeling, this is in the top-tier. Essentially, it's digital clay sculpting - every model starts as a ball, and details are made by pulling material out from it, pushing in, or carving away.
 Some of the most complex movie props and costumes are designed in this and is also commonly found in game development. Fairly affordable at a $795 one-time purchase.
Example of SolidWork's interface
3D Model Repair and Modification Tools
- Netfabb: This free, robust software is most useful in cutting models too large to fit on your print bed, simply drag the "slice plane" and decide where you want your cuts, then export each separated chunk into its own 3D model file. It has many other features to repair or modify the model to improve the 3D printing process.
- Meshlab: Another free repair tool that is great for bringing down the polygon count of a model. Some models are so massive that most slicing software can't handle it, even on a powerful computer.
If you're still not sure which 3D modeling software will be best for you, check out a more in-depth article here.
NetFabb will detect and enable you to repair broken STLs
Downloading a 3D Model for 3D Printing
Maybe you aren't quite ready to model yet, and that's okay! There are many different websites called "file repositories" that exist just to collect 3D models specifically for 3D printing.
- MatterHackers Design Store: We host a variety of 3D models, some for functional purposes, others purely for fun. You can check it out here.
- Thingiverse: The big one. Thingiverse has a massive collection of models. However, there's no restriction to the models uploaded in terms of printability. So, unless you see someone else has printed it, your mileage may vary. In general, most models are printable.
- MyMiniFactory: Each model has to have an attached image of a successfully printed model, so every model will actually work.
- Yeggi3d: This searches a variety of other file repositories, but doesn't always work as well as searching each site individually.
- Cults3D: Another file repository to browse through.
- Pinshape: Regularly runs contests for models relating to disability assistance. Some models are not free and for sale.
- CGTrader: Mostly paid for only models, but highly detailed and generally professionally modeled.

The MatterHackers Digital Design Store - find awesome files to print!
Tools of the Trade
We have a super handy article on the various tools you will need to start 3D printing. If you don't feel comfortable getting all those tools at the start and want to build up your toolbox, at least make sure you have a PVA (not PHP) glue stick, Aqua Net hairspray (brand is specific), a spatula to remove your prints, blue painter's tape, and a pair of pliers to clean off support.
Download Slicing Software
Slicing is the term used for the process that takes your 3D design (most likely an .stl file) and transcribes it into the "language" that the printer can understand (gcode). Slicing basically takes your 3D digital model and turns it into a ton of really tiny layers. There are many slicing softwares that exist, some paid for, others free, but MatterHackers has an awesome slicer called MatterControl. MatterControl has printer profiles, so you can find your make and model and automatically have all the necessary settings filled in. Plus, you can store all of your .stl files in the cloud, and even share them with your friends. Oh, did we mention that it is completely free to download?
Example of MatterControl's user-friendly interface.
Optimizing Your Settings
In MatterControl, there are many settings you can change, from how fast you print, to how hot your printer is, and everything in between. To start off, you won't need to change many settings, in fact, "Basic" settings are all you will need as you first learn how to 3D print. These are the settings you will first see:
Material:
- This setting dictates how hot your printer's nozzle and bed are depending on the material. PLA 3D filament, a beginner material, prints with the nozzle at 200°C and the bed at 60°C (if the printer has a heated bed), whereas ABS 3D filament, a more advanced material, prints with a 240°C nozzle and up to 110°C for the heated bed. Making sure your printer is at the right temperature is imperative for a successful print, and changing your material selection is an easy setting to change.

Layer Height:
- This is where you can get ultra-fine resolution in your prints, or really quick and dirty, first draft prints. The lower this number, the finer each layer of plastic that laid down will be. In general, we bottom out at 0.10mm with a 0.40mm nozzle; any lower and it's hard to even notice a difference for a dramatic increase in print time. If you just need to see how a part feels in your hands or how it fits as a model representation, 0.30mm layer height is great; it's a lot quicker at this height and detail are less pronounced, but if you just need to test how your model works then it is an ideal setting.
- Depending on your printer's hot end, you may be able to change your nozzle to something with a larger or smaller diameter hole. For any nozzle, you should never print at a layer height greater than 75% of the nozzle's diameter; e.g. a 0.40mm nozzle maxes out at 0.3mm layers, but a 0.80mm nozzle can go up to 0.60mm layers.
- The reason for this is that layers greater than 75% struggle to get the proper adhesion per layer.

- The reason for this is that layers greater than 75% struggle to get the proper adhesion per layer.
Fill Density:
- Fill Density determines how solid or hollow your part is. 0% infill makes your part completely hollow, conversely, 100% makes your part completely solid. Any percentage in between will have MatterControl automatically generate a pattern inside to fill in and provide strength.
- For purely cosmetic prints, I use 10% infill, but anywhere from 0% to 15% could work well.
- For prints that need to be strong but not rock solid, I like 25%. "Standard" in MatterControl is 30%, so anywhere around there is good. Props and things that are handled are well suited for this infill setting
- For fixtures and printer parts, 50% to 80% should be used. This provides parts with enough rigidity but just enough flexibility to not break as easily under pressure.
Create Raft:
- Rafts are designed to provide better adhesion to the bed. Although it is most commonly used for ABS filament, it can be generated for any material.
 A raft is exactly what it sounds like; several sacrificial layers to provide the model a large amount of surface area to adhere to the bed.
 - It used to be more commonly used, but with advancements in slicing engines, they are almost obsolete except for extreme circumstances, like a model where barely any of it touches the build plate and the majority of the first layer is support material. Brims are the new standard.
Generate Support Material:
- Turns on or off scaffolding to support your 3D print. The most important thing to check before printing is whether your model has what's called "overhangs." These are sections of the model that are at an angle greater than 45 degrees from the bed. Generating support material for models like this is essential for success.
- For example, a cube has no overhangs, but an upside down "L" has a large overhang that needs support printed under it, otherwise, it will droop and print very poorly, if at all. In essence, each layer is stacked on top of the previous, and if it's too far over the edge of the last it'll fall over the edge.

These are the "Basic" settings that are available in MatterControl. Start with this and work your way up to "Standard" when you're ready.
Generating Gcode
Gcode is the code language that most 3D printers run on. It's what tells them where to move, how fast to move there, and how hot to be. There are some 3D printers that run on different languages (some printers are proprietary, others just uncommon), but in general, Gcode is what your printer will understand.
To generate the Gcode you need, you have two options: you can "Export" in the bottom right when you're in the "3D View," or you can go to "Layer View" and click "Generate." "Generate" will completely slice your model, but it will only save it in the backend of MatterControl, which is helpful if you aren't quite sure if the settings for your print aren't right yet and don't want to fill up your SD card. "Export" will slice your model and save it to a location of your choosing.
Once the Gcode has been generated, if you go to "Layer View" you can view what each layer will look like with either one layer at a time or in 3D and see the layer you are on and all the previous layers.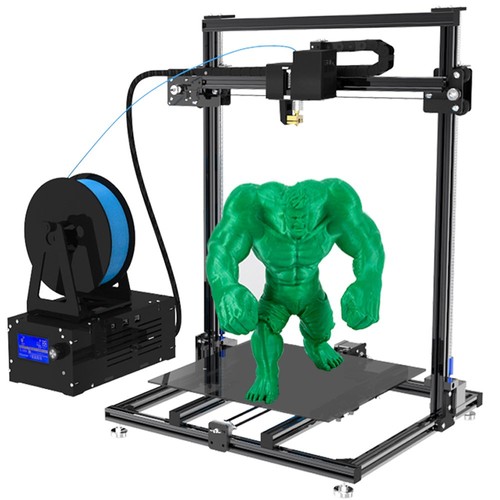
Starting Your Print
So, you have your Gcode, but before you get printing, let's first run through a "pre-flight checklist" to make sure you're good to go.
1. Make sure your bed is level. Depending on your printer there are many different ways to level your bed. Some use inductive sensors and probe the bed, some have a switch that taps around the bed, others need to be done manually. If it's a manually leveled printer, you have two options: turn the thumb screws under the bed to raise and lower each corner until the whole bed is level to the nozzle, or use MatterControl's bed leveling software to precisely align your bed, even if it's ridiculously skewed. If you want to try baby-stepping to level your bed, read our Feature Spotlight we have on the method. Follow the directions provided with your 3D printer.
Example of baby stepping
2. Add your bed adhesive (if necessary). Some materials need bed adhesives, others don't, and some need very specific adhesives as well. There are much too many filaments to go over all of them, but we have the Filament Comparison Guide which goes over all the best bed adhesion materials.
3. Load your filament. Some printers are bowden, which means the extruder motor is not on the print head, other printers are direct drive, which the extruder motor directly on the print head and moves with it. Each method loads slightly differently, so follow the instructions provided by the printer manufacturer. In either case, make sure the nozzle is hot when you change filament, and that the color coming out the nozzle is the same as the one you put in; make sure previous filament is properly purged.
4. Load your SD card or plug your printer into your computer. They each have their pros and cons; printing straight from your slicing software means you can baby-step your print if the bed wasn't as level as you'd like, but if your computer goes to sleep or restarts from an update, you will lose the print. With an SD card, you give up the fine tuning controls you'd get from MatterControl, but free up your computer.
When everything has been checked off, you're ready to get printing! Wait - here are some quick tips though, don't walk away just yet.
- Make sure the first layer is going down really well. If it's smearing, you're too close, if you can easily see where one line was laid down next to the other, you're too far. You have to find that "goldilocks spot."
- Watch the first couple layers. The first layer may be fine, but the subsequent layer may have issues. Stick around for a little while to make sure everything goes smoothly.
- Don't sit there for the whole print. Check up on it regularly, and be nearby, but you don't need to monitor it. At our experience level, once we've tested printers with short prints we can monitor while we are in the office, we will run weekend-long prints on them without worry. For now, even though it may be tempting, (and I've definitely been mesmerized by my printers) don't sit there and watch its every move, once it's started and going well, pat yourself on the back, grab a cold one (beer, soda, water, whatever), and kick back.
 Welcome to 3D printing.
We hope that this article has helped you succeed in getting a great first print. If you are still having some trouble, feel free to comment below or email [email protected].
World's first 3D printed fingerprint to improve fingerprint matching technology
Archive
Subscribe author
Subscribe
Don't want
20 years ago, law enforcement used fingerprints to identify criminals. Today they are used in a wide variety of civil and commercial areas of life.
2D synthetic fingerprint generators produce fingerprint patterns based on mathematical and statistical models. To improve a fingerprint scanning system, researchers must compare millions of images of known fingerprints. However, their actions are limited by the amount of data available. Also, 2D synthetic generators make mistakes when testing non-contact fingerprint recognition technologies, which are increasingly being used as an alternative to traditional touch screen fingerprint systems.
To solve this problem, a team of programmers at Michigan State University led by Enil Jain, a graduate of the Indian Institute of Technology (IIT) Kanpur, created the world's first 3D printed fingerprint.
The use of such 3D printed fingerprints could help sensor manufacturers and algorithm developers improve hardware and software for fingerprint matching systems, says Anil Jain. Ultimately, it can lead to security improvements.
Jain, Emeritus Professor of Computer Engineering, and his team have succeeded in developing a method for transferring a 2D fingerprint image onto a 3D surface.
A 3D printed print with all the bumps and dimples of a normal human fingerprint is printed on a 3D printer. Jane's team called him "the phantom".
Such phantoms are very common in the world of medical imaging. For example, to make sure that an MRI or CT machine is working correctly, you first need to take data from an object whose parameters and properties are well known. “You can 3D print a heart or a kidney,” Jane says. “Since the parameters are already known, they can be loaded into the scanner and the imaging system can be set up.”
In this case, the main goal is to obtain an accurate fingerprint model with known properties and patterns that can be used in customizing the existing technology that is used in fingerprint matching.
“When I see this 3D printed fingerprint phantom in front of me, I know its exact dimensions,” Jane explains. “And since I know its exact parameters, I can better set up the fingerprint reader.”
Although the 3D printed model does not yet have the exact texture or surface of a real finger, it may well advance the technology of reading and matching fingerprints.
“Tools like this will help improve the overall accuracy of fingerprint matching systems, which in turn will lead to improved security in everything from law enforcement to mobile phone unlocking,” says Jane. For example, iPhone 5s can be unlocked using Touch ID.
Jane holds six US patents for fingerprint matching. He also wrote a number of books on biometrics and person identification by face and fingerprints.
Article prepared for 3Dtoday.ru
four
Subscribe to the author
Subscribe
Don't want
One of the most promising and least developed areas of 3D printing is bioprinting. Whole a...
Read more
four
Subscribe to the author
Subscribe to the author
Don't want to
The progress of 3D printing in recent years has gained such a rapid pace that we will soon stop...
Read more
3
Subscribe to the author
Subscribe
Don't want
Recently, cloud-based 3D printing services have been developing. This concept allows the implementation of...
Read more
Fingerprints on a 3D printer are a reality
by 3DAdmin · 08/06/2016
Additive technologies are taking ten-mile steps forward - it is already possible to print food and various objects of any shape and size, to make prostheses and bones using a printer. Is it possible to print human fingerprints? If so, then any owner of a 3D printer can fake the papillary pattern of fingers and the number of crimes around the world will increase. After all, the use of fingerprints to access bank accounts is only a small area where a person can be identified by a unique papillary pattern.
University of Michigan professor Anil Jayne has spent most of his life working in the field of biometrics, developing fingerprint and iris recognition systems. As you know, they are unique for each person, like the DNA code. Professor Jane works closely with companies that develop biometric access systems, for example, together with ZKAccess, the scientist created patient identification technology for a children's hospital.
A. Jane was recently approached by the Michigan State Police with an unusual request. It was necessary to cooperate with the investigation - namely, to create a fingerprint of a dead person. It was necessary to make a prosthetic finger of a dead man in order to unlock a mobile phone that was only protected by the successful recognition of the fingerprint of the owner of the device. Investigators believed that the victim's unlocked mobile phone could help find the killer - after all, some photo or audio information could remain on the phone that could lead the police in the footsteps of the criminal. Police officers watched a video with the participation of Prof. Jaina, posted on YouTube, which showed how you can scan a person's fingerprints, and then use them to create fake artificial fingers and bypass the protection of mobile phone sensors.
State police officers gave Anil's team fingerprint scans of the victim's victim, which were taken long before the attack. As a result of this work, Prof. Jaina, along with her student Sunprith Arora, reproduced replicas of human fingers. First of all, they converted two-dimensional fingerprints into three-dimensional ones. This was done using a 3D printer - the fingers were printed using additive technology - layer by layer, while soft plastic was used as the material. It ensures that the smallest irregularities of the upper layer of the skin are preserved, which will ensure an almost perfect match of the artificial fingerprint with the original.
When the copy of the smartphone owner's finger was ready, the thinnest layers of silver, gold and copper were applied on top of its surface. This was required for the reproduction of electrical conductivity, similar to living human skin. Otherwise, if you do not apply layers of metal, but simply use a plastic copy of your finger, a phone protected by touch access cannot be unlocked. And the plastic material does not have the necessary electrical conductivity.