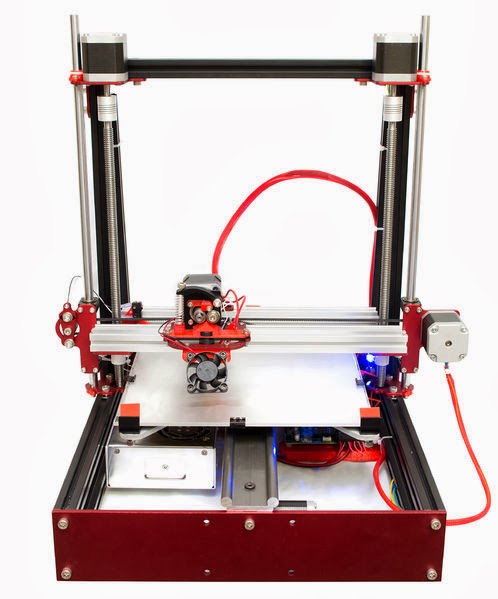
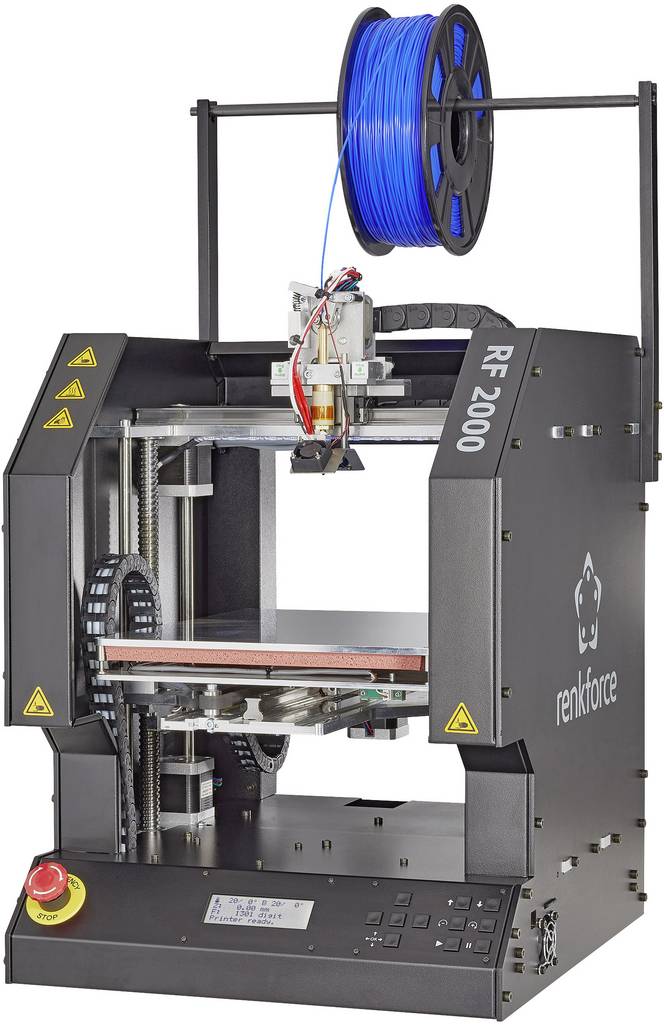
3D printer finishing kit
3D Printing & Assembly | Stratasys Direct
Additive manufacturing can make materials come to life in a single print. Fresh off the machine, a 3D printed part can look like a nearly finished product. Depending on your requirements, the natural surface finish of an additive manufactured part may or may not meet your needs. When cosmetics, specific surface roughness, or functional coatings are needed, Stratasys Direct Manufacturing’s expert finishing department rises to the occasion. With skilled professionals working to deliver your project goals, we offer a variety of options, including sealing, painting, dyeing, EMI/RFI shielding, and texturizing.
In the examples below, you’ll be able to see how technology, material and product life cycle stage all contribute to the various options we can provide to get your product to the finish line.
Finishes for Every Product Stage
EMD Millipore Corporation utilized our finishing services from prototype to production parts when manufacturing the Millipore Muse™ Cell Analyzer. Looking to use the functional Muse prototypes for market research and feedback before tooling and injection molding, we printed Stereolithography (SL) models that mimicked the look of the finished product.
The SL pieces were sanded to ensure an even surface and provide the desired surface smoothness for the application. After, they were primed and painted to match Millipore’s color and texture specifications. Finally, the models were assembled and decals were applied.
Once Millipore approved the finished SL prototype models, secondary SL parts were built as master patterns for urethane castings. We then applied a cast-in texture onto the master patterns per Millipore’s mold-tech specifications. Texturizing and detailing the master patterns expedites the process and enables a uniform look across multiple cast pieces. We took color specifications from Millipore and color matched the urethane parts and assembled the pieces.
Comfortable and Decorative Prototypes
Finishing can be utilized in the prototype stage for cosmetic presentation and functional testing.
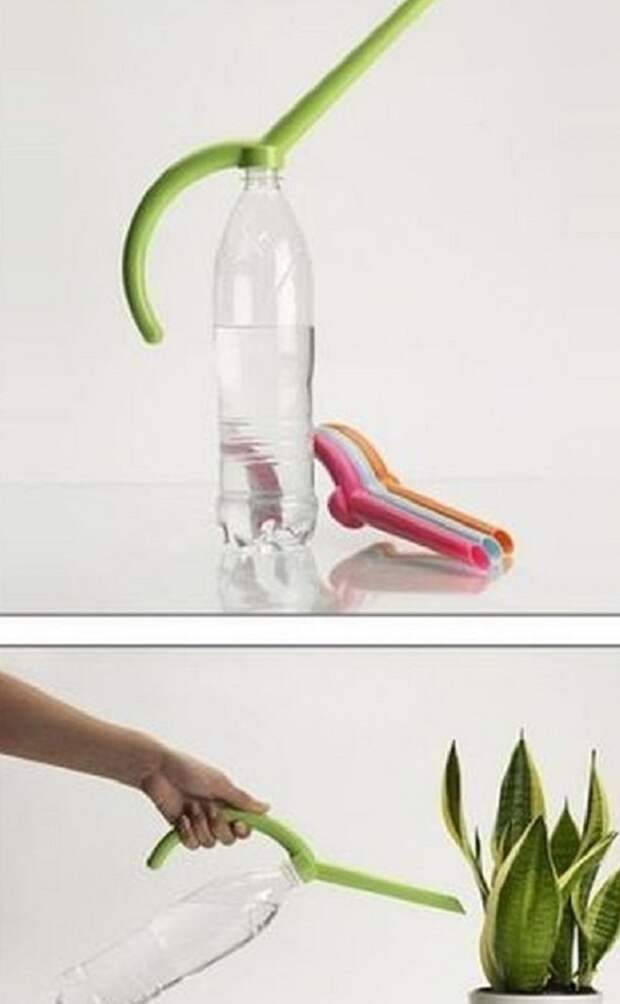
Pillar Product Design LLC designed an advanced hand tool for the urban gardener that provided maximum performance and ergonomic comfort. Stratasys Direct Manufacturing developed a prototype using Laser Sintering (LS) technology with Aluminum Filled Nylon 12 to emulate the billet forged Aluminum used in the final product. Hoping to present the prototype as close to the final product as possible at a low cost, Pillar requested the finishing department remove all traces of build lines on the product.
The part was smoothed by sanding and given a cosmetic clear top coat for a clean surface. Since the product was ultimately going to feature a soft touch TPU grip for easy handling, our finishing department also applied a rubberized soft touch black paint. The paint not only provides a more comfortable grip when testing the product, but gives the illusion of the final product’s feel and comfort. The rubberized black paint is a fast and cost-effective alternative to over molding or bonding a grip onto the part.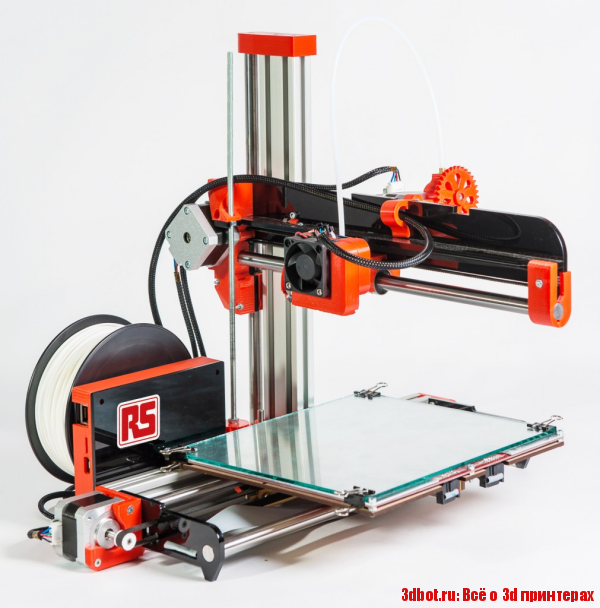
Assembling a Functional Form
Lockheed Martin Space Systems Company was seeking a more efficient satellite design, when they approached us to prepare form, fit and function simulators for the satellite’s fuel tanks. Although Lockheed Martin owns additive manufacturing machines, the size and post process requirements of the prototype posed a challenge.
We took on that challenge, proposing Fused Deposition Modeling (FDM) for the tank simulators and offering an array of functional finishing options available for the project. The prototype was built in 16 sections and hot air welded together. Hot air welding melts a filament of the same material to fill seams, allowing pieces to be brought together without adding foreign material. Because of the weight and rounded shape of the tank pieces, we built customized fixtures to hold the sections while welding the parts together.
After fusing, the surfaces and seams were sanded to provide a uniform surface finish. Additionally, we offered an integral fuel tank (IFT) coating which protects materials against corrosion from fuel contaminants.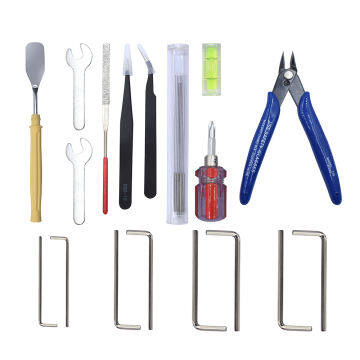
Applying Aesthetics and Smoothing Functionality
These examples highlight a few of the finishing options we offer to our customers. Other functional finishes include:
- Media blasting for a fast alternative to sanding that creates matte finishes
- Tumbling durable materials, such as metals and polycarbonate, in vibratory units with ceramic, plastic and synthetic media to smooth surfaces
- Bonding sections together with either two-part epoxy or cyanoacrylate
- Sealing products that need to be water-resistant or airtight
Additional cosmetic finishes include:
- Dyeing parts color matched to your specifications
- Vapor polishing FDM ABS and PC/ABS materials by melting the outer surface with a solvent
- Electroplating with EMI/RFI shielding, which can block electromagnetic and radio frequency interference
- Clear coating to add water resistance and desired sheen
Achieving Final Products with Additive Manufacturing
As you choose the materials and technology to manufacture your product, we can provide guidance on which finishing options can help you realize your product objectives. From providing aesthetically pleasing finishes to achieving necessary durability, our finishing services are at the ready to enhance your 3D printed part.
Interested in what finish is right for your project? Contact Us
Ultimate Guide to Finishing 3D Printed Parts
Time to read: 13 min
The purpose of this article is to detail the different finishing methods for FDM and PolyJet 3D printed parts and the techniques/tips that can elevate the look and feel of your prototypes.
A simple Apple Watch stand design will be utilized as a case study. This stand is a model with pockets and internal and external features that needs to be surface finished to a standard that complements the shiny exterior of an Apple Watch put on it.
Here’s a quick overview of the main points this article covers:
- PLA: If you’re working with a tight budget then PLA is going to be your best material choice; the results aren’t as polished but the price is cheapest.

- ABS: If your budget is moderate then go with ABS. It’s not as cheap as PLA but still at a low price point and the material is more reliable than PLA.
- VeroBlack or VeroWhite: For the highest quality parts go with VeroBlack/VeroWhite. This will give you the best dimensional accuracy and best overall polished look.
The 3d printing post-processing needed for the watch stand parts involves a combination of repairing and preparing the print for post-processing, sanding, and painting.
The finished sample 3D printed parts with all three materials should be smooth, matte black surfaces. Inherent to the 3D printing process, with every print are unique challenges and considerations to arrive at the best finish possible. Although there are ways to mitigate the challenges, experience in 3D printing goes a long way.
The print settings process for each material is detailed separately and a summation of the results may be found in the conclusion of this article.
ABS (Printed on a Dimension Elite)
The Dimension Elite prints are smooth, clean, and ready to sand out of the NaOH bath.
There are, however, clear stepping lines between the printed layers. If we don’t remove these stepping lines, they’ll show up in the final paint coat which will ruin our smooth finish. Thankfully, removing these will be easy thanks to ABS’s high melting point and easy sandability.
Materials Needed
The materials we’ll be using:
- Sandpaper (grits 100 to 600)
- Medium, fine, and extra-fine sanding sponges
- XTC-3D brush-on coating (As an alternative, Bondo putty is a common solution to fill holes in parts. We chose XTC-3D for its viscosity, sandability, and ability to penetrate small perforations, which makes it desirable over Bondo putty)
- Razor blade
- Foam brush, mixing cups and popsicle sticks
- Sandable Krylon Primer
- Montana Acrylic Primer in Shock Black
- Matte Acrylic Varnish
Sanding
Sanding the ABS print is simple and straightforward. First start with 100 – 200 grit sandpaper to remove stepping lines and then gradually increase up to 600 grit to achieve a smooth finish without sanding lines.
Pro Tip: Sand in small circular movements evenly across the surface of the part. Avoid sanding in one direction only, especially in the direction of the stepping lines to prevent striations or “trenches” in the print.
Beware that ABS is very easy to sand, so be careful not to overdo it. Removing as little as .010” can be enough to completely remove any stepping layers and oversanding can compromise critical dimensions.
After sanding the parts, some holes are revealed on our part left by an incomplete layer around the letters DIM. These holes can perforate through the finished paint coat to create ugly sinkholes, so we need to find a solution.
As you can see in the Catalyst tray to the right, there are large holes between the DIM and the edge of the part. Moving the DIM up in our Solidworks model would solve this, but for now we’ll have to find a way to fill these holes with a sandable filler.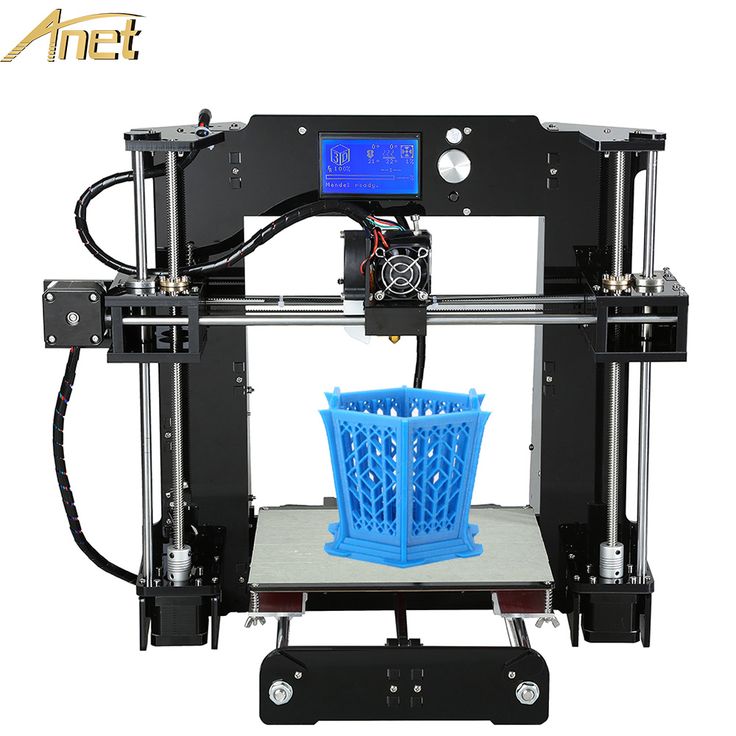
We’re going to use a thin, sandable epoxy called XTC-3D to fill the tiny holes and crevices in our print. XTC-3D is cheap (a 24 oz bottle costs about $25), quick, thin, and effective. Note that a small amount goes a long way (within the 10 minute pot life).
Pro Tip: Be sure to maintain a weight ratio of 100 Part A to 42 Part B. Mix thoroughly for one minute and coat your part within the 10 minute pot life. For more details, check Smooth-On’s technical bulletin here, and a great instructional example here.
Before applying the XTC-3D, wash the part with soap and dry with compressed air to ensure your part is thoroughly clean and free of any oils or sanding dust. Also make sure to wear gloves so as not to get any hand oils or sweat on your part.
Fill in holes or gaps in your print with a very thin (1/64”) coat; a thin layer of XTC-3D will level itself out. We used a razor blade to scrape excess XTC-3D into the unwanted holes and gaps, making sure to avoid any areas we didn’t want filled (like the letters DIM).
Allow the XTC-3D sufficient time to become tack-free dry (approximately 2 hours). Now we’re ready to continue sanding away at the excess XTC-3D layer with 300 to 600 grit to reveal the repaired surface.
Then, after another thorough wash, we’re ready to begin preparing our repaired surfaces for painting.
Priming and Painting
Painting 3D printed parts is a vast world of acrylics, enamels, sprays, and airbrushes.
In this example, we’ll be using Montana spray can paints to follow a relatively straight forward process: prime, dry, paint, dry, varnish, dry.
Standard spray painting principles apply:
- First make sure your surface is oil-free, dust-free and hole-free
- Shake your cans for at least two minutes prior to painting
- Ensure your cap is clean to prevent drips
- Be aware of how the paint is accumulating on the part and look for any pooling or dripping
- Paint in many light coats rather than fewer heavy coats; this is especially important for 3D printed parts with internal and obscured geometries
- Paint in controlled, well-ventilated and well-lit areas
The Dimension prints started with very obvious stepping between layers. If you’ve sanded properly up until now to create as smooth a surface as possible, these layers shouldn’t show up in your final paint finish.
The finished ABS part is matte black and smooth to the touch with very little evidence of layering in most surfaces. A few important results to note here:
- Sharp internal pockets are tough to sand. After about 30 minutes of sanding, we still had a hard time removing all the layering and the stepping shows up even after priming, painting, and varnishing the print.
- Because we had to remove more surfaces from the sanding, there is some sacrifice in regards to the final geometry of the part.
- Filling the incomplete layer with a thin coat of XTC-3D worked very well; those holes are invisible in the final paint layer.
VeroBlack (Printed on an Objet30)
Thanks to .0011” resolution, the Objet30 prints have some stepping between layers, but nowhere near as obvious as in our FDM prints.
The Objet30 prints come out of the printer with a thick layer of support structure material so before we can begin finishing our VeroBlack part, we’ll need to remove this support structure and the residue it leaves behind.
VeroBlack 3D Printed Part Materials NeededThe materials needed for post-3D printing finishing:
- Sandpaper (grits 100 to 600)
- Medium, fine, and Extra fine Sanding Sponges
- Sandable Krylon Primer
- Montana Acrylic Primer in Shock Black
- Matte Acrylic Varnish
Start with 100 grit sandpaper to wet sand the residue and gradually move to wet sand with 300 grit sandpaper; the residue will fall off in small soft white chunks. This is the hardest part of the VeroBlack finishing process and it took us about 30 to 40 minutes to remove all the residual layer.
After removing the residual layer by wet sanding utilizing 300 grit sandpaper, the surface of the part will begin to feel smooth. If you rub the part with your fingernail, you’ll feel it’s harder and more plastic-like beneath the gummy residual coat. Continue wet sanding through to 600 fine grit sandpaper until the part is fully smooth.
Pro Tip: Water breaks up the residue, so wet sanding is a highly effective method to get a smooth, residue-free, paintable, and homogenous surface.
Thoroughly clean your part with soap and water before you move on to the next step to remove any additional residue. Again, we recommend using compressed air to dry the part and clear any accumulated dust.
Beware that VeroBlack is like ABS: very easy to sand, so be careful not to overdo it. Once you break through the residual layer, the actual VeroBlack will sand very easily. Removing as little as .005” can be enough to completely remove any stepping layers. Be careful as oversanding can compromise critical dimensions.
VeroBlack 3D Printed Part Priming and PaintingNext, we’re going to paint the VeroBlack part just as we did the ABS part: using Montana spray can paint with the following process: prime, dry, paint, dry, varnish, dry.
Standard spray-painting principles apply:
- First make sure you have a good surface quality which is oil-free, dust-free and hole-free
- Shake each paint can for at least two minutes prior to painting
- Ensure your cap is clean to prevent drips
- Be aware of how the paint is accumulating on the part and look for any pooling or dripping
- Paint in many light coats rather than fewer heavy coats; this is especially important for 3D printed parts with internal and obscured geometries
- Only paint in controlled, well-ventilated, and well-lit areas
The finished VeroBlack part is matte black and smooth to the touch. A couple points to note here:
- Some of the internal corners were not sanded enough to remove the residue, so you can see how the paint powdered up in these areas.
 This will likely result in peeling paint over time.
 - Although very little stepping is visible on the part, you can see slight evidence of it here. This part could have probably used 30 more minutes of thorough sanding.
Now for the dreaded PLA, a notoriously difficult material to finish. But with some tricks and patience, it too can join ABS and VeroBlack in the ranks of matte black glory!
This Replicator print came off the plate with severe striations: see the parallel grooves in the layers of the part above. This could be a result of machine quality, but for now we’ll just have to find a way to maneuver these striations to a smooth part.
Sanding PLA is difficult, in part because of how soft and gummy it becomes if you try to sand too aggressively or quickly, so we’ll explore options on how to smooth 3d prints with minimal effort and abrasion.
PLA 3D Printed Part SandingIf you choose to sand the PLA directly, the process is straightforward. Note: PLA acetone smoothing is not advisable. PLA smoothing is not as forgiving as ABS when it comes to sanding and abrasion, so you will likely spend more time removing the stepping between layers, especially with the severe striations in a print like ours.
Begin with a low (100 – 200) grit sandpaper, sanding away at the bumpy striations and any raft or support material (aluminum foil) left behind. Particularly in the case of MakerBot support, it’s easiest to remove them with a flush cutter or pair of pliers and brush them with a rotary multi-tool first before sanding away at them.
Depending on the size and geometry of your part, you’ll likely be stuck in the 100 – 300 grit sandpaper range for a while to smooth out striations and pesky support structure remnants.
Once layering and striations are less prevalent, move through finer grits (400 – 600) sandpaper to achieve a shiny surface ready for priming and painting.
Pro Tip: Patience is key when sanding PLA. Turn on a movie or your favorite show, but don’t zone out! Sand in small circles evenly across the surface of the part. If you’re using a sanding multi tool on PLA, be careful not to overheat/melt your 3D printed part.
An alternative method to sanding PLA prints directly is smoothing the PLA print with the XTC-3D first and then sand on top of the coating.
PLA 3D Printed Part FinishingWe’re going to use XTC-3D to create a smooth, sandable, paintable layer of epoxy clear coat glossy finish around our PLA print.
Before applying XTC-3D, ensure that your part is thoroughly clean, free of any oils and sanding dust (sensing a pattern yet?). Wash the part with soap and dry with compressed air to clear any dust. Again make sure to wear gloves to protect both your part and your hands.
Brush on the XTC-3D in a thin (1/64”) coat; as long as the coat is thin enough, it will level itself out. Between coats, leave 1.5 hours for the XTC-3D to dry.
It may be difficult to coat an entire part at once, so don’t be afraid to do it in sections, making sure to keep overlapping to a minimum between sections. Wait 90 minutes between first and second coats and after you’ve finished wait 2 hours to allow the shiny surface to become tack-free.
With striations as severe as ours, it will take multiple coats to get a smooth uniform surface, so patience is key. Remember that multiple thin glossy finish coats will level better than thick coats.
Pro Tip: Internal pockets are susceptible to pooling so be careful to suck up or remove any pooling that occurs before the XTC-3D begins to dry (that’s what we’re doing in the left picture above).
Beware that XTC-3D may compromise critical dimensions, but applying thin glossy finish coats will allow you to minimize the additional material.
After the XTC-3D layer has hardened (two hours after application of the last coat) it should be ready for sanding. Follow basic sanding guidelines, starting with 300 grit sandpaper (thanks to the smoothness of the XTC-3D) and sanding in small circular movements to even the surface. Any wavy patterns may require a coarser grit sandpaper to remove.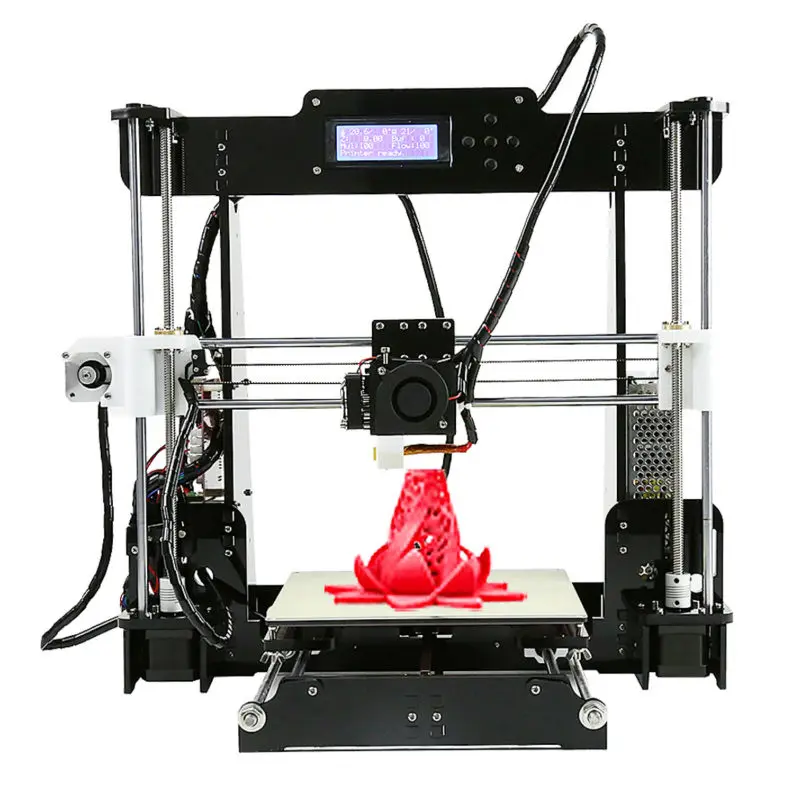
The sandpaper will scratch up the XTC-3D coat; focus on getting a level surface, moving through to 600 grit sandpaper.
After you’ve finished sanding 3D prints, make sure to thoroughly clean your part with soap and water and then dry using compressed air before moving on to the next step.
PLA 3D Printed Part Priming and PaintingPainting PLA parts follows the same process as the ABS and VeroBlack parts: prime, dry, paint, dry, varnish, dry.
Standard spray painting principles apply:
- Make sure your surface is oil-free, dust-free and hole-free
- Shake your cans for at least two minutes prior to painting
- Ensure your cap is clean to prevent drips
- Be aware of how the paint is accumulating on the part and look for any pooling or dripping
- Paint in many light coats rather than fewer heavy coats; this is especially important for 3D printed parts with internal and obscured geometries
- Paint in controlled, well-ventilated and well-lit areas
The XTC-3D coated PLA part is matte, black, and has a smooth surface to the touch with a few problems:
- Although the XTC-3D has worked well to smooth the part and make sanding quicker and easier, it has left pooling in the internal pocket that has shown through the paint finish.
- Striations are still visible on the part. 30 more minutes of sanding 3D prints could have prevented these from showing through the final paint finish.
After finishing all three parts to a smooth, matte black finish, let’s take a look at the differences in process, time, materials and finish.
Differences in ProcessABS (Dimension Elite)- Sand from 100 to 600 grit
- Repair holes with XTC-3D (may not apply to your part)
- Sand away XTC-3D with 300 to 600 grit
- Prime, Paint, Varnish
- Sand from 100 to 600 grit
- Prime, Paint, Varnish
- Coat in 1 to 3 layers of XTC-3D (depending on how bad the striations on your print are)
- Sand away XTC-3D with 100 to 600 grit
- Prime, Paint, Varnish
The part that took the longest to finish was PLA due to the XTC-3D coating time. Even without XTC-3D, however, PLA typically takes longer to sand than ABS or VeroBlack.
In our example, the VeroBlack was ultimately faster to finish since we repaired our ABS print with XTC-3D and stepping between layers was not as significant in the VeroBlack print.
All things considered, VeroBlack was the quickest to get to a smooth, matte black finish.
Pro Tip: If you’re in a rush to get from printer to photoshoot, pick the Dimension Elite or Objet30. Especially in models with overhangs and significant amounts of support material, the Dimension Elite and Objet30 both have support material that is quickly removable via dissolution, whereas the PLA support on a Replicator can significantly increase the time required to get to a smooth surface part.
Differences in Cost and MaterialsIt’s important to consider the amount of time it will take to finish your model as well as the overall look and dimension when considering the price.
PLA is the cheapest out of the three, at $20 per part, followed by ABS at $55, and VeroBlack at $110. In our opinion, VeroBlack is the best bang for your buck since it’s the shortest to surface finish and will give you the most accurate model.
At first glance, all three models may look very similar, but there are a few key differences in the final finish.
Both the ABS and the PLA finished prints have evidence of stepping between layers that is visible in the final paint coat. The VeroBlack print requires much less effort to remove these steps, which ultimately are not as obvious in the final paint coat.
Although the ABS and the VeroBlack finished prints have very similar surface finishes, more material (approximately .020”) was lost in the sanding process for the ABS to remove stepping between layers. In contrast, the VeroBlack print required less sanding, so the final object dimensions are closer to the original design intent.
Individual Summary of Each PartVeroBlack: High layer resolution (. 0011”) means little sanding is required to get a smooth, paintable part. Critical dimensions don’t need to be compromised to get a smooth surface quality part and no repairs are needed for fine detailed features.
ABS: Parts are easy to sand, but small fine detailed features may require repairing and careful sanding to remove stepping between layers. Once this stepping is removed, painting is straightforward.
PLA: The cheapest option, but also has the potential to be the most difficult to finish, depending on support structures and quality of the print. May require significant sanding and repairing via XTC-3D or Bondo filler.
Browse our website to learn more about our capabilities, such as 3D Printing and CNC Machining.
Quick Facts:
- Finishing a 3D printed part often involves a combination of the following processes: smoother application, sanding, polishing, cleaning and painting. The process is unique to the material type.

- A smooth finish with 3D printing is achievable but, post-processing will greatly improve the smoothness of parts.
- Epoxy resins are an excellent choice for sealing PLA printed parts.
- Acetone smoothing is not recommended for PLA prints.
- In general, IPA or rubbing alcohol will not dissolve PLA but there are some varieties that may be IPA soluble. Consult your filament material datasheet or technical datasheet for more information.
- PLA may be smoothed without sanding by dipping it or spraying it with a coating.
- ABS is tougher and lighter than PLA which is stronger and stiffer. Both have their ideal applications, but PLA is typically considered a hobby material whereas ABS is ideal for prototyping.
Post-processing of 3D printed parts (PLA, ABS, SBS, PETG)
Table of contents
- Removal of supports
- Remove Soluble Supports
- Sanding
- Cold welding
- Filling voids
- Polishing
- Priming and painting
- Pair smoothing
- Epoxy coating
- Metallization
Introduction
FDM technology is best suited for fast, low-budget prototyping. Layer lines are usually visible in FDM prints, so post-processing is essential if a smooth surface is to be achieved. Some post-processing techniques can also make a print more durable by changing the degree of its elastic properties, density, structural and textural features.
In this article, we will discuss the most common post-processing techniques in FDM.
Post-processed FDM prints (left to right): cold welded, void filled, raw, sanded, polished, painted and epoxy coated. Photo 3dhubs.com
Removing supports
Removing supports is usually the first step in post-processing for any 3D printing technology that uses them. In general, props can be divided into two categories: standard and soluble. Unlike other post-processing methods discussed in this article, the removal of props is mandatory and does not result in improved surface quality.
Initial printout with props, poor prop removal, good prop removal. photo 3dhubs.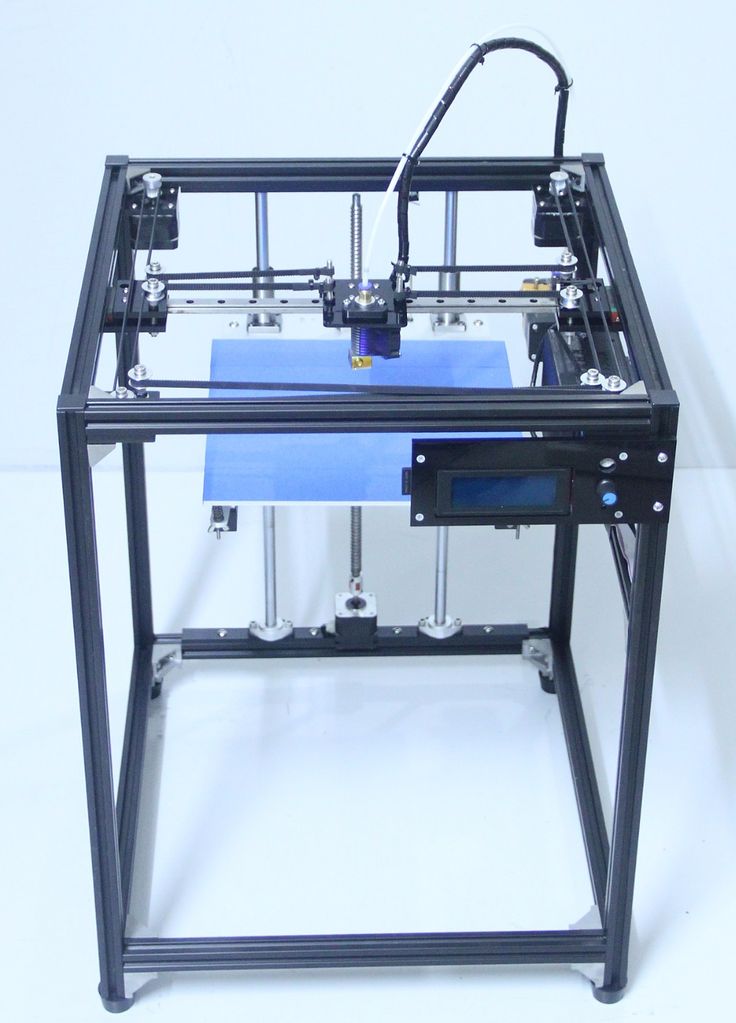 com
com
Removal of standard props
Tools
- Wire cutters, needle nose pliers, tongs
- Toothbrush, brush
| Finishing | ★ ☆ ☆ ☆ ☆ |
| Approvals | ★ ★ ☆ ☆ ☆ |
| Speed | ★ ★ ★ ★ ☆ |
| Suitable for | all thermoplastics FDM |
Process
Normally, backups come off the printout without problems, and hard-to-reach places (such as holes or cavities) can be cleaned of backup material with an old toothbrush. Proper placement of support structures and correct print orientation can significantly reduce the negative impact of supports on how the final printout will look.
Pros
- Does not change the overall geometry of the part.

- The process is very fast.
Cons
- Does not remove layer lines, scratches or other surface defects.
- If excess material or marks remain from the support structure, print accuracy and appearance suffer.
Dissolvable Support Removal
Instrumentation
- Solvent resistant container
- Thinner
- Ultrasonic cleaner (optional)
| Finishing | ★ ★ ★ ☆ ☆ |
| Approvals | ★ ★ ☆ ☆ ☆ |
| Speed | ★ ★ ★ ★ ☆ |
| Suitable for | all thermoplastics FDM |
Process
Soluble support standard materials are removed from the printout by immersing it in a reservoir of the appropriate solvent. Supports are usually printed:
- HIPS (usually with ABS)
- PVA (usually with PLA)
A glass container like a preservation jar is fine. Any non-porous vessel is suitable for water treatment. To quickly remove props from HIPS/ABS printouts, you will need a solution of equal parts D-limonene and isopropyl alcohol. Many other support structure materials such as PVA (with PLA) dissolve in normal water.
Pro Tips
Use an ultrasonic cleaner to shorten the solution time and change the solvent as it becomes saturated. A warm (not hot) solution works faster - heating is useful if there is no cleaner.
Pluses
- Complex geometry is allowed for which the standard method of removing props is not possible.
- Smooth surface at the support points.
Cons
- Improper dissolution of the props can cause discoloration and skewed printouts.

- Does not remove layer lines, scratches or other surface imperfections.
- May cause small holes or holes if soluble material seeps into the object during printing.
Cleaning with a skin
SHIP SHIP ABS ABS ABS PROBECTION
Instrumentation
- EVERTICAL PREASE with grain
for 150, 220, 400, 600, 1000 and 2000 66666 - Cleaning cloth
- Toothbrush
- Soap
- Face mask
| Finishing | ★ ★ ★ ★ ☆ |
| Approvals | ★ ★ ★ ☆ ☆ |
| Speed | ★ ★ ☆ ☆ ☆ |
| Suitable for | all thermoplastics FDM |
Process
Once the props have been removed or dissolved, sanding can be done to smooth the part and remove any obvious imperfections such as smudges or prop marks. Which sandpaper to start with depends on the thickness of the layer and the quality of the print: for layers of 200 microns or less, or for prints without blotches, you can start with sandpaper at P150. If there are blobs visible to the naked eye, or the object is printed with a layer thickness of 300 microns or more, stripping should begin with P100.
The process can be continued up to P2000 grit (one approach is to go to 220, then 400, 600, 1000 and finally 2000). Wet sanding is recommended from the very beginning to the very end - this will avoid excessive friction, which can lead to an increase in temperature and damage the object, as well as contaminate the sandpaper itself. Between sanding, the printout should be cleaned with a toothbrush and washed with soapy water, then wiped with a cloth to remove dust and prevent it from sticking together. Even P5000 can be sanded to achieve a smooth, shiny FDM part.
Pro Tricks
Always sand in small circular motions - evenly over the entire surface of the part. It may be tempting to sand perpendicular to the layers, or even parallel, but this can lead to gouges. If the part is discolored or has a lot of scratches after sanding, it can be heated a little to soften the surface and allow some defects to smooth out.
Pros
- An exceptionally smooth surface is obtained.
- Further post-processing (painting, polishing, smoothing and epoxy coating) is greatly facilitated.
Cons
- Not recommended for double or single shell parts as sanding may damage the printout.
- The process is difficult in the case of sophisticated surfaces and the presence of small details in the object.
- If the grinding is done too aggressively and too much material is removed, the appearance of the part may be affected. Acetone for ABS. Dichloromethane for PLA, ABS
- Sponge Applicator
| Finishing | ★ ★ ☆ ☆ ☆ |
| Approvals | ★ ★ ☆ ☆ ☆ |
| Speed | ★ ★ ★ ★ ★ |
| Suitable for | all thermoplastics FDM |
Process
If the object is larger than the printer capacity, the object is printed in parts and then assembled. In the case of PLA and some other materials, assembly can be done with Dichloromethane or a suitable adhesive (the choice of adhesive depends on the plastic). In the case of ABS, it is possible to "weld" with acetone. The mating surfaces should be slightly moistened with acetone and squeezed tightly or clamped and held until most of the acetone has evaporated. So the parts will be held together by chemical bonds.
Pro Tricks
Increasing the surface area of the acetone contact increases bond strength. Tongue-and-groove to help.
Pros
- Acetone does not change surface color as much as most adhesives.
- After drying, the compound acquires the properties of ABS, which makes further processing easier and more uniform.
Cons
- The bonding of ABS parts by cold "welding" with acetone is not as strong as if the part were printed as a whole.
- Excessive use of acetone can dissolve the part and affect final appearance and tolerances.
Void Fill
Black ABS Print, Filled and Sanded
Tool Kit
- Epoxy (for small voids only)
- Automotive body filler (for large voids and joints)
- ABS filament and acetone (only for small voids in ABS printouts)
| Finishing | ★ ★ ☆ ☆ ☆ |
| Approvals | ★ ★ ★ ☆ ☆ |
| Speed | ★ ★ ★ ☆ ☆ |
| Suitable for | all thermoplastics FDM |
Process
Unusual voids may come out after the part has been ground or dissolved. These voids are formed during printing when the layers are incomplete due to any restrictions on the trajectory of the print head, which is often inevitable. Small gaps and voids can be easily filled with epoxy and no additional treatment is required in this case. Larger gaps or voids left by assembling a multi-part object can be filled with automotive bodywork filler, but the printout will then need to be re-sanded. Putty works great, is easy to process with sandpaper and can be painted. Moreover, the parts connected by such a filler, or voids filled with it, turn out to be stronger than the original plastic.
Cracks in ABS printouts can also be filled with ABS thinned with acetone, which reacts chemically with the ABS object and seeps into existing voids. It is recommended to make such a putty from 1 part ABS and 2 parts acetone, then it will not spoil the surface if used correctly.
Dichloromethane works on all plastics: ABS, PLA, HIPS, SBS, etc.
Epoxy is also useful if you want to make your 3D printed part more durable
Pros
- Epoxy filler is easy to sand and prime, resulting in an excellent surface for painting.
- An ABS solution of the same filament will give the same color so nothing will be visible on the surface.
Cons
- Auto body filler or other polyester epoxy adhesive is opaque when dry and will leave discolored areas on the printout.
- Additional processing required to achieve a uniform surface.
- If the grinding is done too aggressively and too much material is removed, the appearance of the part may be affected.
Polished
PLA model, polished. Photo rigid.ink
Tools
- Plastic Polishing Compound
- Sandpaper for P2000
- Cleaning cloth
- Toothbrush
- Polishing pad or microfiber cloth
| Finishing | ★ ★ ★ ★ ★ |
| Approvals | ★ ★ ★ ☆ ☆ |
| Speed | ★ ★ ☆ ☆ ☆ |
| Suitable for | all thermoplastics FDM |
Process
Once the part has been cleaned, a plastic polish can be applied to the part to give a standard ABS or PLA object a mirror finish. After the part has been sanded for 2000, it is necessary to remove dust from the printout with a cloth and rinse the printout under warm water using a toothbrush. When the object is completely dry, buff it on a buffing pad or microfiber cloth, adding a polishing compound as you go, such as polishing jewelry. They are designed specifically for plastics and synthetics and give a long-lasting shine. Other plastic polishes, such as those used to polish car headlights, also work well, but some of them contain chemicals that can damage the printout.
Pro Tricks
To polish small parts, place the polishing wheel on your Dremel (or other rotary tool such as a power drill). For larger and stronger parts, you can use a grinder, just make sure that the part does not stay in one place for too long, otherwise the plastic may melt from friction.
Pros
- The part is polished without solvents that can warp it or change its tolerances.

- When cleaned and polished correctly, a mirror-smooth surface is obtained, very similar to cast.
- Polishing and deburring plastics is extremely economical, making this a very cost-effective method of achieving a quality finish.
Cons
- If you want to achieve a mirror-smooth surface, the part must be carefully ground before polishing, which may affect tolerances.
- After polishing, the primer or paint no longer sticks.
Primer and paint
Gray PLA FDM print spray painted black. 3dhubs.com
Tools
- Cleaning cloth
- Toothbrush
- 150, 220, 400 and 600 grit sandpaper
- Aerosol primer for plastics
- Finish paint
- Polishing sticks
- Polishing paper
- Masking tape (only if multiple colors are expected)
- Nitrile gloves and matching face mask
| Finishing | ★ ★ ★ ★ ★ |
| Approvals | ★ ★ ★ ☆ ☆ |
| Speed | ★ ☆ ☆ ☆ ☆ |
| Suitable for | all thermoplastics FDM |
Process
Once the printout has been properly sanded (it is enough to reach P600 when painting), it can be primed. Aerosol plastic primer should be applied in two coats. This primer is intended for subsequent painting of models, provides an even coating and at the same time thin enough not to hide small elements. Thick primer, which is sold in hardware stores, can clump, and then you have to seriously work with sandpaper. Apply the first spray coat with short pressures from a distance of 15-20 cm from the object, trying to do it evenly. Let the primer dry and smooth out the unevenness with 600 grit sandpaper. Apply a second coat of spray with light, quick pressures, also very gently and evenly.
When the priming is completed, you can start painting. You can paint with artistic acrylic paints and brushes, but a spray gun will provide a smoother surface. Hardware store spray paints are thick and viscous and difficult to control, so use paints that are designed specifically for modeling. The primed surface must be sanded and polished (sanding and polishing sticks, which are used in nail salons, can be purchased online, they are great for our task), and then wiped with a cloth. The paint should be applied to the model in very thin layers, the first layers should be transparent. When the paint finish becomes opaque (usually 2-4 coats), let the model rest for 30 minutes to allow the paint to dry completely. Carefully polish the paint layer with manicure sticks, repeat the procedure for each of the colors (between each applied paint).
Separate parts of the model can be covered with masking tape so that the colors, if there are several, do not mix. When painting is complete, remove the masking tape and polish the object with polishing paper. Polishing paper, such as 3M or Zona, comes in a variety of grits and is a relatively new product. It is sold in packs in various online stores, and after processing with this paper, the ink layer or topcoat will literally shine - and nothing else can achieve this effect. Apply 1-2 coats of top coat to protect the paint and let it dry completely. The top coat is selected in accordance with the recommendations of the paint manufacturer. If the topcoat and paint are incompatible, it can render your entire painting job meaningless, so compatibility is very important here.
Pro Tips
Don't shake the can when spraying! It is important not to mix the pigment or primer with the propellant (propellant gas), which will cause bubbles to form in the spray. Instead, the can must be rotated for 2-3 minutes so that the mixing ball rolls like a pearl, and does not strum.
Pros
- Excellent result, if you take into account all the nuances of the process and practice.
- You can do anything with the final look of the object, no matter what material it is printed on.
Cons
- Primer and paint increase the volume of the model, which affects the tolerances and can be a problem when it comes to a part of a larger object.
- High quality aerosol paint or spray gun increases costs.
Vapor smoothed
Vapor smoothed black hemisphere, ABS printed
Tools
- Cleaning cloth
- Solvent resistant sealed container
- Thinner
- Paper towels
- Aluminum foil (or other solvent resistant material)
- Face mask and chemical resistant gloves
| Finishing | ★ ★ ★ ★ ☆ |
| Approvals | ★ ★ ☆ ☆ ☆ |
| Speed | ★ ★ ★ ☆ ☆ |
| Suitable for | all thermoplastics FDM |
Process
Line the bottom of the container with paper towels, if possible along the sides. It is critical that the vapors cannot damage the container and that the container itself is sealed. It is recommended to use a glass or metal container. Apply enough thinner to the paper towels so that they are wet but not soaked - this will also help them adhere better to the walls. Acetone is famous for its ability to smooth out ABS. PLA can be smoothed with a variety of other solvents (dichloromethane works well), but this plastic tends to be much harder to smooth than ABS. When working with any solvents, please follow the safety precautions for handling chemicals and always take appropriate precautions. Place a small "raft" of aluminum foil or other solvent-resistant material in the center of the paper towel-lined container. Place the printout on the "raft" (either side of your choice) and close the lid of the container. Steam polishing can take varying amounts of time, so check your printout periodically. To increase the speed of polishing, the container can be heated, but this must be done carefully so as not to cause an explosion.
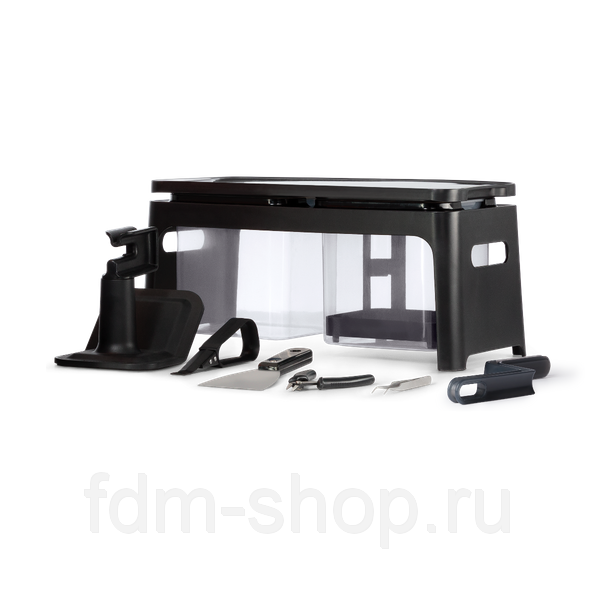
When removing the printout from the container, try not to touch it in any way, leave it on the “raft”, take them out together. In all those places where the printout has come into contact with something, there will be defects, since the outer layer will be under-dissolved. Before working with it, let the printout completely “breathe” so that all solvent vapors have evaporated.
Many aerosols and/or solvent sprays are flammable or explosive and their vapors can be harmful to humans. Be extremely careful when heating solvents, always handle them and store them in a well ventilated area.
Pros
- Many small blotches, as well as many layer lines, are smoothed out without additional processing.
- The printout surface becomes exceptionally smooth.
- The procedure is very fast and can be done using commonly available materials.
Cons
- Doesn't "heal" gaps, doesn't completely hide layer lines.

- During the smoothing process, the outer layer of the printout dissolves, which greatly affects the tolerances.
- Negatively affects the strength of the printout due to changes in the properties of its material.
Immersion
PLA model immersed in dichloromethane. Photo 3dpt.ru
Tools
- Solvent resistant container
- Thinner
- Eye hook or cog
- Large wire for sculpture or landscaping
- Dryer or drying frame
- Face mask and chemical resistant gloves
| Finishing | ★ ★ ★ ★ ☆ |
| Approvals | ★ ☆ ☆ ☆ ☆ |
| Speed | ★ ★ ★ ★ ☆ |
| Suitable for | all thermoplastics FDM |
Process
Make sure the container you are using is wide and deep enough to completely submerge the printout in the solution. Fill the container with the appropriate amount of solvent - be careful not to splash. As with vapor smoothing, ABS dip smoothing can be done with acetone, which is easy to find in the store, and for PLA, dichloromethane can also work well with ABS, HIPS, SBS, PETG, and many other materials. PLA is quite resistant to solvent smoothing, so it may take several passes to achieve the desired result. Prepare the printout for dipping by screwing a hook or eye screw into it in an inconspicuous place. Pass the wire through the eyelet or wrap the wire around the screw so that the printout can be immersed in the solvent. If the wire is too thin, it will not be able to withstand the buoyant force on the printout, and it will be difficult to sink the object.
Once the printout is ready, use a wire to completely immerse it in the solvent for a few seconds. Remove the printout and hang it by the wire in a dryer or on a drying frame to allow the solvent to completely evaporate from the surface.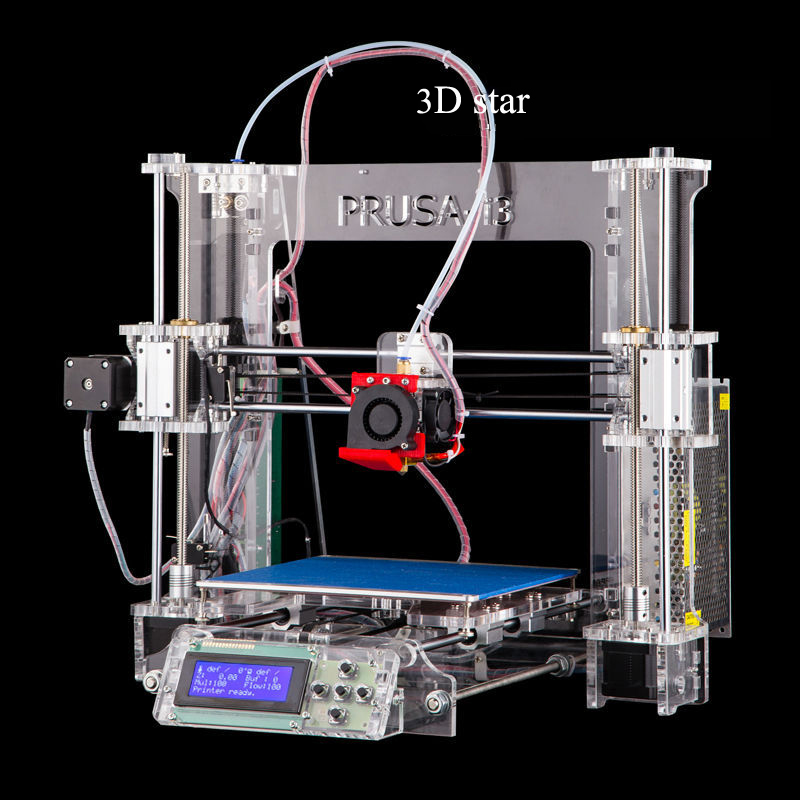 After ejection, the printout can be gently shaken to facilitate the drying process and ensure that no solvent has accumulated in the depressions.
Pro Tricks
If an opaque whitish coating appears on the printout after drying, this can be corrected by holding the object over a solvent bath for a while so that its vapor slightly dissolves the surface. This restores the original color of the printout and achieves a shiny outer layer.
Pros
- The surface of the print is smoothed much faster than steam polishing.
- Significantly less fumes are generated than other solvent polishing methods, so this method is less hazardous.
Cons
- The surface is smoothed very aggressively, so you can forget about tolerances.
- Immersion for too long can result in complete deformation of the object and a significant change in material properties.
Epoxy
Black ABS printout, half epoxy coated, half uncoated
Tools
- two-component epoxy06
- Sponge Applicator
- Mixing container
- Sandpaper P1000 or finer
| Finishing | ★ ★ ★ ★ ☆ |
| Approvals | ★ ☆ ☆ ☆ ☆ |
| Speed | ★ ★ ★ ★ ☆ |
| Suitable for | all thermoplastics FDM |
Process
After the printout has been cleaned (preliminary cleaning gives the best end result), wipe it thoroughly with a cloth. Mix the resin and hardener in the proportion indicated in the instructions, accurately measuring all volumes. The curing process of epoxy resin is exothermic, so glass containers and containers made of materials with a low melting point should be avoided. It is recommended to use containers that are specifically designed for mixing epoxy resins. Incorrect ratio of resin and hardener can result in longer curing time or no curing at all and result in a permanently sticky substance. Mix the resin and thinner as directed in the instructions - carefully, in smooth movements to minimize the amount of air bubbles remaining inside the mixture. Very little epoxy is needed, and most of these resins only work for 10-15 minutes, so plan accordingly.
Use the sponge applicator to apply the first coat of epoxy, being careful not to build up in crevices and small parts. When the printout is sufficiently coated, allow the resin to fully cure - as described in the instructions that came with it. One coat may be sufficient, but for optimum results it is best to lightly sand the printout with fine sandpaper (on P1000 and above) to eliminate any imperfections. Wipe off the dust with a cloth and, in the same way as before, apply a second layer of epoxy.
Pros
- A very thin coat of epoxy won't affect tolerance too much (unless the printout has been sanded too hard first).
- A protective shell is formed around the object.
Cons
- The layer lines will remain visible, they will only be covered by a smooth shell.
- If too much epoxy is used, it can flood parts and edges, and the surface can appear greasy.
Plating
FDM-printed structural element nickel-plated with Repliform RepliKote
Tools (for home use)
9
- Sacrificial anode. The anode material must match the metal of the solution: for example, if copper sulfate is used in the solution (with water it is copper sulfate), then the anode must also be copper. Any object made of the appropriate metal will do (for example, copper wire for copper plating), or you can buy special strips of metal for galvanization.
- Conductive paint or acetone with graphite. For galvanization, the surface of the printout must be electrically conductive, and this can be achieved with a conductive paint or a solution of equal parts graphite and acetone. Conductive paint will work with any material, but acetone with graphite will only work with ABS.
- Power rectifier. A simple battery can be used as this element, only it will not be as efficient and will not give a fast enough result than the rectifier itself (household current).
 The rectifier is safer in the sense that it can simply be turned off and thus cut off the current during the galvanization process.
 - Conductive screw or eye hook
- Non-conductive container
- Contacts
- Non-conductive gloves and goggles. Electroplating solutions are acidic and can cause injury if splashed into the eyes, so wearing glasses is very important. Solutions also irritate the skin and conduct electricity, so insulating gloves are needed.
- The metallized shell increases the strength of plastic printouts, which greatly expands the scope of their applications.
- Properly galvanized, the metal coating is very thin so that tolerances are generally maintained.
- The surface (again, if everything was done correctly) turns out great, no one will think that the object is printed on a 3D printer.
- In general, it is very expensive to get a professional result. Professional electroplating at home requires a fair amount of equipment.
- Electroplating at home can result in personal injury if safety precautions are not followed.
- A galvanizing solution can be obtained by mixing a metal salt, acid and water, but if the proportions are inaccurate and the substances are of insufficient quality, one cannot count on a professional result.
 If you buy a ready-made solution (as in Midas kits), you can be sure that the problems with plating are not caused by the solution.
 | Finishing | ★ ★ ★ ★ ☆ |
| Approvals | ★ ★ ★ ☆ ☆ |
| Speed | ★ ★ ★ ★ ☆ |
| Suitable for | all thermoplastics FDM |
Process
Electroplating can be carried out at home or in a professional workshop. To do everything right, you need to be well versed in the materials, in what is actually happening - and at home these opportunities are usually limited. In order to achieve excellent surface quality and to have more plating options, including chrome plating, it is best to use the services of professional workshops. The copper galvanization process will be described below as an example.
At home, you can galvanize with copper or nickel, and this coating will then serve as the basis for galvanizing with other metals. It is critically important that the printout surface be as smooth as possible before it is galvanized. Any bumps and lines in the layers will be enhanced as a result of the process. Prepare the sanded and cleaned object for plating by coating the plastic with a thin coat of high quality conductive paint, or with a graphite and acetone solution for ABS printouts. Allow the conductive coating to dry completely, sand if necessary to ensure a smooth surface. At this stage, it is extremely important not to touch the printout with bare hands or to wear gloves, because sweat marks on the object will certainly affect the quality of the galvanization.
Insert a screw or eyelet in an inconspicuous place on the printout and connect it to the negative terminal of the rectifier. This will be the cathode. Connect the copper anode to the positive contact of the rectifier. Fill the container with enough copper plating solution so that the printout is completely covered with it. Immerse the anode in the container and turn on the power. After the rectifier is turned on, immerse the printout in the container, making sure that it does not touch the anode anywhere. Beware! When the object is already in the bath, the galvanization system is active, and contact with the solution, cathode or anode can be traumatic. Set the voltage on the rectifier to 1-3 Volts, and the process will go to full metallization. To speed things up, the voltage can be increased, but not more than 5 volts. When enough metal has deposited on the printout, simply turn off the power and dry the object with microfiber towels. When it's dry, varnish the object to protect it from corrosion.
Pros
Cons
3D printed plastic post-processing, mechanical and chemical
The most popular finishing methods for 3D printed objects are sanding, sandblasting and solvent vapor treatment.
It is a misconception that 3D printing cannot produce objects that are as smooth and polished as traditional industrial technologies. Such claims can be countered with simple sandpaper, and this finishing technique is very common.
Which finishing technique is used depends largely on the geometry and material of the part. These factors determine both the level of aesthetics that can be achieved and its functionality, because different methods allow you to achieve different textures and appearances. Some methods are better suited for prototypes and exhibition models, while others are better for machine parts.
Sanding
Although fusing systems are designed to produce high-quality parts directly from the printer, layer connection lines remain visible and the end user does not need this at all, especially when it comes to a solution in which the aesthetic appearance is priority. Sanding eliminates these shortcomings and can be used for models, sales samples or concepts, fully functional prototypes and end-level assemblies and mechanisms.
Many high-quality 3D-printed objects can be smoothed with sandpaper to get rid of lines where layers overlap.
Everyone knows the process of sanding. Plastic parts are processed by hand or on a grinding machine, as is done with wooden or metal elements. Sanding is inexpensive and effective, and it is a proven method by which a quality finish can be achieved. In fact, this is the most common way to refine 3D printed objects.
All but the smallest details can be sanded with sandpaper. And they can be large as much as you like, although it can be difficult to manually get to small defects and irregularities. In typical situations, the process is relatively fast. In layer-by-layer welding, we are usually talking about the fight against stepped surfaces. Steps on a part the size of a remote control take about 15 minutes to clean, while painting the same part takes 2 hours due to additional steps such as preparation and drying.
When a part must be precise and durable in the first place, it is very important to consider how much material will be removed by sanding. If a lot of it is removed, it is necessary to make changes to the design before printing, to make the walls thicker. The requirements for the part also determine which sanding technique will be used, manual or mechanical, and which tool will be used.
Sandblasting
The second most common finishing method is sandblasting. In this case, the operator controls the nozzle, from which a finely dispersed material is sprayed under pressure onto the part in order to hide traces of layers on it. The process is fast, takes 5-10 minutes, the result looks whole.
When sandblasting a part placed in a closed chamber, a stream of small plastic particles is sent, resulting in a smooth surface after 5-10 minutes.
This technology is easily modified and can be used with most materials. It is also used during the development and manufacture of a part, at any stage - from prototyping to production. This kind of flexibility is due to the fact that processing is usually done with fine particles of finely processed thermoplastic. It is this "sand", the abrasive characteristics of which, when sprayed, are in the range from medium to high.![]() Baking soda works very well as it is not too harsh. However, it is somewhat more difficult to work with than with plastic.
Baking soda works very well as it is not too harsh. However, it is somewhat more difficult to work with than with plastic.
One of the limitations of sandblasting is the size of the object. Since the process is carried out in a closed chamber of limited volume, it is usually up to about 60 x 80 x 80 cm.
Steaming
The third most popular finishing method is called steaming or steaming. In this case, the part is in an atmosphere of evaporation of a substance brought to the boiling point. The particles of the evaporating substance are fused into the treated surface to a depth of approximately 2 microns, making it smooth and shiny in just a few seconds. Those who prefer a matte finish can sandblast the part after steam blasting, when the part has already been smoothed and mechanical contact stress has been removed.
Acetone vapor treatment of ABS plastic makes the surface smooth and glossy, the only drawback of this technology is that corners and small parts are folded
Since the surface is very smooth, vapor treatment is widely used for consumer goods, prototypes and medical applications.