3D printer bed adhesion
How to Fix it Step-by-Step
- Author
- Recent Posts
Martin
Besides many test devices, Martin now has his fourth own 3D printer running and prints as a hobby for friends, family and himself. He is happy to share his experience with each new article.
Latest posts by Martin (see all)
Disclosure: Links marked with * are Affiliate Links. I earn from qualifying purchases if you decide to make a purchase through these links – at no additional cost for you!
It can be annoying when a 3D print won’t stick to the print bed. It’s even more frustrating when you don’t know what the problem is or how to fix it. There are indeed many factors that can lead to poor print bed adhesion, but there are at least as many solutions.
Unfortunately, however, the cause can rarely be diagnosed purely visually. Therefore, you may have to apply several of the solutions presented and tested here until the print bed adhesion is sufficient.
If a 3D print is not sticking to the print bed, the first thing to do is to clean and level the print bed and calibrate the Z-offset of the nozzle. After that, measures that cause the filament of the first layer to cool down more slowly can increase the adhesion.
Key Takeaways:
(The solutions should be applied in this order.)
- Clean the print bed so that the filament sticks to the print bed and not to foreign objects and residues.
- Re-level the print bed for a consistent distance between the nozzle and the print bed.
- Reduce the distance between the nozzle and the print bed: If the filament is pressed more strongly onto the print bed, it bonds better with it.
- Reduce the printing speed of the first layer: The longer the filament remains hot and liquid, the better it can bond with the print bed.
- Deactivate the cooling of the first layer: Same effect as no. 4 – the filament stays hot longer.
- Increase the print bed temperature: Same effect as no.
 4 – the filament stays hot longer.
 - Thicker first layer: Same effect as No. 4 – the filament stays hot longer.
- Apply adhesive: Use hairspray, glue sticks, Blue Tape, special 3D printing adhesives like Magigoo.
- Use a Brim or Raft to increase the surface of the first layer (often difficult to remove).
- Replace the print bed if all other measures were unsuccessful. (Recommendation: PEI print bed*)
Table of Contents:
- 1 Clean the Print Bed
- 2 Re-Level the Print Bed
- 3 Reduce the Distance Between the Nozzle and the Print Bed
- 4 Reduce the Printing Speed of the First Layer
- 5 Deactivate the Cooling of the First Layer
- 6 Increase the Print Bed Temperature
- 7 Thicker First Layer
- 8 Apply Adhesive
- 9 Use a Brim or Raft
- 10 Replace the Print Bed
Clean the Print Bed
A clean print bed is important to ensure good print bed adhesion. If the print bed is not clean, the filament may adhere to contaminants on the surface and not to the print bed. This can cause all or part of the print to peel off.
This is the first step in achieving good print bed adhesion. Cleaning should be done before each print. The advantage is that it usually only takes a few seconds.
There are several ways to clean the print bed:
- Spatula against coarse filament residue
- Lint-free cloth against dust and loose filament residues
- Water with some washing-up liquid against fingerprints, grease and most adhesives
- Isopropyl alcohol (IPA) against stubborn grease and certain adhesives
- Acetone against ABS slurry
If you don’t treat your print bed with adhesives, cleaning before each new print is basically just removing any filament residue from the last print with a spatula or lint-free cloth.
If you use or want to use adhesives, cleaning consists not only of removing filament residues, but also of regularly cleaning the print bed of adhesive residues.
For most adhesives, the easiest way to do this is with water and a little dishwashing liquid. However, there are some adhesives for which only stronger solvents such as isopropanol will help.
Print bed cleaning with isopropanol→ If you want to learn more about print bed cleaning, you can check out this article: Print Bed Cleaning for 3D Printers: PEI, Glass, Spray, Tape
Re-Level the Print Bed
If the print bed is not leveled, the filament will adhere to one side of the print bed more than the other. This can cause the first layer of the 3D print to detach from the print bed on one side or completely detach during the print.
Most 3D printers have rotary screws under the print bed to change its tilt. The goal of print bed leveling is to adjust the surface of the print bed parallel to the direction of movement of the nozzle. That way, the distance of the nozzle from the print bed is the same everywhere on the print bed.
By default, the paper method is used for this purpose. In this method, a normal piece of paper (with a thickness of about 0.1 mm) is placed between the print bed and the nozzle. The distance between the nozzle and the print bed is then adjusted so that the piece of paper can be moved with some friction.
Related Post:
3D Printer Bed Leveling Guide | Manual, Automatic & Tests
Many modern 3D printers have a sensor for automatic print bed leveling (such as the BL-Touch or CR-Touch for example). With such sensors, the tilt is set automatically, but not the Z-offset, which is essential for print bed adhesion.
Reduce the Distance Between the Nozzle and the Print Bed
If the nozzle is too far away from the print bed, the filament will only be loosely placed on the print bed and will not be able to make a good connection with it. The distance must be set so that the filament is easily pressed onto the print bed.
After the first two solutions belong to the 3D printing basics, the distance between print bed and nozzle is the first big adjusting screw to influence the print bed adhesion.
You already set the basic distance between the nozzle and the print bed during print bed leveling with the thickness of the paper. The aim of leveling is to ensure that the distance is the same everywhere on the print bed. To achieve this, you can still globally adjust the Z-Offset in the menu on most 3D printers so that you don’t have to adjust the knobs by the same amount on all four corners.
Important to know: The Z-Offset is not the distance between the nozzle and the print bed, it is only a part of it. Z = 0 mm is the distance you set during print bed leveling. So, the distance between the nozzle and the print bed is the Z-Offset plus the distance you set with the piece of paper.
Often this can also be set during printing, allowing you to calibrate the Z-Offset “live” during the first layer. Observe whether the filament is placed loosely on the print bed or pressed somewhat onto it during the first layer.
Be careful not to reduce the Z-Offset too much. If the Z-Offset is too small, the print bed adhesion will be good, but you might end up with an artificial elephant foot (the first layer or layers will be too wide).
To show you the big effect Z-Offsets have on print bed adhesion, I printed a calibration cube with different distances between the nozzle and the print bed.
Distance of nozzle to print bed too big (left), good (middle) and too close (right).If the calibration of the Z-offset has not helped you yet, here are some solutions to extend the cooling time of the filament on the print bed. The longer the filament sits hot and liquid on the print bed, the better the bond between them will be. The filament then has more time to catch on to the smallest crevasses of the print bed and stick there.
Reduce the Printing Speed of the First Layer
A slower print speed of the first layer increases the print bed adhesion in 3D printing. The filament stays hot longer due to the proximity of the nozzle and flows better onto the print bed. It also reduces the tensile forces of the nozzle movements acting on the already printed filament.
A print speed of 5 to 10 mm/s for the first layer increases print bed adhesion a lot.
The default settings in most slicers already include slower print speeds for the first layer. Typically, they are in the range of 50% of the normal print speed, which is about 20 to 30 mm/s for most 3D printers.
If you have an ideal combination of filament and print bed, and all other settings are well calibrated, these default settings are often good enough to produce adequate print bed adhesion. Frequently, however, this is not the case and reducing the print speed of the first layer is just the right solution.
5 mm/s25 mm/sTo demonstrate the effect to you, I set all the other settings somewhat “suboptimal” so that the default print speed settings were not sufficient to produce good adhesion. After changing to 5 mm/s for the first layer, the adhesion was good enough and the print was successful!
When reducing the print speed of the first layer, it can sometimes happen that an elephant foot is created. This elephant foot is then caused by over-extrusion. In most slicers, you can influence the leakage of excess filament in the first layer by making appropriate adjustments to the flow rate or print temperature for the first layer only.
Deactivate the Cooling of the First Layer
Cooling for the part to be printed should be disabled for the first layers to ensure good print bed adhesion. Otherwise, the filament will cool too quickly and will not be able to bond to the print bed.
Most filaments like PLA require part cooling to ensure good print quality. But if the first layer is also cooled, the filament solidifies too quickly and cannot flow properly onto the print bed and into its small crevasses. The result is poor print bed adhesion.
However, with some filaments, such as ABS, cooling should be completely disabled. ABS shrinks quite a bit during cooling and would otherwise warp and detach from the print bed during printing. Therefore, ABS can also be processed better at a high and homogeneous ambient temperature.
In most slicers, cooling can be set separately for the first layers. In Cura, for example, it is also possible to set from which layer or height the normal cooling rate should be applied (see picture above).
0% cooling of the first layer100% cooling of the first layerAs a demonstration, I set the cooling for the first layer once to 100% and once to 0%, with otherwise identical settings. The filament used here is also PLA.
Increase the Print Bed Temperature
The higher the print bed temperature, the better the extruded filament will adhere to the print bed. An increase of 5 to 10 °C is often enough to improve adhesion sufficiently.
However, you should not set the print bed temperature much higher, as this will quickly result in an elephant foot. Stay in the upper range of recommended temperatures for the different filaments, and experiment with higher temperatures with small objects to save filament.
Elephant foot due to a too high print bed temperature.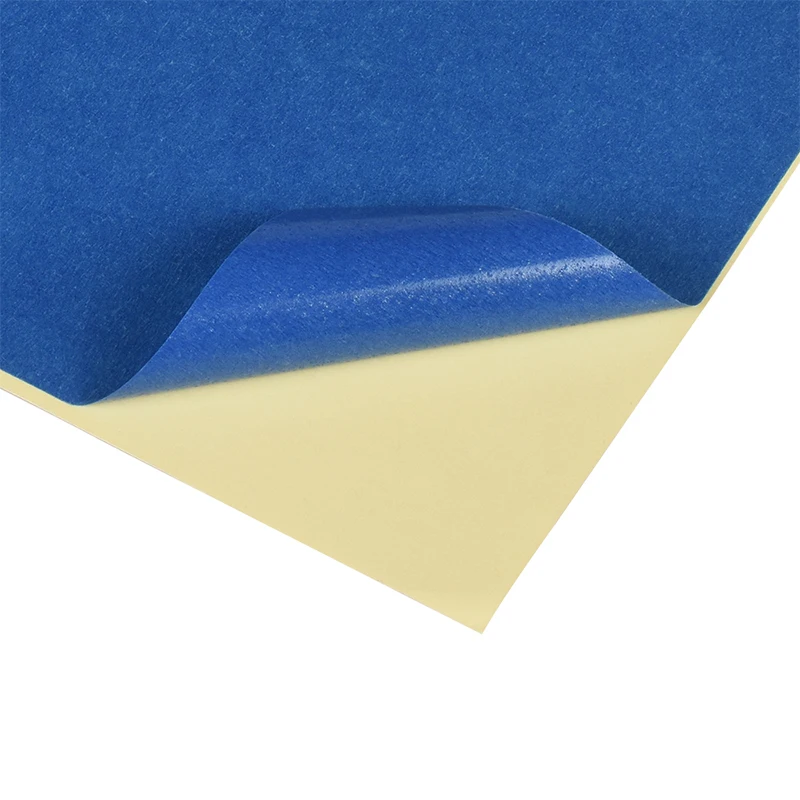
Many slicers allow you to set the print bed temperature separately for the first layer and the rest of the print. If you have problems with adhesion and elephant foot, you can try to increase the temperature only for the first layer and let it cool down to the default value afterwards.
PLA at 65 °C print bed temperaturePLA at 55 °C print bed temperatureAs in the last example, I made the settings so that the print bed adhesion was not sufficient at the default setting. Increasing the print bed temperature by 10 °C resulted in better print bed adhesion and 3D printing was successful.
Thicker First Layer
Thicker lines cool more slowly and their contact area with the print bed is larger, resulting in better adhesion. The layer height should be no more than the diameter of the nozzle, and the line width should not exceed twice the diameter of the nozzle.
As with most other settings, you can adjust the layer height and line width for the first layer. This way the whole object does not suffer from this adjustment. But even a double height first layer will not be noticeable for most objects.
In this example, I adjusted the settings for the first layer so that the print bed adhesion was insufficient with normal line width and layer height. With double the line width and layer height, the adhesion was then good enough.
The previous solutions did not use artificial aids and mainly optimized the settings. With the last three solutions of this article, either the print bed surface or the object is strongly modified so that the object adheres to the print bed. Therefore, you should have tried all other solutions beforehand.
Apply Adhesive
There are many adhesives that, when applied correctly, can significantly increase print bed adhesion in 3D printing. In addition to household adhesives, there are now many specialized adhesives for 3D printing.
You can use the following adhesives to increase print bed adhesion:
Glue stick: Apply a thin layer of glue stick to the print bed and try to avoid chunks of glue. The downside here is that it can sometimes be difficult to remove the object after printing.
You can either apply regular glue sticks directly to the print bed or spread it thinly with a solvent like isopropyl alcohol. I learned this method from Maker’s Muse on YouTube. The result is a very thin layer of adhesive that creates excellent adhesion for the first layer, but doesn’t discolor it or make it too dirty with adhesive.
Hairspray: In addition to the normal glue stick, the use of hairspray is another quick emergency solution. When spraying the print bed, however, be careful not to get hairspray on or in the rest of the 3D printer.
Blue Tape: This tape is popular in the 3D printing community as it is a quick and (compared to glue sticks and hairspray) clean solution to poor print bed adhesion. The rough surface gives the liquid filament enough small crevasses to stick to.
Special 3D printing adhesives: my favorite of these adhesives is Magigoo. Such adhesives provide better adhesion than the previously mentioned adhesives and in the case of Magigoo, one application is enough for several prints and one bottle is enough for several months if you print every day.
Use a Brim or Raft
BrimRaftA brim or raft widens the first layer of the 3D print. This increases the surface area to the print bed and therefore the print bed adhesion of the object.
Brims or rafts are mainly worthwhile when the print bed adhesion is relatively good, but small details do not adhere well to the print bed or the object detaches during the printing process.
The major disadvantage of this solution, however, is that brims or rafts are often difficult to remove from the object after printing without leaving residue. In general, rafts are easier to peel off than brims because they create an entirely new first layer or layers underneath the object. Brims, on the other hand, dock directly to the sides of the object, making them even more difficult to remove.
When using a raft, it’s important to find the right setting for the distance between the raft and the object. With most slicers, the default setting for this distance is usually a bit too small, making it difficult to detach the object from it.
As a demonstration of how a raft works, I printed an object with a very delicate first layer, both with and without the raft. The print bed adhesion was greatly improved with the raft, and with the right settings for the raft, it was not difficult to detach it from the raft.
If rafts and brims are not an option for you, since they consume unnecessarily more filament and sometimes leave unsightly residue, it might be a good idea to switch to a different print bed surface.
Replace the Print Bed
PEI print bed upgrade for the FLSUN Super RacerIf you have poor print bed adhesion, it sometimes makes sense to switch to a different material, like PEI. Especially, filaments like PLA benefit a lot from switching from glass to PEI.
For a long time, textured glass print bed surfaces were considered the best alternative for most standard filaments. Meanwhile, however, flexible printing plates with a PEI coating have proven their worth. This one* would be an example of such a PEI print bed.
Depending on the filament, print bed adhesion on a PEI print bed is much better than on glass. PLA is definitely one of the winners here, but PETG can also be processed better on it. PETG sometimes adheres so strongly to glass that it can hardly be removed without damaging the glass or the object itself.
Disclosure: This website is the property of Martin Lütkemeyer and is operated by Martin Lütkemeyer. Martin Lütkemeyer is a member of the Amazon Services LLC and other Affiliate Programs. These are affiliate advertising programs designed to enable websites to earn advertising revenue through advertising and linking to Amazon.com and others. Links marked with * are affiliate links.
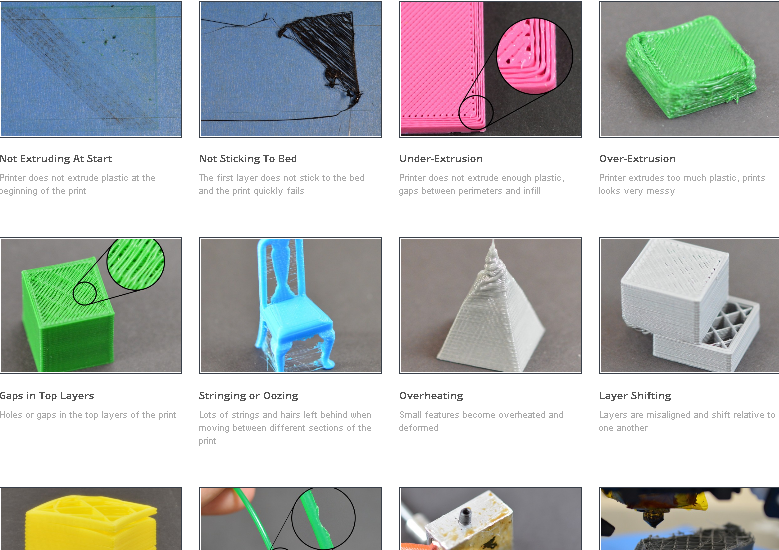
Not Sticking to the Bed
Not Sticking to the Bed
It is very important that the first layer of your print is strongly connected to the printer’s build platform so that the remainder of your part can be built on this foundation. If the first layer is not sticking to the build platform, it will create problems later on. There are many different ways to cope with these first layer adhesion problems, so we will examine several typical causes below and explain how to address each one.
Common Solutions
Build platform is not level
Many printers include an adjustable bed with several screws or knobs that control the position of the bed. If your printer has an adjustable bed and you’re having trouble getting your first layer to stick to the bed, the first thing you will want to verify is that your printer’s bed is flat and level.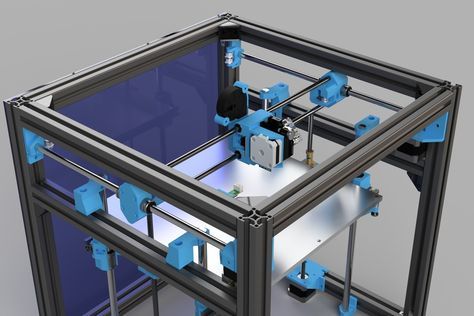 If the bed is not level, one side of your bed may be too close to the nozzle, while the other side is too far away. Achieving a perfect first layer requires a level print bed. Simplify3D already includes a useful bed leveling wizard that you guide you through the bed leveling process. You can find this wizard by going to Tools > Bed Leveling Wizard, and following the on-screen instructions.
Nozzle starts too far away from bed
Once your bed has been properly leveled, you still need to make sure that the nozzle is starting at the correct height relative to the build platform. Your goal is to locate your extruder the perfect distance away from the build plate — not too far and not too close. For good adhesion to the build plate, you want your filament to be slightly squished against the build plate. While you can adjust these settings by modifying the hardware, it is typically much easier (and much more precise!) to make these changes from Simplify3D. To do this, click “Edit Process Settings” to open your process settings and then go to the G-Code tab. You can use the Z-Axis global G-Code Offset to make very fine adjustments to your nozzle position. For example, if you enter -0.05mm for the Z-axis G-Code offset, the nozzle will begin printing 0.05mm closer to your build platform. Be careful to only make small adjustments to this setting. Each layer of your part is usually only around 0.2mm thick, so a small adjustment goes a long way!
First layer is printing too fast
As you extrude the first layer of plastic on top of the build platform, you want to make sure that plastic can properly bond to the surface before starting the next layer. If you print the first layer too fast, the plastic may not have time to bond to the build platform. For this reason, it is typically very useful to print the first layer at a slower speed so that the plastic has time to bond to the bed. Simplify3D provides a setting for this exact feature. If you click on “Edit Process Settings” and go to the Layer tab, you will see a setting labeled “First Layer Speed”. For example, if you set a first layer speed of 50%, it means that your first layer will print 50% slower than the rest of your part. If you feel that your printer is moving too fast on the first layer, try reducing this setting.
Temperature or cooling settings
Plastic tends to shrink as it cools from a warm temperature to a cool temperature. To provide a useful example, imagine a 100mm wide part that is being printed with ABS plastic. If the extruder was printing this plastic at 230 degrees Celsius, but it was being deposited onto a cold build platform, it is likely that the plastic would quickly cool down after leaving the hot nozzle. Some printers also include cooling fans that speed up this cooling process when they are being used. If this ABS part cooled down to a room temperature of 30C, the 100mm wide part would shrink by almost 1.5mm! Unfortunately, the build platform on your printer is not going to shrink this much, since it is typically kept at a fairly constant temperature. Because of this fact, the plastic will tend to separate from the build platform as it cools. This is an important fact to keep in mind as you print your first layer. If you notice that the layer seems to stick initially, but later separates from the print bed as it cools, it is possible that your temperature and cooling settings are to blame.
Many printers that are intended to print high-temperature materials like ABS include a heated bed to help combat these problems. If the bed is heated to maintain a temperature of 110C for the entire print, it will keep the first layer warm so that it does not shrink. So if your printer has a heated bed, you may want to try heating the bed to prevent the first layer from cooling. As a general starting point, PLA tends to adhere well to a bed that is heated to 60-70C, while ABS generally works better if the bed is heated to 100-120C. You can adjust these settings in Simplify3D by clicking on “Edit Process Settings” and then selecting the Temperature tab. Choose your heated build platform from the list on the left-hand side and then edit the temperature setpoint for the first layer. You can just double-click on the value to change it.
If your printer has a cooling fan, you may also want to try disabling that cooling fan for the first few layers of your printer so that the initial layers do not cool down too quickly. You can do this by clicking “Edit Process Settings” and going to the Cooling tab. You can adjust the fan speed setpoints on the left-hand side. For example, you may want the first layer to start with the fan disabled and then turn on the fan to full power once you reach the 5th layer. In that case, you will need to add two setpoints into that list: Layer 1 at 0% fan speed, and Layer 5 at 100% fan speed. If you are using ABS plastic, it is common to disable the cooling fan for the entire print, so entering a single setpoint would suffice (Layer 1 at 0% fan speed). If you are working in a breezy environment, you may also want to try to insulate your printer to keep the wind away from your part.
The build platform surface (tape, glues, and materials)
Different plastics tend to adhere better to different materials. For this reason, many printers include a special build platform material that is optimized for their materials. For example, several printers use a BuildTak sheet on the top of their bed that tends to stick very well to PLA. Other manufacturers opt for a heat treated glass bed such as Borosilicate glass, which tends to work very well for ABS when heated. If you are going to print directly onto these surfaces, it is always a good idea to make sure that your build platform is free of dust, grease, or oils before starting the print. Cleaning your print bed with some water or isopropyl rubbing alcohol can make a big difference.
If your printer does not include a special build platform material to help with adhesion, you still have options! Thankfully, there are several types of tape that stick well to common 3D printing materials. Strips of tape can be applied to the build platform surface and easily removed or replaced if you want to print with a different material. For example, PLA tends to stick well to blue painter’s tape while ABS tends to stick better to Kapton tape (otherwise known as Polyimide film). Many users have also had great success using a temporary glue or spray on the top of their build platforms. Hair spray, glue sticks, and other sticky substances tend to work very well if everything else has failed. Feel free to experiment to see what works best for you!
When all else fails: Brims and Rafts
Sometimes you are printing a very small part that simply does not have enough surface area to stick to the build platform surface. Simplify3D includes several options that can help increase this surface area to provide a larger surface to stick to the print bed. One of these options is called a “brim.” The brim adds extra rings around the exterior of your part, similar to how a brim of a hat increases the circumference of the hat. This option can be enabled by going to the “Additions” tab end enabling the “Use Skirt/Brim” option. Simplify3D also allows users to add a raft under their part, which can also be used to provide a larger surface for bed adhesion. If you are interested in these options, please take a look at our Rafts, Skirts, and Brims tutorial which explains things in greater detail.
Related Topics
everything you need to know
Many 3D printer owners experience parts coming off the table during 3D printing. Let's take a look at the causes and solutions.
What is adhesion?
The very concept of "adhesion" means the adhesion of surfaces of dissimilar bodies. In 3D printing, platform adhesion is the ability of the plastic that a part is made of to adhere to the surface of the stage during printing.
If the adhesion is insufficient, then the manufactured parts may be deformed or even come off the table. During 3D printing, the part must be firmly attached to the platform, and after completion, it should be easy to remove. Filament manufacturers typically recommend adhesives for their filaments, and 3D printer manufacturers offer worktables in aluminium, glass, stainless steel, or even with specialty coatings. All this helps the plastics stick better during printing, but there are no working surfaces that are equally well suited for all types of plastics.
Also, do not forget about thermal expansion, which causes a change in the dimensions of manufactured parts at different temperatures. The difference in temperature between the bottom and top of a part can cause the edges of the part to peel off during 3D printing. This mainly applies to materials such as ABS, which require a heated worktable to work with. When printing with these materials, the layers need to cool down a bit to be able to build a 3D object at all, but not so much as to cause peeling at the edges.
In this article we will look at what affects adhesion and how to solve many problems in terms of adhesion of products to work surfaces.
3D Printer Enclosed Chamber
For printing on materials with high heat shrinkage, the best option is to use 3D printers with an enclosed chamber that prevents drafts and retains heat. Many printers are equipped with an active chamber heater that maintains the desired temperature and does not allow the parts to cool. A uniform background temperature during 3D printing reduces warping and ensures better adhesion.
Owners of open printers are left to come up with various devices (for example, boxes) that cover the 3D printer to keep heat, or build heat-retaining walls around the printed model, which increases printing time and filament consumption.
First coat adhesion
The first thing you should pay attention to is the adhesion of the first layer. This is one of the most common problems faced by almost all printers. If the first layer is laid unevenly, then the percentage of rejects for the rest of the part increases very much, so it is very important to solve the issue of adhesion of the first layer before 3D printing. In most cases, the problem is solved by calibrating the work table and adjusting the distance between the nozzle and the work surface.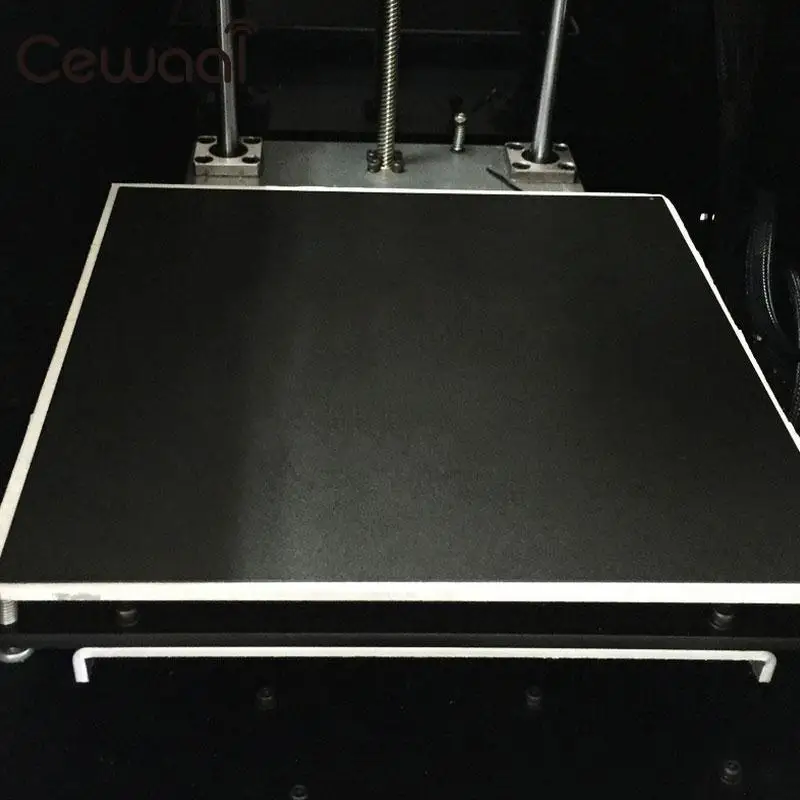
It is important to correctly set the distance between the nozzle and the stage surface
Brim and Raft methods
For better adhesion of the product to the working surface of the table, in the print settings it is often necessary to create additional elements - the substrate or the frame of the model, which help to keep the manufactured part on the table. Brim or Raft increase the contact surface of the plastic with the work surface around the lower layers and thereby increase traction.
Underlays or Rafts consist of several layers and are horizontal grids of filament located under the model. The raft is used as a base for the first layers of the product and is designed to increase the level of adhesion. In addition, the raft helps to level the surface of the table: if there are irregularities on the surface, they are leveled to a certain extent by the substrate, and the model is printed already on a flat base.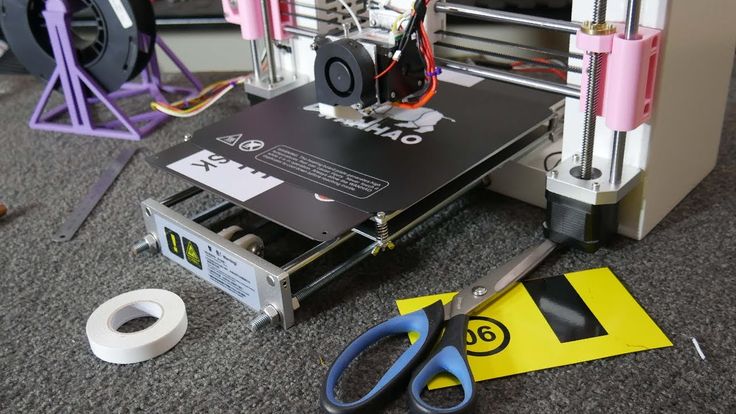 Another advantage of rafting is that it reduces the chance of problems due to too much or too little gap between the nozzle and the table when laying the first layer.
Brim is used to stabilize small patterns or "islands" (separated areas of the printed product). Brims increase the contact area and help the model stay on the table if it comes into contact with the surface in small areas.
Worktable temperature and adhesion promoters
After calibrating the platform and adjusting the gap between the nozzle and the surface of the table, let's move on to the next question. The next reasons for poor adhesion may be the wrong stage temperature (if the 3D printer has a heating option) and the wrong selection of adhesion promoters for a particular filament.
Working stage temperature selection
One of the common causes of poor adhesion is the wrong stage temperature selection for a particular material. When the molten filament is applied to the table and then cools, deformation occurs. If the temperature of the stage is incorrectly selected, the outer edges of the printed product are compressed, and we get warpage: the edge of the product comes off, clings to the nozzle, and the product completely comes off the platform.
Usually, 3D printing filament manufacturers list the recommended heating temperature for the stage on their website or boxes. For the most common materials, you can use average values.
Examples of worktable temperatures for some materials:
- PLA: 60°C
- ABS: 100-110°C
- PETG: 85°C
- Nylon: 100°C (depending on material composition) )
- Polycarbonate: 110°C (the higher the temperature, the better)
Worktable temperatures for each manufacturer's plastic may vary. You can choose the optimal temperature only empirically.
Adhesion agents
To increase adhesive properties and reduce the risk of damage to the glass surface of the desktop, additional agents are often used, such as varnish or glue for 3D printing, PVA glue, stationery glue stick, dissolved ABS plastic (so-called "ABS juice" ), blue tape, etc. One tool for printing all types of plastics will not be enough. In our article, we will not consider such folk remedies as beer or sugar syrup, but will focus on more traditional methods.
Basic adhesives:
Varnish or adhesive for 3D printing
The days of hair sprays are long gone, and now almost no one uses them due to low efficiency. More effective adhesives for 3D printing have come to replace.
Typically, 3D printing lacquers and adhesives are formulated to take into account the properties of different filaments and allow the first layer of the printed model to be reliably adhered to the worktable. Simply put, these are universal tools suitable for working with multiple types of filaments.
There are already quite a few manufacturers of 3D printing varnishes and adhesives on the market in various volumes and for any budget. It's not worth saving - one bottle will be enough for several months of printing, and you will save your nerves and time spent on reprinting damaged parts.
Easy to use: spray varnish or glue on the platform and spread it evenly over the surface with a clean, soft cloth.
ABS juice
Composition for those who like to save money or who do not have glue or varnish on hand. It is made simply: finely chopped ABS rod or the remnants of a previous printing with ABS plastic are immersed in acetone and after a few hours a thick solution is obtained that can be applied with a brush even on a cold platform.
This method is very reliable as an additional adhesive, but acetone evaporates during 3D printing and creates an unpleasant odor.
PVA glue, stationery glue stick
PVA glue is applied to the work surface with a brush and rubbed until a uniform thin layer is obtained. As a rule, when hardening, the glue becomes transparent. After drying, you can start 3D printing. The method is not bad, but the reliability of such a method is doubtful due to the fact that not all PVAs work well.
Stationery glue stick is mainly used when there is nothing else at hand. The most popular option is Kalyaka-Malyaka glue. The glue is applied in one layer, after the platform cools down, the part is easily separated, and the glue itself is easily washed off the glass and from the printed part.
Kapton film, blue masking tape and Lomond film
Masking tape is more suitable for 3D printers without platform heating. The adhesive tape is carefully glued to the entire area of the table and allows you to print small details without heating the table. This option is especially suitable when working with PLA plastic, however, with an increase in the area of \u200b\u200bproducts, the edges of the parts can come off along with the adhesive tape, so the relevance of this method is limited. Kapton tape or Lomond film is more commonly used.
On Kapton tape, the lower surface (the sole of the product) is very smooth, the parts are well separated after cooling, but you can’t leave the product on the cooled table, as the plastic pulls the tape together, and air bubbles form under it. When 3D printing on Kapton tape, it is necessary to heat the platform and additionally smear the adhesive tape with glue. Suitable for 3D printing of medium-sized products.
Lomond film was popular until various adhesives appeared. After gluing, the top layer on the film itself must be washed off for better adhesion. Details after printing on such a film are quite difficult to tear off. Over time, bubbles also form under the film, so the film must be changed regularly. Suitable for 3D printing large items.
Additional Points to Remember
PLA is the least demanding polymer. For stable printing with polylactide, it is not necessary to treat the surface of the table with additional adhesives, a clean glass surface is sufficient. A prerequisite is that the platform is heated to 60°C. If the platform is not heated, then it is better to print using adhesive agents - varnish, 3D printing glue or blue tape for small parts.
PLA also loves airflow, so keep the fans on full.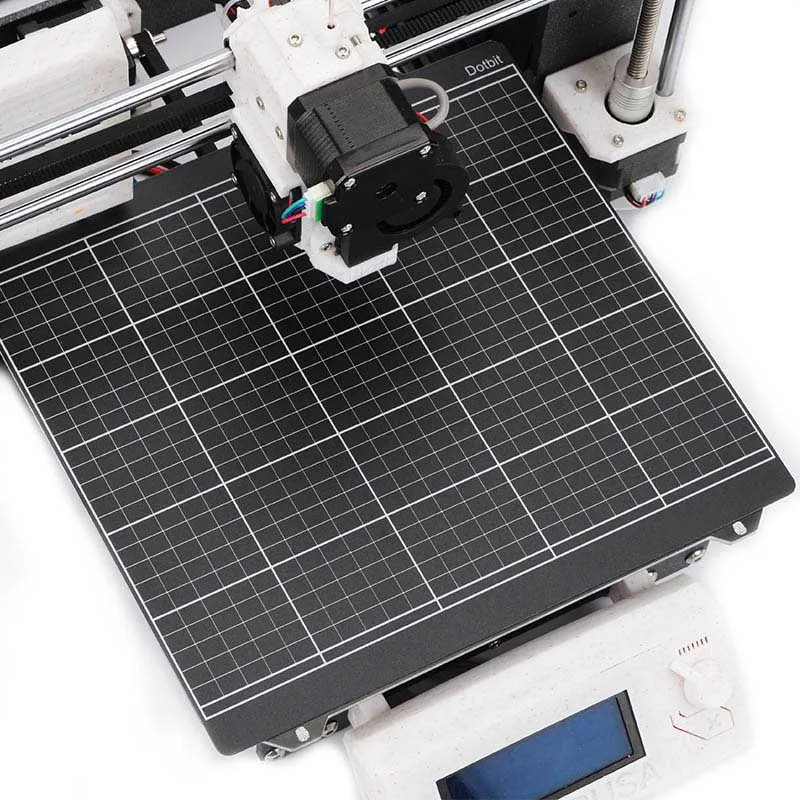
ABS is highly shrinkable and needs help to better adhere to the surface. The main types of additional tools are varnish or glue for 3D printing, ABS glue, stationery glue stick, PVA glue.
When working with ABS, the platform must be heated to 100-110°C. It is advisable to use 3D printers with closed cameras that support high background temperatures. When 3D printing on open printers, it is necessary to use a heat-retaining cocoon around the model. Many slicers already offer this feature. Blowing of products made of ABS plastic is highly undesirable, as cracking of parts in layers and detachment from the working surface due to shrinkage can occur.
PETG is a very easy to work material that does not require high temperatures or fine print settings. Plastic has excellent adhesive properties and adheres very strongly to clean surfaces. On the other hand, high adhesion can lead to separation of pieces from glass tables when products are separated, so it is advisable to apply separating layers on the work surface - the same glue or varnish for 3D printing. This will help both separate products and prevent damage to the glass.
Flex has high adhesive properties, bonding well not only between coats, but also to work surfaces. Again, it is advisable to use 3D printing varnish or glue to avoid damaging the glass. Film coatings are not recommended.
In the case of composite materials , the choice of adhesive agents is mainly determined by the type of material serving as the basis. Usually recommendations for preparing for 3D printing with composites can be found on the manufacturer's website. If not, please contact technical support for advice.
For example, the FormaX composite from the X-line range is based on ABS plastic, but the properties of the composite material differ from pure ABS due to the presence of carbon fiber filler. Formax is not characterized by cracking in layers, but the composite requires the use of additional adhesive agents, so the manufacturer recommends using varnish or glue for 3D printing
Material storage and drying
The effect of moisture on filaments can be both cosmetic and functional. The most innocuous result of high humidity is a change in the textures of 3D printed products, although this is rarely limited to roughness alone (and haze when it comes to transparent plastics) and is usually accompanied by a decrease in interlayer adhesion and adhesion to the substrate. A more serious effect can be an uneven supply of plastic: water in a sufficiently wet filament boils when passing through the hot end, and the resulting steam leads to the appearance of bubbles in the material being laid and even to jerky extrusion with all the ensuing consequences in terms of quality and poor adhesion. Detailed instructions for storing plastics are available at this link, and for drying plastics - here.
That's all for now.
The Wiki on our site has separate, detailed articles about each of the filaments. How to print and with what parameters. Come read here.
If you have additions or comments - we are waiting for your answers.
Regards, REC3D team.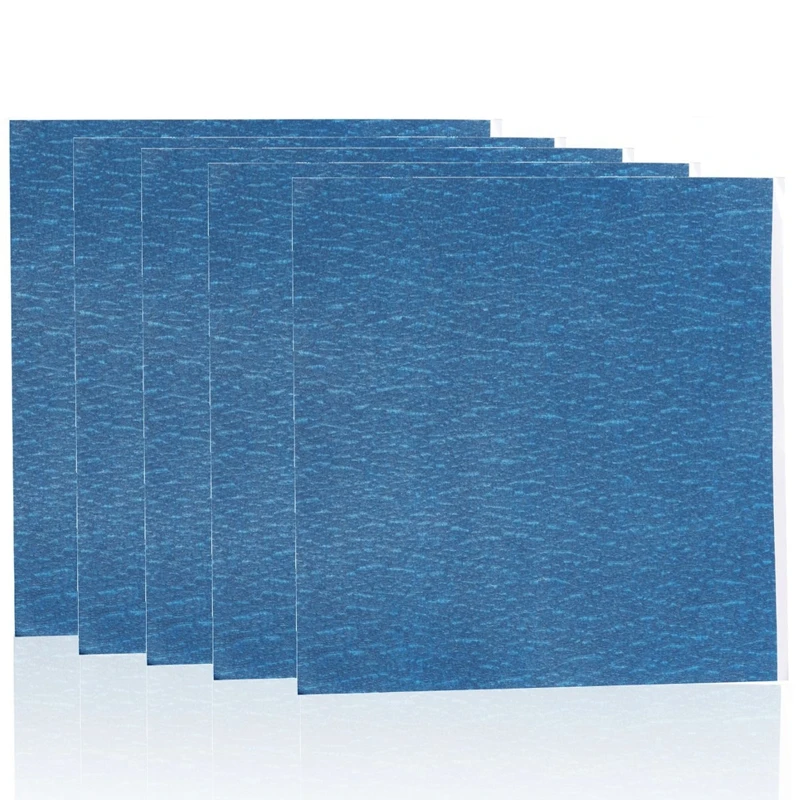
Photos from the blogs of Sergey and akdzg are published in the article.
The model does not stick to the 3D printer table: What should I do?
Adhesion of the model to the working surface of the 3D printer table - ways to increase it
FDM 3D printing technology involves a number of conditions in order to obtain the best printing result. One of these necessary conditions is a high adhesion rate, that is, reliable fastening of the lower printed layer of the product to the working platform of the device. In the case where the first layer does not adhere securely to the table, there is a high probability of occurrence of such troubles as deformation of the product. This is especially true of ABS plastic, in relation to the protruding parts of the product and corners.
Every 3D printer needs to be calibrated before printing. In this case, the height of the printed layer along the Z axis will be adjusted. Everyone knows that there should be a gap of about 50-75% of the thickness of the selected layer from the nozzle to the hot layer. Implementing this is very simple. You need to take a regular sheet of A4 office paper. The leaf density index should be 80 mg/m 3 . The nozzle should fit snugly against the table, but the sheet should pass with little effort. In this case, the calibration is considered correct. For those new to 3D printing, there are also videos illustrating proper desktop setup.
3D printers can be supplied with an aluminum or glass work platform, depending on the model. Some 3D printers prefer to print directly on the platform without using any additional tools. But in any case, there are some rules that must be followed.
Rule #1: A smooth surface must be free of dust and grease before printing. For this, isopropyl alcohol is used. If this rule is neglected, then you will definitely encounter deformation of the first printed layer, and, accordingly, the entire product will be of lower quality.
Rule #2: To improve adhesive performance, special products must be used: kapton tape, heat resistant tape, thermal mat, ABS solution, garolite, borosilicate glass, 3D printing adhesive, PEI film..jpg) The choice is quite wide and you can choose the best option.
The choice is quite wide and you can choose the best option.
Let's take a look at the most popular options for these products in more detail ...
Blue 3D printing tape or heat resistant tape
This is one of the popular options for increasing adhesion. The advantages of this material are convenience, low cost, ease of application, ease of removal of the finished product. The disadvantages include the disposability of this material, although this is not always the case.
The most popular type of heat resistant tape is blue 3D printing tape. Masking tape can be attributed to this category with a stretch.
How to use: Always degrease and clean the platform surface before using the adhesive. The tape is glued back to back so that there are no defects on the finished product. It is necessary to make pasting the platform as evenly as possible.
Applicability: Heat Resistant Tape is recommended to improve adhesive performance when printing with filaments such as PLA, ABS, Nylon, PETG.
3D Printing Adhesive
This adhesive is a bottle of clear liquid. The material can be used on both glass and aluminum platforms. It can also be used over masking tape or kapton.
The advantages of 3D printing adhesive are ease of application, low cost, compatibility with most 3D printed materials.
How to use: The adhesive was evenly applied to the degreased platform or material with a foam sponge.
Applicability: 3D printing adhesive is compatible with almost all materials. It is recommended to use it when printing with ABS plastic, ABS+, FLEX, RUBBER, PC, as well as PLA and other materials.
ABS solution
This adhesive is a solution of ABS plastic in acetone or ethyl acetate. To prepare such a solution, 15-20 cm of ABS plastic thread and 60-90 ml of ethyl acetate are used. The viscosity of the solution should be intermediate between milk and water, and the mixture should not resemble a resin or paste. This option is the most reliable, allowing to prevent deformation and bending of the corners of the product. But it will be important to maintain the correct consistency of the solution.
How to use: The prepared mortar is applied in a thin and even layer on a degreased working platform.
Applicability: This adhesive will be most effective on ABS plastics, it is also applicable to ABS.
Kapton tape or Kapton
This material is similar to tape in many ways. Kapton tape is a golden translucent material with an adhesive layer. Kapton is made on the basis of a heat-resistant polymer. Thanks to the use of this material, the lower part of the finished product has a smooth and even glossy appearance.
Method of application: Similar to blue adhesive tape - it is necessary to paste over the working platform as evenly and end-to-end as possible, having previously degreased it.
Applicability: It is recommended to use kapton tape when working with the following types of plastics: ABS, PLA
Thermal mat
This material is one of the most popular to increase adhesion. Its advantage is reusability and versatility. The use of a thermal mat allows you to achieve maximum adhesiveness of the printed product, as well as to protect the working platform itself, its surface from scratches and other damage. Thermal mat is a sheet of polymer. It can be magnetic or sticky.
Method of application: If the mat has an adhesive base, then the platform must be degreased before applying it. The protective film is removed from the mat, and it is evenly glued to the platform. To improve adhesion, the platform can be preheated to about 50 degrees. Calibration of the platform is carried out after gluing the thermal mat.
Applicability: Thermal mats are universal, that is compatible with all types of filaments.
Garolith
Garolith, also known as LE sheet, is a coating based on glass fiber or epoxy resin. There are several varieties of harolith.
How to use: The sheet is applied to the printing platform.


