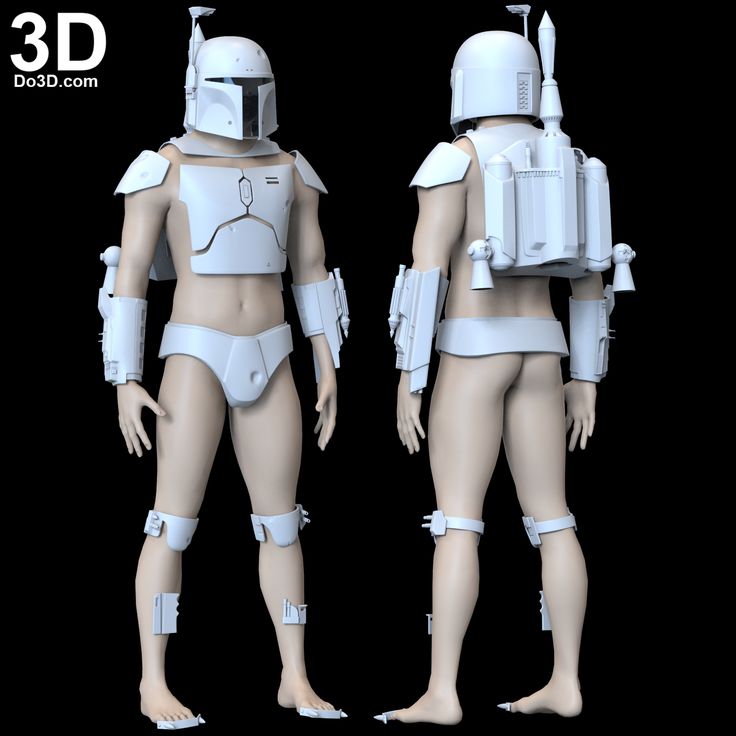
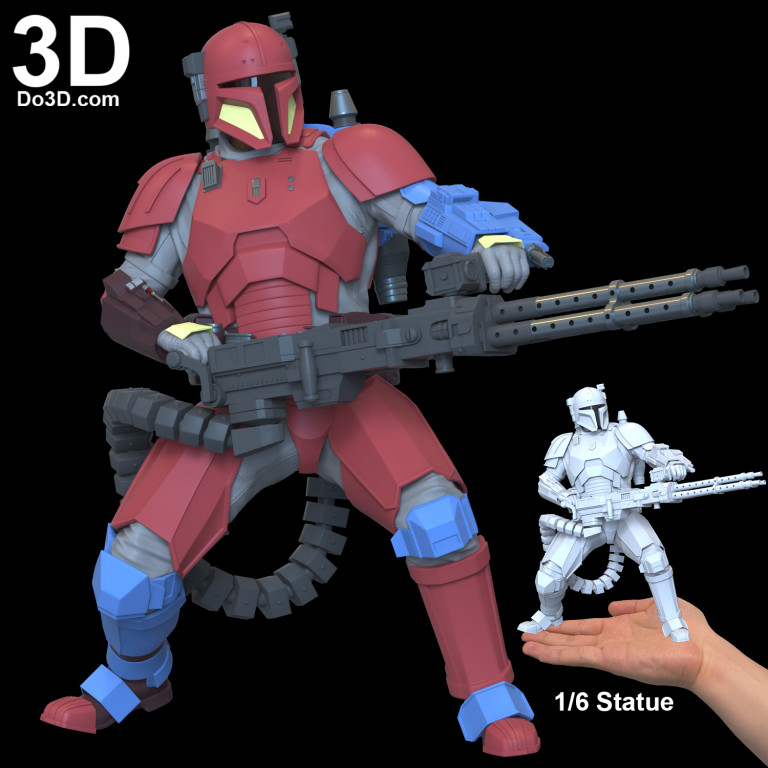
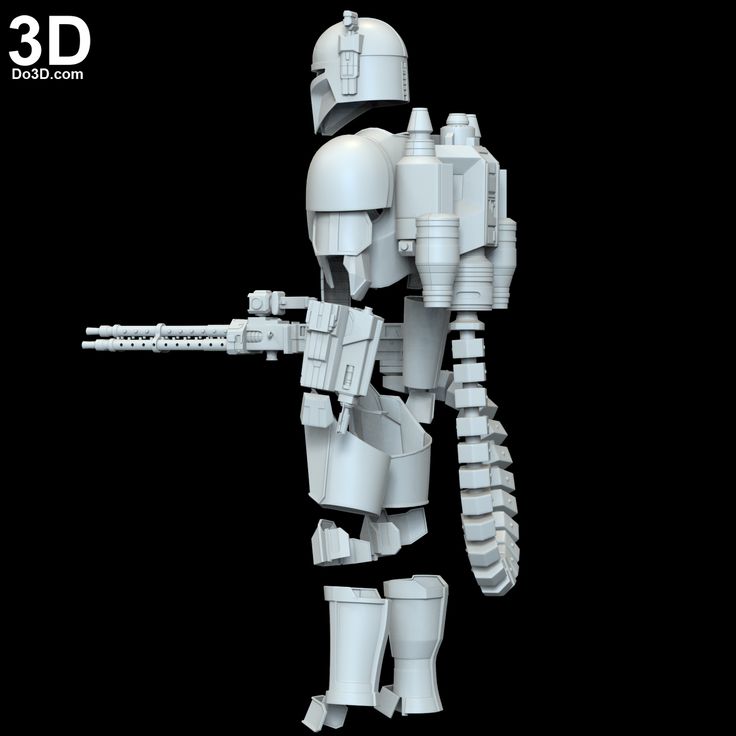
3D printed mandalorian armor
3D Printed Full Set Mandalorian Beskar Armor includes Helmet
Etsy is no longer supporting older versions of your web browser in order to ensure that user data remains secure. Please update to the latest version.
Take full advantage of our site features by enabling JavaScript.
Click to zoom
In 18 carts
€378. 83
Loading
Low in stock
Local taxes included (where applicable), plus shipping
505 sales |
4.5 out of 5 starsListed on Mar 3, 2023
4263 favorites
Report this item to Etsy
Choose a reason…There’s a problem with my orderIt uses my intellectual property without permissionI don’t think it meets Etsy’s policiesChoose a reason…
The first thing you should do is contact the seller directly.
If you’ve already done that, your item hasn’t arrived, or it’s not as described, you can report that to Etsy by opening a case.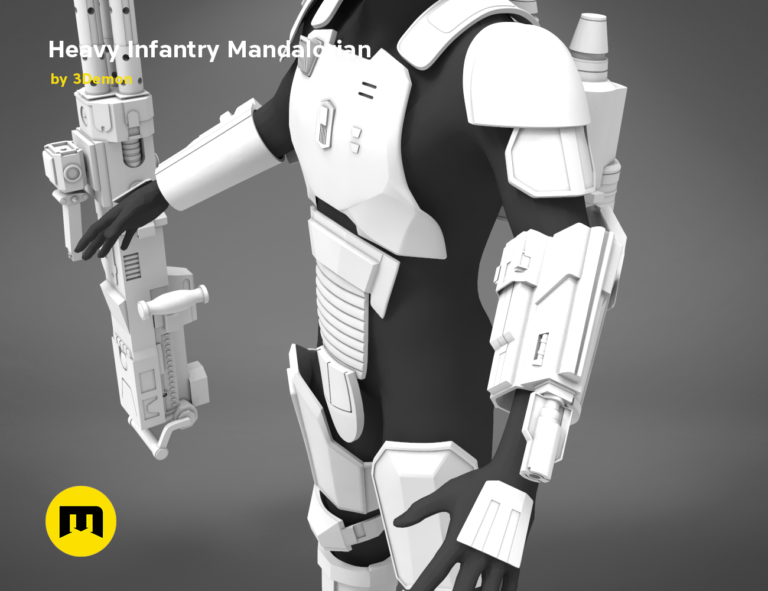
Report a problem with an order
We take intellectual property concerns very seriously, but many of these problems can be resolved directly by the parties involved. We suggest contacting the seller directly to respectfully share your concerns.
If you’d like to file an allegation of infringement, you’ll need to follow the process described in our Copyright and Intellectual Property Policy.
Review how we define handmade, vintage and supplies
See a list of prohibited items and materials
Read our mature content policy
The item for sale is…not handmade
not vintage (20+ years)
not craft supplies
prohibited or that use prohibited materials
not properly labeled as mature content
Please choose a reason
Tell us more about how this item violates our policies.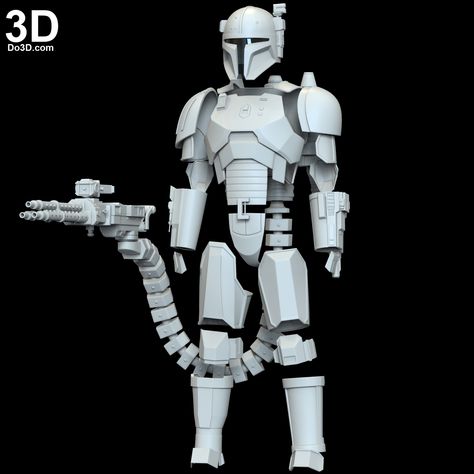 Tell us more about how this item violates our policies.
How a Dad Made a Mandalorian Costume for His Son using 3D Printing + More
In Australia, primary children celebrate Book Week each year by dressing up in costume and participating in a variety of activities. It’s one of only a few days of the year that children can attend school dressed in costume so many children and parents love getting really creative.
Over the years, my son, known as BOTW in Makers Empire, has gone to Book Week as Superman, Harry Potter, Batman, Iron Man, and Iron Patriot. Each year, I bought an official costume and he happily wore it to Book Week.
Last year, he wanted to go as The Mandalorian from the fantastic Star Wars TV series we’d been watching. Now finding a good Mandalorian costume wasn’t as easy. The Mandalorian outfit in the TV series was just so cool looking that the costumes for kids we found online didn’t quite measure up.
Also, in the meantime, both BOTW and his dad had gotten into 3D printing: BOTW was using Makers Empire at school to study Design and Technology and learn about real-world problem solving while his dad was using a 3D printer at home to make custom models and art pieces. BOTW had also created a number of Mandalorian costumes like these two below using Makers Empire’s 3D design software.
After some discussion, BOTW’s dad decided to try to make his son’s costume at home using 3D printing and materials from the local hardware and craft stores. Watch the video of BOTW explaining the process:
As you can see, he was thrilled with how well it turned out!
Now the video above summaries a huge amount of work that went into making the costume so we spoke with BOTW’s dad to learn more about making a kid-sized Mandalorian costume from scratch.
How would you describe your experience with making things?
“I’ve been making stuff ever since I was a kid but I didn’t get into making costumes until I was teaching in Japan and we would make costumes for events at school: I made a Ghostbusters costume and an anime costume.
“I’ve always enjoyed making things out of polystyrene foam as it’s so easy to shape but the 3D printer gives you the option to make durable objects that are more precise. I remember seeing STL files for mechs (big robots) online and that’s when I borrowed a 3D printer to see what it was like.
“A lot of the stuff I initially printed were mini models for Dungeons and Dragons (below left) or models for dioramas. I just printed out ready-made designs that I found and then painted them. I also printed out a baby Yoga/Grogu with heart using a pre-made design from Thingiverse (below right).”
How did you make the 3D printed Mandalorian helmet?
“I thought about using 3D design software to make my own parts but there are heaps of 3D designs already out there. Plus, my heart lies more in the making than the designing. You could definitely try to design your own helmet though – it would be a really fun challenge.
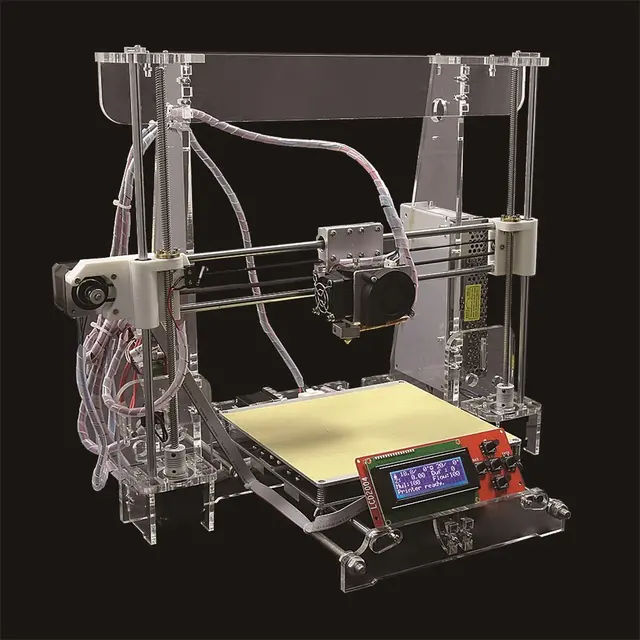
“So I looked on Youtube to see if I could find someone who had already 3D printed a Mandalorian helmet and three different people recommended this Nikko Industries helmet.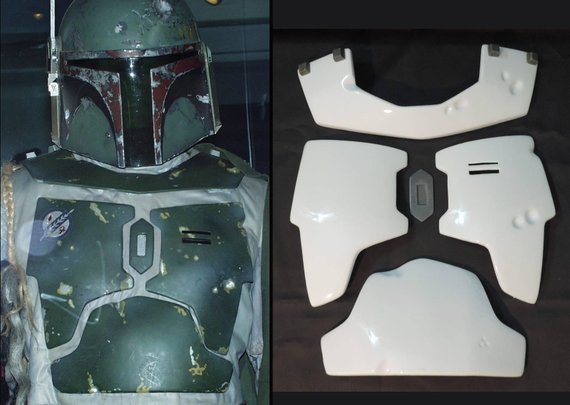 So I bought the STL file (about $30). I started with a child-sized helmet by scaling down the original design but the print failed. I was using the Crealty CR10 3D printer and it didn’t have a resume function or a low filament sensor so if the print failed mid-print it just failed. So that was quite frustrating.
“However, it turned out OK as I then realised it would make sense to make an adult-sized one so he could continue wearing it. So I printed the helmet again at full size. It was a four-day print in the end – the longest I’ve ever done — and I used about 1.5Kgs filament.
“Next, I looked on Youtube for tutorials re weathering Cosplay helmets and armour and applied similar techniques that I’d used on miniatures to paint and weather the helmet. So after printing the helmet I did the following:
- Removed the support material;
- Sanded the helmet with sandpaper to remove some of the layer lines;
- Sprayed the helmet with automotive putty spray primer to fill in some of the layer lines;
- Spray painted the helmet acrylic metallic silver;
- Weathered and distressed the helmet using watered down brown and back paint and a sponge using the techniques described in the video linked above;
- Gave the helmet a few coats of clear varnish to preserve and protect it;
- Stuck on carved, low allergenic foam padding inside to make it comfortable to wear; and
- Added black mesh to the front for good visibility as well as a black panel.
 ”
”
How did you make the Mandalorian body armour and cape?
“I made the pauldrons (shoulder guards) first as I wasn’t sure how long it was going to take and thought that if he had only the helmet and pauldroons it would still look cool.
“I watched this Make Your Own Mandalorian Beskar Pauldron video tutorial, which was really helpful, as it demonstrated foam cutting, sculpting and gluing. I then got a beskar pauldron template from Sionacch Studios that already had the Mudhorn emblem on it and printed it out. I then cut those pieces out of EVA foam from the local hardware and craft stores using a Stanley knife. I shaped the pauldrons using a heat gun and then realised this technique could be used to make the rest of the body armour.
“So I found a chest plate image online and printed it out on paper, tested it on him for size and then scaled it down to fit. I then cut it out of foam as before. For his arm guards and shin guards (greaves) , I just drew rough designs on paper, measured it on his arms and thighs to fit him over his clothes and then made them in foam using the same techniques described above.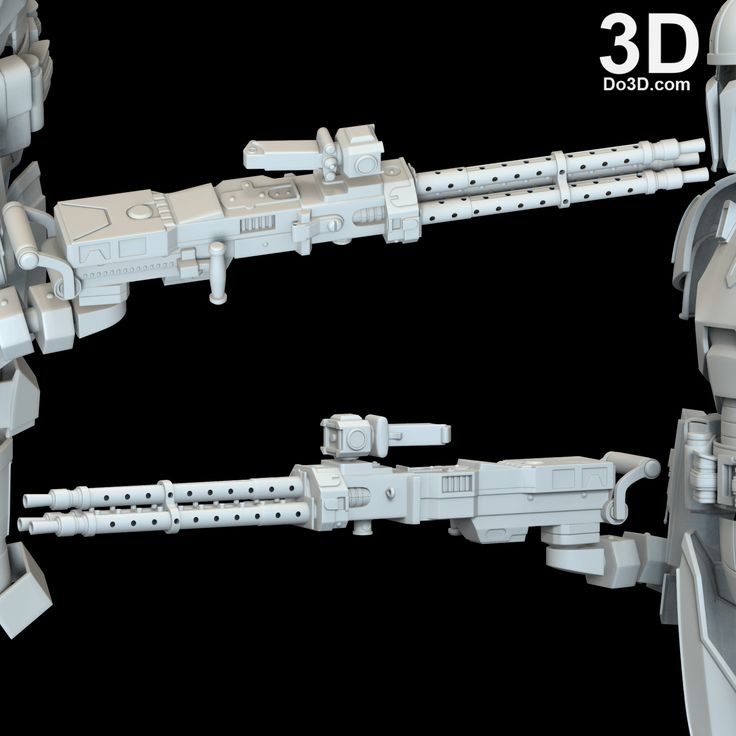 ”
”
“I then researched how to seal EVA foam for printing and found this helpful video tutorial. After sealing the foam as per the tutorial suggestions and letting it dry, I then painted and weathered all of the body armour using similar techniques as described earlier.
“I then measured up the velcro strips against the pieces and BOTW, cut them to the required lengths and attached them to the body armour using a mixture of hot glue and special glue from Bunnings.
“For the cape, I just bought an olive-brown piece of material from the local craft store and distressed it using sandpaper. I then glued velcro strips to it that secured it to the backside of the chest plate.
“The knob from the Razer Crest that Grogu plays with was made from a painted polystyrene ball. I’d previously made the Baby Yoga design using a design from Thingiverse and painted.”
Do you have tips for people wanting to make this costume?
- “Research, design and making the costume was about 20-30 hours total so allow yourself enough time.
 (You can use the designs he used and follow the suggested tutorials to save yourself research time).
 - It took about four full days to 3D print the helmet. I would recommend using a 3D printing service to print the helmet unless you already have access to a 3D printer and have some experience with 3D printing.
- Keep it to your level of experience and allow yourself plenty of time. You don’t have to go all out with this. Even if you just had the 3D printed and painted helmet and wore it with suitable clothes you’d still look pretty cool. People would still know you’re The Mandalorian as the helmet is the iconic, instantly recognisable item.
- Use the materials that are available to you. If it’s a costume for a child make sure you make it out of material that is sturdy and strong and that they have room to move and play in it.
- I found most supplies at my local hardware and craft stores. For more specialised items, the easiest way to find suppliers is to look up people who do live action role play in your area and see which suppliers they recommend.
- You should use appropriate safety gear when handling paint or glue. I used the following gear:
- Nitrile gloves for protection;
- Safety goggles; and
- Respirator when working with foam, paint or glue.”
How did your son react to the finished costume?
“I finished the costume late the night before Book Week and left it to dry. When I got up in the morning — and I got up early to help him with it — he was already standing outside the bedroom door wearing it!
“When I saw him, I thought, “wow, that looks amazing.” I was surprised he managed to get it on by himself though. I was also surprised to see that it all held together so well given that some of the glue had only been applied eight hours earlier (the glue needs 72 hours to set completely).
“The coolest thing was seeing how happy he was. It was enjoyable making it but it was stressful, too. It was really the look on his face when he had it all on that made it so special. ”
”
Christina Soong
Christina Soong is Director of Marketing at Makers Empire. Previously, she has held senior marketing and management roles for leading not for profits and arts organisations in Australia, Asia and England. Christina is also an award-winning writer and photographer and has worked as a consultant and content developer. Christina’s blog, The Hungry Australian, won the national Best Australian Blogs 2014 competition.
Recent Posts
Related Posts
Popular Posts
Recent Posts
Related Posts
Popular Posts
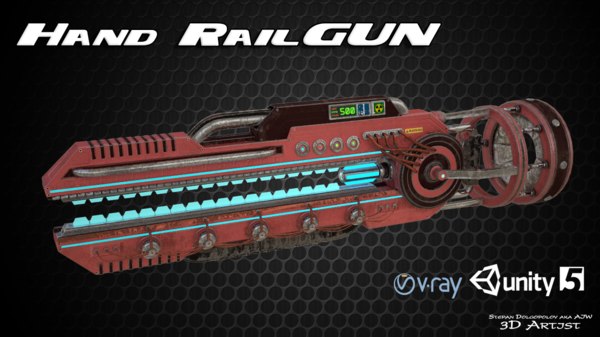
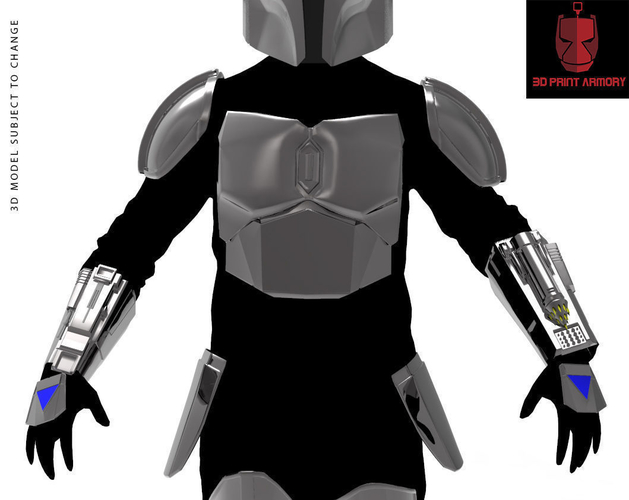
3D File The Mandalorian - Chest Plate Armor - 3D Model
Captain America Shield - STL - 3D files
19.89 €
Headpiece ZERO TWO - STL - 3D files - Darling In The Franxx
7,67 €
Catan card holder
0,99 €
Captain Carter's Shield - STL - 3D files
€19.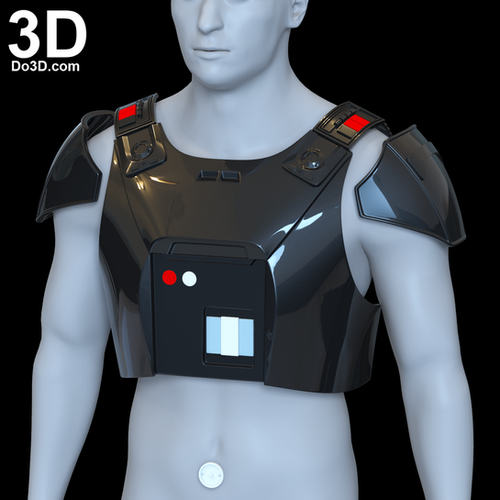 89
89
Scarlet Witch - Comic headdress
14.25 €
The Book Of Boba Fett - Shoulder Armor - 3D Model - STL (Digital Download)
4.99 €
Boba Fett - Chest Plate Diamond (Only) - 3D Model - STL (Digital Download)
2.60€
Boba Fett - Chest Plate Upper Piece (Only) - 3D Model - STL (Digital Download)
11.05 €
Best 3D Printer Files in the Miscellaneous Category
Anonymous custom nozzle
2.47 €
Batman/Joker sculpt
Free
Flashing pumpkin
Free
CLUMSY seal in place Skeleton Cat Flexy Halloween
3. 12 €
12 €
Ceramic pot holder Ivoclar IPS Style
20 €
Steam locomotive - Locomotive - DRG Class 24 - DR BR 24 - DR-Baureihe 24 - Super highly detailed model
10 €
DIY Sprint Race Timing System with Arduino
Free
Arumbaya Fetish - Tintin & Snowy
Free
Bestsellers in Miscellaneous category
Mobile phone holder printed in one piece with gears
6.50 €
Housing FLSUN V400 Version CUT
5 €
4th planet Fighting pre-Olympic god
12 €
Wolf - Flexi Articulated Animal (printed in place, without supports)
2 €
Key holder for middle finger
1 €
Rattlesnake repeating crossbow-pistol with magazine Caliber 12 mm
12,50 €
Melee Weapon Exo Armor
3. 69 €
69 €
Coffin for cartridges 22LR
7.05 €
BoltHAMMER - repeating crossbow pistol with quick change magazine
12.50 €
Decaying bamboo pole
0.94 €
Articulated Gyarados
1.99 €
5-point racing harness kit for 1:24 scale models
3.82 €
SlingHAMMER - repeating crossbow pistol for 6mm 8mm 10mm or 12mm steel balls
12.50 €
Articulated Raykuaza Flexible Dragon Pokémon
1 €
Mr. Mario Juano
2.60 €
Gengar pen holder
1.50 €
💖 Do you want to support Cults?
Do you like Cults and want to help us continue our journey on our own ? Please note that we are a small team of 3 people, so supporting us in maintaining activities and creating future developments is very easy. Here are 4 solutions available to everyone:
-
AD: Disable your AdBlock banner blocker and click on our banner ads.
-
AFFILIATION: Shop online with our affiliate links here Amazon.
-
DONATIONS: If you want, you can donate via Ko-Fi here 💜.
-
INVITE YOUR FRIENDS: Invite your friends, discover the platform and the great 3D files shared by the community!
3D printer cosplay application examples
Probably everyone wanted to feel at least for a while in the shoes of their favorite hero. Or briefly be in a fantasy world. Cosplay allows, at least for a while, to plunge into a fictional world with its own laws.
Cosplay should not be confused with role-playing, because cosplay does not imply the development of the character or history of the character. It focuses on the detailed reproduction of the image of the character to the smallest detail.

Some people think that cosplay is limited only to curvy girls in skimpy outfits, but this is far from the case. The skill of some cosplayers is amazing. They manage to single-handedly create amazing things with precision and detail that many workshops cannot reproduce.
Terminator suit from Warhammer 40k
A good cosplay is not only an external correspondence to the appearance of the selected character, it is the ability to convey the character and other features of the character (for example, characteristic movements, facial expressions, etc.). At photo shoots, with the help of Photoshop, they try to add the atmosphere of the world to better convey the nuances of the character.
It is believed that the term Cosplay was coined by Japanese journalist Nobuyuki Takahashi. The word itself is a combination of the initial letters of the word costume (costume) and play (play).
Warhammer 40k universe photo shoot
The advantage of 3D printing for costume elements
Previously, a cosplay costume was literally made from improvised materials. Each, to the best of his skills, available tools and ingenuity, used various, mainly construction, materials to assemble the costume - isolon, glue gun, tourist rugs, etc.
Now available special materials for the manufacture of parts. The most popular of them is Eva foam.
Eva
Eva is a very convenient material for making a variety of armor. The biggest advantage over other materials is thermoplasticity. When heated, eva easily bends, and after cooling, it keeps its shape. On sale you can find eva foam of various hardness and thickness.
Making armor from eva
But there are certain nuances - for the correct cutting of eva, patterns are needed (there are special patterns or patterns for pepakura are redone). When cutting, it is necessary to take into account the location of the edges and make the cut not straight, but at an angle. Sections, after gluing, must be further processed with sandpaper. The surface of eva is porous, so it is advisable to treat the surface with latex before painting to obtain a smooth surface. For painting and putty, it is desirable to use elastic materials, because eva still remains a little flexible.
Pepakura
Papercraft - this is the name of patterns (reamers) for the manufacture of various elements from paper.
Not only cosplayers are addicted to papercraft, for some it is enough to glue a paper model for a collection.
Usually pepakura is used as an inexpensive and easy way to make massive armor when there is no way to get eva foam.
First, the paper model is glued together. Paper is usually chosen with a high density to minimize the risk of deformation of the model during further work.
Finished paper model
After gluing, the model must be strengthened. For this, fiberglass and epoxy resin are usually used. When impregnating a paper model, it is very important to ensure that the geometry of the model does not "lead". Usually epoxy and fiberglass are applied in several layers. Before applying a new layer, it is necessary to wait for the polymerization of the old one, usually it takes 24 hours.
The resulting model is strong, but too angular. Models in papercraft are high-poly and it is necessary to manually smooth out the angularity with putty and sandpaper. After painstakingly removing the surface of the model, it can be painted.
Left paper model, right after strengthening, processing and painting
Models made by this method are very heavy due to epoxy and putty. And the manufacture of one product takes a lot of time, but this method remains popular because of its availability and low cost. Epoxy can be found in any building market, and fiberglass is easily interchangeable with other materials.
Modeling and casting
This method is suitable when you need to quickly produce many identical parts. A master model is made (for example, from plasticine) and a mold is removed from it using special silicone, into which epoxy, special two-component plastics or polyurethanes can then be poured, depending on what characteristics you need to get in the finished product.
Two-component plastic purity print with metallic powder
To color the finished casting, you can knead the dye into liquid plastic or rub the mold with special powders.
It makes sense to make silicone molds if you need to make many identical elements, it is not advisable to remove the silicone mold for one casting. Silicone is still not cheap and not everywhere you can buy it. In addition, it is necessary to have some skills in silicone and plastic/resin casting in order to minimize the amount of air bubbles and get a quality casting.
Handy materials
And of course, masters know how to use the most unexpected things for cosplay.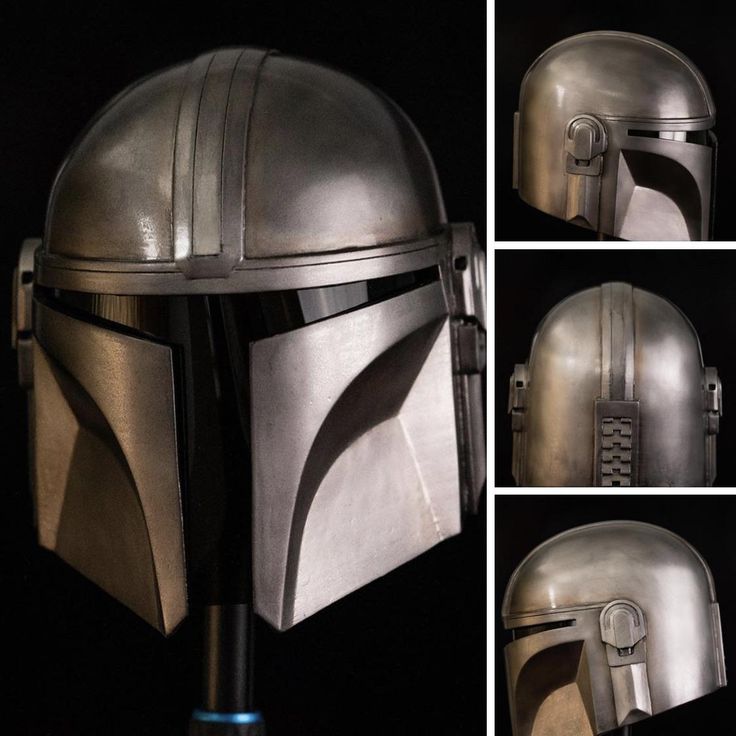 For example, PVC pipes are often used to make frames for fantasy weapons. Izolon for making feathers for wings, etc.
Acrylic folding knife
Using PVC pipes as a sword frame
3D printing
Using a 3D printer to make a complete costume may not always be advisable due to the high cost. But in the manufacture of elements with complex geometry, small elements or high detail, it can greatly facilitate the task and save a lot of time. A 3D printer becomes indispensable for printing engineering, moving elements. This is very convenient when a seat for all wiring and electronics is immediately included in the model and you don’t have to puzzle over where to place everything after assembly.
But 3D printing also has its drawbacks. When fabricated on an FDM printer, models must be further processed to obtain a smooth surface. If you print on a photopolymer printer, then the cost of the finished product will be quite high.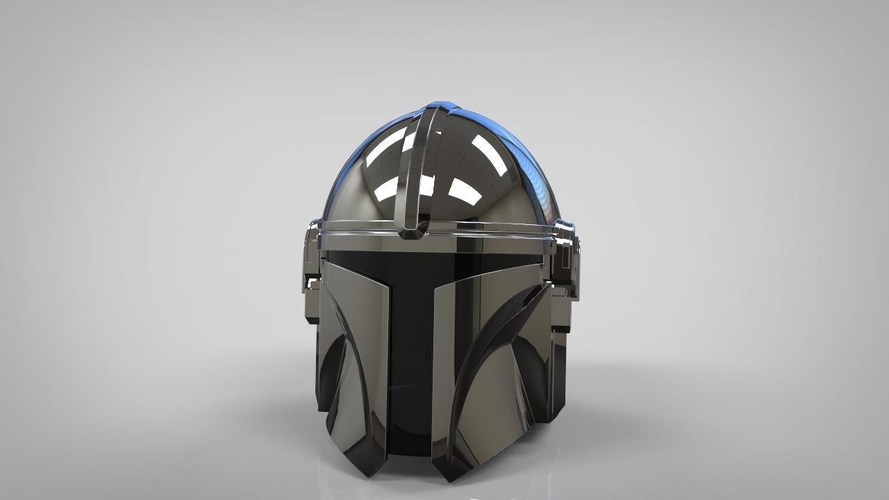 Large elements of the costume will have to be printed in parts and then glued together.
Cosplay 3D printer application examples
Whole costume printing
A 3D printer is becoming an indispensable tool for manufacturing geometrically complex suits or, for example, functional elements of armor.
Iron Man Armor.
Emily Yarid has been modeling, building and refining Iron Man armor since 2013. She initially took it up out of boredom, deciding to upgrade the costume she had.
In the Tony Stark suit, the reactor glows, the helmet automatically closes and opens. On the back there are functional "wings" that open and close.
One of Emily's ready-made costumes
The girl uses a 3D printer to make armor elements. After printing, she processes and paints the details herself.
Printed Armor
Tony Stark Mask
HALO
A user with the nickname mosquitobandito collects full-fledged armor from the HALO universe.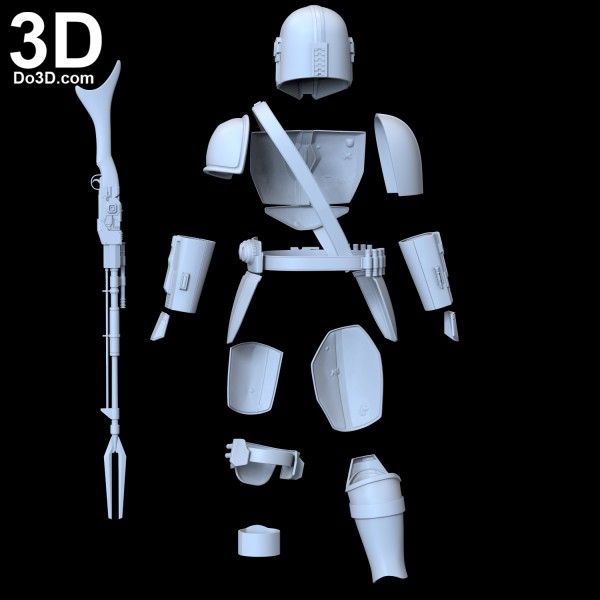
Armor 3D model
Armor is almost entirely 3D printed. There are a lot of issues that need to be addressed when modeling to keep the armor as mobile as it is in the game.
Shoe cover
Pre-assembly of the upper part of the armor before gluing and processing.
The armor part is pre-cut into several parts and printed in parts on an FDM printer. After printing, be sure to check how the parts fit together, as the plastic may shrink unevenly.
Treated and painted hand protection
Costume print
Making a full-fledged costume using 3D printing is not always justified. Simple shapes are much faster and cheaper to make from other materials such as eva.
But complex parts such as helmets, weapons, armor elements are much more accurate if they are made using 3D printing.
Steam Punk Star Wars Helmet
Hand making all the patterns would take much longer, and it is important to make all the patterns symmetrical.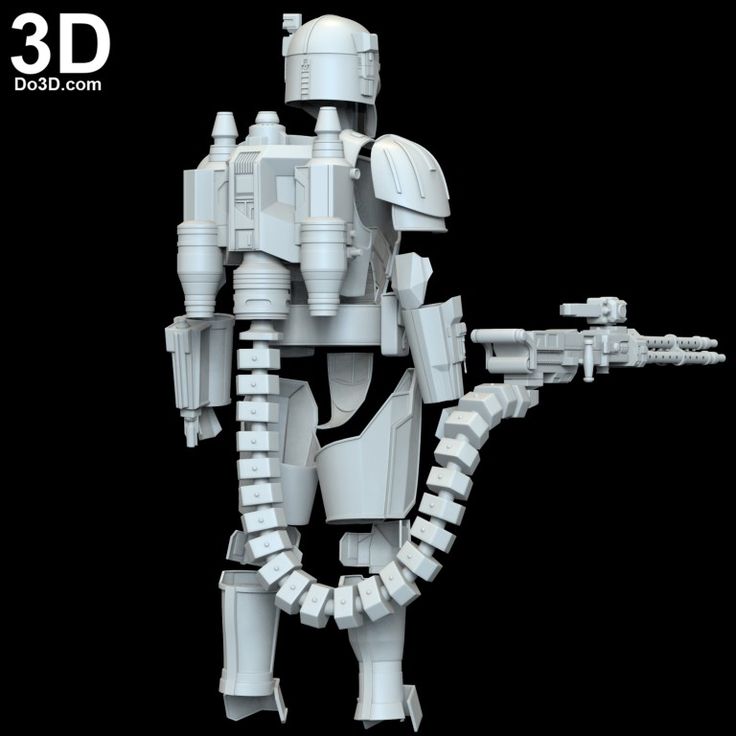 This is a very painstaking work that requires a lot of patience, perseverance and experience.
Iron Man Steampunk Helmet
Composite weapon
Some elements seem quite simple to manufacture, but it can be very difficult, even with a template, to make symmetrical and smooth bends.
Wolverine's Buildable Helmet
Master model making
Sometimes the material with the desired properties is found only among foundry resins and plastics. But to remove the form, you still need a master model.
Epoxy sword casting
It was necessary to make a transparent sword. Epoxy resin is well suited for manufacturing. The master model (except for the rose) was printed on a 3D printer.
Prepared master model
The sword was printed in half - it is much easier to get a high-quality casting without bubbles. The halves of the sword are still the same and can be glued together. After printing, the surface of the master model was brought to perfect smoothness and primed.
Formwork is being prepared from improvised materials for pouring silicone molds
Preparation of the master model for filling with silicone
A slightly tinted epoxy resin is poured into the resulting mold to give an icy blue tint. After casting, 2 halves can be glued together with the same epoxy.
The result is a stunning sword, as if carved from ice. Such an effect would be difficult to achieve using other materials.
Finished casting
Finished Epoxy Sword
Rating of the best cosplay printers
FDM printers
FDM technology for making cosplay has its pros and cons.
Pros:
-
Large build area. Some printer models can print an entire full-size helmet.
-
Inexpensive consumables. The cost of a plastic thread (filament) is still much cheaper than consumables for other technologies.
-
A wide selection of different materials. You can find a filament for any task - from engineering to decorative.
Minuses:
Creality3D Ender 6 (build kit)
Creality3D Ender 6
Characteristics:
Print technology: FDM/FFF
Working area size: 250x250x400mm
Number of extruders: 1
Closed Camera: Yes
Heated table: Yes
Plastic type: ABS, ABS+, PLA, PLA+, PETG, Flex, Nylon (Nylon), ASA, Carbon, Decorative plastics, others
Inexpensive printer for a beginner who knows how to handle tools. Supplied as an assembly kit. A large build area will allow you to print large parts in their entirety, and the version with a closed body can print with any, even engineering, plastics.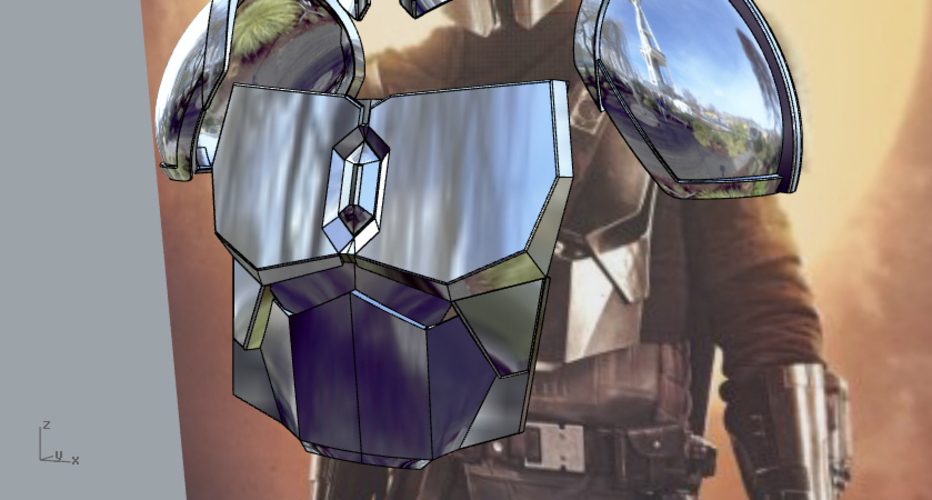
FlyingBear Ghost 5 3D printer (assembly kit)
Flying Bear Ghost 5
Characteristics:
Print technology: FDM/FFF
Working area size: 255x210x200 mm
Number of extruders: 1
Closed chamber: No (but there is an option to purchase)
Heated table: Yes
Plastic type: ABS, ABS+, PLA, PLA+, PETG, Flex, Nylon (Nylon), ASA, Carbon, Decorative plastics, others
A very popular device due to its affordable price. It is sold as a kit kit (for self-assembly), but thanks to the detailed instructions and a huge number of video guides, assembly should not be a problem.
The huge fan base of FlyingBear Ghost 5 makes it easy to find ready-made upgrades and add-ons for the printer. This device is perfect for those who like to experiment and learn something new.
Wanhao Duplicator 6 Plus
Characteristics:
Print technology: FDM/FFF
Working area size: 200*200*180mm
Number of extruders: 1
Max.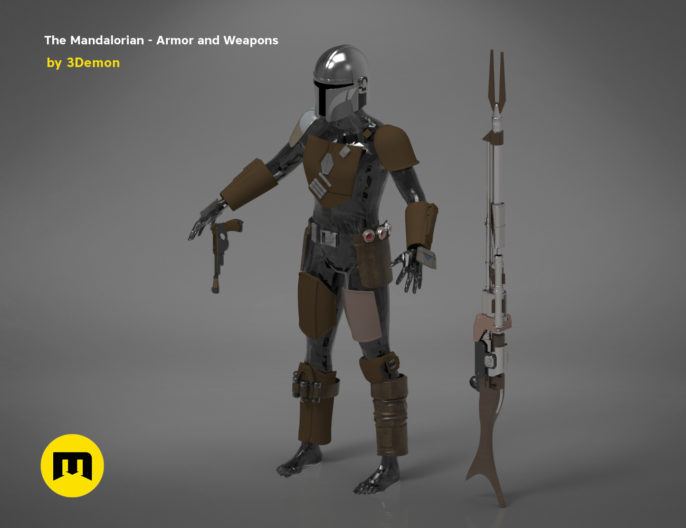 extruder temperature: 260 degrees
Closed Camera: Yes
Heated table: Yes
Plastic type: ABS, ABS+, PLA, PLA+, PETG, Flex, Nylon (Nylon), ASA, Carbon, Decorative plastics, others
Wanhao Duplicator 6 Plus is a reliable workhorse for those who do not want to delve into all the nuances of a 3D printer. Available in 2 versions - with a closed case and not. It is better to immediately purchase a printer with a closed housing so that there are no problems with printing engineering plastics such as ABS, Nylon, etc.
Raise3D Pro2
Raise3D Pro2
Characteristics:
Print technology: FDM/FFF
Working area size: 305x305x300 mm - when printing with the 1st extruder;
280x305x300 mm - when printing with 2 extruders
Number of extruders: 2
Max. extruder temperature: 300 degrees
Closed Camera: Yes
Heated table: Yes
Plastic type: ABS, ABS+, PLA, PLA+, PETG, Flex, Nylon (Nylon), ASA, Carbon, Decorative plastics, others
This is already a serious device with a large print area and 2 extruders for printing complex models.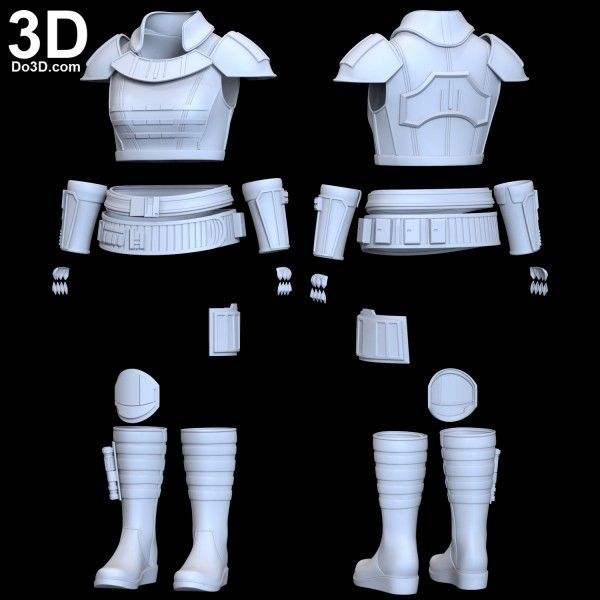 Raise3D Pro2 can be a great help in a small workshop for making decorations and cosplay.
Photopolymer printers
Photopolymer printing is not yet so common for making large items due to expensive consumables, but Western cosplayers have already appreciated the advantages of photopolymer printers for printing small items.
Pros:
-
The ideal surface of the finished model.
-
Amazing detail that is impossible to get on FDM printers.
-
Large selection of resins. You can get an optically transparent model.
Minuses:
Anycubic Photon Mono
Anycubic Photon Mono
Characteristics:
LCD display resolution: 2560x1620 (2K)
XY Positioning Accuracy: 0.051mm
UV wavelength: 405 nm
Working area size: 130x80x165 mm
Layer thickness: 0.01-0.15mm
Affordable photopolymer machine with a small print area.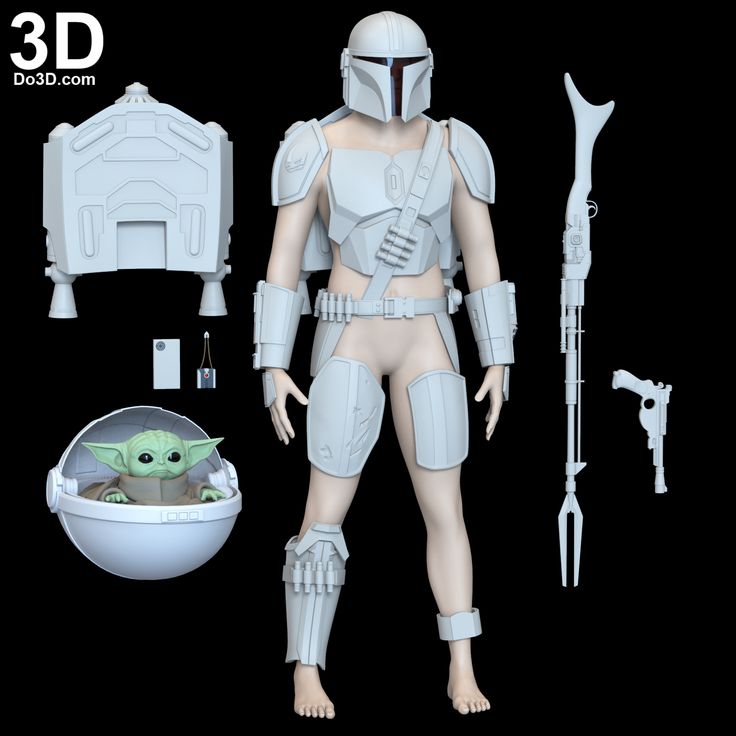 Suitable for making small items.
Phrozen Sonic Mighty 4K
Phrozen Sonic Mighty 4K
Characteristics:
LCD resolution: 9.3" 4K Mono LCD
XY positioning accuracy: 52 microns
UV wavelength: 405 nm
Working area size: 200x125x220 mm
Layer thickness: 0.01-0.3mm
The Phrozen Sonic Mighty 4K is a professional 3D printer with a large print area and a 4k monochrome sensor. This allows you to quickly receive finished products with amazing accuracy.
Phrozen Sonic MEGA 8K
Phrozen Sonic MEGA 8K
Characteristics:
LCD resolution: 15" 8K Mono LCD
XY Positioning Accuracy: 43 µm
UV wavelength: 405 nm
Working area size: 330 x 185 x 400 mm
Layer thickness: 0.01-0.3mm
A professional 3D printer with a huge (by the standards of photopolymer printers) printable area.