3D printed anime figurines
3d Printed Anime - Etsy.de
Etsy is no longer supporting older versions of your web browser in order to ensure that user data remains secure. Please update to the latest version.
Take full advantage of our site features by enabling JavaScript.
Find something memorable, join a community doing good.
( 1,000+ relevant results, with Ads Sellers looking to grow their business and reach more interested buyers can use Etsy’s advertising platform to promote their items. You’ll see ad results based on factors like relevancy, and the amount sellers pay per click. Learn more. )
3D Printed Anime Figures: Best Sites & 40+ Top Free Files
When you think about it, it’s kind of crazy how huge anime is in the west. As a staple of the Japanese entertainment industry, it’s surprising just how popular it is with American and European audiences.
From Akira to Dragon Ball, Naruto to Pokémon, anime has its place in the hearts of many, regardless of where they’re from. And it’s always fun to celebrate that fandom in unique and fun ways.
3D printing anime toys, figurines, and collectibles is a cool way to express your love of your favorite show, manga, or even just anime in general.
There are so many awesome 3D printed anime projects out there that I couldn’t possibly get to them all, so here I’m going to show you where to find some of the best places to find STL files for anime, along with a few of my personal favorite prints.
Since I’m a huge anime fan, I’ll try not to skew the recommendations towards my own tastes too much, but I can’t promise to try very hard.
Why 3D Print Your Own Anime Things?
While there are stores and online marketplaces for any weeb to find their favorite anime, it’s cheaper and a lot more fun to 3D print your own anime toys and figurines.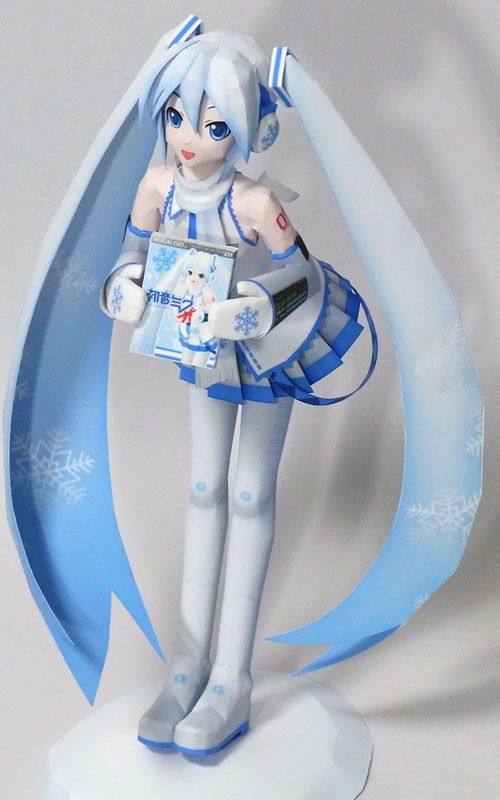
Can’t find one particular character anywhere? Or maybe your favorite anime is too shadowed by the bigger shows to be stocked in your favorite store? 3D printing your own anime collectibles is a great way to ensure you get what you want at a fraction of the cost.
One of the best reasons to 3D print anime stuff is to put your own spins on already existing characters. Want a Pikachu dressed like Deadpool? Or maybe you want a super swole version of the electric mouse for some reason. 3D printing has got you covered.
Or why not print out Sasuke Uchiha as an Among Us character? You won’t find that in stores (at least not the ones I go to.)
With the right editing software, you can add your own touches on any anime 3D print. Give Krillin super Saiyan hair, reunite the Elric family, or have Luffy wield Zangetsu. The only limit is your imagination!
How to 3D Print Anime Figures
3D printing anime toys isn’t much different from other projects. Though naturally there are some things you should keep in mind for top results.
When printing anime characters and set pieces, you’re likely looking for something that seems to have stepped right out of the screen. For this kind of detailing, you’re better using a resin printer as they’re known for their higher resolution prints.
To avoid disappointment, make sure you’re using the highest quality materials and the best resolution possible. Unlike regular prints or parts, you’ll want a nice finish and professional-quality detail.
They may be cartoon characters, but few things are worse to the average anime fan than memorabilia that doesn’t quite match the source material.
Where Can I Find Anime STL Files?
Thingiverse
Thingiverse is an awesome site filled with free STL files for 3D printing, so naturally it’s a great place to look for some anime figurines to print today.
As a community-driven space, Thingiverse is host to a lot of unique designs from creators eager to show off their work and see others put their own spins on their designs
If you’re a Ghibli fan then you’ll love the iconic Totoro family of My Neighbor fame, and the memorable Cat Bus that is still influencing pop culture today in things like Morgana’s bus transformation in 2016’s Persona 5.
If cats are your thing but My Neighbor Totoro isn’t, then check out this anime figure of the often-overlooked Korrin from the overwhelmingly famous Dragon Ball franchise.
Of course, talking about all the Dragon Ball 3D prints you can find on Thingiverse would be an article all its own. The long-running (and still going) series has seen dozens of characters, many with different forms and transformations that I couldn’t possibly cover here.
From SSJSS (later thankfully renamed SSJ Blue) Goku to Kid Buu, Freeza to Cell, and my personal favorite character Future Trunks, you’ll have no problem finding whatever Dragon Ball model you want in any striking anime pose like the ever-popular Kamehameha.
And yes, I spell Freeza without an I.
Needless to say, Thingiverse is a great resource for 3D printing anime figures. If your fandom is a mixed bag like mine, then you’ll find some really cool things to fit your eclectic tastes. Kakashi Pikachu, anyone?
Cults 3D
Cults is another resource for finding excellent anime 3D prints. While many of them are paid for, the designers normally ask very little for their creations, often less than $3 depending on the file.
Cool 3D printed anime models range from Pokémon cookie cutters to add to any 3D printed cookie cutter collection, to some awesome models that look like they stepped from straight out of the manga like this amazing Naruto statue.
Speaking of Naruto, do you remember when Orochimaru was a legitimate threat? Those were good times. If you want to hark back to the days when the villain was actually scary, then this Orochimaru print complete with creepy pose is the perfect one for you.
If you prefer the heroes of the tale, then you may want to check out this design for a decorative piece that, if painted carefully, honors the first five Hokage of the Hidden Leaf Village. Of course, you can always add to the design to feature the sixth and seventh too.
The absolute cutest anime 3D print I could find on Cults is this adorable Calcifer chibi print. Any fan of Howl’s Moving Castle will be happy to have this smart-alecky sentient flame decorating their home.
Call me basic, but my favorite Studio Ghibli creation is Spirited Away, so I’d be remiss not to mention this collection of Spirited Away characters from the beloved anime film. If you want something a little more unique, however, then you might find these accurate models for Yubaba’s loyal and weirdly talented minion heads.
MyMiniFactory
MyMiniFactory is often my go-to for any project. Like Thingiverse, many of the options are free, but you can opt to pay for premium prints if you want something a little more professional.
The 3D printed anime figure and toy options are plentiful, and you should have no trouble finding your favorites here.
This Metalgarurumon was the first to jump out at me with a wave of nostalgia. Don’t worry, though, it’s plastic!
If you want something wearable, then why not try this Tobi mask on for size? It may not do any favors for your depth perception, but it will hide your identity for your nefarious schemes (though let’s be honest, who here didn’t figure out who Tobi really was years ahead of the reveal?)
There are also cool relief designs of 3D printed anime characters by designer Bonnet Sébastien, including Monkey D. Luffy, Gaara, Street Fighter’s Sagat, and even Aang!
If you have clear or translucent filaments, then I cannot recommend this Soul Eater moon lamp enough. It looks as awesome as it is creepy, and will be immediately recognizable to any fan of the action-packed madness of the anime.
Even if you don’t have any clear filaments, it still makes for a really cool 3D printed anime statue!
Etsy
Etsy may not be the first place people think of when looking for STL anime files, but you’d be surprised at just how many designers have uploaded their projects for sale on the homemade wears library.
Luffy on the throne is particularly eye-catching, but there are also mass downloads for STL files for all your favorite anime like Naruto, One Piece, Bleach Attack on Titan, and even Akira. At only $10 for over 125GB of anime STL files, it’s a total steal!
The ancient myth of the nine-tailed fox has influenced and been captured in many anime over the years, from Pokémon’s Ninetails to Naruto’s Kurama. Any anime fan will immediately recognize the image of this mysterious kitsune, so why not 3D print your own awesome one from Etsy here?
While not related to any specific anime, the imagery is familiar to anyone who enjoys the more mythical aspects and influences of the genre.
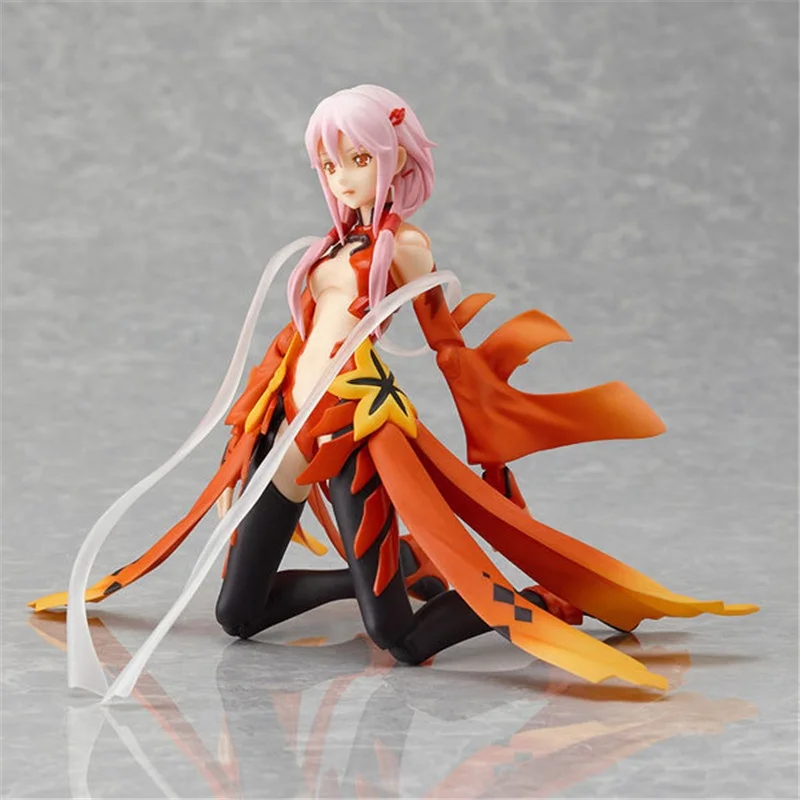
But let’s not only focus on our male heroes. Fan service aside, plenty of anime and manga tales feature very strong and commanding female leads and characters that abandon the stereotype of a typical housewife still seen in plenty of western cartoons and shows today.
To celebrate these characters, you can find 3D printable anime figures of such heroines as Naruto’s legendarily strong Tsunade Senju and Bleach’s former Espada Tres Nelliel Tu Odelschwanck. If these powerful women aren’t enough, then I highly recommend you check out this amazing 3D print of San from the classic Ghibli film Princess Mononoke.
Gambody
The sites we’ve discussed so far are all excellent places to find anime 3D prints, but they aren’t specifically aimed at satisfying all our nerdy needs. Fortunately, that’s where Gambody steps in to the rescue.
Gambody is the ideal site for statues and figurines to 3D print, many of which are of professional quality and look amazing! You have to pay a little more, but one look at this Pikachu vs. Charizard tableau or this chilling Neferpitou statue from Hunter x Hunter and you’ll agree that they’re worth the money.
My personal favorite is this Sage Naruto and Kurama scene, which looks amazing and makes for a great 3D printing project for any anime fan.
If you have specific anime 3D prints in mind, you may need to look for a while to find the exact model you want on Gambody, but I guarantee you’ll have a whale of a time looking at their top-quality models.
Honorable Mentions: Best 3D Printed Anime Figure Files
Now I did say I wouldn’t be able to cover all my favorite 3D printed anime toys and statues in one place, and that’s true. But here I’ll share some of my favorite prints from all over that cover some of my favorite anime in the coolest ways.
Naruto Keychain
Naruto became so huge that it practically redefined the genre and is such a key player that it’s one of the legendary ‘Big Three’ along with One Piece and Bleach.
Because of this, you can find Naruto memorabilia anywhere. But I personally love this 3D printed Naruto keychain. It’s a simple and fun way to carry a piece of this groundbreaking anime with you. And hey, why not check out some other cool 3D printed keychains while you’re at it?
Cosplay
3D printing for cosplay is a really fun way to dress up as your favorite character for conventions, parties, or just for the heck of it! It won’t break the bank and lets you have your own take on the way you step into your anime hero’s shoes.
Tite Kubo’s popular series Bleach is finally making an anime comeback this year with the long-awaited adaptation of the Thousand Year Blood War arc, so there’s never been a better time to celebrate its hero in all his forms. That’s why this rendition of Ichigo’s terrifying hollow mask is one of my favorites.
I also love this hand mouth if you want to make a big bang as the Uchiha-hating Akatsuki artist Deidara (that wasn’t the inspiration for it, it’s just the first thing I thought of!) Or you could live the Disastrous Life of Saiki K, in which case these simple antennae prints are an absolute must!
These are just a few of my personal favorites, but don’t think the buck stops there. There are tons of 3D printed cosplay options to give your next outfit a real kick!
Phantomhive Heirloom Ring
I was debating simply mentioning this under cosplay, but then I realized you can wear this wherever you want!
My fellow fans of the dark and compelling series Black Butler will easily recognize the Earl Ciel Phantomhive’s heirloom ring, which you can 3D print here and cherish as carefully as Ciel himself does in his usual stoic way.
Togepi Egg Cup
While the honor of the first ever Gen II Pokémon to feature in the anime technically goes to Ho-Oh, Togepi made waves back in the day as an introduction to the franchise’s near future. But mainly it was just really really cute.
I can’t help but love this 3D printed Togepi egg cup that uses the half-hatched design in a fun and clever way! Just don’t think too hard about the fact that you’re sort of eating Togepi, okay?
FAQs
Can I 3D print anime figures?
Yes! Anime figures are just as easy and fun to 3D print as any figurine or toy.
Where can I find anime 3D prints?
Anime 3D prints can be found on any 3D printing resource site like Cults 3D, MyMiniFactory, and Gambody.
How do you make 3D anime figures?
After downloading the STL file, you can tweak the design as you like and then send it to 3D print via your 3D printer – or use a 3D printing service if you don’t have one. For intricate coloring, you will need to paint once printing is complete.
Related articles:
- D&D 3D prints – best models and where to download the best files
- Warhammer 40K 3D print files
- 3D printed figurine files
What does it cost us to build everything! The most interesting 3D printing projects / Software
It is possible that the invention of 3D printing will go down in history as one of the most revolutionary inventions in human life. Just think - any thing that used to take days, weeks or even months to create can now be done in a matter of hours. And when technical barriers are overcome, a person will be able to create almost any object - from furniture to electronic devices. Already, individual enthusiasts and entire research centers are creating a variety of devices using 3D printers. The most interesting of them will be discussed below.
⇡#3D printing: a good start
Despite the fact that 3D printing has begun to change our lives only in recent years, it was not invented a year or even ten years ago. Her father is Chuck Hull (Charles W. Hull). Today he is over 75 years old, but the inventor of the very first 3D printing technology - stereolithography - does not think of retiring. “I'm old enough to retire, but I'm so interested that I won't do it,” Chuck says, laughing. His name is not very well known to the public, but Chuck's contribution to the development of 3D printing is simply enormous. The name of Chuck Hull is put on a par with such names as Thomas Edison or Steve Jobs. Chuck Hull owns over 60 US patents and is also the inventor of the versatile STL 3D printing format.
More than thirty years ago, Chuck in his laboratory managed to print the first object - a small cup. He was so delighted with his creation that, despite the late hour, he woke up his wife and showed her the first 3D print. The sleepy wife in pajamas looked at her husband's creation and frankly admitted that she expected something better. But neither Chuck, nor even his wife, could imagine what this discovery would lead to.
The method tested by the scientist was very simple. Liquid photopolymer fills some capacity. An ultraviolet beam moves along the surface of the material, which causes the material to become hard in the right place. Layer by layer, the polymerization process forms a solid object.
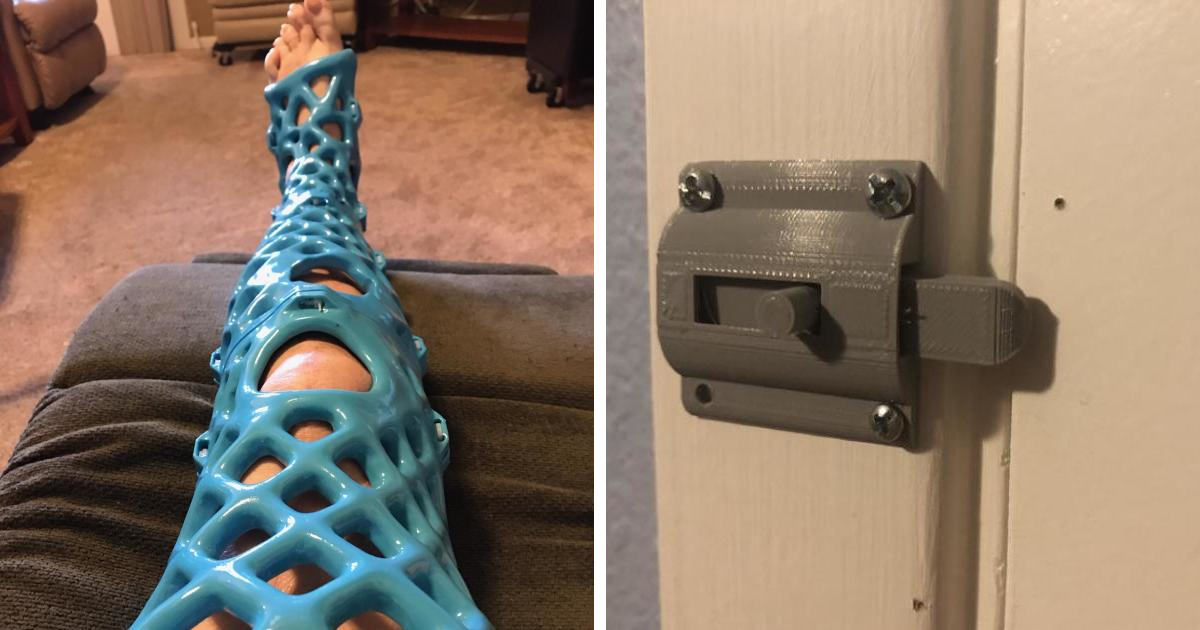
Three decades later, Hull admitted in an interview that he did not expect his invention to have an impact on medicine. But today there is no doubt that the rapid production of robotic prostheses, glasses, assistive devices for people with disabilities, not to mention artificial organs, all this means a revolution in medicine and the discovery of new approaches to treatment.
⇡#3D printing and medicine
The production of implants using 3D printing is one of the most promising areas in modern surgery. With a frequency of a day or two, news appears that this or that organ has been grown with the help of three-dimensional printing or a new prosthesis has been made.
A future where 3D printing is present in every home seems futuristic and incredible. But even stranger is a world where medicine has gone to the next level and is using 3D printing to bring the handicapped back to full life. Moreover, some experiments conducted by scientists today suggest that 3D printing will change the person himself.
⇡#Human Upgrade
Belgian scientists from the University of Hasselt implanted a jaw in an 83-year-old woman. It was created in just a few hours, while previously such a part would have been made in several days. The jaw was 3D printed from a special titanium alloy. Now, somewhere in distant Belgium, a happy granny with titanium teeth chews hams right with the bones and cracks walnuts on a dare. Joking aside, the pace at which doctors are getting closer to creating a Cyberman is mind-boggling.
Doctors have already learned how to create artificial bones and joints by printing them on a 3D printer. And this is no longer the technology of the future, today hundreds of people walk around the planet who can live thanks to printed implants. So, in March of this year, British doctors returned to normal life Stephen Power, whose skull was crushed as a result of an accident. First, X-ray images of the face were carefully examined, and then artificial parts of the skull were printed on a 3D printer, taking into account all the anatomical features of the patient. After a complex operation, doctors from Wales placed the printed parts of the skull on Stephen, restoring facial symmetry. Looking at this man a few months after the operation, you can’t even believe that he survived such a terrible accident.
At the same time, another unique operation was performed at the University Medical Center Utrecht: a young girl had almost her entire skull replaced with a printed plastic copy. This was extremely necessary, since the thickness of the girl’s own skull was constantly increasing due to illness, which created a real threat to life. At the time of surgery, the girl had loss of vision and severe headaches. The operation lasted 23 hours, and the result exceeded all expectations. After only a few months, the girl has already gone to work and feels much better than before the operation. Her sight has returned, and nothing reminds her that her life hung in the balance.
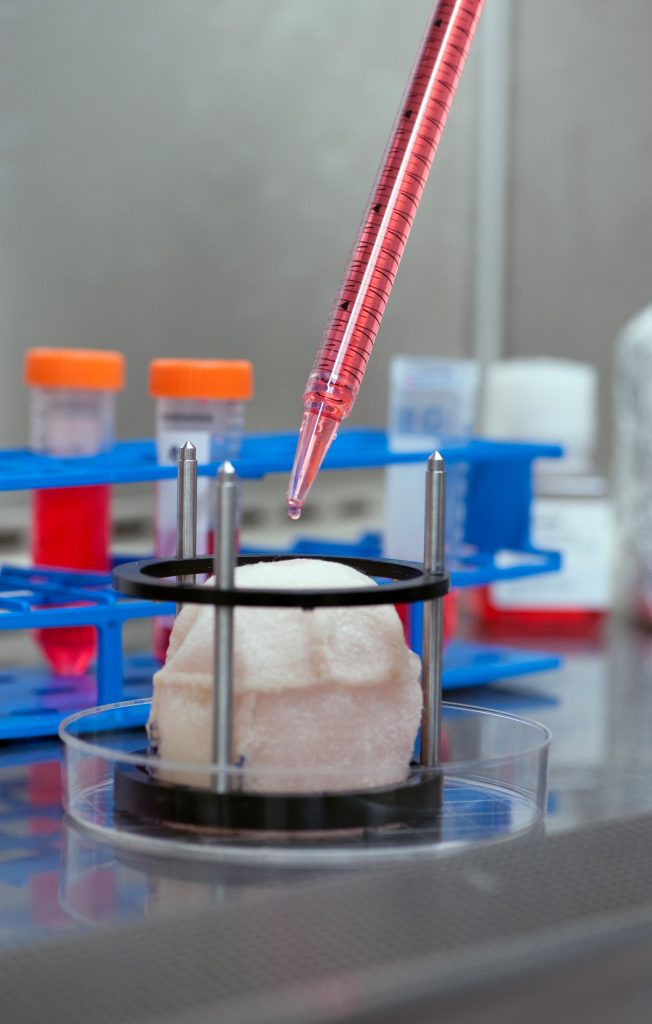
But even this is not as impressive as the prototypes of bionic implants that biologists constantly demonstrate. For example, McAlpine, assistant professor of mechanical and aerospace engineering at Princeton, last year showed a printed artificial ear that allows you to hear radio waves.
The finished ear consists of a helical antenna inside a cartilaginous structure. Two wires lead from the base of the ear and wrap around the helical "cochlea" - the part of the ear that allows a person to perceive sound. If you connect it to the electrodes, in theory, you can not only restore hearing, but also make it sharper, as well as expand the perceived frequency range.
⇡ # How to print a house
As soon as it became obvious that the future belongs to three-dimensional printers, architects rushed to develop models of buildings that could be folded from printed blocks. This task at first glance seemed not so difficult. Building a house with printed parts is as easy as folding a LEGO brick. So thought builders-printers of future houses. For example, in 2013, an architect named Janjaap Ruijssenaars of Universe Architecture confidently claimed that he could showcase the world's first printed building as early as 2014. But just a few months after the first sensational statements in the media, the terms were called much more distant. According to the architect, the erection of such an ambitious creation already took at least a year and a half.
And, as always, China was drawn into the race for the right to be called the first. While American and European builders colorfully described their projects and anticipated the publicity hype that would accompany the opening of such projects, Chinese enterprising businessmen were one step ahead.
Winsun New Materials, a little-known Chinese firm in Suzhou County, Jiangsu Province, has developed a new approach to building simple one-story buildings. With the help of a huge 3D printer, Chinese builders promise an unprecedented speed of building houses - up to ten buildings in 24 hours! To design such a super-useful construction tool, Chinese businessmen invested $3.2 million. The printer itself for building houses was developed by engineers for 12 years.
No less interesting is the material used in the construction of new houses. Winsun New Materials uses unclaimed construction waste to make homes that are environmentally friendly and incredibly cheap—only $4,800 to build. China bribed everyone with cheapness, proving that 3D printing in modern construction is no longer expensive pampering and exotic.
The only detail that the Chinese have not yet learned how to print on a printer is the roof. The builders explain that at this stage it is impossible to erect this part of the building for technical reasons.
Curiously, a Chinese construction firm could have completed many more large projects if it weren't for bureaucratic delays. In one of the interviews, representatives of Winsun New Materials complain that the construction of buildings using this technology requires appropriate regulations, which officials simply do not have time to approve.
⇡#3D printing over the Internet
The development of 3D printing technology stimulates the emergence of startups that are somehow related to 3D printing. All these decisions lie on the surface, and clever businessmen do not miss the chance to earn. Three-dimensional printers have not yet become as common peripherals as inkjet or laser printers. Therefore, web services for printing 3D objects through online orders can bring a fairly large income to their owners.
One of the most successful projects in this area is the Shapeways service, which allows not only to order the printing of your layouts remotely, but also to use a number of additional services, for example, use special types of coatings for printed products, organize the sale of your layouts, etc.
⇡#Bumpy Photo: Bumpy Photo
In addition to services like Shapeways, other 3D printing projects are already available online. An example of such a “timely” service is the Bumpy Photo project.
Simultaneously with the growing popularity of 3D printing, users began to show more and more interest, so to speak, in everything 3D. Someone has discovered a whole world of 3D graphics and is now using a 3D editor to develop and visualize their ideas by printing a prototype on a printer. Other users began to look for easier ways to create 3D, in order to print their ideas again, implementing them in the form of layouts.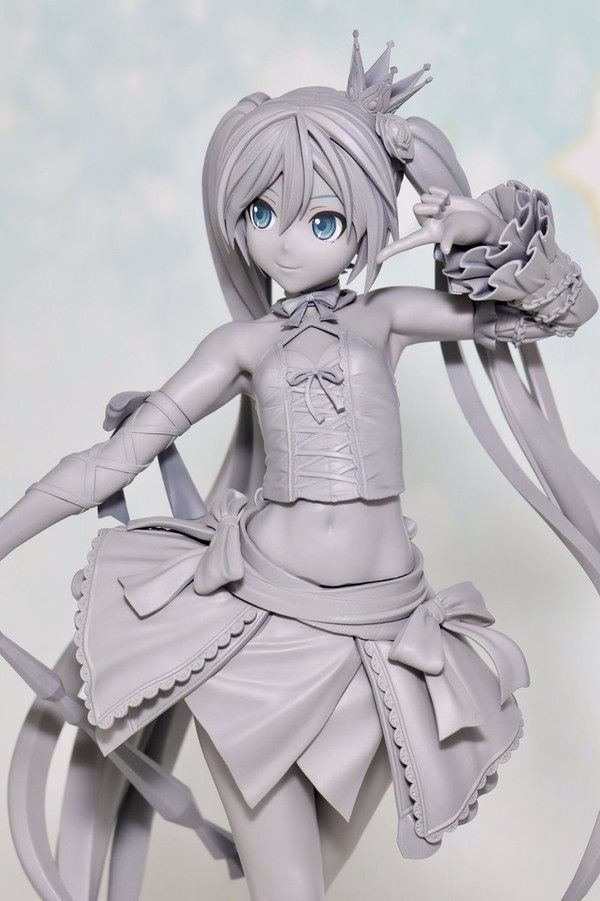 Just for this category of people, the Bumpy Photo service made a bet.
When a person looks at a photograph, he subconsciously determines the volume of objects in the picture, sees the depth of the scene in the frame. Bumpy Photo experts have come up with a way to determine the bulge of objects in a flat image. Using a special algorithm, the selected image is analyzed, and a so-called relief map is compiled for it, which determines the near and far points in the picture. If these points are shifted in the image, a normal photo will get a pseudo-stereoscopic effect.
The creators of the service rightly assumed that there would be many who would like to receive such a printed bas-relief. Portraits of loved ones, as well as photographs of beloved animals, can be given a second life and become a little more realistic if they are turned into a 3D surface. The illusion will become even more noticeable if the light source is correctly placed near such a three-dimensional photograph.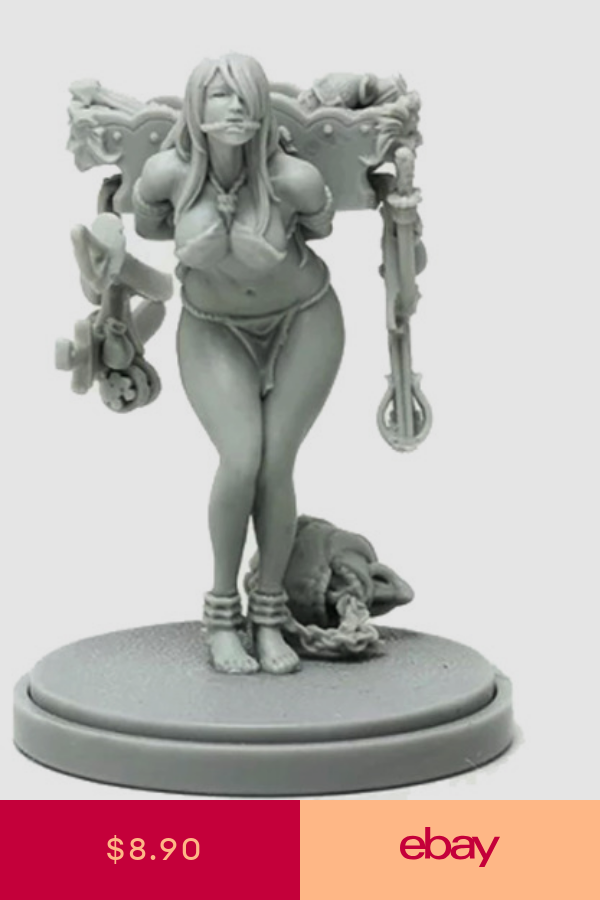
⇡#Minockio: print yourself out
A person likes to look at himself from the side — in a photo, video, in a mirror. Perhaps that is why there are so many projects among 3D printing services that allow you to print yourself. One such service is called Minockio. Using a simple online designer, you can design a cartoon character that will look like a specific person. The design is then sent for printing, and the result is a four-inch figurine with familiar features that shakes its head in a funny way.
⇡#Shapify.me: attack of the clones
The Shapify.me web service is similar to the previous one, but it no longer creates a cartoonish, but quite realistic 3D copy of a person. The process of creating a three-dimensional model is extremely simple and effective. To get a 3D model, you must use a Microsoft Kinect device with an Xbox 360 game console or a Windows computer. With the help of a camera, the system scans a person from different angles. Based on the images taken, a three-dimensional model is formed, which can be sent for printing. In this case, you do not need to have the skills of three-dimensional modeling and know the features of the work of three-dimensional editors. Everything is simple and fast, and the finished result, a small figurine, can be sent to someone as a gift or put on your table and enjoy.
⇡ # How to print sound
Speakers sometimes have a completely amazing look - they can look like a pair of parallelepipeds, they can be shaped like a horn or resemble sea shells. But the geometry of acoustic systems is not only the result of the designer's imagination. In order for this device to give the listener a natural sound, the designer must follow the laws of physics, experimenting with form and materials. By and large, this is a whole science in which there are many interesting solutions and unusual approaches. And in this matter, 3D printing accelerates the pace of creative research.
⇡# 3D printed speaker
The heart of any speaker system is the speakers. No matter how hard engineers try to improve the sound of acoustics, there is a limit that is determined by the technical characteristics of these parts. However, perhaps 3D printing can help improve these characteristics in the future. Last year there were several attempts to create a speaker using 3D printing technologies. The first such experiment was carried out by the New Zealand designer Simon Ellison (Simon Ellison).
Simon Ellison - designer, music lover and fisherman
He managed to create a speaker design that is 90 percent plastic. The only element that had to be left was a magnet with a winding. The glass dome speaker with the printed speaker, which Simon ended up showing off, looks amazing, just as good as the expensive systems from big names.
The designer used a combination of different materials for the highest sound quality. It took nine hours to print the components, and the designer spent several more hours assembling the product. It's hard to say how good the speaker system sounds, but it looks spectacular.
Following Simon, a similar experiment was conducted by Cornell University researchers Apoorva Kiran and Robert MacCurdy. True, their loudspeaker had a rather mediocre sound and looked much more modest than Simon's device.
Perhaps the most unusual project for the production of acoustics using 3D printing was proposed by a group of researchers from Disney Research. Ordinary loudspeakers consist of two obligatory parts - a magnet and a winding. When these elements interact, vibration occurs, which is transmitted to the membrane, which gives rise to sound. The new technology proposed by the experts is based on the electrostatic design of the speaker. In this case, the sound is produced by a membrane that is sandwiched between two conductive surfaces. When a signal is applied to these conductive surfaces, the air between them acquires a charge, and the membrane deforms, that is, sound is generated. Considering that 3D printers are increasingly using multiple materials and there are already separate devices that allow printing with conductive material, creating such speakers will soon be a breeze. This technology opens up new possibilities for acoustic designers, because the speakers can be of any shape.
⇡#Music that was printed
It may seem strange, but the sound itself can also be "sent to print". To do this, you need nothing at all - to give the technique into the hands of the artist. These people think outside the box and use the tool in their own way. For example, the Swedish artist Rickard Dahlstrand learned how to materialize sound. He picked up a 3D printer and listened to its sound. Like any other technique, this device makes a characteristic sound during operation. The tone and timbre of the sound depend on the positioning of the print head. Rickard Dahlstrand tried to print music by making the head move in the right direction. It turned out to be such a “kalyaka-malyaka”, to look at which people line up.
So, at the Music Hack Day 2013 exhibition, which was held in Stockholm, Ricard organized a whole gallery of printed musical works - from the overture to Rossini's "William Tell" to Beethoven's Fifth Symphony and Mozart's masterpieces. And, of course, the Imperial March from Star Wars did not go unnoticed.
Sample video
⇡#Clothes sewn by the printer
Designers of all stripes, regardless of occupation, are showing an increased interest in the new 3D printing technology. Are no exception and those who are engaged in the development of clothing. At a fashion show, the most famous fashion designers do not consider it shameful to demonstrate clothes made from non-standard materials. Often on the podium you can see amazing robes made of wood, metal, plastic - beautiful and completely impractical clothes that are rather symbolic. But if you approach the issue of creating dresses, trousers and shirts in this way, then why not use a 3D printer? Especially since 3D printing can do what a fashion designer can only dream of - almost instantly provide a result.
⇡#Dress sewn according to the formula
One of the first who set out to print clothes on a printer was designer Michael Schmidt. His first creation is a one-of-a-kind dress made entirely with the help of the Shapeways web service (not counting the decorative Swarovski crystals that adorned the finished outfit).
For an unusual dress, an unusual way of designing it was also used. The dress was literally programmed and calculated. Fashion designers are usually far from science, so the help of another person who would have a technical mindset was needed. Michael turned to his friend, the architect Francis Bitonti. After conferring, they came to the conclusion that the surest way to derive a formula for a dress is to refer to the golden ratio, which is easily described by the Fibonacci number sequence. Around this famous mathematical calculation, disputes have long been ongoing. The Fibonacci sequence is interesting because it can be found in the most unexpected creations of nature. Fibonacci numbers can describe the arrangement of seeds in a sunflower, the placement of leaves on a tree, and much more. And yet, according to a popular hypothesis, many man-made masterpieces became such precisely because the rules of the golden section were observed during their creation. Many designers tend to assume that this rule allows you to get the harmony of form. Michael Schmidt was of the same opinion. The curves drawn using the Fibonacci sequence were superimposed on the contours of the female figure, as a result of which the “ideal” topology of the dress was obtained, from which the layout for printing was drawn up.
We can't claim that the golden section rule worked 100%, but the printed version of the clothes looks really good. It contains more than three thousand fastened movable elements that give the dress some elasticity.
⇡#3D shoes
While others are only exploring the possibilities of using 3D printing to produce outfits, renowned sportswear and footwear manufacturer Nike has taken 3D printing to the industrial scale. This brand has announced a new technology for the production of sports boots, which will allow the company to abandon the long process of creating template molds.
The most important thing in sports shoes is maximum grip on the ground. If we consider shoes as a construction, then the main part responsible for the sporting characteristics of the model is the sole. The results demonstrated by the athlete directly depend on the shape of the spikes, their number and the variant of their location on the shoe. Nike has developed a new outsole shaping principle based on selective laser sintering technology.
According to the company, soon the shape of the sole on the shoe can be corrected in a matter of hours, releasing models taking into account the individual characteristics of the athlete. The company's designers are delighted with the new approach. Now you can experiment with 3D printing every day and not languish in anticipation of the next protector prototype being received and tested.
⇡#3D printer as a sewing machine
A 3D printer developed at Carnegie Mellon University in collaboration with a team of scientists at Disney Research in Pittsburgh is capable of creating 3D models from.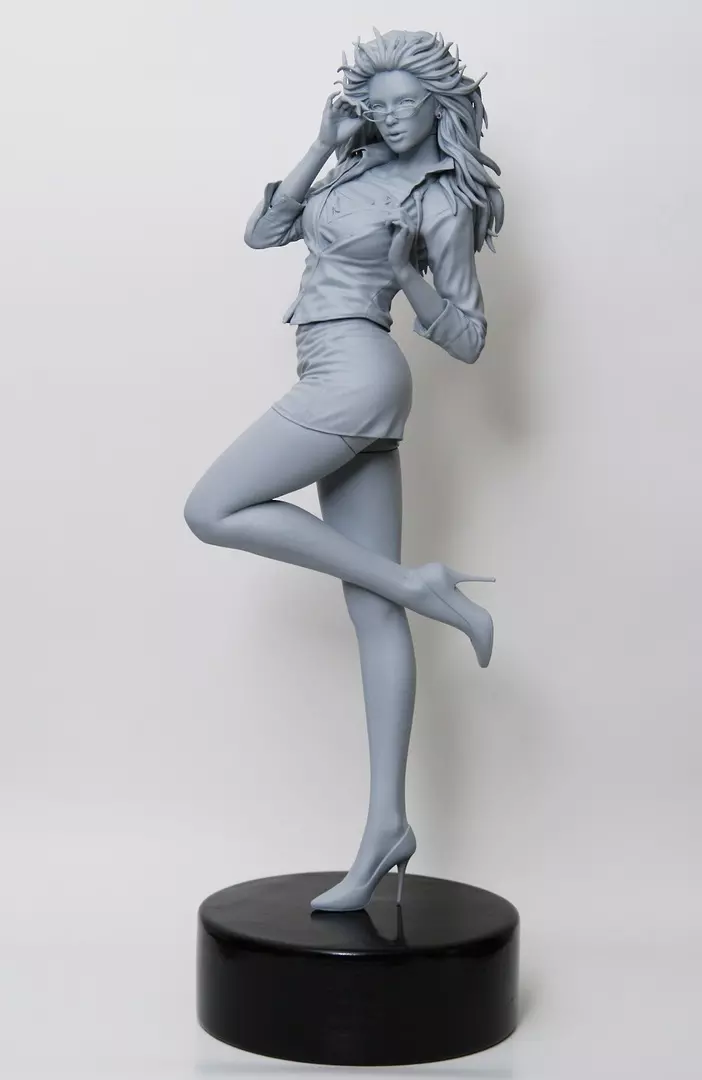 .. soft yarn. The operation of such a 3D printer is somewhat reminiscent of a sewing machine. Along the base moves the needle combined with the print head, which forms the geometry of the printed model by felting. The first thought that comes to mind when you see such a device is that you can easily make soft children's toys with it. And in this sense, the fact that specialists from the ubiquitous Disney company had a hand in creating the printer seems very symbolic to us.
⇡#3D printing for driving and flying
Printed supercars
The main material used in most 3D printing devices today is ABS plastic (sometimes PLA is used - biodegradable plastic). Products made with it can be coated with paint, varnish. Visually "disguised" plastic in such models can sometimes even be confused with some other material, such as metal. This material has many advantages. ABS material is non-toxic, impact resistant, can contact with water, resistant to alkalis, does not react with fats, gasoline, lubricants, hydrocarbons.
Swedish supercar manufacturer Koenigsegg has taken advantage of all these qualities in the production of the new Koenigsegg One:1. This machine has amazing features. The power of 1360 horsepower alone (which equates to one megawatt) is enough for the car to be considered the world's first representative of a new class of cars - megacars. By the way, the very name of the new car has a hidden meaning, “one to one” means the ratio of power and weight of the car, which, thanks to the careful selection of materials, is only 1340 kg.
Designing this machine, the Swedish company's specialists regularly turned to 3D technologies. Before the approval of a particular component of the car, preliminary testing of a part printed on a 3D printer was often carried out. Sometimes Swedish designers used three-dimensional scanning, which made it possible to quickly create a basic model of a particular part.
In addition to ABS, which was ideal for prototyping, the engineers also used printing of titanium structures. So, for example, components of a new turbocharger with variable geometry were printed on a 3D printer. A titanium exhaust tip was also made, reducing the weight of the structure by 14 ounces (400 grams).
3D technology has made it possible to significantly speed up the process of developing the design of components and in some cases even reduce the cost of production (the retail price of the machine was two million dollars in the end).
If you find Swedish supercar manufacturer Koenigsegg's masterpiece beyond your means, don't be discouraged. There is a great way to save money. Pay attention to another supercar - from a small American company Rezvani Motors.
The cost of a sports car from this manufacturer is much lower - from $ 124 900. But the design of this sports car also used printed parts. These are mainly small elements - fragments of the lighting system, mirrors, etc. In addition, three-dimensional models of the car were used at the design stage of the car body, which was eventually made of carbon fiber.
⇡#A flying 3D printer that prints nests and fights radiation
An unusual project was also demonstrated by the Air Robotics Laboratory at Imperial College London. Through the efforts of engineers, a flying 3D printer was created. The main goal of roboticists was to create a device that can be used to clear the area of radioactive debris, for example, in an accident at a nuclear power plant.
Scientists have combined a printer with a quadcopter and developed a special program that determines the behavior of this quadcopter. With the help of sensors, the first flying quadcopter identifies the source of radioactive contamination, after which it flies up and starts printing on the surface of the object with a sticky substance. Next, the robot sends a signal to its partner, which flies up and lands on a sticky "nest". After a while, the substance solidifies, and the second porter robot flies away, carrying away the cargo contaminated with radiation. The prototype is capable of lifting a weight of up to two and a half kilograms, but British specialists intend to build an enlarged copy of these robots in the near future, which will be able to pick up loads of up to forty kilograms.
⇡#Porthole printing
Since 2010, the National Aeronautics and Space Administration has been working on the development of 3D printing technologies in low gravity conditions. During this time, NASA specialists managed to achieve good results. So, in July 2013, a pair of rocket engine injectors were successfully tested, which were subjected to high pressure and temperature (3316 degrees Celsius). The purpose of the ongoing research is to study the possibilities of 3D printing in space and extreme conditions. The presence of such tools on board the space station can significantly reduce the cost of flights, since the crew members will be able to create the spare parts necessary for repairs on their own, and not transport them from Earth.
⇡#Printing under maple syrup: food on a 3D printer
Oddly enough, but one of the first prototypes of 3D printing devices can be considered ... a pastry syringe. Long before the advent of computer technology, confectioners deftly “printed” delicious patterns from cream and dough. But then a lot depended on the individual skill and skill of a person in the kitchen. And with the advent of 3D printers, the task has become easier. It was enough to equip the printer with edible material, correct the printing principle, and the result was a tool for edible masterpieces.
Modern 3D printers can print all sorts of delicious things. For example, one of the major chocolate corporations, The Hershey Company, uses 3D printing to produce confectionery. And the help and technical support of the “chocolate printer” is provided by 3D Systems, the same company that was founded by the inventor of three-dimensional printing, Chuck Hull.
But besides the industrial machines for the production of sweet things, there are many more small interesting food 3D printing projects.
For example, Miguel Valenzuela, back in 2010, built a 3D printer for his three-year-old daughter using the popular Lego children's designer. Miguel once read an article about a British designer, Adrian Marshall, who used Lego to build a miniature pancake machine for a client. When Miguel had the imprudence to tell his eldest daughter Lily about this, she listened to her father, and then turned to her younger sister and said: “Maya! Dad is going to make a pancake machine!” When a three-year-old child demands a pancake machine, it's better not to argue, Miguel decided, and began designing such a device. He spent six months to create this miracle, but the efforts of the head of the family were more than justified. The children were delighted with the cooked pancakes and ate them with increased appetite. It looked like this.
Miguel built an invented device on the Arduino platform, it was called PancakeBot and printed pancakes beautifully. By pouring batter according to a given pattern, the PancakeBot pancake printer can make any shape, such as “build” the Eiffel Tower or draw the silhouette of an animal.
⇡#Fly in the ointment: printed weapons and a threat to health
3D printing has many advantages, however, in addition to the benefits it promises, this technology can bring harm to humanity. It all depends on the purpose for which a person will use it. You can print cases for gadgets, you can design prostheses, or you can use 3D printing to make jewelry. And you can set a goal to create a weapon aimed at the destruction of other people. Unfortunately, this thought quickly crossed the man's mind. And as soon as 3D printers became available to the average user, there were enthusiasts who immediately offered their designs of plastic weapons.
⇡#Printers in service
The first model of a pistol that could be easily printed on a 3D printer was the Liberator. It was invented by a Texas student named Cody Wilson. Interestingly, at the time of the appearance of the first printed pistol, Cody had a license to develop firearms.
The Liberator's first single-shot pistol made of plastic
The Liberator was made entirely of standard consumables, with the exception of one small detail - the pistol's firing pin had to be metal. However, this is not a problem at all, since this part of the gun can simply be made from an ordinary nail.
As soon as Cody demonstrated his development, it was immediately subjected to a flurry of criticism from officials. Less than a week later, the US government passed a law restricting free access to blueprints for such devices.
Nevertheless, it is almost impossible to control the 3D printing of weapons today. Anyone with a 3D printing device can make firearms at home.
Israel's Channel 10 reporters conducted an experiment that only added fuel to the controversy surrounding the unexpected problem of controlling the production of new weapons. They smuggled an unopened pistol into the Knesset without any difficulty and were able to pass, along with the weapon, within a few steps of Prime Minister Benjamin Netanyahu.
Other Daily Mail journalists Simon Murphy and Russell Myers similarly demonstrated the extent of the problem. They unsealed the gun from documentation from the Web and, with no concealment of their cargo, were able to take the Eurostar train at rush hour and travel from London to Paris. The security service did not notice the threat, and the metal detectors could not fix the components of The Liberator, which Simon Murphy assembled without problems in a single structure in the train lavatory.
Scandals related to 3D-production and distribution of weapons continue unabated. One of the latest incidents took place in Japan, where gun laws are known to be very strict. Local resident Yoshimoto Imura, to his misfortune, posted a video on YouTube showing a weapon printed on a printer. After some time, the police raided his house, who confiscated several ready-made pistols.
A 27-year-old Japanese man feigned surprise and stated that he knew nothing about the illegality of his actions. He bought the printer quite legally, paying almost $600 for it, and downloaded all the necessary documentation from the Internet. Of course, Yoshimoto was cunning, because he, as a lover of weapons, should have been well aware that it was the Japanese government that had a very strict policy regarding the possession of firearms. Firearms Act of 1978 years prohibits the Japanese from owning any firearms, with very rare exceptions. Japanese citizens are allowed to own rifles or shotguns, but only if they hold a hunting license. The licensing procedure in Japan is very strict and obtaining a license is a lengthy process. This incident is interesting, first of all, because the law was first applied to unsealed weapons.
Production of things using 3D printing technologies is dangerous not only because scientific progress can turn to the “dark side” for the production of weapons. Infected with the idea of easy creation of things, many do not pay any attention to the safety precautions that must be observed by the user when working with a 3D printer.
⇡#Watch out, 3D printing in progress!
According to researchers at the Illinois Institute of Technology and scientists at the National Institute of Applied Sciences in Lyon, 3D printers may pose health risks when used in the home. In 2013, a team of scientists conducted a series of studies, and it was found that when plastic is heated during the printing process, it emits up to 20-200 billion ultra-small particles into the air per minute. Their entry into the lungs and blood poses a threat to human health, especially for those who suffer from asthma.
Also during the heating of acrylonitrile butadiene styrene (ABS plastic) by-products are released that are toxic to mammals. Of course, the degree of negative health impact largely depends on the 3D printing technology used, the design of the device, the presence of a hood, and other factors. However, in any case, it is best to print in a well-ventilated area, and the machine itself should ideally be hermetically isolated from the user during operation. At the moment, there are many artisanal designs of printers that are sold under the do-it-yourself scheme. Often these are Chinese assembly kits, where elementary security measures are not provided at all.
⇡#3D printing: what's next?
Mix of materials: printing anything
It is easy to predict the near future. Devices for three-dimensional printing will master more and more new types of materials. The development of technology can be strongly influenced by some new discovery, which we simply cannot predict. The only thing that can be said with certainty is that the scope of three-dimensional graphics will become wider.
The day is not far off when the owner of a 3D printer at home will be able to print not only plastic parts, but also complex electronic devices. One of the most requested features is support for printing with multiple materials at the same time.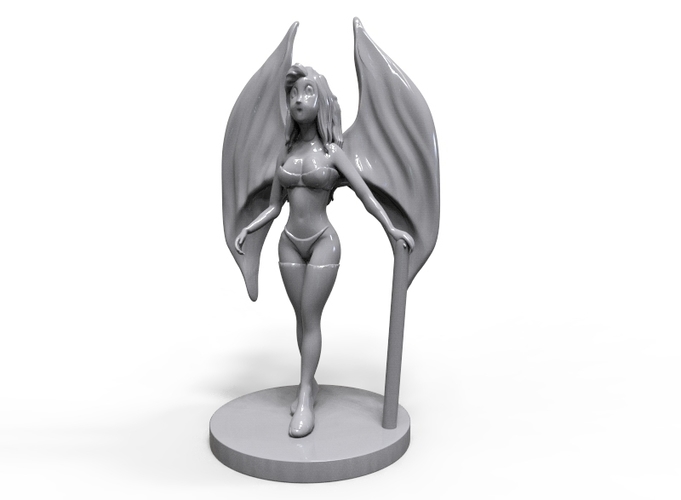 In the future, the possibility of combining different materials opens up simply fantastic opportunities for the production of objects for various purposes. One of the prototypes of such a device is a printer called Rabbit Proto, created by graduates of Stanford University.
The design of this "pilot" printer includes two modules - a module for standard ABS 3D printing and an additional head that works as a nozzle for precise injection of conductive ink. This combination makes it possible to literally create electronic devices. As an example, the creator of Rabbit Proto demonstrates how easy it is to make a Nintendo-like game controller using such a 3D printer.
The designer guarantees the compatibility of its nozzle with most modern RepRap printers. It is assumed that a completely ready-to-use Rabbit Proto printer will cost $ 2,500. The developer made his project open. Anyone can read the technical documentation of the device on GitHub.
3D printing, 3D scanning, 3D copying: ALL IN ONE
The process is likely to become more advanced and the functionality of 3D printers will expand.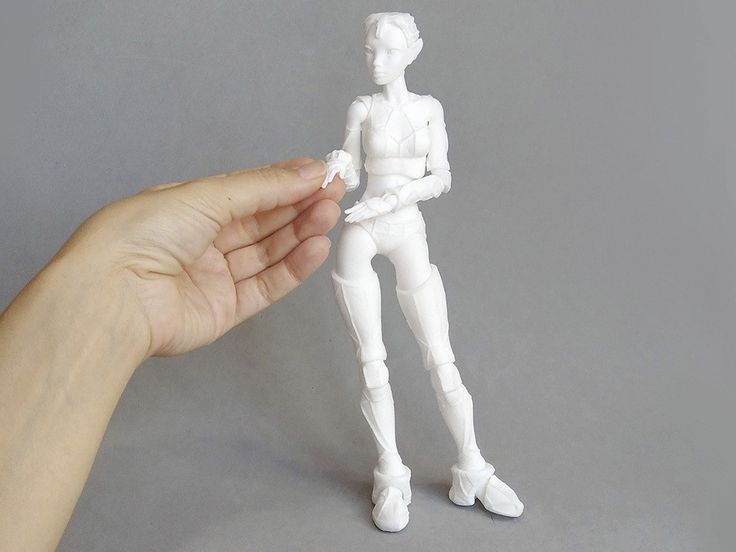 Already now we see the first hint of the evolution of these devices. In the same way that conventional printers have become MFPs with the ability to scan and copy, 3D printers will also learn to digitize the geometry of objects on the fly. This idea has already begun to be implemented by the engineers of the American company AIO Robotics.
ZEUS All-In-One 3D Printer
Recently, they showed a model of a multifunctional device. A device called ZEUS All-In-One 3D Printer can print, scan, copy models. In addition, this device supports the Fax mode of operation, which allows you to transfer the model geometry to a remote print station (to a similar printer).
ZEUS 3D Printer should go on sale this summer. It is equipped with a seven-inch color display, can perform auto-calibration and model grid alignment, and is very easy to operate. Scanned space 9inches (diameter) x 5 inches (height), and the printable space is 8 x 6 x 5. 7 inches. The printer supports a resolution of 80 microns when printing and 125 microns when scanning objects. Initially, the device will be priced at $2,499, excluding consumables.
⇡#Printing with the power of thought
Well, if you still try to imagine what 3D printing devices will look like in the future, you should discard stereotypes and conventions. The Chilean company Thinker Thing has demonstrated an amazing thing - a 3D printer controlled by a telepathic interface. With the help of a special headset with sensors for the activity of neural connections in the brain, the user can send a three-dimensional form for printing with an effort of thought.
It is possible that 3D modeling will become just as easy and comfortable in the future, and to create a 3D masterpiece, you just need to imagine it well.
Post-processing of 3D printed parts (PLA, ABS, SBS, PETG)
Table of Contents
- Remove Supports
- Soluble Support Removal
- Sanding
- Cold welding
- Filling voids
- Polished
- Priming and painting
- Pair smoothing
- Epoxy coating
- Metallization
Introduction
FDM technology is best suited for rapid, low-budget prototyping.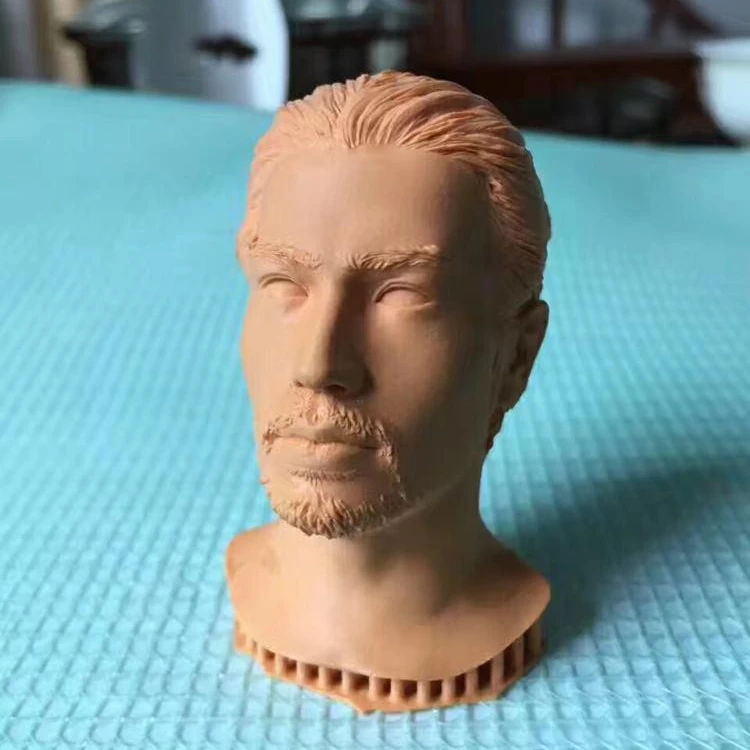 Layer lines are usually visible in FDM prints, so post-processing is essential if a smooth surface is to be achieved. Some post-processing techniques can also make a print more durable by changing the degree of its elastic properties, density, structural and textural features.
In this article, we will discuss the most common post-processing techniques in FDM.
Post-processed FDM prints (left to right): cold welded, void filled, raw, sanded, polished, painted and epoxy coated. Photo 3dhubs.com
Removing supports
Removing supports is usually the first step in post-processing for any 3D printing technology that uses them. In general, props can be divided into two categories: standard and soluble. Unlike other post-processing methods discussed in this article, the removal of props is mandatory and does not result in improved surface quality.
Initial printout with props, poor prop removal, good prop removal. photo 3dhubs.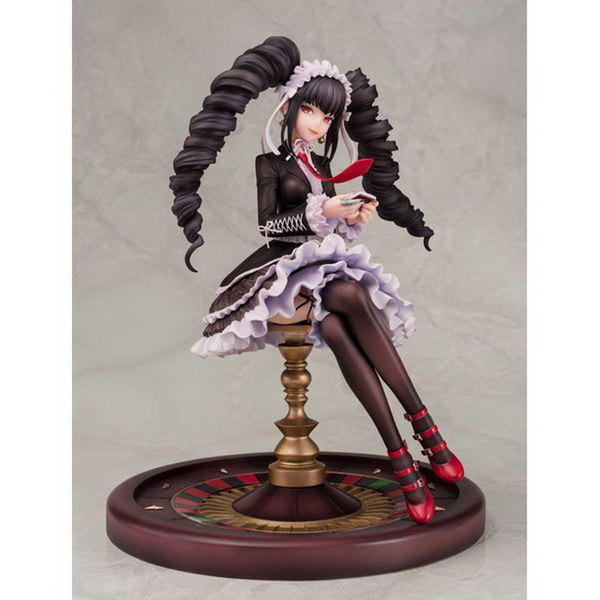 com
com
Removal of standard supports
Tools
- Nippers, needle nose pliers, tongs
- Toothbrush, brush
| Finishing | ★ ☆ ☆ ☆ ☆ |
| Approvals | ★ ★ ☆ ☆ ☆ |
| Speed | ★ ★ ★ ★ ☆ |
| Suitable for | all thermoplastics FDM |
Process
Normally, the backups come off the printout without problems, and hard-to-reach places (such as holes or cavities) can be removed from the backup material with an old toothbrush. Proper placement of support structures and correct print orientation can significantly reduce the negative impact of supports on how the final printout will look.
Pluses
- Does not change the overall geometry of the part.
- The process is very fast.
Cons
- Does not remove layer lines, scratches or other surface defects.
- If excess material or markings remain from the support structure, print accuracy and appearance suffer.
Soluble Support Removal
Instrumentation
- Solvent resistant container
- Thinner
- Ultrasonic cleaner (optional)
| Finishing | ★ ★ ★ ☆ ☆ |
| Approvals | ★ ★ ☆ ☆ ☆ |
| Speed | ★ ★ ★ ★ ☆ |
| Suitable for | all thermoplastics FDM |
Process
Soluble support standard materials are removed from the printout by immersing it in a reservoir of the appropriate solvent.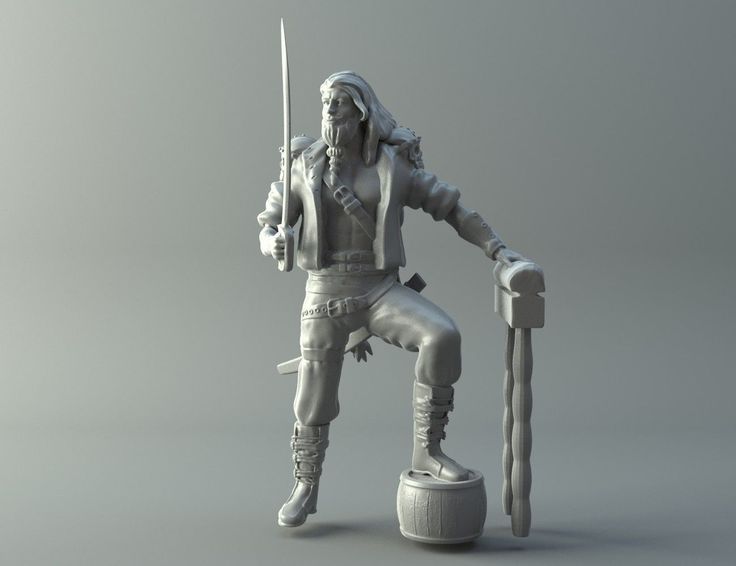 Supports are usually printed:
- HIPS (usually with ABS)
- PVA (usually with PLA)
A glass container like a preservation jar is fine. Any non-porous vessel is suitable for water treatment. To quickly remove props from HIPS/ABS printouts, you will need a solution of equal parts D-limonene and isopropyl alcohol. Many other support structure materials such as PVA (with PLA) dissolve in normal water.
Pro Tricks
Use an ultrasonic cleaner to shorten the solution time and change the solvent as it becomes saturated. A warm (not hot) solution works faster - heating is useful if there is no cleaner.
Pluses
- Complex geometry is allowed for which the standard method of removing props is not possible.
- Smooth surface at the support points.
Cons
- Improper dissolution of the props can cause discoloration and skewed printouts.
- Does not remove layer lines, scratches or other surface imperfections.
- May cause small holes or holes if soluble material seeps into the object during printing.
Cleaning with a skin
Screenshot Gray ABS ABS ABS PROBECTION
Instrumentation
- EVERTICAL PREASE with grain
on 150, 220, 400, 1000, 1000 and 200 - Cleaning cloth
- Toothbrush
- Soap
- Face mask
| Finishing | ★ ★ ★ ★ ☆ |
| Approvals | ★ ★ ★ ☆ ☆ |
| Speed | ★ ★ ☆ ☆ ☆ |
| Suitable for | all thermoplastics FDM |
Process
Once the props have been removed or dissolved, sanding can be done to smooth the part and remove any obvious defects such as blots or prop marks. Which sandpaper to start with depends on the thickness of the layer and the quality of the print: for layers of 200 microns or less, or for prints without blotches, you can start with sandpaper at P150. If there are blobs visible to the naked eye, or the object is printed with a layer thickness of 300 microns or more, stripping should begin with P100.
The process can be continued up to P2000 grit (one approach is to go to 220, then 400, 600, 1000 and finally 2000). Wet sanding is recommended from the very beginning to the very end - this will avoid excessive friction, which can lead to an increase in temperature and damage the object, as well as contaminate the sandpaper itself. Between sanding, the printout should be cleaned with a toothbrush and washed with soapy water, then wiped with a cloth to remove dust and prevent it from sticking together. Even P5000 can be sanded to achieve a smooth, shiny FDM part.
Pro Tricks
Always sand in small circular motions - evenly over the entire surface of the part. It may be tempting to sand perpendicular to the layers, or even parallel, but this can lead to gouges. If the part is discolored or has a lot of scratches after sanding, it can be heated a little to soften the surface and allow some defects to smooth out.
Pros
- An exceptionally smooth surface is obtained.
- Further post-processing (painting, polishing, smoothing and epoxy coating) is greatly facilitated.
Cons
- Not recommended for double or single shell parts as sanding may damage the printout.
- The process is difficult in the case of sophisticated surfaces and the presence of small details in the object.
- If the grinding is done too aggressively and too much material is removed, the appearance of the part can be affected. Acetone for ABS. Dichloromethane for PLA, ABS
- Sponge Applicator
| Finishing | ★ ★ ☆ ☆ ☆ |
| Approvals | ★ ★ ☆ ☆ ☆ |
| Speed | ★ ★ ★ ★ ★ |
| Suitable for | all thermoplastics FDM |
Process
If the object is larger than the printer's capacity, the object is printed in parts and then assembled. In the case of PLA and some other materials, assembly can be done with Dichloromethane or a suitable adhesive (the choice of adhesive depends on the plastic). In the case of ABS, it is possible to "weld" with acetone. The mating surfaces should be slightly moistened with acetone and squeezed tightly or clamped and held until most of the acetone has evaporated. So the parts will be held together by chemical bonds.
Pro Tricks
Increasing the surface area of the acetone contact increases bond strength. Tongue-and-groove to help.
Pros
- Acetone does not change surface color as much as most adhesives.
- After drying, the compound acquires the properties of ABS, which makes further processing easier and more uniform.
Cons
- The bonding of ABS parts by cold "welding" with acetone is not as strong as if the part were printed as a whole.
- Excessive use of acetone can dissolve the part and affect final appearance and tolerances.
Void Fill
Black ABS Print, Filled and Sanded
Tool Kit
- Epoxy (for small voids only)
- Automotive body filler (large voids and joints)
- ABS filament and acetone (only for small voids in ABS printouts)
| Finishing | ★ ★ ☆ ☆ ☆ |
| Approvals | ★ ★ ★ ☆ ☆ |
| Speed | ★ ★ ★ ☆ ☆ |
| Suitable for | all thermoplastics FDM |
Process
Unusual voids may come out after the part has been ground or the soluble props have been dissolved. These voids are formed during printing when the layers are incomplete due to any restrictions on the trajectory of the print head, which is often inevitable. Small gaps and voids can be easily filled with epoxy and no additional treatment is required in this case. Larger gaps or voids left by assembling a multi-part object can be filled with automotive bodywork filler, but the printout will then need to be re-sanded. Putty works great, is easy to process with sandpaper and can be painted. Moreover, the parts connected by such a filler, or voids filled with it, turn out to be stronger than the original plastic.
Slots in ABS printouts can also be filled with ABS thinned with acetone, which reacts chemically with the ABS object and seeps into existing voids. It is recommended to make such a putty from 1 part ABS and 2 parts acetone, then it will not spoil the surface if used correctly.
Dichloromethane works on all plastics: ABS, PLA, HIPS, SBS, etc.
Epoxy is also useful if you want to make your 3D printed part more durable
Pros
- Epoxy filler is easy to sand and prime, resulting in an excellent surface for painting.

- An ABS solution of the same filament will give the same color so nothing will be visible on the surface.
Cons
- Auto body filler or other polyester epoxy adhesive is opaque when dry and will leave discolored areas on the printout.
- Additional processing required to achieve a uniform surface.
- If the grinding is done too aggressively and too much material is removed, the appearance of the part can be affected.
Polished
PLA model, polished. Photo rigid.ink
Tools
- Plastic Polishing Compound
- Sandpaper for P2000
- Cleaning cloth
- Toothbrush
- Polishing pad or microfiber cloth
| Finishing | ★ ★ ★ ★ ★ |
| Approvals | ★ ★ ★ ☆ ☆ |
| Speed | ★ ★ ☆ ☆ ☆ |
| Suitable for | all thermoplastics FDM |
Process
Once the part has been cleaned, a plastic polish can be applied to the part to give a standard ABS or PLA object a mirror finish.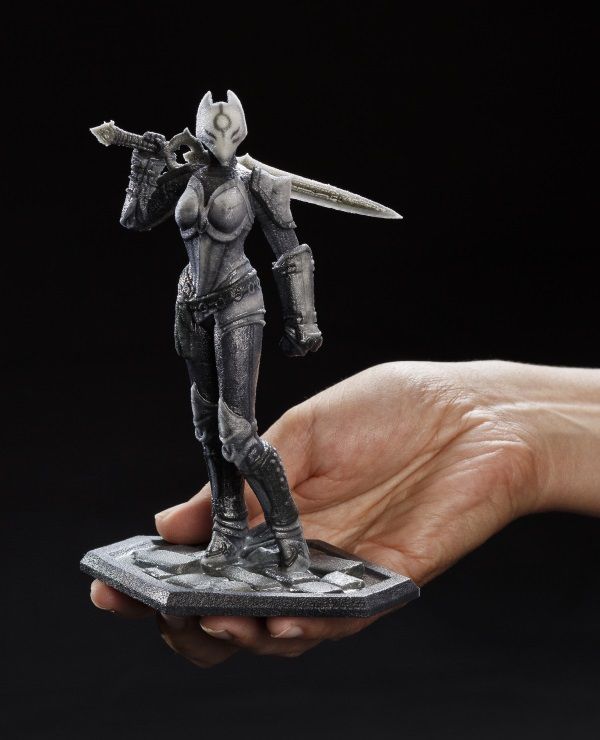 After the part has been sanded for 2000, it is necessary to remove dust from the printout with a cloth and rinse the printout under warm water using a toothbrush. When the object is completely dry, buff it on a buffing pad or microfiber cloth, adding a polishing compound as you go, such as polishing jewelry. They are designed specifically for plastics and synthetics and give a long-lasting shine. Other plastic polishes, such as those used to polish car headlights, also work well, but some of them contain chemicals that can damage the printout.
Pro Tricks
To polish small parts, place the polishing wheel on your Dremel (or other rotary tool such as a power drill). For larger and stronger parts, you can use a grinder, just make sure that the part does not stay in one place for too long, otherwise the plastic may melt from friction.
Pros
- The part is polished without solvents that can warp it or change its tolerances.

- When properly ground and polished, a mirror-smooth surface is obtained, very similar to cast.
- Polishing and deburring plastic is extremely economical, making this a very cost-effective method of achieving a quality finish.
Cons
- If you want to achieve a mirror-smooth surface, the part must be carefully ground before polishing, which may affect tolerances.
- After polishing, the primer or paint no longer sticks.
Primer and paint
Gray PLA FDM print spray painted black. 3dhubs.com
Tools
- Cleaning cloth
- Toothbrush
- 150, 220, 400 and 600 grit sandpaper
- Aerosol Primer for Plastics
- Finish paint
- Polishing sticks
- Polishing paper
- Masking tape (only if multiple colors are expected)
- Nitrile gloves and matching face mask
| Finishing | ★ ★ ★ ★ ★ |
| Approvals | ★ ★ ★ ☆ ☆ |
| Speed | ★ ☆ ☆ ☆ ☆ |
| Suitable for | all thermoplastics FDM |
Process
After the printout has been properly sanded (it is enough to reach P600 when painting), it can be primed.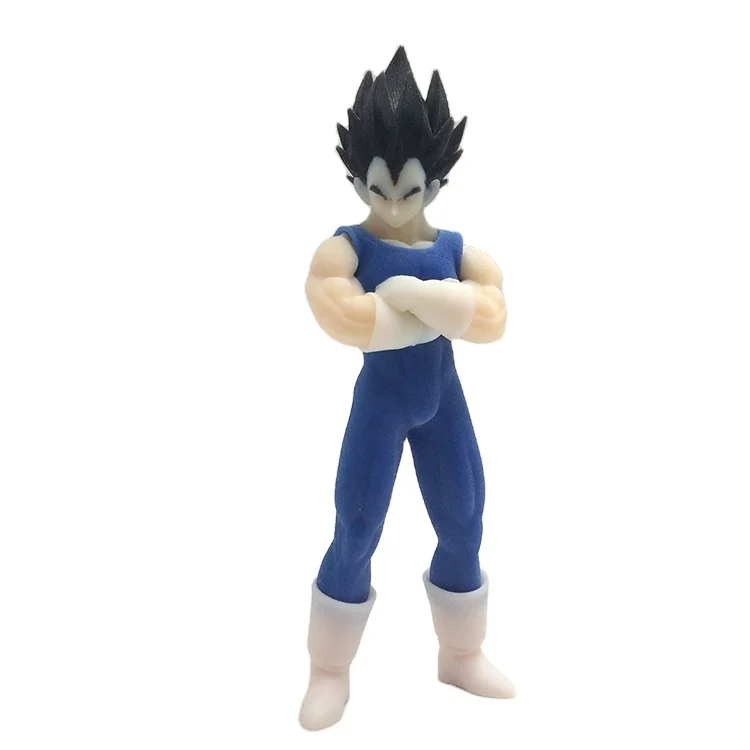 Aerosol plastic primer should be applied in two coats. This primer is intended for subsequent painting of models, provides an even coating and at the same time thin enough not to hide small elements. Thick primer, which is sold in hardware stores, can clump, and then you have to seriously work with sandpaper. Apply the first spray coat with short pressures from a distance of 15-20 cm from the object, trying to do it evenly. Let the primer dry and smooth out the unevenness with 600 grit sandpaper. Apply a second coat of spray with light, quick pressures, also very gently and evenly.
When the priming is completed, you can start painting. You can paint with artistic acrylic paints and brushes, but a spray gun will provide a smoother surface. Hardware store spray paints are thick and viscous and difficult to control, so use paints that are designed specifically for modeling. The primed surface must be sanded and polished (sanding and polishing sticks, which are used in nail salons, can be purchased online, they are great for our task), and then wiped with a cloth.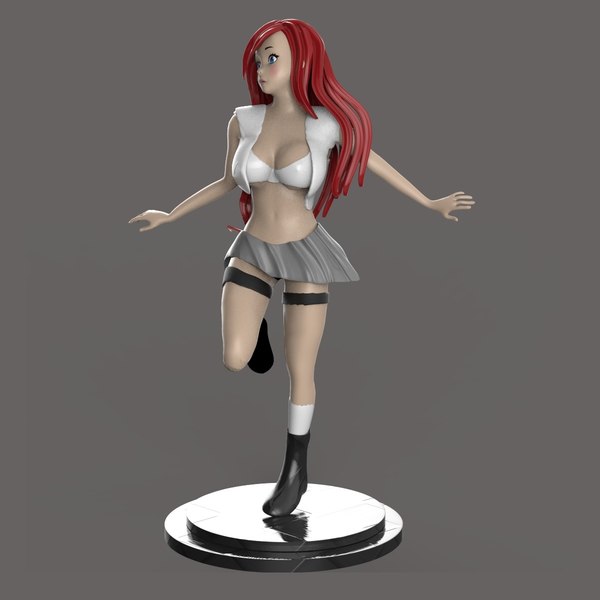 The paint should be applied to the model in very thin layers, the first layers should be transparent. When the paint finish becomes opaque (usually 2-4 coats), let the model rest for 30 minutes to allow the paint to dry completely. Carefully polish the paint layer with manicure sticks, repeat the procedure for each of the colors (between each applied paint).
Separate parts of the model can be covered with masking tape so that the colors, if there are several, do not mix. When painting is complete, remove the masking tape and polish the object with polishing paper. Polishing paper, such as 3M or Zona, comes in a variety of grits and is a relatively new product. It is sold in packs in various online stores, and after processing with this paper, the ink layer or topcoat will literally shine - and nothing else can achieve this effect. Apply 1-2 coats of top coat to protect the paint and let it dry completely. The top coat is selected in accordance with the recommendations of the paint manufacturer. If the topcoat and paint are incompatible, it can render your entire painting job meaningless, so compatibility is very important here.
Pro Tips
Don't shake the can when spraying! It is important not to mix the pigment or primer with the propellant (propellant gas), which will cause bubbles to form in the spray. Instead, the can must be rotated for 2-3 minutes so that the mixing ball rolls like a pearl, and does not strum.
Pros
- Excellent result, if you take into account all the nuances of the process and practice.
- You can do anything with the final look of the object, no matter what material it is printed on.
Cons
- Primer and paint increase the volume of the model, which affects tolerances and can be a problem when it comes to a part of a larger object.
- High quality aerosol paint or spray gun increases costs.
Vapor smoothed
Vapor smoothed black ABS printed hemisphere
Tools
- Cleaning cloth
- Solvent resistant sealed container
- Thinner
- Paper towels
- Aluminum foil (or other solvent resistant material)
- Face mask and chemical resistant gloves
| Finishing | ★ ★ ★ ★ ☆ |
| Approvals | ★ ★ ☆ ☆ ☆ |
| Speed | ★ ★ ★ ☆ ☆ |
| Suitable for | all thermoplastics FDM |
Process
Line the bottom of the container with paper towels, if possible along the sides.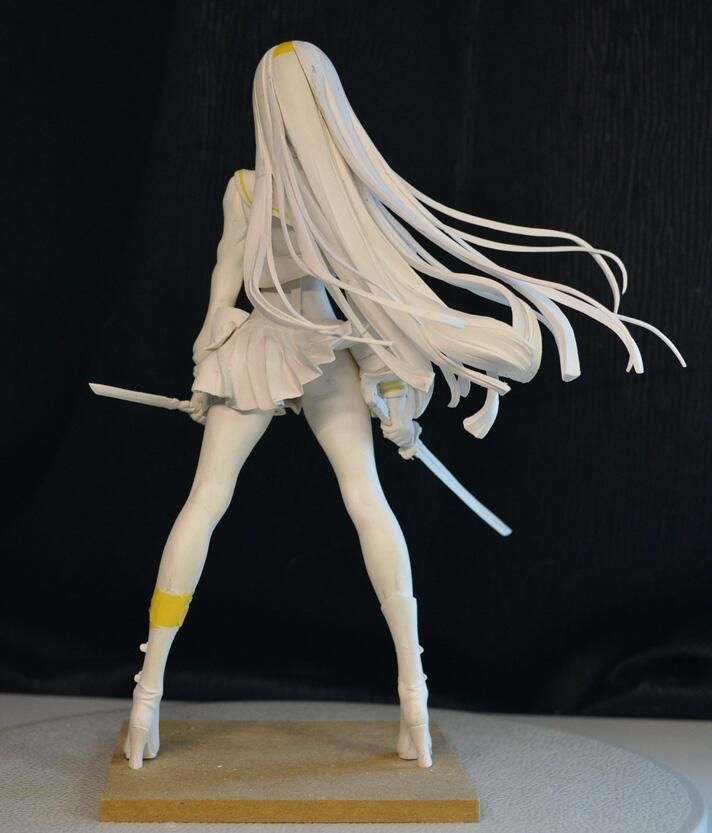 It is critical that the vapors cannot damage the container and that the container itself is sealed. It is recommended to use a glass or metal container. Apply enough thinner to the paper towels so that they are wet but not soaked - this will also help them adhere better to the walls. Acetone is famous for its ability to smooth out ABS. PLA can be smoothed with a variety of other solvents (dichloromethane works well), but this plastic tends to be much harder to smooth than ABS. When working with any solvents, please follow the safety precautions for handling chemicals and always take appropriate precautions. Place a small "raft" of aluminum foil or other solvent-resistant material in the center of the paper towel-lined container. Place the printout on the "raft" (either side of your choice) and close the lid of the container. Steam polishing can take varying amounts of time, so check your printout periodically. To increase the speed of polishing, the container can be heated, but this must be done carefully so as not to cause an explosion.
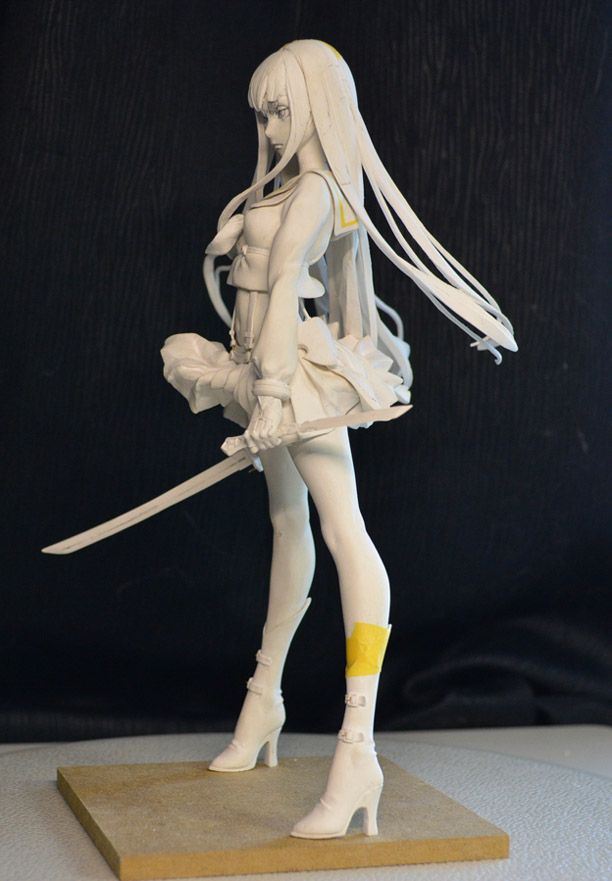
When removing the printout from the container, try not to touch it in any way, leave it on the “raft”, take them out together. In all those places where the printout has come into contact with something, there will be defects, since the outer layer will be under-dissolved. Before working with it, let the printout completely “breathe” so that all solvent vapors have evaporated.
Many aerosols and/or solvent sprays are flammable or explosive and their vapors can be harmful to humans. Be extremely careful when heating solvents, always handle them and store them in a well ventilated area.
Pluses
- Many small blotches, as well as many layer lines, are smoothed out without additional processing.
- The printout surface becomes exceptionally smooth.
- The procedure is very fast and can be performed using widely available materials.
Cons
- Does not “heal” cracks, does not completely hide layer lines.
- During the smoothing process, the outer layer of the printout dissolves, which greatly affects the tolerances.
- Negatively affects the strength of the printout due to changes in the properties of its material.
Immersion
PLA model immersed in dichloromethane. Photo 3dpt.ru
Tools
- Solvent resistant container
- Thinner
- Eye hook or cog
- Heavy wire for sculpture or landscaping
- Dryer or drying rack
- Face mask and chemical resistant gloves
| Finishing | ★ ★ ★ ★ ☆ |
| Approvals | ★ ☆ ☆ ☆ ☆ |
| Speed | ★ ★ ★ ★ ☆ |
| Suitable for | all thermoplastics FDM |
Process
Make sure the container you are using is wide and deep enough to completely submerge the printout in the solution. Fill the container with the appropriate amount of solvent - be careful not to splash. As with vapor smoothing, ABS dip smoothing can be done with acetone, which is easy to find in the store, and for PLA, dichloromethane can also work well with ABS, HIPS, SBS, PETG, and many other materials. PLA is quite resistant to solvent smoothing, so it may take several passes to achieve the desired result. Prepare the printout for dipping by screwing a hook or eye screw into it in an inconspicuous place. Pass the wire through the eyelet or wrap the wire around the screw so that the printout can be immersed in the solvent. If the wire is too thin, it will not be able to withstand the buoyant force on the printout, and it will be difficult to sink the object.
Once the printout is ready, use a wire to completely immerse it in the solvent for a few seconds. Remove the printout and hang it by the wire in a dryer or on a drying frame to allow the solvent to completely evaporate from the surface. After ejection, the printout can be gently shaken to facilitate the drying process and ensure that no solvent has accumulated in the depressions.
Pro Tricks
If an opaque whitish coating appears on the print after drying, this can be corrected by holding the object over a solvent bath for a while so that its vapor slightly dissolves the surface. This restores the original color of the printout and achieves a shiny outer layer.
Pros
- The surface of the print is smoothed much faster than steam polishing.
- Significantly less fumes are generated than other solvent polishing methods, so this method is less hazardous.
Cons
- The surface is smoothed very aggressively, so you can forget about tolerances.
- Immersion for too long can result in complete deformation of the object and a significant change in material properties.
Epoxy
Black ABS printout, half epoxy coated, half uncoated
Toolbox
- two part epoxy resin
- Sponge Applicator
- Mixing container
- Sandpaper P1000 or finer
| Finishing | ★ ★ ★ ★ ☆ |
| Approvals | ★ ☆ ☆ ☆ ☆ |
| Speed | ★ ★ ★ ★ ☆ |
| Suitable for | all thermoplastics FDM |
Process
After the printout has been cleaned (preliminary cleaning gives the best end result), wipe it thoroughly with a cloth.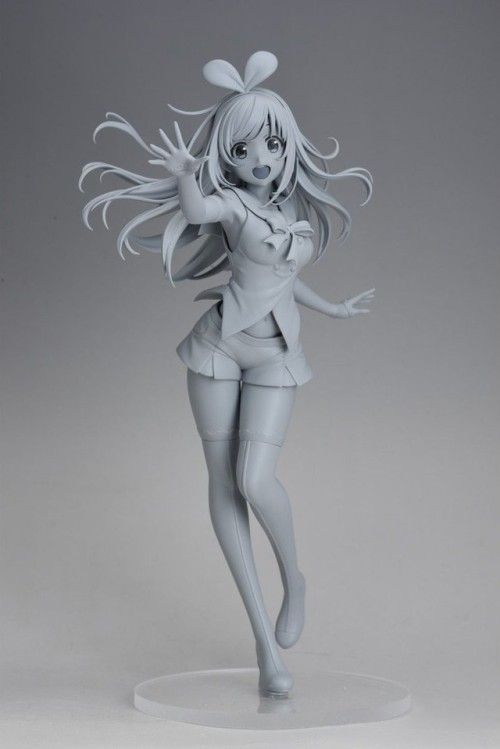 Mix the resin and hardener in the proportion indicated in the instructions, accurately measuring all volumes. The curing process of epoxy resin is exothermic, so glass containers and containers made of materials with a low melting point should be avoided. It is recommended to use containers that are specifically designed for mixing epoxy resins. Incorrect ratio of resin and hardener can result in longer curing time or no curing at all and result in a permanently sticky substance. Mix the resin and thinner as directed in the instructions - carefully, in smooth movements to minimize the amount of air bubbles remaining inside the mixture. Very little epoxy is needed, and most of these resins only work for 10-15 minutes, so plan accordingly.
Apply the first coat of epoxy with a sponge applicator, being careful not to build up in crevices and small parts. When the printout is sufficiently coated, allow the resin to fully cure - as described in the instructions that came with it. One coat may be sufficient, but for optimum results it is best to lightly sand the printout with fine sandpaper (on P1000 and above) to eliminate any imperfections.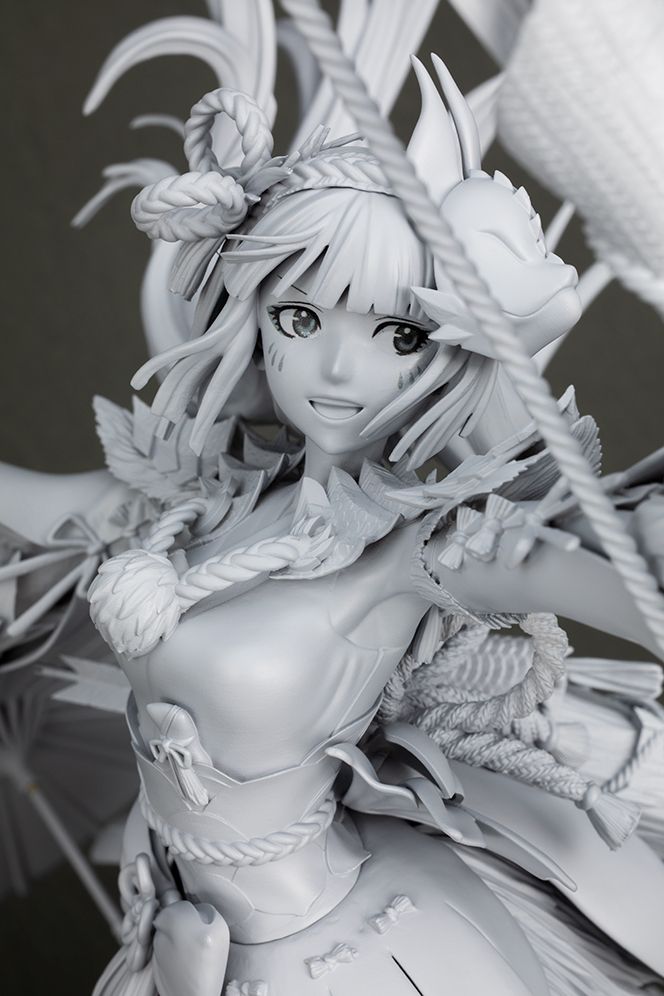 Wipe off the dust with a cloth and, in the same way as before, apply a second layer of epoxy.
Pros
- A very thin coat of epoxy won't affect tolerance too much (unless the printout has been sanded too hard first).
- A protective shell forms around the object.
Cons
- The layer lines will remain visible, they will only be covered by a smooth shell.
- If too much epoxy is used, it can flood details and edges, and the surface can appear greasy.
Plating
FDM printed structural element nickel plated with Repliform RepliKote technology
Tools (for home use)
- Sacrificial anode. The anode material must match the metal of the solution: for example, if copper sulfate is used in the solution (with water it is copper sulfate), then the anode must also be copper. Any object made of the appropriate metal will do (for example, copper wire for copper plating), or you can buy special strips of metal for galvanization.
- Conductive paint or acetone with graphite. Electroplating requires the print surface to be electrically conductive, and this can be achieved with a conductive ink or a solution of equal parts graphite and acetone. Conductive paint will work with any material, but acetone with graphite will only work with ABS.
- Power rectifier. A simple battery can be used as this element, only it will not be as efficient and will not give a fast enough result than the rectifier itself (household current).
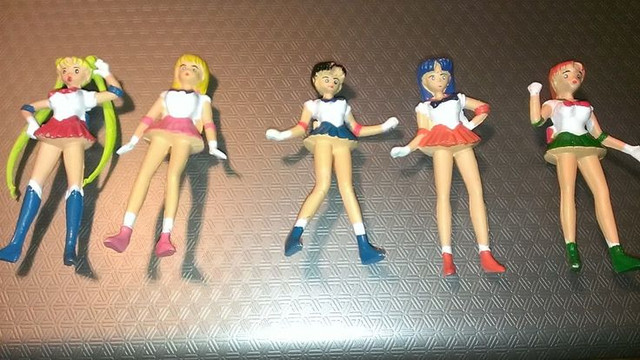 The rectifier is safer in the sense that it can simply be turned off and thus cut off the current during the galvanization process.
 - Conductive screw or eye hook
- Non-conductive container
- Contacts
- Non-conductive gloves and goggles. Electroplating solutions are acidic and can cause injury if splashed into the eyes, so wearing goggles is very important. Solutions also irritate the skin and conduct electricity, so insulating gloves are needed.
- Electroplating solution can be obtained by mixing a metal salt, acid and water, but if the proportions are inaccurate and the substances are of insufficient quality, one cannot count on a professional result.
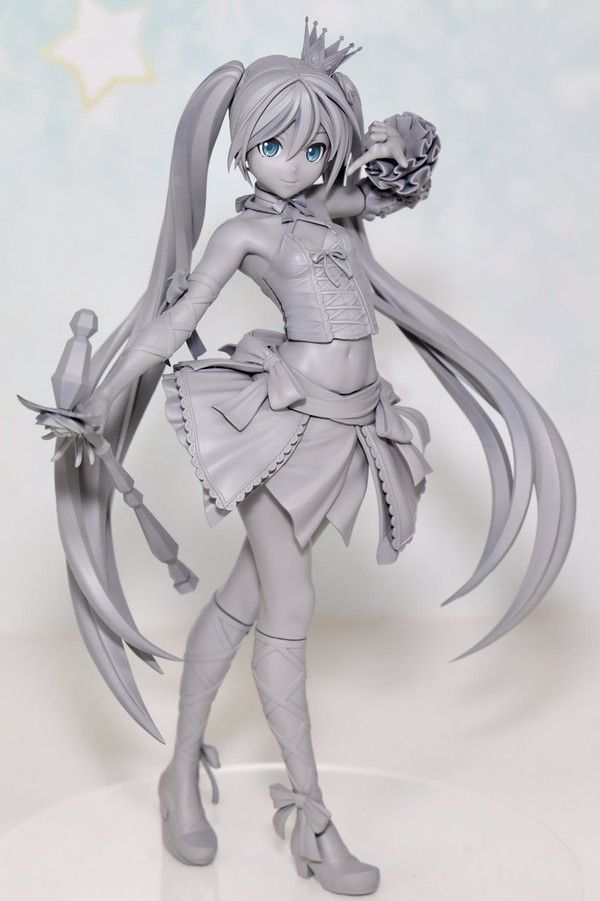 If you buy a ready-made solution (as in Midas kits), you can be sure that the problems with plating are not caused by the solution.
 | Finishing | ★ ★ ★ ★ ☆ |
| Approvals | ★ ★ ★ ☆ ☆ |
| Speed | ★ ★ ★ ★ ☆ |
| Suitable for | all thermoplastics FDM |
Process
Electroplating can be carried out at home or in a professional workshop.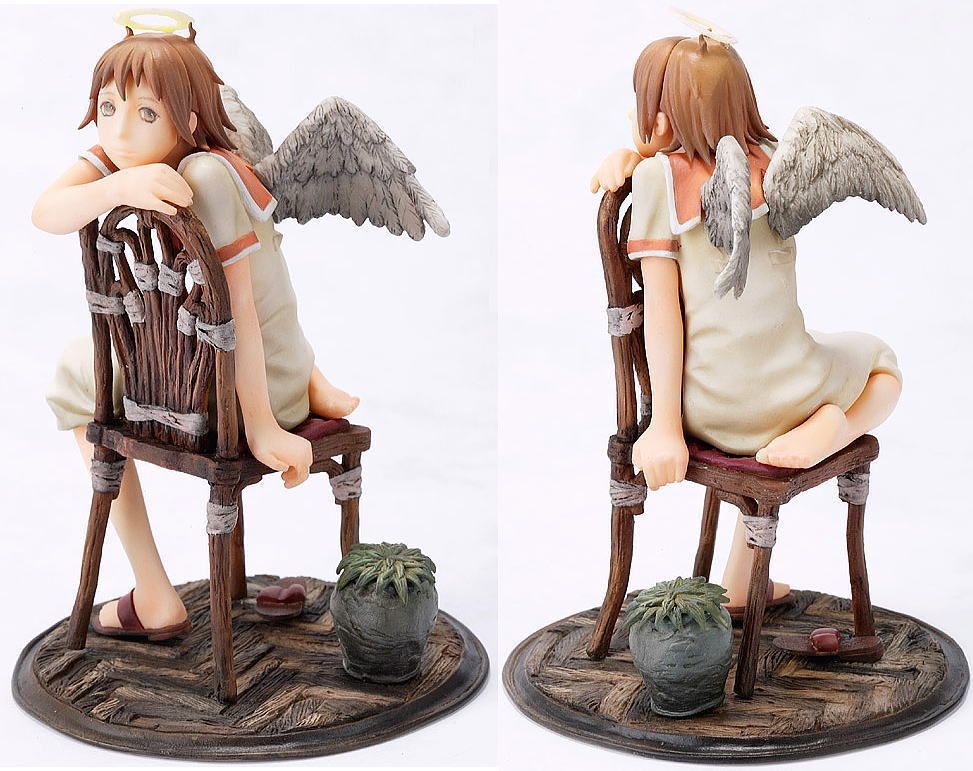 To do everything right, you need to be well versed in the materials, in what is actually happening - and at home these opportunities are usually limited. In order to achieve excellent surface quality and to have more plating options, including chrome plating, it is best to use the services of professional workshops. The copper galvanization process will be described below as an example.
At home, you can galvanize with copper or nickel, and this coating will then serve as the basis for galvanizing with other metals. It is critically important that the printout surface be as smooth as possible before it is galvanized. Any bumps and lines in the layers will be enhanced as a result of the process. Prepare the sanded and cleaned object for plating by coating the plastic with a thin coat of high quality conductive paint, or with a graphite and acetone solution for ABS printouts. Allow the conductive coating to dry completely, sand if necessary to ensure a smooth surface. At this stage, it is extremely important not to touch the printout with bare hands or to wear gloves, because sweat marks on the object will certainly affect the quality of the galvanization.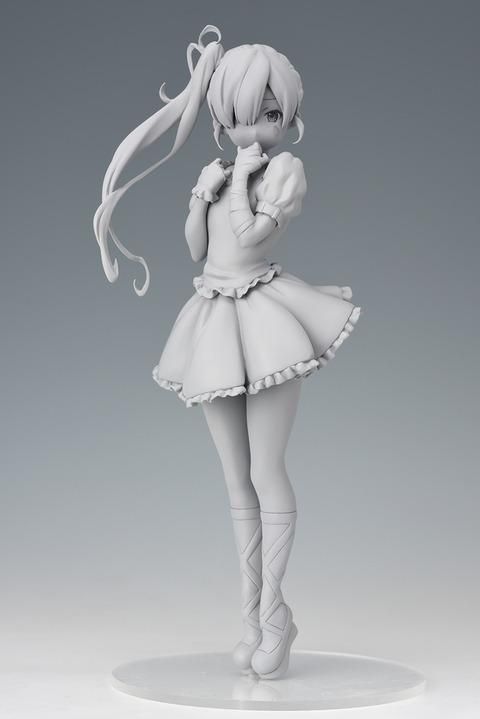
Insert a screw or eyelet in an inconspicuous place on the printout and connect it to the negative terminal of the rectifier. This will be the cathode. Connect the copper anode to the positive contact of the rectifier. Fill the container with enough copper plating solution so that the printout is completely covered with it. Immerse the anode in the container and turn on the power. After the rectifier is turned on, immerse the printout in the container, making sure that it does not touch the anode anywhere. Beware! When the object is already in the bath, the galvanization system is active, and contact with the solution, cathode or anode can be traumatic. Set the voltage on the rectifier to 1-3 Volts, and the process will go to full metallization. To speed things up, the voltage can be increased, but not more than 5 volts. When enough metal has deposited on the printout, simply turn off the power and dry the object with microfiber towels. When it's dry, varnish the object to protect it from corrosion.